A ripe apple is the most popular and favorite fruit among children. The complexity of such a drawing for children depends on the method of drawing, as well as on how realistically the appearance of the fruit is required to be conveyed. Start teaching a child to draw Often they start with this drawing.
Tools and materials
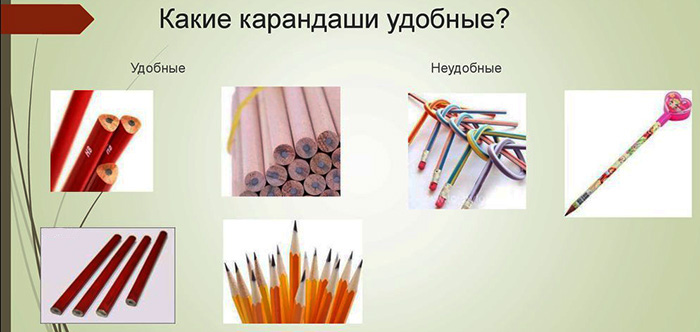
For drawing simple pictures you can use colored pencils. Pencils come in different shapes (hexagonal, triangular and round). For preschool children it is recommended to buy triangular pencils.
The Marco brand produces a special series of pencils called “Jumbo”, which has a wide and strong body, which allows the child to hold the pencil firmly in his hand and draw confidently. The presence of edges on the pencils prevents them from rolling off the table, which is very convenient.
For children of middle school age, you can buy hexagonal pencils, and for those who draw professionally, it is acceptable to use pencils with a round body.
For small children, pencils with a thick lead (4-5 mm) should be chosen, which will protect them from frequent breakage. The downside of such pencils is the need to sharpen them constantly. For older children, pencils with a lead diameter of 3 to 4 mm are the best option.
Colored pencils come in different degrees of softness. When choosing them, you should make sure that they do not crumble and that the color they leave on the paper is rich and clear.
The properties of pencils depending on their composition and degree of softness are given in the following table:
| Type of softness | Properties of a pencil | Scope of application |
| H (hard) | It has a very hard lead and is smudge resistant. | Creation of drawings and outline sketches. |
| HB (hard-soft) F (hard-soft, but harder than HB) | It has a medium-hard lead and smudges a little when drawing. | Suitable for writing and drawing. In drawing, it can be used both for contours and for tinting small parts of the drawing. |
| B (soft) | It has a low-hardness lead and is easily smeared when drawing. It is easily erased with an eraser. | Drawing and coloring the picture, as well as creating various background decorations. |
Depending on the type of lead, there are several types of pencils:
- watercolor (the pencil lead contains special emulsions that create the effect of watercolor paints);
- classical (consists of white clay and colored pigments);
- pastel (contains linseed oil, which creates the effect of a particularly soft image);
- wax (the lead does not require sharpening and glides smoothly across the paper).
When purchasing a set of pencils, you should limit yourself to a small number of different colors in it, so that the child spends more time drawing, rather than searching for and trying out different colors in the set.
For little ones, a minimal set of pencils of 10-12 different colors is enough.
When choosing an album, if the child is going to draw only with pencils, you can limit yourself to an album with medium-density sheets. It is recommended to choose albums in which spiral wire is used to attach the sheets, which ensures the evenness of the sheet surface during drawing.
With a simple pencil
Apple - a drawing for children who are just starting to take their first steps in drawing.
For this drawing you will need a soft pencil, a sheet of paper and an eraser.
Drawing an apple with a pencil consists of the following steps:
- Draw a square, measuring 8x8 cm, and then divide it into 4 parts with two perpendicular lines passing through the center of the square. Then draw the outline of the apple inside the square. The outline of the apple should be semi-oval and touch the square on its left and right sides at the points where the perpendicular lines intersect the sides of the square. On the upper and lower sides of the square, the outline of the apple should touch at points located slightly to the left and right of the intersection point of the perpendicular line and these sides of the square.
- Draw a small horizontal arc (convex down) at a distance of 0.5 cm from the top of the apple. Then draw a branch perpendicular to this arc, 2 cm long.
- Draw a leaf to the right side of the branch, starting from its middle. Then draw a line along the leaf in its center, and from it to the sides draw small veins in the form of small horizontal lines.
- Apply small strokes (0.5 cm) inside the apple along its contour. In the area of the base of the branch, it is necessary to apply strokes along the arc.
- Apply horizontal strokes medium-sized (1 cm), moving from the bottom of the apple to its top. When applying strokes, the density of their application should decrease as you move from bottom to top.
Easy way to draw
Apple is a drawing for children that can be drawn with an ordinary pencil in a few minutes.

A simple way to draw an apple consists of the following steps:
- Draw a circle with a thin line (as a sketch). The size of the circle is chosen in accordance with the future size of the apple.
- Using a circle, draw the outline of an apple. In the process of drawing the outline, you need to outline the left and right sides of the circle with a pencil, and in the upper part of the circle the outline should have the shape of a concave arc. The lower part of the apple outline should also be slightly concave relative to the previously drawn circle-sketch.
- Trace the top of the sketch circle (leaving 2 holes for the branch and leaf). The result should be the upper, additional contour of the apple.
- Draw a branch from the center of the main outline of the apple., pointing upwards. Then, a little higher, from this branch, draw a leaf, also pointing upwards. The branch and leaf should fill the holes left earlier in the additional outline of the apple.
On a transparent background
Apple is a drawing for children that is very easy to draw on a transparent background.
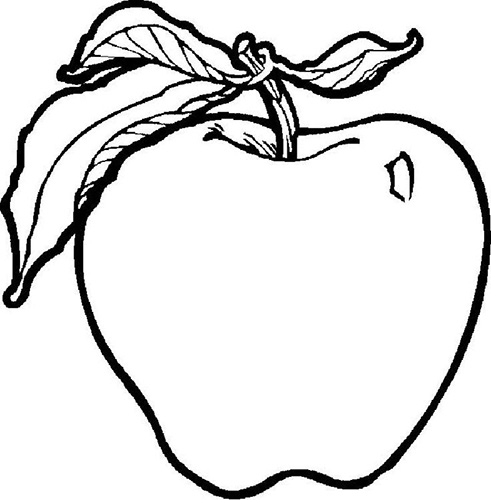
The process of drawing it consists of the following stages:
- Draw a circle (as an auxiliary outline), and then draw the outline of the apple, while the upper and lower parts of the outline should be slightly flattened relative to the circle.
- Draw a small horizontal arc at the top of the apple (the curve of the arc should point downwards).
- Draw a branch emanating from the center of the drawn arc.
- Draw a leaf (pointing to the right from the center of the branch).
- Draw the veins inside the leaf, and outline the apple itself with small strokes along its contour and the area at the base of the branch.
Drawing with chiaroscuro
To make the drawing of an apple more realistic, apply a tone overlay and draw a shadow cast by the apple.
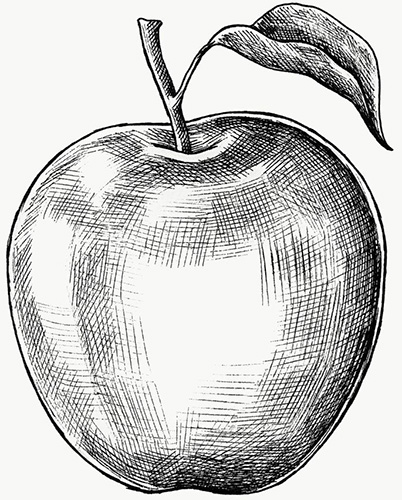
When applying tone using strokes, the pencil must be well sharpened.
The process of drawing an apple with chiaroscuro consists of the following steps:
- Draw a circle, slightly narrowed at the bottom. At the base of the circle, draw a horizontal line, which will be the plane on which the apple is located.
- Draw the outline of an apple on top of the circle, matching the sides of the circle and slightly flattened relative to the circle at the top. The bottom of the apple should be made slightly wavy.
- Just below the top of the apple outline, draw a semi-oval horizontal arc, from the center of which draw a vertical branch.
- From the center of the branch to the right, draw a leaf, which is drawn using an oval, the outline of which is then sharpened at the edges. Then, inside the leaf, draw a central line and small veins perpendicular to it.
- Inside the apple, make small horizontal strokes along the outline of the apple, as well as along the outline of the arc at the base of the branch.
- Make larger strokes on the inside of the apple, avoiding the central area, which is usually exposed to light in natural conditions. Horizontal strokes form the tone overlay on the drawing. The density of the strokes at the bottom should be higher than at the top. When applying strokes, the density should smoothly decrease as you move from the bottom of the apple to its top. When applying strokes, you can alternate between horizontal and vertical application.
- Draw a shadow under the apple with a simple fat pencil. For a more natural blur of the shadow, you can use an eraser along the edges of the shadow. In the center of the apple, you can also use an eraser, thereby making the highlights more natural.
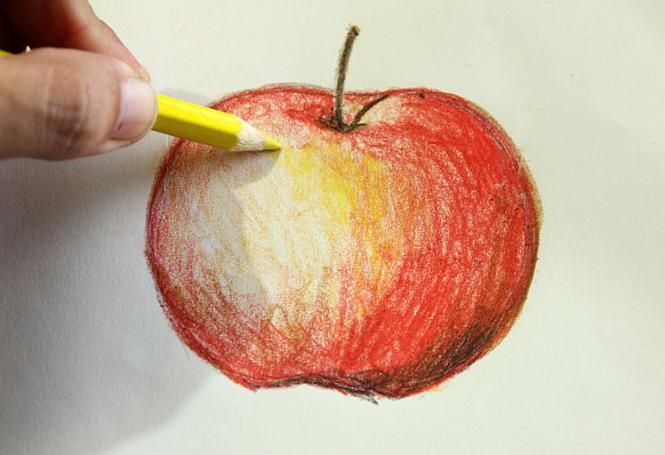
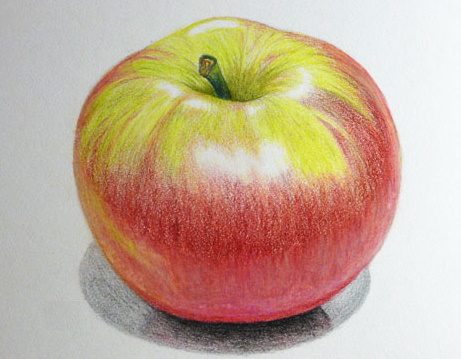
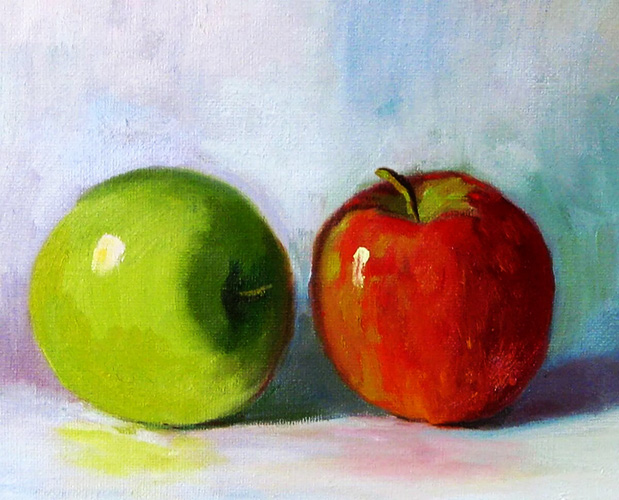
In color
You can draw a colored apple by preparing the necessary set of colored pencils for children and a thick sheet of paper.
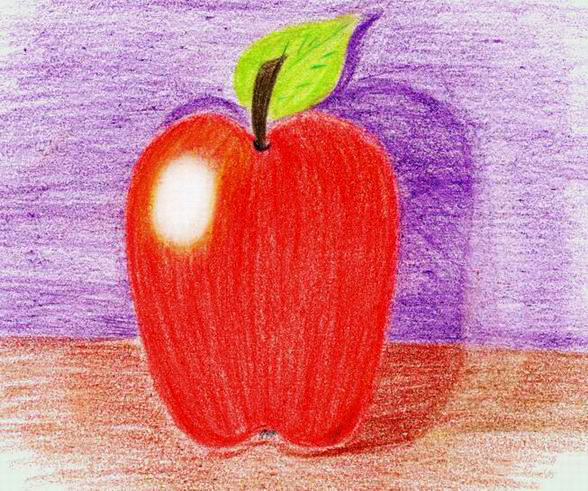
Drawing an apple consists of the following steps:
- Draw a circle with a simple pencil, and then use it to create the outline of the apple. The top of the outline should be lower than the top of the circle, and the bottom slightly higher than the bottom of the circle.
- Draw a semi-oval-shaped depression at the top of the apple, and draw a vertical stalk from the center of the depression.
- From the middle of the stalk, draw a leaf to the right, and inside it, draw the outline of the veins in the form of one longitudinal central line and stripes perpendicular to it.
- Erase the auxiliary lines with an eraser and outline the apple with a clear line.
- Paint the apple stem brown.
- Using vertical movements, paint the entire apple yellow, leaving the highlight area unpainted (this part of the apple is located between the center and the left edge of the apple).
- Use green shades to paint the part of the apple located above the stalk, as well as the left part of the apple (to the left of the highlight area). The movement of the pencil should follow the contour of the apple.
- Paint the right half of the apple with red shades, while the saturation of the tone should gradually increase from the upper part of the apple to its lower part.
- Use red, green and yellow tones to give the apple more saturation by using each of these colors in the appropriate area of the drawing.
- To give the highlight area a more realistic look, use the eraser to erase the highlight area a little.
- Using a grey pencil, draw the shadow cast by the apple and blur it a little using an eraser.
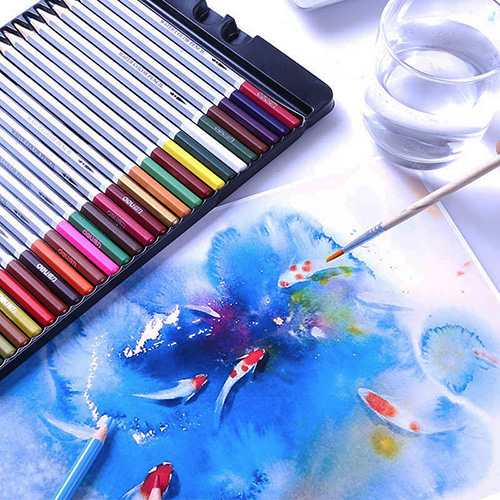
An apple is a drawing for children that can be drawn not only with pencils, but also with paints.
To paint an apple with watercolors, you need to follow these steps:
- Draw an auxiliary circle with a simple pencil in the center of the album sheet.
- Draw the outline of the apple by tracing this circle, while the upper and lower parts of the apple outline should be slightly flattened relative to the auxiliary circle.
- Draw a semi-oval-shaped depression at the top of the apple, and then draw a stalk pointing upward from the center of this depression.
- Erase the auxiliary lines.
- Wet the left half of the apple with a damp brush.
- Take a light yellow shade of paint on the brush and paint the left half of the apple, without touching the central part of the apple (there will be highlights here).
- Lightly wet the right half of the apple with a damp brush, then paint this part light red.
- When the paint has dried a little, apply another layer of diluted red paint so that the color gradually becomes lighter as you move from top to bottom.
- Mix yellow paint with orange in a 2:1 ratio, and then paint the apple's surface with the resulting color by moving the brush from top to bottom along the apple's contour.
- Take some diluted red color on the brush and paint the apple in places by moving the brush from top to bottom along its outline.
- Paint the apple stalk grey.
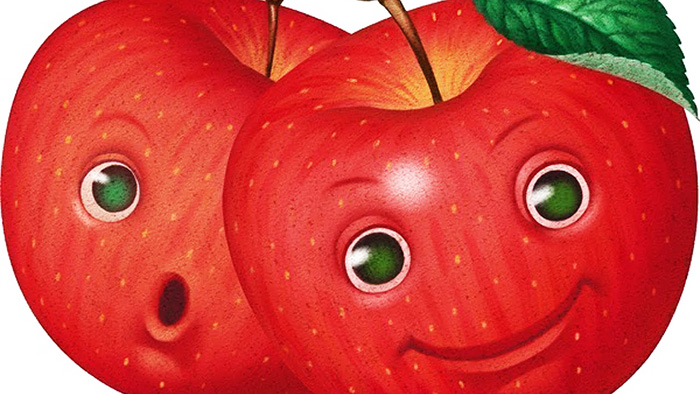
Two apples and a slice
This drawing can be drawn with just one simple pencil.
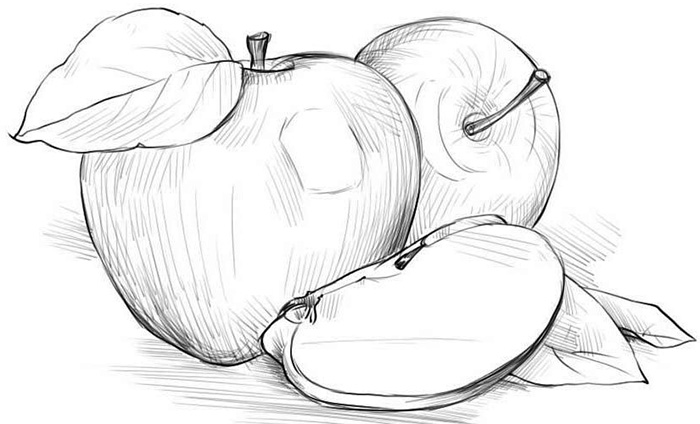
The drawing process consists of the following stages:
- Make a sketch in the form of a circle (the first apple), a semicircle adjoining it on the right (the second apple), and an oval (an apple slice), which is located horizontally on top of the two apples.
- Draw the outline of the first apple using the sketch of a circle. As a result, the outline should be flattened at the top and bottom relative to this circle.
- Draw a small horizontal semi-oval (depression) at the top of the first apple, and from its center draw a vertical stalk. Then from the base of the stalk draw a petal directed to the left over the left upper part of the apple. The size of the petal should correspond to 1/4 of this apple.
- Draw the outline of the second apple, which should correspond to the semicircle. Then, in the center of the outline, draw a small round depression, from which the stalk should emerge, directed to the right. The shape of the stalk, both the first and the second apple, should have an elongated cylindrical shape.
- Draw the outline of the slice using the oval sketch. The bottom of the outline will match the shape of the oval, while the top will be a straight, horizontal line (part of the oval is cut off).
- Draw an apple seed at the top of the apple slice, and the base of the stalk at the edge. Then you need to draw the inner contour of the slice, parallel to its main contour and several millimeters away from it.
- Erase the auxiliary lines.
- Draw the outline of the veins inside the petal, and then hatch along the outline of the two apples, leaving space for highlights. When hatching, you can use both vertical and horizontal semi-oval strokes, which should be applied in accordance with the outline of the apple.
- Apply several horizontal strokes to the surface of the apple slice.
- Apply shadow under the apples using long horizontal pencil strokes and erase them a little around the edges with an eraser.
Bitten Apple
It's quite easy to draw such an apple.
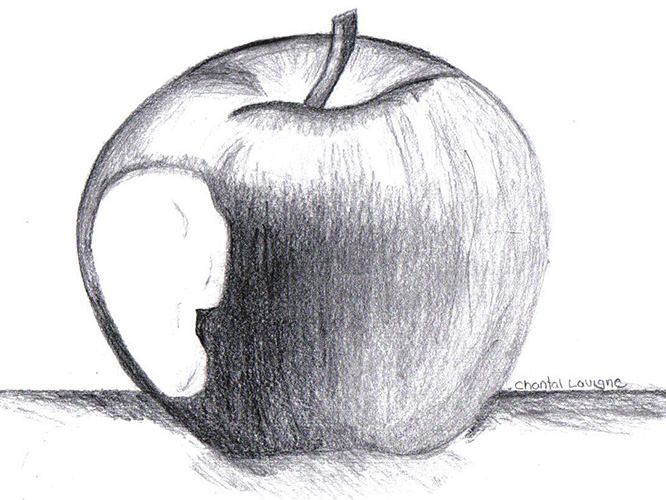
The creation of a drawing consists of the following stages:
- Draw a circle that tapers slightly at the bottom.
- Draw the outline of an apple along the outline of the circle, the upper part of which will be slightly concave.
- At the top of the apple, draw a depression in the form of a horizontal arc, concave downwards.
- From the center of the arc, draw a branch in the form of a long, curved, thin cylinder.
- Erase part of the apple outline on the right with an eraser.
- Draw a semi-oval with angular lines, concave inwards into the apple, which should connect the upper and lower parts of the apple contour on the right.
- To give the image three-dimensionality, draw another semi-oval, with the same angular lines, parallel to the first semi-oval.
- Add some strokes to the resulting bite area.
- Add small horizontal strokes around the inside of the apple.
A beautiful drawing made by children can be a great gift for parents or friends. You can get your child interested in drawing by offering to draw an apple, copying it from a real fruit.
Video about drawing an apple
Master class on drawing an apple with colored pencils: