The image of objects of different geometric shapes develops a child's sense of volume. Balloon - drawing for children, which uses different materials - gouache or watercolor, colored and simple pencils, wax crayons.
In the process of drawing, the ability to work with these materials is consolidated. A useful skill for children is practiced - depicting the volume of objects, a sense of composition in drawing and the correct use of color are developed.
Balloon is a drawing for children that develops a sense of volume and symmetry.
Simple balloon
It is better to start drawing a balloon for children with a simple example. The master class is designed to teach a child to draw a simple oval-shaped balloon with a string using a pencil. For the model, you can use a real balloon or its image. The child can look at it and compare it with his drawing.

For the drawing you will need:
- sheet of paper;
- simple pencil;
- eraser.
- First, you need to determine the location of the ball on the sheet. This is necessary to practice the child's sense of composition.
- An oval is drawn with a simple pencil.
- The place where the ball is tied with a thread is located below the oval. It should be drawn in the shape of a triangle.
- The thread with which the ball is tied is depicted as an arbitrary line extending from this triangle to the end of the sheet.
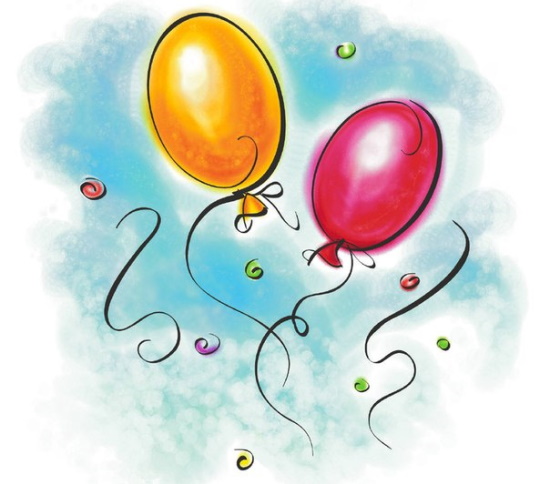
The balloon can be colored with paints or colored pencils. There is a glare on the balloon. It is depicted as a spot of arbitrary shape. The entire balloon is painted in any color, and the glare is not painted.
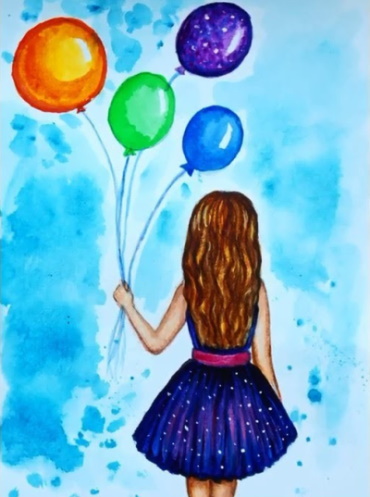
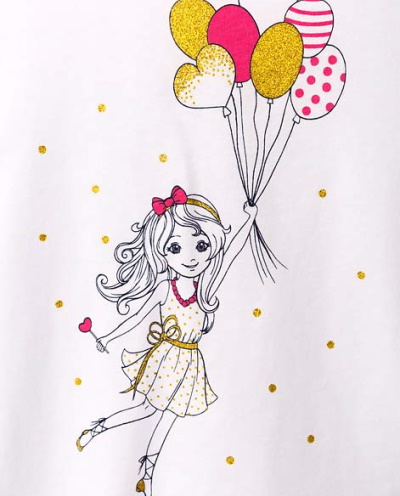
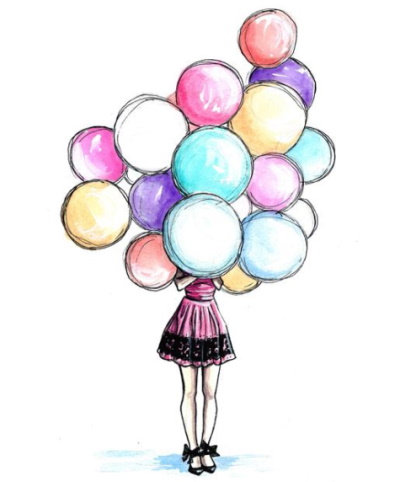
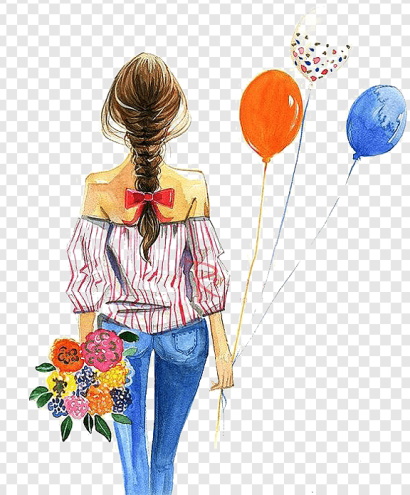
Girl with balloons
A girl with balloons is a drawing that is much more interesting for a child to draw than just an inanimate object.
For this drawing you will need:
- sheet of paper;
- simple pencil;
- watercolor or gouache paints;
- soft brush, medium thickness.
The work process step by step looks something like this:
- At the beginning of the work, you need to determine the location of the girl on the sheet. To do this, mentally or with a light line of a simple pencil, you need to divide the sheet in the middle with a vertical line. The figure of the girl is located from the center closer to the lower right part of the sheet. And the balls will be located in the upper left part of the sheet.
- Figure of a girl. The girl in the drawing will stand with her back to the viewer, her neck will be covered by hair. But you still need to draw the location of the neck and head to maintain the proportions of the human figure.
- The head is depicted in the shape of a circle or oval.
- From it below, to the left and right, there are two vertical lines – the neck.
- From the neck there are two horizontal lines to the right and left. These are the shoulders.
Now you need to draw the body:
- Two lines need to be drawn from the shoulders down.
- You need to draw a belt on the waist.
- The fullness of the skirt should be shown with a wavy line.
Hands:
- The girl holds the balls with one hand, so the arm is depicted bent at the elbow and the hand should be depicted with bent fingers.
- The second hand should be drawn simply lowered downwards.
Next, you should draw long hair that covers the neck and reaches almost to the waist.
The girl has balls in her hand:
- First, draw strings of balls, several pieces.
- An oval is added to each thread.
- The place where the balloon is tied with a thread is depicted in the shape of a triangle.
The balls need to be drawn at different heights relative to each other.
The next stage is coloring.
Let's start with the hair:
- The hair is dyed yellow.
- Then the curls are drawn in brown.
- After the brown paint has dried, you need to paint the hair with dark brown paint to make the curls look more voluminous.
Next, paint the dress.
For this, blue and purple colors are used:
- First, draw in blue.
- Then apply purple color with a thin brush and draw the folds on the skirt.
- The belt on the dress is made in dark pink color.
The next stage is the girl's arms and legs.
For the arms and legs, use a pale brown color to match the body color:
- The arms and legs should be outlined with a darker brown color, giving them volume.
- The shadow from the full skirt falling on the girl's legs should be drawn carefully after the skirt has completely dried.
Balls:
- They are painted with bright colors.
- Do not paint over the spot on each balloon. The spot on all balloons should be positioned the same way, since the light falls from the same side.
- Having painted the ball once, you need to let the drawing dry a little. And then take the same color of paint and draw along the contour again, not reaching the highlight a little. Two layers of paint make the color more saturated and dark. That's why the ball looks voluminous.
- The strings from the balloons should be drawn with a thin brush tip or a colored pencil or felt-tip pen.
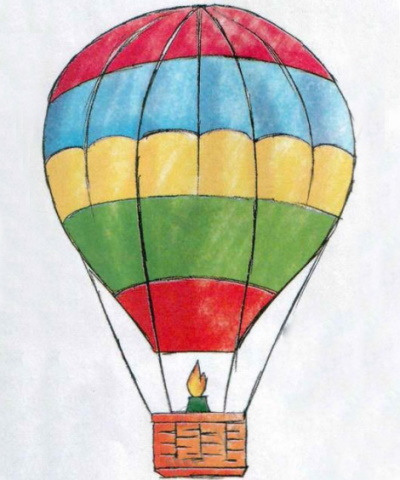
Multicolored balloon with basket
To work you will need:
- sheet of paper;
- simple pencil;
- ruler;
- eraser;
- paints (gouache or watercolor); colored pencils or wax crayons.
Stages of drawing creation:
- On the sheet, you need to mark the location of the ball and the basket. To do this, mentally or with a light pencil line, divide the sheet into 2 parts in the center with a horizontal line. The ball will be located in the upper part of the sheet, and the basket in the lower part.
- Drawing a ball. At the top of the sheet, draw a square with a simple pencil. Draw a circle inside the square.
- At the bottom of the sheet, mark the basket. It is much smaller than the ball. Draw a rectangle and connect it with straight lines to the ball on the left and right. These lines are the rafters with which the basket is attached to the ball.
- At the bottom, above the basket, the balloon narrows. Since this balloon is a drawing for children, the balloon can be compared to a lamp to make it easier to draw its shape.
- Next, draw 2 lines going from the very top of the ball to the basket. They need to be slightly curved, as they pass through the round shape of the ball and cannot be straight. They seem to lie on the ball, repeating its shape.
- Add horizontal lines that encircle the ball. They should also be slightly curved, as they pass through the round surface.
- The square is no longer needed, so it needs to be erased.
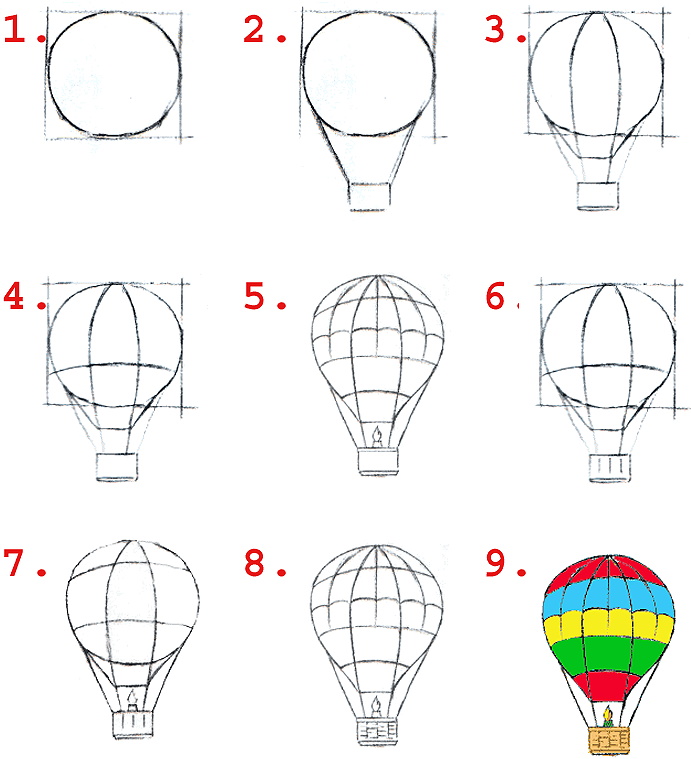
- They depict a burner in the basket - an air heater, with the help of which the balloon flies.
- Next you need to draw the basket.
- Add one more line to the left and right of the vertical lines already drawn on the ball. Also draw a line going from top to bottom in the center. It will no longer be curved, as it goes through the center of the ball and visually looks straight.
- Add another horizontal line in the center of the ball, bending it to the shape of the resulting “slices” of the ball.
- Draw basket weaving.
The ball sketch, drawn with a simple pencil, is ready. Now it needs to be colored with bright colors, using paints, wax crayons or colored pencils. For careful drawing of fine details, such as the ropes of the ball or the weaving of the basket, use a felt-tip pen.
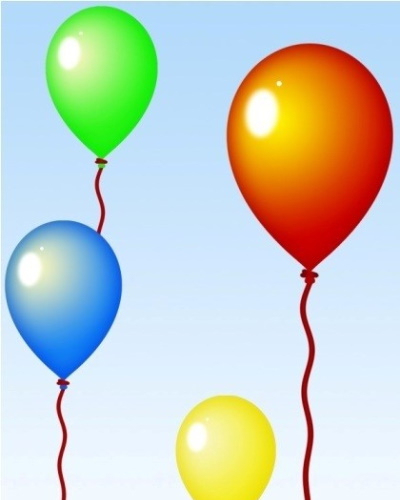
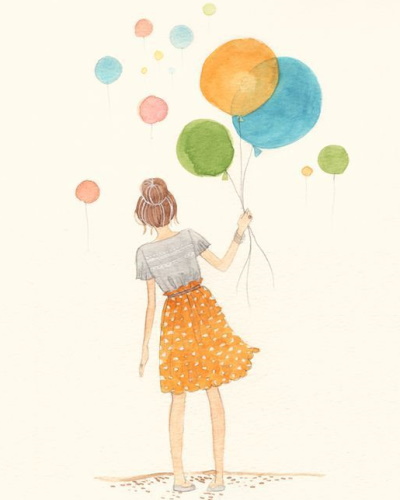
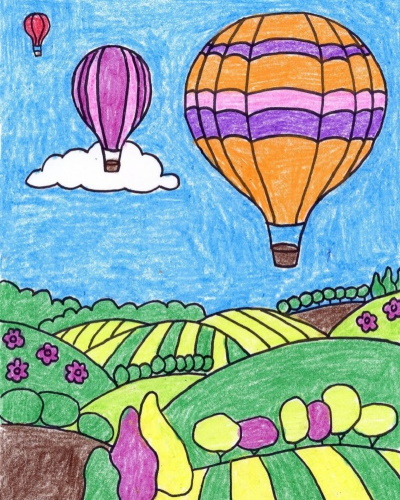
Balloons in the sky
In this master class, we propose to draw a landscape with balloons flying against the blue sky. Using the example of balloons in the sky, a child can be introduced to the principle of perspective in a simple and understandable way: the closer an object is to the viewer, the larger it is, the further it is from the viewer, the smaller it is.
To complete this drawing you will need:
- sheet of paper;
- simple pencil;
- eraser;
- black marker;
- colored pencils or wax crayons.
The drawing is done in stages:
- At first, mentally or with light lines of a simple pencil, divide the sheet in half with horizontal and vertical lines. Then these lines will need to be erased. But for now they are needed to determine the center of the composition.
- The balloons are placed relative to this center. The balloon in the upper right part is closest to the viewer, and therefore the largest. In the upper left part are the other two balloons, moving away from the viewer. The smallest one is the farthest from the viewer.
- Draw the balls. Draw vertical stripes on them, going from the top of the ball to the basket. There can be 5 or 6 of them. These are the ropes connecting the basket and the ball. Then add horizontal stripes on the ball. Finish drawing the basket.
- At the bottom of the sheet, outline the hills and trees. Since the balloons are flying across the sky, this should be emphasized with a light cloud.
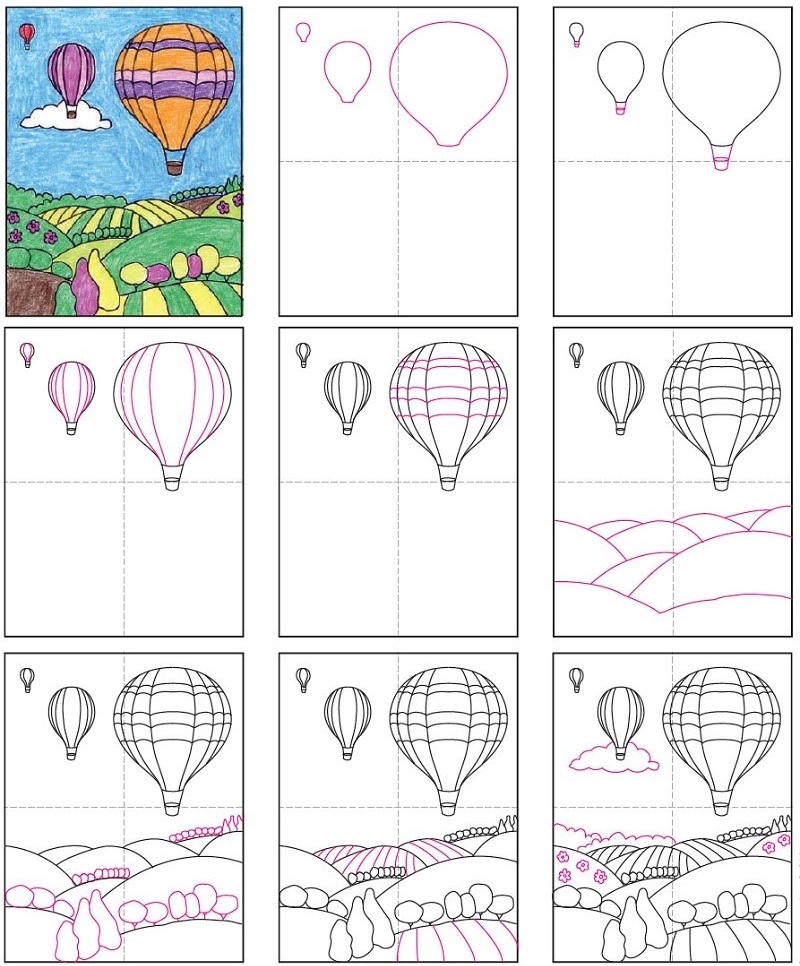
- Erase all unnecessary lines with an eraser. Now carefully outline the drawing with a thin black felt-tip pen.
- The last stage is coloring.
For this purpose, use colored wax crayons or colored pencils. Or paints, as you choose.
Hot air balloon hovering over the city
Drawing a hot air balloon in this master class will consolidate knowledge and skills in drawing for young children. But something new will appear, namely, elements of the urban landscape. The acquisition of skills in working with color continues, knowledge of the principles of perspective is consolidated.

To work you will need:
- drawing paper;
- simple pencil;
- eraser;
- round and flat brushes;
- gouache;
- thin markers of different colors.
First, you need to determine the center of the sheet. The entire composition will be located relative to this center. To do this, divide the sheet in half with a vertical and horizontal line.
The intersection of these lines is the center of the sheet and the composition of the drawing. The lines are drawn with a simple pencil.
The balloon will be located at the top of the sheet. At the bottom of the sheet is the city.
A simple pencil should be used to make a sketch. The location of the ball in the sky is outlined. It can be placed in the center of the composition or closer to the edge of the sheet, as desired. A drawing for children should not be complicated. Therefore, the urban landscape can be made a little fabulous and easy to perform.
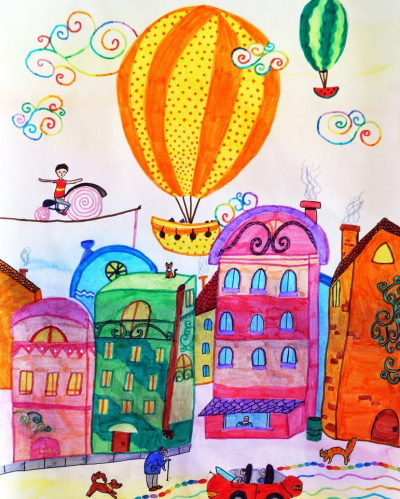
The location of the city's houses is outlined:
- The houses are depicted close to each other.
- Windows are painted on houses. They can be of different sizes – square, rectangular.
- The roofs are drawn at different heights.
- At the very bottom of the sheet you need to show the surface on which the houses are located. This is a city street. You can draw small figures of people and cars on it.
Once the sketch is made, they begin working with paints:
- Paint the background blue. This is the sky.
- Clouds are painted with white gouache.
- They are painting a hot air balloon.
- They draw the roofs of houses.
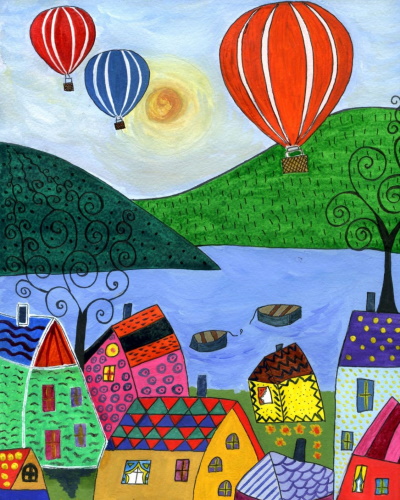
You can depict a fairy-tale city and use different colors for this. And the houses themselves can also be painted in different colors.
On some roofs of houses you can draw tiles. And on the walls show brickwork. But not on all houses.
Next, you need to let the work dry. Then, with a thin felt-tip pen, you need to outline the house, roof, window, roof tiles. And other small details are drawn in this way. The drawing is ready.
Balloon-drawing for children of any age. The master classes show the principle of creating a drawing for children of primary school age.
To make such a drawing, the child will need to master the skills of drawing three-dimensional objects, learn to work with the background, and develop spatial thinking. Drawing a round ball will help the child learn to maintain symmetry when depicting geometric figures.
Video about drawing a hot air balloon
Simple drawing of a hot air balloon: