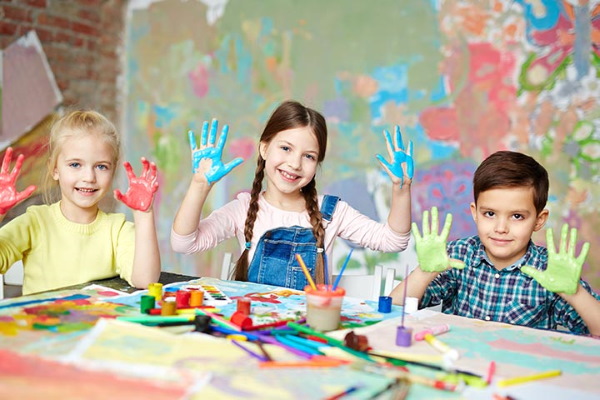
Everyone loves to draw, especially children. However, they are not very good at it due to the lack of necessary skills. Parents should help a 4-5 year old child master the basics of drawing. They need to properly organize the creative process and make sure that the lesson captivates the child and is fun. The selection of lessons, as well as the availability of the necessary materials and tools, will help with this.
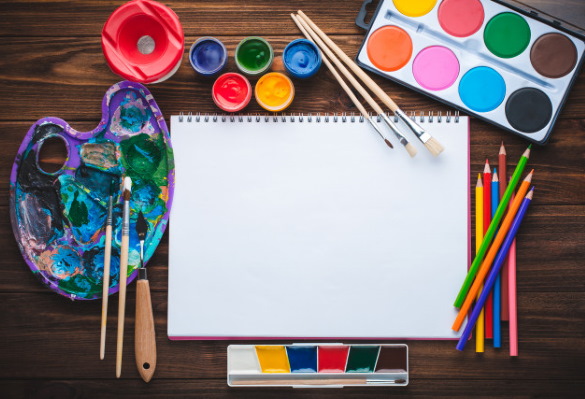
Drawing tools
Drawing lessons for children 4-5 years old include the following stages:
| No. | Stage | Description |
| 1 | Think about the upcoming lesson | You need to run through in your head the sequence of actions that the young student will perform. |
| 2 | Prepare materials and tools | For work you will need sheets of A4 paper. For example, the drawing can be done in an album. The main tools will be pencils, markers or paints.
If paints are selected, you will additionally need:
|
| 3 | Prepare non-standard tools | In addition to the basic items and materials, you may need items that have a different purpose. For example, for painting with paints you can use:
Kids will also enjoy painting with their fingers, without any tools. Another unusual way of drawing is using a large piece of wallpaper. The drawing is done on the back side, which is white. In this case, it is not just a picture, but a whole composition. It can be done by several children at the same time together with adults. |
| 4 | Complete a sample drawing | This will make it easier to explain the material.
For example, you can take the following to conduct classes:
The child will happily support his toy teacher, trying to help him. |
| 5 | Prepare additional materials | They will help make the activity more interesting and fun.
These could be:
|
Master classes
Drawing lessons for children 4-5 years old are recommended to be conducted after preparing materials and tools for work.
Sky
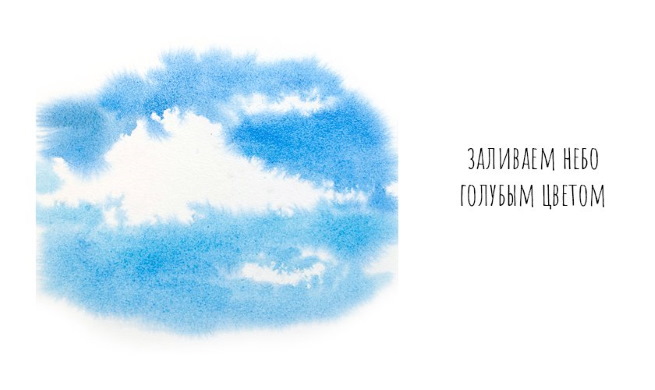
The lesson can begin with the words: "Today we will draw a blue sky." At the same time, it is necessary to show the child various photographs and landscapes. There should be gouache paints on the table.
The teacher should tell and show that:
- sky blue is formed by mixing blue and white paint;
- the sky may not only be blue. It may be pink at dawn. In this case, you need to mix red and white gouache. Also, the sky is painted light orange when the sun sets behind the horizon. For this, orange and white paints are mixed;
- the morning can be grey. For such a drawing you will need black and white gouache;
- Sunbeams give the sky a light yellow hue. To do this, mix white and yellow.
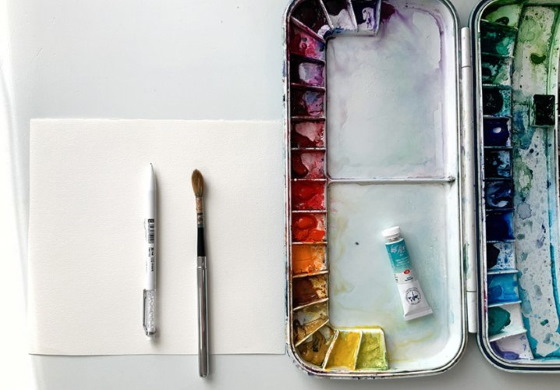
In addition to paints, children should have the following on their desk:
- brushes;
- dry cloth;
- container with water;
- paper.
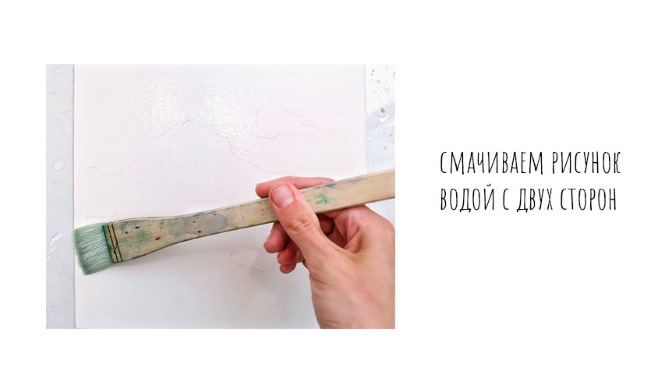
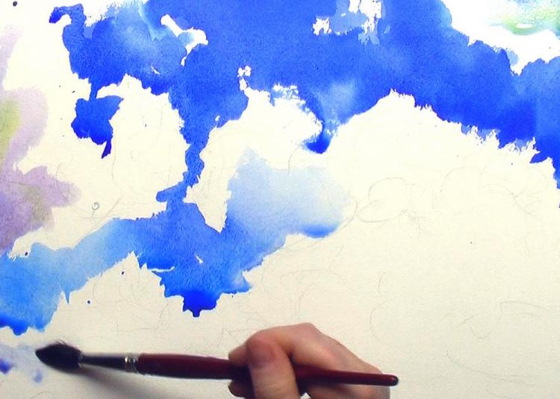
The work will be done on half of the album sheet. Students must draw a beautiful sky, choosing any gouache for this. It is important to show children the technique of applying paint to paper.
To do this:
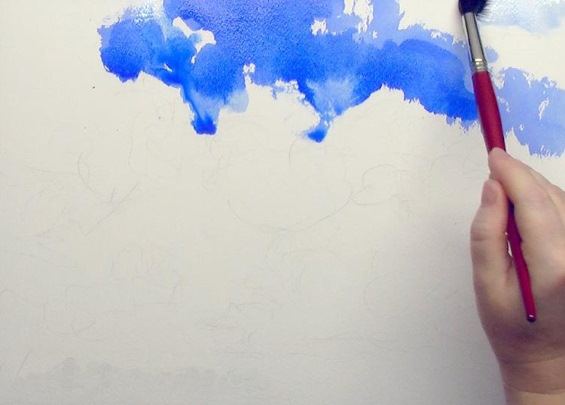
- Take a clean brush and apply gouache using the brushstroke method (moving from top to bottom). This is done until the paint runs out.
- The brush is washed in water and excess moisture is squeezed out with a cloth.
- A new color is taken and the same movements are performed. As a result, a beautiful sky is formed on the paper.

Once the work is completed, all that remains is to look at the drawings and give them suitable names, for example:
- "Merry Sky";
- "Gloomy Sky";
- "Morning Sky".
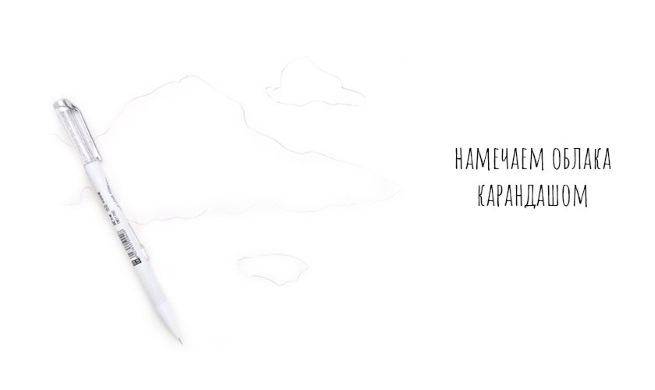
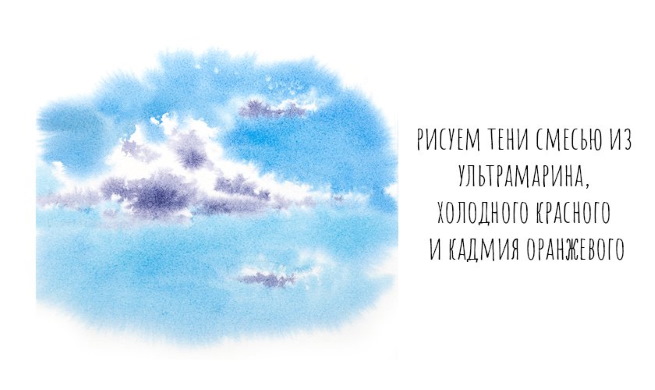
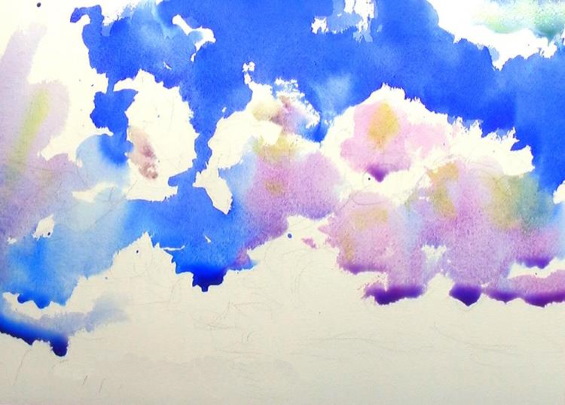
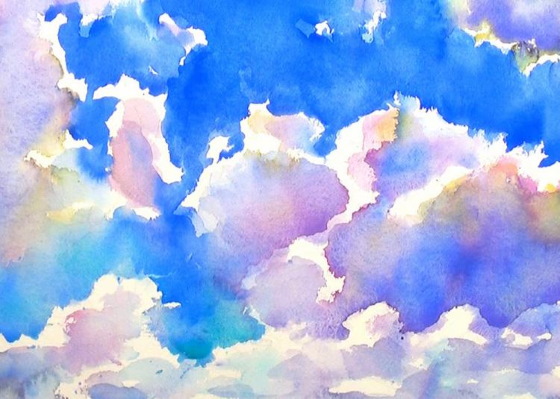
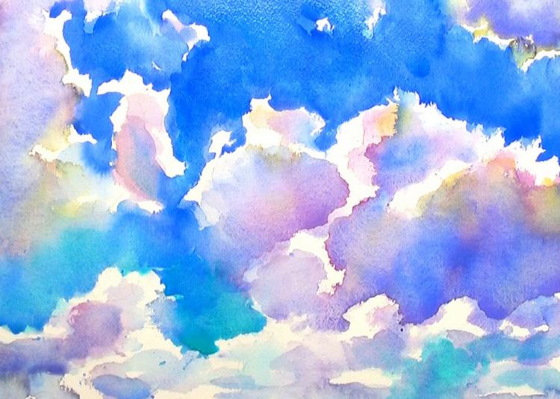
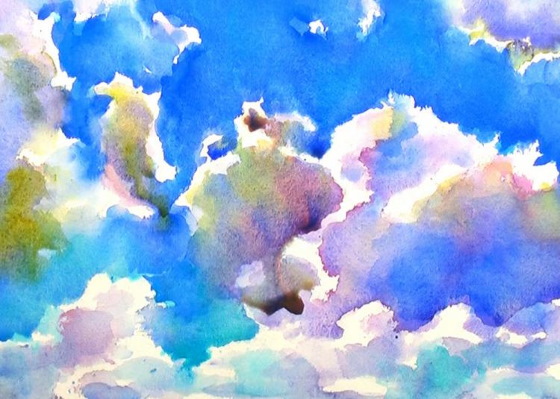
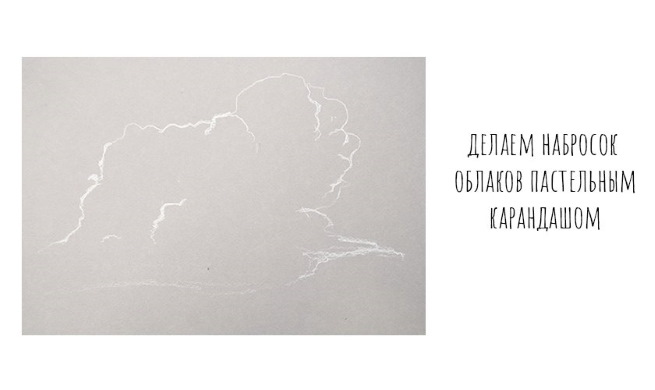
Clouds
The sky drawing will be incomplete without clouds. It is necessary to show the students pictures with clouds, which clearly express the mood. There should be sad, happy, anxious pictures. It is necessary to tell the children that the weather affects a person's mood.
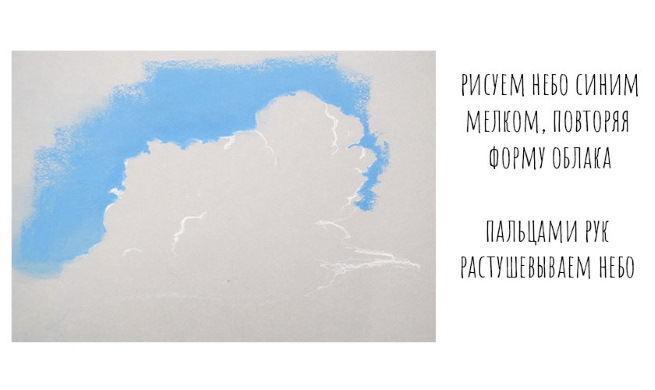
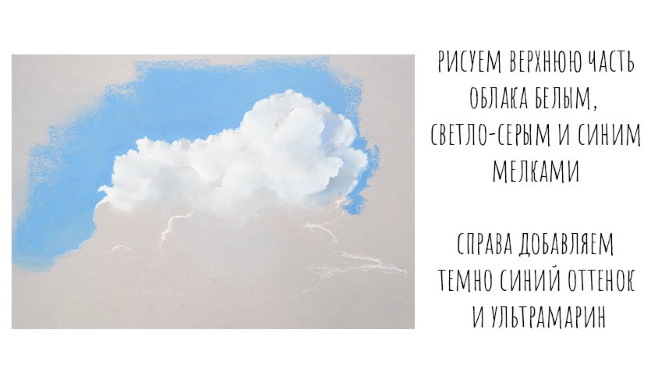
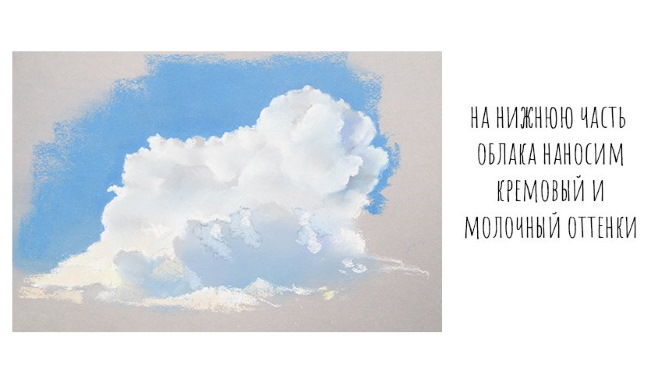
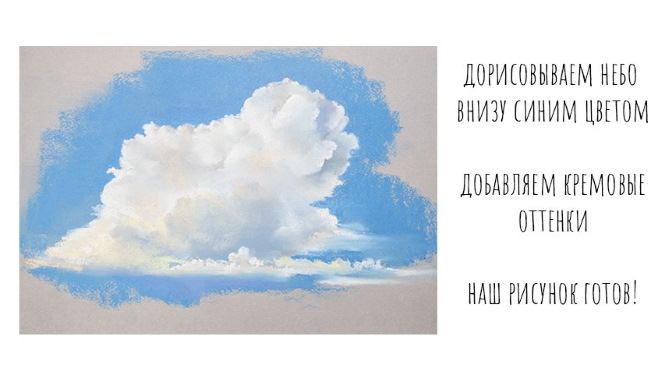
Then you need to show the techniques of working with gouache when drawing clouds. To do this, take white paint with a clean brush and leave several spots of different shapes on the paper. Mixing with the sky color, the white gouache acquires a certain shade. When the children do the same, it remains to analyze their drawings.
Sun
The brightest celestial object is the sun. At first, various landscapes are also shown where the sun is present. It is necessary to show photographs where the daylight is at different times of the day and notice that its color changes from orange in the morning to bright red in the evening.
It is also important to draw children's attention to the shape of the sun and the rays emanating from it. The sun itself is round, and the rays can be sticks, waves, dots. The drawings that children make can be compared with flowers familiar to them, such as daisies and chrysanthemums.
Pebbles painted using potatoes
Beautiful designs can be quickly created using a small slice of potato. To do this, cut the tuber into 2 halves, and then create a relief on the cut of the first one, running a fork through it several times.
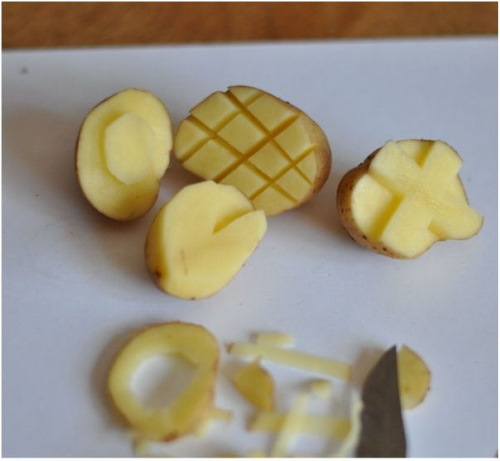
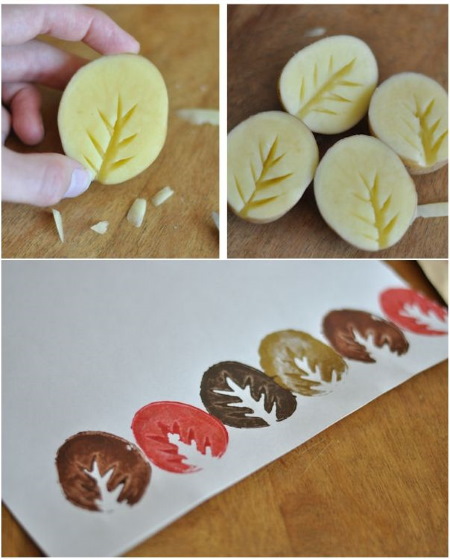
The prepared piece of potato is dipped in paint, then it can be used to make prints. This is how beautiful pebbles are created.
Fishes
Drawing lessons for children aged 4-5 years on a marine theme will require paints.
The stages of drawing a fish will be as follows:
- Imprint the body by placing the pad of your thumb on a sheet of paper. The paint in which your finger is first dipped can be any color.
- Use the tip of your index finger to draw a tail for the fish.
- Add eyes and a mouth using markers.
- The 2nd, 3rd and subsequent fish are drawn in the same way. There can be any number of them in the picture. The child decides.
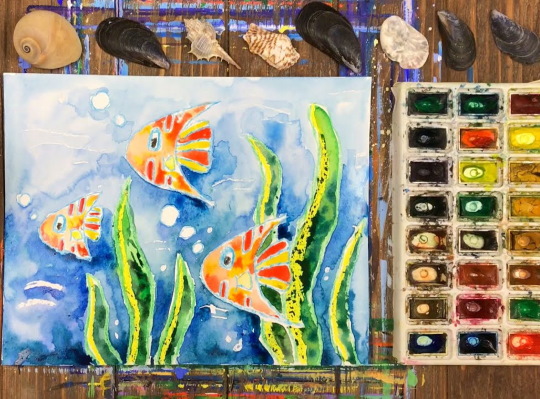
The fact that the fish are under water should be indicated by the following lying on the bottom:
- bubbles. They can be printed using the tip of a thin plastic straw;
- seaweed. Half an onion will help to depict them;
- pebbles. They are drawn using potatoes using the method described in the example above.
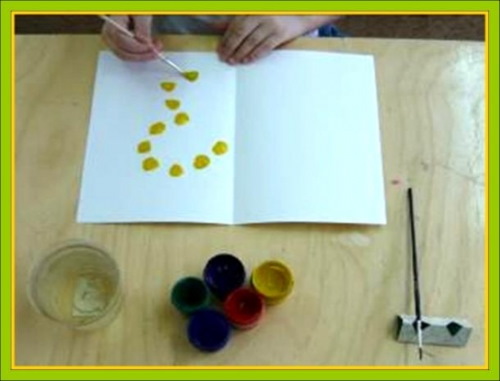
Butterfly painted with blots
Blotography is an unusual way of drawing. Its essence is to teach a child to leave blots of different colors on a sheet of paper so that they create images, objects or individual details.
By pondering the question: "What does this blot look like?", the young artist will use his imagination, which will contribute to its development. Then, without forcing the child, you should move on to the next step - tracing or finishing drawing the existing blots. As a result, you can get a full-fledged plot picture.
To implement it, you need to do the following:
- Fold a sheet of paper of any size in half, and then unfold it back.
- Together with your child, place 2-3 spots of different colors on the straight fold line. You can use gouache paint or ink for this.
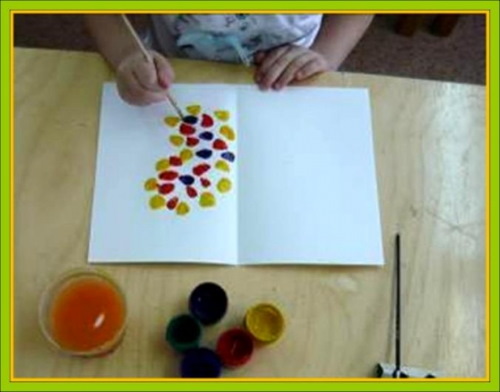
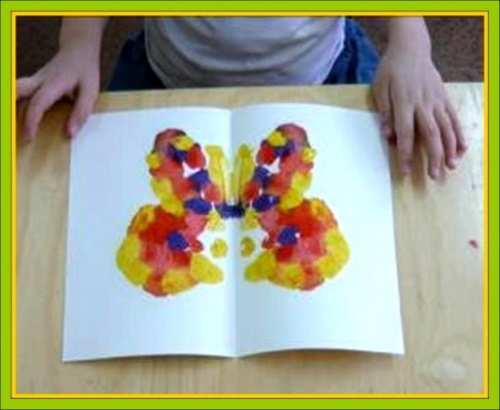
- Fold the sheet in half again along the existing fold and, running your finger from the center to the edges (while saying some magic spell), unfold the sheet back.
A drawing will appear on it, which will remain to be supplemented with missing elements, using familiar drawing tools. First, you just need to wait until the gouache dries.
A design created using threads
A drawing lesson with children aged 4-5 using threads can be called threadography. The result can be anything, depending on how much the child's imagination runs wild.
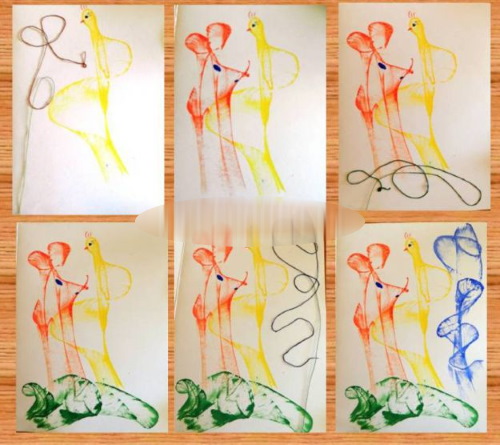
To work you need:
- Take a white sheet of cardboard, square in shape, about 20 cm wide, and a thick woolen thread about 30 cm long.
- Bend the cardboard and then straighten it to form a fold line.
- Dip one end of the thread into thick paint (approximately 10 cm), and then place it between the cardboard halves.
- Pressing slightly, move the thread along the sheet. You can play the role of a powerful good wizard, casting a spell consisting of a set of strange words.
The result is a chaotic image, which the child must come up with a name for. This work, combined with the visual one, will contribute to the intellectual development of the child. If desired, you can draw the missing details.
Snail
To draw a snail you will need:
- A4 album sheet;
- watercolor;
- several brushes of different sizes;
- container with water;
- napkin.
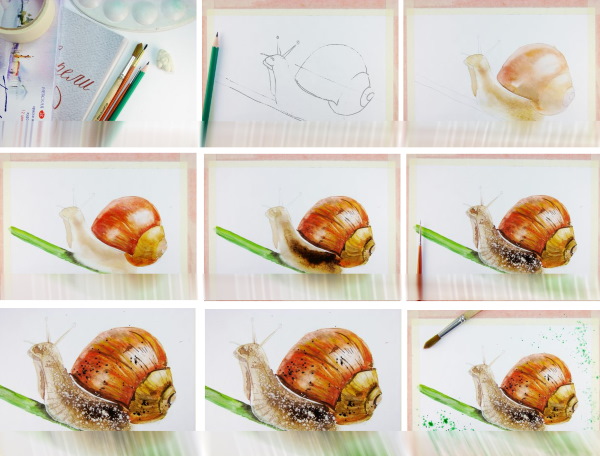
The steps to creating a character on paper are as follows:
- When starting to work with brushes, you can tell the children that the paints are not yet awake and need to be awakened by gently stroking them with a brush.
- Draw a circle in the center of the paper sheet with yellow paint. You can tell the children that it is a bun. While drawing it, you need to gradually unwind the brush.
- Draw an arc under the yellow circle. Use brown paint for this.
- Turn the arc into a loop.
- Draw a couple of small horns and color the loop. The horns should look like small brown mushrooms with a round cap and legs widening towards the base.
- To color the loop, which is the snail's body, use brown.
- Decorate the snail shell. To do this, draw a thin spiral on a yellow circle in brown.
- Make the snail look cheerful. To do this, use black paint to draw a mouth - a small arc line located just below the horns on the head.
- At the top of the horns, which are represented by small circles, draw 1 small black circle. These will be the snail's eyes.
- Think of a background for the drawing – the location of the snail. It can be green branches, colorful autumn leaves, yellow sand, a blue pond, lots of shells.
Turtle
You can draw a cute turtle with your children using:
- A4 size album sheet;
- watercolor paints;
- brushes;
- a jar of water.
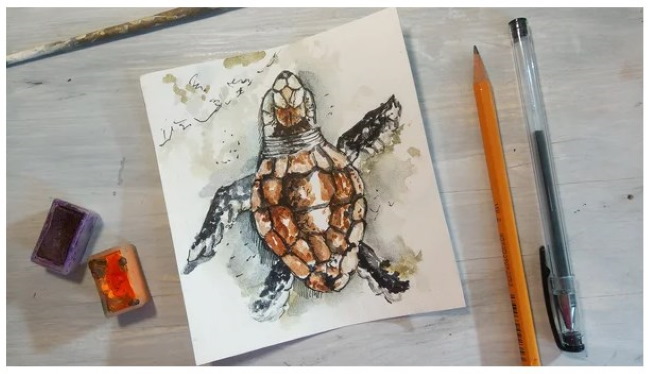
The stages of work are as follows:
- Draw a yellow circle in the center of the sheet.
- Using brown paint, draw 4 loops near the circle, represented by thin arced lines: 2 loops should be located at the top and 2 at the bottom. The distance between the top 2 should be approximately the same as between the bottom 2.
- Draw the 5th loop. The same brown color is used for this. This loop should be the largest and located on the right side of the circle - approximately in the middle between the upper right and lower right small loops drawn earlier.
- All 5 loops need to be painted with the same brown paint.
- At the end of the largest loop, draw 2 small white circles. These will be the eyes. Add 1 more smaller black circle to each of them, which will represent the pupils.
- By doing this, the largest loop turns into a cute turtle head.
- Transform the other 4 loops into paws. To do this, draw 3 small black strokes at the end of each of them. These will be some kind of claws.
- Decorate the shell. Here the child can use his imagination and draw any pattern.
Fish
By analogy with the above examples, you can paint a beautiful multi-colored fish with watercolors.
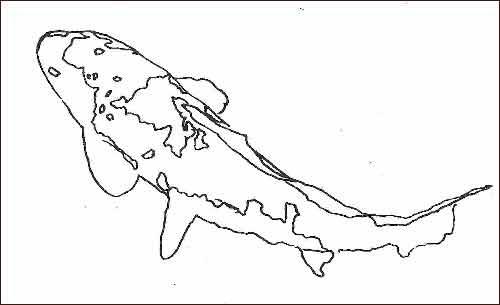
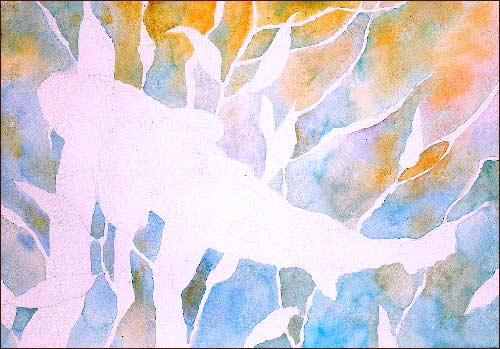
The drawing will be done in the following stages:
- Start with a yellow circle, which should be drawn in the center of the sheet.
- Enclose the yellow circle in 2 arcs, one of which is located on top and the other - below. Both arcs are connected by their ends to each other. They should be drawn with yellow paint, which was used for the circle. The result is something that looks like a large yellow eye. This is the body of the future fish.
- Draw a beautiful tail on the fish, which is attached to the right side of the body. It should be a triangle with a wavy line, which is drawn in yellow paint.
- Decorate the fish using red paint. Using light brush strokes, draw 2 small strokes on the left pointed edge of the body. This will be the mouth. Draw 2 strokes under the lower end of the body. These are the fins. The upper fin should be represented by a wide wavy stripe.
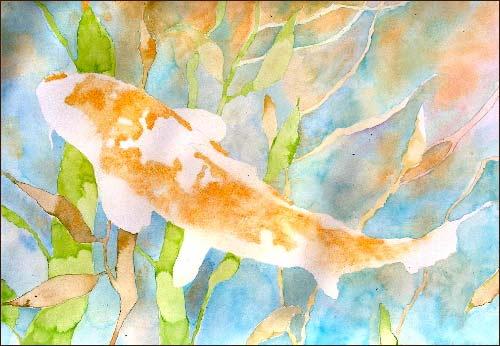
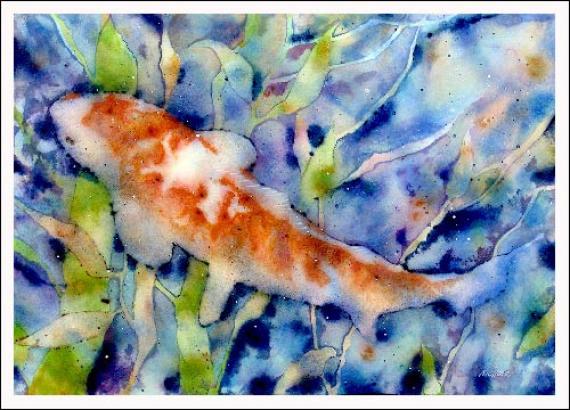
- On the tail, place patterns in the form of several stripes, like rays, extending in different directions from the body of the fish.
- Using red paint, draw scales. First, separate the area of the body that will be the head with a transverse red arc strip. There should be no scales here.
- Draw a large eye using black paint. You need to warn the child that this color should be used carefully.
- First, a circle is drawn with a thin black line, and then a solid black circle is drawn inside it. This will highlight the pupil.
- Add a background. The fish is surrounded by water, as well as pebbles and seaweed. To depict water, you can simply put a few "stamps" with blue paint. Pebbles are drawn similarly, using brown. Seaweed is green wavy lines.
Winter meadow
Drawing lessons for children aged 4-5 can be seasonal. For example, for a winter meadow you will need a blue sheet of paper, which will be the background.
The stages of work are as follows:
- Draw 5 white circles and 1 oval on a blue sheet of paper.
- Draw 1 large white circle. It should be located on the left side of the sheet, approximately in the middle between its upper and lower edges.
- Slightly to the right of the circle, draw a large white oval, elongated vertically.
- To the right of the oval, draw another large white circle.
- On the right side of the sheet, draw 3 circles for the snowman. The bottom one should be the largest, but slightly smaller than the previously drawn circles. An even smaller circle is located on it. The last circle, which will become the snowman's head, should be the smallest.
- Draw snowdrifts by drawing several white wavy lines at the bottom of the sheet – under all the previously drawn figures.
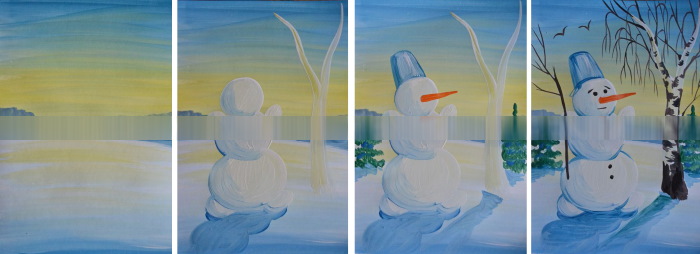
- Using brown, draw tree trunks and branches, as well as the missing parts of the snowman. There should be 3 trees in the picture. The 2 large circles and oval drawn first will become their snowy crown.
- Draw the snowman's arms, which are made of branches. In one of them he holds a broom, which is brown. At the top of the snowman's head there are 2 brown eyes, which can be represented by small circles. At the bottom of the head there is a mouth, also represented by many small brown circles.
- Complete the drawing and turn it into a full-fledged picture. To do this, you should depict several white snowflakes on a blue background.
- Finish drawing a green bucket on the snowman's head and a green scarf on his neck.
When drawing, a person expresses his own view of the world. This is a good way to convey feelings and mood. Psychologists believe that children draw not what they see around them, but what they imagine. By organizing lessons for 4-5 year olds, parents have the opportunity to visit their child's small world and understand it better.
Video about drawing
Drawing lessons for children 4-5 years old - how to draw ice cream: