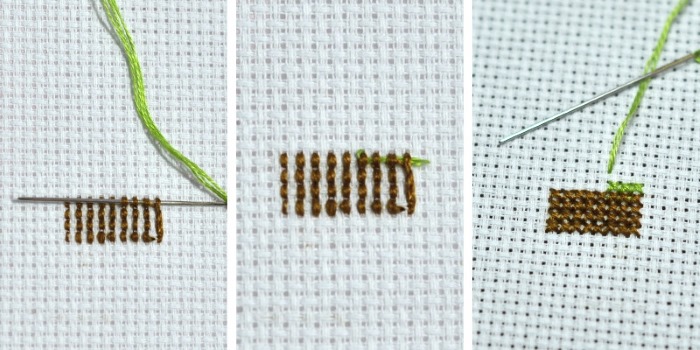
Embroidery on cardboard with threads is an art form that adults and children can learn. To start learning, you need to know how to properly prepare for them, what materials to use, look at several simple patterns and understand how to work with them.
Materials and tools for embroidery with isothreads on cardboard
Not all cardboard or threads are suitable for embroidery. The article below provides a detailed description of all the necessary materials and tools.
Warp
Album and office sheets are not suitable for embroidery because the thread cuts them when pulled. It is better to use colored cardboard intended for children's creativity.
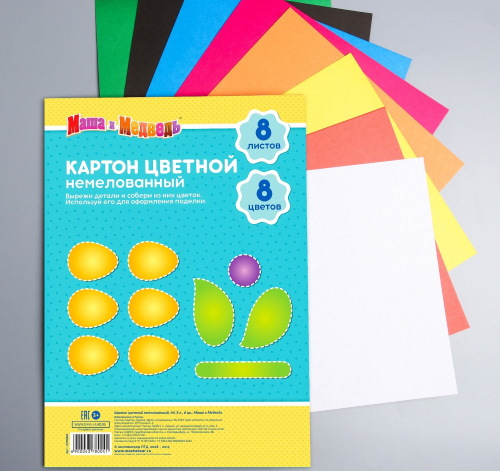
It is quite dense, does not deform in hands. You can puncture holes in it at a distance of 1 mm from each other, this technique is used to create openwork and decorative embroidery.
You can choose colored or white cardboard. Usually, sheets are sold in a set. They can be glossy or matte. The texture and color of the embroidery base depends on the intended pattern. You can make a multi-layer base by gluing a printed picture or a piece of beautiful wallpaper on top of the cardboard.
Embroidery on a velvet base looks expensive and original. Sheets of cardboard and velvet paper are connected to each other with glue stick or PVA for strength. The workpiece needs to be dried under a press so that it remains smooth.
Threads
For embroidery on cardboard, thin twisted or, conversely, crumbling threads are suitable. You can use Iris yarn with lurex or nylon thread.
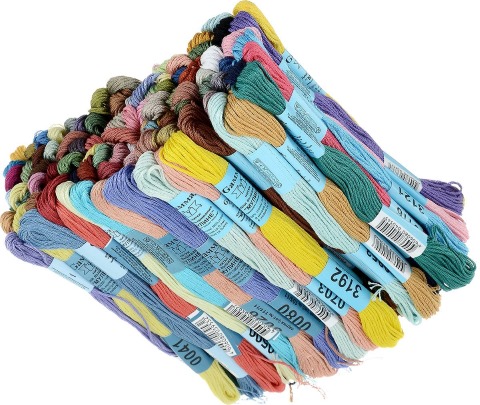
Most often, floss is purchased for isoniti. It is convenient to work with such material. It does not fray or crumble. Floss comes in different colors and shades. You can choose matte or shiny threads.
Wool threads are considered unsuitable. They are fuzzy and dull. A picture made from them looks dull and unattractive. However, experienced craftsmen use wool in their works and embroider secondary parts of the picture with such threads, for example, objects in the background.
Other materials
In the table you can see the names, as well as the purpose of other materials and tools that will be needed for embroidery on cardboard.
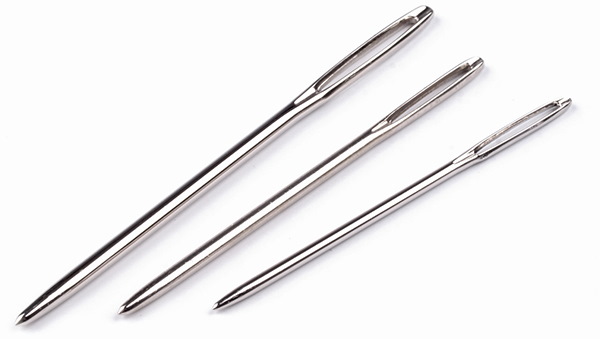
| Needles | They are needed for piercing and threading through cardboard. They should be of different sizes and have wide and long eyes. |
| Scissors | Required for cutting off excess threads. |
| Awl | Useful for making punctures on thick bases. |
| Pencil | Needed for creating markings. Experienced craftsmen recommend using pencils marked T2 (hard). |
| Ruler | Needed for drawing straight lines and measuring the distance between punctures in cardboard. |
| Compass | It will help you draw circles and angles evenly. |
| Scotch | They are used to fix the threads on the back side of the cardboard. |
The work table needs to be protected from scratches that can be accidentally caused by the needle. Usually, craftsmen use a wooden cutting board or a piece of foam as a substrate.
Tips for Beginners
Before you start your first job, you should familiarize yourself with the recommendations for beginners:
- You can glue a printed pattern with marks for punctures to the back of the base. This will make it easier to make stitches of the same size.
- You need to pierce the base slowly so that the cardboard does not tear on the back side.
- Any bumps that may form on the front side of the cardboard after piercing should be carefully cut off with a sharp utility knife.
- The remaining threads should be glued to the back of the base using small pieces of tape. If this is not done, a piece of thread will come out on the front side of the embroidery and spoil its appearance.
- Experienced craftsmen use not only cardboard as a base, but also leather and thick fabric. Punctures on such materials are made with an awl. If you heat the awl, you can puncture a CD and embroider a beautiful pattern on it.
- To ensure that the embroidery looks neat, the length of all stitches must be identical.
It is rare to get perfect embroidery on the first try, so don't get upset if something goes wrong. You can carefully cut the threads, pull them out and repeat all the steps from the beginning. Extra holes can be masked by painting their edges with a marker that matches the color of the base.
Preparation for embroidery
Beginners need to take a ready-made, printed diagram with marks for punctures and numbers for their first work. The thread should be inserted into the numbered holes in ascending order.
Preparation for embroidery is carried out in 5 stages:
- Select a design and print the template.
- Decide on the background color and select several skeins of thread.
- Glue the diagram to the back of the cardboard.
- Puncture all marks.
- Secure the thread and start embroidering.
Punctures should not be made while holding the cardboard in your hands. It is better to place it on a foam backing.
How to secure the thread
The thread at the beginning and at the end of the work can be secured in 2 ways:
- Pass the needle under the last stitch and pull it through the loop formed from the threads. Tighten and cut off the excess.
- Tie a knot and secure the thread with tape on the back side of the embroidery.
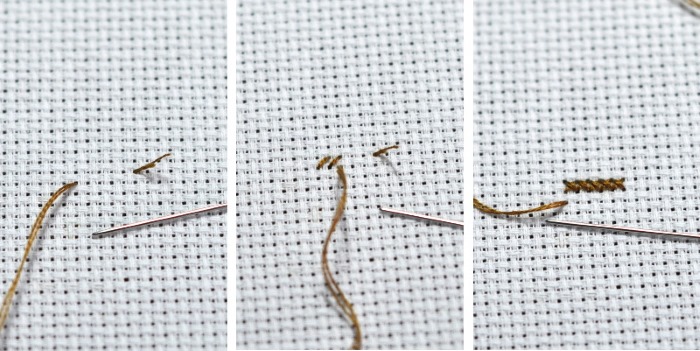
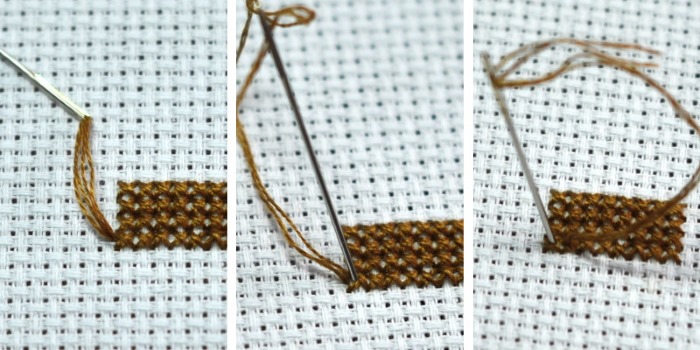
The latter method is considered more reliable than the first.
Thread tension force
The appearance of the embroidery and the integrity of the base depend on the tension of the threads. If you pull too hard, the cardboard will become deformed and may tear. If you pull too hard, the stitches on the front side will sag, which will cause the embroidered image to lose its clarity and accuracy.
To determine how much force to tighten the threads, you should practice on an unnecessary sheet of cardboard, making short and long ties.
How to change thread color
It is very easy to extend the thread or replace it with another one. The remaining tail from the old thread should be fixed to the back of the base with tape, then similarly fix the new thread and continue the embroidery, bringing the needle from the back to the front side.
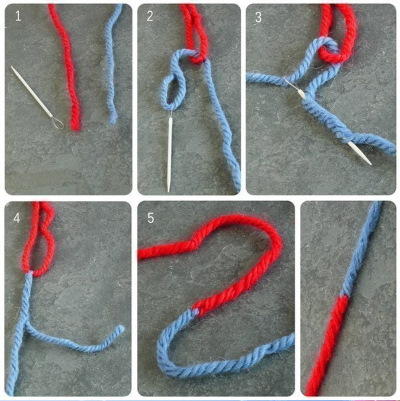
You can simply tie the ends of the old and new threads. To make the fastening reliable, at the end the back side with knots is glued with a sheet of white paper.
Description of the main elements
Circles and angles are the basic elements in isonline embroidery that you need to learn how to do correctly before you print out the finished pattern and start working. Further in the article you can consider a step-by-step description of each element.
Circle
How to embroider a circle correctly:
- Use a compass to draw a small circle, about 5 cm in diameter.
- Divide the figure into 12 equal parts. Make holes along the outline of the figure. There can be more than 12, the main thing is that this number is even.
- Thread the needle and fill the circle with stitches along the marked lines.
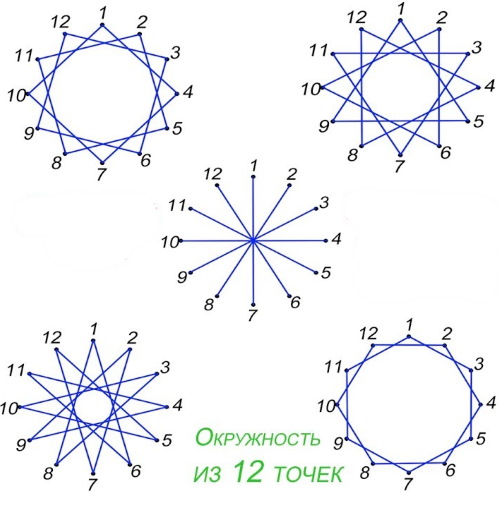
- Tie a knot in the thread and bring the needle to the front side of the embroidery.
- Make a stitch by inserting the needle into the next point, then pull the thread from the back to the next point and bring the needle out to the front again.
- Sew the entire figure in the same way.
- The pattern should resemble a star. On the other hand, there will be short stretches around the circle.
- To achieve a beautiful effect, the circle must be filled with stitches of different lengths.
The size of the stitches when filling a circle or oval can vary depending on the desired result. Long stitches fill the pattern more densely, and the central hole becomes small. Short stitches, on the contrary, will give the embroidery an openwork and lightness. In this case, the central hole inside the figure will remain large.
Corner
How to embroider corners correctly:
- Draw a right angle on the base.
- Divide the figure into 12 equal parts.
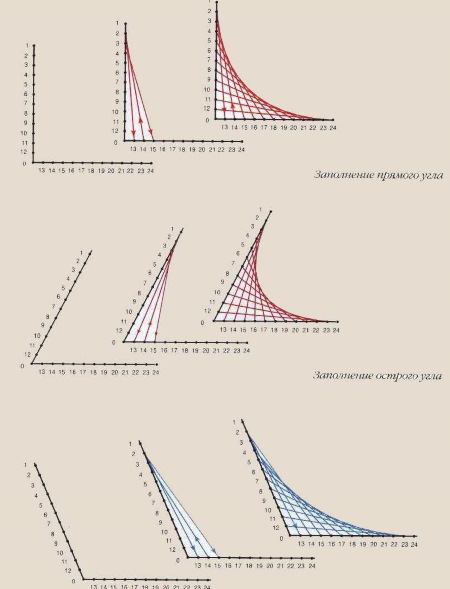
- From the top of the angle, all marks need to be numbered. For convenience, the top itself can be designated by a letter, for example, "A".
- Make punctures at the designated points using a thick needle.
- Change the needle to a thin one and thread the thread through the eye.
- Insert the needle and thread from the wrong side of the cardboard and sew the corner along the markings.
Angles can be different: straight, acute or obtuse. However, these elements are embroidered according to 1 pattern. Always start from the corner and lead from the edge to the top. On the other hand, vice versa, from the top of the corner to the edge. Unequal angles are stitched in the same way. The number of punctures should always be identical on both sides of the corner.
There are also other elements in isonit embroidery:
- star;
- square;
- triangle;
- oval;
- spiral;
- arc;
- drop.
All of them are derivatives of angles and circles, so it is important to master these elements first.
Cardboard embroidery patterns for beginners and children
Embroidery on cardboard with threads (patterns for children and beginners will help you do the job correctly) is always done using a template.
You can find a picture with markings on the Internet and print it out, or you can draw it yourself with a pencil. Below are options for decorating embroidery made using simple templates that are suitable for creating your first works.
Postcards and metrics
Embroidery with isonite is often used to decorate greeting cards and children's metrics. For the first work, it is better to choose a ready-made color picture and embroider lace or floral patterns around it, in the form of a frame.
Finished patterns can be decorated with beads, sequins and studs. Pearl beads are suitable for wedding cards. They will give the product a festive look. You can also spray the threads with glitter hairspray.
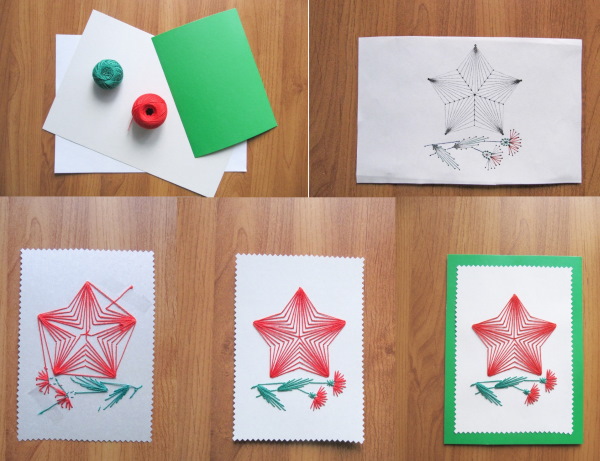
Twisted threads with added lurex are suitable for decorating Christmas and New Year cards. You can buy "iris" yarn or use metallic floss.
Isothread in flowers and bouquets
Embroidery on cardboard with threads (patterns for children with floral patterns will help the child to study the parts of plants and their types in more detail) should contain simple elements. You can move on to more complex patterns when easy forms will be obtained without errors.
The smooth curves of the stems and flower leaves can be conveyed using thin, loose threads. Pictures embroidered with isonit can be flat or three-dimensional. Therefore, experienced craftsmen often use floss threads of different shades.
Thanks to simple artistic techniques of mixing different colors, you can achieve visual volume. Those areas of the plants that should be in the shade are filled with stitches of dark green threads, and light green threads are used to stitch the areas that should be illuminated.
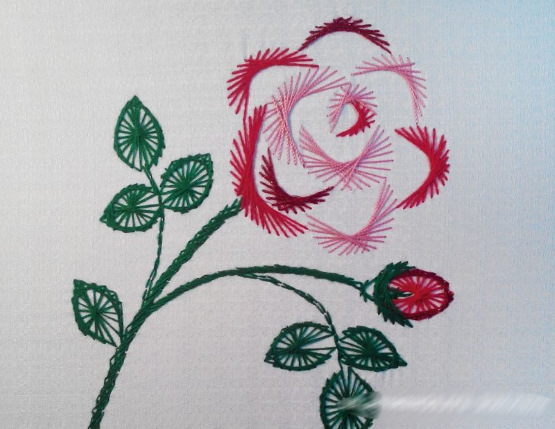
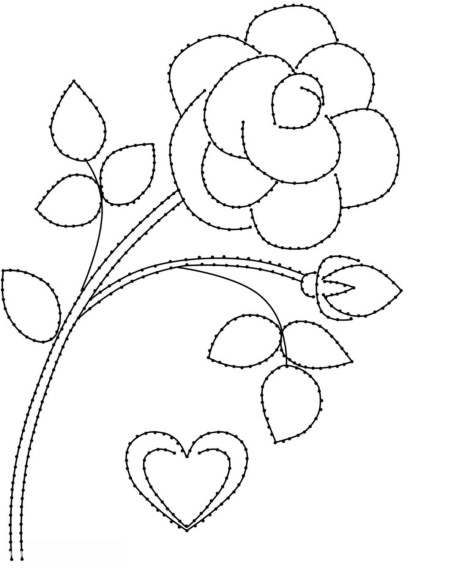
Petals and flower buds can be embroidered with matte threads, but it is better to use smooth and shiny ones. They better convey the light and delicate texture of the inflorescences.
The direction of the stitches plays an important role. For example, horizontal stitches will visually make parts of plants heavier and thicker, while vertical stitches, on the contrary, will add lightness and sophistication to the image.
Abstraction
Abstract patterns consist of combinations of basic elements. These can be circles, triangles, squares and other geometric shapes.
For the base, you can use brown, gray or black cardboard. Abstract patterns look great on velvet paper. Usually such embroidery is done with bright floss threads. You can combine pastel colors with acid and neon shades.
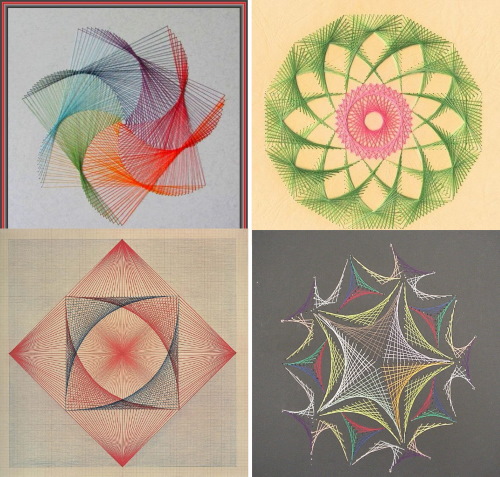
The pattern can be round, like a mandala, or have several corners. Experienced craftsmen embroider pictures with ornate and lacy elements. Such drawings can be interpreted in different ways.
Everyone will see in the patterns what their own imagination will show them. This type of embroidery helps children develop creative thinking, imagination, and fine motor skills.
Circle
Circles can be filled with isonit in different ways. They can become part of an abstract pattern or act as an additional background decoration. When filling a circle, you can arrange the threads in different directions, use bright shades of floss, and combine short and long stitches.
Fan
A fan is another basic element in embroidery on cardboard. It is made according to 1 pattern, and then used as a template for entire images. A fan can imitate petals and leaves of flowers, ears or paws of animals, and also act as additional details in the design of the background.
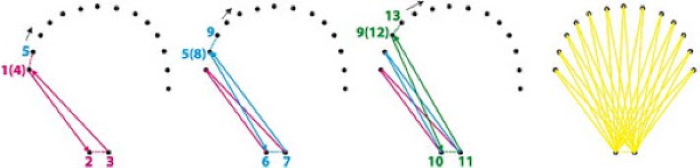
How to embroider a fan correctly:
- Use a pencil to draw an arched line on the cardboard.
- Make holes along this line. The number of holes must be even.
- Make 2 holes at the bottom.
- Connect the bottom dots with the top stitches.
The number of punctures at the top must be divided by 2, and the first part must be embroidered, starting from the lower left point, and the 2nd part must be embroidered, bringing the needle out to the front side through the lower right puncture.
Cat
Animal patterns for children and beginners should be as simple as possible. To embroider a cat on cardboard, you need to draw the silhouette of the animal, consisting of the main elements. A large oval is the body, the head can be made round, and the ears triangles. The tail is usually depicted as a curved line.
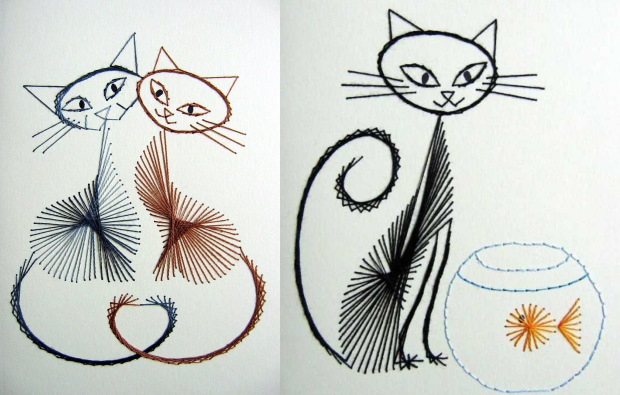
You need to make holes along the contours of all the figures and fill the drawing with stitches. You can choose any color of threads. For the first work, it is better to use floss of 1 shade.
Star
There are several ways to embroider a star on cardboard. This element can become part of a pattern or be a separate image.
In the first case, the star is embroidered like this:
- They make markings on the cardboard in the form of a five-pointed star.
- A thick needle is used to pierce the design along the outline.
- In the center of the figure, make 1 hole.
- Fill the star with long stitches coming out of the center hole.
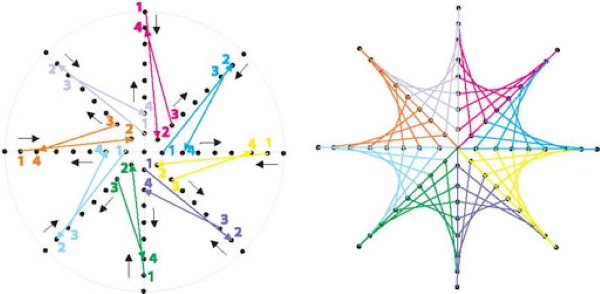

A more complex but interesting version of the star image is an empty outline, around which the space is filled with colored threads. The pattern is made in the same way as in the simple version, excluding the central hole. Here the stitches come out from the outline, stretching beyond its limits in any direction.
Web
Embroidery of a web is one of the easiest to do, so this pattern is suitable for children and beginners. For the background, you will need dark cardboard and white floss. On the back side of the base, you need to draw a template. First, mark the center of the web, then mark the lines of its branching.
The circular pattern can be straight or curved. Embroidery should start from the center. The stitches should be long. First, stitch the center and the branches of the web, and then the pattern around the circle.
Numbers
Embroidery on cardboard with threads (patterns for children should be outline, without small details) of letters or numbers is often used to decorate postcards and metrics. Contour drawings can be used as a pattern.
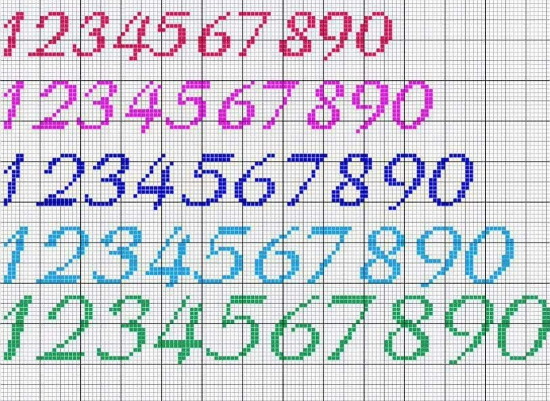
Such patterns are stitched along the edge with small stitches. An adult can try to embroider more complex numbers, with monograms, at an angle or with a pattern inside.
Heart
The heart pattern is very simple. You need to mark the outline of the figure on the cardboard and puncture it along the edge. The thread with the needle should be inserted from the back side of the cardboard, passing through the hole located in the middle of the top of the heart. From this point, you need to lay long stitches to each puncture along the outline.
Signs of the zodiac
It will be difficult for beginners to embroider images of the zodiac signs, so experienced craftsmen advise to design 1 work in this style in the form of symbols that denote each sign.
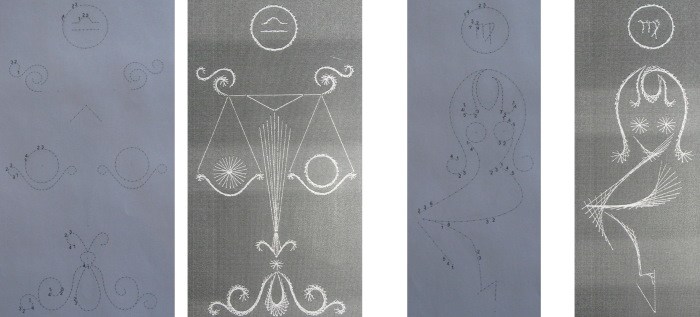
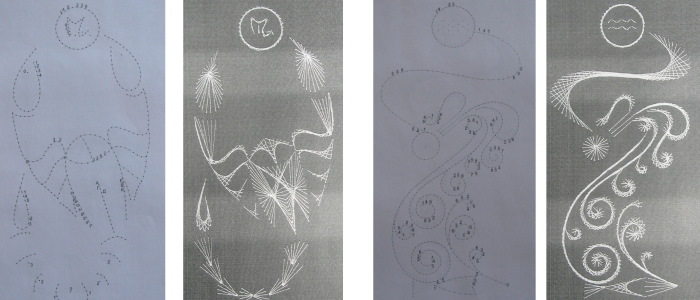
These symbols can be filled with stitches of different lengths, placing them inside each figure. The easiest option is to make an outline sketch of the symbol on cardboard and stitch it with short stitches along the edge.
Embroidering on cardboard with threads is not difficult. Patterns and advice from experienced craftsmen will help beginners master this type of creativity faster. If a child has become interested in isonim embroidery, parents should supervise their activities for safety, and also explain how to properly handle piercing and cutting tools.
Video about embroidery
Embroidery on cardboard with threads: