The theme for creativity "Protect nature!" is appropriate to use in classes with both kindergarten pupils and schoolchildren of all ages. This slogan can also be used as a theme when creating drawings. It is recommended to select image examples or sources for copying depending on the development and abilities of a particular child.
Pictures on the theme of take care of nature for kindergarten
A drawing on the theme “Protect nature!” created by a kindergarten student usually consists of a minimum number of objects that do not require much time to draw.
Drawings on the theme of taking care of nature are especially relevant today
Examples of such images can be such variants of simple drawings.
Planet Earth
Image creation algorithm:
Draw an even circle in the center of the working plane.
Using a smoothly curved line, divide the inner part of the circle into 2 equal parts.
At one level, in each part of the circle, depict a small circle, the inner area of which should be filled with 2 semicircles (eyes).
Draw short vertical lines (eyelashes) from the upper border of the eyes.
Draw small pointed ovals (tears) to the lower border of the eyes.
On top of the main circle, draw a semicircle with an upward bend, then outline a small area, including part of the border of the main figure, making the lines similar to the outline of a hat.
On the left half, inside the drawn circle, draw smoothly curved lines that, when placed close together, resemble the outlines of leaves. They should be placed randomly.
Fill the lower part of the right half of the circle with curves with smooth bends located at the bottom, side and top.
Inside the figures that are formed by the close placement of semicircles with the borders of the main figure, draw the outlines of the leaves with broken lines.
On the middle part of the dividing vertical, draw a semicircle, strongly curved downwards (nose).
Step back 3-5 cm from the nose and draw a semicircle with an upward bend (sad mouth).
Colour the drawing using markers, paints or crayons, making the left side colourful and the right side black and white.
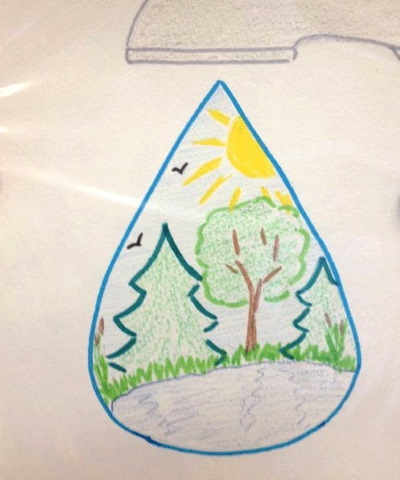
Water drop
Image creation algorithm:
From the upper right corner of the working plane, step back 3 cm and draw at this level a semicircle with an upward bend, the starting point of which is the right side of the sheet of paper used.
Step back from the extreme point of the semicircle 7-8 cm to the left, draw another semicircle with a vertical orientation. The extreme point of the second semicircle should be located at the same level as the extreme point of the horizontal one.
Connect the extreme points of the semicircles that are closest to each other with a horizontal line.
Draw another parallel line under the straight line.
Step back from the center of the horizontal lines 2-4 cm down.
At the indicated level, draw a drop, placing it with its corner facing upward.
In the inner part of the figure, draw a semicircle at the bottom with an upward bend.
Along the entire length of the semicircle, stepping back 1 cm upwards from it, draw a zigzag line (grass).
From the curve, draw upward the outline of various trees (spruce, birch, oak, and so on).
Above the trees on the right, depict the sun (a circle with straight lines directed in different directions).
Fill the free space with silhouettes of birds (check marks).
Color the resulting image.
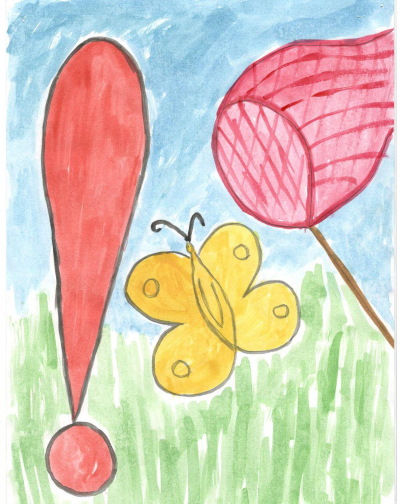
Butterfly and net
The algorithm for creating an image is as follows:
A drawing on the theme "Protect nature" with a butterfly, consisting of 3 simple objects, can be drawn even by a pupil of the younger group:
On the right side of the sheet of paper used, draw a semicircle, curved and extended upward so that its extreme points intersect, forming an angle.
If possible, step back 1 cm from the main figure and draw an even circle.
To the right of the exclamation mark, draw a butterfly. To do this, draw an oval with pointed edges (the insect's body), a small circle above it (the head), and large semicircles whose borders are smoothly curved lines (the wings).
Add detail to the butterfly's appearance by adding, for example, whiskers or a pattern on the wings.
From the right side of the working plane, draw a diagonal line directed towards the upper left corner.
Taking the extreme point of the line as the point of contact, draw an oval on top.
From the oval, draw smoothly curved lines to the right side of the sheet.
Colour the picture using bright colours.
For school
The drawing on the theme “Protect nature!”, which a schoolchild must create, can be limited to 2 main areas: protection and conservation of the environment; protection of the planet from garbage.
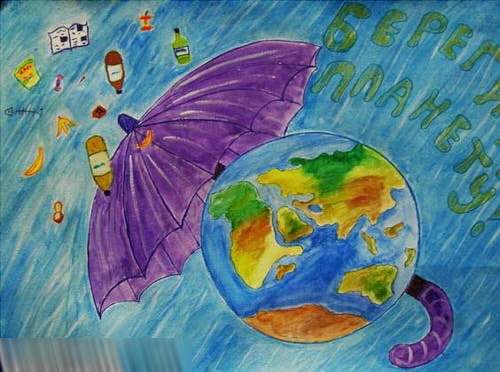
Protect the planet from trash
Drawings on the theme of protecting the planet from garbage, made by schoolchildren, may look like this.
An example of a drawing on a given topic
Image creation algorithm
In the area of the lower right corner of the working plane, draw an even circle (planet).
Fill the inner part of the circle with smoothly curved lines (the outline of the planet's islands and continents). If the image in question is being created by senior schoolchildren, it is recommended that they copy the outline of real objects from a world map.
From the right border of the circle, draw 2 semicircles located at a distance of 2-3 cm. Connect them with a smoothly curved line (umbrella handle).
Visually draw a straight line from the umbrella handle towards the opposite edge of the circle, and draw the umbrella on the outside of the main figure (it is recommended to use triangles and zigzag lines).
Above the umbrella, draw objects of various shapes that look like garbage. For example, ovals with small rectangles at one end are bottles, rectangles with a vertical line in the middle are newspapers, 2 identical semicircles connected to each other are banana peels, and so on. The size of the objects should be determined based on their distance from the umbrella (the closer the object is to the umbrella, the larger and more carefully it should be drawn, and the further away, the smaller).
Using colored pencils, markers or paints, color the drawing, including shading the background.
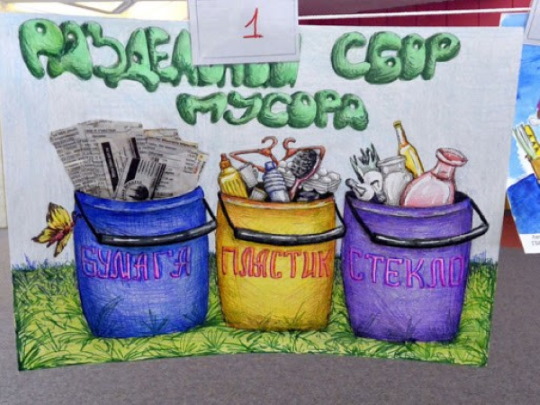
Mark the horizon line with a straight line, placing it at a distance of 5-10 cm from the bottom edge of the sheet of paper used (the exact distance is determined by the page format).
Step back 2 cm from the lower border of the working plane, then draw 2 vertical lines in the center. The length of the lines should be calculated so that the previously designated horizon is in the middle.
Adjust the verticals by making them slightly curved in opposite directions (bucket outline).
Connect the extreme points of the verticals at the bottom with a horizontal line, and at the top with a semicircle with a slight downward bend.
Using parallel diagonals and a connecting horizontal line, draw a handle on the bucket.
On the front side of the bucket write “Plastic”, and above the upper border of the object draw the outline of plastic waste (bottles, hangers, etc.).
In a similar way, draw another bucket on each side of the central object. Write "Paper" and "Glass" on them, and then draw the corresponding objects on top (newspapers, magazines, bottles, vases, light bulbs, etc.).
Fill the area above the buckets with a slogan, for example, “Separate waste collection.”
Color the image.
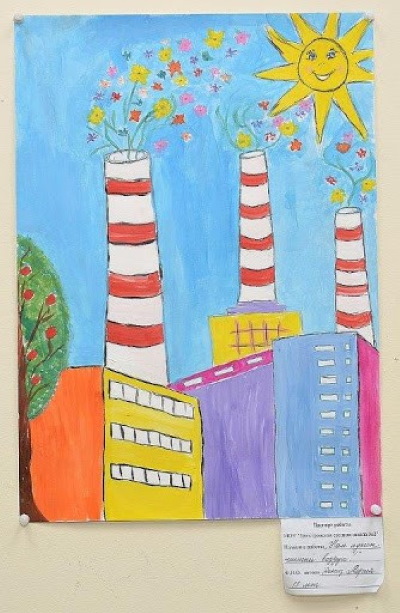
From the bottom border of the sheet of paper, draw 5 vertical lines so that the 4th and 5th lines are the same length.
Transform the first vertical into the outline of a half-hidden tree. To do this, step back 3-4 cm from its top point down, and then draw a semicircle, placing its extreme points on the side border of the working plane.
Connect the 2nd and 3rd lines with a diagonal. The 3rd line should be 1-2 cm lower than the 2nd (factory building).
Draw a horizontal line to the left of the top point of the second line, part of which is hidden behind the crown of the tree drawn earlier.
Fill the space between the 2nd and 3rd lines with small squares located close to each other (windows).
From the diagonal connecting the second and third lines, draw 2 vertical lines equal in length upwards. Connect the extreme points of the lines with 2 semicircles with opposite bends (factory chimney).
Fill the space between the verticals with 8 horizontal lines, grouped by 2.
Connect the remaining lines together to form the outline of the factory building.
Following the recommendations from point 6, draw 2 more pipes of different colors.
In the area of the pipe openings, draw small figures, placing them in a chaotic order (fireworks).
Add detail to the image (windows, building relief, etc.), and then color the drawing using bright pencils, markers, or paints.
Protection and conservation of nature
A drawing on the theme “Protect nature and preserve it!”, the idea of which was developed personally by the schoolchild, usually looks like this.
An example of a drawing on a given topic
Image creation algorithm
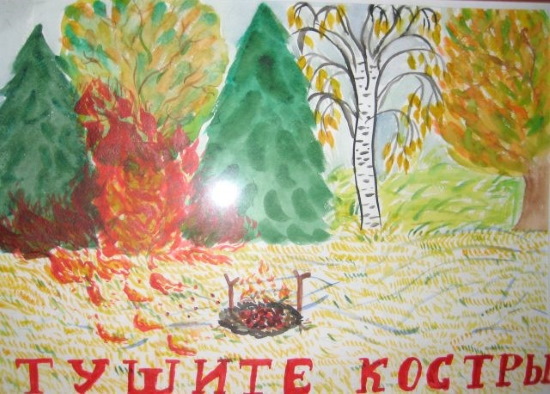
Mark the horizon line, placing it approximately in the middle of the working plane.
Under the dividing line, draw an oval, from the center of which rise many vertical lines, drawn in a chaotic order (a fire).
On the sides of the fire outline, draw 2 vertical lines with short diagonals at the ends.
Above the horizon line, depict trees of various types (birches, firs, poplars, etc.).
Between the trees, draw a schematic flame using broken horizontal, vertical and diagonal lines.
Under the drawn fire, write in large letters the call: “Put out the fires.”
Colour the image using bright shades of paint or pencils.
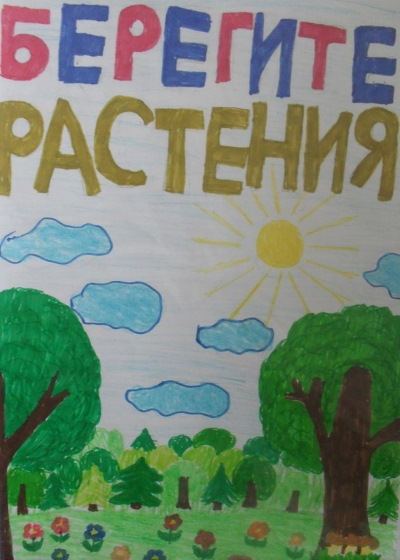
Visually divide the sheet of paper into 2 parts, where the top one should be half the size of the bottom one.
In the upper area, write in large letters the call: “Protect plants.”
Under the inscription, in the lower half, draw clouds using ovals, the borders of which are smoothly curved lines. The clouds should be placed chaotically.
Between the clouds, draw a small circle with straight lines drawn in the direction away from it (the sun with rays).
Draw trees standing in the distance under the clouds. It is enough to draw the outline of the plants schematically.
In the foreground, it is necessary to depict 2 large trees, the trunks of which should be formed by straight lines, and the crown - by a semicircle.
Fill the space between the trees with flower drawings. To do this, draw a short vertical line. From its bottom point, draw 2 pointed ovals (leaves) upwards on each side of the stem.
Stepping back from the upper extreme point of the depicted object, draw a small circle, and around it, draw a wavy line to depict the outline of the flower petals.
Repeating the algorithm given in points 7-8, draw at least 5 plants.
Color the resulting image.
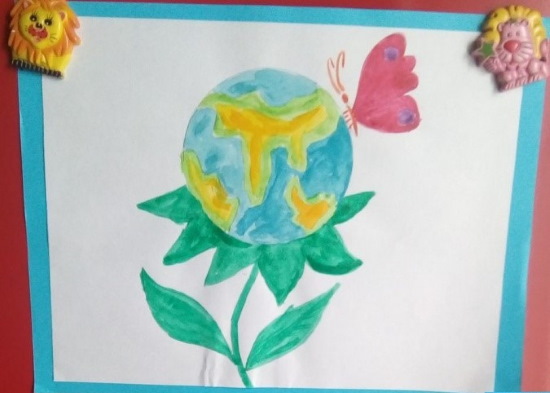
Step back 1-2 cm from the edges of the working surface, then draw a frame for the future image.
From the middle of the lower border, draw a smoothly curved line, the extreme point of which should be located 5-7 cm below the center of the sheet of paper used (the stem of the flower).
To the right and left of the stem, draw leaves (ovals with pointed edges).
Step back 4-6 cm from the extreme top point and draw an even circle. Fill the inner part of the circle with the drawn contours of continents, islands and archipelagos (the globe).
From the bottom edge of the circle, draw triangles, placing them close to each other and using them to fill the space between the circle and the stem.
On the right side of the globe outline, draw a butterfly (a vertical line and a semicircle drawn with a smoothly curved line).
Colour the image using shades of green, pink, yellow and blue.
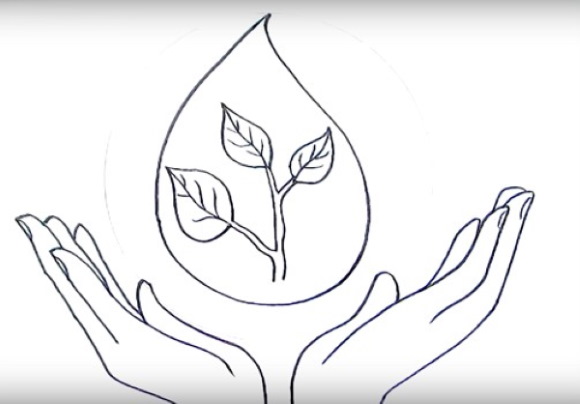
Easy pictures to copy with a pencil
Drawings on any topic are easiest to draw if you have a sample in front of you.
The simplest source images for copying, the main idea of which is the slogan “Protect nature!”, look like this.
An example of a drawing on a given topic
Image creation algorithm
Determine the center of the bottom border of the sheet of paper.
From the indicated point, at a distance of 2 cm from each other, draw 2 lines, curved towards the lower border, directed to the right and left.
Using other lines of a similar shape, draw palms with fingers facing away from each other.
Between the palms, stepping back 5 cm upwards, draw a drop, the outline of which is formed by smoothly curved lines.
Inside the drop, at a distance of no more than 1 cm from each other, draw 2 vertical lines, slightly curved to the left (the stem of the plant).
From the main stem, grow several small branches, also using parallels.
At the extreme points of the branches, draw ovals with pointed corners (leaves).
The inside of the leaf should be filled with schematically drawn veins.
Draw the nails on the fingers, remove secondary lines (if any), and then re-outline the outline of the image, making it more expressive.
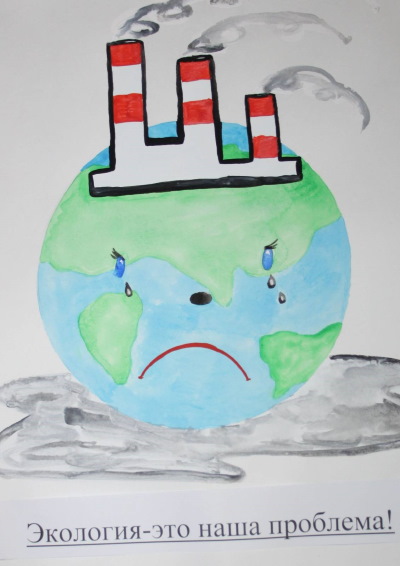
Determine the horizon line, placing it 3-5 cm below the middle of the sheet, depending on the format used.
Draw a large circle on the bottom plane of the sheet of paper you are using.
Inside the circle, schematically depict the boundaries of islands, continents and archipelagos.
In the center of the circle, draw 2 small ovals of the same size, placing them vertically (eyes).
From the upper border of the ovals, draw several short parallel lines, directing them diagonally (eyelashes).
Between the ovals, draw another oval with a horizontal orientation (nose).
Under the ovals, at the bottom inside the circle, draw a semicircle with an upward bend (sad mouth).
Above the eyes of the planet, schematically depict the pipes of factories, the emissions of which have a negative impact on the environment.
At the bottom of the sheet, under the planet, draw a dirty puddle using curved lines.
At the bottom edge of the work surface, write the appeal: “Ecology is our problem.”
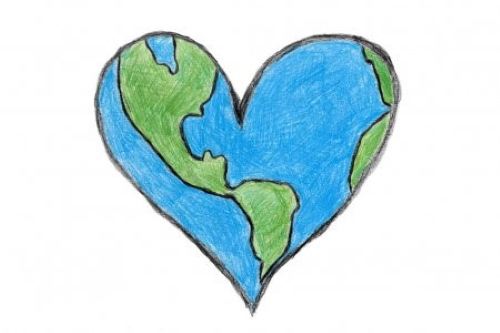
One of the simplest options for drawings dedicated to the theme of nature conservation is a heart, inside which the outlines of continents and archipelagos are depicted.
To make the task more difficult, children should be given the task of copying a specific section of the world map.
To copy the given version of the picture you need:
Draw the outline of the heart.
From the upper left part of the figure (semicircle), draw 4 curved lines downwards, forming the continent as a result of the intersection.
Draw 2 semicircles close to each other on the right border inside the heart.
Colour the drawing with coloured pencils, using blue and green shades.
Children find it easier to create drawings when the teacher limits their creative activity to a specific topic.
This not only speeds up the process of thinking through composition and ideas, but also encourages the younger generation to think.
For example, works related to the slogan “Protect nature!” will give children of all ages the opportunity to analyze their attitude to the environment, as well as adjust their behavior, drawing appropriate conclusions (do not litter, sort waste, conserve water, do not make a fire in the forest, and so on).
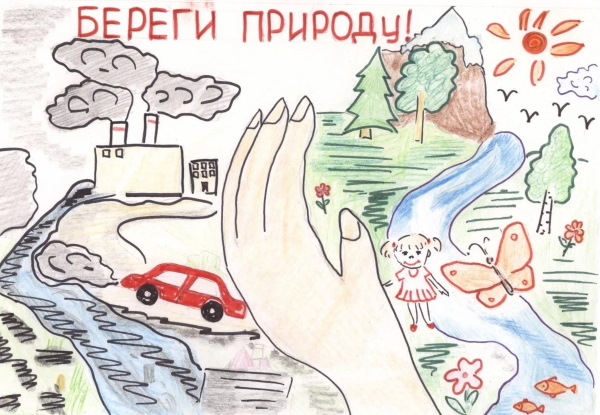
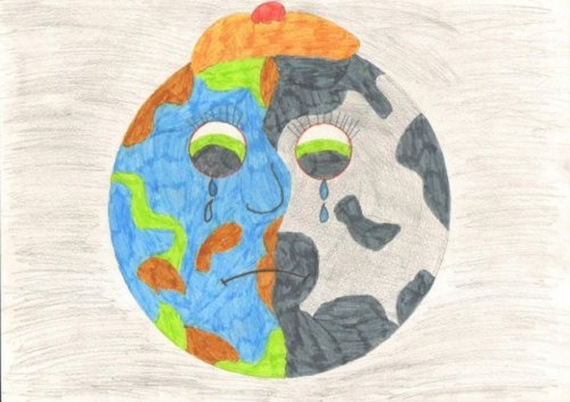 Image creation algorithm: