Learning to draw bullfinches is not difficult. To get started, you need to know what materials and tools you might need, and also read some detailed instructions on drawing beautiful pictures for children and beginner artists.
What do you need to draw a bullfinch?
The table lists all the necessary tools and materials for drawing:
| Tool | For what |
| Simple pencil | A tool with a hard-soft lead (TI or HB) is suitable. |
| Eraser | It is advisable to purchase a rubber eraser. It removes pencil lines from paper well without smearing the graphite. |
| Sharpener | Colored and regular pencils should always be kept sharp. |
| Art brushes | You should have a set of brushes of different sizes and hardness on hand. |
| Container for washing brushes | For classes with children, it is better to take a plastic spill-proof cup. It is difficult to spill water from such a container, and the plastic will not break if it falls on the floor. |
The choice of paper depends on the coloring method. For drawing with pencils, you can use album sheets, writing paper or printer sheets. For pictures that will be colored with paints, it is advisable to choose a thicker material. You can use watercolor sheets, Whatman paper or drawing paper. Thin paper can deform from exposure to moisture, so the drawing will turn out sloppy.
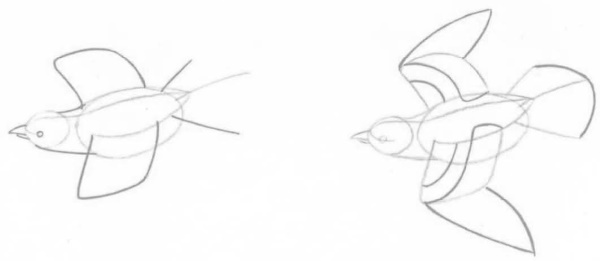
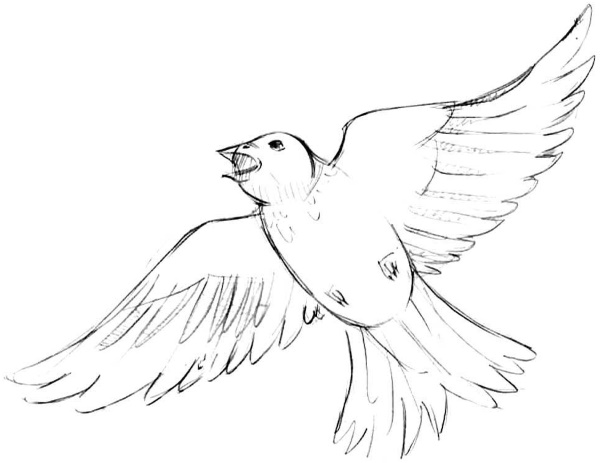
Easy drawing of a bullfinch in flight with a pencil using a circle. Instructions for children and beginners
A drawing of a bullfinch for children and beginning artists should be easy to perform. The method of drawing with circles will help to facilitate the process of creating a drawing. The basis of the drawing (the silhouette of the bird) is drawn by connecting circles of different sizes with smooth lines.
Once the bird's body parts have been drawn, the circles are carefully erased with an eraser.
Body shape
How to draw a bullfinch's body:
- Without pressing on the pencil, draw a thin line at an angle. The length of the line is equal to the size of the body together with the tail.
- Start drawing a large circle from the top end of the line. The drawn stripe should pass through the center of this circle and protrude slightly beyond it. It is better to draw circles by hand. If you use a compass or any templates, the drawing will be less realistic.
- At the bottom, where the line protrudes, draw a small circle. This is the base of the tail.
- Connect the circles with each other using smooth lines.
- Slightly sharpen the tip of the base of the tail.
Use an eraser to remove excess lines.
Head
How to draw a head:
- Draw a circle that is slightly larger than the one drawn for the base of the tail. A small part of this circle should slightly extend beyond the outline of the body.
- Use smooth lines to connect the head to the body, drawing the bird’s short neck.
- Use an eraser to remove excess lines.
- Use dots to mark the position of the beak and eye.
On the top of the bird's head you can see 2-3 small protruding feathers.
Wing
How to draw wings:
- At the base of the body, in the upper part, put a dot.
- Find the center of the body. Place a point slightly lower than the previous one.
- Connect the marks with an arched line.
- From the first point, draw a smooth line upward.
- From another point draw a shorter line. It should deviate slightly to the right.
- Connect these lines with a barely noticeable stripe.
- Using the last line drawn as a guide, depict the feathers on the bird’s wing.
- Draw part of the second wing.
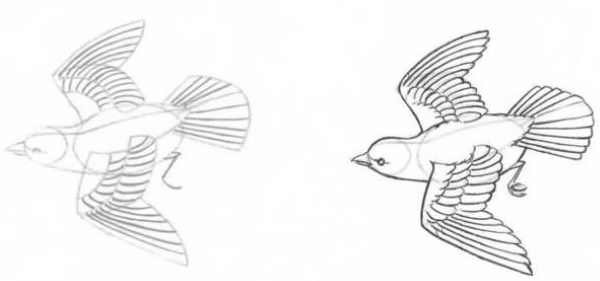
Use an eraser to erase extra lines.
Beak
Drawing a smooth beak is very simple:
- Draw a small circle where the beak will be located.
- Add a sharp tip to the front of the beak. It should point slightly downwards.
- Use an eraser to erase the extra lines inside the beak.
Draw a horizontal line dividing the beak into 2 parts.
Cheeks
How to draw white cheeks of a bullfinch:
- Use a smooth line to highlight the dark part of the head.
- Draw a round eye with a small glare on the bird.
- Draw a small circle under the eye.
- Draw another small circle on the right side of the circle. Its outline should slightly intersect with the borders of the larger figure.
Use the eraser to erase the intersection of the circles.
The final touches
There are only 2 details left to draw: the bird’s tail and paws.
How to do it:
- In the place where the base of the tail was narrowed, you need to draw a narrow triangle. The long angle of the figure should be directed towards the lower right corner of the sheet.
- Draw another, shorter and narrower triangle next to it.
- Use the eraser to remove the intersection lines of the 2 figures.
- Use smooth lines to connect the base of the tail with the feathers.
- Round the tips of the feathers slightly.
- Draw 2 paws with 4 toes on the bird. 3 toes on each paw should be hooked, and 1 should be short and straight.
Draw short hook-shaped claws.
Coloring
What colors of pencils will you need to color the picture:
- red;
- dark gray;
- black;
- brown;
- dark brown;
- grey.
How to color:
- Use a red pencil to shade the bird's chest, belly and part of the head.
- Paint the eye with black.
- Without pressing on the pencil, shade the head, back and tail.
- Paint the paws and the upper half of the beak brown.
- Shade both wings with a dark gray pencil.
- Paint the base of the tail with grey.
Use a dark brown pencil to outline the drawing, leaving bold lines. Color the lower half of the beak.
Step-by-step drawing of a bullfinch on a tree with paints. Master class for beginner artists
A drawing of a bullfinch for children and beginning artists can be done using watercolors.
What paint colors will you need:
- black;
- red;
- dark green;
- blue;
- white.
How to draw:
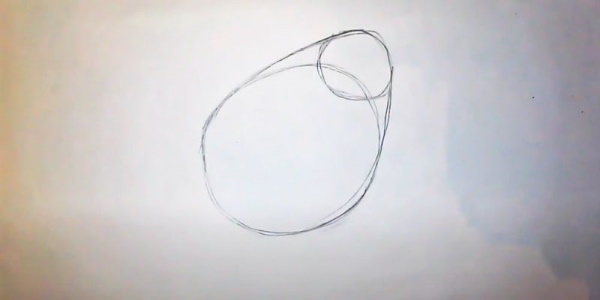
- Use a simple pencil to sketch out a tree branch.
- Draw a round body of a bullfinch.
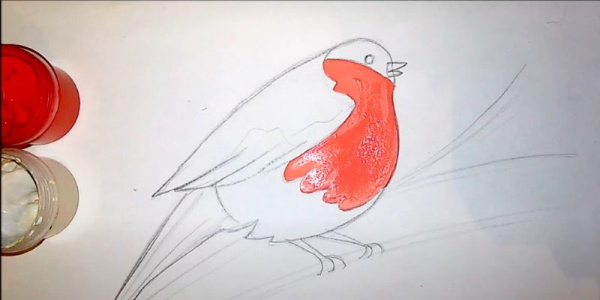
- Finish drawing the head, beak and paws.
- Draw the wing as a semicircle.
- Finish drawing the tail.
- Outline the eye.
- Paint the bird's beak dark green.
- Dilute black paint with water in equal parts. Paint the head, wing and tail.
- Darken the edges of the beak.
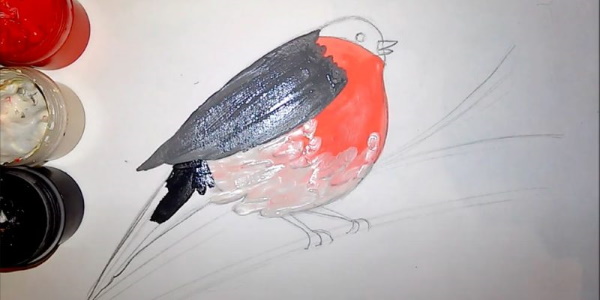
- Using a medium-sized brush, paint the bullfinch's chest with red color.
- Paint the head with black paint in 2 layers, without touching the crown. It should be painted in 1 layer.
- Outline the bottom edge of the wing using a thin, soft-bristled brush.
- Paint the tip of the wing.
- Select a few feathers on the tail.
- Use a thin brush to draw the bird's feet.
- Dry the drawing.
- Dilute black paint with water in equal parts. Draw the tree branches.
- While the black is drying, apply a few dark green strokes to the tip of the wing.
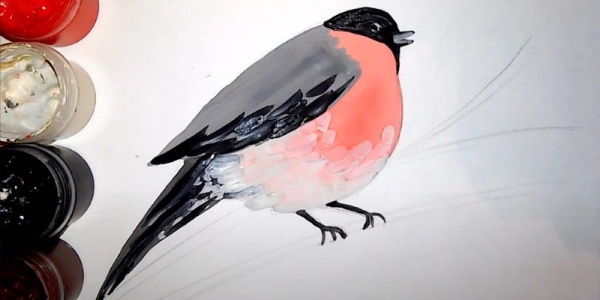
- Outline the eye with white paint using a very thin brush with short, soft bristles.
- Draw white feathers on the wing.
Mix blue paint with white in a ratio of 1:2. Using a brush with hard bristles, paint snow on the branch.
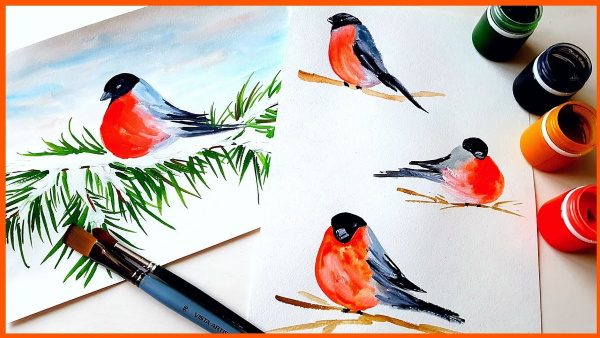
Other ideas for beautiful drawings of bullfinches for copying with pencils and paints
When conducting classes with children, it is advisable to choose simple pictures for copying, without fine detail. Then the child will not get tired of drawing. Over time, the level of difficulty of the drawing can be increased. Adult beginner artists, on the contrary, should pay attention to small details, for example, drawing the feathers of bullfinches, as well as highlighting the shadows. This way, the drawings will be more realistic.
Further in the article you can look at 3 detailed master classes on drawing pictures with bullfinches, made with paints or colored pencils.
Under the snowfall
A drawing of a bullfinch for children and beginning artists can be done with gouache.

What paint colors will you need:
- red;
- black;
- brown;
- blue;
- white.
How to draw:
- Using a simple pencil, draw a branch on which the bullfinch will sit.
- Finish drawing the bullfinch's oval body.
- Add head.
- Draw the beak.
- Draw a wing and tail.
- Use an eraser to erase all unnecessary lines.

- Paint the bullfinch's chest with red paint.
- Using a medium sized brush, paint the branch with brown.
- Using a thin brush with soft bristles, draw smaller branches.
- Mix black paint with white in equal proportions. Paint the wing and tail.
- Using a thin brush and black gouache, paint the bird's head and beak.
- Draw the feathers on the tail.
- Darken the lower part of the wing and its tip. Apply several short strokes to the lower part of the wing, imitating protruding feathers.
- Wait until all paints are completely dry.
- Using a thin brush, paint the lower part of the bird's body white. The white paint should slightly cover the red. It should be applied in short strokes, starting from the base of the tail, slowly moving towards the middle of the body.
- Select the bird's eye.
- Mark the highlights on the beak.
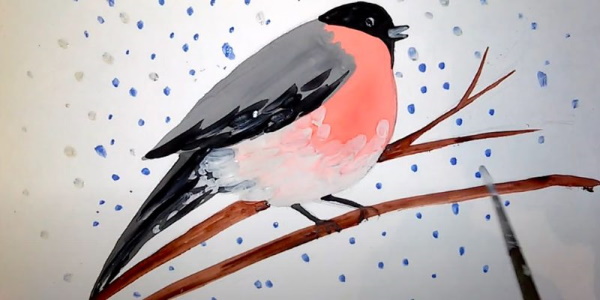
- Mix blue and white in a 1:2 ratio. Draw snow on the branches.
- Using a thin brush with hard bristles, paint snowflakes in the form of dots in the background of the drawing.
- Wash the brush. Take blue paint. Carefully draw shadows on the snow lying on the branches.
- Draw a few more snowflakes.
- Use white paint to draw snowflakes on the bird's wings.
To get even dots, you can use a brush handle, without a pointed tip. You need to slightly wet it in paint and make prints in a chaotic order. This way you can draw snowflakes of all colors.
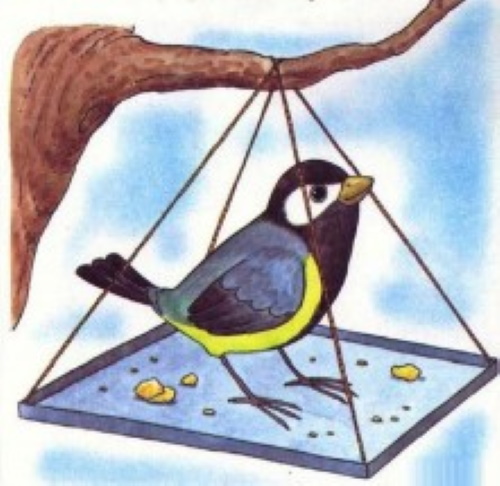
With a feeder
Another version of the drawing, done in gouache. The picture will depict a bullfinch sitting in a hanging feeder with a roof.
What paint colors will you need:
- yellow;
- brown;
- black;
- red;
- white;
- dark brown.
How to draw:
- Draw the bottom of the feeder with a simple pencil. Since the object is located in front of the viewer, the far corners of the bottom should be slightly closer to each other than the front ones. First, you can mark the corners with dots, and then connect them with straight lines.
- Draw the columns of the feeder on which the roof is supported.
- Add some sides to prevent the grain from spilling out.
- Finish drawing the triangular cover of the feeder. Mark out the planks on it by drawing several horizontal lines.
- Finish drawing the sides of the roof.
- Draw branches with leaves in front of the bird feeder.
- Draw a bullfinch inside the feeder. Draw all parts of its body. Work out small details.
- Use an eraser to erase extra lines.
- Dilute brown paint with white in equal proportions. Paint the bottom of the feeder, sides and posts.
- Paint all the leaves on the branch, as well as the roof of the bird feeder, yellow.
- Mix black paint with white in a 1:2 ratio. Paint the bird's head and the top of the neck.
- Paint the chest and stomach red.
- Use black paint to highlight the wing and long tail feathers.
- Using a thin brush and dark brown paint, finish painting the bird's paws and paint over the tree branches.
- Using a stiff-bristled brush, paint the grain of the wood on the boards of the feeder. You will need to apply several short strokes to each board. Do not press down on the brush.
- Using a thin brush, make a few strokes on the sides of the roof.
- Draw a tree pattern on the posts.
- Use brown to highlight the shadow on the sides of the feeder.
- Show shadows on all leaves.
- Wait for the paint to dry.
- Highlight the veins on all the leaves with dark brown color.
- Draw seeds inside the feeder.
- Using a thin brush and black gouache, highlight the shadows on the branches.
- Draw the bullfinch's feathers using short, hatch-like strokes.
- Draw an eye and a beak on the bird.
- Draw some larger seeds.
- Use brown paint to outline the roof of the feeder. Highlight the boards.
- Using dark brown paint, outline the remaining parts of the feeder.
Use white paint to highlight the highlight inside the bird's eye and on its beak.
Paired image
You can draw two bullfinches using colored pencils.
What colors will you need for drawing:
- black;
- red;
- grey;
- dark brown;
- brown;
- orange;
- yellow.
You will also need a black gel pen for this work.
How to draw:
- Using a simple pencil, draw 2 branches parallel to each other.
- On 1 branch, which is located closer to the viewer, depict 2 bullfinches. They should look at each other. It is necessary to draw all parts of their bodies, including the eyes.
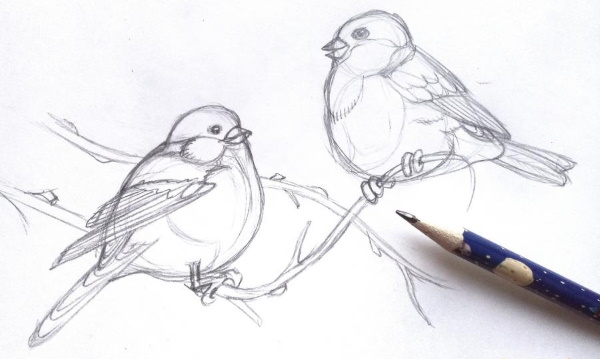
- On small branches depict clusters of berries.
- Use an eraser to erase extra lines.
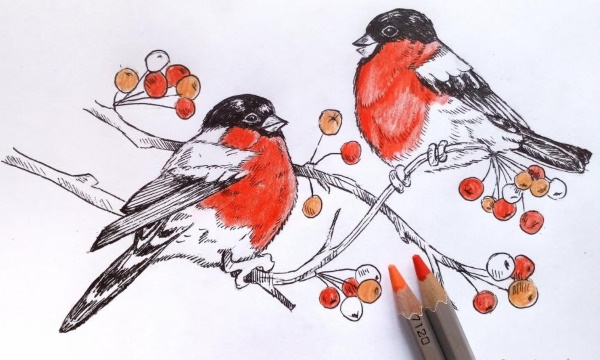
- Use a brown pencil to color the branches.
- Paint the bullfinches' chests red.
- Use a grey pencil to shade the wings, backs, tails and lower parts of the bullfinches’ bodies.
- Use a black pencil to color the heads and also the beaks. It is necessary to leave very thin gaps around the eyes, otherwise the black color will “lie” on the drawing as a solid spot and it will be difficult to highlight the eyes.
- Highlight the shadows on the bodies of both birds.
- Draw black feathers on the tails and wings.
- Use a dark brown pencil to color the birds' feet.
- Show shadows on branches.
- Draw smaller branches.
- Paint the berries orange, yellow and red in a random order.
- Use a black gel pen to more clearly draw the feathers on the birds' tails and wings.
- Highlight the small protruding feathers by applying short strokes.
- Draw wrinkles on the paws.
- Highlight the shadows on the branches using light shading.
- Outline the beaks.
- Outline the branches and berries.
- In the center of each berry, depict indentations by drawing large dots and small crosses.
- Use short strokes to highlight the shadows on the berries.
- Draw all the thin branches that hold the berries.
- Highlight the birds' eyes.
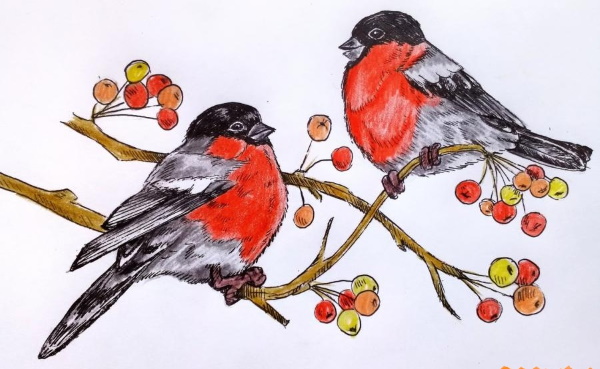
Applying short, broken strokes, outline the bullfinches. Beginner artists and children need to practice drawing bullfinches in different locations to learn how to create beautiful pictures. It is important to remember that the background is very important for creating a realistic and three-dimensional drawing. Therefore, you should pay attention to drawing details and applying shadows.
Video on how to draw a bullfinch
How to draw a bullfinch on a branch: