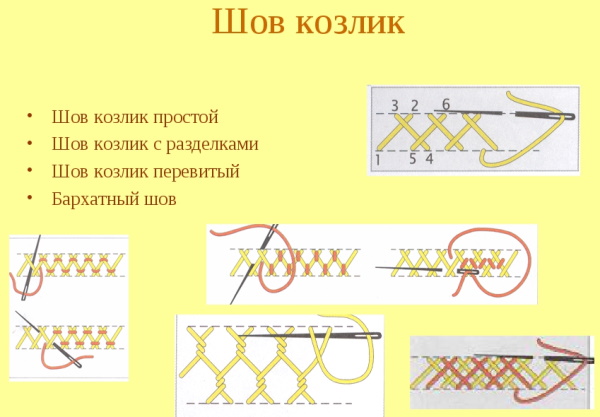
The Goat stitch, done by hand step by step, is considered a decorative stitch. It can be used to make the edge of the product more beautiful. It is a zigzag line of stitches. It is used in both sewing and craze quilts.
Necessary materials
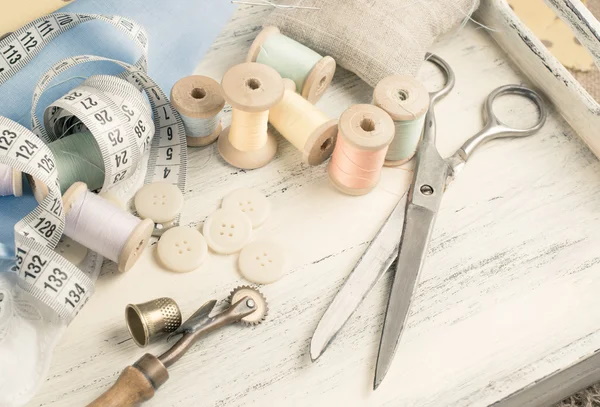
The following items will be required for this work:
- textile;
- threads;
- needles;
- scissors;
- thimble to protect fingers from needle pricks;
- hoop for uniform tension of fabric;
- ruler for marking lines with stitches.
The Goat stitch can be done on many types of fabric: linen, cotton, stretchy fabrics, fabrics with uniform weave of fibers.
Any embroidery threads can be used for the work - iris, floss, silk. Everything depends on the purpose for which the seam is made.
The table shows the main types of threads for sewing:
| Base of the thread | Purpose |
| Cotton thread | Used for making clothes, decorative embroidery and crazy quilts. |
| Polyester, nylon | They are used for embroidery and sewing on fabrics of various density and composition. |
| Nylon | Threads are necessary for sewing very durable products. |
| Silk, satin | The material is often used in the creation of lace. |
Where to start
This seam is embroidered from the bottom up, the stitches are embroidered in the direction away from the craftswoman. The thread can be secured in 2 ways: by tying a knot on the back of the fabric, or without using a knot. Option 2 is considered more preferable, since it helps to avoid unevenness and bumps on the fabric. The Goat stitch for step-by-step manual execution can be started by securing the thread with a double stitch back.

To do this, you can stick the thread, leaving a small piece of it in the fabric. Then you need to make a very small, no more than 3 mm, stitch back and bring the thread out at the place of the 1st puncture of the fabric. Then you need to make the 2nd same stitch and continue embroidering.
To secure the thread, you can also use the following method. At the beginning of the work, bring the needle to the wrong side, leaving a small piece of thread on the front side. The needle should be brought out again on the front side and continue embroidering. When sewing a line with stitches, you need to pass the needle along the previously left piece of thread. These stitches will help to secure a piece of thread at the beginning.
Sequence of work
The Goat stitch, performed step by step in sewing and embroidery, can be used to decorate finished products.
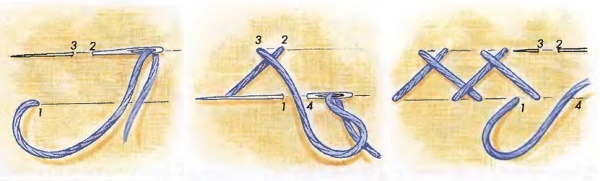
The basic technique of embroidery can be presented as follows:
- Bring the thread out at point 1. Make a diagonal stitch to the right and up, inserting the needle at point 2, then making a puncture 3.
- Make a diagonal stitch to the right and down, bringing the needle out at point 4. At this point, return the needle to point 1.
- To continue the seam, repeat steps 1 and 2. It is important to ensure that the stitches and the distance between them are the same length.
- All variations of the stitch can be used to work on all types of fabric, including even-weave fabric. When embroidering on this visible fabric, the way the fibers are intertwined can be used as a guide to determine the height of the stitch. The Goat stitch, performed step by step by hand on even-weave fabric, is stitched in the same way as this stitch on fabric with an uneven weave of fibers. To achieve the desired effect, you can change the location of the stitches, their slope.
- The goat stitch is convenient because it can be used on many types of fabric, including stretchy fabric. When embroidering, the stitches move up or down diagonally, and it is important to ensure that the thread does not twist as you work.
Performing in a double way
This type of stitch is considered a denser variation of the regular Kozlik. It consists of 2 rows of the regular Kozlik, which are made on top of each other. To make the stitch more decorative, you can use threads of different colors. It is considered more difficult, since when making the top line, you should first pass the thread under, and then over the stitches of the 1st row, so that the threads are intertwined.
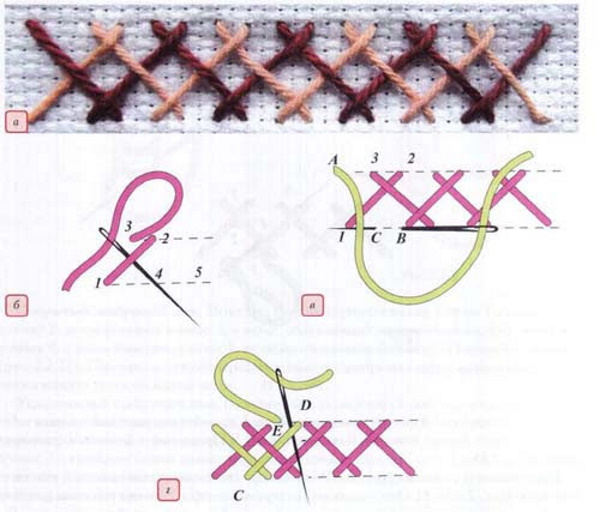
The Goat stitch, done step by step for decorative purposes, can decorate the finished product. The 2nd variation of the double goat stitch is a double stitch with interlacing. The beginning of the stitch is done in the same way as with a single stitch in stage 1. To finish the stitch, a diagonal stitch should be sewn. It should be directed to the bottom of the line, and the thread should be passed under the stitch. Then the needle is inserted at point 4 and brought out at point 1.
After this, it is necessary to repeat the previously described steps, while the needle must be passed under the diagonal stitches of all the crosses. To start a new row, it is necessary to bring the tool out on the front side at the top of the seam at point A. The needle should be located above the very first point of piercing the fabric. After this, a diagonal stitch is sewn in the direction of the bottom line. The needle should be at point B, then it must be brought out to the front side from point B.
Then you should pass the needle under the 2nd stitch of the 1st cross of the previous row and carefully pull out the thread. Next, the tool is inserted at point G and brought out on the front side at point D. It should be passed under the stitch with points B - G. Finishing 1 stitch in the 2nd row, the needle is inserted at point E. To continue the interlacing line, you need to repeat all the steps described earlier.
Performed in a decorative way
Double Goat can be decorated not only with 2 stitches-interlacing, but also in several other ways. For example, at the ends of the seam you can sew small stitches in a contrasting color. The basis of the seam is a regular stitch of the Goat seam, and the 2nd part is the overlap of all the crosses with threads of a different color. The thread must be secured on the left at the bottom of the seam, and then it overlaps the lower cross. Then the needle is pulled along the back side to the upper cross and comes out on the front side on the left.
This cross is overlapped in the same way as the first one. Continuing the seam, it is necessary to go to all the crosses in the line.
The Goat stitch can also be decorated with small tassels. The basis of the stitch is the classic Goat stitch, and the addition is small tassels in the stitch crosses. They can be made with threads of a different color. To make the 2nd decorative stitch option, you should first embroider the Goat stitch line, and then decorate each cross with tassels. Each tassel can have from 2 to 5 simple stitches.
All stitches that are located in the crosses come out of 1 puncture in the fabric. Manually and step by step embroidered seam Goat can be used for many purposes. With its help you can decorate the edge of a blouse or any other item of clothing. It can be used to fasten the edge of the product. To make the seam more decorative, it can be supplemented, for example, with small tassels in the crosses of the stitches.
Video on how to make a Goat stitch by hand
How to make a goat stitch, manual version: