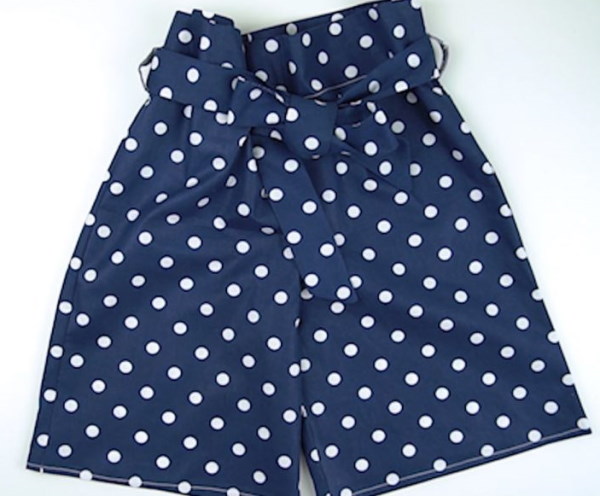
High waisted shorts – a fashionable and bright trend of the spring-summer season. Manufactured according to standard patterns adjusted in accordance with the parameters of the figure, such a model is easy to make and can become an adornment of any woman's wardrobe.
Necessary tools and materials
Women's high-waisted shorts are a bright and elegant model that does not restrict movement and is ideal for walks and the beach, as well as for work, a picnic or a date.
| Materials needed for manufacturing | Their characteristics |
| Main fabric | For the manufacture of shorts, knitted or elastic fabrics are preferable, and their required quantity is selected individually and depends on the length of the product (for capri pants, shorts or trousers). To select the length of the product, you need to measure the distance from the waist to the desired length, additionally adding 20-30 cm, necessary for processing the waist and making a belt. |
| Lining | Tape or interlining used to finish edges. |
| Pattern | They are made from a basic shorts pattern taking into account the parameters of the figure and are used to cut out the product. |
| Threads | Three types of threads are used in modeling:
|
| Additional materials |
|
Classic model
Women's high-waisted shorts can be made using a classic basic pattern, adjusted depending on the parameters of the female figure.
The changes are carried out in accordance with the following measures:
- Waist circumference (From) – measured at the narrowest point of the natural curve of the waist.
- Half waist circumference (Half waist circumference) — measured along an auxiliary tape or elastic band located at the narrowest part of the figure.
- Hip circumference (Hips) – is measured along the most protruding part of the hips, without going down or up.
- Half thigh circumference (PoB) – a measurement taken by placing a tape measure horizontally around the figure. At the back, the measurement is taken along the most protruding points of the buttocks. At the front, it is taken taking into account the protrusion of the abdomen.
- Seat height (H) – is 26.5 cm. Depending on how tightly the shorts should fit the groin area, you need to add or subtract 1 cm from the seat height. For tight-fitting shorts made from elastic fabrics, Bc is 25.5 cm. For a looser model – 27.5 cm.
- Product length (Di) – measured from the waist to the desired length of the shorts.
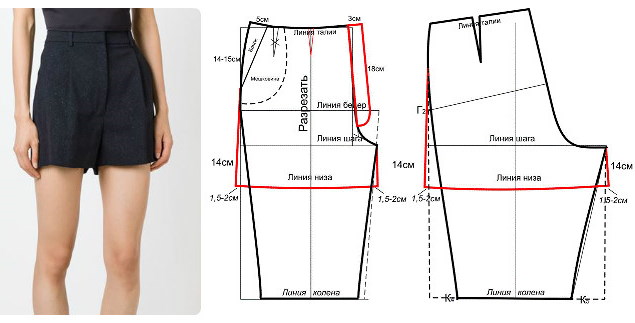
 In a simple classic model of shorts, instead of darts at the waist, a single waist cut is preserved. On the side cut, it is allowed to preserve or not to bend the hip line.
A mandatory condition for cutting the fabric is the presence of an upper allowance of 11 cm:
- 5 cm is needed to create a high waist;
- 5 cm is used for hemming seams;
- 1 cm is the distance left as a seam allowance.
To make shorts:
- Having placed the pattern on the material (having pinned the template), it should be cut out, adding to each detail of the product a mandatory seam allowance of 1-2 cm. Having folded the legs with the right side facing each other, they should be pinned along the side cut, basted, and then machine stitched. The resulting fabric cuts should be processed with an overlock, and the finished seams should be ironed.
- After connecting the product with pins along the inner step seams, they need to be sewn together with a machine stitch and the resulting edges overcast with an overlock.
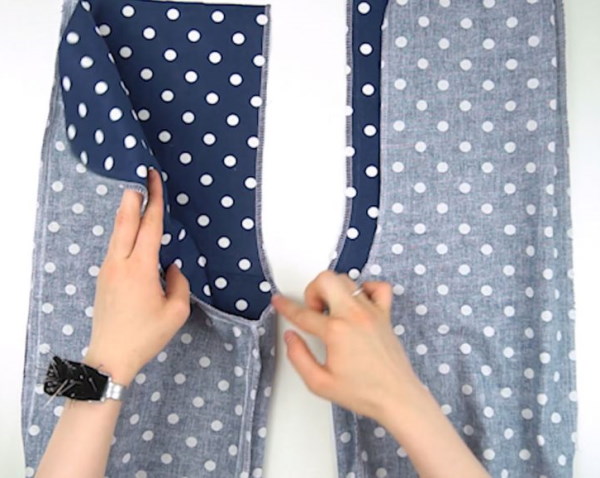
- Turn one half of the product right side out and insert it into the second leg. The step seams and middle cuts on both parts of the product should be connected with pins and basted. Machine stitching is done along the basted seam, finished cuts should be processed with an overlock and the resulting seams should be ironed.
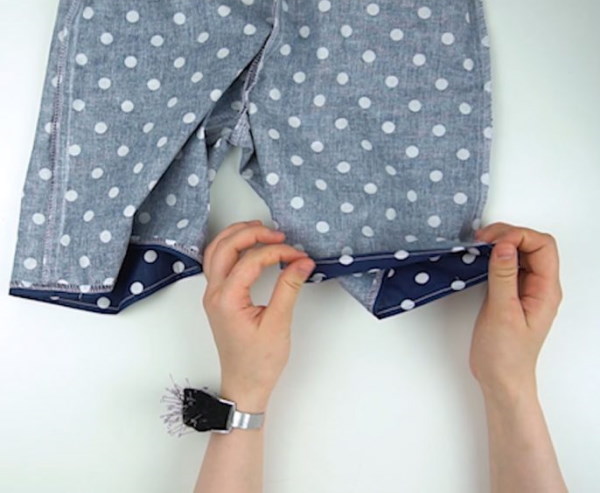
- At the bottom, both legs need to be folded by 1 cm (on the wrong side) and a circular stitch should be made.
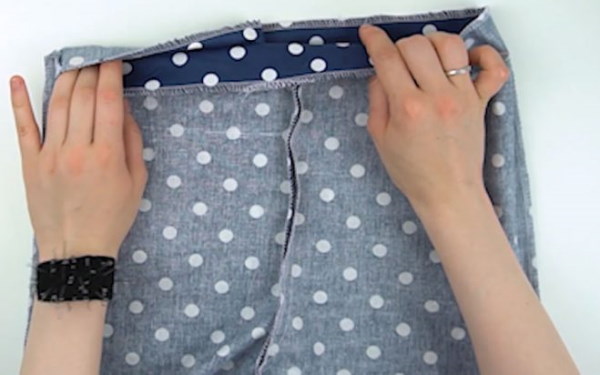
- To process the waist cut, the top of the product needs to be folded down by 6 cm (from the inside) and secured in a circle with pins.
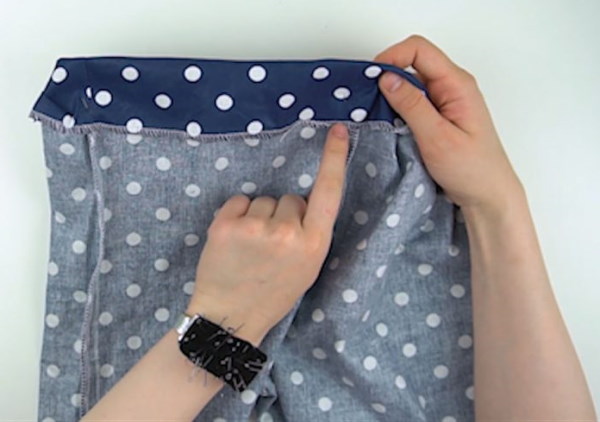
- The fitted part of the product should be machine stitched around the circumference, and the resulting cut should be processed with an overlock.
- Before making a belt from the main material, you need to cut out the parts that secure it (belt loops) so that the length of each is 2 cm longer than the width of the belt.
- The finished strips need to be processed with an overlock or zigzag stitch.
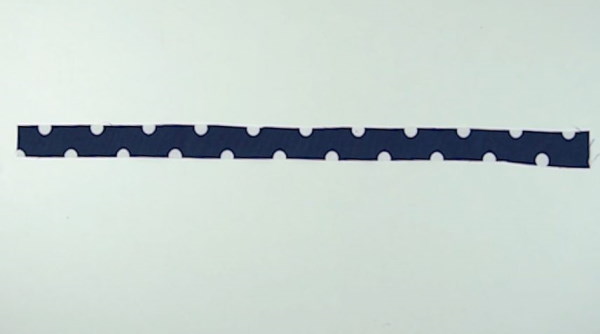
- To make a belt, you need to cut out a rectangle of a length corresponding to the width of the material (approximately 1.4-1.5 m). The desired width of the belt depends on the woman's wishes, and when cutting it increases by 2 times. In addition to the obtained value, 2 cm are added (1 for seams on each side).
- The cut strip needs to be folded in half (with the right side facing inward), the long edges aligned, secured with pins and stitched with a straight seam.
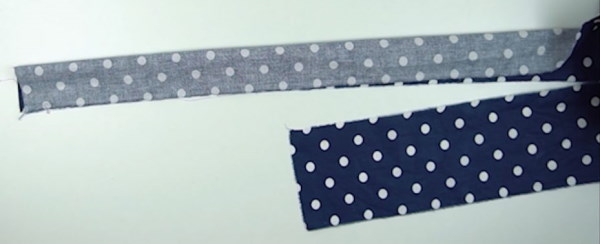
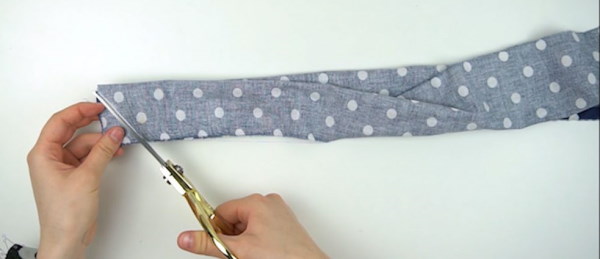
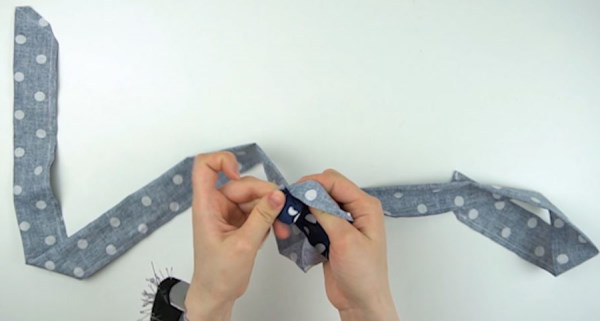
- The ends of the belt need to be made at an acute angle. To do this, they should be connected, folded in half and, having marked the desired cutting line at an angle of 45 degrees, cut off the excess fabric.
- The belt should be stitched starting from the corner, stepping back 1 cm from the edge of the product. The line should be laid continuously to the middle of the belt, where a small hole (12-15 mm) should be made, in order to then turn it inside out. Before turning the product to the front side, all the formed corners of the fabric should be carefully trimmed, not reaching the seam by 1-2 mm. This is done so that excess thickness does not form in the corners, compacting the fabric.

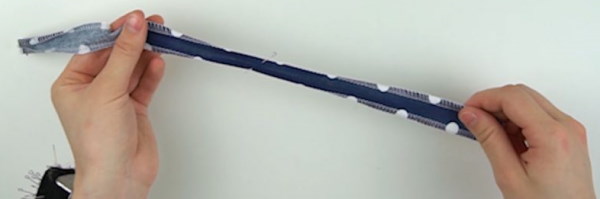
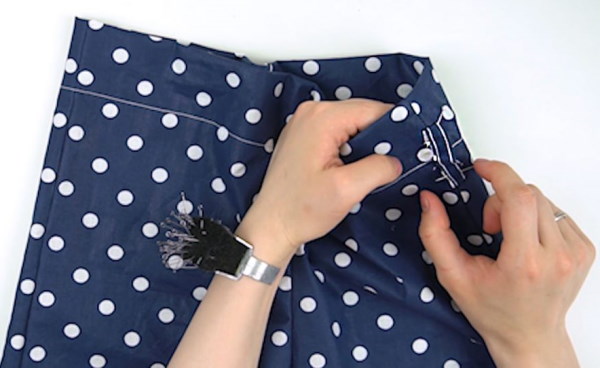
- The belt should be turned right side out through the hole left in the fabric. The hole itself should be carefully hand-sewn with a blind stitch.
- Belt loops are used to attach the belt to the garment. One of them is placed with the middle to the side seam of the shorts and secured with a pin. The second piece of fabric is attached to the second side seam. The parts are secured with machine stitching, laid 2 mm below the fold edge.
- The third belt loop strip is fixed along the back seam. The belt is inserted into the belt loops that hold it and is evenly distributed.
Bermuda shorts
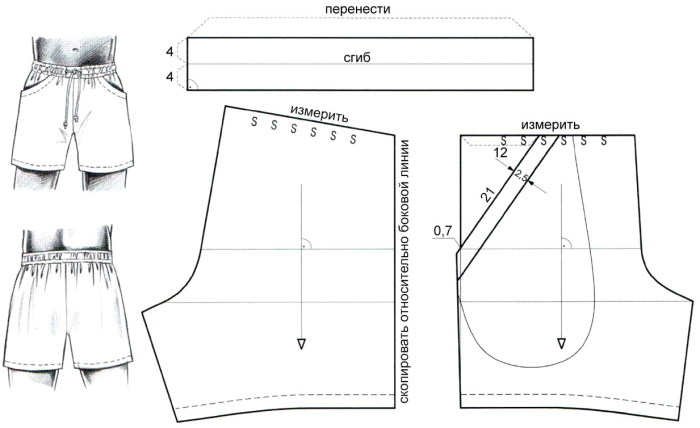
Women's shorts with a high waist, up to the middle of the knee or 8-10 cm higher, straight or slightly flared towards the bottom are called "bermudas". This model in the classic version has arrows, side pockets and a sewn-on belt, and is made of linen, cotton, denim or knitwear.
Before cutting, the pattern needs to be adjusted according to the parameters of the figure, and then laid out on the material, traced with a pencil and cut out (seam allowance 1.5 cm).
The following are made separately for the belt:
- rectangle, 12 cm wide;
- 2-3 strips, 2.5 cm wide each;
- 4 pieces of slit pocket frames (each about 5cm wide and 14cm long).
To sew the product:
- The darts located on the back of the shorts need to be stitched, then straightened and ironed to the side cuts.
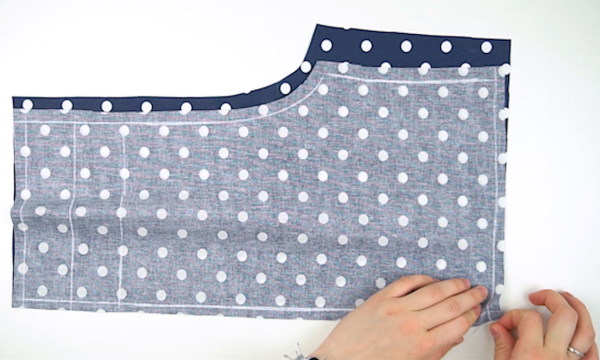
- The burlap of the inner pockets is folded with the details of the front part of the product, aligned along the cuts, basted and stitched at the top line. The resulting pockets need to be folded to the wrong side, ironed well and stitched along the edges.
- The side parts (front half of the product) with one-piece pocket pockets should be placed on the inside of the front parts with the right side facing out and basted along the top line.
- All parts of the inner pocket are basted and stitched along the edge on the wrong side.
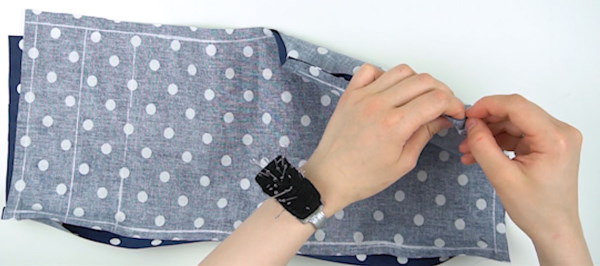
- The main parts of the pattern need to be connected (with the right side facing inward), swept along the side seam and machine stitched. The edges of the product need to be processed with an overlock, and the resulting seams ironed. The same should be done with the step and middle seams. On the latter, 16-20 cm should remain unclosed to the top (for "sewing in" the zipper).
- The bottom part of both legs needs to be folded over by 0.5 cm from the wrong side, serge in a circle, and then sewn with a straight machine stitch, hitting exactly the basting line.
- The top edge of the product should be treated with interlining, folded over by 5-6 cm, swept in a circle and machine stitched. Allowances should be processed with an overlock.
- The rectangle of fabric for the belt should be folded in half (with the right side inward) and machine stitched. The allowances should be processed with an overlock. If you want to give the edges of the belt an angular shape, they should be connected, folded in half and cut with scissors at an angle of 45 degrees. In this case, the machine seam is laid strictly from the edge of the product and goes in a continuous motion. In the middle of the belt, a 15 mm hole should be made in order to turn the product right side out. Subsequently, the hole should be sewn up by hand with an invisible seam.

- The belt loops on both sides need to be processed with an overlock, and then placed on the side and back seams, securing them in the middle with a pin.
- The places where the pins are connected to the belt loops must be machine stitched.
- On one part of the belt, you should make and overcast 2 loops, and sew buttons on the other.
- The selected zipper should be unzipped and tacked to the left side of the shorts with tape. Having placed a strip of interlining (piping) under the tape, you need to sew three layers of fabric with one machine seam: lining, shorts material and zipper tape.
- The half-sewn zipper needs to be fastened and the right outer part of the model with the zipper and interlining pinned. Having stitched the right edge of the product with a straight machine seam, it needs to be turned inside out, the free part of the zipper tape needs to be tucked inside the product and basted, and then stitched with a machine seam (first the left part, then the right part).
- Finished shorts need to be ironed well.
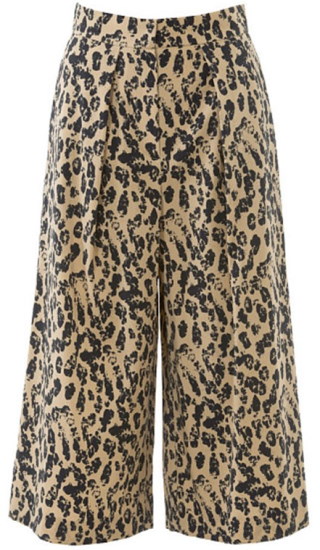
Shorts-skirt
High-waisted shorts-skirt, an original part of a woman's wardrobe, emphasizing the beauty and grace of its owner. To make a pattern for the model, in addition to the main measurements, you will need to take an additional one - the height of the seat (H), measured in a sitting position and equal to the length laid from the waist line to the point of contact of the buttocks with the seat of the chair. Thanks to this measurement, the finished product will not be too tight when sitting on the chair.
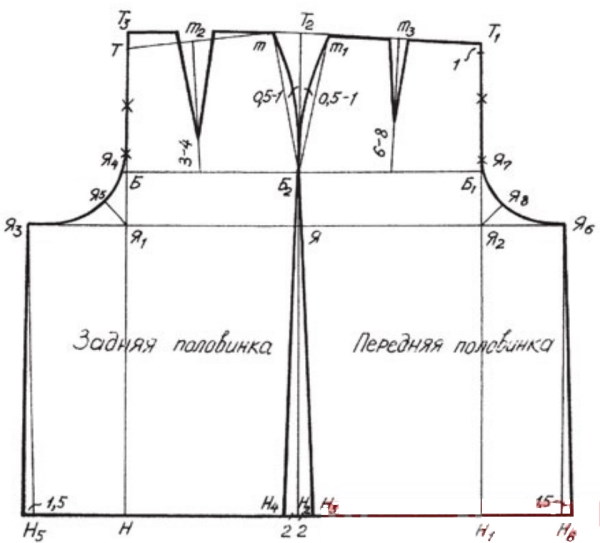
Stages of pattern construction:
| Modeling the front part of the product | 1. From point T2 down the side cut, a segment equal to 25 cm is laid (Вс-1 cm); 2. From the found point Я, a horizontal line should be drawn intersecting with the lines on both parts of the product at points Я1 and Я2. 3. To create point Я3, the resulting line must be extended to the left at a distance corresponding to 1/5 of the hip semi-girth with 1 cm added to it, which is necessary for the product to fit loosely on the figure. 4. The resulting distance Я1-Я3 should be equal to the value (ПоБ + Пб) * 0.2 + 1 cm; 5. From point T, a line corresponding to the value of 1/10 PoB – 2 cm should be drawn upwards and marked as point T3. 6. The resulting segment Y-T3 should be divided into 3 equal parts. 7. The lower part of the division is called Я4. 8. From the angle formed by connecting points Я4-Я1-Я3, it is necessary to draw a bisector dividing it in half and mark off a strip on it, continuing to point Я1 and constituting 1/10 of the value of ПоБ. This point is called Я5. 9. Markers Я3, Я5 and Я4 must be connected with a smooth concave line. |
| Modeling the step cut of the front part of the pattern | From the mark Я5, you need to draw a perpendicular line to the bottom of the product and mark the resulting point Н5. Stepping back from it, to the left side you should lay a horizontal segment of 1.5 cm, and connect the point found in this way with a straight line with the value Я3. |
| Modeling a side cut | From point H2, you need to lay down 2 cm sections, and connect its end point H3 with a straight line to the value B2. |
| Modeling the central slice | 1. The segment Я1-Я3 must be laid to the right side at a distance equal to 1/5 of the value of PoB +5 cm-1 cm (Я6);
2. Line Я2-Т1 is divided into 3 equal parts, the lower one is designated by the mark Я7; 3. On the bisector of the angle Я7-Я2-Я6, a line is drawn to the Я2 mark and is 1/10 PoB – 1 cm (Я8). 4. The found point is connected with Я7 and Я2 by a smooth concave line. |
| Modeling the step cut of the back part of the product | 1. From point Я6 you need to draw a perpendicular to the bottom line (Н6).
2. From the found point, a horizontal line of 1.5 cm should be measured to the right. 3. The end part of the segment is connected to Я6 by a straight line. |
| Modeling by side cut | 1. From the bottom, 2 cm are measured (H4).
2. Points H2 and B2 are connected. |
 To create counter folds, the finished varnishes need to be cut along the middle lines and widened to the width of the folds (from 16 to 24 cm).
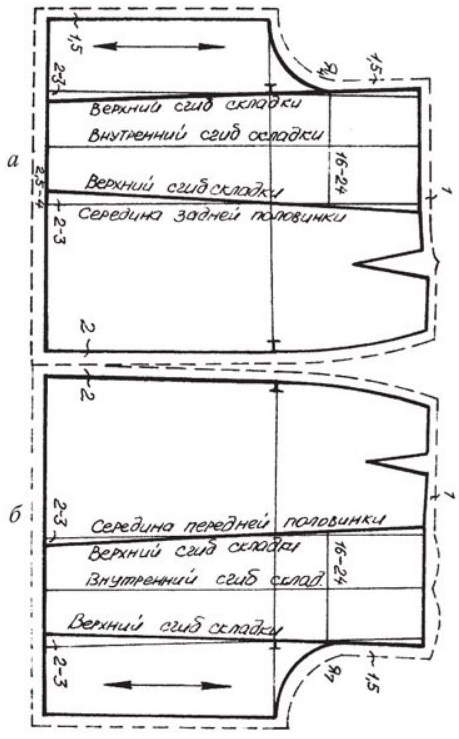
The depth of each fold should be reduced by 2-3 cm at the bottom level on each side, and a fold line should be drawn along the marks Я4-Я7 to the waist level. During the cutting process, the darts are extended to the hip line.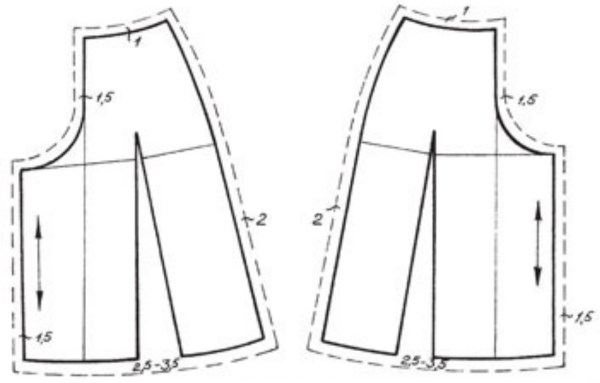
When sewing a skirt-shorts:
- Having laid out the pattern on the fabric, it is necessary to trace it with tailor's chalk (pencil) with a mandatory seam allowance of 1.5 cm.
- The copy seam is laid along the contour of the patterns and the upper folds of the pleats. The product is basted and stitched.
- Both parts of the model should be stitched along the side cuts. On the left side, the seam is interrupted at a distance of 15-20 cm from the waist line to sew in the zipper.
- The step edges of the product should be basted. The central front and back edges should first be pinned and then basted. All previously basted edges should be stitched on a sewing machine, the resulting seams should be smoothed out, and the edges should be processed with an overlock.
- After making the folds, they should be swept away.
- After attaching the belt to the top of the shorts, you first need to baste it and then stitch it with a simple machine stitch.
- You need to insert a zipper into the remaining product, placing interlining between it and the main fabric, and stitch it first on the left side, and then on the right side.
- The finished product must be ironed well.
Denim shorts
Women's high-waisted shorts can be made from old jeans by cutting them to the desired length, turning them up and machine stitching, or you can make them yourself from denim using a pattern downloaded from the Internet or a magazine.
To make the product:
- All pattern parts need to be laid out on the fabric, traced along the contour (taking into account the seam allowance) and cut out.
- To process side pockets, you need to stitch the edge of the entrance to them with lining, notch the allowances and, folding the lining down, tuck in the stitched edge. A double machine stitch is laid along the edge of the entrance part of the pocket.
- The front part of the product should be pinned to the front side of the side pocket so that the edges of the marking line coincide. The resulting structure should be stitched.
- When working with patch pockets on the back of the model, you should:
- stitch the top corners;
- straighten the seams, first turning the pocket inside out, and then iron them, folding them to the wrong side;
- the top edge of the pocket needs to be machine stitched;
- The finished pocket needs to be sewn to the main product.
- Both halves of the pattern need to be stitched along the side, step and central cuts. The central cut should be left unstitched, stepping back 16-24 cm from the top of the product. The seams should be ironed, and the allowances should be processed with an overlock.
- A zipper needs to be inserted into the central cut, stitching it with tape first to the left and then to the right part of the garment. The zipper tape needs to be finished with piping (doublerin).
- To create a belt, a denim rectangle cut out twice the length of the Ot value is folded in half (with the right side facing inward) and stitched with a machine seam. In the middle of the belt, an opening of 15-20 mm remains unclosed, which is necessary to turn the product right side out.
- The top of the shorts needs to be folded over and machine stitched, then the belt loops need to be stitched to it with the right side facing down.
- Having connected the pieces with the right sides facing inward, you should stitch the outer part of the belt along the top edge of the shorts so that the belt loops fall under the machine stitching.
- The waistband allowances should be ironed upwards, and the longitudinal cut of the inner side of the waistband should be ironed inside out.
- Having sewn the seam along the back part of the belt, you need to form a drawstring. You should insert the elastic into it, having previously adjusted its length. The ends of the elastic are fixed on the side seams.
- The belt loops pulled up need to be stitched to the top edge of the belt.
- The bottom edge of each leg of the shorts needs to be folded over and stitched in a circle.
- At one end of the belt you should sew a loop and at the other end you should sew a button.
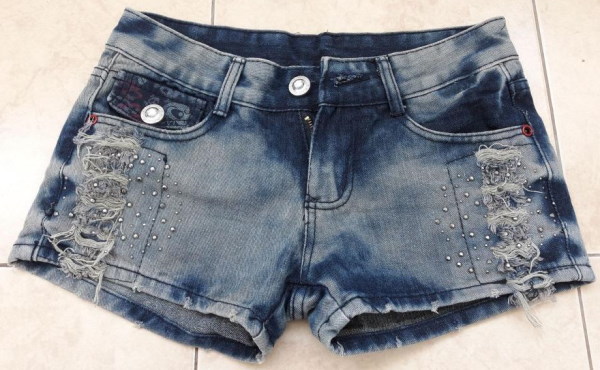
It is recommended to stitch denim shorts with a double stitch using a special needle. Rivets can be made on the sides of the product. Lacing, beads or lace can also be used to decorate the model.
Leather shorts
Women's high-waisted shorts made of leatherette or eco-leather are made according to standard patterns.
To create a model:
- The pattern of the product must be placed on the fabric and the model must be cut out with a mandatory seam allowance of 1.5 cm.
- Both parts of the product should be folded together with the right sides facing and stitched along the side, central and crotch cuts.
- The lower part of the product needs to be processed in a circle, having first folded it over from the wrong side (by 0.5 cm).
- The parts of the inner pockets are folded, applied to the front part of the product, aligned along the cuts, basted and stitched along the entry lines. The resulting pockets are folded to the wrong side, ironed well and stitched along the edges.
- The top of the product needs to be folded and stitched in a circle. Using belt loops, a belt made from a strip of leatherette needs to be sewn to it.
- You need to insert a zipper into the middle of the central seam, sewing first the left and then the right part of its tape.
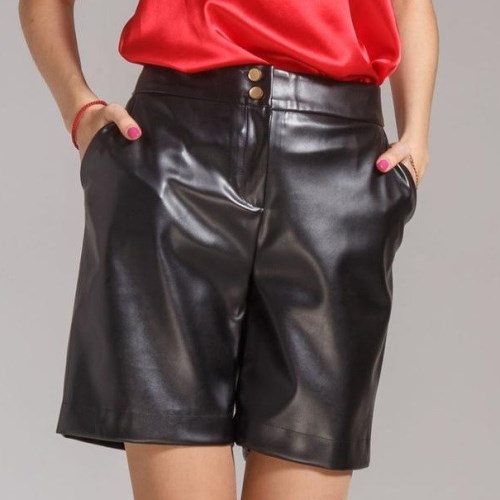
Unlike other materials, leatherette requires special care in work and careful processing of seams.
You can make women's high-waisted shorts without any special skills, using a basic pattern adjusted to your own measurements. The model of the product and the material are selected depending on the woman's wishes and preferences, and the shorts themselves are an indispensable part of a woman's wardrobe in the hot spring-summer season.
Video about high waisted shorts
How to sew high-waisted shorts: