A shark is one of the majestic creatures of nature. Almost no story related to the ocean can do without the presence of such predators. There are many myths about them, a large number of films are dedicated to them, they are often drawn by art lovers and children.
Drawing tools
To depict a shark you don't need any specific tools or materials. The drawing can be created with regular pencils, markers and paints, using ordinary paper for this.
To simplify, speed up and improve your work, it is better to listen to the recommendations of experienced artists.
Pencils
When choosing a pencil, you need to pay attention to the markings that indicate how hard or soft the lead is.

The following letters are used for marking:
- "H", which denotes hardness and is the initial letter of the English word "hardness";
- "B", denoting blackness and being the first letter of the English word "blackness".
The lead of a simple pencil contains graphite, clay and a small amount of other components. The hardness of the pencil depends on the ratio of graphite to clay: the less clay, the softer it is. Also, with a decrease in the amount of clay, the thickness of the lines drawn and their blackness increases: the less clay, the darker the lines.
Hard pencils, which contain less graphite and more clay, leave a thinner and lighter trace on paper. Such a line does not smudge and leaves furrows on the surface. The number next to the letter characterizes the degree of hardness and darkness. The softest and blackest pencils are designated "9B", and the hard ones - "9H".
There are also pencils that are marked with both letters at the same time. In this case, the manufacturers want to say that the tools are slightly harder than "B", but softer than "H". Domestic pencils use the marking "T" and "M". The first letter means hardness, the second means softness.
Pastel
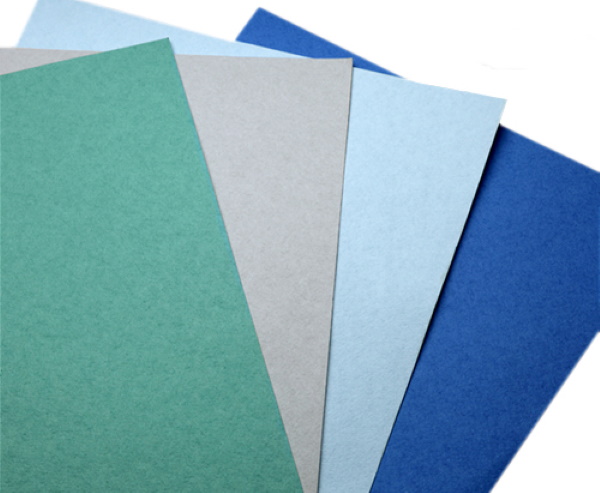
If you decide to draw with pastel paints, then you need to prepare a textured surface with a rough effect. As a rule, colored paper is used to make pastel drawings, since the white material does not allow you to fully appreciate the saturation of the main colors. In the case of a shark, it is advisable to use blue paper, because this creature lives in the sea.
Those who want to draw with pastel paint should remember that this coloring agent has a serious drawback: pastel easily crumbles. Therefore, a drawing made with pastel must be fixed using special fixatives. Hairspray can play this role.
However, after using the fixative, the appearance of the paint changes: it becomes darker. Also, the work done with pastel paint can be placed under a glass surface in a suitable frame.
There are 3 types of paper designed for pastel paint:
| Paper type | Description |
| Special sandpaper for artists | This material is sold in large format sheets. |
| Pastel board | This material is made from small particles of cork. |
| Velvet paper | This material is distinguished by the presence of a velvety surface. When working with this type of paper, you can use a minimum amount of fixative |
In addition to these types, you can also use watercolor paper and sheets of a notebook or album. Their format can be different, depending on what size drawing you plan to create.
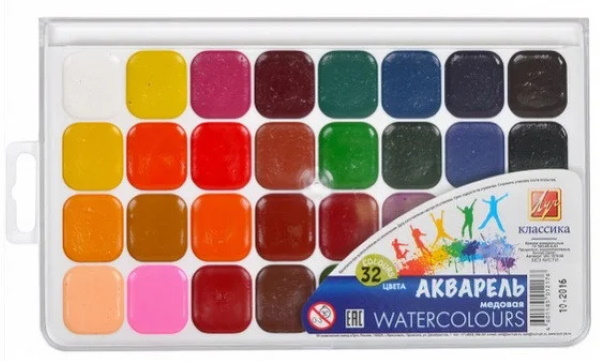
Watercolor
Drawing a shark for children with watercolor paints involves choosing any watercolor, but having special paper. It should say "watercolor" or "for watercolor".
Such paper can be purchased individually. As for brushes, it is better to buy "squirrel" ones. They have sharp tails, thanks to which you can work on both large and small details.
Master classes
At first, it is better to find ready-made images and copy them. When the drawings become more beautiful, the artist will understand that it is time to move on to creating his own creations.
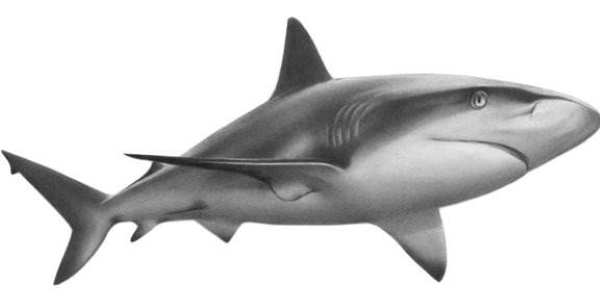
Shark in profile
One of the easiest ways to depict a shark is to draw it in profile, swimming underwater.
The work takes place in the following stages:
- Outline the main body parts. These will be the head, body and tail. To do this, draw a horizontally elongated oval in the center of the sheet. This will be the body of the sea predator. To the left of the drawn oval, draw lines so that they intersect at a point located a few cm to the left of the oval. The intersection point of these 2 lines ends. As a result, you will get something similar to a triangle. This will be the head of the shark. To the right of the body, you need to draw the tail. To do this, you also need to draw 2 lines that should connect a few cm from the oval. The point of their intersection will become the top of the triangle, which will indicate the shark's tail.
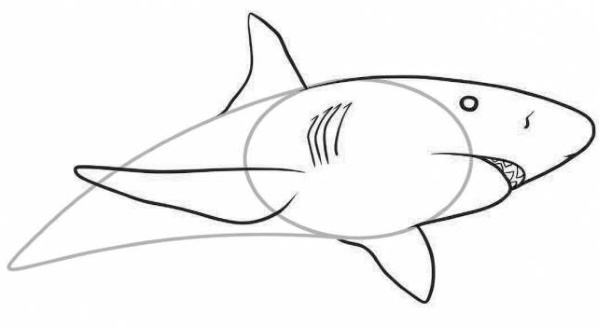
- Draw the details of the head. The eye, nostrils and mouth should be located here. For the eye, it is enough to put a point a few mm from the oval line. A little lower and to the left of this point, place the nostril, which is marked with a short arc line. At the bottom of the head, mark the mouth with 2 lines that start at the bottom of the head, go to the right and connect with each other at a point located slightly to the right of the oval line. It is important not to forget to draw the teeth in the mouth.
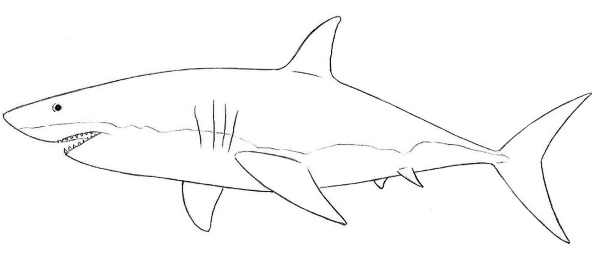
- Draw the fins. One of them is on the back at the top, the other is on the chest at the bottom, and the third fin is the tail. All the fins should be represented by figures similar to a triangle with rounded corners.
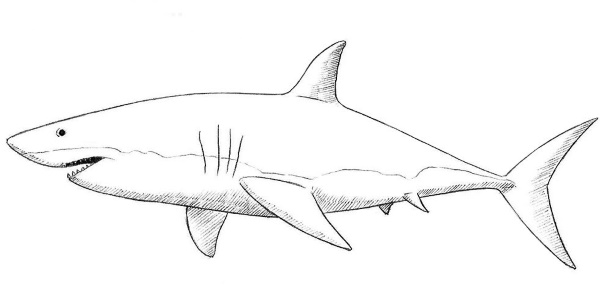
- Draw the gill slits located to the left of the lower fin. You should also add 3 small fins located close to the tail. 1 of these 3 fins is on top, the other 2 are on the bottom.
- At this stage, it is also necessary to outline the shadow line on the belly.
- Shade the head, mouth, large dorsal fin and belly area.
- Finish drawing shadows on the body and tail fin.
Hammerhead shark
The hammerhead shark is considered an interesting representative of these predatory animals. Children especially love to draw it.
Such a sea animal can be depicted in the following steps:
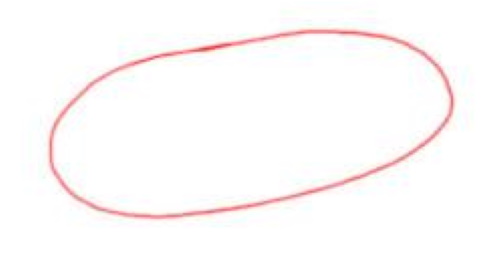
- Draw an oval, which should be located in the center of the sheet and at the same time be elongated to the left and right.
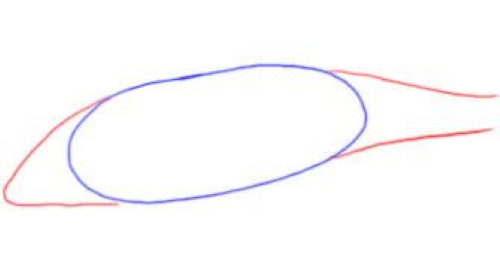
- Draw 2 lines on the left side of the oval. This will be the base of the head. As with a regular shark, these 2 lines should start from the oval and end at 1 point, located a few cm from the oval.
- Draw 2 lines to the right of the oval. Unlike the lines on the left, these lines should not intersect. Each of them ends a few cm from the oval. Here, in the following stages, the tail will be drawn.
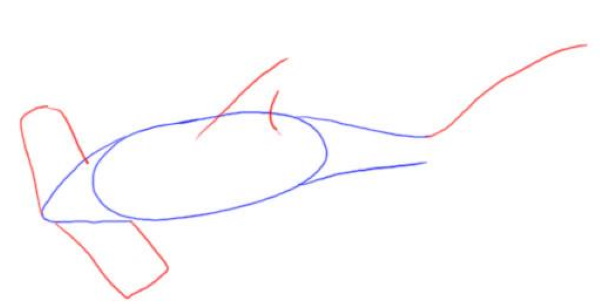
- Draw a hammer. It is located in the head area and should be represented by a pair of rectangles: 1 is located above the head, the 2nd is below the head.
- Draw the shark's dorsal fin, which should be represented by a triangle located above the body line.
- Draw the tail. It should start at the point where the top line ends, passing to the right of the body. From this point, draw a diagonal line directed upward and to the right.
- Draw another part of the tail and add 3 fins. At the point where the diagonal line of the tail, which was drawn in the previous step, ends, the next tail line should begin. First it goes down and to the left, then smoothly changes direction and rushes down.
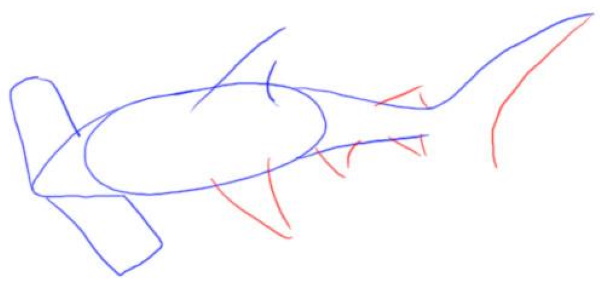
- Add some fins. 1 should be located at the top near the tail. The size of this fin is small, 2 fins are located below. 1 of the lower fins should be the same size as the dorsal fin. It is located under the bottom line of the body, and the 2nd fin, which is much smaller in size, is located near the tail.
- Proceed to the final part of the work on drawing a hammerhead shark. To do this, add another 1 large fin, which is located in the upper part of the body. It is located to the left of the previously drawn fin and is directed in the opposite direction.
- Finish drawing the tail. To do this, just draw 1 short line. It should connect the main part of the shark's body with the point where the previously drawn tail line ended.
- Draw the smallest details of the predator's body. To do this, draw a smooth line in the tail itself. It should start at the bottom of the tail on the left and rush up and to the right at the same time.
- Detail the hammer that decorates the animal's head. It should be given volume. To do this, add small ovals along the edges at the bottom and top. Several short lines should be drawn along the shark's body. At the bottom, near the tail, there should be another small fin.
- Color the resulting shark. You can also finish drawing the sea.
Two sharks
A cartoon shark drawing for children can be created with 2 representatives of sea predators. 1 of them is a common shark, and the 2nd is a hammerhead shark.
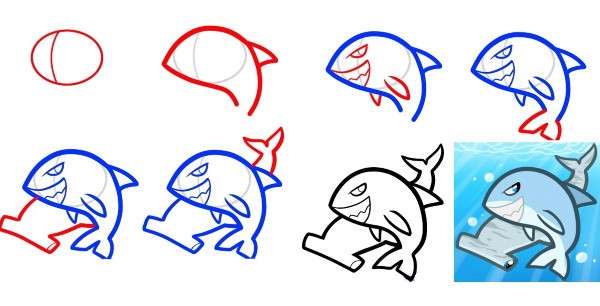
The work takes place in the following 7 stages:
- Draw an oval, which in this case will represent the upper part of the shark - both the head and the body.
- Divide the oval into 2 parts. To do this, draw a line from its upper border to the lower border. The line should be arced and rounded to the left. It should be located closer to the left edge of the oval.
- Create the outline of the head and draw the body with fins and a tail. To do this, draw 2 lines. 1 of them goes above the oval, starting on the right under it and ending slightly to the left of it. This will be the back line. The fin should also be located on it. The 2nd line goes under the oval: it starts at the point where the top line you just drew ends, goes to the right and bends slightly.
- Draw a pair of side fins, as well as an eye and a large mouth, not forgetting to add sharp teeth.
- To make one of the sharks fully drawn, all that remains is to add its tail.
- Start drawing the 2nd shark. This will be the hammerhead shark. It is located behind the 1st shark, so it is not fully visible. First, you need to make the initial outline. This will be the front part of the hammerhead shark. The outline line starts near the mouth of the 1st shark and goes slightly down. At the point where it ends, a line begins that will indicate the hammer.
- The 2nd contour line starts from the tail of the 1st shark, goes slightly to the left and down. At the point of its end, the hammer also begins. The hammer should be represented as a rectangle. In its right part, a small arc line should be added, thereby giving volume.
- Draw the tail of the 2nd shark near the dorsal fin of the 1st shark.
- Erase all auxiliary lines and color the drawing.
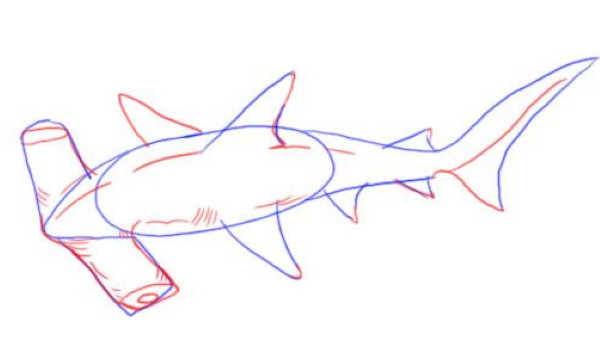
Shark in three quarters
A drawing of a shark for children can be done from a half-side view, then the animal will look realistic. In this angle, the shark is most often presented in various images and pictures. In this position, they try to capture it with an underwater camera, because this is how the predator demonstrates power and grace, which the observer can see.
For the image you need to do the following:
- Make a sketch of the main forms. They will be used as the basis for further construction of the shark's body. First, draw an oval indicating the location of the head, then draw a cone curved downwards to it, which should be slightly larger in size than the oval. This cone indicates the body of the fish. The fins and tail will be located here.
- Draw the head, where the eye, nostril and mouth should be.
- To depict it, you need to continue drawing a cone in the front part from the oval that is connected to the body. At the bottom, interrupt the cone with a mouth line. The shark's eyes are round. In this case, only 1 eye is visible, so it is enough to draw 1 small circle. Add another line to the jaw, thereby showing that it is open. Closer to the front part, place a pair of nose holes. Draw teeth in the mouth.
- Detail the remaining parts of the shark's body. Approximately in the center of the oval, draw 4 curved lines that will indicate the gill slits. On the left, under the gills, place a long lateral fin. Part of another one should be visible on the other side of the shark's body. Add the upper fin, rising above the back in a sharp curved triangle.
- Finish drawing the main parts of the body. Draw the back. The tail looks like a big sharp tick. Place a small cone-shaped fin going down next to it.
- Between the long side fins and the tail at the bottom of the body, draw a couple more small fins that also look like cones. Draw 1 small cone-shaped fin at the top of the tail.
- Divide the shark's body into the upper and lower parts. To do this, draw a thin line from the tail to the nose. The lower part of the shark is light, and because it blends with the sunlight, predators do not notice it from below. The upper part, on the contrary, is dark and therefore is not noticeable from above.
The main advice for beginning artists: do not stop at the achieved result. Above were only a few cases and methods of drawing. To draw a shark quickly and easily in any image and in any style, you need to improve your skills every day. It is noteworthy that beautiful drawings can be done even by small children.
Shark Drawing Video For Kids
How to draw a shark, step by step tutorial: