The 3 Markers Drawing Challenge is a type of betting game where the host-blogger offers his subscribers a task to complete in his video. Activities may vary in difficulty for adults and children and include tasks from different areas of interest.
Game Description
Usually, the blogger himself shows as an example how he copes with the task and passes the baton. Anyone can repeat the challenge by looking at ideas on the hashtag or on other videos with a similar name. The "3 markers" challenge on simple drawings appeared on the vastness of YouTube, where participants must choose any 3 colors with their eyes closed, which they will use to paint the image.
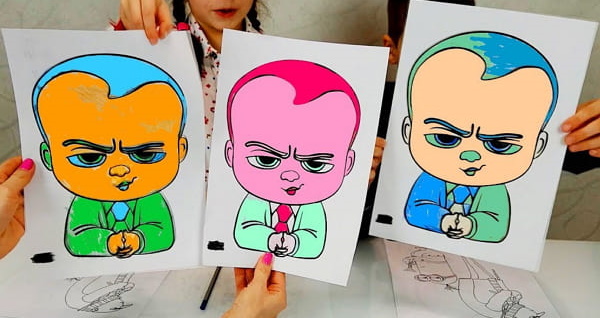
The game is suitable for 2 or more people. During the process, participants can come up with a picture that they will color, or use a ready-made line. The initial image must be the same for all participants. At the end, players compare the pictures that they filled with 3 selected colors. The winner is the one who completed the task better.
To create a line for the challenge, you will need the following tools:
| What will come in handy | For what |
| Paper | For markers, choose a thick, non-transparent type of paper. |
| Simple pencil | For sketching. A hard or hard-soft pencil is less likely to get dirty. |
| Eraser | Remove inaccuracies from the sketch. |
| Liner | Trace the finished sketch. |
| Felt-tip pens | Several at once, so that there is a choice for the challenge participants. |
You can come up with a drawing for the game yourself, redraw any idea you like, or print out a ready-made line.
Mouse - a simple drawing for preschool age
Drawings for the "3 Marker Challenge" can be of varying complexity, depending on the drawing skills of the game participants. To reduce the time for creating a line, you can use a simple drawing that adults and children can repeat. This will allow you to quickly begin the coloring stage.
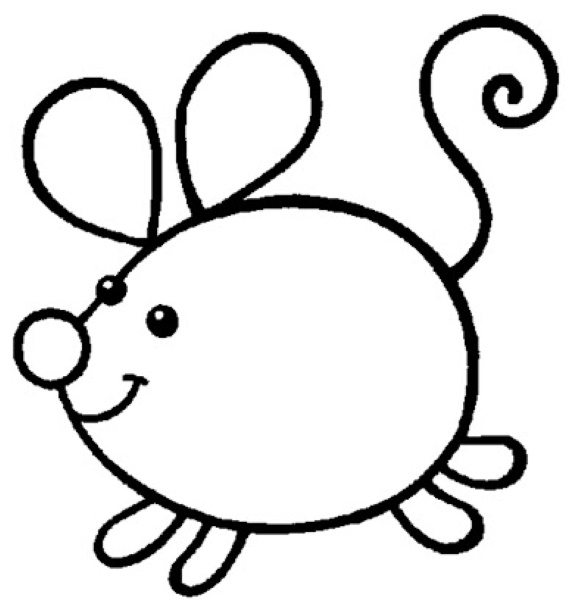
Stages of drawing creation:
- In the center of the sheet, draw a drop with the tip pointing to the left – this will be the future body of the mouse.
- The nose is shown with a small circle on the tip. The ears are depicted with teardrop-shaped figures on the upper part of the body, closer to the nose. The paws are drawn with 4 oval figures in the front and back parts of the body.
- The dots show the eyes. The curved line shows the mouth in a smile. From the widest part of the body on the right, draw the tail of the mouse in the form of a curved spiral line.
- Erase uneven lines with an eraser. Outline the finished drawing with a liner.
- Let's start coloring.
Winnie the Pooh drawing for challenge
To make the process of creating a drawing interesting for children, you can offer to redraw a familiar character. Fairy tale and cartoon characters are often used for this. Winnie the Pooh can be such an example. Coloring him in 3 colors during the challenge will be easy for children from 3 years old.
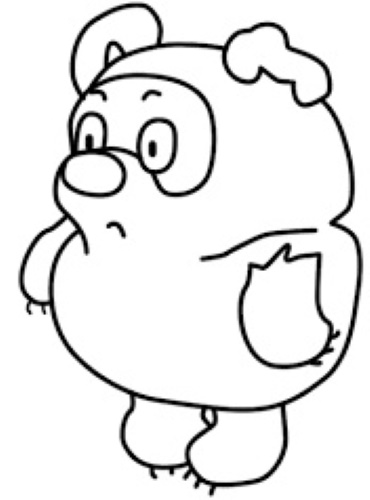
The process of creating a drawing:
- The two circles in the center of the sheet represent the body and head of the bear cub. The circles are placed one under the other.
- The elongated paws are drawn in ovals at the bottom of the body and on the sides. The far paw is not fully visible, it is drawn narrower.
- The circles indicate the ears on the top of the bear's head and the nose on its elongated muzzle.
- To highlight the muzzle, the eyes are drawn as small ovals and the area around them is outlined with a curved line.
- They add details: draw pupils, curved lines of eyebrows, mouth, claws.
- Smooth out all parts of the body and erase any inaccuracies in the drawing with an eraser.
- The finished image is outlined with a liner and the coloring process begins.
Picture of 3-color cookie
Drawings for the "3 Marker Challenge" are not always chosen from cartoon characters. They can be easy-to-make funny images, such as a cookie.
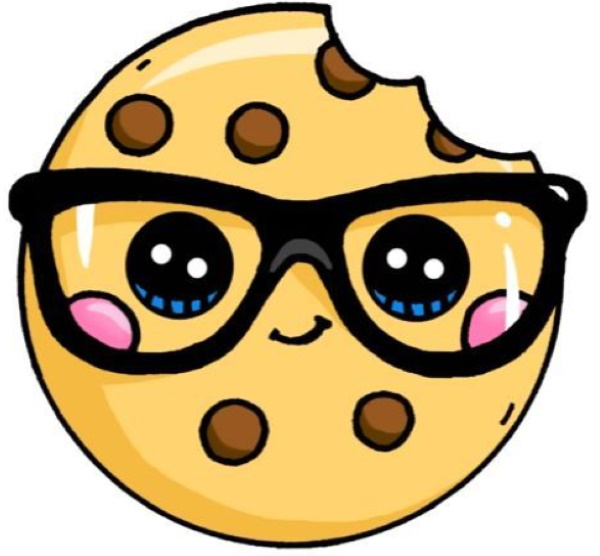
The process of creating a drawing:
- Draw a circle in the center of the sheet. For convenience, use a round shape or compass to make the circle even.
- The drawing is schematically divided into 4 parts and in the upper 2 parts the eyes are drawn with small circles.
- Even smaller circles show the cheeks and chocolate chips on the cookies.
- Glasses are drawn around the eyes, repeating the curve of the frame, as in the example, or another shape of glasses is depicted.
- In the upper right part, a part of the cookie is separated in semicircles to create a bite effect.
- Add details. Use short lines that follow the curve of the frame to add highlights on the lenses and the glasses themselves. Draw highlights on the top and bottom of the cookie. Use a curved line to draw a smiling mouth and the iris of the eyes.
- Erase unnecessary lines and outline the drawing with a liner.
- They move on to the challenge stage, where they choose markers to color the image.
Rainbow Cat Drawing for Beginners
As a line for the challenge, you can use a simple drawing of the hero of a popular video, a cat in the form of a rainbow. This image can be repeated by children 4-5 years old and older. In the process, you can use rounded objects. They can be traced to repeat the curved lines of the drawing.
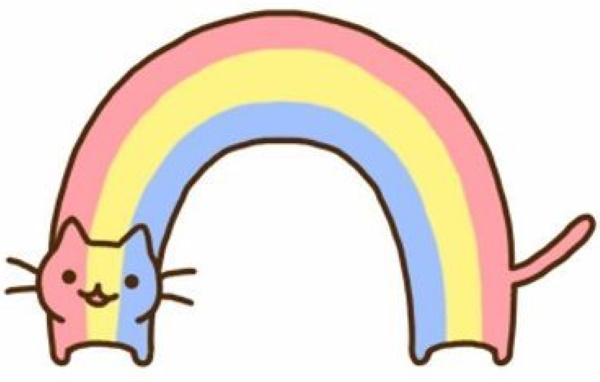
The process of drawing a rainbow cat:
- The cat's body is drawn with 2 curved lines. The top line is drawn with an indentation so that the body is the same thickness along its entire length.
- At the end of each arc, draw 2 small circles – the cat’s paws. Round off the places where the paws connect to the body.
- On the right, a long line shows the cat's tail sticking up. Its end is rounded.
- In the lower left part of the body, the cat's head is indicated by a horizontal oval. The ears are shown by 2 triangles pointing in different directions. The junctions of the head and ears are rounded.
- Add small details to the drawing. The eyes are shown with dots. The cat's mouth is drawn with small semicircles. Straight lines indicate the whiskers. To make it easier to color the figure, the cat's arched body can be divided into several identical stripes, each of which will be colored in a different color.
- They outline the drawing with a liner and erase the unnecessary pencil sketch.
- Color the finished drawing with 3 selected markers.
Gravity Falls Characters
Drawings for the "3 Marker Challenge" are chosen based on the age of the participants. There are cartoons that both adults and children like to watch. Therefore, for players of different ages, for example, parents and children, an image of the characters from the animated series "Gravity Falls" may be suitable.
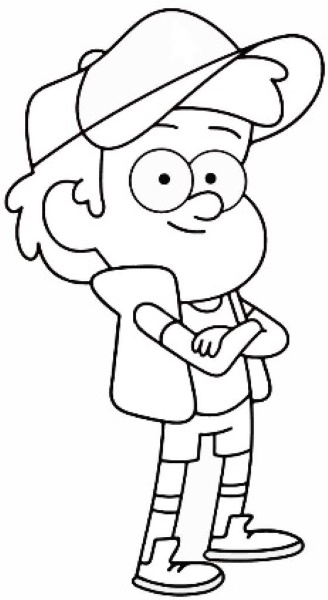
Steps to draw Dipper Pines character:
- The sheet is placed vertically. The head is depicted in the center of the sheet as an oval at the top. The body is shown below as a rectangle, stretched downwards from the head. The legs are schematically depicted with 2 straight lines.
- The head is drawn in detail. In the center of the face on the right side, eyes are drawn in the form of 2 circles. Pupils are shown with dots. The nose is marked with a small circle between the eyes. Eyebrows are drawn with curved thin lines, slightly indented from the eyes. The mouth is marked with the same line.
- On the left side of the head, an ear is shown in a circle. The head is slightly narrowed towards the eyes and rounded, imitating a cheek. On the top of the boy's head, a cap with a visor is drawn with curved lines and divided into several parts. Under the cap, hair is drawn above the forehead and on the sides of the ear with wavy lines.
- Around the body, draw a vest with rounded lines, repeating the lines of the stomach and back with an indent. At the top of the vest, make a rounded standing collar.
- Dipper's arms are crossed on his chest. They are shown with thin lines in the form of 2 triangles. The far triangle is slightly smaller because it is further from the viewer. Each line is outlined from 2 sides, adding thickness to the arms. The hands are shown as ovals and the fingers are drawn with parallel lines. The collar and sleeves of the T-shirt are shown with a curved short line.
- The lines of the legs are outlined with 2 lines at equal distances to make thin legs. On the legs, shoes are drawn with rounded ovals.
- They add details: they draw shorts and socks. They add a sole, laces and a tongue to the shoes. All the lines are straight with a slight bend.
- They outline the finished image with a liner and erase the pencil sketch. They proceed to the coloring stage.
Girls may want to use the female cartoon character Mabel Pines as the basis for the challenge.
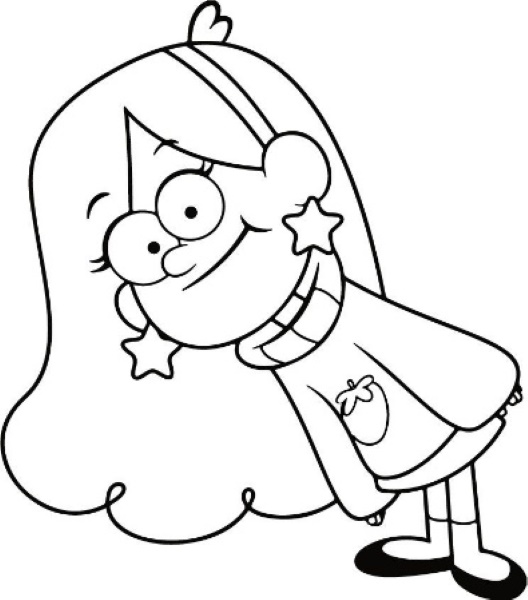
Character drawing process:
- The sheet is placed vertically. The girl's figure is depicted schematically. Mabel's head is drawn with a large oval tilted to the side. A straight line is drawn from the head to the left and down, showing the direction of the body. On the sides of the body, 2 short straight lines show the direction of the arms. From the end of the body, 2 straight lines are drawn down - the legs. A schematic curved line shows lush hair.
- The head is drawn in detail. All elements of the face are drawn at an angle, in the same direction as the head. In the center, the eyes are marked with 2 circles, the pupils are drawn as dots. On the sides and in the upward direction, a pair of curved eyelashes are drawn. The eyebrows and mouth are depicted as arcs. The nose is shown as a small semicircle, directed to the left.
- On the sides of the head, circles show the ears with star-shaped earrings. All lines are rounded. The left ear is further from the viewer, so it is smaller and not fully visible because of the head. Rounded lines outline Mabel's hair. From the right ear, two straight lines are drawn upwards, indicating the headband.
- They begin to depict the girl's clothes. The sweater and skirt are drawn voluminous, for this purpose they outline the line of the body with a large indentation using rounded lines. The sleeves are slightly wider at the end, from under them you can see the fingers - they are drawn with small semicircles. The collar of the sweater is wider at the top, the knitting is shown with vertical hatching. From the collar to the head they draw a thin neck with short straight lines. The skirt repeats the bottom edge of the sweater with a small indentation, also widening downwards.
- The lines of the legs are outlined on both sides and end with 2 pointed ovals pointing in different directions.
- Add details. Draw shoes, coloring the edges of the legs. Show socks with a short curved line. If desired, draw a pattern on the front of the sweater in the form of a berry, as in the example or any other. Earrings in the ears can also be changed to another shape.
- They outline the finished drawing with a liner, erase the pencil sketch and begin coloring the drawing with markers.
Spongebob for 3 marker challenge
The drawings for the "3 Marker Challenge" are chosen from cartoon characters because they are well suited for coloring in 3 colors. Even if the participant of the game chose colors different from the original, the cartoon characters still turn out bright and can win the challenge. The SpongeBob character is suitable for those who have basic drawing skills. All lines are easy to repeat. Additional time may be needed to depict small details, but they can be omitted if desired.
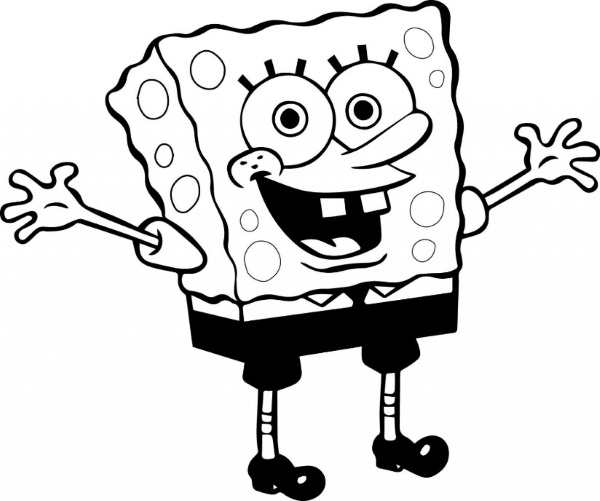
The process of redrawing Spongebob for coloring:
- The sheet is placed horizontally. In the upper central part of the sheet, the body and head of SpongeBob are schematically depicted in the form of an elongated rectangle. The rectangle slightly widens at the top and has a tilt to the left. Straight lines are used to draw arms directed upward in different directions and 2 straight legs directed downward.
- Additional lines are drawn. The line of the body is repeated on the left side with a small indent downwards to show the volume of the figure in a half-turn. The face is separated from the body by a horizontal line. This line runs at the very bottom of the rectangle. The legs and arms are given a small volume by outlining schematic lines on the sides. The hands end with rounded splayed fingers. The character's feet are wearing boots, which are depicted as 2 circles.
- The face is drawn in detail. In the central upper part of the head, 2 eyes are drawn in the form of circles. In the center of each, the pupils and iris of the eye are marked with smaller circles. At the top of the eyes, 3 short straight lines show the eyelashes. A long, thin and rounded nose is drawn slightly below the eyes, with an indentation to the right. To the side of the left eye, a cheek is shown in a semicircle, from which a wide-open mouth begins. It is drawn as a semicircle, inside which there are 2 square teeth and a tongue.
- Circles are used to draw pores on the entire face, including the left side. Dots are used to show freckles on the cheek. A wavy line is used to draw the lower lip.
- The sleeves are drawn separately from the shirt. They are depicted as rounded triangles. The arms start right from them.
- The trousers are painted black, showing the legs with squares, slightly wider than the legs. Above the trousers is a shirt with a tie. The collar is depicted with triangles just under SpongeBob's head.
- Add details. Draw socks on the legs with short lines. Smooth out the lines, outlining the shoes and adding a small heel. Draw the edges of the face and lips with wavy lines.
- The resulting drawing is outlined with a liner and the sketch is erased with an eraser.
- The drawing is ready for coloring with 3 markers.
Complex Zendoodle Drawings
For those who have drawing skills, more complex copying options are suitable, where there are more small details and uneven lines. In ready-made coloring books, the Zendoodle style is often used to make the process more interesting. The name of the style comes from 2 words "zen" - calm and "doodle" - sketch. This method of drawing is more suitable for adults or those who like to draw small details.
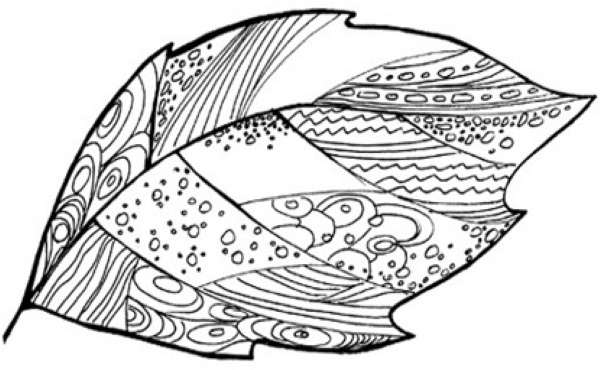
The process of redrawing a sheet in stylele zendoodle:
- The sheet is placed horizontally. In the center, with a slight tilt to the right, a pointed oval is drawn, schematically depicting a tree leaf.
- Draw a curved line down the middle of the sheet, dividing it into two halves. Extend this line from the bottom, depicting the stem.
- The edges of the sheet are sharpened in several places towards the tip (top right).
- Transverse lines are drawn at different distances from the central line.
- Each resulting space is painted in different ways: hatching in different directions and frequencies, circles, rounded lines and zigzags, dots. Several methods can be combined at once.
- The resulting figure is outlined with a liner and the pencil sketch is erased. In this style of drawing, ideal features are not sought, so the lines may be uneven.
- Color the resulting drawing with 3 selected markers.
Useful tips
The choice of a drawing for the "3 Marker Challenge" may depend on the age, gender or interests of the participants. The youngest players are advised to choose simple drawings for copying that are easy to repeat. These can be images of animals or objects with a minimum number of lines. In other cases, the choice of a drawing depends on the drawing skill, but the copying process can be made easier and faster if you follow simple tips.
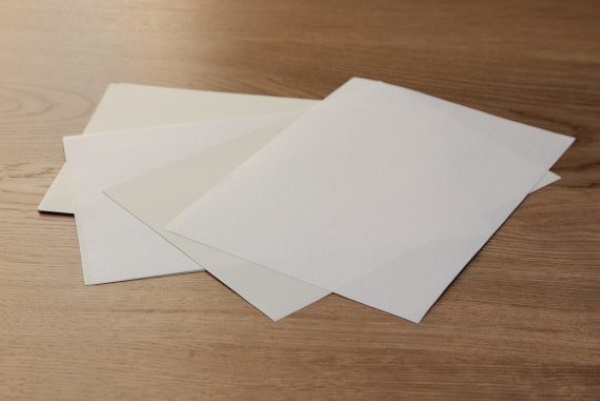
- Selecting paperMarkers and felt-tip pens bleed through thin paper and leave uneven lines, so it is recommended to choose thick types of paper or special sheets for drawing with markers.
- Sheet arrangementThe sheet is positioned vertically or horizontally in advance, depending on which part of the drawing takes up more space.
- Schematic representationTo ensure that the selected drawing fits exactly in the center and does not go beyond the edges, the character is first depicted with schematic lines using a simple pencil.
- Stages of drawing charactersWhen choosing a complex image with many small details, start drawing with close-ups and general plans (head, body, arms) and move on to less significant ones (elements of clothing, folds, short lines).
- They start drawing with a pencil, to correct unsuccessful lines at any time. The finished image is outlined with a liner, black pen or marker. After that, the pencil sketch is erased.
Video about drawings for 3 marker challenge
3 Markers Challenge: