Beginner knitters need to learn how to hold knitting needles in their hands and correctly design the details in order to work. Edge loops, knitted in different ways, make the finished product look neat and finished.
How to knit an edge loop with knitting needles
In some cases, edge loops are hidden in the seams when sewing parts together. In other cases, they can play a decorative and embellishing role. Then the way of knitting edge loops becomes especially important.
For those who are just starting out in the interesting world of needlework and knitting, the simplest methods of making edge loops will do. However, there are several interesting options for knitting edges.
Edge loops are cast on in addition to the required number of loops calculated for the work. They are knitted separately, regardless of the main pattern, design and knitting pattern. The most popular and easiest to perform types of knitting edge loops are considered to be "knot" and "braid" ("chain"). Even the most inexperienced knitter can do them.
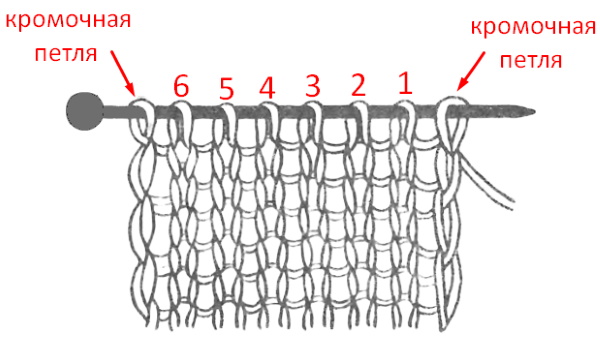
Edge loops are the outer loops in each knitted row, which form the edge of the working fabric. The way they are made determines the appearance of the product parts. Knitting edge loops does not present any difficulty for those who already know how to cast on loops and are familiar with the simplest types of knitting on knitting needles.
For knitting you will need:
- yarn;
- knitting needles (their size is selected according to the thickness of the thread of the yarn used).
The work should be carried out as follows:
- Cast on stitches onto knitting needles.
- The outer loop at the beginning of the row should be removed to the working needle without knitting. The thread should be behind the working fabric.
- Next, knit the entire row according to the selected pattern or diagram.
- The outer loop at the end of the row is knitted through the front wall.
- Turn the working canvas.
- The 2nd and all subsequent rows are done in the same way as the first (the 1st loop is removed without knitting, and the last one is knitted).
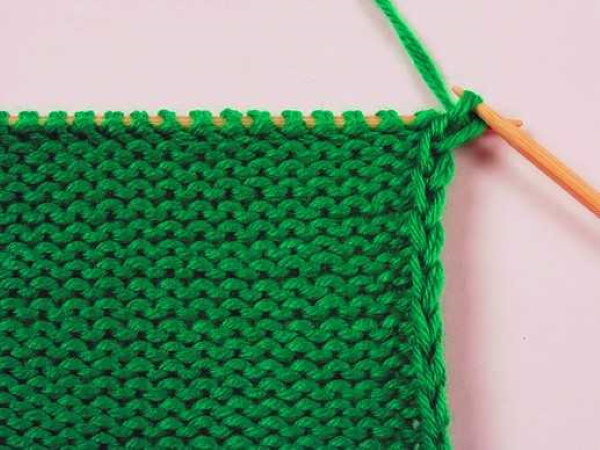
This method of knitting edge loops is called "knotted". It can be used when knitting with any pattern and any loops. The "knotted" edge is more durable. It is dense, which prevents the products from stretching and deforming. It looks most harmonious in garter stitch and is best suited for making products from thin yarn.
Different ways of knitting
The edge loop with knitting needles for beginners is not a difficult element in knitting. The main thing is not to forget to perform the edge loops in each row according to the chosen method. And there are several of them.
The method of knitting the edge depends on the type of product or parts in which it will be used:
| Features of implementation and application | Purposes of use |
| Requires careful execution for the product to look perfect. | Straight fabric edging. |
| · To raise additional loops along the edge of the fabric; · to continue working with other types of knitting using other knitting tools. | · Connecting parts by binding;
· knitting decorative details, collars, strips, sleeves to the main product. |
| The edges remain invisible, they are hidden in the seams. | Sewing the parts together. |
Braid (chain)
The first stages of work are carried out with a set of loops:
- Knit the outer loop that starts the row.
- After that, the entire row is knitted according to the chosen pattern or diagram.
- Before the last loop, the thread should be moved forward in front of the working fabric.
- Remove the last loop that completes the row onto the working needle without knitting.
- Turn the work over.
- The following rows are performed in the same way.
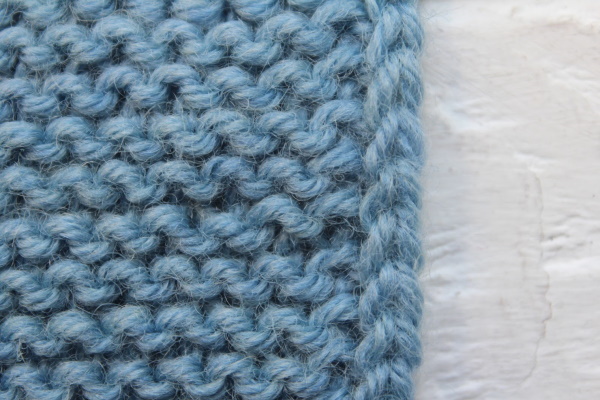
As a result, a "braid" (or "chain") is obtained on both edges of the fabric. Such an edge of edge loops looks beautiful, and it is convenient to sew parts of products with it. But there is one significant disadvantage - the edges can curl, especially if the work is made from thin yarn.
With a yarn over
The edge loop with knitting needles (for beginners the instruction is quite easy) can be with a yarn over. The work begins with dialing the required number of loops. 2 loops are dialed additionally to form the left and right edges. They are edge loops.
Before starting to knit the next row, you need to make a yarn over on the working knitting needle:
- Next, the outer loop that starts the row needs to be removed to the working knitting needle as a front one. To do this, insert the right knitting needle from left to right.
- Subsequent rows are knitted according to the pattern or diagram chosen.
- Knit the final row loop with the yarn over made at the beginning of knitting as a purl loop.
- Turn knitting.
- The remaining rows should be done in the same way.
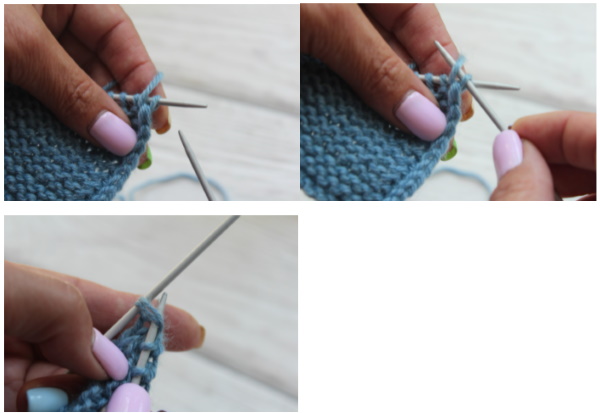
You can make a yarn over at the beginning of knitting after removing the initial loop, and not before it. This will not affect the result. The edges of the product will remain equally smooth and beautiful.
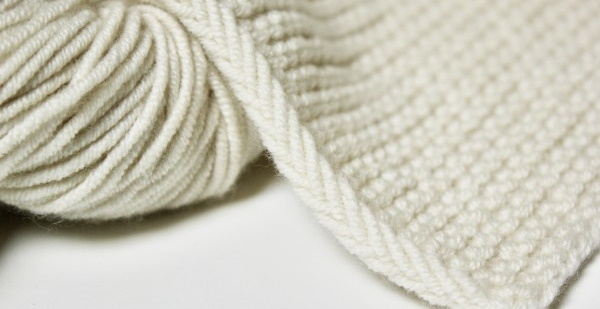
The edge loops knitted in this way make the edge of the work very beautiful, similar to a 3D image format. From the front, side and back, the edge of the fabric looks like a voluminous cord-spikelet of loops.
This easy-to-make option is suitable for making scarves, stoles, blankets or strips on knitted clothes. The knitting edge turns out beautiful. In addition, it is elastic and at the same time quite resilient.
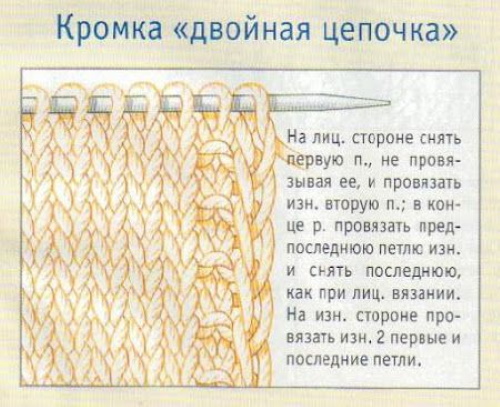
Double edge
The edge option is done slightly differently, but the resulting edge is similar to the previous result.

Instructions:
- Cast on the required number of loops for the work, taking into account 2 edge loops - one on each edge of the row.
- The first row will be the front row. In it, the outer starting loop must be removed to the working needle.
- The next loop after the 1st is knitted with the front loop. To do this, insert the knitting needle into the loop from left to right.
- Next, knit everything according to the selected pattern or diagram until the penultimate loop in the row.
- Knit the penultimate loop through the front wall.
- The last loop at the end of the row is knitted purlwise.
- Unfold the working canvas.
- The next row is a purl row. In it, the outer loop at the beginning of the row should be removed to the working knitting needle.
- Place the thread in front of the work. Remove the next loop without knitting.
- Next, until the penultimate loop, knit according to the pattern.
- Place the thread in front of the working fabric, and remove the penultimate loop without knitting.
- The last loop at the end of the row is knitted as a purl.
- Unfold the working canvas.
- Next, each row is performed in turn as described above.
Products with edges made in this way look very neat and beautiful.
Triple edge
The edge loop is a rather significant element in every type of knitting. Even for those who are just starting to do work on knitting needles, it is important to know the different ways of decorating the edges of products. In order to perform the following version of the edge loop design, you need to additionally dial 3 loops on each side when casting on knitting needles.
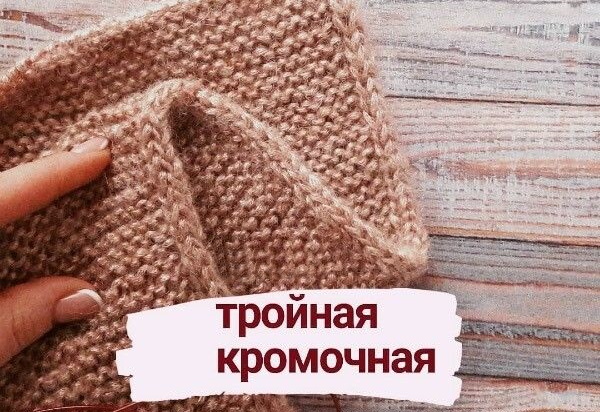
Work begins with casting on the required number of loops (plus 6 for edge decoration - 3 at the beginning and 3 at the end):
- Do not knit the outer loop that starts the row, but slip it onto the right working knitting needle.
- The loop following the 1st should be knitted through the front wall, inserting the knitting needle into it from left to right.
- The last of the 3 loops is removed to the working needle without knitting. The thread at this point should be located in front of the work.
- Next, the entire row is knitted according to the chosen pattern.
- When there are 3 loops left on the left knitting needle at the end of the row, the 3rd from the end of the work needs to be knitted.
- Remove the penultimate one without knitting. The thread should be located at this point before knitting.
- Knit the last loop purlwise.
- Expand the work.
- At the beginning of the next row, remove the outer loop to the right knitting needle without knitting.
- Knit the next stitch as a front stitch.
- Without knitting, remove the 3rd loop onto the right knitting needle. Thread in front of knitting.
- Then continue knitting according to the selected pattern or diagram until the last 3 stitches that complete the row.
- The 3rd loop from the end of the row should be knitted through the front wall.
- The next loop must be removed without knitting onto the working needle. The thread at this point should be located in front of the work.
- The last, final loop must be knitted purlwise.
- Repeat this for each subsequent row in the work.
The edge in fabrics knitted using this method of making edge loops turns out stable, voluminous, beautiful and even. This knitting is well suited for making blankets, shawls, snoods, scarves, as well as for strips on products.
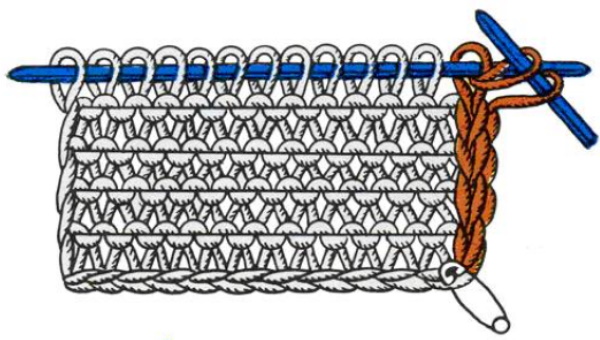
Double chain
The edge loop with knitting needles for beginners and experienced needlewomen begins and ends each row in the work. Not only the final result, but also the appearance of the created product depends on the correctness and clarity of its execution. This method of designing edge loops allows the completed work to hold its shape well and not deform. In addition, the edges of the product look unusual and beautiful.
The work begins with casting on the required number of loops, taking into account 2 edge loops - one at the beginning and one at the end of the row:
- Remove the outer loop at the beginning of the front row without knitting onto the working needle.
- Knit the next loop after the first one as a purl.
- Then continue knitting according to the selected pattern (diagram) until the last 2 loops that complete the row.
- Knit the loop before the outer loop at the end of the row in the same way as the 2nd one - purlwise.
- Without knitting, remove the final row loop onto the working knitting needle.
- Turn the knitting over in front of you.
- The next row is a purl row. In it, the first 2 loops and the 2 loops that complete the row are knitted purlwise, and the entire row is knitted according to the pattern.
- Turn the work over in front of you and continue knitting as indicated above, alternating front and back rows.
"Garland"
This method of knitting edge loops makes the edge of the product dense, and it looks beautiful and unusual.
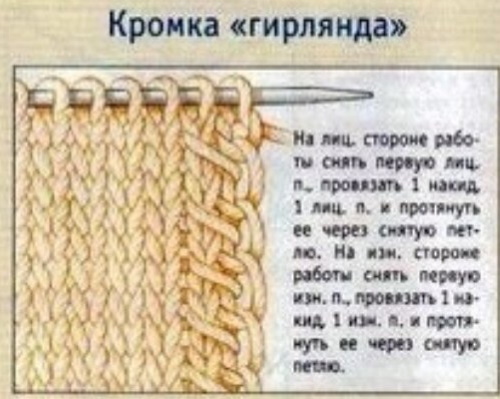
The work begins with casting on the required number of loops, taking into account 2 edge loops - one at the beginning and one at the end of the row:
- Remove the outer loop at the beginning of the row on the front side onto the working needle without knitting.
- Make a yarn over.
- Knit the next stitch after the last starting stitch.
- With the left knitting needle, grab the 1st loop from the front wall and pull the previously made yarn over and the 2nd loop knitted with the front knitting needle through it. There should be 2 loops left on the right knitting needle.
- Next, the row is knitted according to the selected pattern.
- Turn the work piece over in front of you.
- Remove the outer loop at the beginning of the next row on the wrong side.
- Make a yarn over.
- Knit the next stitch purlwise.
- With the left knitting needle, grab the 1st loop from the front wall and pull the previously made yarn over and the 2nd loop knitted purlwise into it with the right knitting needle. There should be 2 loops left on the right knitting needle.
- Next, the row is knitted according to the selected pattern.
- So, alternating rows and performing the above manipulations in each of them, knit until the end of the work.
Pearl pattern
This option for finishing the edge and edge loops is suitable for knitting blankets, throws, scarves, shawls and large straight fabrics.
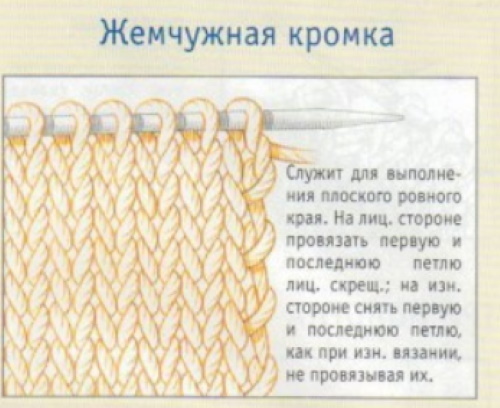
When knitting, rows are done the same on all sides:
- Knit the outer loop at the beginning of the work as a purl.
- The next one is the front one.
- 3rd - purl.
- Then knitting continues according to the pattern (drawing) until the last 3 loops in the row.
- Knit the 3rd loop from the end purlwise.
- The loop before the last loop that completes the row is the front loop.
- The loop that ends the row is purl.
- Turn the knitting over and knit the 2nd and all rows in the work in the same way.
The result is a canvas with beautifully designed edges.
Secrets of a Perfectly Smooth Edge
The main mistake some knitters make is the disorderly execution of edge loops. This is expressed in non-observance of the principles of removing loops. As a result, they twist when knitting the next row. The edges of the fabrics and parts of the products are skewed or twisted. Even after washing and ironing, such a defect is difficult to correct. And after sewing the parts, the uneven edges will still stick out.
In order to avoid such troubles, you should strictly follow the order of edge loops in each row. In this case, in the case of knitting double-sided fabrics, loops in the front rows should be removed to the working knitting needle behind the front wall, and in the back rows - behind the back wall. In addition, the impeccable appearance of the edge of the knitted product depends on the chosen method of knitting edge loops.
To sum it up, we can say the following. In order for a knitted product or its parts to have a neat appearance, you should follow simple rules that will be useful for both beginners and experienced needlewomen.
Next:
- Having chosen the method of knitting edge loops, the order of all stages of removing and knitting them follows until the end of the entire work.
- It is better to knit the loops that begin and end a row of work a little tighter.
- The working thread must have the same tension during each stage of knitting.
- Each edge of the knitted fabric from any side should look and be knitted the same.
Any work done on knitting needles by an experienced or novice needlewoman will look presentable if the methods for knitting edge and other loops for this are chosen correctly.
Video on how to make an edge loop with knitting needles
How to make an edge loop with knitting needles:
Good day, thank you for the lessons. I have an edge loop in the middle of the pattern +, tell me how to knit it. Thank you