Drawing various insects, including beetles, is very interesting for children. Such drawings not only help to master the necessary artistic skills, but are also very educational. The world of insects is very diverse, so you can simultaneously study different types of beetles and have a good time drawing.
Beetles have a body shape that is common to most insects. Therefore, having learned to draw them, a child will be able to easily depict an ant, a butterfly, and many others.
A Brief Introduction to Beetles
There are many varieties of these insects, but they are all built in roughly the same way. If you look at the image below, it becomes obvious that the beetles differ in body shape, but they all have common features. For example, all insects have antennae. These are a kind of sensor, with the help of which beetles navigate the terrain perfectly.
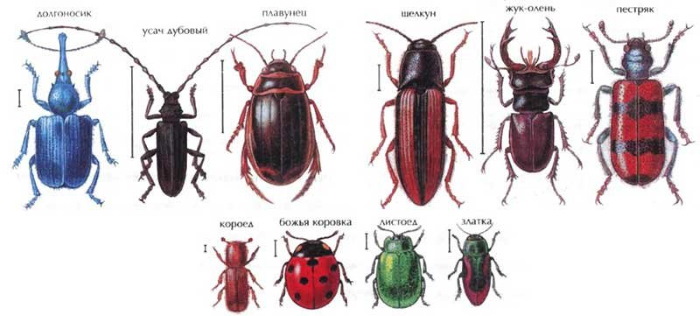
Beetles can be more elongated or round in body shape, like a ladybug, for example. There are insects whose main asset is their antennae. A striking example is the oak barbel. Children may also enjoy drawing a weevil, a stag beetle, and other beetles.
Ideas can be found both on the Internet and in various encyclopedias.
Drawing tools
Before you begin, it is worth preparing everything you need for drawing with a pencil.
| Tools | Features of selection |
| Simple pencil | When learning, it is better to give preference to pencils of medium hardness. They do not scratch the paper when pressed, and the resulting lines are quite easy to erase. |
| Eraser | The eraser should be new, soft enough so that you don't have to go over it many times to erase a line. It's better to use a soft eraser rather than a coarse, high-grain eraser, which is more suitable for a ballpoint pen. |
| Paper | Regular A4 sheets will do, but it's better if they're thick, like sheets from a drawing pad. It's easier to use an eraser on thicker paper, as it thins the paper a little. If the sheet is too thin, it's easy to rub a hole in it. |
| Wet wipes | When drawing with a pencil, your hands often get dirty and eventually the pencil smears all over the sheet. Therefore, it is useful to wipe your hands from time to time. |
Additionally, you can prepare a ruler. It will allow you to draw guidelines. Also, many beginning artists use one useful trick. They draw lines in the drawing. If you apply markings of the same scale to a clean sheet of paper, it will be much easier to copy individual elements of the image.
But this only applies to those cases when the beetle needs to be redrawn from a finished image. If you plan to draw without the so-called source, then it is enough to remember the main stages of drawing.
How to quickly draw a simple beetle
Beetle - drawing for children is not the most difficult, so for the basis it is enough to use simple geometric figures. There are several techniques for drawing these insects.
For example, it is worth considering the following step-by-step instructions:
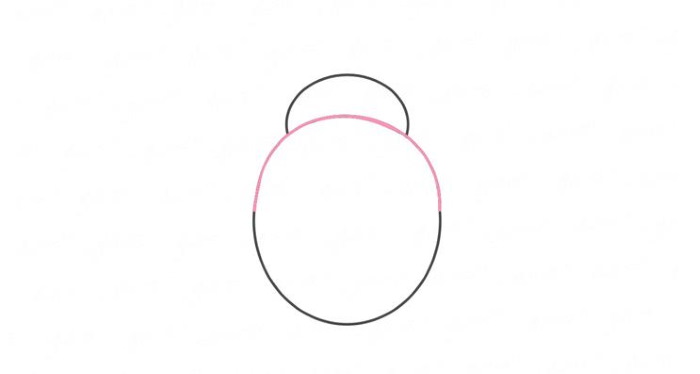
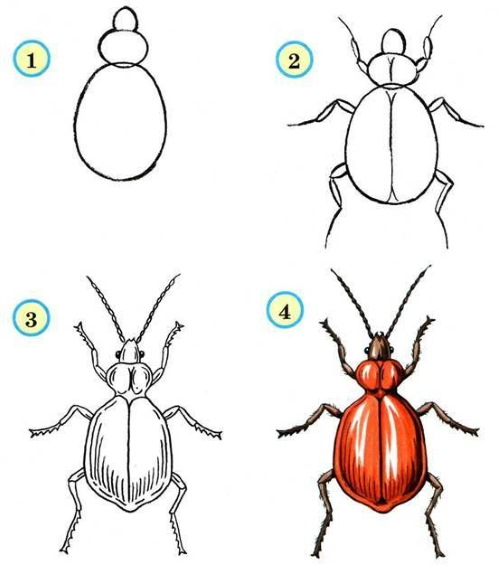
- First, it is worth drawing the prothorax. This is the name of the part of the insect's body that connects the body and head. To do this, it is enough to draw a slightly flattened circle.
- The next step is to draw an oval that overlaps the first circle. The extra line needs to be deleted.
- Now you can slightly correct the contour of the upper part of the body. Insects do not have perfectly even shapes. Therefore, you need to give it some naturalness.
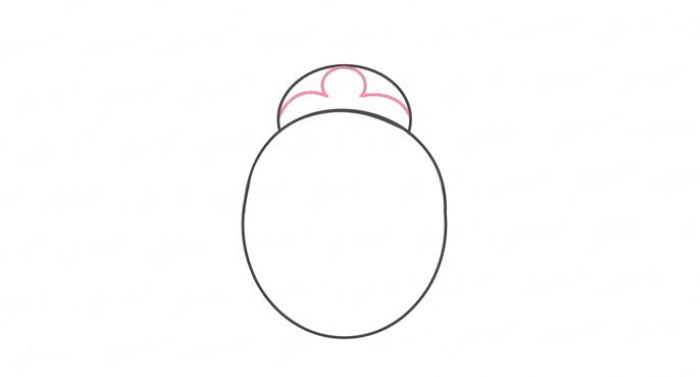
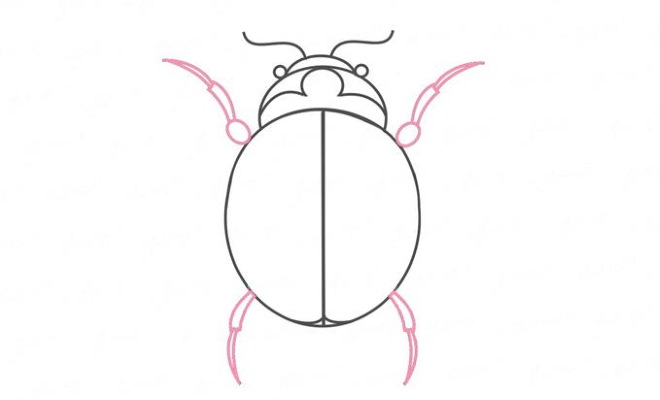
- On the part connecting the body and the head, you need to depict a simple pattern, which will later be painted over with a different color.
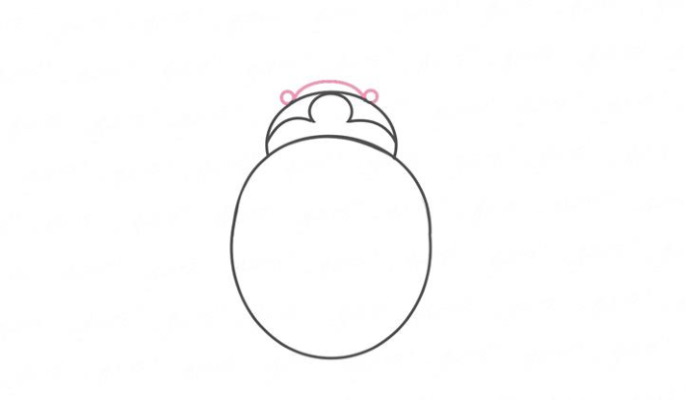
- The beetle's head is small. It is enough to draw a slightly curved line from the upper part of the prothorax and add 2 small circles. These will be the insect's eyes.
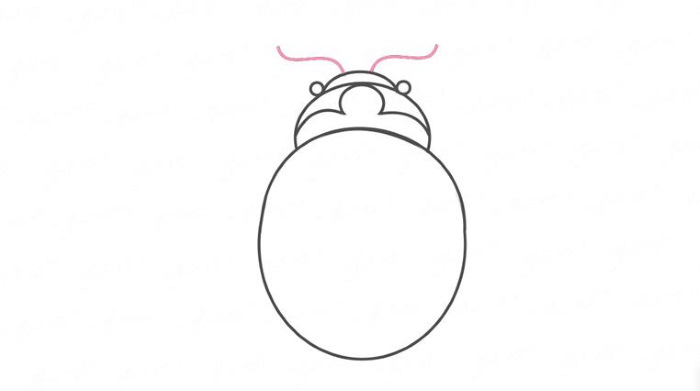
- Whiskers are a standard part of almost all insects. They can be depicted using curved, diverging lines, as shown in the picture below.
- Drawing paws may seem like a more painstaking and complicated process to a child. But it is enough to practice a few times and then you can easily depict these parts for any insect. In this case, the paws consist of several parts. First, draw small ovals on the sides of the body, and then complement them with thinner and more elongated "legs".
- The central and lower paws can be depicted without ovals.
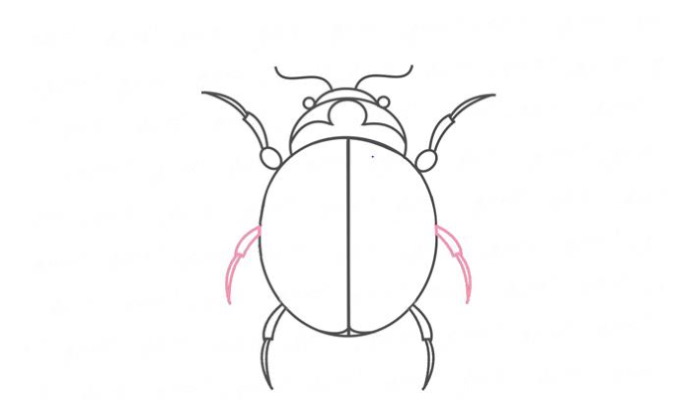
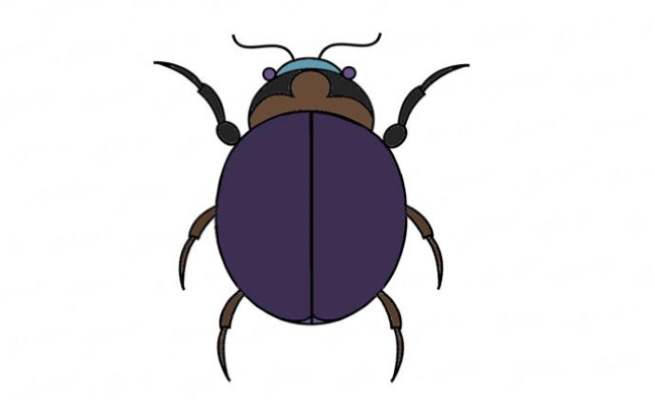
The beetle (the drawing for children looks quite impressive) is ready. It remains to color it. For this, you can use colored pencils, markers, paints and any other materials.
To get a clearer image, first outline the image using a black marker. Then erase the extra pencil lines and start coloring. For the beetle, you can choose calmer, darker colors or, on the contrary, color it with bright colors.
Step by step drawing of a simple striped beetle
The drawing of a beetle below is a collective image. If in the first case there was more realism, then in this lesson you can show your imagination. You can ask the child to decide for himself what features the insect will have. This will be a good lesson for developing imagination.
The drawing process is as follows:
- First you need to draw an oval that is slightly tilted to the right.
- After this, you need to draw several lines inside the oval, thereby defining the area for the wings.
- Now you need to draw the lower part of the head. To do this, it is enough to draw a semicircular line in the upper part of the body.
- The next step is to complete the head, draw small bulging eyes and antennae.
It remains to depict 6 legs and color the beetle. The stripes look spectacular. First, it is worth outlining them, and then coloring them in a darker color.
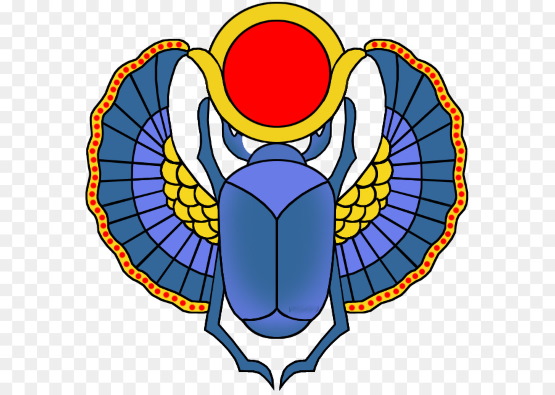
How to draw a scarab
The scarab is a beetle that often appears in all sorts of legends. Its image is believed to bring good luck, so in ancient times, jewelry in the form of a scarab was often made.
It was especially revered in Egypt, where people believed that this beetle was a sacred symbol of the sun. According to legend, its movement across the sky is the personification of the god Khepri, who was responsible for creation.
This is a more complex drawing that is suitable for children aged 8 years and older:
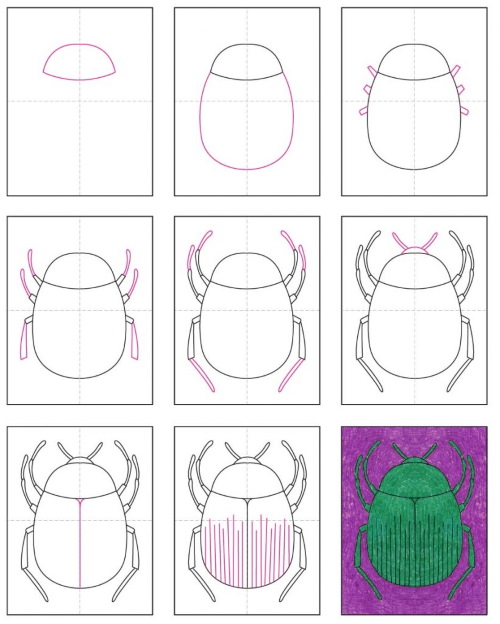
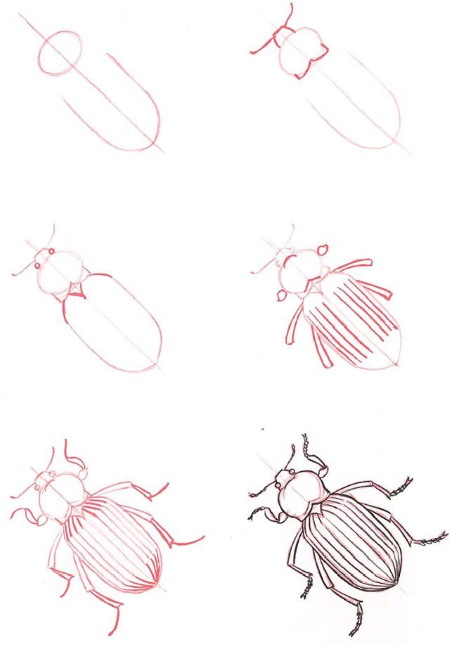
- First draw an oval.
- Next, draw a cross in the center of the beetle's body. Draw a few lines in its center to make small triangles. Do the same on the sides.
- Now delete the inner parts of the resulting triangles. Then the body of the beetle will acquire a more interesting shape. Also at this stage, draw the head of the insect. It can be depicted as shown in the picture below (point 3). On the sides of the body, you need to draw small semicircles. These will be the places where the body and legs connect.
- Next, the legs themselves are drawn. They are thicker and more detailed in the scarab, especially the upper ones.
- At the next stage, draw an inner contour along the parts of the beetle’s body and paint only the inner part.
The scarab beetle, a drawing of which will be very interesting for children, does not necessarily have to be painted in blue. If you find pictures on the Internet, you can get many additional ideas for coloring. For example, Egyptian symbols are often painted on its back.
You can make the beetle rainbow or other. It is also worth telling the child about the legends about scarabs and suggesting that he himself come up with how such a mystical insect can be painted.
Draw a stag beetle step by step
So far, the standard drawing technique using an oval as a base for the beetle's body has been considered. But there are other techniques.
For example, it is more convenient to draw a stag beetle using other simple geometric shapes – squares:
- First, draw a rectangle, the upper part of which is slightly wider. Above it, draw a square. After that, draw the guides so that the intersection falls on the future head of the beetle.
- Now you can detail the image and make it more realistic. The stag beetle is called so for a reason. The thing is that on its head, in addition to the whiskers, there are expressive horns. These need to be depicted. They should be longer than the head.
- The central guide of the head needs to be slightly rounded, thus dividing it into 2 parts: the head itself and the prothorax. You also need to detail the body, dividing it into two vertical parts, along which the beetle hides its wings.
- Now it's time to draw the legs. This variety of beetles has not 6, but a little more. The back legs are straighter and shorter, the beetle almost never uses them.
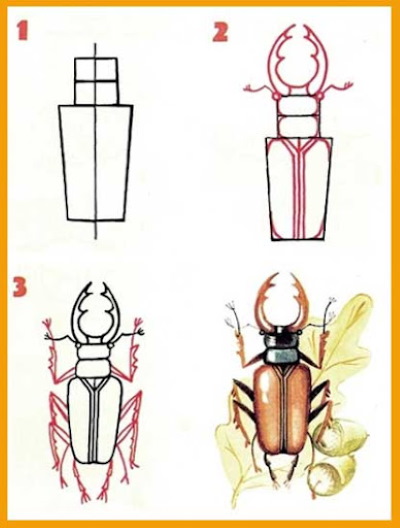
It remains to paint the beetle. Traditionally, its head is black, and the body and horns are brown.
A more complex version of drawing a stag beetle
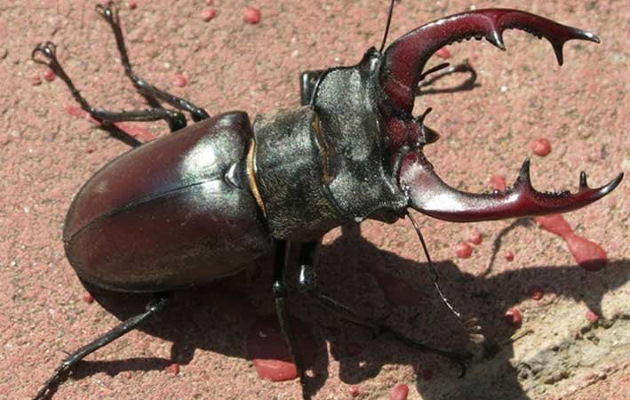
A beetle (a drawing for children can be more interesting if you first show them real beetles outside or in the garden) of this type can also be drawn using another technique. This is a more complex version that will suit older children. Additionally, you can tell the schoolchild that the horns of this beetle are actually called mandibles.
In fact, these are not horns, but the insect's massive upper jaws. Beetles of this species feed on tree sap, so such impressive jaws help them a lot in this. Due to the expressive appearance of beetles, they can often be seen on artists' canvases. You can draw this large insect from a photo.
To get a realistic drawing of a beetle, you need to follow a few steps:
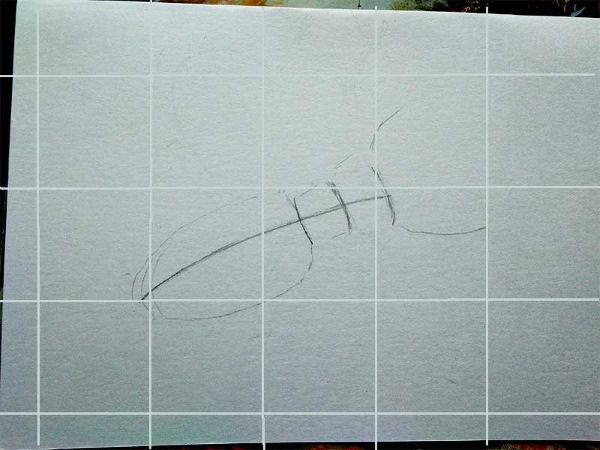
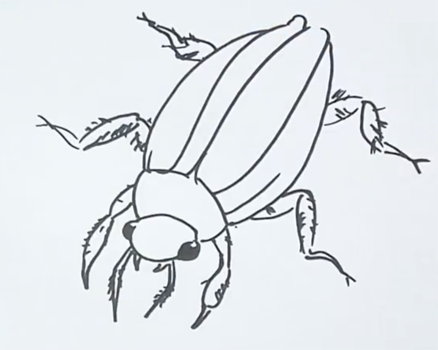
- First, draw light lines to just outline the area of the body and head of the beetle. If it is more convenient to navigate by cells, then you can first draw lines on the paper. This is an important stage, as it is the basis.
The head should be slightly elongated, more rectangular than oval. Draw a line down the center of the body that will divide it in half, and depict the intersection on the head.
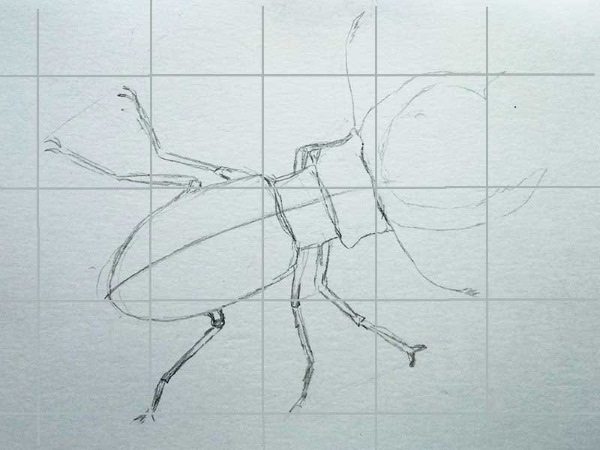
- The next step is to detail the image. To do this, slightly enlarge the top of the head so that the beetle has a "neck". Also outline the area of the horns and draw them schematically.
Additionally, at this stage, draw the main legs. They should end with a kind of small slingshot, since real beetles have legs like that. The whiskers should be depicted at the edges of the head. To do this, it is enough to draw 2 lines and draw a few additional ones at their edges.
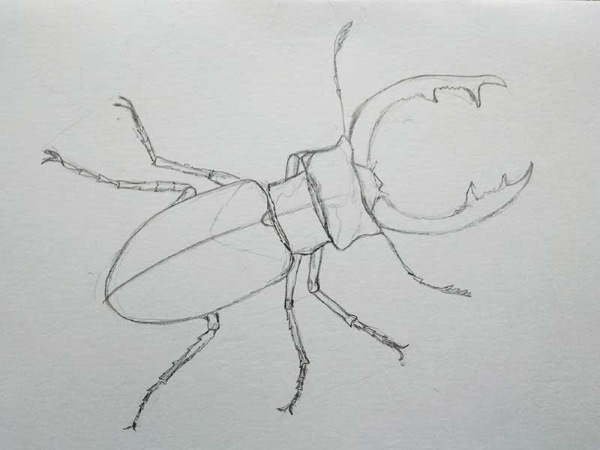
- When the image is as close to a photograph as possible, make the image clearer. To do this, it is enough to outline the main contours more boldly and remove unnecessary pencil lines. Also at this stage, add teeth to the horns and create a bridge in their center.
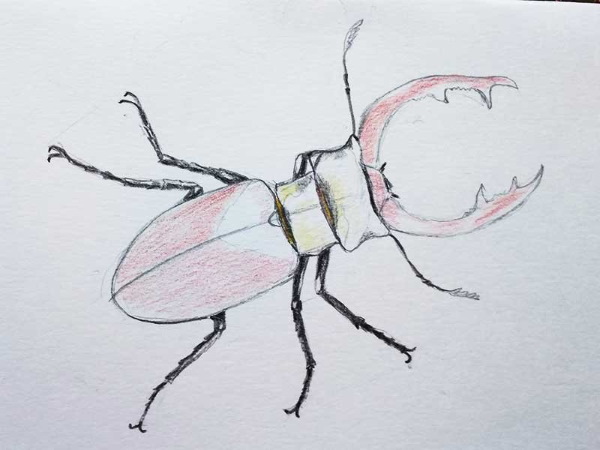
- You can move on to coloring. To make the shell look more realistic, you need to use red and brown pencils, mixing them. If it is difficult to color with shading, you can shade the colors a little with your finger.
If the shading goes far beyond the edges of the drawing, use an eraser. You also need to add a little black and orange pencil to darken the necessary parts of the drawing, as shown in the image below.
- Now you need to continue painting the beetle. You need to be patient, as this is not a quick process. You should immediately determine the places of glare and not paint them over. If it doesn’t work out, then it’s okay. Then you can lighten the necessary areas with an eraser or use white gouache when all the main painting work is completed.
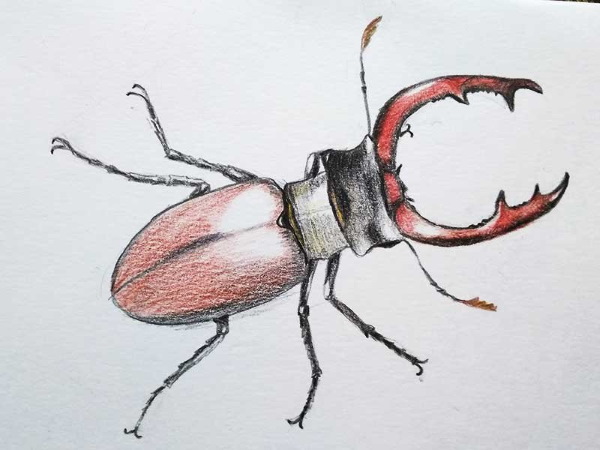
When shading, follow the shape of the beetle's body. The horns can be colored with a red pencil, also leaving highlights. A black pencil should be used at their ends. Then they will look more voluminous.
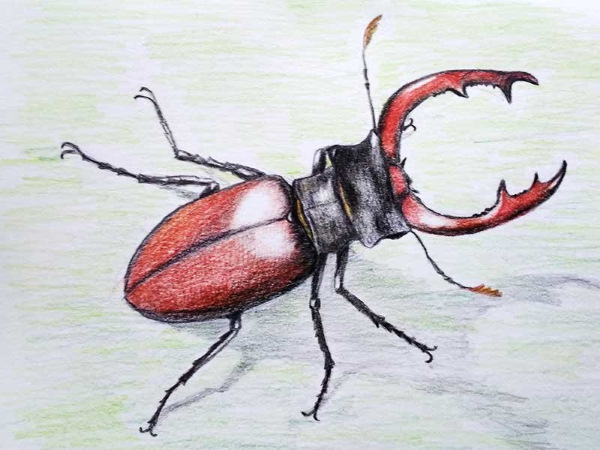
- To get a full composition, you need to add some surface on which the beetle moves. It remains to depict the insect's shadow on it. Closer to the beetle's abdomen, the shadow should become darker and lighter as it moves away from it.
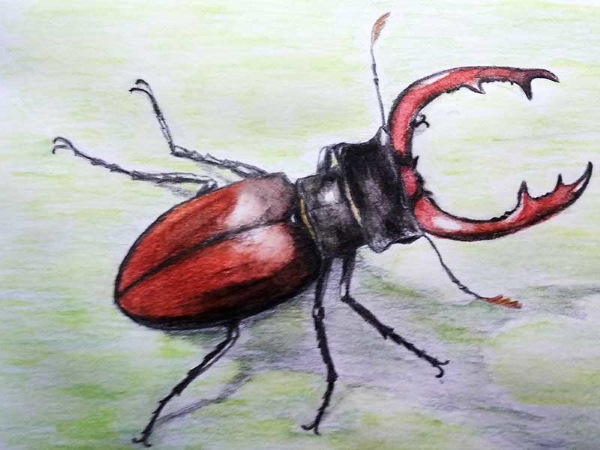
- If you use watercolor pencils, you can then use a wet brush to create more expressive color transitions.
This technique produces a very realistic image. The shadows and highlights create the impression that the beetle is slightly raised and three-dimensional. Such an image can be safely framed and admired constantly.
Drawing of a diving beetle
The beetle (a drawing for children will be interesting and educational) can also be of a different shape. For example, children often see unusual floating beetles in reservoirs or even barrels with rainwater, which rise to the surface and quickly sink to the bottom when they sense danger. They are found in Russia, Europe, Asia, almost in all countries of the world.
This is one of the insect species that not only feel good in water, but also live in it, swimming perfectly. However, such beetles need oxygen. When they rise to the surface of the water, they take air into their elytra.
To depict a diving beetle, you need:
- First, draw the head and a small jaw - mandibles, as well as the eyes. To do this, you can draw ovals and gradually give them the shape shown in the image. The eyes of this type of beetle are quite large. You also need to draw the part that connects the body and head of the insect.
- The next step is to draw the body. The beetle has a rather long, elongated, almond-shaped body. Additionally, it should be divided into several parts, thereby depicting the shell and elytra. The beetle's front legs are quite large, they have hairs that allow this unusual insect to swim or stay on the surface of the water.
- It remains to draw 2 pairs of hind legs. They are also "muscular" and hairy. Since this beetle mainly swims, its limbs are much better developed than those of other insects of this type.
The drawing is ready. It remains to color it. Diving beetles are usually black and slightly blue or green. It is difficult to depict such a shimmer using pencils. Therefore, you can use paints.
How to draw a ladybug
This is a type of insect that is distinguished by its bright coloring and very touching appearance. It is believed that they can bring happiness to the house or even fulfill wishes. Ladybugs feed on aphids. Therefore, they are very popular with gardeners who cannot get rid of pests.
To draw this colorful insect, you need to follow these steps:
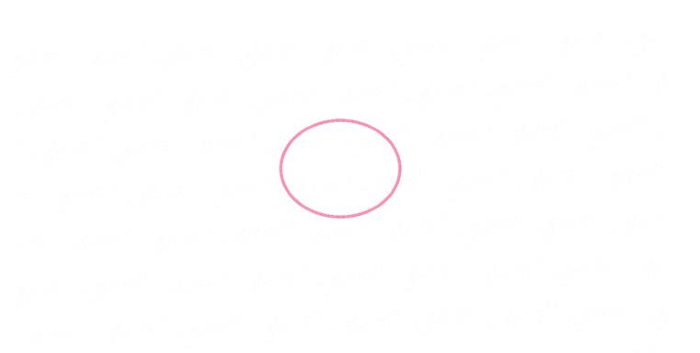
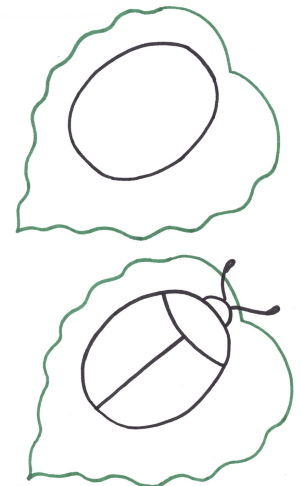
- First, you need to draw a circle. This will be the body of the insect.
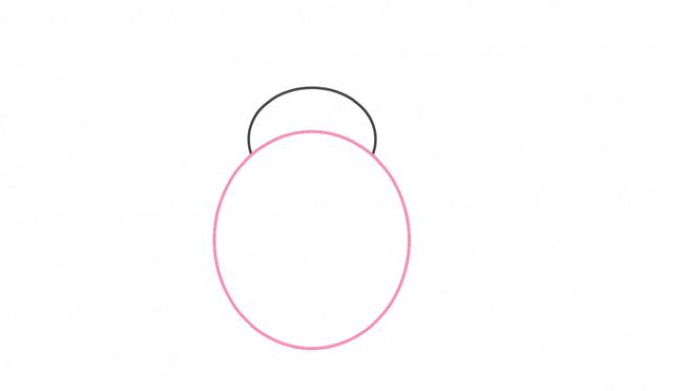
- The next step is to finish drawing the beetle's head. To do this, simply draw a small semicircle above the circle. There is no need to draw all the details at once, it is enough to mark the main zones.
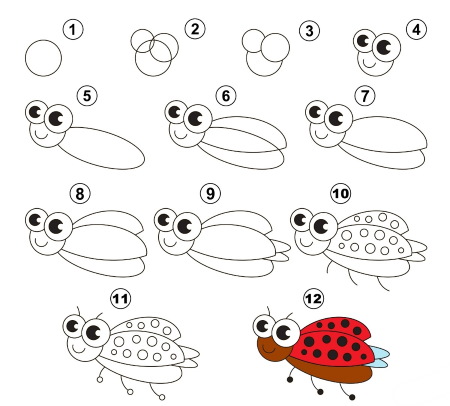
- Now the body needs to be divided into 2 parts using a straight vertical line. This will allow you to create places for the insect's wings.
- Now it's time to draw large circles on the wings. This is the main distinguishing feature of all ladybugs. The largest circle should be the one closest to the head. A small circle is drawn in the center, and a little larger at the bottom. There may be more dots. Their number depends on how realistic the insect the child wants to depict.
- The eyes of this species of insects are large. They can be depicted using ovals.
- Also, like all beetles, the ladybug has antennae. In this case, they are quite compact. To do this, you need to draw 2 slightly curved lines from the head and draw small circles at their ends.
- The most interesting part is left – to paint the beetle. Usually ladybugs have a beautiful and bright red color. You can even say that these insects look poisonous. But in fact, they are not dangerous to humans.
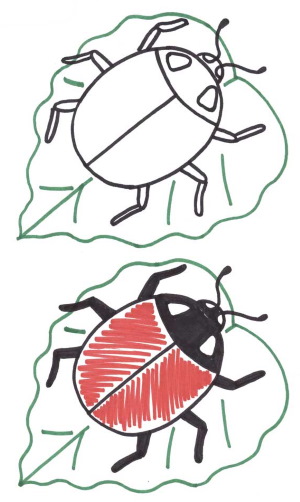
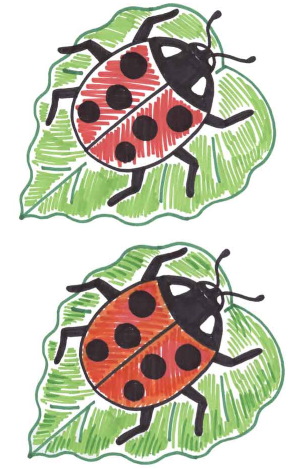
Such bright coloring is needed by harmless insects in order to scare away potential enemies, for example, birds, which do not risk feeding on such aggressively colored beetles.
The rest of the body can be painted black. The result is a very bright and interesting image. The ladybug is very easy to draw, so younger children can handle this task. You can also ask your child to come up with a new color for this round beetle.
To draw a beetle, it is worth preparing photographs and pictures of real insects for children. This will help them understand their differences and, conversely, similarities. The article presents different drawing techniques, more complex or simple options.
Younger children should start with simple images. To make the task more challenging, ask your child to draw a scarab or a stag beetle.
Video about drawing
Beetle drawing for kids: