Sketching began even before the advent of writing. This is confirmed by cave paintings by primitive people. In art, the technology has an independent direction. The technique of quick drawing is used by novice artists, professionals and as a hobby.
What is sketching
The essence of a sketch is to convey the necessary idea, without taking into account unimportant, insignificant details. It can contain both pictures and words.
Sketching is a fast drawing. Just as an idea or inspiration comes unexpectedly, a sketch is born spontaneously. A fast drawing is not permanent. It is finished, corrected, it is not a finished work.
Why learn the technique of quick drawing
If you want to start drawing, then sketching is the most suitable technique. In this direction, there are no clear rules and boundaries, it is impossible to make a mistake. The main thing is to convey the idea.
It is a way to hone your drawing skills and craftsmanship, and in addition:
- Belgian scientists have proven that drawing is a good workout for the brain and memory. Therefore, sketching is a great activity for free time.
- For people in creative professions, a quick drawing is simply necessary as a convenient tool to capture an idea. Show it to the interlocutor and do it in an interesting way.
- For travelers. If you sketch interesting objects, they will be remembered more vividly than with the help of a photograph.
- Sketching helps you relax, relieve stress and have fun.
- Sketching will help you start seeing interesting details in the world around you.
Tools and materials
A notebook, pencil, and eraser are the minimum set of things you need for sketching that are at hand:
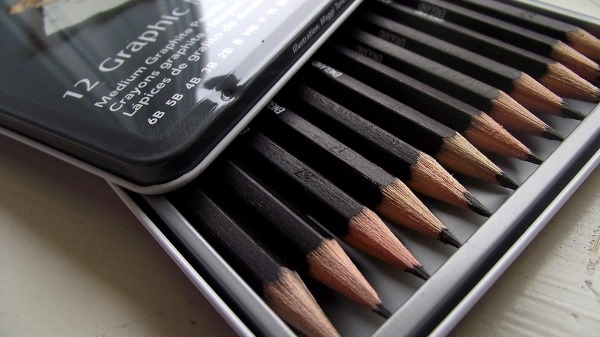
- Graphite pencil comes in 3 colors: black, white, gray. Pencils are classified by hardness. In Russia, there are 3 scales of hardness: M - soft, T - hard, TM - hard-soft. The European scale is wider: B - soft, H - hard, F - medium tone, HB - hard-soft. In both Russia and Europe, next to the marking letter there is a number that indicates the degree of hardness.
- Eraser It can be hard, soft, hard with sand mixed in (for removing the top layer of paper), or a kneaded eraser for removing the tone.
- Gel pens are popular for creating sketches. This is due to the fact that such a pen uses a gel or other water-based liquid. Due to this, the writing process becomes easier. The disadvantages of the pens are high ink consumption and a high probability of leakage.
- White gel pen used for paper of different colors or on other colors in the drawing. Also suitable as a corrector.
- Liner — a drawing pen that is filled with ink. There are 3 types: disposable, with a replaceable or refillable cartridge. Disposable options are more often chosen for sketch drawing. The liner is used to make strokes of varying thickness. The advantages include the fact that such a pen uses waterproof ink.
A special type of liners is the brush pen. This is a pen with a brush-shaped tip. There are two main types - thin, similar to a felt-tip pen, and wide, like a brush. The ink in brush pens is waterproof or water-based.
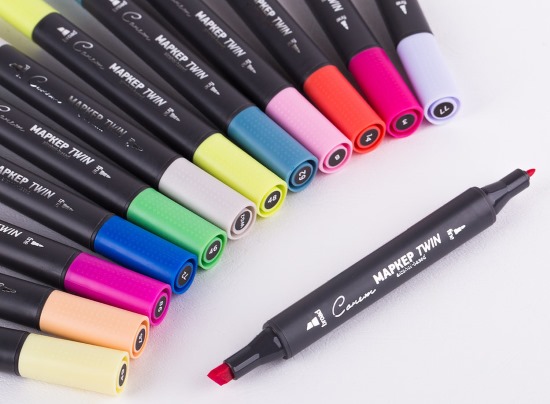
- There are 3 types of markers - artistic, decorative and industrial. Sketchers use artistic. Marker paints are waterproof and washable, permanent, non-mixable and mixable, transparent and impermeable. Marker tips are also varied - square, round, beveled. The marker palette includes more than 350 colors.
- Sketching using watercolors means water-based paints. There are solid, paste-like and liquid paints. Professional watercolors are used for the quick drawing technique. The standard palette contains 24 colors.
- Charcoal for drawing It comes in 3 varieties: sticks, pencils and pressed charcoal.
When drawing large objects, soft charcoal is used, and hard types are used for details. It shows texture well. Charcoal is flexible and therefore does not stick well to paper. Drawings made with charcoal cannot be stored unless they are treated with a special fixative. A budding artist should try a charcoal pencil.
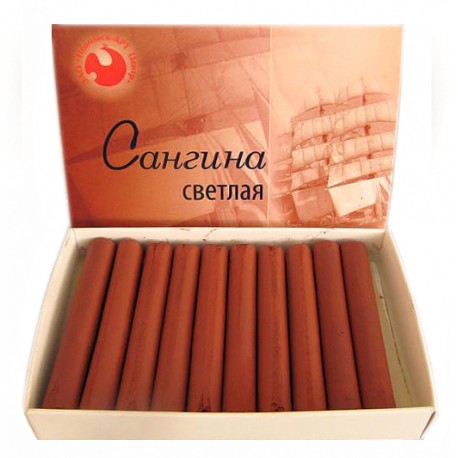
- Sanguine — is a soft material for drawing in the form of crayons. The color range of sanguine is from red to brown. This material, like charcoal, does not adhere well to the surface and needs to be fixed. Sanguine, due to its color, is often used to depict the human body or portraits.
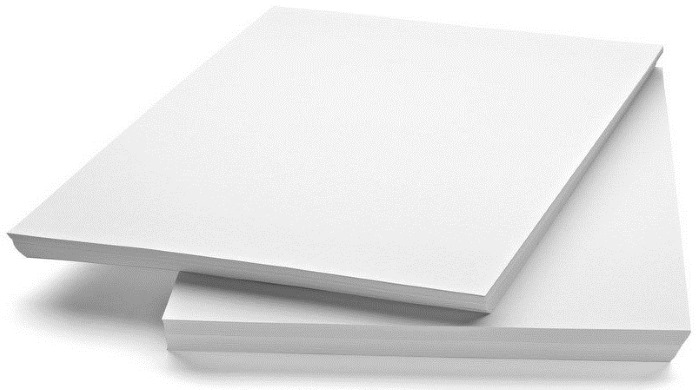
- Paper. For the quick drawing technique, it is important to choose the right paper. There are universal options, but when using different materials, the result will be different.
The properties that are used when choosing paper for sketching are density, texture, and color. Paper with a density of 120–130 g/m2 is suitable for sketching, and 200 g/m2 for working with watercolors. The main rule is that it should not be thin.
According to the texture, paper is divided into smooth, grainy, embossed, craft (rough, strong, brown). Smooth paper will be convenient when drawing large color spots, matte for small details. Smooth paper may not be suitable for watercolors and ink, since the material will not stay on it.
Paper whiteness is measured in percentages. For white paper it is from 70% to 98%. The clarity of the picture depends on this indicator, the higher the percentage, the clearer the picture. There is no single rule for choosing paper, you need to search and try.
Sketching genres
Sketching (the technique of quick drawing has an independent direction) can be done in the form of a quick sketch and as a sketch-drawing. A drawing is a work that the artist created for several hours, carefully working on.
Sketch genres:
| Genre | Description |
| Interior sketch | Sketch of interior, design, decor |
| Fashion sketching | Sketches based on the theme of fashion and everything related to it |
| Sketch of the city | Images of buildings, structures and cityscapes |
| Landscape sketching | Drawings of squares, parks, garden plots and gardens |
| Botanical sketching | Drawings of everything related to flora - flower arrangements, plants, mushrooms |
| Product sketching | Drawings on the theme of food and eating |
| Travel sketching | Sketches made during the trip |
| Sketch portrait | Image of a human face |
| Industrial sketching | Sketches of technology and household items |
Sketching techniques
Sketching is classified according to the materials used.
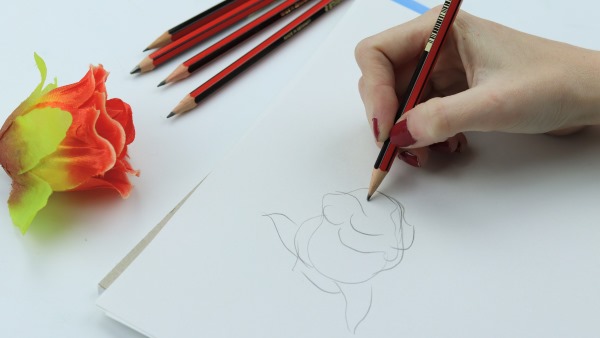
Pencil sketch
Sketching (a quick drawing technique often done with a pencil) is the most easily accessible method. All you need are simple tools - a notebook and a graphite pencil.
To begin constructing the drawing, use free lines, apply minimal pressure on the pencil, and place it at a minimal angle to the paper. The same technique is used for the main tinting of the drawing. The figures are easily outlined.
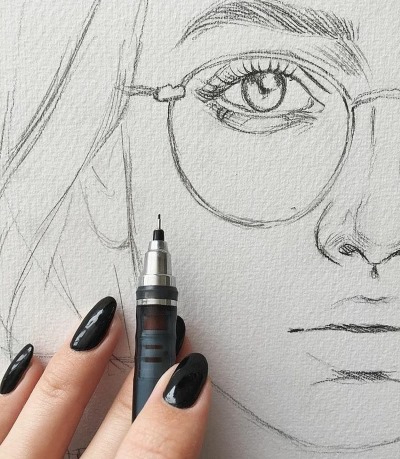
To mark the contour lines, the pencil is held as if writing, at a large angle to the paper. These lines must be carefully controlled from start to finish.
Sketch with marker
When drawing sketches with markers, several techniques are used:
- Drawing with contours.
- Drawing without contours.
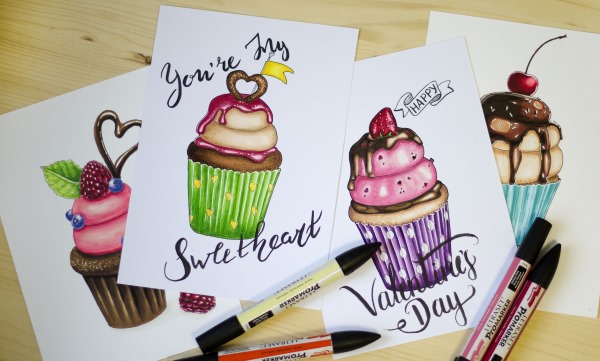
- Marker as a supplement to other material.
Three stage technique
This technique is suitable for beginners in sketching.
Includes 3 stages of drawing creation:
- Pencil sketch. At the first stage, a pencil sketch is created, on which the contours and main elements of the future drawing are indicated.
- Fill color. At the second stage, the main color spots are filled in. Watercolor is most often used for this, but markers can also be used.
- Processing with marker. At the final stage, the contours of the drawing are worked out, as well as small elements and details that give the sketch a finished look.
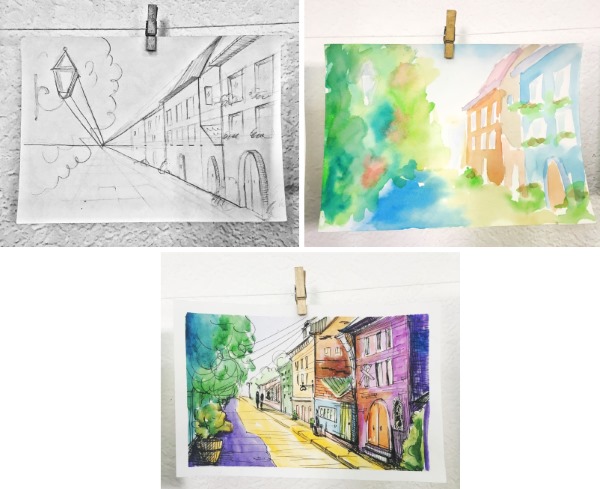
There is another version of the three-stage technique, in which the sequence of the steps is changed. After a pencil sketch, a marker is applied, and then the color is filled in.
How to learn sketching
Sketching is a technique of quick drawing, and if you remove the stereotype that you need talent to draw, then everyone can learn. Drawing is a skill that comes with experience, you only need training and practice.
How to learn to draw using sketching technique:
- You can start with coloring, gradually moving on to complex copying, and then to creating your own drawings. Drawing will be easier if you do it step by step.
- An artist needs two skills: control of his hand and vision.
- To train hand control, mechanical exercises are used. They can be done with a graphite pencil.
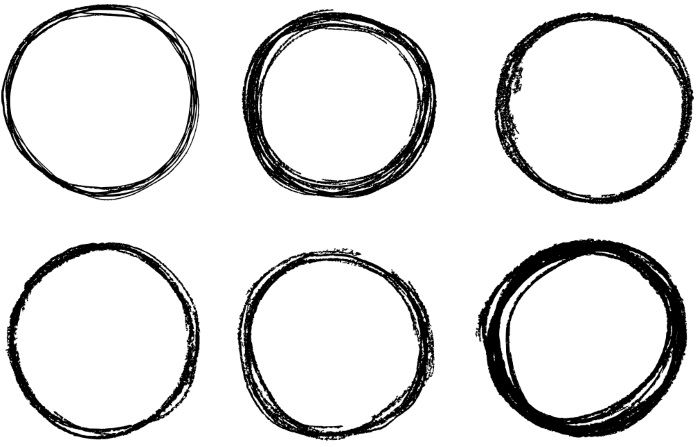
- Drawing circles of different sizes. The main thing is that the circles do not intersect. In this way, fill the entire sheet, trying to draw as many circles as possible. This exercise helps to relax, get the hang of it, and trains your eyesight.
- The second exercise is related to lines. Fill the sheet with hatching. It is important to learn to apply hatching in different directions without turning the sheet of paper.
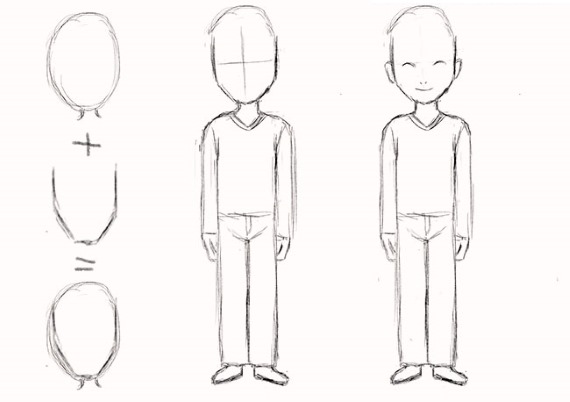
- A beginner in drawing needs to learn to depict a basic set of simple shapes - a line, a triangle, a rectangle, an oval.
- To draw a complex object, it is visually broken down into several simple shapes. For example, a house is a complex object, but mentally it can be broken down into several simple ones - a rectangle, a triangle, a square.
- When drawing complex pictures, the law of perspective is used: the further away the object, the smaller it is in relation to the closer ones. Using this law makes sketches three-dimensional and volumetric.
- In complex sketches, light and shadow are drawn. Simple hatching conveys a weak shadow, while cross hatching creates more shaded areas.
- Complex sketches include portraits. Their creation requires attention and diligence. Portraits are started when there is experience in drawing.
Tips for Beginners
Experienced artists give advice to beginners on some technical issues.
How not to smudge the drawing
The first step to a quality drawing is to handle it carefully.
Touching the area with your hand can smudge the area you have drawn, and greasy marks can remain on a clean sheet of paper. To avoid this, place a sheet of paper under your hand. For large jobs, use special devices - a bridge or mahlstick.
To remove crumbs from the drawing, use a brush designed for this purpose. It is important to keep the brush clean so that it does not stain the drawing.
You can prevent your sketch from smudging with a special fixative. Fix the drawing in parts, as the sheet fills up, or fix it all at the end of the work. But the fixative should be used in moderation.
How to draw curls
Drawing curls begins with constructing the base - the skull. The hairstyle is divided into several main parts and their configuration is determined. The hair that is located separately from the skull is drawn as a separate detail. The curls located in the frontal lobe are worked out especially carefully.
There are several ways to draw curls:
- Wavy lines are depicted - the contours of future curls.
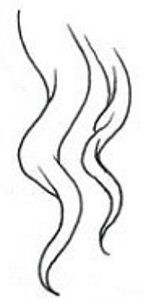
Mirror lines are added nearby, without touching, and connected at the ends.
- Rectangles are drawn that are located along a diagonal line.
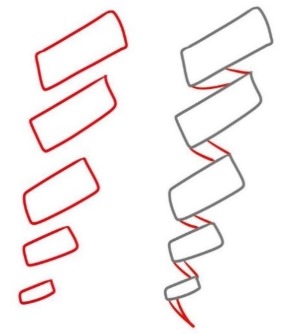
Each subsequent rectangle is smaller than the previous one. Then opposite corners are connected with straight lines.
- A truncated cone is drawn.
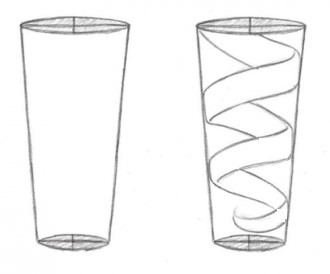
Smooth oblique lines connect the opposite sides of the cone, like a ribbon. When painting, it is worth remembering that the curl on the front surface should be lighter than in the depths.
Texture
Textures are used to depict the properties of surfaces. There is no single method for creating textures in sketching, there are many, both simple and complex.
Here are some examples of creating simple textures:
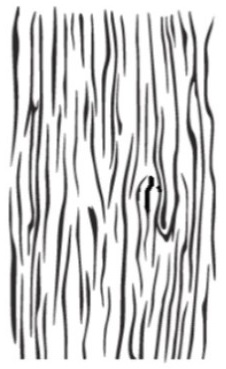
- The wood texture is created using vertical lines of varying thickness that move and create a curved stripe.
- The texture of concrete is made in several shades, each next one darker than the previous one. It is applied with characteristic strokes, moving in a herringbone pattern, in a chaotic manner, changing the direction of each stroke.
- An unusual way to create a stone texture. From one side of a dish sponge, you need to tear out small pieces of different sizes. So that the entire side becomes uneven. Then dilute any convenient paint with water - watercolor, ink, gouache. And with the resulting sponge, carefully apply the pattern.
Shading technique
In sketching, there are 2 drawing techniques - hatching and shading. In academic drawing, it is believed that before starting the shading technique, it is necessary to master the hatching skill.
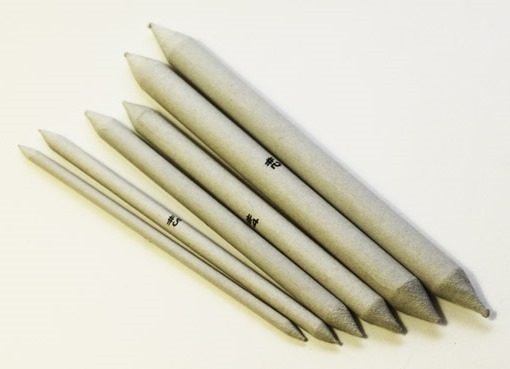
The shading technique is suitable for drawings with soft materials., for example, sanguine or charcoal. Shading is the rubbing of a stroke on paper using a special stick, twisted from paper, a kneaded eraser. This technique gives volume to a figure and realism to the drawing as a whole.
Shading should be done along the stroke, moving from dark to light. This is very painstaking and time-consuming work. High-quality shading is monochromatic, without breaks, where the tone smoothly transitions from dark to light.
Hatching
Classic hatching is a basic drawing technique that is essential for any sketcher. It is used to show the direction of light and shadow, tonal relationships, to give texture and the necessary shape to an object. Different types of hatching are used in sketching.
Hatching rules:
- The strokes should be applied separately, one next to the other, and after each one, the pencil should be lifted from the paper.
- Do not make zigzags and commas.
- When shading, you should move from dark to light.
- Apply hatching to the shape of the figure.
- When cross-hatching, make the angle of inclination minimal.
- For a more even shading, apply more layers.
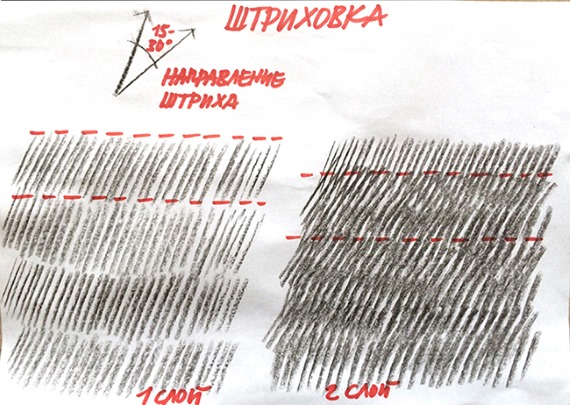
- With each subsequent layer, do not bring the shading to the end of the previous row, so that a seam does not form.
- You shouldn't use both hatching and shading in one sketch. This will make the drawing look sloppy.
There are many types of hatching. Some of them are: short, parallel, cross hatching, contour hatching.
Pencil control
Sketching is a quick drawing technique that helps build visual maps. For a beginner sketcher to learn how to draw, it is not necessary to force yourself to hold the pencil correctly. But it is worth trying new methods, they may be more comfortable for your hand. And if you learn, that is, develop the habit of holding the pencil correctly, the lines will be smoother and more accurate.
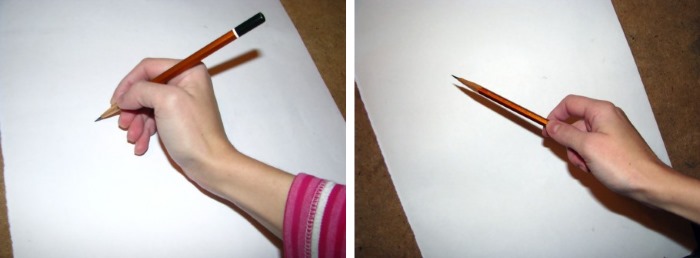
Ways to hold a pencil:
- Hold the pencil with a "pinch", as for writing. With this method, only the fingers work, and short strokes are obtained. This method is suitable for working out small details when special precision is required.
- "For the middle." The pencil is taken by the middle and clamped with outstretched fingers, positioned almost parallel to the paper. In this case, the brush works, and the hand is relaxed. With this method, long strokes are applied, the tone of the sketch is set.
- "At hand." The pencil is clamped inside the palm by the thumb. The hand should be relaxed. This method is used to draw long lines when working on the entire drawing.
The ideal option is when the sketcher forgets about the pencil, it becomes an extension of the hand.
Application of different lines
Line is the basis of a sketch. They depict contours and tone (shading). Lines can be: straight, curved, simple, complex, long, short, thick, thin, contour, auxiliary.
Rules for using lines in sketching:
- In sketching, lines must be alive. To do this, they are drawn quickly, sharply and not outlined several times. Using different lines in drawing allows you to achieve different effects.
- To place emphasis on an object, it is drawn with wider lines.
- To emphasize the weight of an object, a heavier one is depicted with thick lines, and a lighter one with thin lines.
- To emphasize light and shadow, objects in shadow are indicated by thicker lines, and illuminated ones by thinner ones.
- If the object is depicted further away, it will be drawn with thin lines. And the one that is closer - with thick ones.
How to Draw Silhouettes
A silhouette is the shape of an object with a filled interior space, like a shadow. When depicting a silhouette, it is impossible to convey the features and details of the internal space of a figure. But the details that will create the silhouette are important. They determine whether the silhouette will be recognizable or will become illegible.
The silhouette is depicted in a dark tone on a light background, less often the other way around. An object drawn using the silhouette composition technique is a generalized image. The main feature of the silhouette technique is the contrast of colors. This technique depicts: portraits, architecture, human figures, landscapes.
To draw a silhouette, you need to correctly determine the proportions of the object and find the distinctive features of the outline. For example, to draw a human silhouette, the head is taken as a unit of measurement. The body is equal to 7 such units plus the head. And portraits are usually depicted in profile.
How to transfer a drawing using tracing paper
There are several ways to copy a drawing: using carbon paper, using a lightbox, using tracing paper. Tracing paper is thin, transparent paper.
Stages of image translation using tracing paper:
- The required drawing should be fixed to the surface. For this purpose, special tape is used, as regular tape can damage the paper.
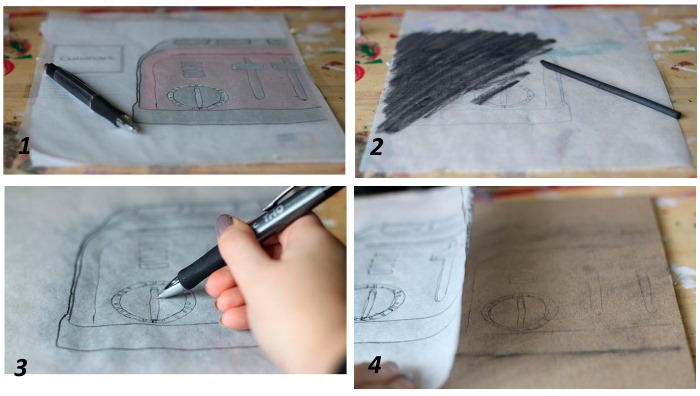
- Place the tracing paper on the paper and secure it in the same way.
- Trace the image with a pencil. At this stage, you can get rid of unnecessary details or move them to another place. It is also worth carefully working out all the small details.
- Remove the tracing paper and turn it over. Use a soft graphite pencil to shade all the drawn lines. This step can be avoided by tracing the drawing with a soft, unsharpened pencil. In this case, there will be less dirt on the final image.
- Fix the paper onto which the image is transferred. Carefully place the tracing paper on it with the shaded side.
- Use a sharp pencil to trace the entire image again. The graphite from the shading will transfer the drawing to the paper.
Symmetry in drawing
Symmetry is the correspondence of one half of an object to another, relative to a point or a line.
If there is complete conformity, it is a symmetrical object; if there is a slight deviation, it is asymmetrical. When the deviation is significant, it is asymmetry. Absolute symmetry occurs in objects created by man, but in nature it is very rare.
To draw a symmetrical object, you need to mark the central axis. Then outline half of the object with light lines and copy them relative to the central axis. Accuracy is important when drawing symmetrical objects.
Pictures for beginners step by step
Apple:
- Draw a circle.
- The area where the stalk will be is marked with an arc. The stick is depicted with 2 lines pointing upwards.
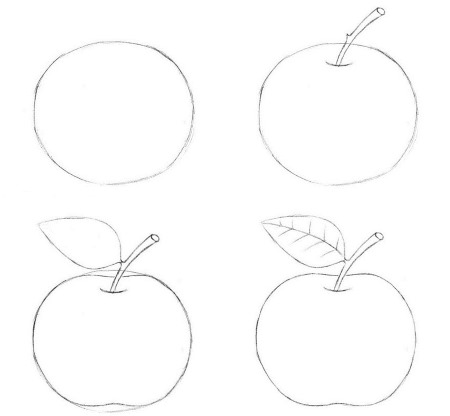
- Slightly trim the top and bottom sections to give it the desired shape.
- Draw a symmetrical leaf and add veins to it.
Sofa:
- Draw a rectangle.
- Raise the back and shape the armrests.
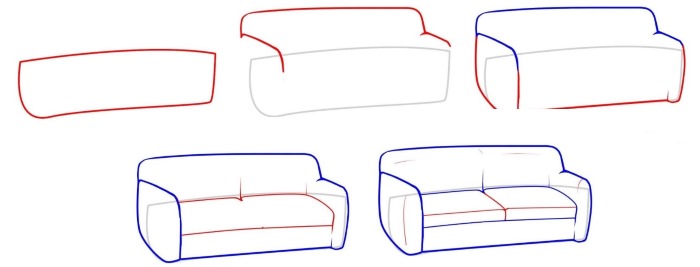
- Then draw the visible side part and the bottom of the sofa.
- Two rectangles for seat cushions.
- Use light lines to highlight the details. Finally, you can add some color.
Scene:
- Draw a straight, horizontal line that represents the ceiling.
- From it, on both sides, symmetrically depict the wings.
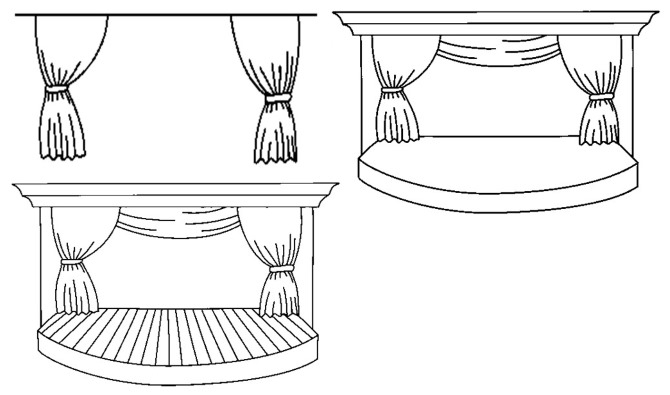
- Next, using straight lines (you can use a ruler), draw the walls and the stage in the form of a semicircle.
- Draw the ceiling with straight lines and use light strokes to indicate the horizontal curtain.
- Mark out the wooden floor.
To try yourself in the technique of quick drawing, you need the simplest materials and minimal skills in fine art. This is one of the main advantages of sketching. It has simple techniques and methods in its arsenal. Therefore, it is widely used and continues to gain popularity.
Author: Kovalchuk Olga
Article formatting:Natalie Podolskaya
Video about sketching
Sketching - a quick drawing technique for beginners:
Apparently the use of the word "sketching" gives the instruction a divine connotation....
Maybe.
Everything would be fine, but (!) only balloons can be "helium"! From the word "helium". And pens are gel. Because their filler is GEL!
Thank you. I didn't know.
Yeah. At first I thought it was a coincidence, but then the person continued to write "helium"
Thank you for such extensive information!
Thank you, useful information!
Thank you! Everything is simple, clear and useful!
Thank you, great article! Especially for beginners. Everything is clear and understandable, without unnecessary fluff. The illustrations are very appropriate.
Yes! Lots of useful information for beginner sketchers like me.
Very useful information. Thank you.
Need how to learn sketching from scratch on your own
Where to find out how to learn sketching from scratch on your own
I'm interested in how to learn sketching from scratch on my own. Instructions alone are clearly not enough ((
you have an error here:
"When shading, you should move from dark to light."
The correct answer would be:
When shading, you should move from light to dark.
Thanks for the article! Very useful! I'm learning to draw from it.