Knitting a vest from a rectangle An experienced craftsman can knit it in a few free evenings. In the 18th century, this part of the wardrobe was considered male, and its ancestor was the camisole.
The word "vest" is French. Historians suggest that the first vests were called this way because they were worn by fairground performers, popularly known as gilets.
Necessary tools and materials
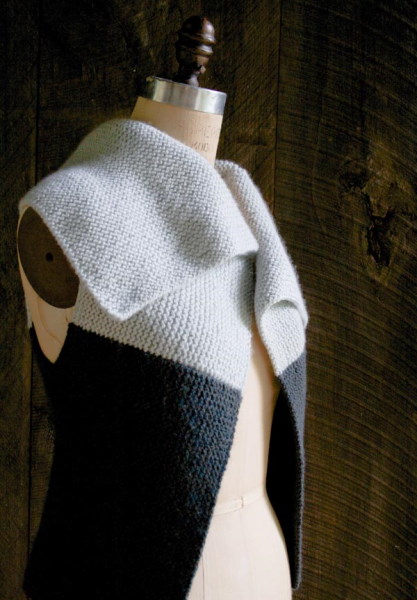
A knitted rectangle vest is a convenient item for cold winter evenings. It is warm, comfortable and can be worn under almost anything.
The waistcoat or vest, as this part of the wardrobe is also called by the people, appeared in Rus' in the middle of the 18th century, and was worn by both ordinary people and the rich. They differed in the material from which they were made. Peasants, for example, wore knitted waistcoats, and wealthy nobles preferred things made of satin or velvet.
Modern world brands offer fashionistas of both sexes a wide range of vests for every taste, color, style and budget. A novice needlewoman can also add this fashionable item to her wardrobe by choosing a vest pattern from a rectangle.
To knit a vest, you need to choose a style, yarn and knitting needles of the appropriate diameter. For example, experts recommend choosing woolen types of thread for winter products, and breathable and thin ones for light summer or demi-season ones. The first thing a knitter needs for needlework is yarn. You need to approach its choice carefully.
Before purchasing a skein you need to:
- Crush in your hands.
- Consider the structure of the fibers.
- Conduct a static build-up test.
- Understand the elasticity of the material.
- Smell the skein.
- Read the information on the label.
Experts recommend taking a skein of yarn you like in your palm and lightly kneading it. This will help determine how the body reacts to the material and how tactilely pleasant it is. A vest is usually worn over something lighter, so the yarn should not prick or be too stiff.
To understand the quality of the thread, you need to examine the structure of its fibers. This can be done by slightly untwisting the free end with your fingers. If the constituent parts of the thread are uniform, without thinning or breaks, then the material is of high quality, and the item made from it will last a long time.
To create winter items, experts recommend using yarn with the least accumulation of static electricity. To test this quality, you need to hold the free end of the thread between your thumb and forefinger and rub it a little. If the fibers remain uniform and their fluff does not fly apart, then the yarn does not accumulate static electricity.
It is recommended to knit vests from elastic material that stretches sufficiently and takes the desired shape of the figure. Also, the item should hold its shape well and not stretch after washing. To understand how the thread will behave when deformed, you need to stretch its free end in different directions with 2 fingers and see how quickly the yarn returns to its original state. The faster this happens, the better.
You can determine whether the yarn contains toxic elements by holding it to your nose and smelling it. High-quality material has almost no smell, and if there are foreign, barely perceptible unpleasant odors, it is better to put the skein aside. Toxic, low-quality material can cause allergies and other health problems in the future.
Before buying, you should always read the information on the label or packaging. Here the manufacturer indicates the composition of the yarn, its weight and the length of the thread. In addition, the annotation contains a hint about what diameter of knitting needles are suitable for working with this thread.
Schemes with description of works
A knitted rectangle vest will become a fashionable detail of any woman's or man's wardrobe. In addition, you can feel stylish in it in any situation and under any circumstances.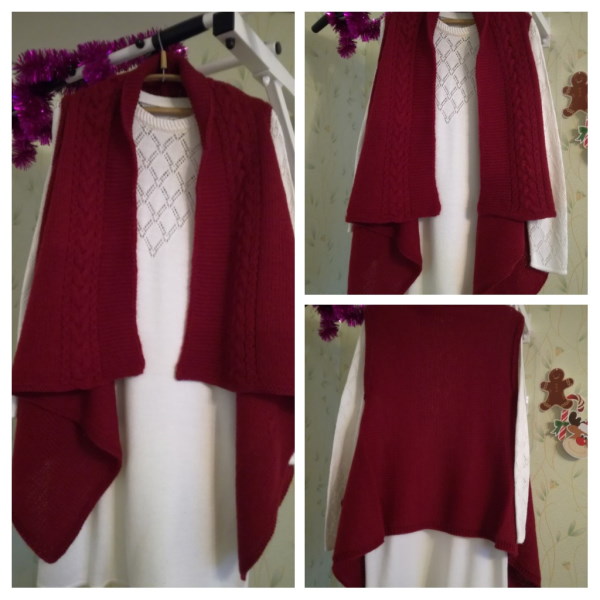
The versatility of the vest is that it can be chosen for any type of figure and appearance. There are slimming models for ladies with curvy shapes, and there are voluminous ones for thin girls.
Vests can be knitted in one piece or fastened, with an elongated back or an uneven hem. Some like them to fit the figure, while others prefer a loose cut.
Before knitting a rectangular vest, you need to take measurements to figure out the number of loops and the size of the item.
| What to measure | How to do it |
| chest circumference | the meter runs along the protruding part of the chest and along the shoulder blades |
| waist circumference | the meter completely encircles the waist above the hips |
| hip circumference | the meter runs along the most convex parts of the hips and buttocks |
| length of product | measure from the waist to the middle of the upper leg |
Those who do not want a long vest, but prefer short styles, do not need to measure the last indicator, since it will be enough to knit the product to the waist or slightly above the hip.
It is recommended to create vests from light yarn of thin or medium twist. This wardrobe item made of thick fibers looks rough, voluminous and heavy. If the product is designed for winter, it will be worn under a jacket or down jacket, so volume will definitely not be appropriate here.
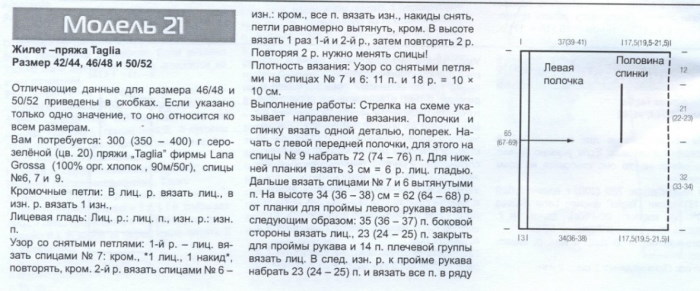
In the process of knitting vests, face and back loops are used, familiar to every knitter. In the diagrams, the designation of the pattern and abbreviations in recommendations and descriptions are also made with symbols recognized at the world level.
Edge loops are designated as "Ո" or edge. The front loop is always abbreviated as "lit." or "лп", and designated as "Х" or "I", and the back loop is "изн." or "ип", and coded as "-".
Yarn over for adding loops looks like "+" or "nak." To reduce the number of loops, knit several as one for the back or front wall.
Most often in knitting patterns for creating vests, we find garter stitch, where all the loops are knitted as front loops, and purl stitch, where all the rows are formed as back loops. Warm items are knitted in a single color or several colors are introduced.
The vest can be secured with a belt, a button or ties. Some models look spectacular with a regular pin.
Popular models of vests are:
- "For Beginners";
- "Scarves";
- "Universal".
Even a novice craftswoman can handle each of the above schemes. The vest was called a rectangle because it consists of 1 or more knitted fabrics of a designated shape, the length and width of which determine the style of the product.
For Beginners
The model of a women's vest for beginners will allow you to easily and quickly knit a fashionable wardrobe item, having minimal knowledge of knitting. For work you will need a skein of wool, separate knitting needles, a needle and scissors.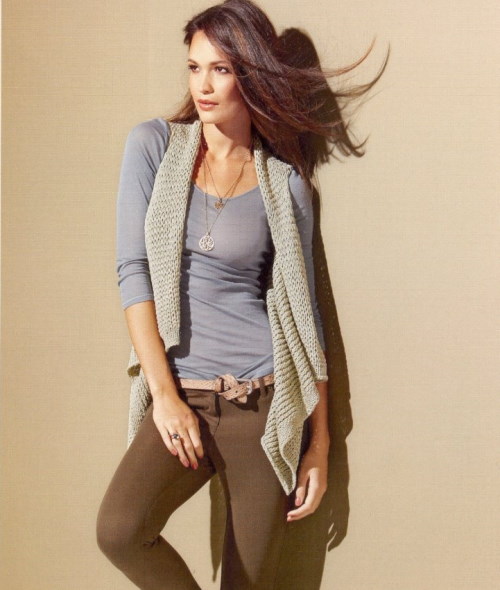
To knit a vest yourself, you need:
- Cast on the required number of stitches on the knitting needles, for example, 110.
- Knit the row after casting on with purl stitches, not forgetting the first and last edge stitches.
- Form row 1 with knit stitches only.
- Work row 2 in the same way, using only knit stitches.
- Knit 60 cm of fabric using the front surface stitch.
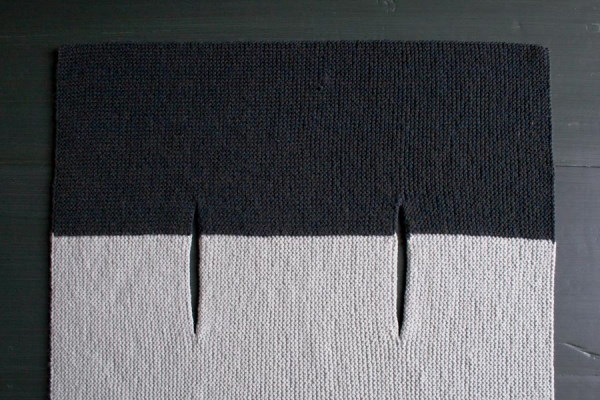
- Proceed to simple formation of the neck. To do this, in the row on the knitting needle, close the central 30 loops, and make the rest with satin stitch.
- Cast on the missing number of stitches in the center of the next row.
- Continue knitting the fabric with the front surface for a length of 60 cm.
- Close the loops at the end of the work.
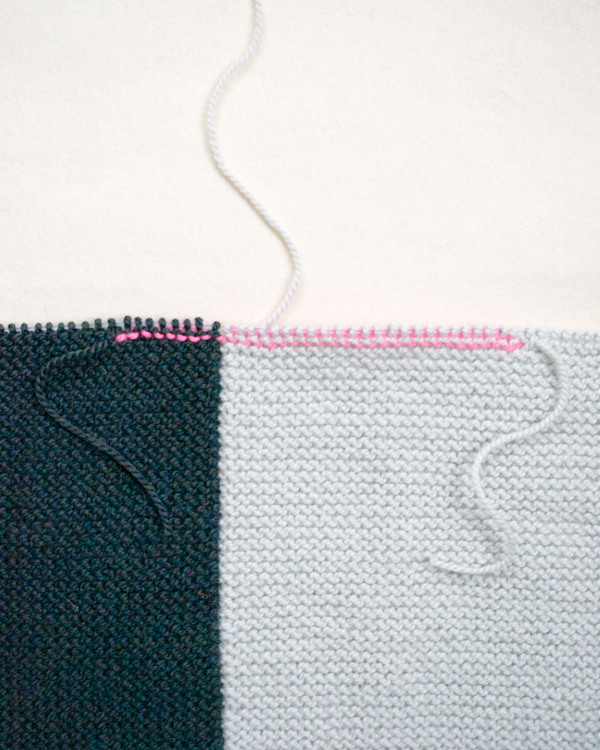
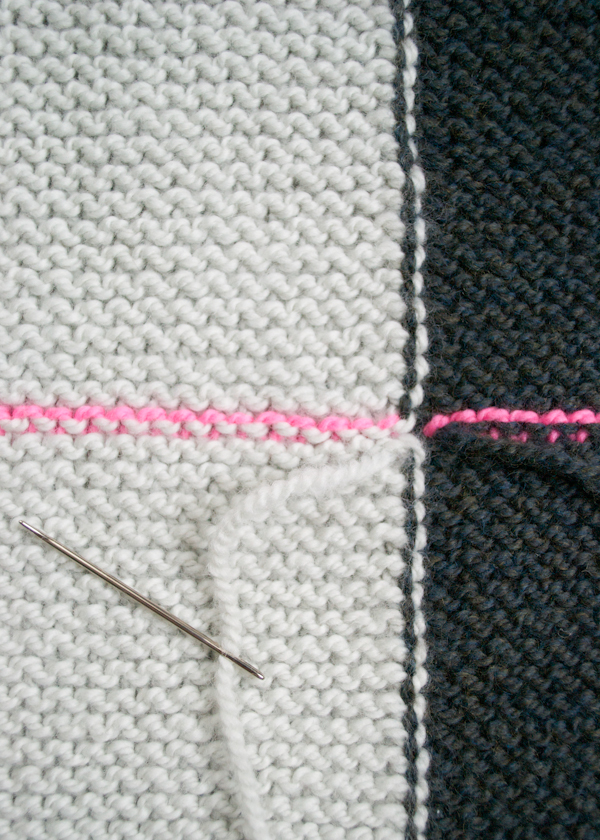
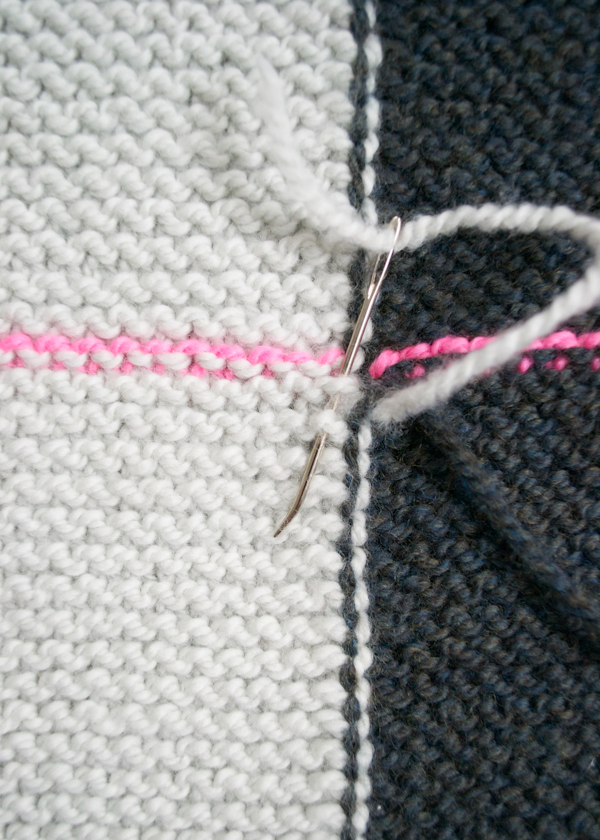
- Sew the side parts of the product at the desired height or simply grab them on the sides with thread.
The finished product is tried on, washed, dried and worn if necessary.
Scarves
A vest can be knitted from a rectangle using the "2 scarf" technique. In this case, the product is formed from several equal long pieces. For knitting, the needlewoman will need yarn, separate knitting needles and scissors.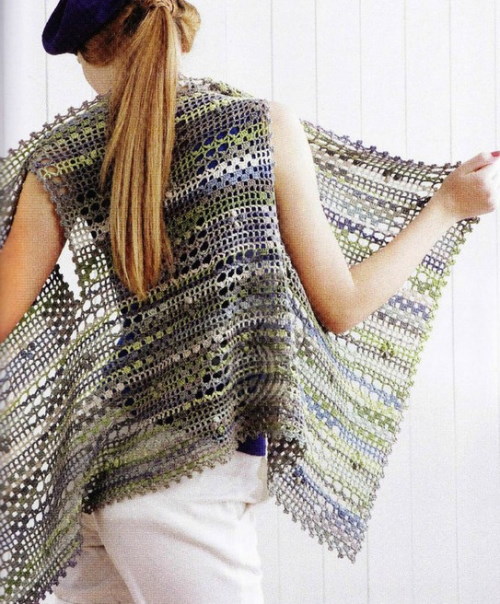
To create a fashionable wardrobe item, you need:
- Cast on 60 stitches.
- Knit the first row after casting on as purl stitches.
- Work row 1 with knit stitches only.
- Form row 2 following the pattern on the fabric.
- Knit all odd rows as front rows.
- Create all even rows following the pattern.
- Close the loops when the product reaches 1 m in length.
- Proceed to create the second fabric, identical to the first. Repeat the knitting technology completely.
- Close the loops when the length of the “scarf” is 1 m.
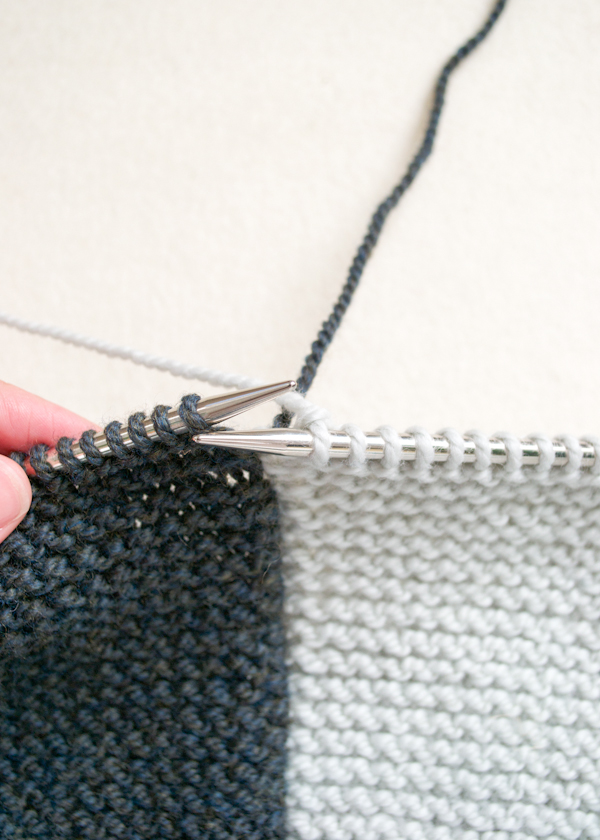
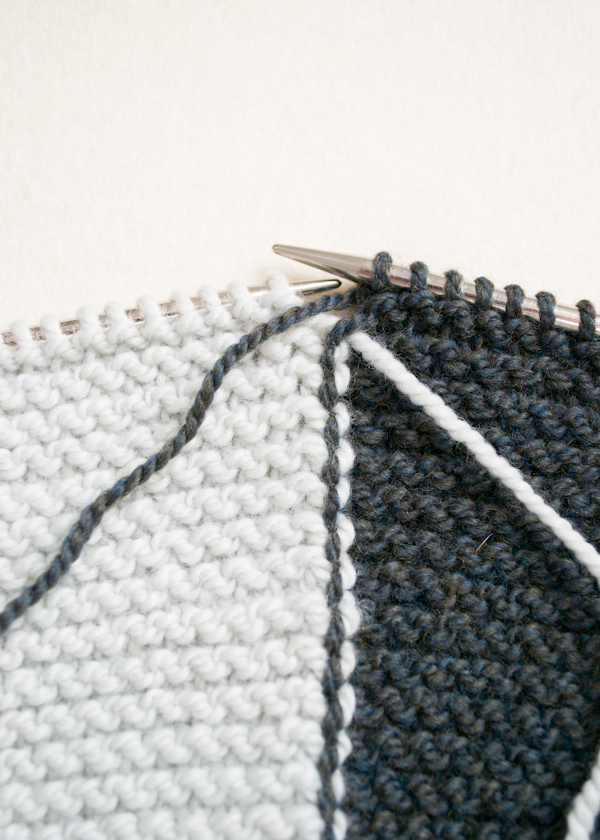
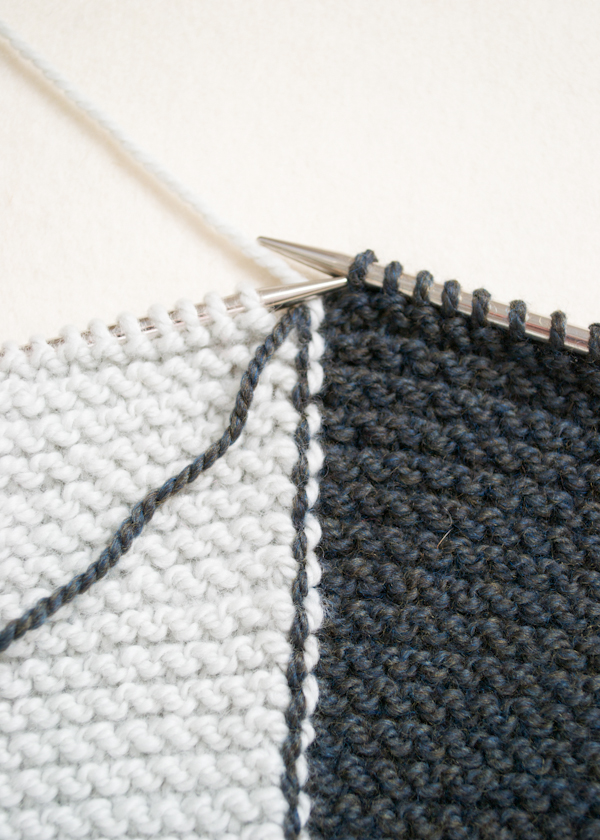
- Start assembling the vest. To do this, fold the scarves exactly in half and sew the ends of each.
- Place the vest pieces one inside the other so that their folds fall on the model’s shoulders, and secure the pieces at the points of contact in the front and back.
The vest is ready to try on and wear. Those who want the product to be warmer can attach the scarves to the sides with a thread. If you want to make the product more form-fitting and elastic, you can use the "Rubber" pattern with a step of 2 or 3 when creating the fabric.
Universal
The universal vest is knitted in one piece, and work begins with the right side. The item turns out warm and is suitable for wearing in the cold season.
To work you will need yarn, separate and circular knitting needles, and scissors.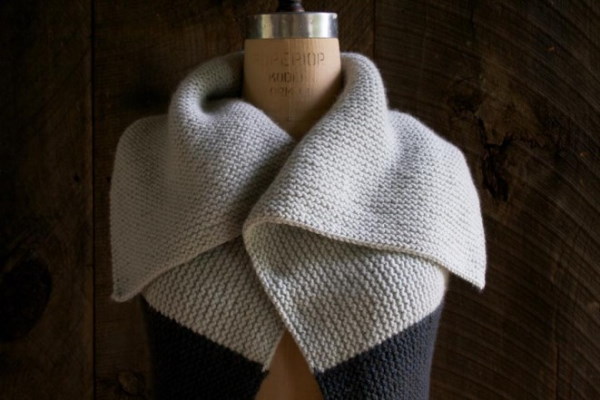
To knit a women's vest, you need:
- Cast on the required number of stitches, for example, 111.
- Knit row 1 with knit stitches only.
- Form rows 2 and 3 from knit stitches only.
- Work row 4, alternating 1 knit, 1 plink, 1 knit, purl to last 3 sts, 1 knit, 1 plink, 1 knit.
- Knit rows 5, 6, 7 and 8 the same as row 4.
- Form row 9 by knitting 7 front loops, yarn over, slip 1 stitch, knit 1, throw the slipped stitch over the knitted stitch like a “lasso,” and knit 10. Finish the strip with a yarn over, slip 1, throw over the knitted stitch, and then knit 6.
- Knit rows 10, 12, 14 and all even rows purlwise.
- Start row 11 with 5 knits after the slipped edge stitch, then alternate 2 together knits, yarn over, slip stitch, knit, yarn over slipped stitch and 7 knits. The pattern is repeated from 2 together knits to 7 knits until there are 10 stitches left at the end of the row. Finish the row with 5 knits.
- Create row 13, starting with 4 knits after the edge, then knit step by step:
- 2 together knitwise;
- yarn over, knit, yarn over, slipped, knit, lasso from slipped to knitted;
- yarn over, knit, yarn over, slipped, knit, lasso from slipped to knitted;
- 5 knit, 2 together knit, yarn over;
- repeat the report from 1 front to lasso;
- finish the row with knit stitches.
- Knit row 15, starting after the edge with 3 front loops, further step by step:
- 2 together knit, yarn over;
- 2 together knit, yarn over;
- knit, yarn over, slipped, lasso on knitted, knit, slipped, knit, yarn over slipped, lasso, 3 knits, 2 together knits, yarn over (this is a repeat);
- finish row 3 with knit stitches.
- Start row 17 with a yarn over after the edge stitch. Next step by step:
- 4 knits, 2 together knits, yarn over, 1 knit;
- 2 knits, yarn over, slip, knit, lasso onto knitted;
- 2 knits, yarn over, slip, knit, lasso;
- knit, k2tog, yarn over;
- knit, k2tog, yarn over;
- you need to finish the row with 4 knit stitches.
- Create row 19, making after the edge 3 knits, 2 together knits, yarn over, 2 knits. Next step by step:
- 3 knits, yarn over, slip, knit, lasso onto knitted, 3 knits, 2 together knits, yarn over, 2 knits (this is the repeat);
- finish row 3 with knit stitches.
- Knit row 21, starting with 3 knit stitches after the edge stitch. Next step by step:
- 2 together knits, yarn over, 2 knits;
- 3 knits, yarn over, remove 1, knit, lasso onto knitted, 3 knits, 2 together knits, yarn over, 2 knits (this is the repeat);
- finish row 3 with knit stitches.
- Start row 23 with 5 knits after edge stitch. Next step by step:
- yarn over, slipped, k2tog, lasso from slipped to knitted, yarn over, k4;
- yarn over, slip 2tog knit; lasso, yarn over, knit 4;
- finish the row according to the loops of the above-described pattern.
- then yarn over, slip 1 stitch, knit 2 together, throw the slipped stitch over the knitted stitch, yarn over, knit 4. Repeat the pattern to the end of the row.
- Create row 25, starting with 6 knits after the edge. Then yarn over, remove 1, knit, lasso, 4 knits. Do not change the knitting until the end of the strip.
- Work row 26 purl stitches.
- Repeat work from rows 9 to 26 one more time.
- Knit the remaining fabric with the front surface to a height of 45 cm.
- Start creating the armhole. To do this, knit 32 loops, close the next 42 and knit the remaining ones with a garter stitch.
- Knit 37 stitches in stocking stitch, then cast on 42 stitches and knit the row to the end.
- Continue shaping the armhole until it measures 51 cm from the closed loops.
- Form armhole 2 in the same way as 1.


Finish the work by tying the armhole. For this, cast on 97 loops, close them and make 2 rows with purl stitches. In the process of creating the product, do not forget about the first removed edge stitch and the last one, knitted with purl stitch.
Secrets for Beginners
It is not difficult to knit a vest from a rectangle. To create an original wardrobe item, you need to choose threads that do not fade. To check the material for dye fastness, you need to wet its end and clamp it between folds of white fabric. After a while, see if the paint has run.
It is also important to choose a material that does not pill. In this case, you need to look for yarn marked "anti-pilling" on the label. Threads of this quality are less prone to rolling of their surface fibers when worn.
You also need to carefully select the diameter of the knitting needles. To do this, pierce a hole in the paper with the tip and pull the thread through it. If it does not sag, passes freely and does not catch, then the diameter of the tool is selected correctly. In addition, when using circular knitting needles, you need to make sure that the connection of the tip with the line is smooth, so that the yarn does not catch during work.
It is interesting to knit a vest from a rectangle with knitting needles. Here you can show your imagination and add your own individual highlight to a standard thing.
Rectangle Vest Video
Square + rectangle. Vest, tunic, cape: