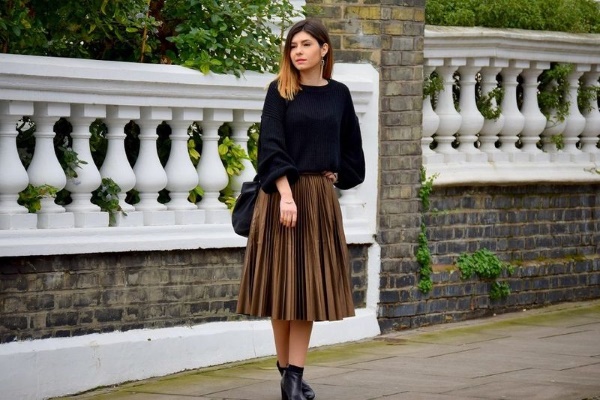
Nothing in the modern world is as constant as fashion. It sometimes dies down, giving people a chance to take a break from its "breaths", and then bursts into their lives with renewed vigor in various interpretations. This also applies to pleated skirts. Their sewing remains standard and not complicatedThe main thing is to correctly calculate the material consumption and create a pattern.
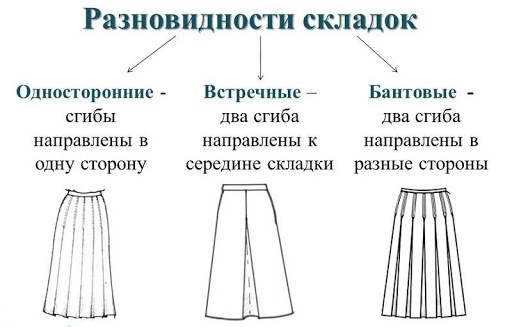
Types of folds and features of their processing
Pleats are one of the varieties of darts. They help create the necessary size along the waistline, and the diverging parts provide a comfortable fit of the product in the hip area.
Pleated skirts, the sewing of which differs depending on the style, have several varieties:
- For example, box pleats are tucks of varying depth, symmetrically located on the front side of the product in opposite directions. Their number varies from one to several, depending on the chosen model.
- Counter folds are similar to the box pleats, but done in the opposite direction. That is, the direction of the center lines of the tucks is not from the middle of the product to the side seams, but vice versa. Moreover, the two central folds must exactly converge on the vertical line of the middle of the front of the skirt.
- The next type of folds is circular.. They are located along the entire waistline, following each other in one direction. Their execution is more complicated than the previous ones. This consists of an accurate and error-free calculation of the depth of the folds, the total number of which must coincide with the waist measurement. More details on this will be discussed below. Also, depending on the style and fabric used when sewing this type of folds, they can be small (in the form of pleats), medium and large.
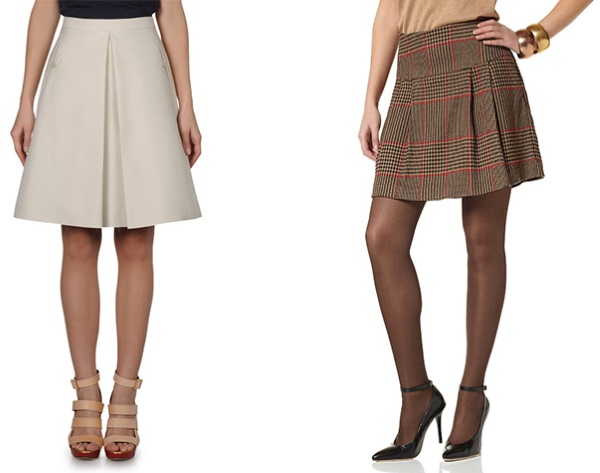
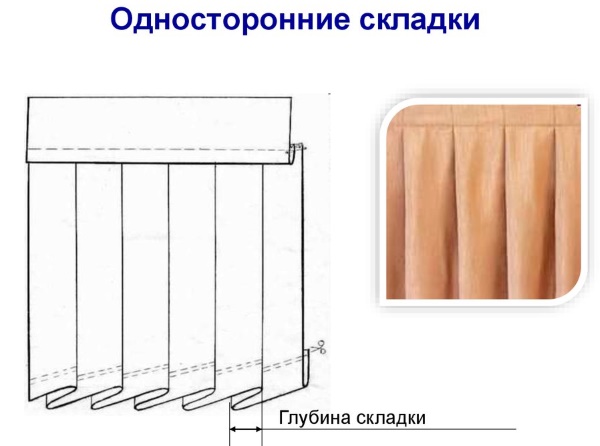
- Quite often women are seen wearing business suits asymmetrical folds. They are mainly represented by one, two or three tucks, directed to the left or right side. This is influenced by the location of the set of folds, which can be on the right or left side of the front panel of the skirt.
Models and styles
Pleated skirts, the sewing of which largely depends on the chosen material, have many variations.
All types of folds are applicable to artificial lightweight fabrics of a single color, with an asymmetrical, abstract plant or other pattern. However, their clear shape to the bottom of the product will not be preserved due to the structure of the material.
Fastened at the waist with a belt, they fall in soft folds and create a slight splendor to the garment. If the model requires giving a certain clear shape to the style, this can be achieved by partially fastening the folds with finishing stitches to a certain length.
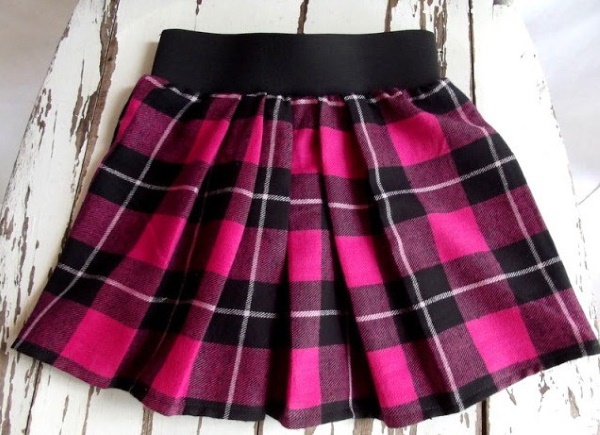
A more complex process of making skirts is sewing them from tartan material.
All types of folds are also acceptable for it, but when distributing and calculating them, several factors should be taken into account:
1. Firstly, if the model provides for a certain number of tucks, then they must be positioned so that the integral pattern of the fabric is not violated. That is, the inner part of the folds must be "hidden" in such a way that on the front side the cells of the fabric clearly join each other without violating their size and color scheme.
2. Secondly, if the model includes circular folds, there are several variations of their execution:
- The depth of the tuck is equal to the width of the fabric pattern cell. In this case, the original pattern of the fabric is not disturbed.
- When making folds, the depth of which is equal to two cells, this also does not lead to distortion of the main pattern.
- The width of the tuck is equal to half the original cell. As a result, the original fabric pattern is reduced by half.
When making calculations, it is necessary to ensure that the total size of the finished folds exactly matches the waist measurement.
Unlike lightweight synthetic fabrics, checkered fabric contains a greater amount of natural fibers and is quite dense and heavy.
Thanks to this, it retains the shape of the folds well along the entire length after fixing them with wet-heat treatment of the product.
Length options
When making pleated skirts of a certain model, special attention is paid to the length. Depending on the purpose of the product, frequency of use, fabric, it can vary from mini to maxi.
 Thus, varieties of box and counter tucks are perfect for both short and long skirts. When shortened, they will emphasize the slenderness of your legs and the elegance of your figure, and when floor-length, they will hide some possible defects and create a fullness that visually reduces your waist size.
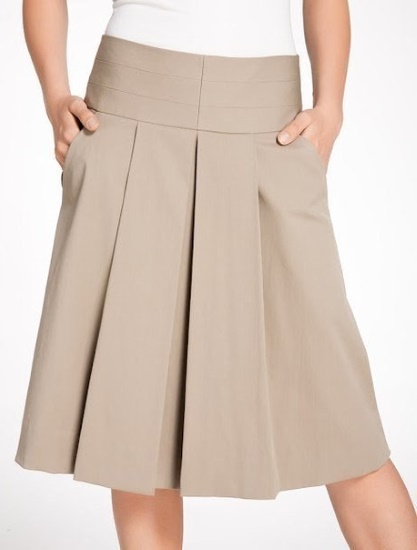
These folds, located on the yoke, are very good for women with a pear-shaped figure.For such skirts, the best length would be just above or below the knees.
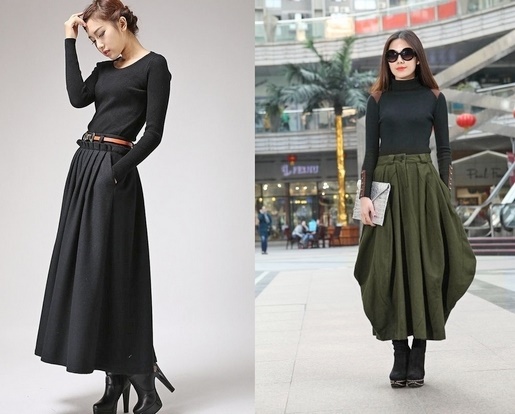
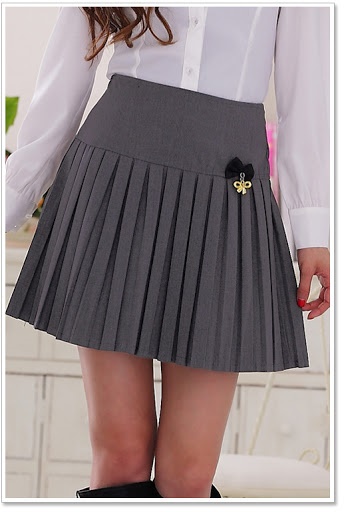
Experts recommend paying attention to the fact that soft vertical folds are great for thin women, visually making their shapes more curvy.
But representatives of luxurious figures should give preference to long, rigid vertical tucks, which visually increase height and reduce volume.
For everyday use, fashion designers recommend using waist belts of medium length, that is, midi. They may contain circular folds of varying depth, as well as asymmetrical and counter folds.
Made from semi-wool or wool fabric, they hold their shape perfectly and create a strict business style, both for a separate element and for the entire suit as a whole.
Taking measurements
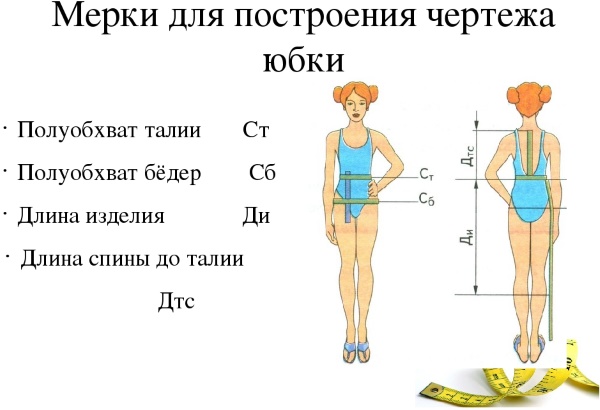
The standard measurements for subsequent production of the skirt pattern are:
| Short designation | Full name of the measure | Method of change and purpose |
| Dst | Back to waist length | Measured along the spine from the seventh cervical vertebra to the waist line. This measurement is necessary to determine the location of the hip line. |
| Di | Length of product | It is defined from the waistline to the desired length level. It indicates the length of the skirt according to the model. |
| Sweat | Half waist circumference | The measurement is half the waist measurement, which is measured by placing a tape measure horizontally around the waist.
It is necessary to determine the length of the belt and the width of the product at the waist level. |
| Pob | Half hip circumference | The measurement is taken through the most prominent points of the hips, buttocks and stomach to take them into account when constructing the correct pattern. Half of the measurement is used for the drawing. |
Also, the Pot and Pob measurements are necessary for calculating the dart solutions if they are present in the model.To do this, the difference between these measurements is determined and, according to requirements, is distributed among all darts.
Pleated skirt with waistband
This product can be sewn by a beginner without much experience. This is possible even without a pattern.
The main thing is to make the necessary calculations correctly:
- The total size of the folds must be equal to the waist measurement. Based on this, you can calculate the possible number of circular tucks with a certain depth. To do this, measure the waist and divide the resulting value by the expected depth of the fold, which will result in a whole number (without remainder).
- For example, the measurement Ot (waist circumference) is 68 cm, then when dividing it by 4 cm, you get 17 folds, each 4 cm deep.
- If the measurement is an odd number (77 cm), then the depth of the pinch can have a fractional value (3.5 cm).
- When dividing these values, we get 22 folds with a depth of 3.5 cm.
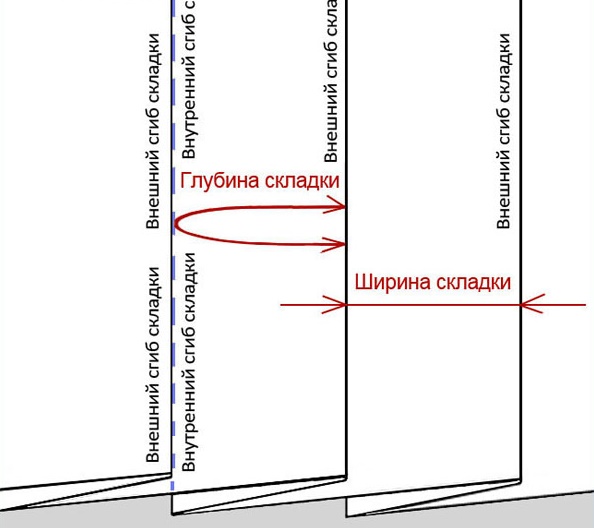
- After determining the number of tucks on the skirt, you can begin calculating the required fabric. To do this, you need to consider the following factor. When making circular folds, take double the value of their depth. Therefore, based on the first example, each fold will take 8 cm of fabric (4x2).
- Multiplying the result by their number, we get 136 cm (17x8). This value is only for making folds.
- Next, you need to add the full waist circumference (68 cm) to this value. The result is 204 cm.
- One should not forget about the presence of seam allowances and free fit, determined by GOSTs or technical conditions for certain categories of clothing. Their quantity and size depend on the number of seams in the product, as well as the material used.
- Having decided on the fabric consumption, you can start cutting. To do this, first of all, you need to apply the actual dimensions of the product to the back of the fabric (with a sharp piece of soap, chalk or graphite pencil), and then mark the contours of the allowances with a second line. Cut the resulting piece of fabric along them.
- Next, you need to mark the folds. Each of them is defined by three notches, the middle one defines the middle, and the other two are the beginning and end of the tuck.
- After the work has been completed, you can begin sewing the product. First, the skirt panel is joined (if there is one seam) or two side seams, if the product consists of two parts.
- Then, along the marked notches, folds are basted in such a way that their inner fold is on the wrong side and directed to the left.
- It is recommended to start this type of work from the side or back seam and make the first tuck so that the seam coincides with the middle line of the fold and is hidden inside it.
- Continue the process until it is completely finished. When finished, sew on the belt with the fastener. This can be done with a blind stitch followed by securing the back part with a finishing stitch or by simultaneously connecting both parts of the belt to the main product and final processing of the edges with an overlock.
- The final stage of production is hemming the bottom edge of the skirt.
With box pleats
Pleated skirts, the sewing of which includes bows, are made even easier than the previous one:
- In this case, to calculate the fabric consumption, it is enough to add 4 values of the fold depth, if 2 are provided.
- With a larger quantity, the number of values increases proportionally. For example, according to the model, the skirt has 4 tucks with a depth of 5 cm. Then 40 cm should be added to the waist size (4x2=8; 8x5=40).
- Having marked the center of the front on the fabric during cutting, make notches for creases in different directions from it. Moreover, the middle of the depth of the left and right of them should subsequently touch each other on the back side of the product.
- Connect the side seams with the zipper design.
- Next, secure the fabric along the notches in the required direction, namely from the center to the sides along the front side.
- Sew on the belt and finish the bottom edge of the product.
- Perform wet-heat treatment of the finished skirt.
With counter folds
To sew a product with counter symmetrical folds on the front panel, you need to carry out similar operations, how to make a skirt with box pleats.
The difference in the work performed is only that the direction of their location changes to the opposite. That is, the contact of the middle lines of the depth of the central folds occurs on the front side.
The calculation of the fabric, as well as its cutting, is carried out in exactly the same order.
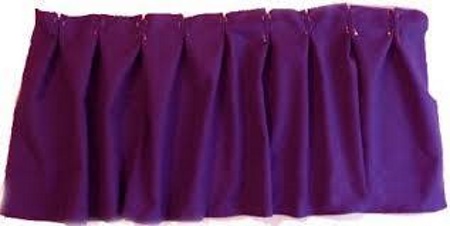
In a decorative one-sided fold
This method of arranging creases, as mentioned above, is used in women's business suits., which are sewn from semi-woolen or woolen fabric.
Due to the straight cut of the skirts, the presence of such tucks provides freedom of movement and adds a certain zest to the ensemble.
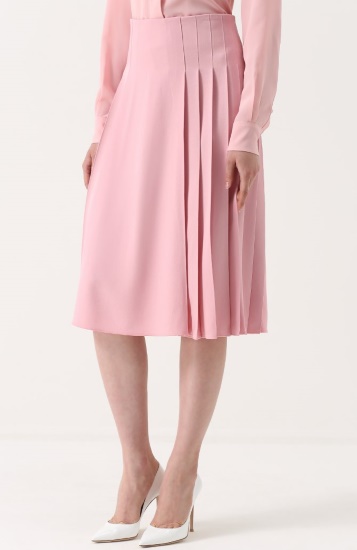 Made on the left or right side of the front panel of the product in the amount of 2-3 pieces, partially decorated with decorative stitching and, due to the properties of the material to maintain a given shape, perfectly fixed.
Cutting and sewing:
- To calculate the required amount of fabric to create such folds, it is enough to know their number and depth. So, if the product is designed to have 2 tucks of 5 cm each, then 20 cm will need to be added to the waist circumference (2x2=4; 4x5=20).
- To make such a skirt cut, you will need a pattern. Having made the basis of the straight silhouette of the product, you should determine the middle on ½ of its front part and draw a vertical line through it. It will serve as a demarcation between the two folds.
- Then cut the pattern along the drawn trajectory. When transferring the pattern to the fabric, at the place of the cut, it is necessary to step back 20 cm and continue transferring its second part. These 20 cm will subsequently be turned into tucks. It is also recommended to mark the middle of this section.
- After the cut pieces are ready, you should start assembling them. First, the darts are sewn together, then the creases are basted. On the front side, they should be directed from the center to the side seam. The first of them is laid before the intended center line, and the second - after it.
- Next, the side seams are joined by sewing in a zipper, the belt is sewn on and the bottom of the garment is finished with a blind stitch.
- After finishing the work, the finished item undergoes wet-heat treatment.
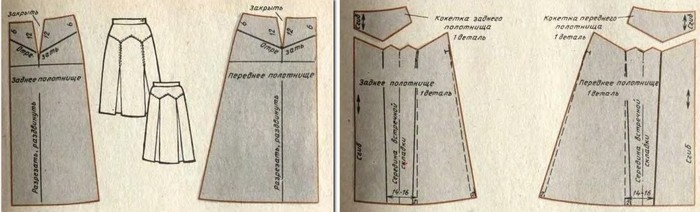
On the yoke
Pleated skirts, the sewing of which assumes the presence of a yoke, require certain skills in cutting and sewing. But, having carefully studied the method of constructing the basic basis of the pattern, further manipulations with its changes will not present any difficulties.
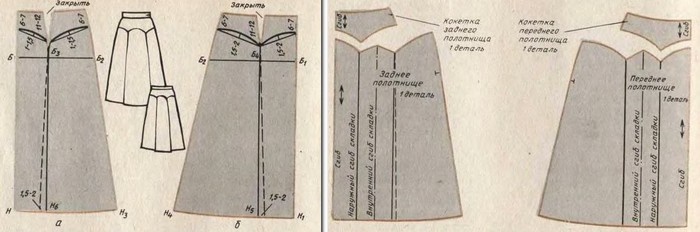
To transform a regular straight skirt pattern into a garment with a shaped yoke and two counter folds on the left and right sides, you need to perform the manipulations described below.
Manufacturing sequence:
- On the front part of the pattern at the level of the hip line, from the side seam towards the middle, draw a slightly inclined line. The upper part will be the yoke. Before placing it on the fabric, the pattern must be cut along the line.
- On the lower part, determine the middle and draw a vertical line. The pattern should be cut along it. This will be the center of the counter tucks.
- When transferring pattern pieces onto fabric, remember that most yokes are made double to create density and give the product a given shape. Therefore, there should be 2 of them.
- When transferring the lower part of the pattern, at the place of the cut you need to make an indentation equal to four fold depths. For example, if the depth is 3 cm, then you should indent 12 cm (3x2=6; 6x2=12).
- When transferring the pattern to the fabric, it should be folded in half. And its fold should coincide with the middle of the back and front parts of the patterns.
- After preparing the cutting parts, you should begin to connect them in a certain sequence.
- First of all, the front part of the skirt is prepared. To do this, both counter folds are laid and fixed on the lower part of the part. On the yoke parts, the darts are closed.
- Then (if your skill allows) you simultaneously connect the front and back parts of the yoke with the bottom part along the shaped cut. If you are not yet able to do this, you can do it one by one, that is, first sew on one part of the yoke, then turn the work over and repeat the same with the second part.
- Then, at the basting point, sew a machine stitch and remove the auxiliary threads.
- Turn the yoke pieces to the front side, straighten the toe in its center, sweep the joint and make a finishing stitch. Remove the basting. This completes the preparation of the front part of the skirt.
- Next, close the darts on the back panel of the skirt.
- Connect the side seams by sewing in the zipper.
- Sew on the belt.
- Process the bottom of the product.
- Perform wet-heat treatment of the finished skirt.
On an elastic band
This variation of the skirt is very easy to make. It can be sewn by a person who does not have any sewing skills. But in order not to make a mistake during the work process and not to spoil modern expensive fabric, it is advisable to carefully follow the recommendations of specialists.
- Before you start sewing this model, you need to decide how many and how small (large ones will be inappropriate) tucks will be placed on the product. There is no point in placing them close to each other, since when fitting material with frequent creases to an elastic band, they will stick out and create an unsightly appearance. But at a distance of 2-4 cm and with a depth of no more than 2 cm, the product will look better.
- Since a skirt with an elastic band should have a certain allowance for ease of putting on, at least 10 cm should be added to the hip measurement. According to the selected model, this allowance can be much larger.
- Once the final size has been determined, the number of tucks and the distance between them should be calculated. For example, the waist is 68 cm and the hips are 78 cm. This means that the minimum width of the fabric, taking into account only the allowance for freedom of movement, is 88 cm (78 + 10 = 88).
- With the folds 2 cm deep and 2 cm apart, there are 22 pieces. After calculation, it turns out that an additional 88 cm of material will be needed to make small tucks (2x2=4; 4x22=88). When summing up the obtained calculations, the material consumption is equal to 176 cm in width (88+88=176). In length, the consumption is equal to the length measurement of the product plus allowances for joining with the belt and processing the bottom.
- After preparing the fabric, you can start sewing the product. First, connect the side (or side) seam.
- Then the tucks are marked. They can be located either in one direction or symmetrically in relation to the middle of the front part of the skirt.
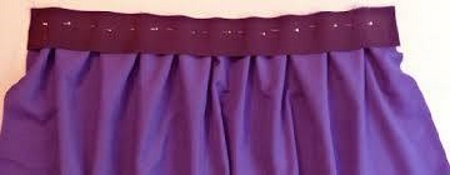
- Next, you need to make a belt with an elastic band. To do this, prepare a strip of fabric, 8-10 cm wide and 88 cm long, plus 2 cm seam allowance.
- Having sewn this strip into a ring, it is folded in half and an elastic band 3-4 cm wide and about 60 cm long is placed inside. The open edge is basted.
- Next, it is connected to the upper edge of the main fabric and sewn with a machine stitch. The final edge processing is done with an overlock.
- Next, the bottom of the product is designed and subjected to wet-heat treatment.
It is not always necessary to spend a lot of money and time hunting for fashionable new items in order to look great and have a large, beautiful wardrobe.
It is enough to look for a material that is suitable in color and structure, calculate its quantity and, following the recommendations given in this article, sew original and exclusive pleated skirts yourself.
Video on the topic: how to sew a pleated skirt
How to sew a pleated skirt: