Drawing competitions on the topic of labor protection are held in schools every year. These events are necessary to explain to children what safety rules are and why they are needed. Drawing pictures on this topic helps a child remember information better, teaches him how to act correctly in emergency situations.
Occupational Safety Drawing Ideas for Primary School Students
The drawing style should match the child's age. The younger the child, the simpler the drawing should be. Complex pictures with small details take a lot of time, so younger children quickly get distracted and lose interest. An older child can already maintain concentration longer, so he can be given a more difficult task.
The table shows examples of ideas for drawings on the topic of labor protection for children of different ages:
| Age of the child | Brief description of the image |
| 7 years old (1st grade) | Safety rules are depicted as icons that are located around a cartoon character. |
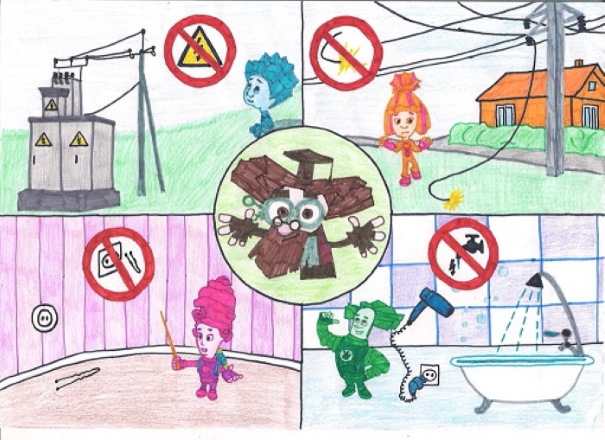
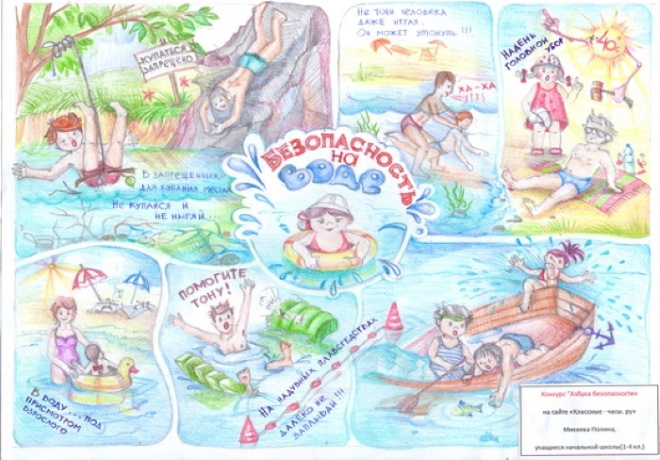
| 8 years old (2nd grade) | The sheet of paper is divided into colored sectors. Each sector contains a character who is doing something wrong. The pictures can be accompanied by captions that describe the meaning, and also depict the consequences of neglecting safety rules. |
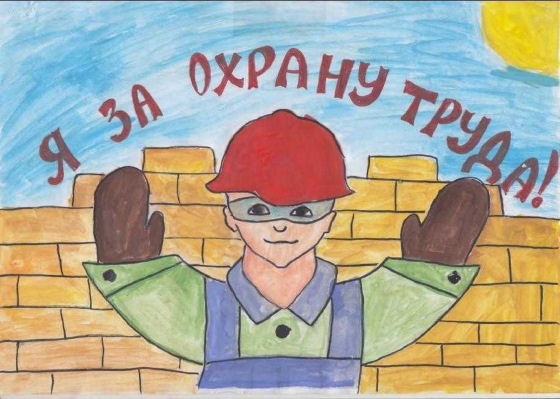
| 9 years old (3rd grade) | In the center of the sheet there is a worker (builder, plumber, electrician) who talks about safety rules in verse form. The verses can be written with colored pens or markers. |
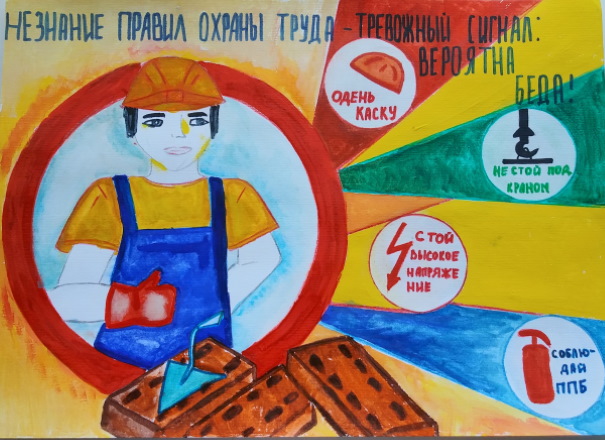
| 10 years old (4th grade) | The picture shows a construction site where workers show how to put on helmets, put away tools and explain other rules. |
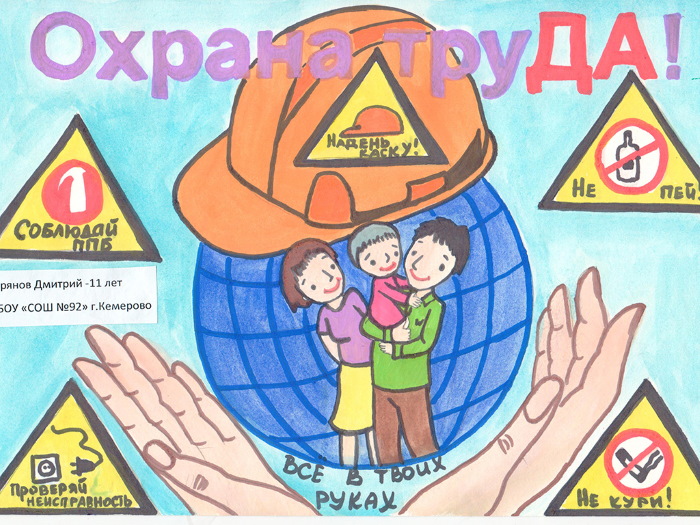
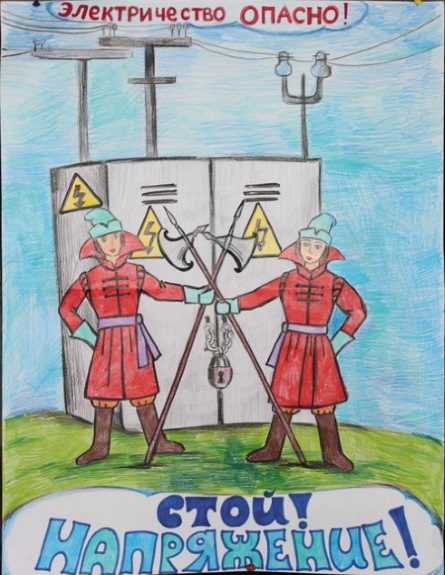
| 11 years old (5th grade) | The drawing is divided into sectors, which depict representatives of different professions (builder, doctor, welder, fireman). In the center, you can write a slogan, for example: "Labor protection is the key to life." |
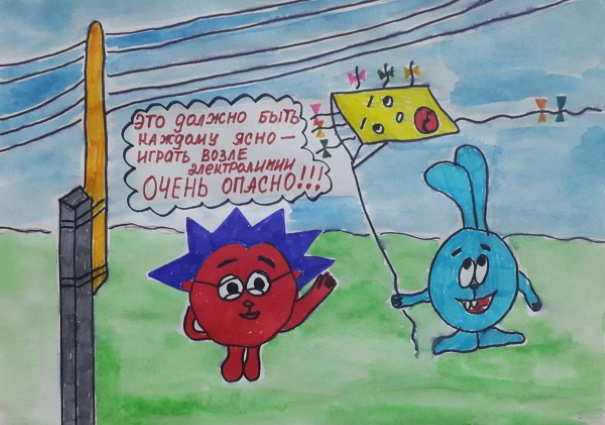
To interest younger children in creativity, you can offer them to draw characters from their favorite cartoons. It is desirable that the child draws independently, but adults can help and add some details to the characters.
Children in grades 3-5 can be asked to draw representatives of different professions. Let the child draw as many details as possible and make explanatory captions. Such drawings will help children expand their knowledge of different professions.
Drawings can be accompanied by slogans and mottos:
- Say yes to labor safety!
- Take care of yourself!
- Safe work is the right of every worker!
- Your life is in your hands!
If there is a lot of free space left in the picture, it can be filled with short poems about labor safety.
Option #1:
For life to be beautiful,
And the work is safe,
Not only do you know the rules,
But remember, observe!
Option #2:
A man was electrocuted -
A severe shock is inevitable.
Don't touch the cord with your hand -
Only with a dry stick!
The cable must be de-energized immediately –
And hurry to help quickly!
You can draw pictures with simple or colored pencils, as well as paints and markers. Below in the article are several ideas for creating a school poster on the topic of labor protection, as well as step-by-step instructions for drawing.
Step by step instructions for drawing with a simple pencil
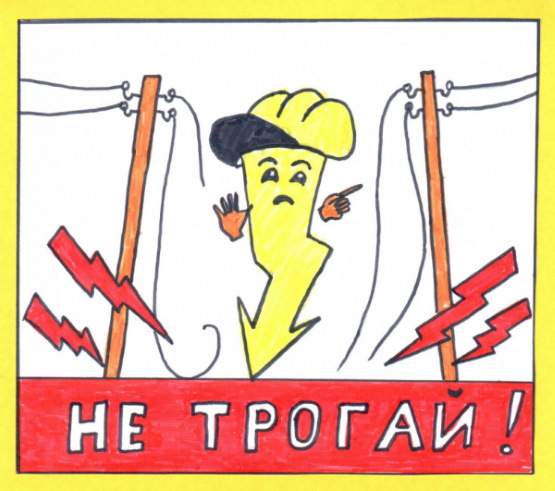
A drawing on the topic of labor protection can be done with simple pencils. This style of drawing is suitable for children who do not really like to draw. They will not have to select colors and think through details. The idea of the drawing described in this master class is to show why you can’t touch bare wires.
To work you will need:
- hard and soft pencil;
- eraser;
- ruler;
- stencil with letters;
- A4 sheet of paper.
The work begins with constructing a sketch.
Contours
The child will spend about 5 minutes to mark the contours. You need to use a hard pencil.
Algorithm of actions:
- Place a sheet of paper horizontally on the table.
- From the lower edges of the sheet, step back 5 cm towards the center and put dots.
- From these marks, measure 1.5 cm towards the center and draw 2 horizontal lines, 15 cm long.
- Connect the narrow parallels at the top with a short line. These will be the electric poles.
- Between the pillars you need to depict a character in the form of lightning. In the center of the sheet draw a horizontal line 5 cm long.
- Using a ruler, draw a 3-step zipper. Mark the bottom corner.
- At the top of the lightning, depict a helmet with a visor in the form of a semicircle.
- Draw the wires by drawing smooth lines by hand from the side edges of the sheet so that they pass through the tops of the posts.
- Closer to the center of the drawing, the wires should be depicted as damaged or torn. The lines can be twisted or straight.
When sketching, you don't need to press too hard on the pencil, otherwise it will be difficult to erase extra lines with an eraser.
Detailing
Now we need to draw the details.
Algorithm of actions:
- Draw big eyes for the lightning character.
- Add a wide open mouth and raised eyebrows.
- On the helmet, use thin lines to mark the strap and draw the relief.
- Draw sparks at the ends of the wires.
- At the bottom of the drawing, draw a thin horizontal line from one column to the other.
- Using the drawn line as a guide, you need to apply the stencil and trace the letters along the outline. The drawing will have the inscription: "Do not touch!"
- Draw small lightning bolts around the inscription.
Now you need to erase all the extra lines with an eraser. Remove the border of the helmet and lightning, erase the lines inside the letters and under them.
Shadows and Light
The picture is almost ready, now we need to give it volume.
Algorithm of actions:
- Using a hard pencil, shade the large lightning bolt, as well as the letters and small sparks.
- Tint the helmet and the pillars. The strokes need to be carefully rubbed with your fingers.
- Using a soft pencil, color the pillars up to the center vertically, mark the shadow under the helmet near the lightning and add a few dark lines inside each spark.
- Trace the wires with a soft pencil.
To make the drawing look brighter, you can outline all the contours. You should start outlining from the top of the drawing, so as not to accidentally rub the soft graphite on the paper.
Master class on painting with paints
A drawing on the topic of labor protection, made with paints, will turn out bright and beautiful. It is better to use gouache, since watercolor is a transparent paint. To get rich shades, you will have to paint the picture in several layers, which can deform the paper and roll up.
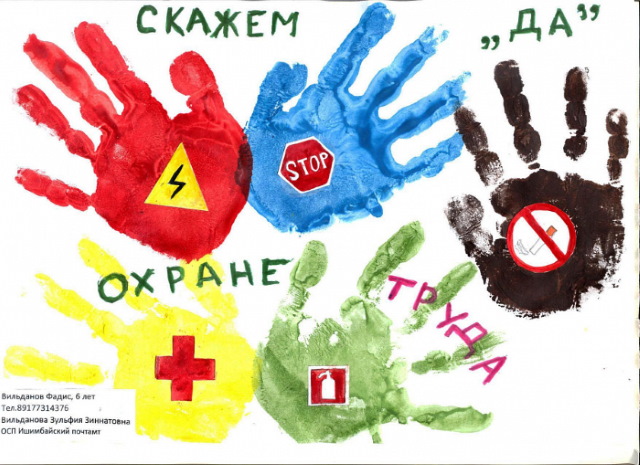
This master class describes a drawing with icons that illustrate safety rules in different life situations. The picture will depict 6 silhouettes of hands, with open palms raised upwards. In the center of each palm, a certain sign will be depicted.
What you will need for work:
- A3 paper;
- gouache in yellow, red, brown and blue;
- hard lead pencil;
- eraser;
- thick and thin art brushes;
- compass;
- ruler.
To outline the drawing you will need black gouache or a marker.
Sketch
The sheet of paper should be placed vertically on the table. First, outline the contours with a hard pencil. Here, you will need the help of your parents. The hands in the drawing should be different in size, so you can outline the father's hand in the center, 2 mother's hands on the sides, and outline the child's hands at the bottom to make 3 small hands.
Draw warning signs in the center of each palm. First draw circles with a compass, and then draw small objects inside these circles.
Examples of icons:
- high voltage;
- explosive;
- gas cylinder;
- slippery;
- the load may fall;
- biological hazard.
At the bottom of the drawing, you need to draw 2 thin horizontal lines for orientation and write the slogan in 2 lines: “Say yes to labor protection!”
Coloring
The hands should be painted in different colors so that the paint does not go beyond the circles drawn in the center of the palms. It is advisable to use a thick brush.
To make all the shades look harmonious, you can choose this order:
- Paint the largest hand blue.
- Paint medium-sized hands with yellow and red.
- Paint the little hands with brown paint.
You also need to color the slogan. You can make the top line one color and the bottom line another, or color each letter separately in different colors.
Outline
The drawing needs to be outlined with black paint or a marker along the contour to make it brighter. First, outline the symbols on the palms, then the hands, and then the letters of the slogan. If the outline is done with gouache, it is better to use a thin brush with hard bristles.
You should wait until all the other colors dry, otherwise the paint will mix, spread, and the picture will be dirty. This picture is suitable for a school competition on the topic of labor protection, because it demonstrates the idea that every person, regardless of age, must remember and follow safety rules.
Drawing with colored pencils or markers
A picture on the topic of labor protection can be drawn with colored pencils or felt-tip pens. It is better to combine these materials, because a picture colored only with pencils turns out pale. Felt-tip pens can be used to make a bright outline and draw details.
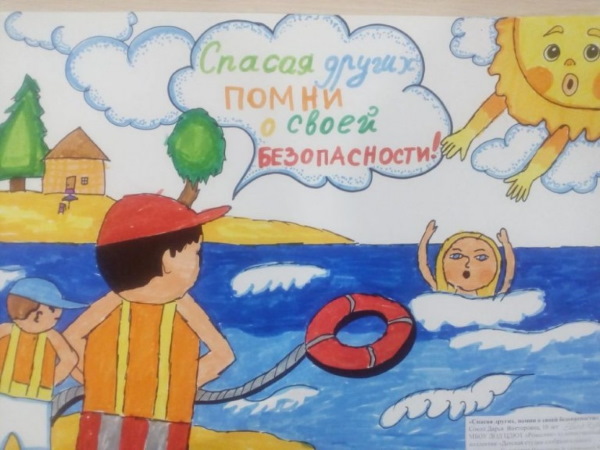
The picture described in this master class depicts rescuers. They are wearing special vests and throwing a lifebuoy to a girl drowning in the sea. In the center of the picture there will be a slogan: "When saving the lives of others, remember about your own safety!"
What you will need for work:
- colored pencils and markers;
- A4 paper;
- hard lead pencil;
- eraser;
- white corrector;
- cotton pad;
- small knife.
The knife should be used with the help of adults or under their supervision!
Contours
A sketch needs to be made with a hard pencil.
Algorithm of actions:
- Place a sheet of paper horizontally on the table.
- Draw a horizontal line by hand through the middle of the sheet from one edge to the other.
- On the left, above the line, mark a small hill.
- On the hill, make a sketch of a small house and draw trees nearby.
- In the lower left corner, mark the boundary between land and water.
- Draw 2 rescuers. In the picture they are depicted from the back. Therefore it is enough to depict pants, a square vest, a neck and a head. Finish drawing the arms stretched forward.
- In the part of the picture where the sea will be depicted, you need to draw the girl’s head and raised arms.
- From the right lifeguard draw a line “into the sea”, at the end depict a lifebuoy.
- In the upper right corner, draw a cloud and a sun circle with thick, short rays.
- Since the sun in the drawing will be animated, you can add hands to it that are reaching out to the drowning girl.
- Draw clouds in the sky. One of them, the one in the center, should be larger than the others. The slogan will be written inside this cloud.
For the letters of the slogan, you need to draw 4 parallel horizontal lines inside the cloud shape.
Detailing
What details need to be drawn:
- pockets on rescuers' pants;

- inflatable vest parts;
- design the rescuers' hairstyles (you can add caps);
- draw the turns of the rope from the lifebuoy;
- add lines on the circle itself;
- draw a girl's hairstyle, draw big eyes and a wide open mouth;
- draw a window and a door on the house;
- on the hill, depict 2 sun loungers and a beach umbrella;
- decorate tree crowns;
- draw big eyes, a round mouth and eyebrows shaped like a house for the sun.
The faces depicted in the picture must clearly convey emotions. The girl is scared, and the sun sympathetically tries to help the rescuers.
Coloring
The drawing on the topic of labor protection, described in this master class, must be painted in 2 layers. First, you will need colored pencils.
Procedure:
- Paint the sky blue. To make the tone even, you can crumble some graphite from a pencil onto a sheet of paper with a knife, and then rub it over the drawing with a cotton pad.
- Use a yellow pencil to color the hill, the part of the land under the rescuers, the girl's hair and the sun.
- Use an orange pencil to shade the vests and walls of the house in the background.
- Paint the rescuers' hair, the roof of the house and the tree trunks brown.
- Use a green pencil to color the crowns of the plants.
- Fill the lifebuoy, the lifeguards' caps, the girl's mouth and the sun with red.
- Use a grey pencil to shade the rope and stripes on the circle.
- Use a blue pencil to make a thick outline of each cloud.
- Paint the bodies and faces of the rescuers and the girl in beige.
The rescuers' pants can be painted in the same way as the clouds so that they don't blend into the general background.
Now you can take the markers and continue coloring. First, you need to color the light areas, and then the dark ones. If you do it the other way around, you can accidentally touch the dark lines with a light marker. The tip of the light marker will be colored darker, and all the following lines will be dirty.
Order:
- Use yellow to make a thick outline of the upper part of the land, the hill and the sun rays.
- Use orange to draw the sun's cheeks, outline the lower eyelids and lips, and also to mark the shadow on the lifeguards' vests.
- Use a dark green marker to mark the shadows on the tree crowns.
- Use a brown marker to show the shadow on the roof of the house, and also draw strands of hair on the rescuers.
- Color the girl's eyes and the sun's eyes blue.
- Outline the clouds. Closer to the center of each cloud, you need to create a color transition effect. This can be done with small dots.
- Use a purple marker to color the umbrella on the hill.
- Paint the sun loungers pink and add a blush to the girl's cheeks.
- Now you need to color the sea. With a blue marker, you need to divide it into 2 halves horizontally. Color the lower part blue, and the upper part blue.
- Use white corrector to depict small waves and sea foam.
- Using markers of different colors, write the slogan in the center of a large cloud: “When saving the lives of others, remember about your own safety!”
You need to paint the sea correctly. You can't make random strokes on the paper, otherwise it will roll up and the drawing will turn out ugly.
First, you need to outline the desired area. Then you should color the picture with long horizontal strokes, placing them as close to each other as possible so that there are no gaps. If it is difficult to draw 1 long and even line, then you can color the sea with short strokes using the same principle.
You need to outline carefully with a black marker. You should start from the top of the drawing, so as not to accidentally smear the dark paint with your hand below. Where you need to draw thin lines, for example, tracing rope coils and faces, you do not need to press down on the marker.
Its tip should barely touch the paper. You can put a sheet of clean paper under your hand so as not to smear other colors. It is advisable to wait until 1 color is completely dry before you start painting with another.
Adults should draw the picture together with the child. During the creative process, parents should explain all the situations that will be depicted in the picture on the topic of labor protection. It is also necessary to tell children about the consequences that may arise if you neglect safety rules.
Video about drawing
Drawing on the topic of labor protection:
Thank you!