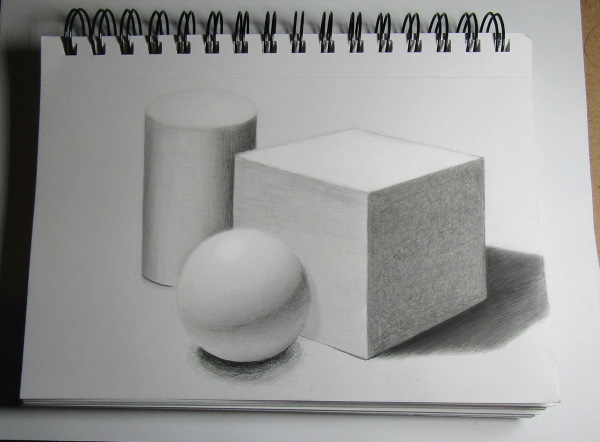
The simplest geometric figures with shadow (sphere, cube, cylinder, cone, pyramid, parallelepiped, ellipsoid) are the basis for the construction of all other forms of nature and things created by man. Therefore, creating a pencil drawing using the basic rules of construction and light and shadow is a good exercise for developing spatial thinking.


Ball
Geometric figures with shadow, the pencil drawing of which is not complicated, in all cases are performed in the system of “light source, body, own shadow and cast shadow”.

To draw a ball, you will need paper, simple graphite pencils of HB and 3B hardness, a ruler and an eraser. The pencils should be sharpened with a knife to a height of about 1.5 cm. Such sharpening allows you to draw longer (after sharpening, the pencil quickly becomes dull) and achieve the necessary tilt of the tool when shading. Otherwise, you will have to constantly sharpen the lead during the work. The eraser also needs to be cut to get a sharp edge.
The construction of the sphere and its shading is done as follows:
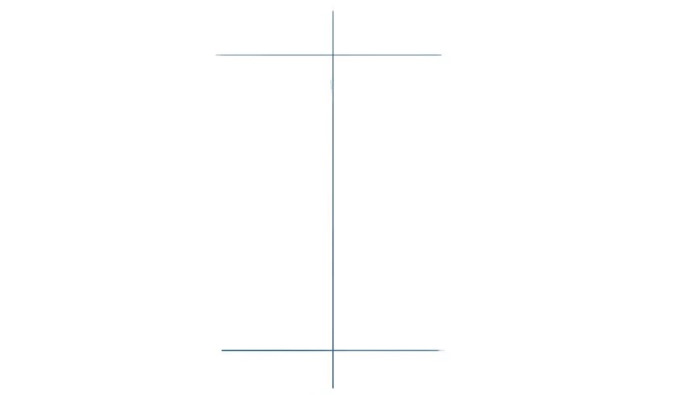
- Draw a square in the center of the album sheet to obtain an even outline of the sphere. Draw its diagonals, at the intersection of which you will get the center of the figure. Through it draw the vertical and horizontal axes.
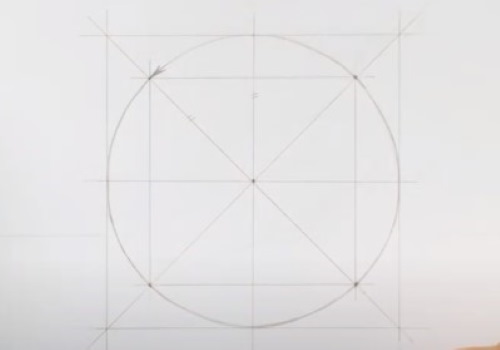
Using auxiliary lines, draw a circle. The circle can be made easier - with a compass, but this method allows you to better understand the construction. When drawing a circle, you must also remember that its radius is the same at all points.
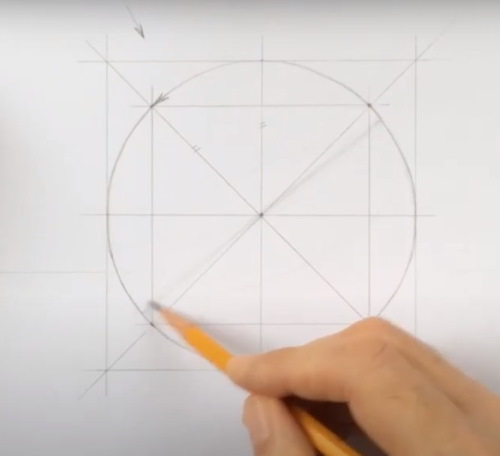
- At the top, use an arrow to show the direction of the light rays (arbitrary, at the artist's choice) falling on the ball, and draw a diameter perpendicular to it inside the circle. At the first stages, work is done only with a pencil with a hardness of HB.
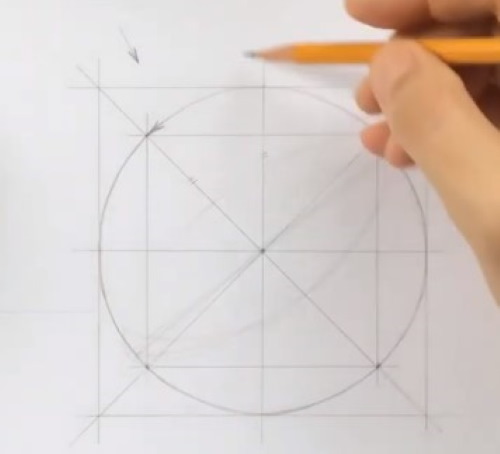
- Using this diameter, construct an ellipse that will serve to separate the shadows on the ball. This will give it volume.
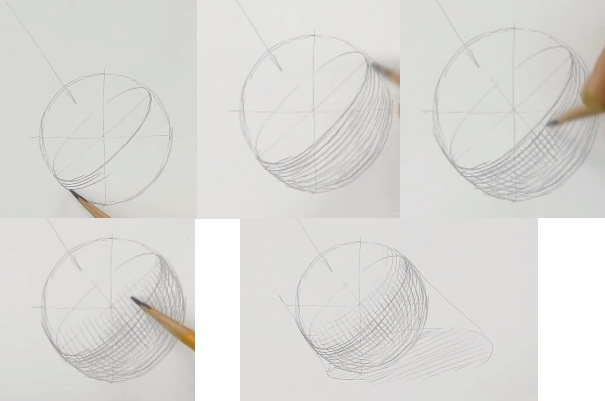
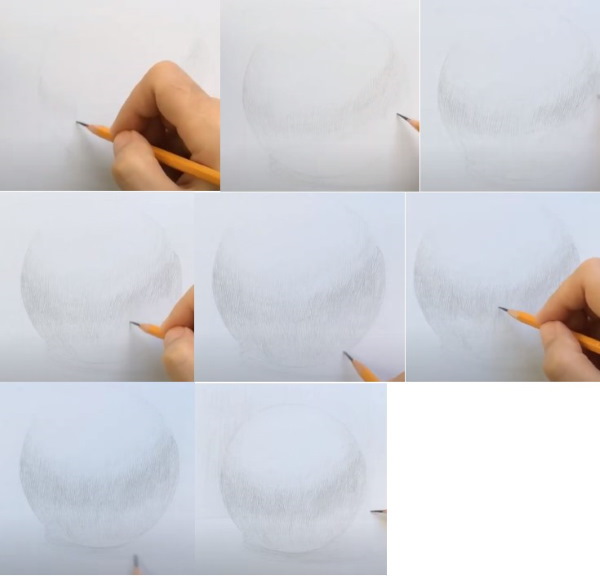
- Erase auxiliary lines with an eraser. The principle of applying hatching to the sphere is shown below with bright lines. At the first stage, you need to make parallel strokes along one of the edges.
- In the strict sense of the word, there are no surfaces on the sphere that are absolutely parallel to each other. As the shading approaches the outer surface of the sphere, the lines should become more curved.
- Similarly, make the shading in the transverse direction. Closer to the central axis, the strokes should gravitate toward a straight shape, and further, toward the edge of the body, they should be more steeply curved, approaching a round shape.
- Above the ellipse line there should be a halftone - a stretch from shadow to light. According to the above-mentioned hatching principle, a custom shadow is created over the entire area of the sphere.
- To depict a falling shadow, draw two tangents to the ellipse, parallel to the direction of light (shown by the arrow). Through the resulting points, draw an elongated ellipse lying on a horizontal surface. The strokes for this shadow should be applied in the form of straight, not curved lines.
- The previous stages showed the general principle of shading. In order for the ball to be more realistic, it must be done with thin lines, gradually superimposing and intensifying the tones.
Each subsequent layer of shading should intersect with the previous "diamond". As a result, smooth transitions of tone will be achieved. In the background, behind the ball, make the shading in the form of vertical lines.
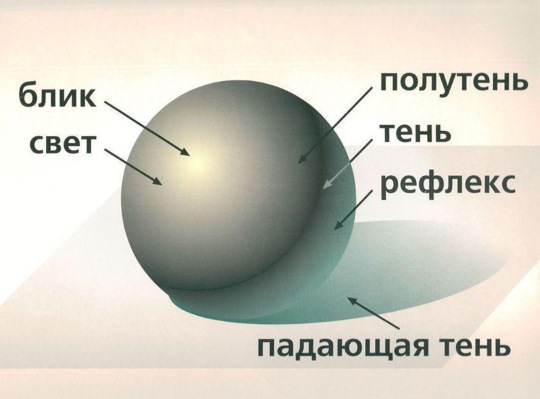
- Leave a lightened area at the bottom of the ball - a reflex that occurs as a result of light reflection from the horizontal surface on which the ball lies. The shading areas are shown more clearly in the figure below.
Since the reflection is also part of the shadow, it should be darker than the highlight and halftone. A brighter reflection is given to a glass and metal sphere. In this example, we are drawing a plaster sphere, so it should be pale.
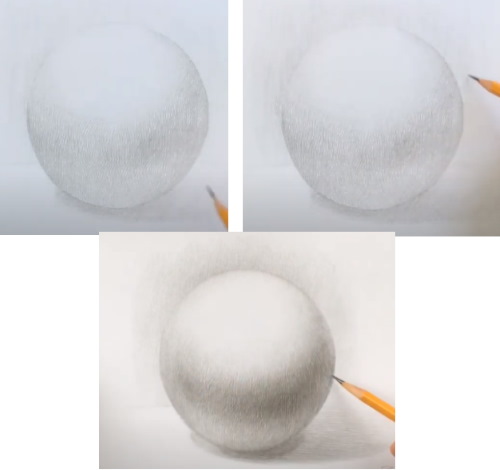
- Darken the falling shadow directly below the ball.
- Gradually “gain” the background tone so that the highlight on the surface of the ball begins to play.
- With correct and consistent shading, the final result should look like this:
When shading, it is recommended to place a folded sheet of paper under your hand, as skin fat "stains" the drawing. In order to achieve the correct application of shadows, shading must be carried out simultaneously on all elements, strengthening it where necessary.
Cylinder
Geometric figures with shadow (the pencil drawing in this master class is dedicated to the cylinder) can be used by the artist in other works and allow achieving greater realism. For work you will need a sheet of A4 paper, 2 graphite pencils of HB and 2B hardness, an eraser. The construction lines, as in the previous case, are made with an HB pencil.
The principle of drawing a cylinder is as follows:
- Draw a straight vertical line in the middle of the sheet (it should be positioned vertically). You can check whether it is parallel to the edge of the sheet using a pencil - the distance from the top and bottom should be the same.
- Make two horizontal lines that limit the cylinder outline vertically. Check their parallelism to the sheet edges in the same way as in the previous step.
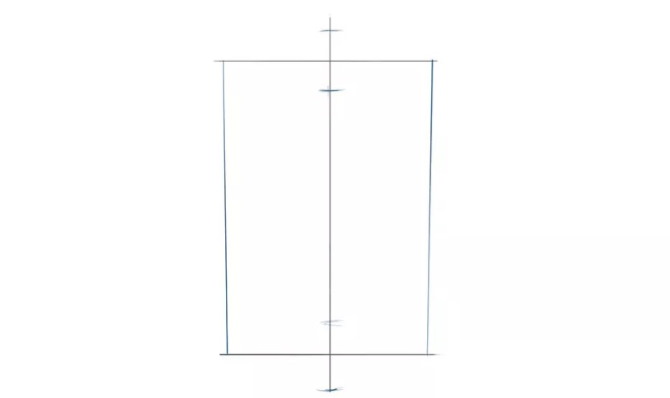
- Mark the width of the cylinder with a pencil using two equal segments from the vertical axis.
- Connect the resulting points and construct a rectangle.
- Mark a point on top of the cylinder's vertical axis, and at the bottom it should be at a greater distance, since when viewed from the front, the far edge will appear further away and the front edge closer. This is shown in the example with the tape.
- Draw an ellipse through these points. Its outline should be smoothly rounded, without sharp corners.
- On the lower base of the cylinder, draw a second ellipse, which should be slightly wider than the upper one.
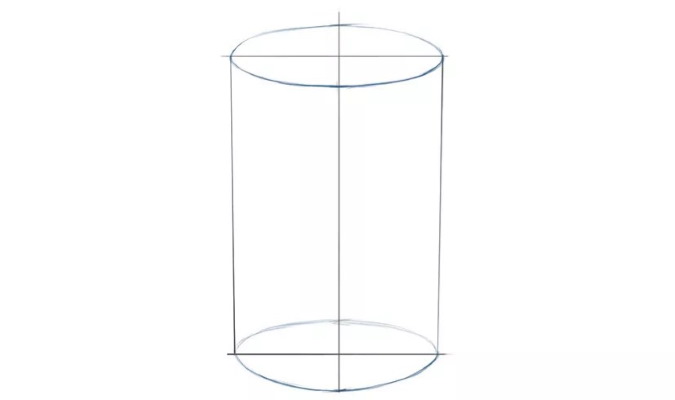
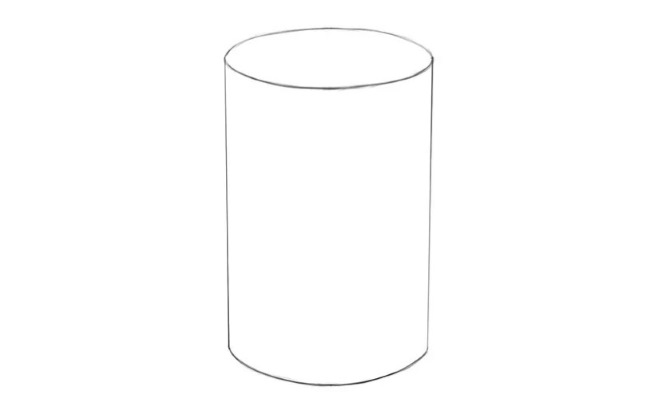
- Erase the auxiliary and invisible lines with an eraser, and draw the rest more clearly. Outline the front edge at the top and bottom with a 2B pencil.
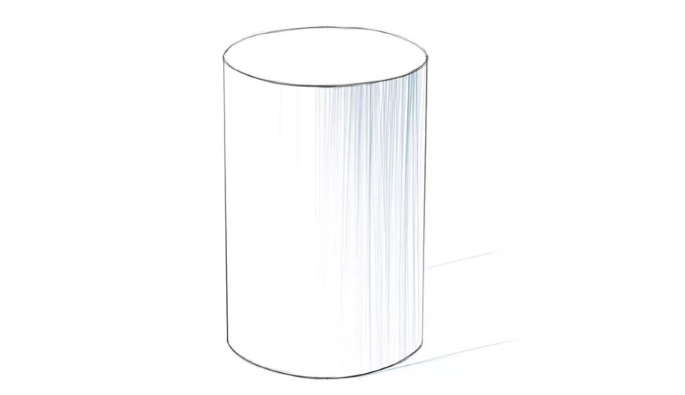
- The light will fall on the object from the top left (shown by the arrow). On the left part of the cylindrical surface, shade the lighter strip with a hard pencil.
- Next, draw the stripe with even paler shading. To do this, the pencil should be positioned almost horizontally, at a slight angle.
- Then comes the area of the surface that is exposed to bright light (light spot). It does not need to be shaded. The following stripes are shaded similarly - first the penumbra, then the shadow. The strokes should not be the entire height of the cylinder. Their length is chosen so that it is comfortable for the artist's hand.
- Continue shading, gradually increasing the pressure on the pencil. Leave an unpainted strip on the right - a reflex (part of the shadow that is slightly lighter than the shadow itself).
- Shade it so that it is approximately the same tone as the penumbra.
- Take a 2B pencil and use transverse strokes (in the shape of a cylinder) to make the shadow part brighter, including the reflex strip.
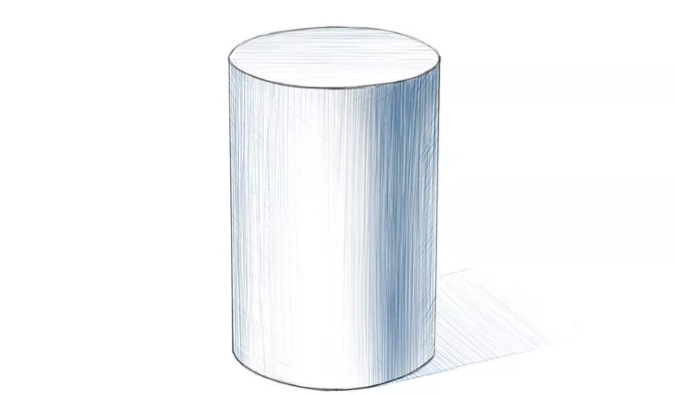
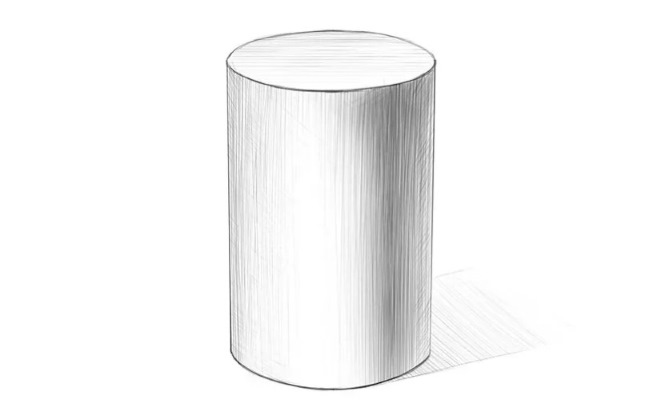
- Strengthen the middle of the shadow additionally by applying strokes at a slight angle, then soften the transition.
- Shade the middle of the darkest area with vertical lines.
- Strengthen the strokes at the top, on the border with the horizontal part of the body. The shadow should acquire a slightly triangular shape.
- Draw the contours of the falling shadow.
- Using a 2B pencil, color it in with horizontal strokes.
- Make the shadow darker near the cylinder, not forgetting about smooth transitions between tones.
Geometric figures with shadows can be arranged to form the figure of an animal or a person. This will allow you to better master the technique of creating a pencil drawing, taking into account the illumination of objects at different angles.
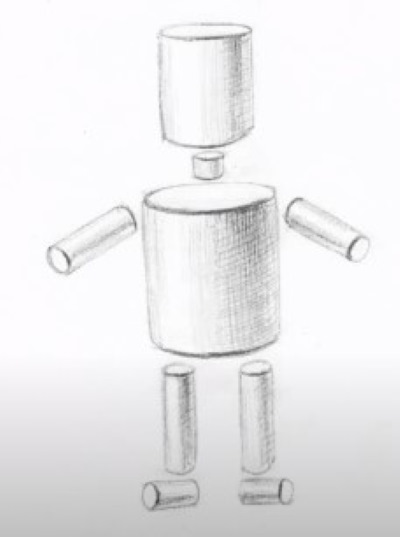
An example of such an image is given above.
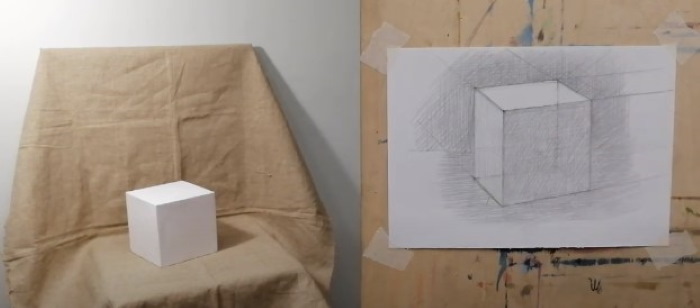
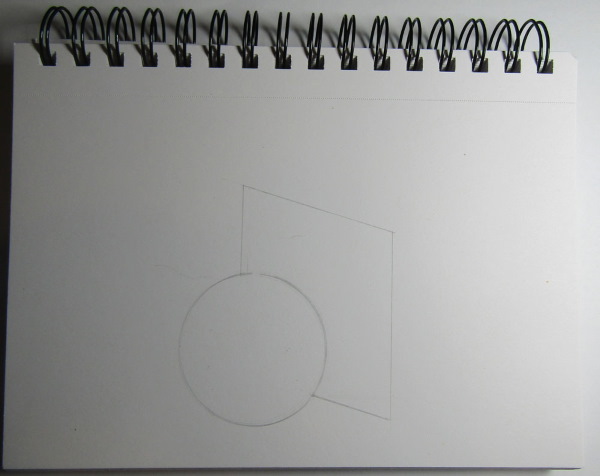
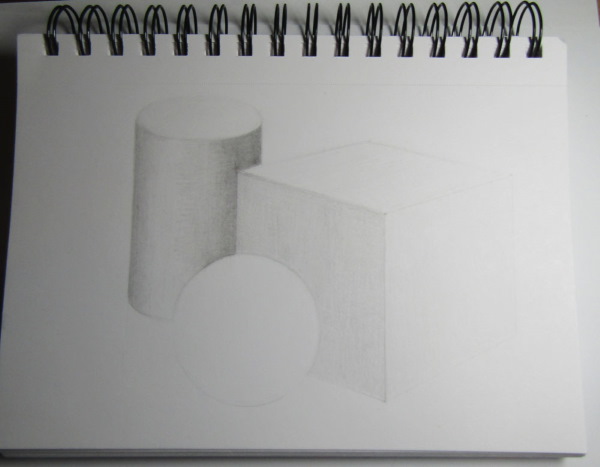
Cube
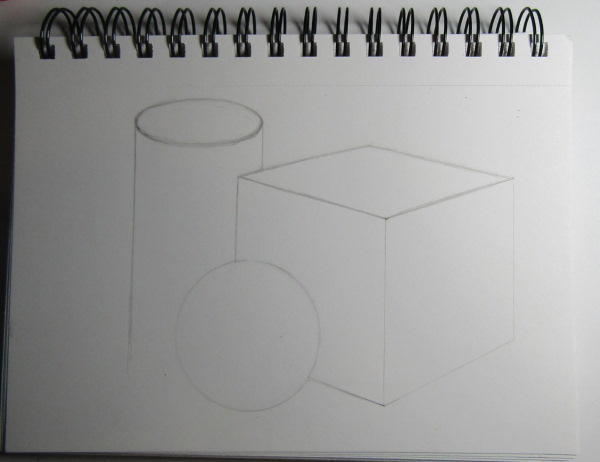
Geometric figures with shadow (a pencil drawing is given below for a cube) begin to be made with compositional placement on a sheet. All objects are first outlined with light lines, marking the borders at the top and bottom. At the same time, the angle and perspective are taken into account.
A cube is one of the simplest geometric bodies, the edges of which are drawn according to the laws of perspective. For younger children, this type of construction may be too complicated. This master class examines a simpler way of drawing.
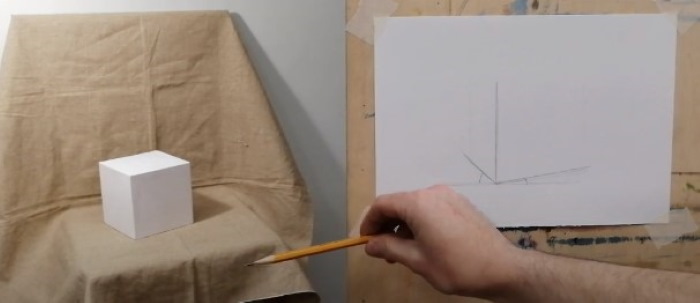
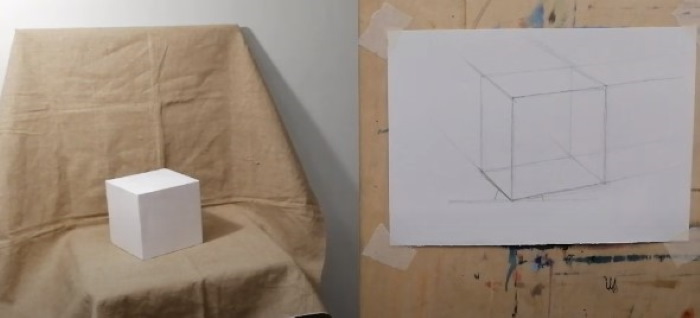

To draw a cube with shadows, you need to do the following:
- Draw a vertical line - the left face of the cube, from which all further construction will be based. Through the lower point draw a horizontal line, used for precise observance of the angles of inclination of the faces. Match the angles and diverge the rays using a pencil.
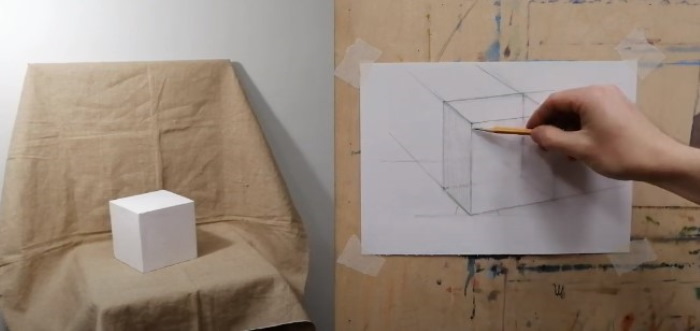
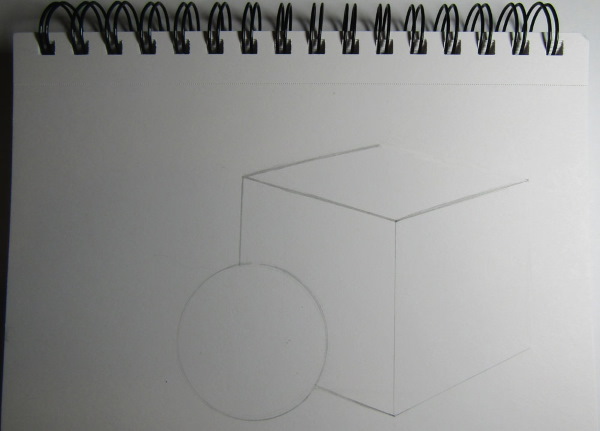
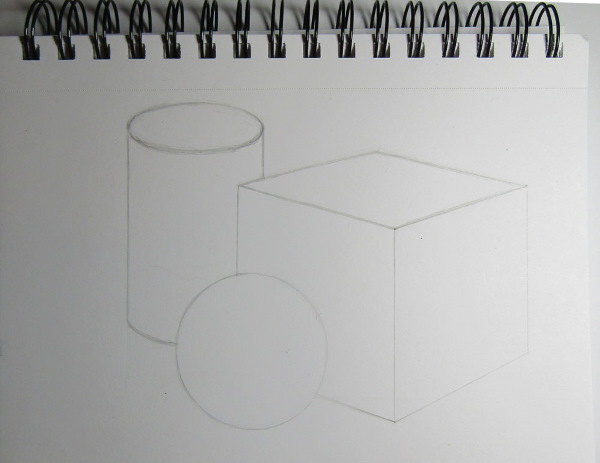
- The remaining faces of the cube are constructed as parallel segments. According to the law of perspective, those lines that go away from the viewer into the distance should eventually visually converge at one point at a large distance.
Therefore, ideally, the edges should not be completely parallel, but slightly inclined to each other. But to simplify the drawing, they can be made parallel. The vertical lines do not converge or diverge.
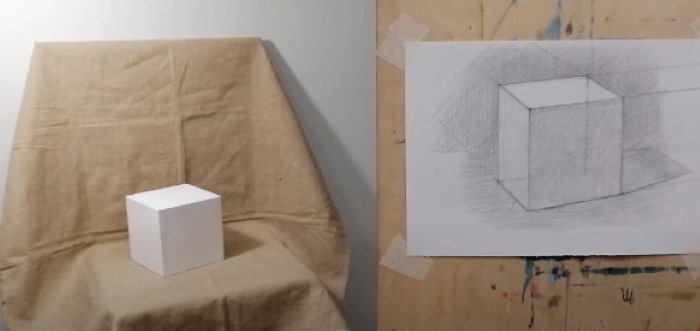
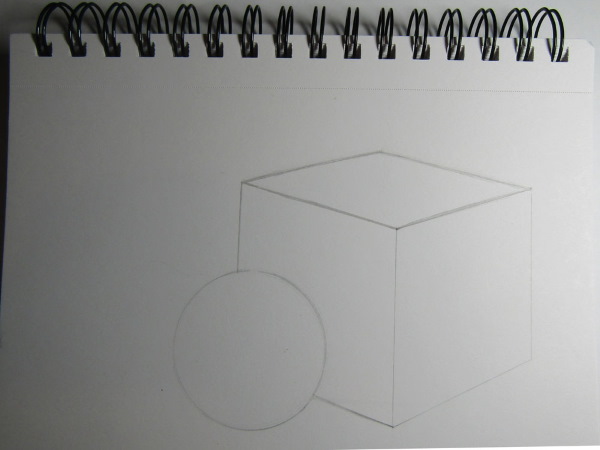
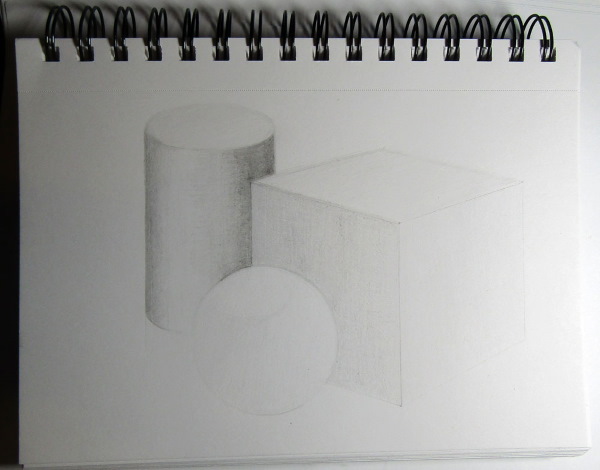
- Refine the construction, make the edges brighter. In order for the cube to be even, it is necessary to draw it "transparent", that is, the back edges should be visible. After the main construction is completed, the extra lines can be erased with an eraser.
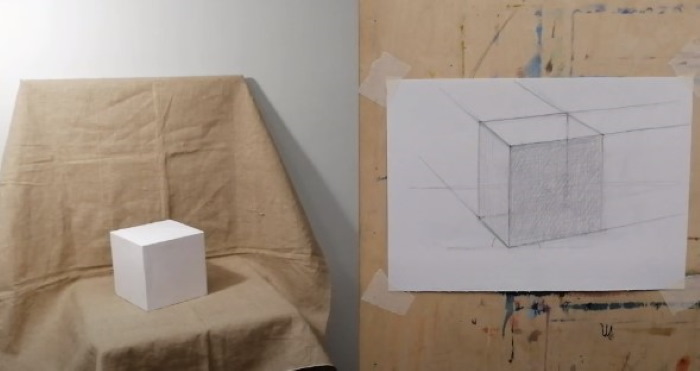
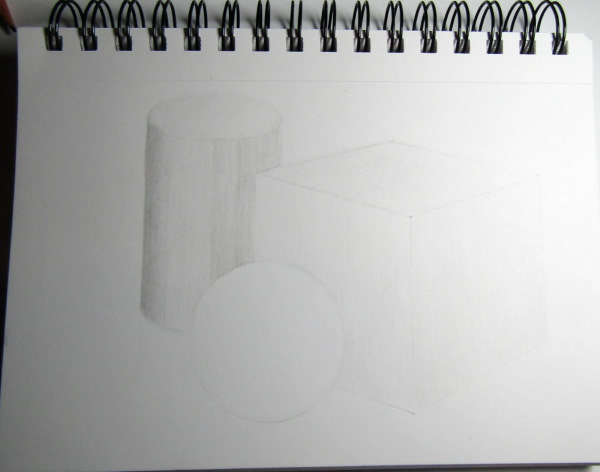
- Shade the left side of the cube. Apply the shading in 2 "layers", first parallel to the inclined side, and then with vertical strokes.
- Shade the second, front face of the cube. In this case, it is the darkest. Apply the strokes first vertically, then parallel to the bottom face and "diagonally".
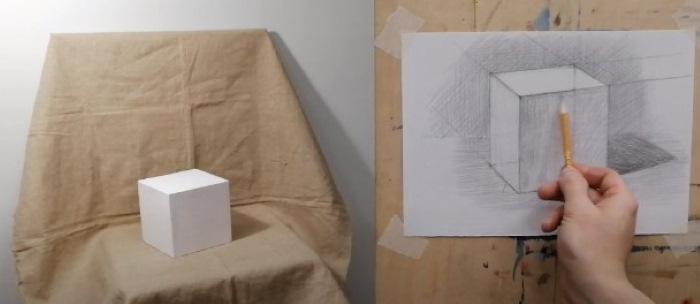
- The background is made with diagonal and vertical hatching.
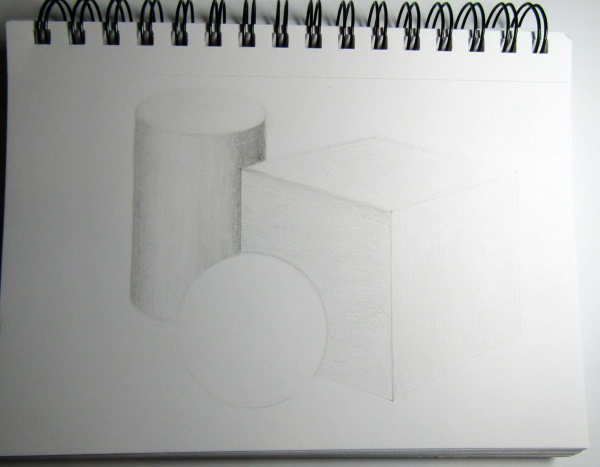
- The horizontal surface on which the cube stands is shaded with horizontal strokes, and then slightly "dilute" them with diagonal strokes. The color of this plane should be slightly darker than the lightest upper face of the cube.
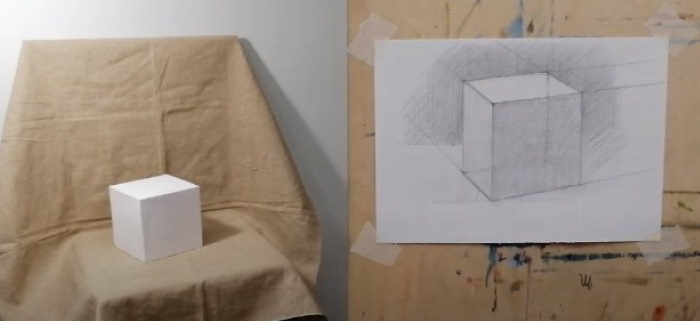
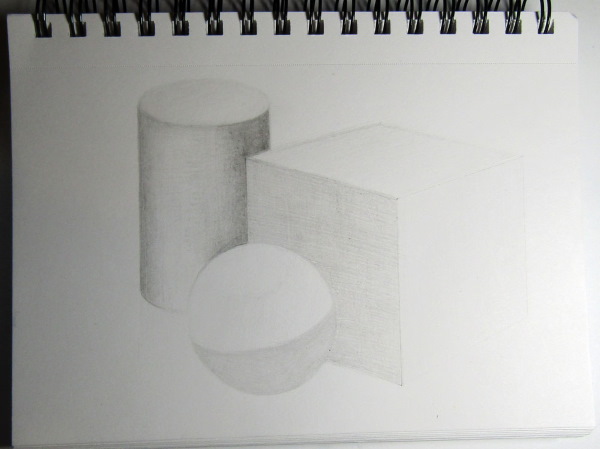
- Draw a falling shadow from the cube, continuing the horizontal edge.
- Shade the falling shadow. It should be the darkest in the drawing. It is also necessary to take into account that as it moves away from the object, it should gradually “dissolve”, that is, become lighter. Its tone should be darker near the edge of the cube. Those surfaces that are closer to the viewer are depicted as more contrasting and clear.

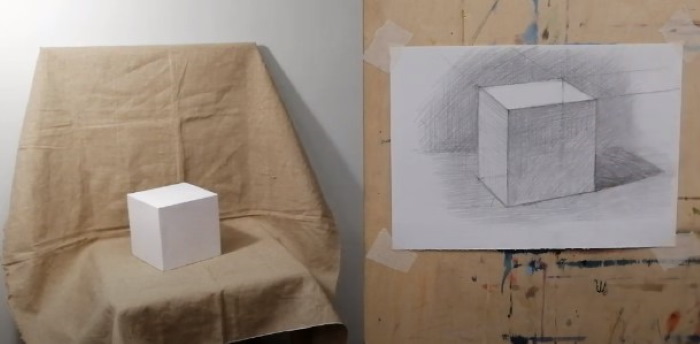
- Make the drop shadow brighter. Also darken the upper part on the front edge. It is slightly illuminated by the reflex from below. The tonal stretch goes in the direction from the lower right corner to the upper left. The transition between the shadows should be depicted smoothly.
- Make the background more saturated by applying additional shading. In the process of drawing, you need to constantly adjust the tone on all surfaces (this is called generalization in academic drawing), since it is impossible to depict it correctly right away.
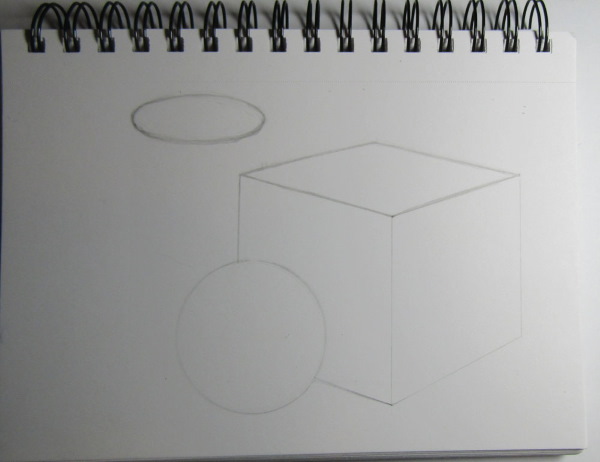
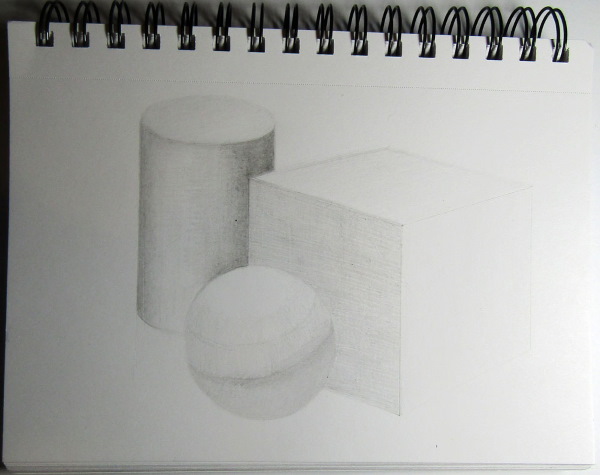
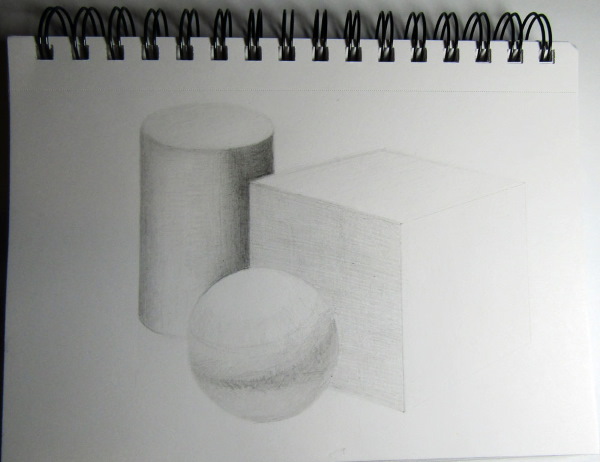
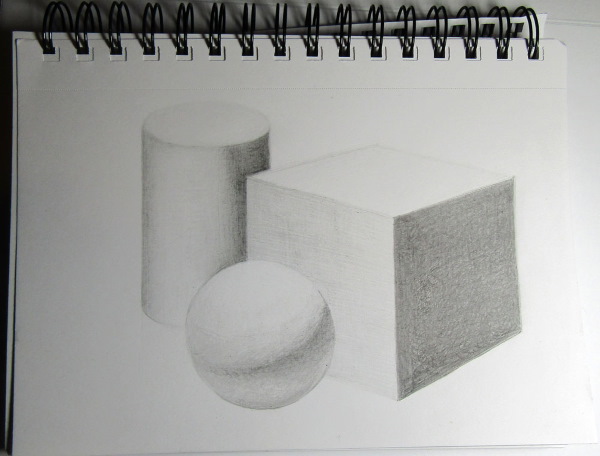
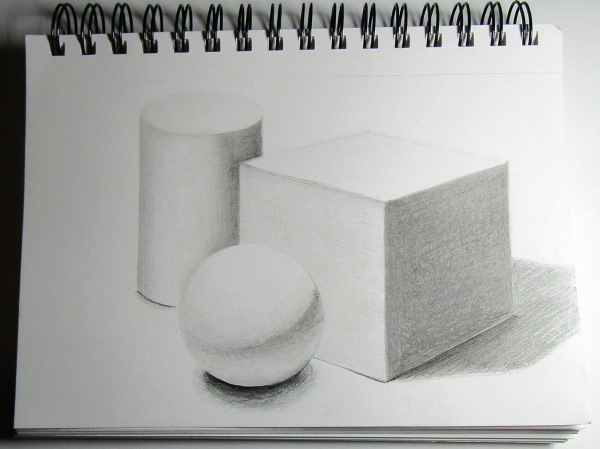
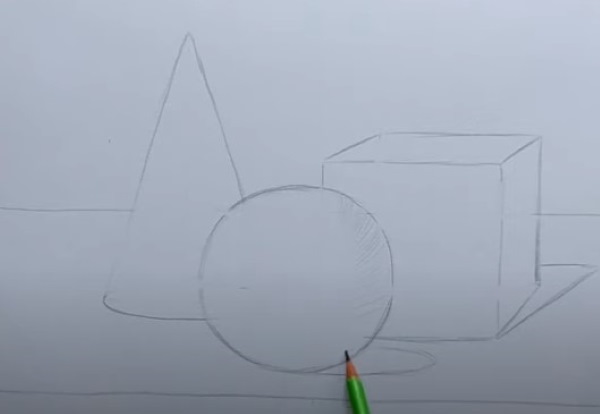
Still life of geometric bodies
Geometric figures with shadow (a pencil drawing can be depicted as a composition of several bodies) are included in the Fine Arts program for the 6th grade of comprehensive schools. This master class examines a composition of a sphere, a cube, and a cone.
How to draw the first 2 bodies has already been described above. For work you will need 2 graphite pencils of hardness HB and 6B (for drawing shadows), an eraser and a sheet of paper.
The step-by-step process of drawing a still life is described below:
- Draw 2 horizontal lines - the near and far edge of the table on which these geometric figures will be located. All lines should be done "by hand", without a ruler.
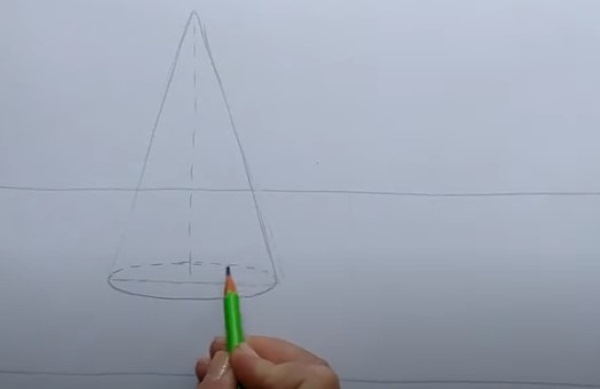
- On the left side of the album sheet, draw the axes of the cone with dashed lines. Place the lower axis approximately in the middle of the horizontal surface (table plane).
- In cross-section, the cone is an isosceles triangle. Draw it symmetrically relative to the vertical axis. Measure the distance from the axis with a pencil, fixing your finger on it.
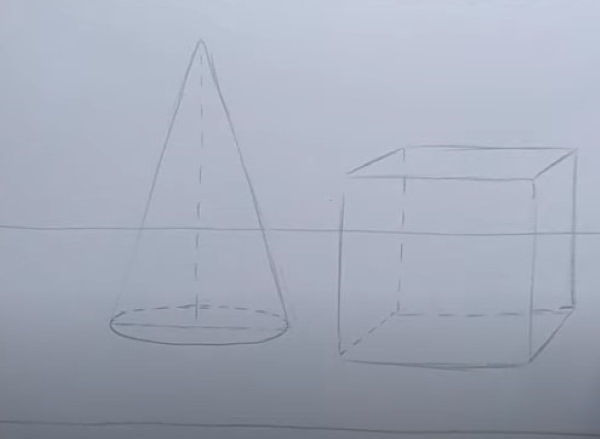
- Draw an ellipse at the base of the cone. Show the back edge, which is not visible to the viewer, with a dashed line. The ellipse should not have either sharp corners or straight sections. Show its outline as smooth.
- To the right of the cone, draw a square – the front face of the cube.

- From the top points, draw 2 parallel segments towards the horizon line. This will be the top face of the cube.
- Connect the top points with a horizontal line. Draw the bottom right edge of the cube, parallel to the top ones.
- Finish drawing the right edge of the cube, connecting the upper and lower points with a vertical segment. Similarly, depict the edges that are in the background and are invisible. The back plane should have the same square as the front one.
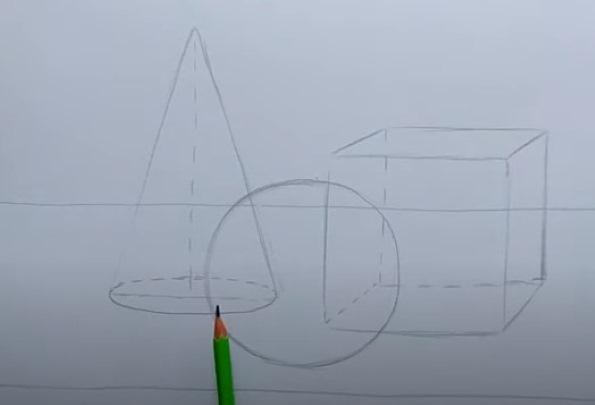
- Draw a circle in the foreground, this will be a ball. To give it volume, you need to do the shading on it correctly.
- Erase the auxiliary lines and those that should not be visible with an eraser.
- Lighting will fall from the top left. Show the contours of shadows falling from geometric bodies onto a horizontal surface. For a cube, it will look like a triangle, and for a sphere, it will look like an oval.
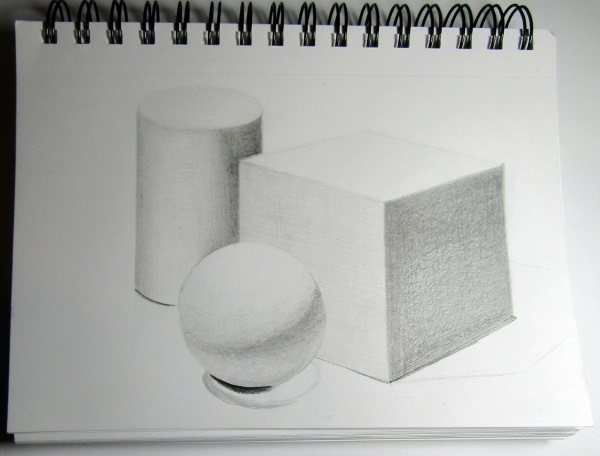
- Use a hard pencil to draw a light shadow on the ball. Apply the strokes according to the shape of the body, i.e. curved. Subsequently, the shadow will be “gained” and will become brighter due to subsequent layers of shading. To make the transition of shadows smooth, shading is applied in several stages. The darkest will be the falling shadows (on the horizontal plane).
- On the cone, make hatching with lines diverging from the top vertically. On the left side, there should be a lighter area on which the lighting falls. At the initial stages of hatching, there is no need to darken the objects too much.
- Darken the ball at the edges, also leave a light spot on the left. Apply strokes in the form of short arcs, without strong pressure, in several passes with a pencil of HB hardness. The surface of the cone near the ball should be darker to contrast, and not merge.
- On the cube, leave the upper edge unshaded. The front edge should be lighter than the right one. The shading should be applied in the form of straight lines, combining horizontal, vertical and inclined strokes. The falling shadow should also be shaded, it should be darker.
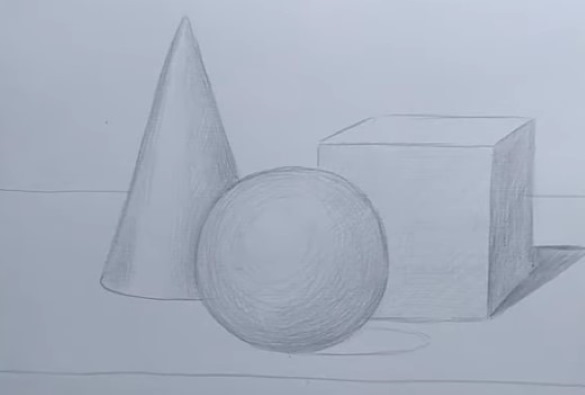
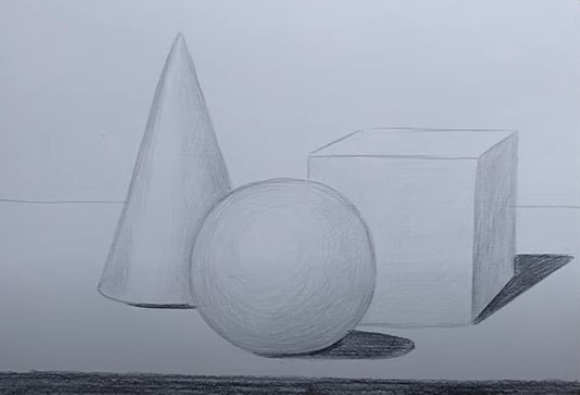
- Darken the shadow falling from the cube with a softer graphite pencil.
- Similarly, shade the falling shadow from the ball, draw the lower edge of the cone darker, shade the front plane of the table.
- Use inclined lines to shade the surface of the table, enhancing the contours of the bodies.
- Shade the background (wall) with vertical and horizontal lines.
Mastering the technique of drawing geometric figures with shadows is also necessary for passing exams when entering art and architectural educational institutions.
A pencil drawing does not necessarily have to be done "clean" right away; creating intermediate versions and reworking is a normal phenomenon that allows you to get a higher quality and more detailed version. Therefore, it is recommended to first make contours without pressing, since intensive erasing with an eraser damages the top layer of paper and leads to "sloppiness" of the drawing.
Video about drawing
Geometric shapes with shadow: