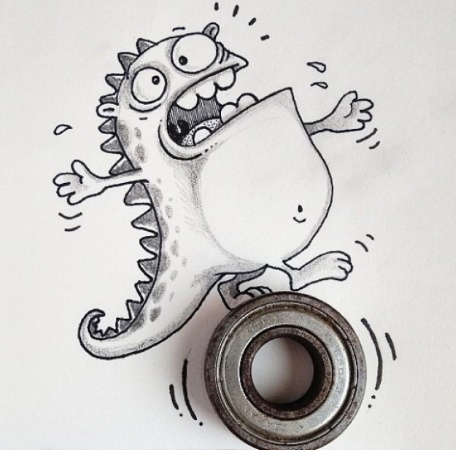
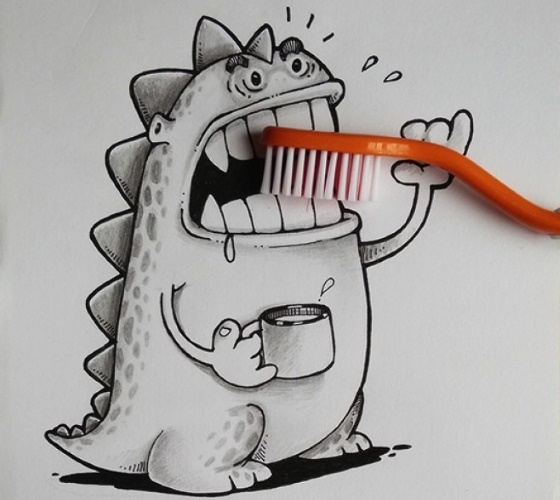
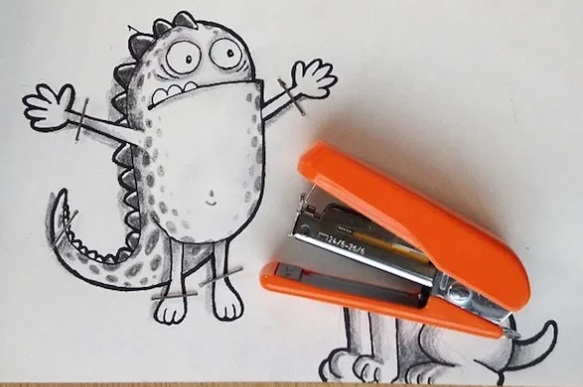
Funny drawings for baby — a great way to cheer him up and get him interested in such a useful activity as drawing. After all, drawing is simply necessary for developing the child’s imagination and fine motor skills. Simple drawings for copying can be used at the initial stages of learning to draw.
Drawing tools
Funny drawings for copying can be drawn with regular pencils. The right set of pencils and paper for drawing determines not only the convenience of the drawing process itself, but also the quality of the created drawings.
Colored pencils have a number of characteristics that you should pay special attention to when purchasing.
The main characteristics of colored pencils are given in the following table:
| Parameter | Variety | Application |
| Form | 6-sided, 3-sided | Recommended for preschool and primary school children. The edges help the child hold the pencil firmly in his hand. |
| Round | Used by experienced artists. | |
| Softness | H (hard) | For outline drawings and blueprints. |
| HB (hard-soft) | For contour drawing and tinting small parts of the drawing. | |
| B (soft) | For coloring pictures and creating background landscapes. | |
| Rod thickness | From 4 to 5 mm | Recommended for preschool children, as the thick lead protects the pencil from frequent breakage. |
| From 2 to 3 mm | Can be used by school-age children. | |
| Lead material | White clay and color pigments (classic lead) | Used for contour drawing. For coloring, you can use a soft (B) classic lead with a diameter of 3-4 mm. |
| Wax (wax) | Used for coloring and drawing landscapes. Does not require sharpening. | |
| Water emulsions (watercolor) | Used as a substitute for painting. | |
| Linseed oil (pastel) | Used for coloring and also for creating background details of the drawing. |
When choosing pencils, you should also pay attention to the strength and quality of the lead. It should not crumble during drawing, and the lines drawn with it should have a rich and bright color. The shell of the lead, the so-called pencil shirt, can be wooden or plastic.
The more common wooden shell is not always durable and sometimes cracks. The plastic jacket has a strength factor that is an order of magnitude higher than the wooden one, which better protects the lead from external influences.
The number of pencils in a set can vary from 6 to 72 pieces of different colors. For preschool children, it is better to limit yourself to a small set of 12 colors. A small number of colors in a set will allow the child to focus more on the drawing itself, rather than on choosing a pencil while drawing.
Among foreign and domestic pencil manufacturers, the following brands have decent quality: Faber-Castel, Crayol, “Sibirsky cedar”, Stabilo, Bic and Koh-i-noor.
It is advisable to use album sheets with a density of at least 100 g/m2 as drawing paper. When choosing an album, you should pay attention to the way its sheets are attached. It is recommended to choose albums in which the sheets are attached using a spiral wire, which ensures a smooth surface of the sheet during drawing.
Recently, such type of album as sketchbook has become very popular. It is a medium-sized notebook, which is convenient to always carry with you.
If the child plans to draw not only at home, but also during walks, then sketchbooks of the following sizes are suitable for this:
- A5 (sheet size: 120×148 mm).
- B6 (sheet size: 176×125 mm).
- B5 (sheet size 250×176 mm).
If you plan to draw only at home, then you don’t need to worry about the compactness of the album.
In this case, the following notebook sizes will be suitable:
- A4 (sheet size: 297×210 mm).
- A3 (sheet size: 420×297 mm).
- B4 (sheet size: 250×353 mm).
The binding of a sketchbook is thicker than that of a regular album, which provides protection of the sheets from external influences and damage.
Cool drawings for copying


Master classes
Funny drawings for copying are great for a child for daily drawing in a sketchbook. Such drawings are done with colored pencils and are suitable for preschool and primary school children.
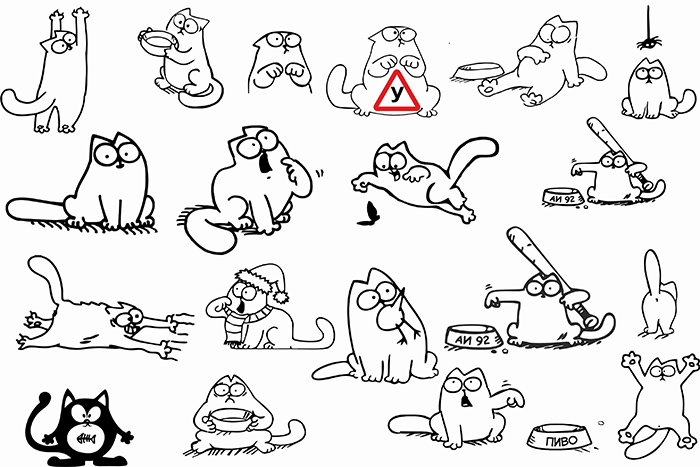
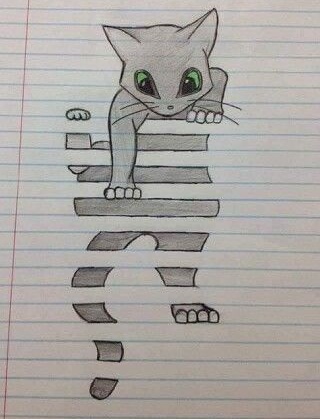
Funny cat
The drawing is of a cat with big eyes, sitting facing the viewer. It can be drawn with a regular pencil.
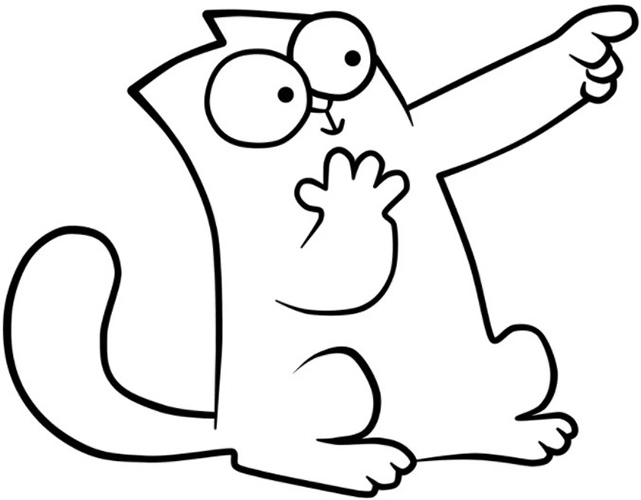
To do this, you need to take the following steps:
- Draw a blank of the body in the form of a vertical semi-oval. Then erase the upper and lower parts of the oval with an eraser.
- Draw the cat's ears as a continuation of the upper part of the body. To do this, place the pencil lead at the top of the left side of the body, and then draw a triangular ear pointing upward. Then place the lead at the top of the right side of the body and draw the same ear on the right. After that, draw a horizontal connecting line between the ears at their bottom.
- Draw the hind legs in a bent position. To do this, place the pencil lead in the middle of the left part of the body contour and draw a semi-oval to the left at a 45° angle relative to the vertical line of the body. The semi-oval should reach the lower part of the body. After that, place the pencil lead in the middle of the right part of the body contour and draw a semi-oval to the right at the same angle. The semi-oval should reach the lower part of the body. You will get two hind legs. The size of the semi-ovals should be 3 times smaller than the size of the body.
- Draw the front legs straight. To do this, draw a small vertical oval just below the center of the body, and then to the left and right of it, two vertical arched lines parallel to the outline of the drawn oval. The right line should be a continuation of the right part of the body outline.
- Draw the toes at the tip of each paw. To do this, place the pencil lead in the lower left part of the paw outline and draw 3 semicircles connected to each other in sequence, the last of which should connect to the right part of the paw outline.
- Draw two eyes in the form of 2 large circles touching each other and located above the center of the body. The left eye should be slightly larger than the right. Then you need to draw the pupils in the form of thick black dots located on the left side of each eye. It should look like the cat is looking to the side.
- Draw the nose as a small semi-oval, located horizontally under the eyes. Then color it with a pencil.
- Draw the mouth in the form of two semicircles coming from the center of the nose down. Then draw the mustache on the right and left in the form of two parallel lines on each side.
- Draw the tail in the form of a long curved oval that comes out from under the cat's left paw.
Little pig
Even little kids can draw this picture.
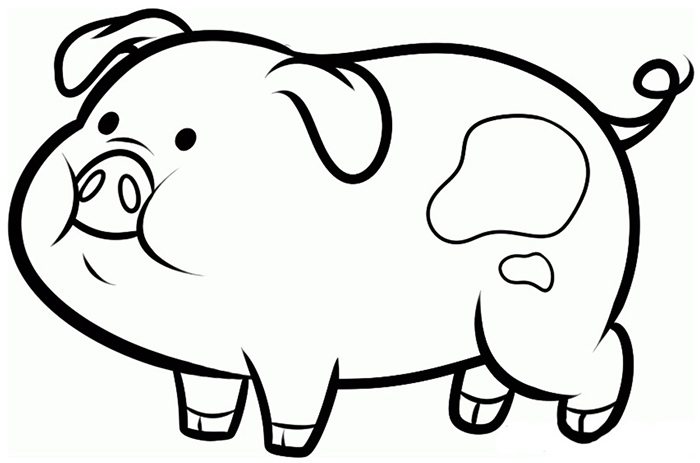
To complete the drawing, you need to follow these steps:
- Draw a circle (body) with a diameter of 4 cm, and then draw an oval (head) with a diameter of 3 cm, located horizontally and intersecting the circle in its lower left part. Then you need to erase with an eraser the part of the circle line that is inside the oval.
- Inside the head, below the center, draw a snout in the form of a horizontal oval with a diameter of 1.5 cm. Then inside the snout, draw two nostrils in the form of two vertical stripes. Above the snout, you need to draw eyes in the form of small circles located at a distance of 1 cm from each other.
- On the head, draw ears in the form of two triangles, stretched in different directions.
- Draw two front legs in the form of columns under the head. Then, under the right part of the body, draw two back legs in the form of the same columns. After that, inside each leg, in the center of the lower part, draw a vertical line (to imitate a hoof).
- Draw the tail on the right side of the body in the form of a zigzag line.
- Color the body and head pink.
- Color the snout and the inside of the ears burgundy.
Funny sheep
The sheep in this drawing will look very perky and cheerful.
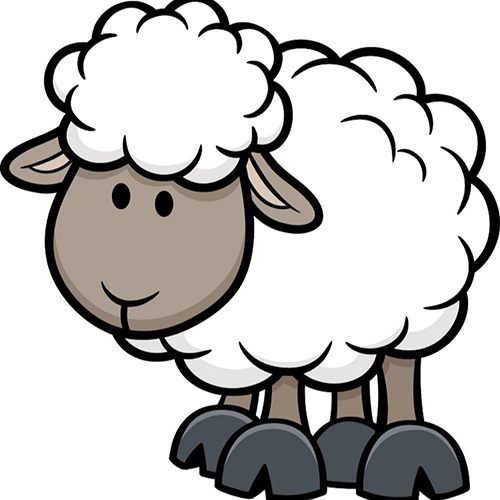
The process of drawing it consists of the following stages:
- Draw the body in the form of a large oval in a horizontal position.
- On the left side of the body, draw a head in the form of an elongated oval (resembling an egg in shape) at an angle of 45° relative to the central horizontal line of the body. The narrow part of the head should be on top, and the head itself should slightly intersect the body. Then you need to erase the part of the body outline that is inside the head outline.
- At the top of the head, on the right, draw a twisted horn in the form of a circle. The size of the circle should be 2 times smaller than the size of the head. Then you should draw part of the second horn in the form of a semicircle peeking out from the top left of the head.
- Between the horns, draw a fringe in the form of four semicircles connected to each other. The left and right parts of the fringe outline should be connected to the left upper part of the right horn outline.
- Draw the eyes as two ovals located at the top of the head at an angle of 45° relative to the central horizontal line of the body. Then inside each eye draw another oval 2 times smaller than the outline of the eye.
- Draw two nostrils in the form of two small ovals located at the bottom of the head outline. Then draw a smiling mouth by placing the pencil lead at the center of the bottom of the head outline and drawing a small curved line upwards.
- Draw two front legs as rectangular columns, coming from the lower left part of the body contour and directed slightly to the left. Then draw two back legs as the same columns, coming from the lower right part of the body contour and directed slightly to the right.
- At the base of each leg, draw a hoof in the form of two connected triangles.
- Inside the horn, from its center, draw a spiral line that expands until it reaches the outline of this horn.
- Draw the sheep's wool in the form of small swirling lines along the contour of the body and inside the body.
- To the right of the body, draw a tail in the form of two semi-ovals connected to each other in its right part.
Funny mouse
Funny pictures for copying are very popular with kids. This picture is suitable for preschool children.
The process of drawing it consists of the following stages:
- Draw the body in the form of an oval in a vertical position.
- Draw the ears in the form of two semicircles located on the left and right sides of the upper body.
- In the center of the lower part of the body, draw the stomach in the form of a small oval in a vertical position.
- To the left and right of the body, draw the front legs in the form of elongated ovals at an angle of 45° relative to the central vertical line of the body.
- Below the body, draw the hind legs in the form of two semicircles, the convex part of which should be directed upward, and their lower parts should be connected in one line and intersect with the lower central point of the body contour.
- Inside each ear, in the center, draw a circle with a diameter 2 times smaller than the diameter of the ear.
- At the top of the body, draw eyes in the form of two small dots, elongated vertically, and just below the eyes, in the center, draw an oval nose 3 mm wide, located horizontally.
- Draw the mouth in the form of two semicircles, coming from the center of the lower part of the nose and directed with the convex side down. Then under these circles, in the center, draw two teeth in the form of rectangles, rounded at the bottom.
- To the right of the body, just above the right paw, draw a long zigzag tail directed to the right.
- Color the body, paws, ears and tail gray.
- Color the inside of the ears and belly pink.
Happy hedgehog
Funny pictures can be colored in almost any colors. for copying. In this drawing for copying, the child can show his imagination, depicting various fruits on the hedgehog's back.
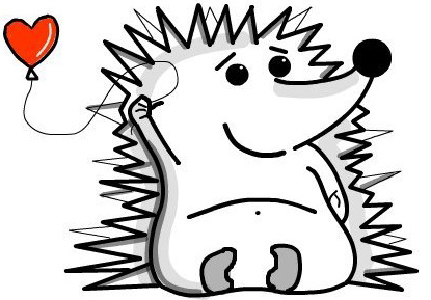
To draw such a hedgehog you need to follow these steps:
- Draw the body in the form of a large oval, located in a horizontal position.
- On the right side of the body, draw a square with rounded corners. Then erase the part of the body outline that is inside the square, and also erase the lower right part of the square and in this area draw a muzzle in the form of a triangle curved upwards. As a result, you will get the outline of the hedgehog's head. Then, at the top of this triangle, draw a round nose.
- In the upper left corner of the head outline, draw an oval ear. Then draw the same oval hole inside the ear.
- Draw a round eye in the upper right part of the head, and draw a semicircle pupil in the lower left part of the eye. Then draw a small circle (glare) inside the pupil. Then paint the pupil black, leaving the glare unpainted.
- Draw an eyebrow in the shape of a semicircle above the eye.
- Draw a smiling mouth at the bottom of the muzzle. To do this, first draw its upper part in the form of an inclined arc, and then add a semi-oval to its left part, directed with the convex part downwards and slightly to the left.
- Draw needles along the outline of the body using a sawtooth line.
- Draw paws under the body in the form of curved rectangles with rounded corners. Then draw fingers on the tips of the paws in the form of 3 semicircles connected to each other.
- Draw various fruits, such as mushrooms or apples, on the hedgehog's back.
- Color the body brown and the paws and face gray.
- Color the nose black.
- Color the fruits in their corresponding colors.
Drawings for copying usually do not require special skills and are very easy for children to master. Kids like funny drawings and they draw them with pleasure.
Video about drawing
How to draw a hedgehog: beautiful simple drawings for copying: