One of the most popular and at the same time environmentally friendly types of applied art is felting. A wide variety of things are created from unspun sheep wool: from clothes and shoes to toys. Cozy mittens made by hand, can be the first step in mastering a new handicraft.
Choosing a Felting Technique
Any felted items are created by carefully tangling and bonding wool fibers. As a result, a dense and durable uniform surface is formed. Natural wool of fine-wool merino sheep is used as the main working material.
There are two fundamentally different ways of felting natural wool. Each of them is more or less suitable for making certain products.
Dry felting technique
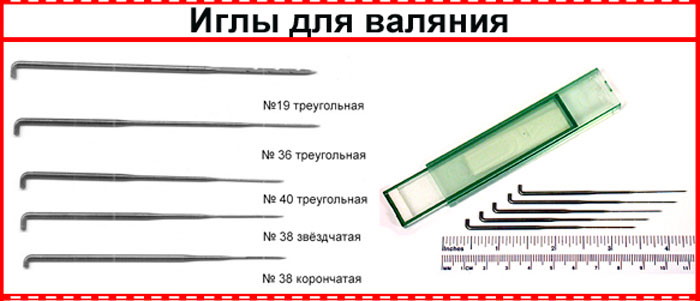
For dry felting you will need carded wool and special needles with notches.
Carding is a type of processing of unspun wool. In appearance, it resembles cotton wool, in which individual fibers are located randomly, in different directions.
Felting needles are different from regular sewing needles. They do not have an eye, and there are notches along the tip. Depending on the location and number of notches, needles are distinguished by numbers. A needle of a certain number is intended for each stage of work.
The felting process is carried out by entangling individual fibers using the notches on the needle. A tuft of wool is tightly rolled up and pierced with a needle over the entire surface in different directions. The punctures should be deep and frequent. As a result of this action, the wool lump gradually becomes denser and takes shape.
Technologically, this process resembles the creation of a sculpture, when a given shape is molded and fixed from a shapeless mass. A high-quality felted product should be dense and elastic.
This technique is usually used to create three-dimensional and relief products:
- collectibles or children's toys;
- objects for interior decoration;
- brooches;
- small accessories (eg keychains).
This technique is not suitable for creating clothes and small wardrobe items (gloves, ties, socks). However, you can use a needle to “stamp” a pattern onto a textile surface: knitted fabric, clothes, a bag, etc.
Wet felting technique
Felted wool mittens can be created using the wet felting technique. You will need combed wool, water and soap.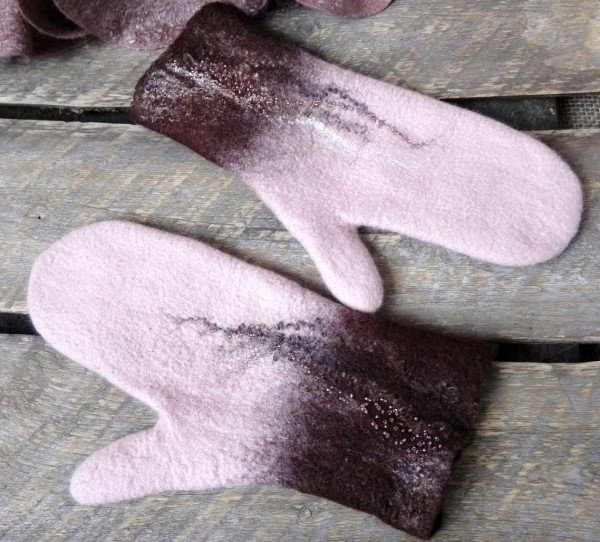
Combed tape, or tops, is merino wool that has been combed on special devices and stretched into a long, even tape. All the fibers in it are straight and lie in one direction.
The choice of soap is quite wide and depends on the individual preferences of the craftswoman. Many needlewomen prefer to use other detergents instead of soap.
The most commonly used materials for wet felting are:
- special olive soap for felting;
- solid toilet/laundry soap;
- liquid toilet/laundry soap;
- dishwashing liquid;
- inexpensive shampoo.
You should choose a product that will not cause irritation on your hands.
The choice also depends on the thickness of the wool and the type of product.
The felting process is as follows:
- Thin strands are pulled out of a woolen skein and laid out with a slight overlap on a flat surface. The layout can be in one or several layers, depending on the specific task.
- The laid out wool is covered with a mosquito net and moistened with a soap solution.
- Then the layout begins to be carefully rubbed with the palms over the mesh.
- The mesh should be lifted from time to time to prevent it from becoming matted to the wool. As the fibers adhere to each other, the friction should be increased.
- Then the woolen cloth should be rolled into a roll, wrapped in a towel and rolled on the table.
- The finished fabric should be durable, with a uniform texture reminiscent of dense fabric.
- After finishing work, the product must be rinsed well and laid out to dry on a horizontal surface.
Using wet felting technique you can create:
- clothes;
- shoes;
- headwear;
- bags;
- interior decoration items;
- accessories (scarves, wallets, gloves, brooches and others).
Necessary materials
The following materials and tools will be required for the work:
- fine wool in combed tape – 50 g;
- underlay for laminate – 80/40 cm;
- warm soapy water;
- bubble wrap;
- mosquito net;
- a stick for rolling in a roll (a rolling pin, a shovel handle, a piece of plumbing pipe, etc.);
- scissors;
- polyethylene/vinyl gloves.
For this product, you should take thin wool from 18 to 21 microns. A thing felted from thicker wool will be rough and uncomfortable to wear.
You can choose any color or use merino wool of 2-3 different colors. The choice will depend only on the artistic taste and imagination of the craftswoman.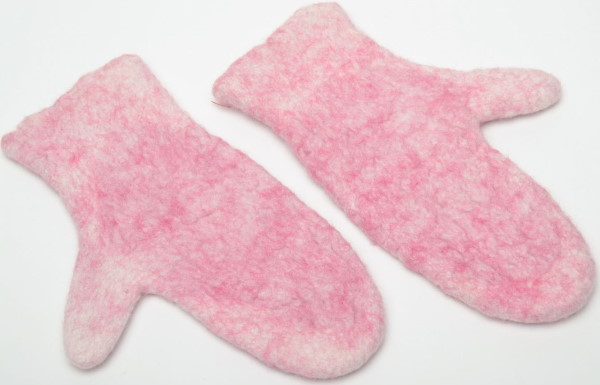
The specified amount of wool will be enough for medium-sized women's mittens. It may vary depending on the expected size of the future product. Thus, for children's mittens you will need 30-40 g, and for men's - up to 70 g of merino.
Felted wool mittens can be decorated at your own discretion. For this, you will need additional materials: viscose fibers, threads, scraps of fabric, etc. More details on the design of the finished product will be discussed below.
How to decide on the size of future mittens
Before starting work, you need to take measurements from your hand and draw a pattern template based on them. You can make a drawing on paper and then transfer it to the backing for the laminate or immediately make a template on the backing. There are different ways to make it. Below is a simple option that will be understandable even for beginners.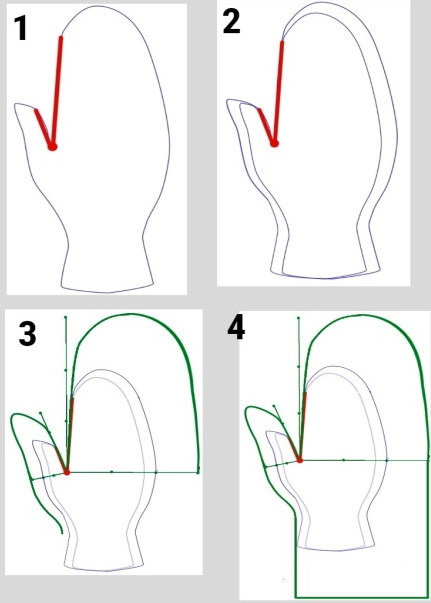
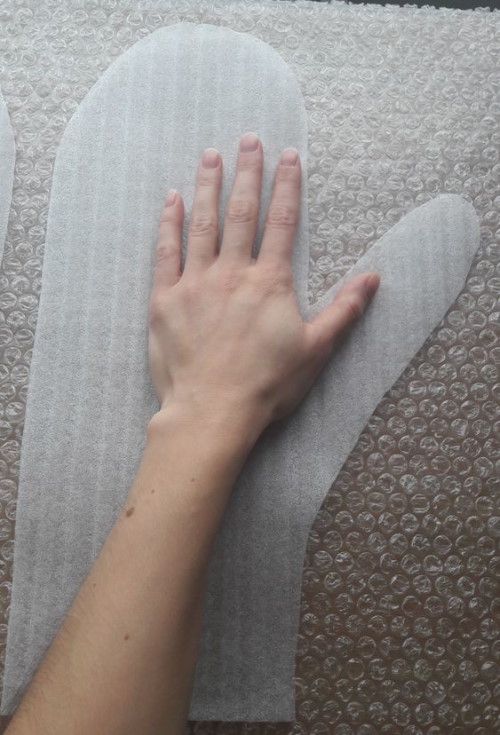
- Place your palm on the pad and trace the outline of your hand, slightly moving your thumb to the side. The length of the cuff is determined arbitrarily and depends only on personal choice.
- From the base of the thumb, draw 2 lines up along the thumb and index finger to the natural bend points. These are the main lines that will not change.
- Make an increase for the thickness of the hand, increasing the initial outline by 3 cm. Do not increase the red lines between the thumb and index finger.
- Measure the length and width of your palm and thumb.
- Multiply the obtained data by 1.5. This is the shrinkage coefficient (SC), since during the felting process the wool will shrink by 1.5 times from the original volume.
- Draw straight lines up and to the sides from the base of the thumb, taking into account the KU.
- Using the extreme points of the drawn lines as a guide, draw the upper part of the contour taking into account the KU.
- Measure the desired cuff length on your arm and multiply by the CU.
- Put the obtained value at the bottom of the pattern and draw the remaining lines.
- Using scissors, cut a template from the laminate backing.
- Cut out the pattern for the second mitten in mirror image, attaching the finished template.
Master class on felting wool mittens
Before starting work, you need to prepare your work area and materials.
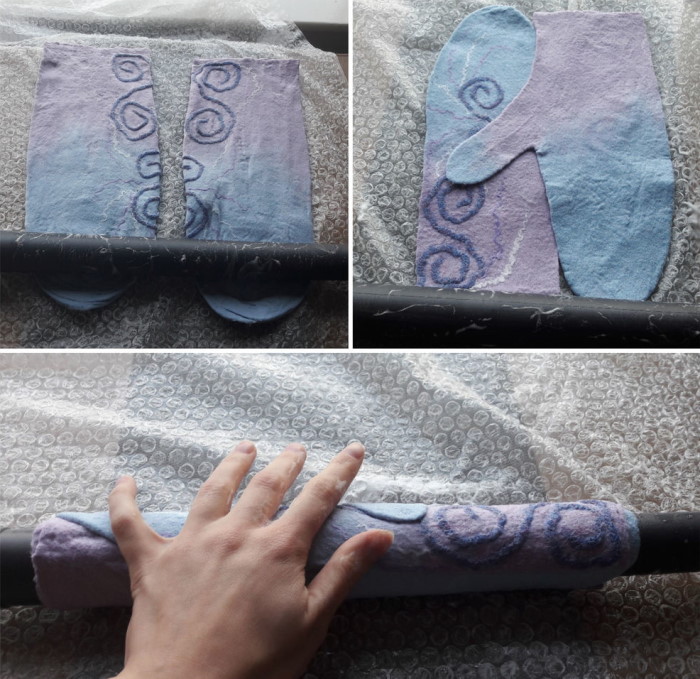
The wool should be divided into 4 equal parts. Each of them is intended for 1 side of 1 mitten (2∙2=4). Any paired items are recommended to be felted simultaneously to avoid inaccuracies in sizes and shapes. Therefore, on a table covered with air bubble wrap, with the bubbles facing up, you need to symmetrically place 2 templates at some distance from each other. After that, you can start working, strictly following the description.
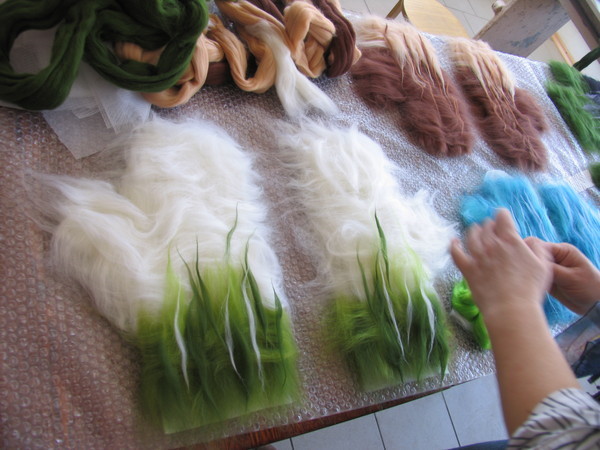
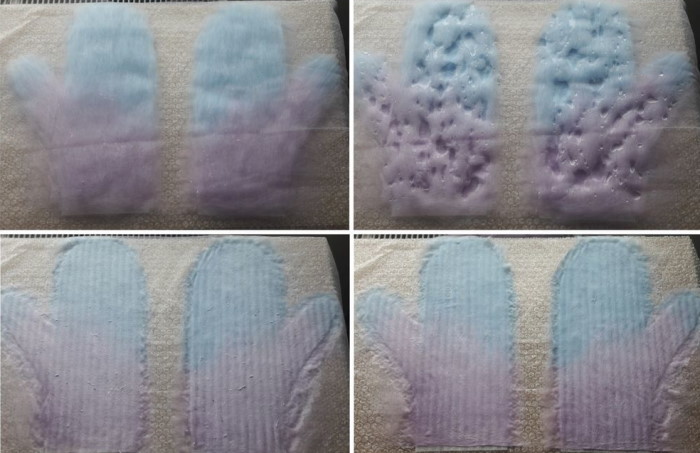
- Place a thin layer of wool horizontally on the surface of each template, separating uniform strands from the skein. Lay out with an overlap of 30-40% of the length of the strands. The entire template should be covered with wool. Its ends should extend beyond the boundaries of the stencil by 1-1.5 cm along the entire perimeter except for the lower edge of the cuffs.
- Lay out the second layer of wool in exactly the same way, but in the longitudinal direction.
- Lay another horizontal layer on top of the first two.
- Strengthen the corner near the base of the thumb by placing a small additional strand and bending its end to the underside.
- To align and strengthen the bottom edge, place a thin strand of about 0.5 cm in width along it. The wool on this side should not reach the edge of the template by 1-1.5 cm.
- Press the layout lightly with your hands, cover with a mosquito net and spray generously with a soap solution from a spray bottle.
- Put on work gloves and use your hands to distribute the water over the wool so that it soaks all the layers of the layout.
- Rub wet wool through a mesh for 0.5-1 min. The movements should be light and gentle so that the fibers do not shift.
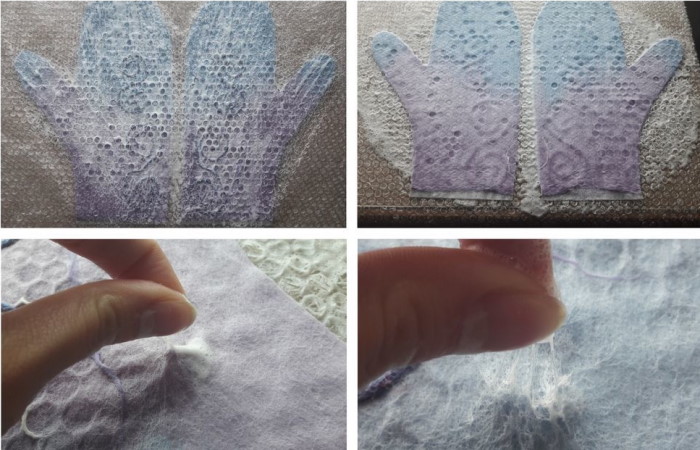
- Carefully remove the mesh and trim the open edge with the same careful movements.
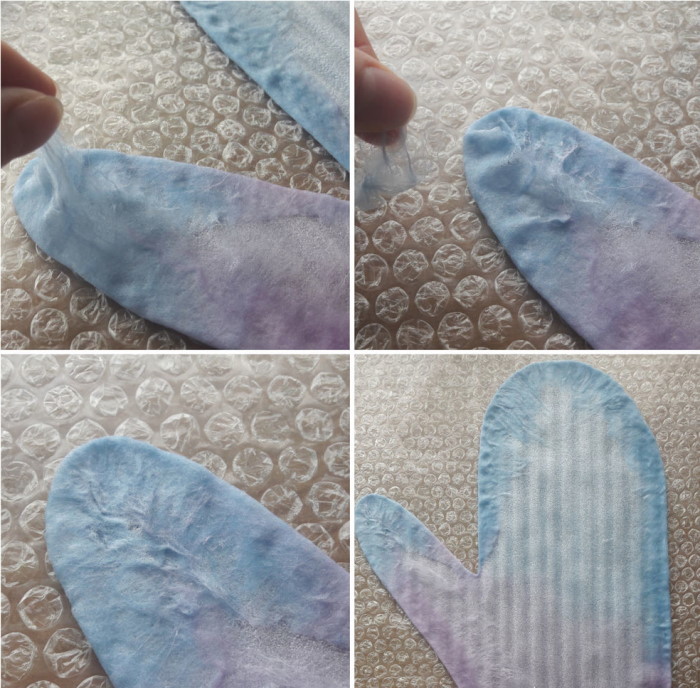
- Turn the layout over together with the template and bend the protruding woolen edges to the free side. You should carefully straighten them out, evenly distributing them along the perimeter and pulling them tightly enough to the edge.
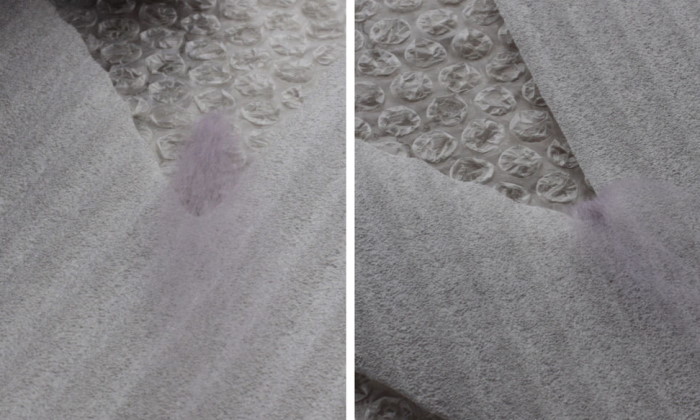
- Cut the angle between the thumb and the palm with scissors, stopping about 1 cm from the template. Stretch the wool at the cut, carefully distributing it along the edge of the template.
- Lay out the wool in 3 layers, just like on the previous side, without going beyond the template. The strands should be placed end to end with tucked allowances to avoid thickening.
- Wet and rub the layout, repeating steps 6-9.

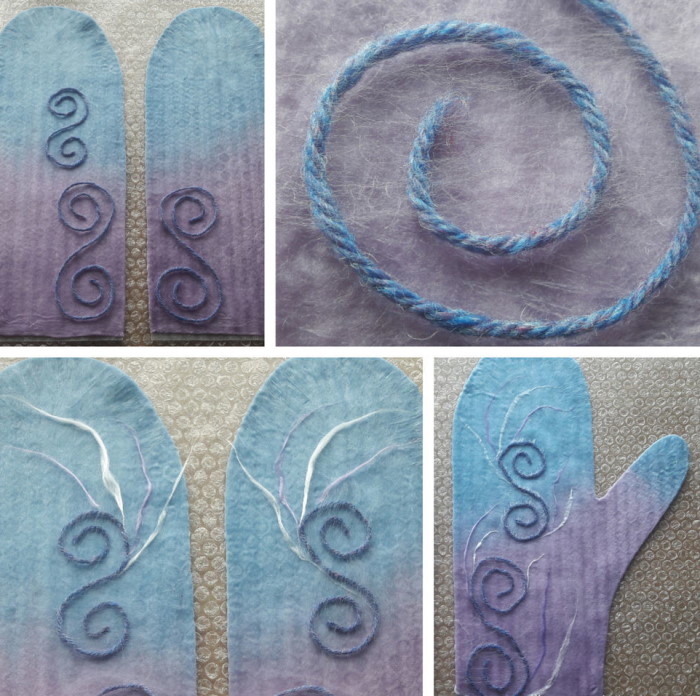
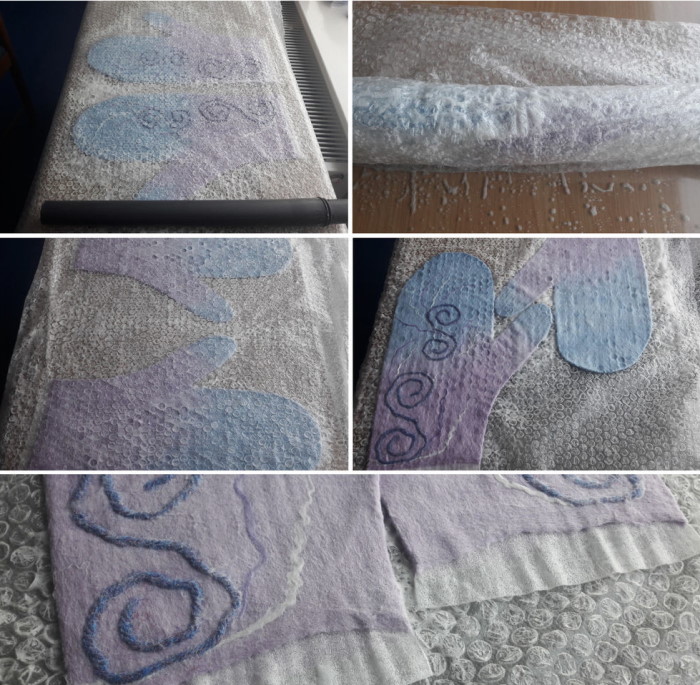
- If desired, you can decorate the finished layout with viscose, silk, wool threads or other materials. More details on the design will be given below.
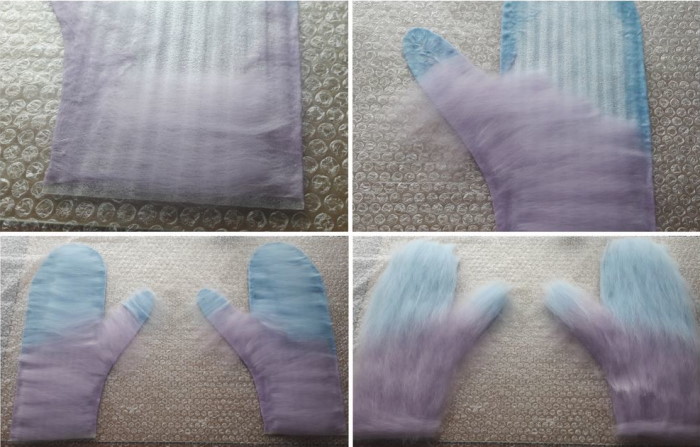
- Wet the wool with a fresh soap solution and rub through the mosquito net on each side in turn. The net should be periodically lifted so that it does not fall to the mittens. Rub until the fibers stick together.
- Cover the gloves with bubble wrap and wind them tightly around a stick/pipe. To prevent the roll from unrolling during work, the ends can be secured with a rubber band.
- Roll the roll on the table with forward and backward movements approximately 50-60 times.
- Unroll the twist and, turning it over to the other side, wind it onto the pipe again. Repeat the rolling cycle.
- Roll in the same cycles in all directions and on both sides, each time winding the mittens in a new way: along, across, from the fingers to the cuff and vice versa.
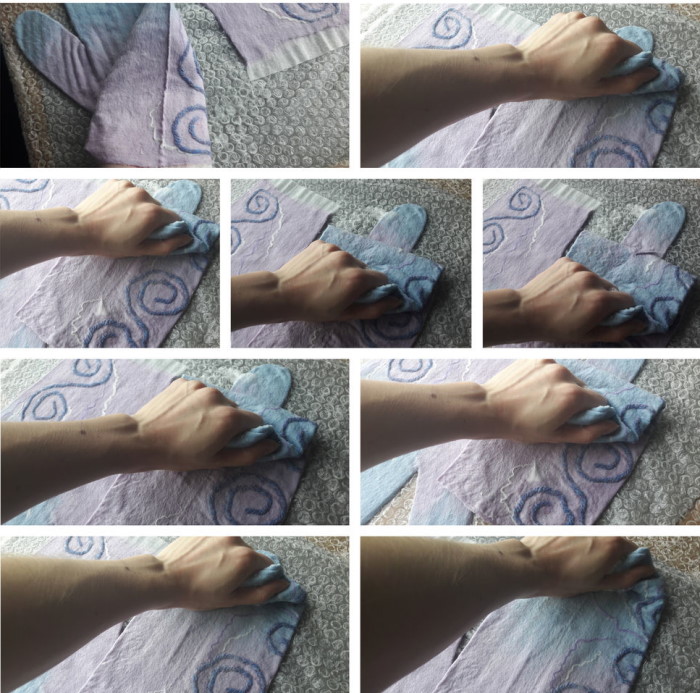
- When the mittens begin to shrink and decrease in size, the template must be removed.
- To prevent creases from forming at the folds, the mittens should be put on your hands and the sides should be rubbed against bubble wrap and/or against each other. If the “ribs” have already appeared, they can be smoothed out at this stage using the method described.
- Lightly crumple the mittens and throw them on the table about 50 times with light slapping movements.
- Wet the work with fresh and warm soapy water and repeat the rolling cycle on the pipe in different directions, but without the air-bubble film. The degree of pressure with your hands should be increased.
- Repeat throwing on the table, but more energetically. You can also make movements that imitate kneading dough. Continue these manipulations until the mittens decrease in size and fit exactly on your hand.
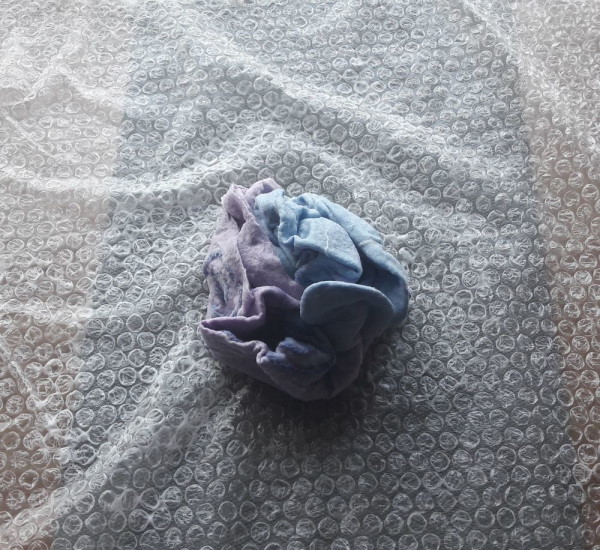
- Rinse the finished product thoroughly in cool running water, straighten it out and lay it out to dry on a horizontal surface.
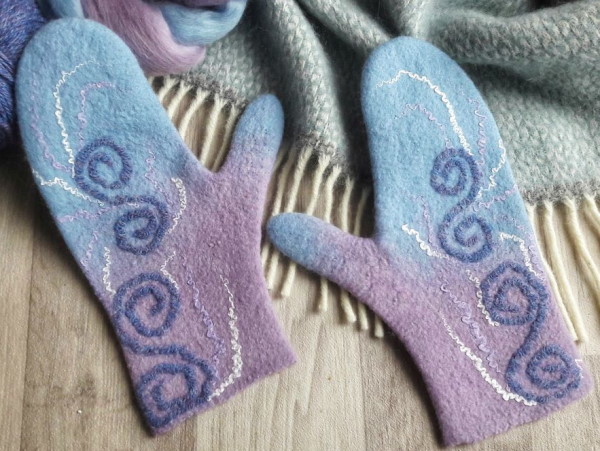
The felted wool mittens are ready. To make the surface smooth and lint-free, you can steam them with an iron.
Design of felted mittens
You can decorate and embellish the mittens both during the work process and after it is finished.
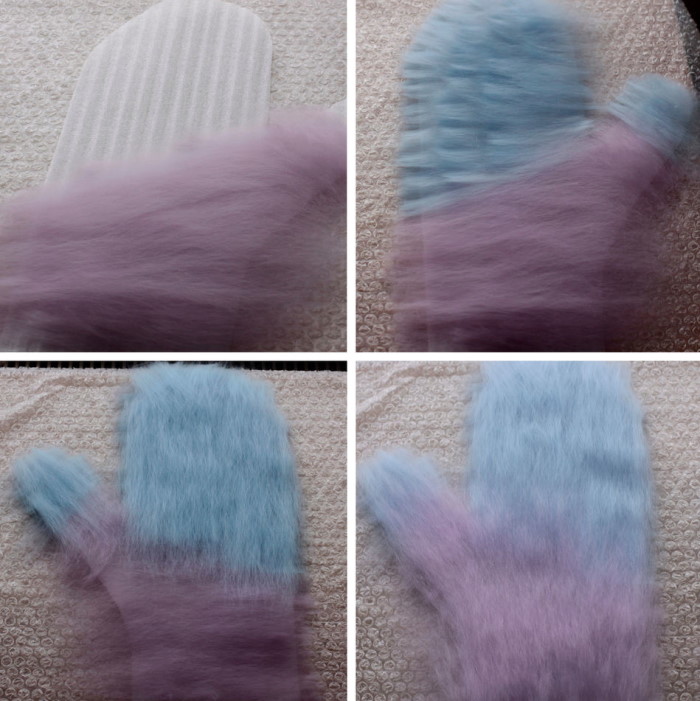
Even a simple felt surface can be diversified without taking any additional steps. To do this, it is enough to use not 1, but 2-3 colors at the layout stage. These can be smooth transitions of related shades, a gradient or contrasting stripes. 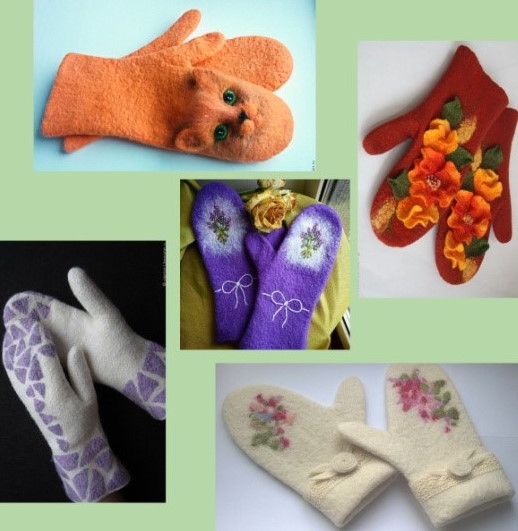
Various materials and decorative elements are also used for decoration:
- multi-colored plant fibers (viscose, flax, nettle and others);
- silk fibers;
- woolen threads;
- scraps of fabric;
- lace;
- beads and/or beads;
- sequins.
In general, you can use any decor that is easy to felt or sew to a felt surface. There are no special rules here, and everything depends only on the desire, imagination and technical capabilities of the master.
Below is an approximate list of the most common types of materials and handicraft techniques used in the design of mittens.
| Materials for decoration | Stage of work | Type of handicraft | Tools and accessories | Brief description of the process |
| Prefelt (loose woolen fabric - "semi-finished product") | Rolling | Application | Soap solution, rolling pipe, scissors. | The pieces cut from prefelt are lightly rubbed by hand onto the surface of the mittens and then rolled into a roll. |
| Decorating the finished product | Scissors, sewing needle, thread. | The cut out prefelt pieces are sewn onto the finished product using a decorative stitch. | ||
| Carding | Decorating the finished product | Dry felting | Felting needles, foam backing. | The three-dimensional image is “stuffed” with a needle onto a dry felt surface |
| Decorative fibers (viscose, silk, linen and others) | Layout | Wet felting | Soap solution, template. | The fibers are laid out on top of the wool layout. Then felted as usual. |
| Fabrics (thin silk, chiffon, gauze and others) | Layout | Wet felting | Soap solution, template, scissors. | A piece of fabric is moistened with a soap solution, wool is laid out on top of it and then the entire felting cycle is completed step by step. |
| The patterned piece is placed on top of the layout, the edges are masked with wool and felted as usual. | ||||
| Woolen threads | Decorating the layout | Wet felting | Soap solution, template, scissors. | The threads are laid out in patterns on a dampened layout, lightly rubbed and felted as usual. |
| Decorating the finished product | Knitting | Knitting needles/crochet hook, sewing needle with a wide eye. | You can complement felted mittens with knitted cuffs or sew crocheted decorative elements (flowers, snowflakes) onto them. | |
| Decorating the finished product | Embroidery | Sewing needle with a wide eye. | Embroidering of individual motifs or mini-plots (for example, a bird on a branch). You can embroider with a cross, satin stitch, back stitch or any other decorative stitch. | |
| Lace | Decorating the layout | Wet felting | Soap solution, template, scissors. | Rub the pieces of lace onto the dampened layout and continue felting as usual. |
| Decorating the finished product | Sewing | Sewing needle, cotton thread. | Sew the lace to the finished product using a blind stitch. | |
| Beads, sequins | Decorating the finished product | Embroidery | Beading needle, threads for sewing on beads. | Decorative elements are sewn onto the finished product using a blind stitch. |
Tips and recommendations for beginner needlewomen
Even a beginner can create felted wool mittens. Such a small product is perfect for practicing skills in a new type of handicraft. However, ignorance or ignoring some nuances of the work can lead to disappointment.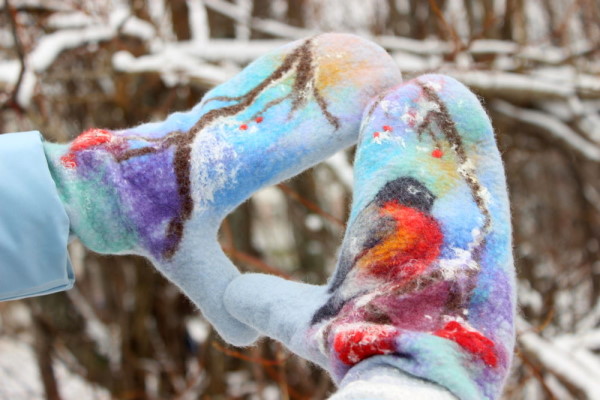
The most common ones are described below:
- The shrinkage coefficient of different types of wool can vary greatly. This depends on its thickness, the breed of sheep and the composition of the dyes.
- Before you begin working on any project, you should felt a sample. This will help you understand the degree of shrinkage and determine the amount of wool needed.
- Samples are also necessary when adding any decor during the felting process. Different fibers, fabrics and threads are felted differently and significantly affect the degree of shrinkage.
- Beginners are better off using "proven" natural fibers for work: viscose, silk, linen, scraps of thin natural fabrics. Materials of artificial origin, as well as dense fabrics, are felted with difficulty or do not felt at all.
- Fine and/or undyed wool shrinks more than dyed and coarse wool.
- When felting the product on the template, it is important to ensure that no "ribs" or "creases" are formed on the sides. To do this, you need to periodically straighten the folds and align them by rolling them in a roll.
- When laying out the wool, it is unacceptable to tear the strands from the skein. Grasping the end of the strand with your hand, you need to carefully pull it and easily, almost without effort, separate it from the combed tape.
- For a smooth transition of the connection of different shades, multi-colored strands should be connected with diffuse edges. The diffuse edge is considered to be the one separated from the strand, and not the one that is clamped in the hand.
By following these tips, you can avoid many annoying mistakes and disappointments.
For most needlewomen, acquaintance with felting begins with the creation of small works. Warm and soft mittens with unusual decor can become a thing that will inspire the creation of large woolen products and a serious passion for a new type of creativity.
Author: Veronica Reutova
Video about felting mittens
Master class on felting mittens: