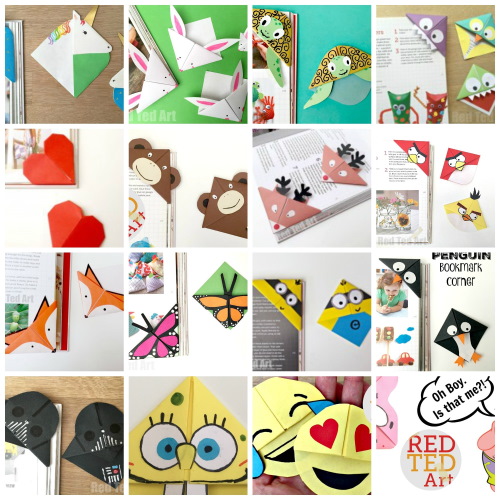
You can learn how to make bookmarks for textbooks, in the form of corners that are put on the pages, with your own hands. To do this, you need to know what tools and materials you may need, and also read several step-by-step instructions for creating bookmarks of different shapes.
Necessary materials and tools
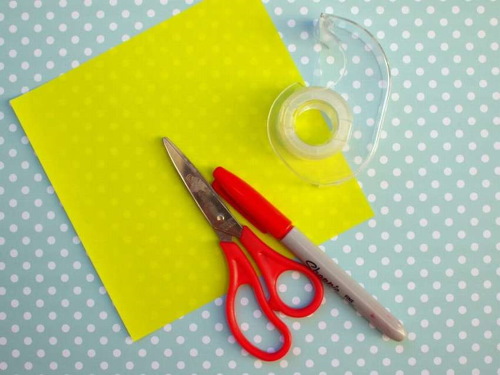
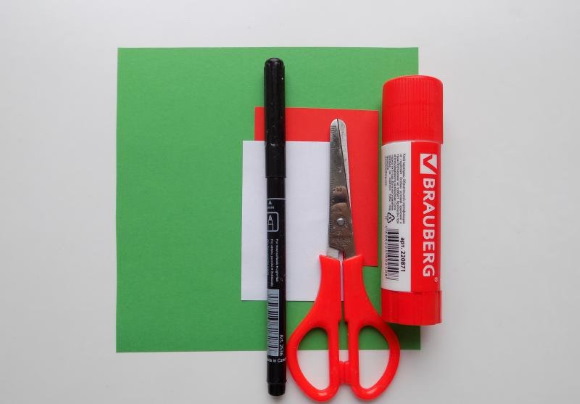
What you need to create bookmarks:

| A simple pencil and a ruler | To create markup |
| Glue stick | For gluing parts. |
| Scissors | For cutting out blanks. |
| Double-sided colored paper | The base from which the bookmarks will be made. |
For decoration, you can use scraps of paper of other colors, as well as markers, pens and felt-tip pens.
The easy way
Textbook corners (you can make bookmarks not only from paper, but also from thin double-sided cardboard), made according to this master class, can fix several pages at once. In this way, you can mark a whole paragraph in the textbook. You won't have to flip through the pages to find where it ends.
How to make a simple pointed tip:
- Place a sheet of colored paper vertically on the table.
- Place a ruler on the lower right corner, measure 10 cm. Make a mark.
- From the same corner, measure 10 cm on the left side.
- Draw a square.
- Draw another square of the same size on the left.
- Draw a third square above the first.
- Draw a diagonal line through the top square, the line should extend from the top right corner to the bottom left.
- By analogy, draw a diagonal line through the square located below, on the right.
- Use scissors to make cuts along the diagonal stripes.
- Cut the workpiece to the end.
- Turn the workpiece on the table so that the sharp corners face up.
- Bend the left sharp end so that its edge coincides with the fold line of the other end.
- Apply glue to the sharp edge.
- Bend the other sharp end and press it against the first one. Press with your fingers.
- Wait for the glue to dry.
The bookmark can be painted with pens or felt-tip pens.
Corner pocket
Textbook corners (you can make this type of bookmark in 5 minutes) with pockets will help students who are nervous during tests and independent work. You can hide small hints in the pockets.
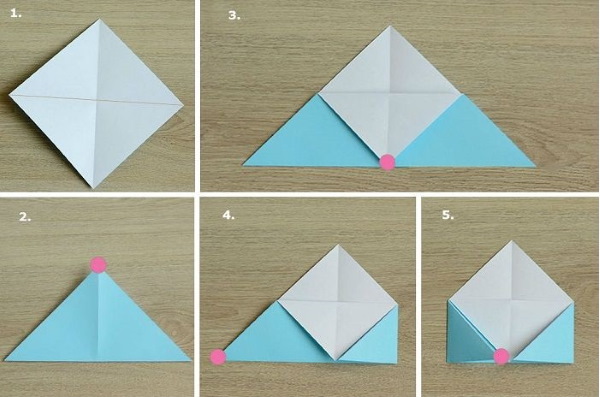
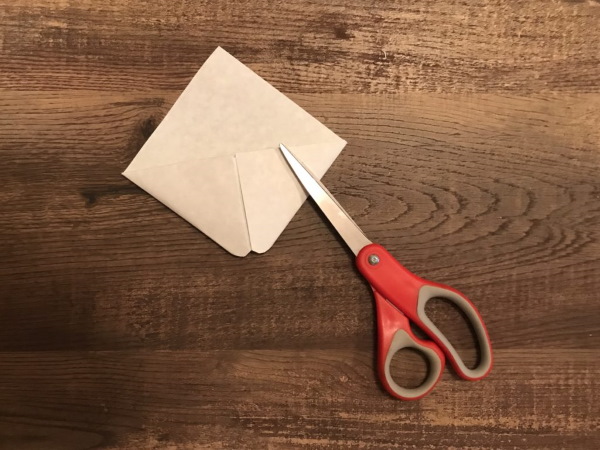
How to make a corner with pockets:
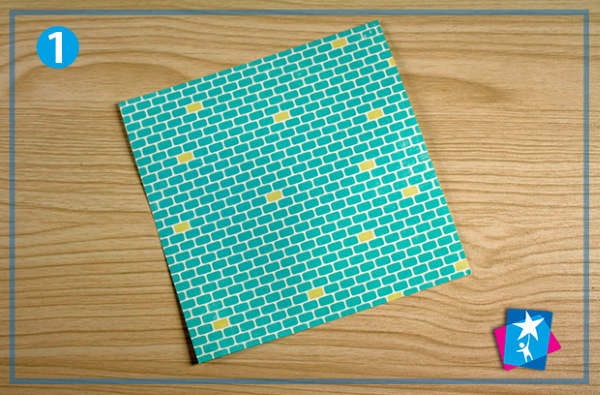
- Cut out a 14x14 cm square from colored paper.
- Turn the piece so that one corner faces up.
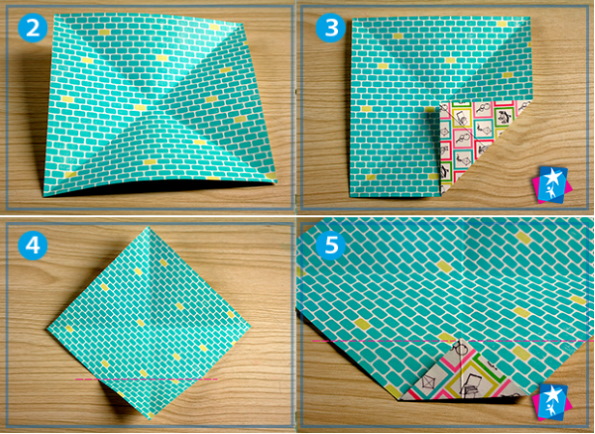
- Fold the sheet in half. The sharp edges should match.
- Fold the left lower sharp edge of the workpiece towards the middle.
- Fold the right bottom edge to the middle.
- Press down on the fold with your fingers.
- Open the blank so that it becomes triangular again.
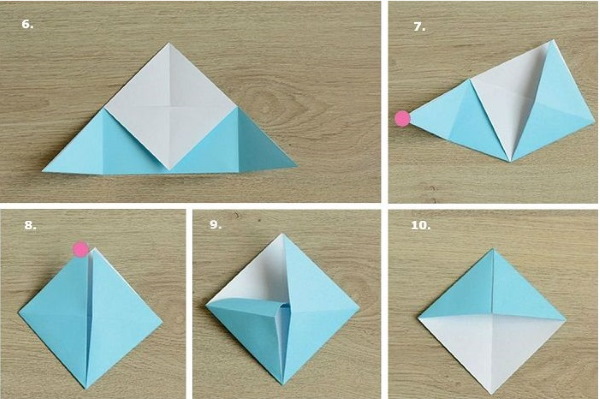
- Bend the top sharp edge down. The corners should match.
- Fold the right lower sharp edge towards the middle of the workpiece.
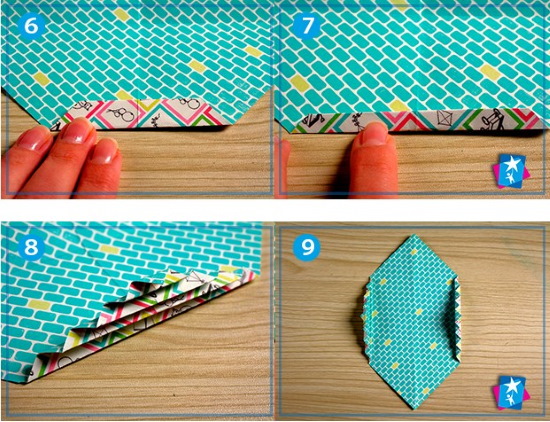
- Tuck the top sharp edge into the center pocket.
- Also fold and tuck the left edge.
- Use your fingers to press down on all folds so that the paper does not open.
The bookmark with pockets for cheat sheets is ready for use.
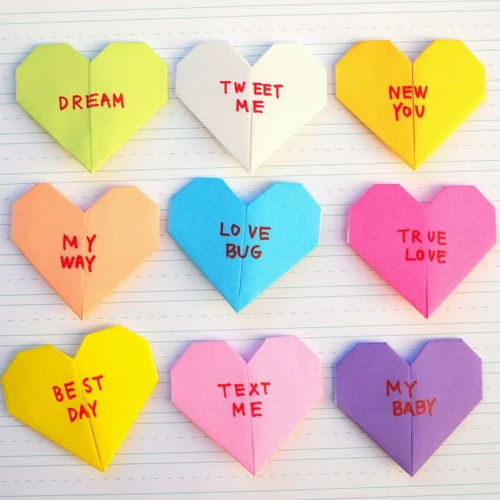
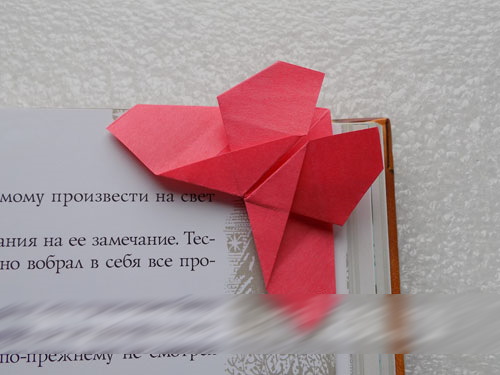
Heart-shaped corner bookmark
The corner can be made in the shape of a heart. Such a bookmark is put on the edge of the textbook page.
Instructions:
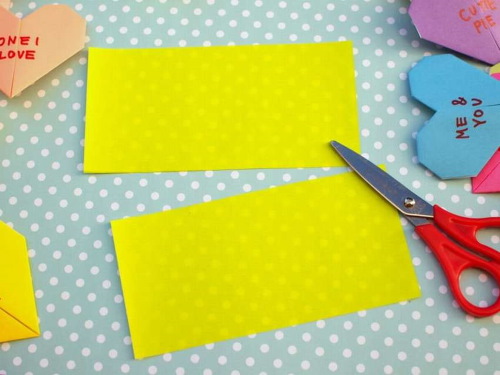
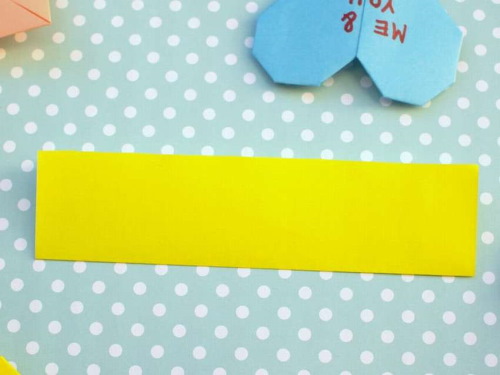
- Cut a 12x12 cm square out of paper.
- Turn the workpiece so that one of the corners faces upward.
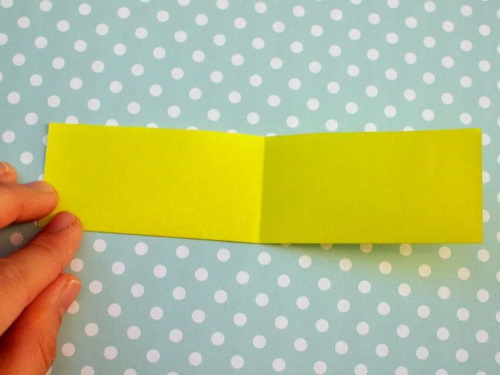
- Fold the square in half. Connect the top and bottom corners.
- Press the strip from the fold with your fingers and open the workpiece.
- Turn the paper over and fold it in half, bringing the other 2 corners together.
- Turn the workpiece again so that it becomes square.
- Turn the sheet over to the other side.

- Fold the paper in half. It should form a rectangle.
- Open the paper. Now it is divided into 2 parts by a horizontal line.
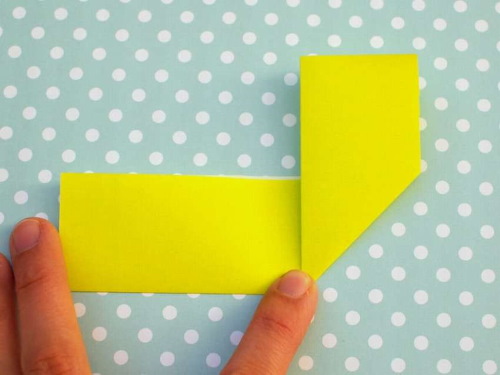
- Fold the bottom part in half. Its edge should coincide with the central fold line.
- Straighten the paper.
- Turn the sheet over to the other side. The horizontal stripes should be on top.
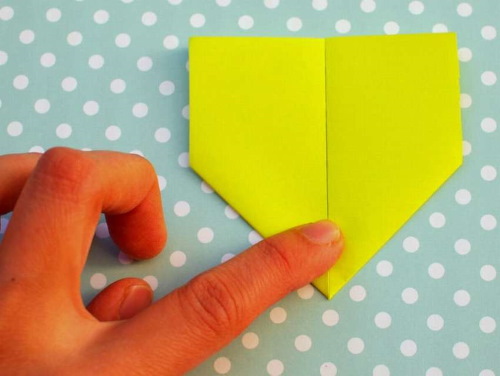
- The convex corners, where the stripes intersect, need to be pressed with your fingers so that they straighten out in the other direction.
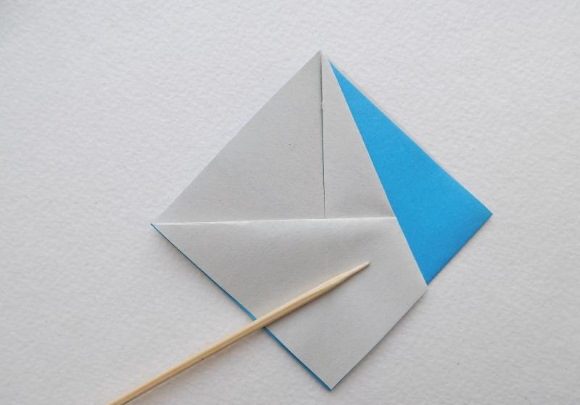
- Use your fingers to grab the sides of the blank and pull them toward the center. The paper will fold into a double triangle.
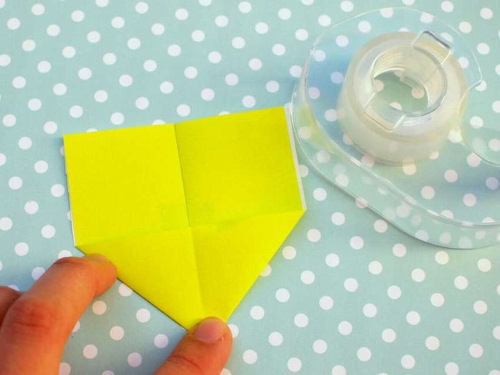
- Smooth out all fold lines.
- Use your fingers to press down all layers of the triangle except the top part.
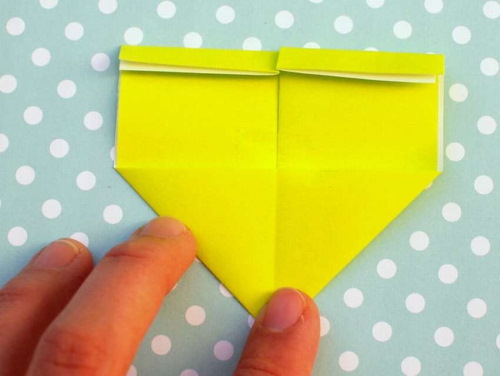
- Pull the top part upward by the bottom edge.
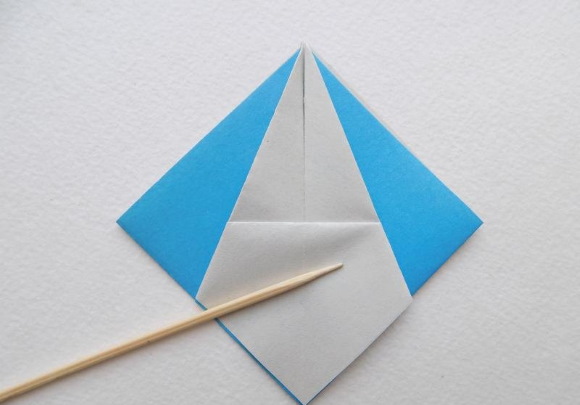
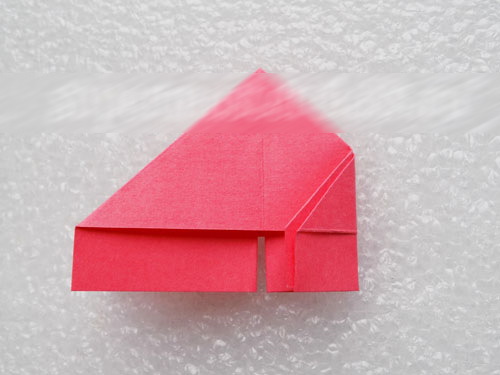
- Two protruding upward corners are formed. The right sharp edge must be folded so that its smooth side coincides with the upper edge of the workpiece. The central fold strips must also coincide.
- Make the left corner in the same way.
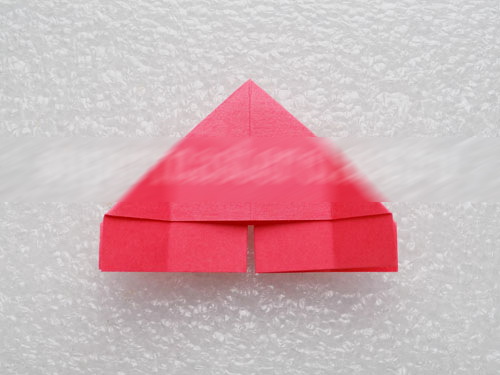
- Fold the resulting piece along the fold, pointing it downwards.
- Fold the resulting rectangle in half.
- Carefully unfold the right corner, press on the top point of the fold. The sharp end should fold and tuck inside. All the central stripes formed by the folds should match.
- Fold the left corner in the same way.
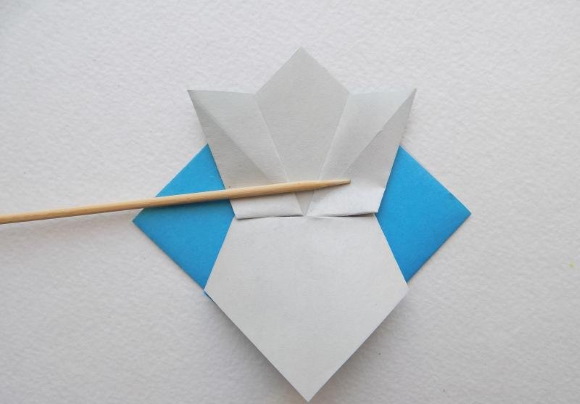
- At the bottom you will get 3 small squares. The sharp edge of the left square needs to be connected to the edge of the folded corner.
- In the same way, bend the sharp edge of the other square.
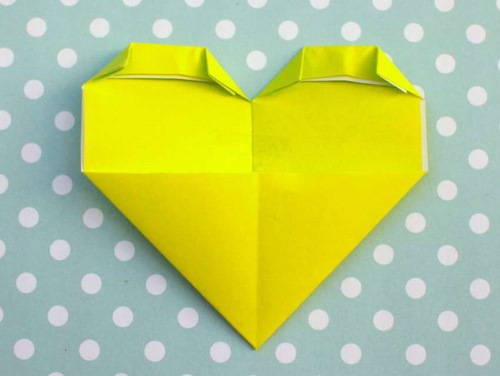
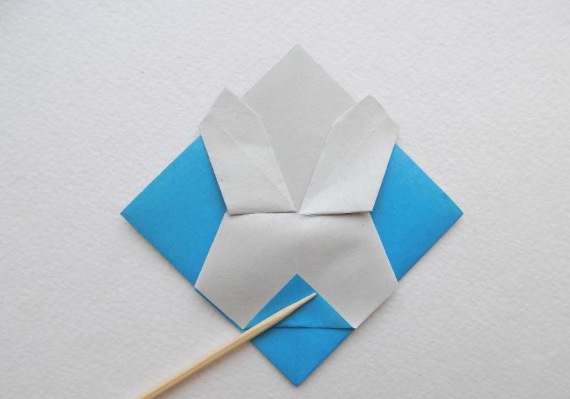
- New corners have formed that need to be folded so that their tops coincide with the central fold line.
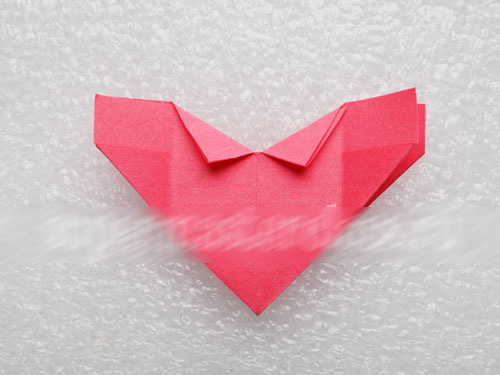
- Lift the bent part of the piece up.
- The resulting heart needs to be slightly bent so that it straightens out.
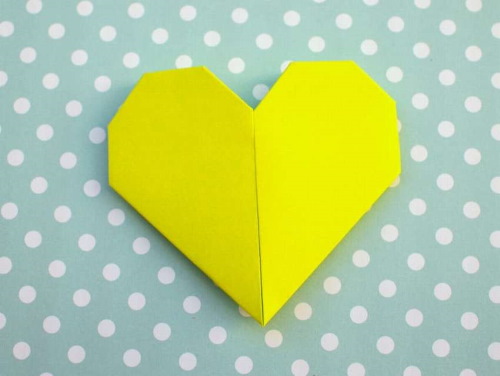
- Bend the piece down.
- Coat the top of the back side of the heart with glue. Glue the corners.
The bookmark in the form of a corner with a heart is ready for use.
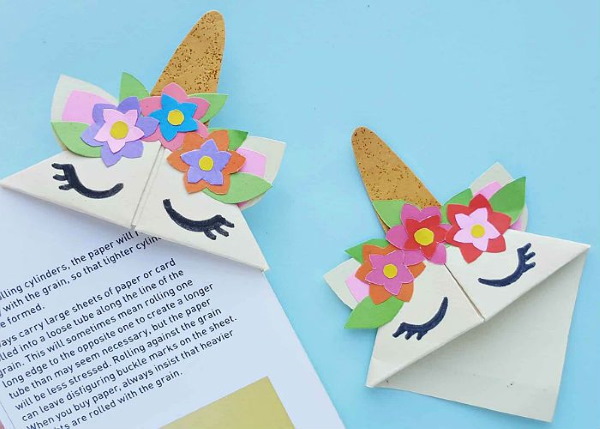
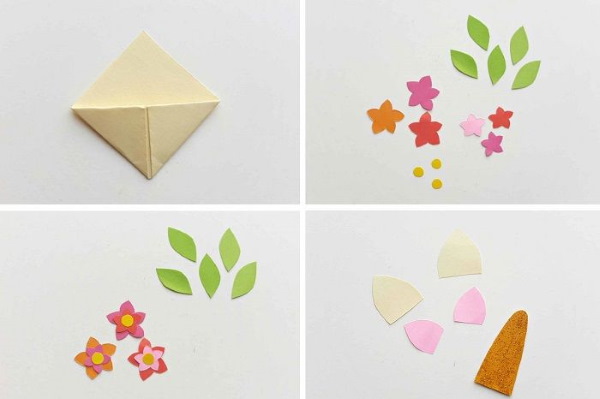
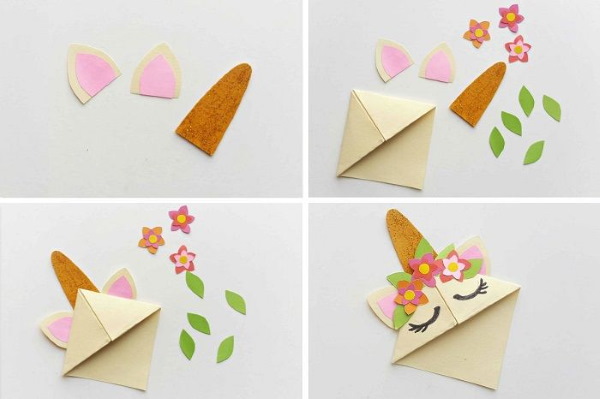
In the form of a unicorn
Textbook corners (you can make a unicorn from an ordinary corner if you choose the right decor) in the form of unicorns, look funny. For work you will need felt-tip pens, as well as white and pink paper.
Instructions:
- Cut out a square measuring 11 x 11 cm from white paper.
- Fold the workpiece in half.
- Fold the resulting strip back in half.
- Use your fingers to press down the strip from the fold.
- Unfold the strip of paper so that it lies horizontally on the table.
- Lay out the workpiece.
- Fold the right sharp edge towards the central strip from the fold so that its edge coincides with it.
- Fold the left edge in the same way.
- Turn the paper over to the other side.
- Bend the corners of the protruding rectangles so that they turn into the tops of the heart. Iron the fold well.
- Glue the corners.
- Turn the workpiece over to the other side and turn it with the sharp corner facing up.
- Cut a strip out of pink paper. Its length should be equal to the left edge of the workpiece, and its width should be about 2 cm.
- Fold the strip lengthwise. Unfold it. Make frequent cuts with scissors. They should not go beyond the fold line.
- Coat the uncut part with glue and glue it to the back of the bookmark, to its left side.
- Cut out an ear from white paper. Glue it to the top of the bookmark.
- Cut out a horn-shaped piece from pink paper. Glue it to the right side of the bookmark.
Use a black marker to draw the unicorn's eye and nostril. Use a pink marker to draw the inside of the ear and depict a blush on the cheek.
Frog
You will need green, red and yellow paper for this project. You will also need a black marker.
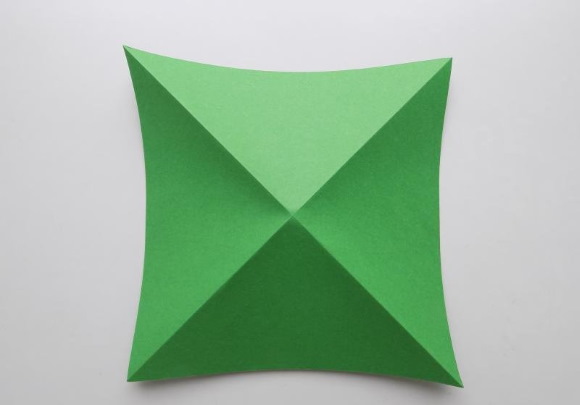
How to make a frog bookmark:
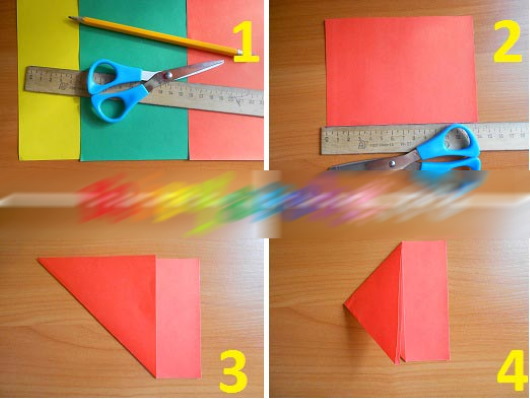
- Place a sheet of green paper vertically on the table.
- Place a ruler on the lower right corner, measure 13 cm. Make a mark.
- From the same corner, measure 13 cm from the left side of the paper.
- Draw a square. On the left side, draw another square with sides of 13x13 cm.
- Draw a third square above the first.
- Draw a diagonal through the top square. The stripe should connect the top right and bottom left corners. Draw the same diagonal through the square located at the bottom, on the right.
- Cut out the blank with scissors. Start cutting along diagonal stripes. Then cut out the corner.
- Turn the paper with the sharp corners facing up.
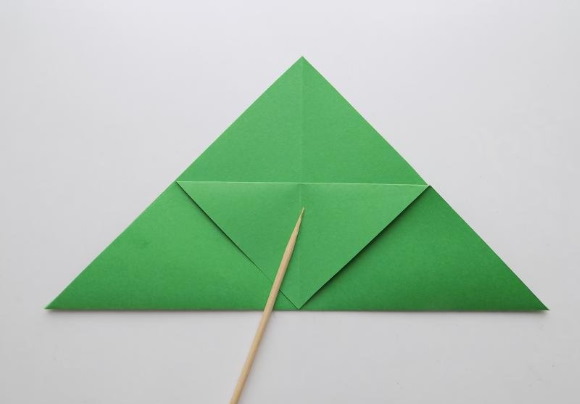
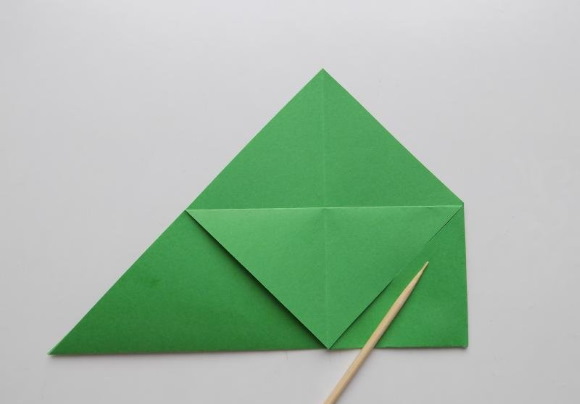

- Bend the left sharp end so that its straight edge coincides with the fold line of the other corner.
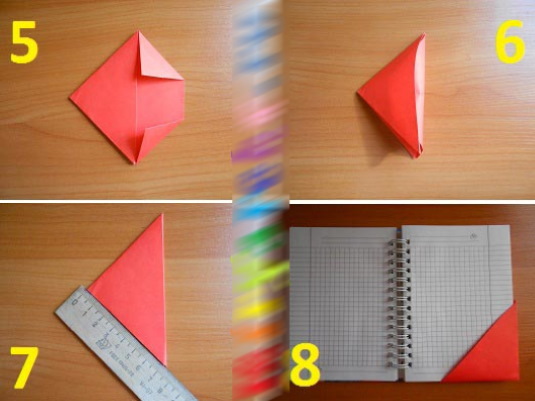
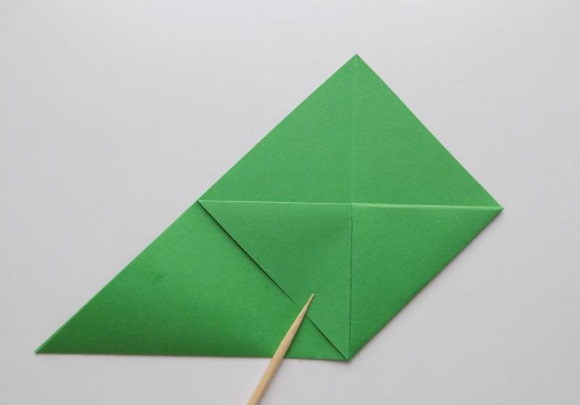
- Apply glue to this sharp edge.
- Fold the other corner and press it against the first one.
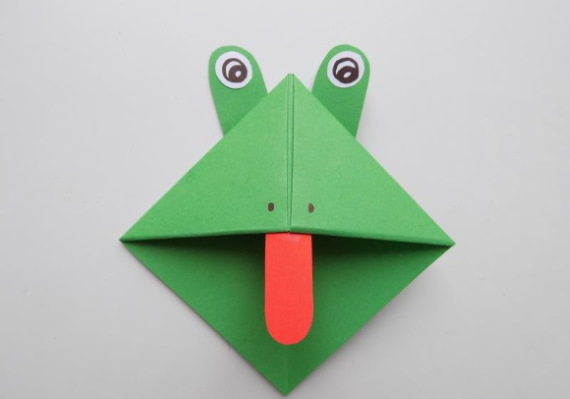
- Cut out 2 triangles from yellow and red paper, which will be 0.5 mm smaller than the top and bottom of the bookmark.
- Glue the yellow triangle to the top of the bookmark and the red one to the bottom.
- From green paper cut out 2 circles, 1.5 cm in diameter.
- Cut 2 circles 1 cm in diameter from yellow paper.
- Glue the yellow circles on top of the green ones. These are the frog's eyes. They need to be glued to the bookmark.
Use a black marker to draw pupils and nostrils on the frog.
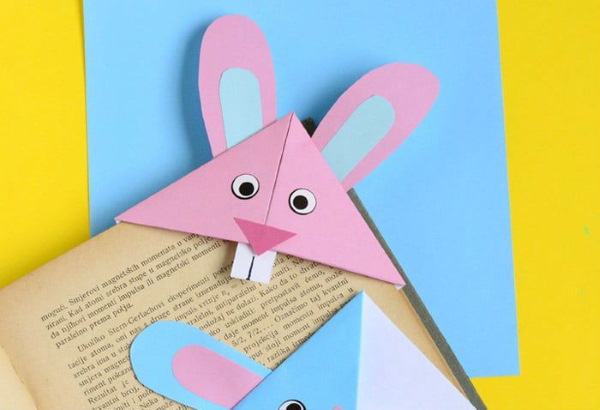
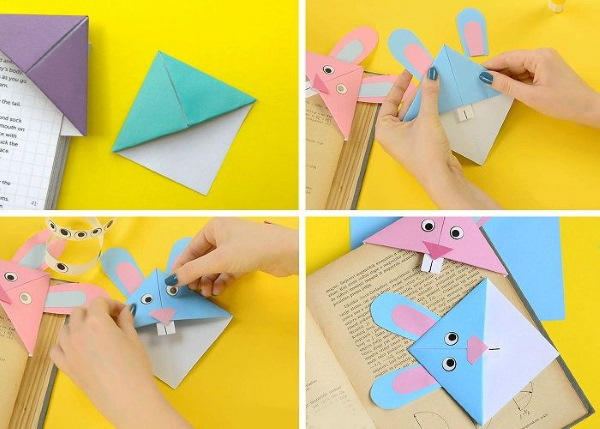
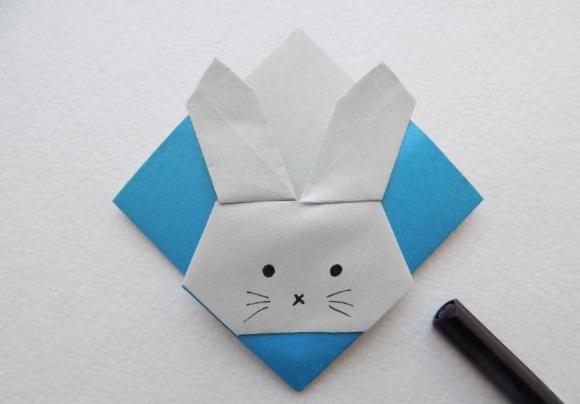
Bunny
To make a bunny bookmark, you will need one-sided orange paper. The other side of the sheet should be white.
Instructions:
- Cut a 13x13 cm square out of paper.
- Turn the square so that one of its corners faces up.
- Fold the workpiece in half. The sharp edges should match.
- Unfold the workpiece.
- In the same way, fold the workpiece again, closing the other 2 corners. Press the folds and unfold the paper.
- Turn the workpiece over with the white side up.
- Turn the paper over so that the straight edge is facing up. Fold it in half.
- Unfold the paper. Make another strip from the fold on the other side, repeating the previous step.
- Unfold the paper. Turn it over with the wrong side up.
- Use your fingers to lift the sides of the square and pull them toward the center. The paper should fold into a double square.
- Unfold the double square so that the corner consisting of several layers is at the top.
- Bend the sharp edge located at the top of the figure in half. The tip should coincide with the bottom corner of the workpiece.
- Turn the sheet over to the other side.
- Fold part of the left edge so that it is aligned with the fold strip located in the middle.
- 1 layer of paper on the left side, unfold, pulling to the right.
- Fold the other side of the corner in the same way.
- Straighten the top corners. Direct them in different directions. Iron the folds well.
- Glue the resulting rectangles, applying glue to the top part, from the back side. Wait for the glue to dry.
- Bend the edges of the "ears" so that they become sharp. Cut the corners along the marked lines.
- Bend the lower sharp end of the workpiece upward.
- Turn the tip along the marked strip, coat with glue, and tuck it under the top layer of paper.
- Use a marker to draw the hare's eyes, nose and whiskers.
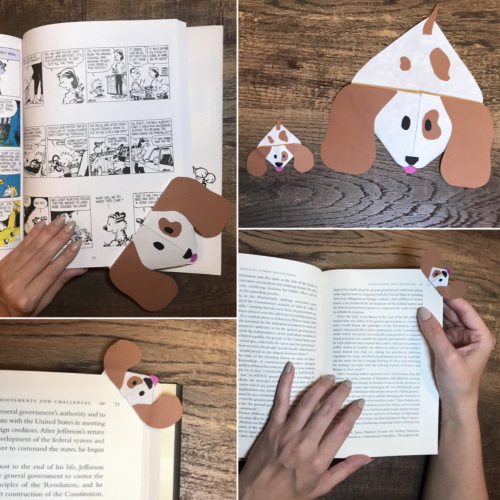
This bookmark should be placed on the bottom sharp edges of the pages.
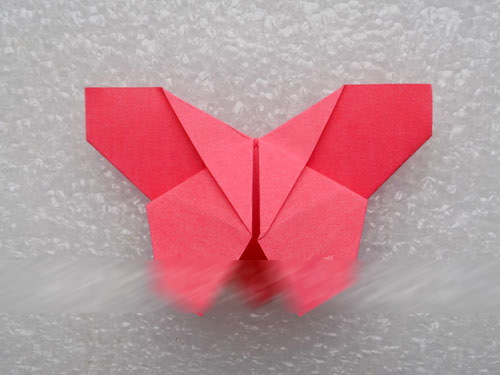
Butterfly
Corners for textbooks (you can make a butterfly from shiny paper) in the form of butterflies look unusual.
How to make a butterfly bookmark:
- Cut a rectangle measuring 9 x 13 cm out of paper.
- Place the paper with the wide side facing up.
- Fold in half. Press the fold with your fingers.
- Straighten the paper.
- Turn the sheet over with the narrow side facing up.
- Fold in half again.
- Turn the workpiece over so that the two-layer side is at the bottom.
- Fold the right sharp edge of the paper, pulling it towards the central fold line (just like when folding a classic paper airplane).
- Fold the left sharp edge in the same way.
- Unfold both corners. Bend them along the marked stripes in the other direction.
- Use your fingers to open the right corner, pushing it inward.
- Also open the left corner. The result should be a double triangle.
- There are 2 rectangles left at the bottom. The inner sharp edge of the right rectangle needs to be folded so that its top slightly extends beyond the lower edge of the triangle.
- In the same way, bend the inner sharp edge of the left triangle.
- Turn the workpiece with the sharp corners facing up.
- The right sharp end that sticks out needs to be bent and placed between the layers of paper. Iron the folds so that nothing sticks out.
- In the same way, bend the sharp end on the left side.
- Bend the right sharp edge of the workpiece, form a fold at the fold. Smooth this fold well with your fingers. This is the lower wing of the butterfly.
- Bend back the sharp tip on the left side as well.
- Use a black marker to outline the triangles on the wings, as well as the edges of each wing along the outline.
- Draw a pattern on the butterfly's wings consisting of triangles.
- Round off all sharp edges of the pattern.
The butterfly bookmark is ready. It can be placed on the top and bottom sharp edges of the pages.
Unusual bookmarks for textbooks
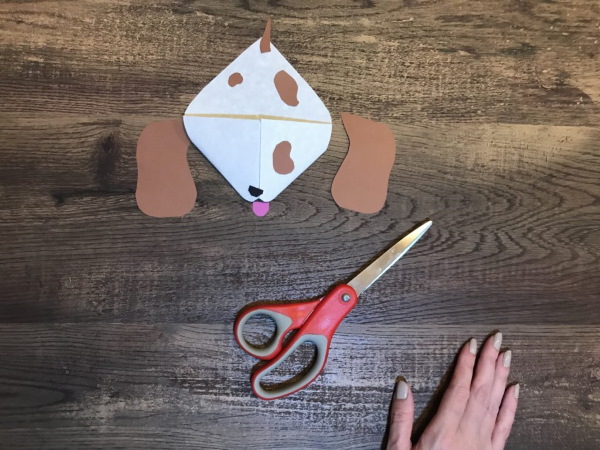
Experienced origami masters can make more unusual bookmarks. You can make a bookmark in the form of a dog.

Instructions:
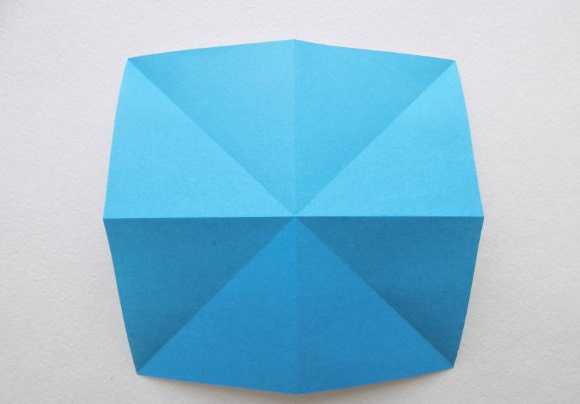
- Cut a 14x14 cm square out of white paper.
- Fold it diagonally twice. The fold lines should intersect in the center of the sheet. Straighten the sheet.
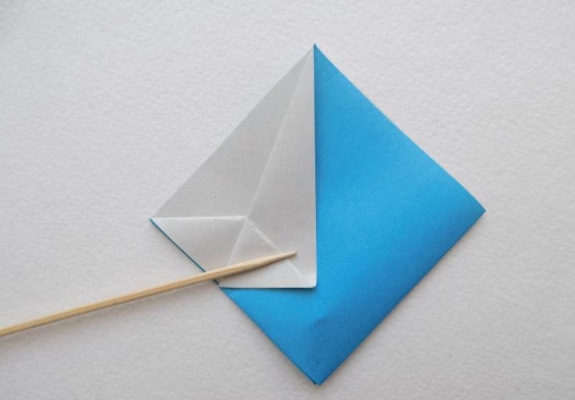
- Bend the lower and upper sharp edges to the center of the square. The corners should match.
- Turn the workpiece over to the other side.
- Fold the bottom part of the figure in half. There is no need to bend the sharp end sticking out from the bottom.
- Fold the top side in the same way.
- Turn the workpiece vertically. Fold it across.
- Turn the workpiece over with the sharp corner facing down.
- Fold the lower sharp edge upwards. The tip should coincide with the end of the strip remaining from the fold.
- Fold the right side of the resulting figure, pressing its edge to the bottom side.
- Open the corner and turn it outward.
- In the same way, turn the sharp tip out on the right side.
- Fold both sides of the workpiece so that a sharp tip remains sticking out in the middle.
- Fold the sharp end in half. Straighten. Iron the folds.
- Bend the upper sharp edge of the resulting rhombus and glue it from the back side.
- Also bend and glue the bottom corner.
- Bend and glue the lower sharp edges of the side diamonds.
- Bend the dog's ears to make them look droopy.
- Use felt-tip pens to color the dog's nose, cheeks and ears. Draw the eyes.
This type of bookmark should be placed on the top sharp edges of the pages.
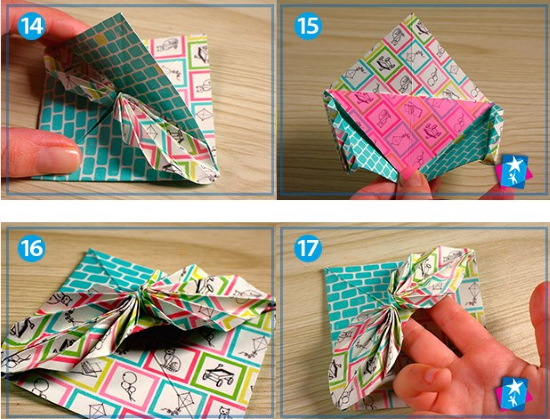
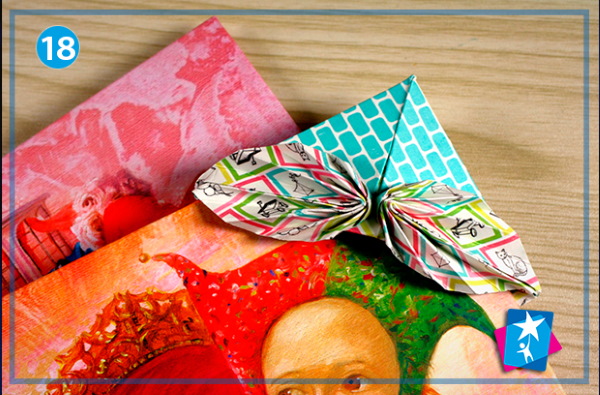
You can make a bookmark in the shape of a bow - instructions:
- Cut out a 15x15 cm square.
- Fold the square to form 2 diagonals. Unfold the workpiece.
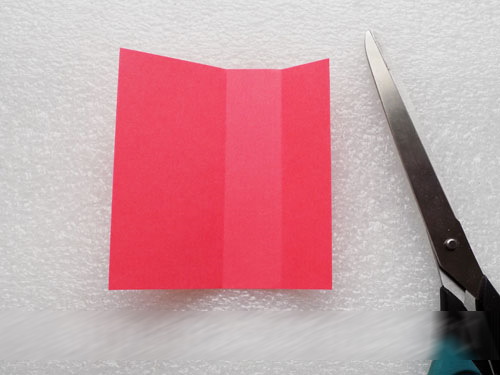
- Fold horizontally.
- Straighten the paper, put the other side up. Fold in half again. Unfold the paper again.
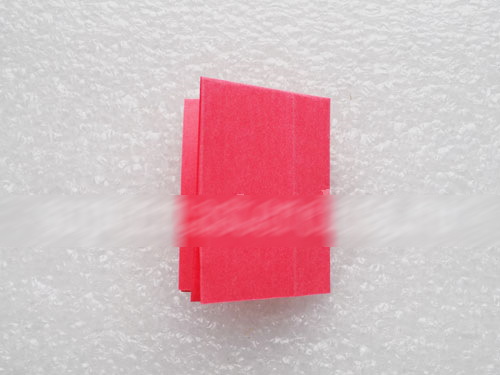
- Place the sheet with the corner facing up. Pull the edges from the sides to the center. The paper will fold into a double square.
- Turn the workpiece layers down.
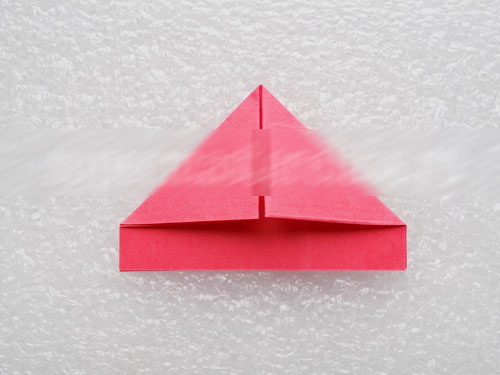
- Fold the right and left sides towards the center.
- Fold the top sharp edge down.
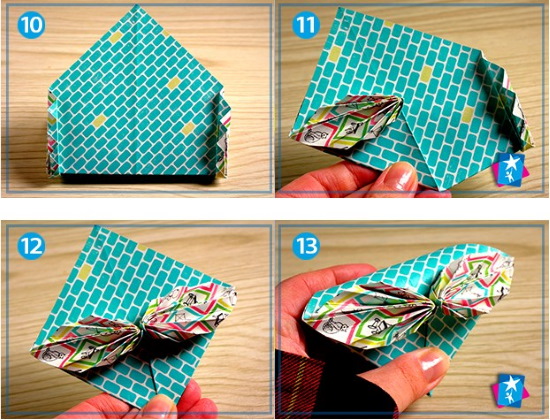
- Pull the workpiece upwards by the lower sharp edge. Straighten this corner.
- Bend the resulting rhombus in half by pulling it by the top corner.
- Unfold the workpiece and perform the steps from point 7 to point 10.
- Bend the sharp edge so that it coincides with the strip marked in the middle.
- Straighten the corner. Straighten it out, fold it along the fold strips.
- By analogy, unfold the left corner. You should get a four-pointed star.
- Fold the right and left sharp edges towards the center of the star.
- Turn the paper over to the other side.
- Fold the diamond by pulling the top corner.
- Fold the corner over, creating a fold over the small corner that is between the layers.
- Turn the workpiece over to the other side and bend the upper sharp edge down.
- Apply glue to the sharp end and tuck it under the layers of paper.
This bookmark can only be placed on the top sharp edges of pages.
How to decorate
Options for decorating paper bookmarks in the form of corners:
- Bookmarks made of colored and white paper can be decorated with felt-tip pens. On dark-colored paper, you can draw patterns with a corrector, white oil pastel, or acrylic pencil.
- When creating bookmarks in the form of animals and various characters, you can glue flat plastic eyes to the paper. They will give the bookmarks a funnier look.
- Bookmarks can be made from double-sided scrapbooking paper.
- The edges of the sheets can be trimmed with decorative scissors.
- Using scraps of colored paper and glue, you can add various details to the bookmarks, such as tails, ears, teeth, wings.
It is not difficult to learn how to make corners for textbooks with your own hands. The main thing is to strictly follow the instructions, and at the end of the work, beautifully decorate the bookmarks so that they look unusual and attract the attention of classmates or fellow students.
Author: Frolova Ekaterina
Video about bookmarks
Corners for textbooks: