A tetrahedron made of paper or cardboard can be used as a model, explaining to a student the features of this figure in geometry. Also, homemade volumetric figures can be used to decorate a room or a desktop. To learn how to make a tetrahedron with your own hands, you need to read several step-by-step instructions for making figures from different materials.
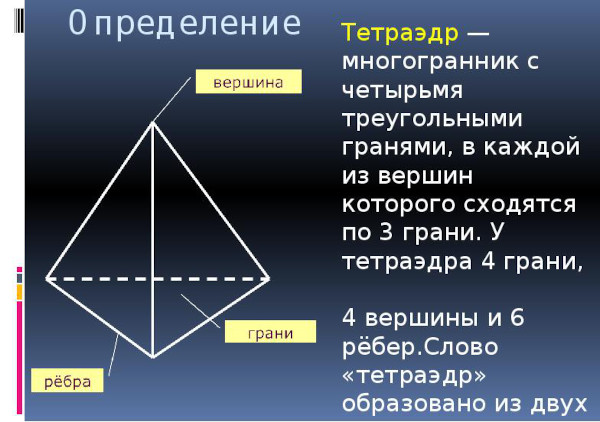
Features of the figure, how many faces and angles does a tetrahedron have
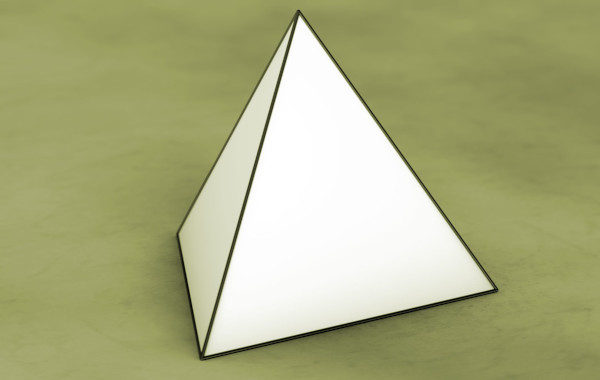
A tetrahedron is a three-dimensional geometric figure of a triangular shape. It looks like a pyramid. A tetrahedron has 6 edges, 4 vertices and 4 faces. The sizes and shapes of the faces depend on the type of geometric figure.
What types of tetrahedrons are there:
| Equilateral | The edges are equal to each other. |
| Orthocentric | The heights dropped from the vertices to the opposite faces intersect at one point. |
| Rectangular | The edges adjacent to one of the vertices are perpendicular to each other. |
| Incentric | The segments of the figure connect the vertices with the central points of circles inscribed in opposite faces and intersecting at 1 point. |
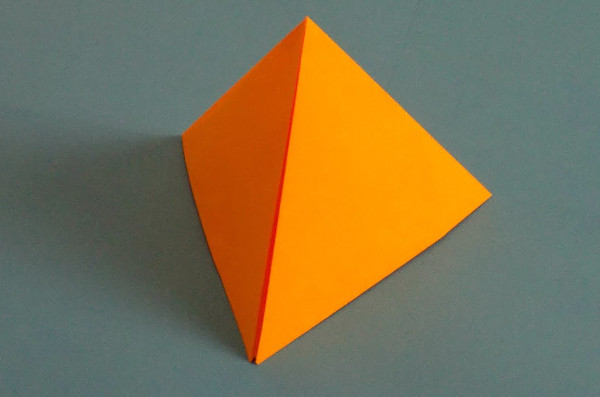
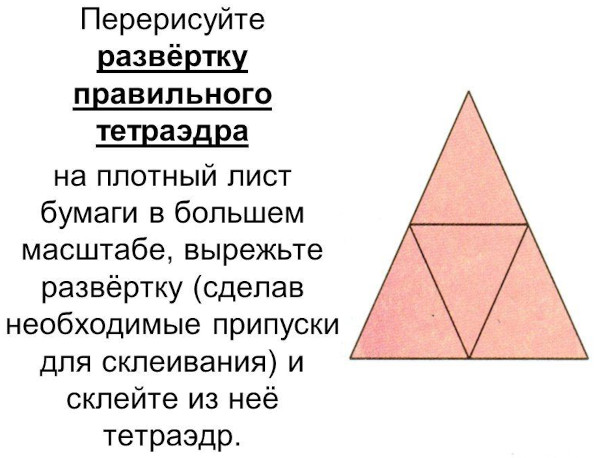
The simplest type of figure is called a "regular tetrahedron". Its faces are one-sided triangles. Assembling a regular tetrahedron from paper or cardboard is much easier than other types of this figure. Further in the article, you can consider examples of constructing scans, as well as read the instructions for gluing a three-dimensional figure.
What you need to make a tetrahedron with your own hands
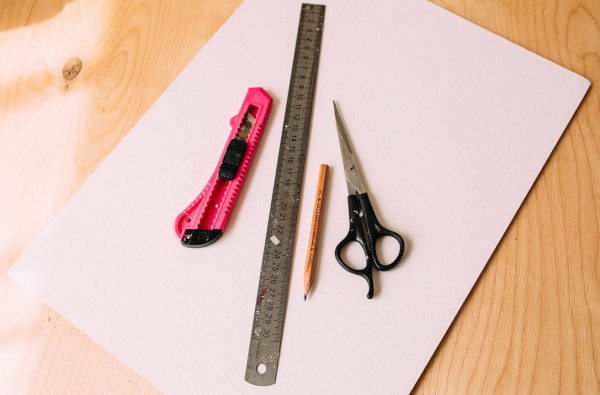
List of materials and tools needed to create a paper or cardboard tetrahedron:
- thin cardboard;
- paper or hard cardboard;
- simple pencil;
- ruler;
- protractor;
- scissors, stationery knife;
- glue stick or Moment glue.
It is desirable that the paper on which the drawing will be constructed be thick. Drawing sheets, watercolor paper or sheets from an album will do. You can use printer paper with a density of at least 80 g / sq. m. Thinner material will not hold its shape well, and will also tear and wrinkle during the process of gluing the figure.
How to make from A4 paper
The production of a tetrahedron takes place in 5 stages:
- size calculation;
- preparing a template from thin cardboard;
- drawing up a drawing;
- cutting out the part;
- gluing the figure.
To glue paper structures, you can use regular office glue or PVA. For figures made from denser materials, it is advisable to use Moment glue or high-quality double-sided tape without a soft layer between the adhesive tapes.
Size calculation
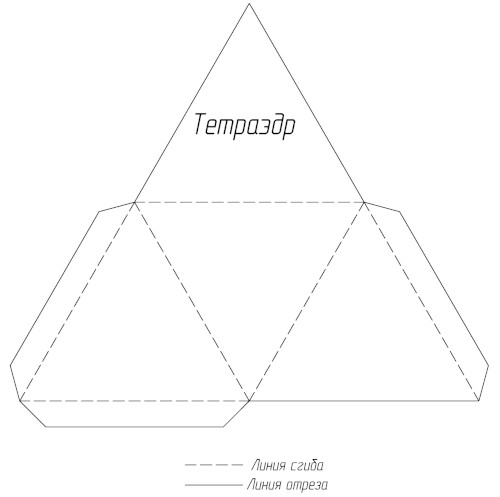
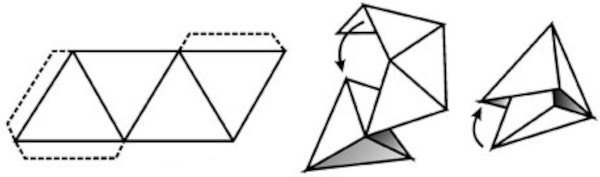
The size of the future figure depends on the type of scan. The faces can be arranged in a circle. In this case, the figure will be small. The height of such a tetrahedron will be about 6 cm. If you draw a horizontal scan, where the faces will be arranged in such an order that they form a figure in the form of a parallelogram. In this case, you can get a larger figure.

The optimal length of the edge of a tetrahedron drawn in horizontal scan on an A4 sheet is 10 cm.
The result will be a parallelogram with a diagonal equal to 26.6 cm. The size of an A4 sheet is 21×29.7 cm. The diagonal of the sheet is 36.4 cm. Therefore, a scan with a diagonal of 26.6 cm will fit perfectly on A4 paper, and there will still be some free space to draw strips for gluing the figure.
Preparing a cardboard template
You can make a template of 1 face of a tetrahedron out of cardboard to make it easier to construct the pattern later.
How to make a blank step by step:
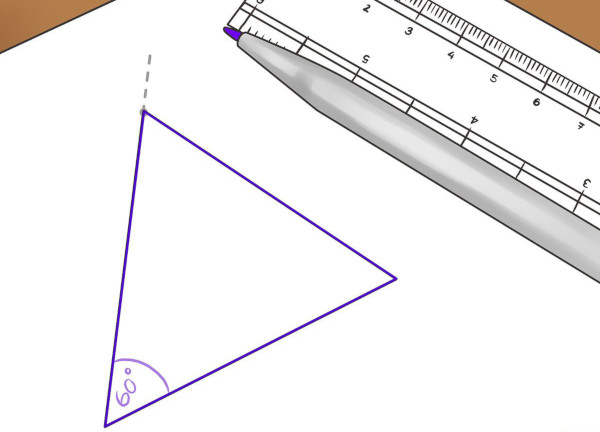
- On thin cardboard, using a ruler and a simple pencil, draw a horizontal line equal to the length of the edge of the figure.
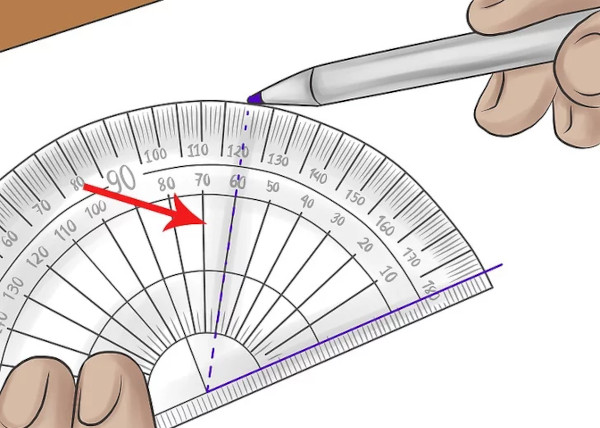
- Place a protractor on the left end of the line. Mark at 60 degrees.
- Place the protractor on the right corner of the line and mark 60 degrees.
- Draw 2 lines through the marks.
- Measure the length of the lines to their intersection. All 3 sides of the figure must be equal.
Using scissors, carefully cut out the template.
Construction of the development, drawings
How to draw a circular pattern of a tetrahedron using a cardboard template:
- Place the triangle in the center of the sheet, with the acute angle facing down. Trace the template along the contour, without pressing on the pencil.
- Place the flat side of the template on the top of the already traced triangle. The base of the template and the drawn figure should match. Trace the cardboard blank.
- Move the workpiece to the left edge of the first triangle. Their sides should also match. Trace the template.
- Move the workpiece to the right side of the central triangle. Trace the template again along the contour.
- Remove the cardboard blank.
- Use a ruler to draw all the lines clearly. Use an eraser to correct any inaccuracies. Measure the sides of the triangles. They should be the same.
- Using a ruler, measure 1.5 cm from the left side of the upper triangle. Draw a line parallel to this side. Connect the edges of the lines so that beveled angles are formed. That is, the length of the new line needs to be shortened by 10 mm (5 from each end).
- By analogy, draw 2 more "ears" for gluing the figure. 1 should be located on the lower part of the triangle located at the bottom, on the left. Draw the other "ear" on the side of the lower right triangle.
Use an eraser to remove excess lines.
How to draw a horizontal scan of a tetrahedron without using a cardboard template:
- Place a sheet of A4 paper horizontally on the table.
- From the lower left corner of the sheet, move up 2 cm. Put a point and mark it with the letter “A”.
- From point “A” measure a segment equal to 20 cm to the right. Mark the end of the line with the letter “C”.
- Divide the line in half and place point "B".
- Place a protractor on point A2 and mark at 60 degrees.
- Place the protractor at mark "B" and mark 60 degrees.
- Draw 2 lines through the points until they intersect.
- From the top of the resulting triangle, measure 10 cm to the right. Draw a line. Call the end of the segment "D".
- Place the protractor at point "D", mark 60 degrees down. Draw a line to point "B".
- Connect points "C" and "D" with a line.
- From point “D” measure 10 cm to the right. Connect the end of this line with point “C” with a new line.
- The result will be a parallelogram divided into 4 equal triangles. The triangles should be numbered from left to right.
- On the top of triangle #2 draw an "ear" for gluing the figure. The same "ears" need to be made on the bottom of triangle #3, and on the side of triangle #4.
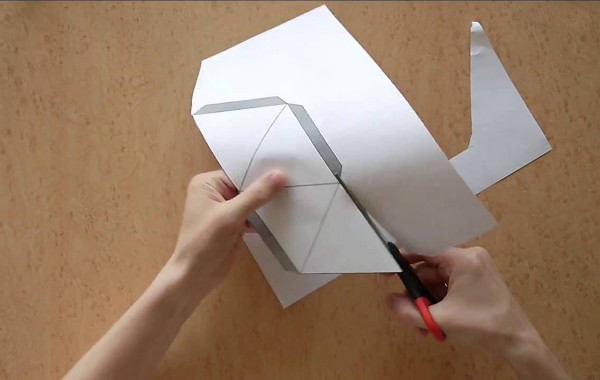
When the drawing is ready, it needs to be cut out along the outline. You can use scissors or a stationery knife.
Working with a finished form, gluing
It is not difficult to glue the figure using the cut out pattern.
Procedure:
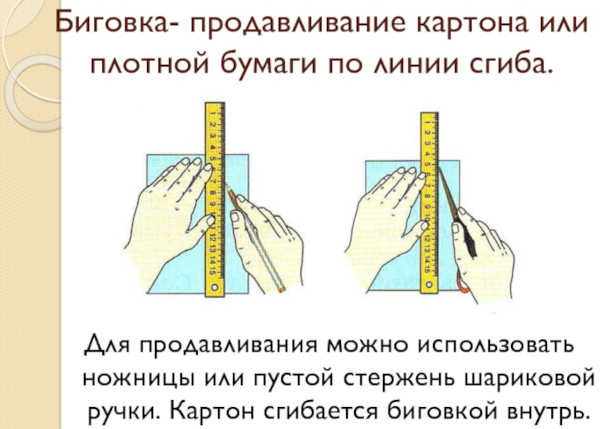
- Press all the fold lines with a blunt object. You can use a ruler or a dried ballpoint pen.
- Fold the figure so that the drawing is located inside.
- Check if the dimensions match and if there are any large gaps or other inaccuracies.
- Unfold the workpiece.
- Alternately lubricate the “ears” for fastening with glue, and assemble the figure.
The "ears" for fastening should be positioned from the inside. In order for the parts to stick together well, it is necessary to hold the joints with your fingers for 10-15 seconds.
Large tetrahedron made of cardboard
A tetrahedron made of cardboard (you can make it step by step according to the instructions provided later in the article) will be strong and will hold its shape well. The size of the volumetric figure depends on the type of cardboard.
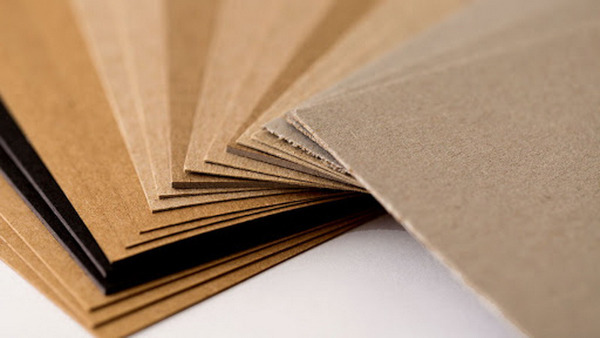
What kind of cardboard can be used for work:
- Coloured (for children's creativity). Suitable for creating tetrahedrons up to 25 cm high. This cardboard is quite thin, so a large figure made from it will be unstable. The edges may bend and deform. But you can make a multi-colored tetrahedron from colored cardboard if you use a sheet of a different color for each edge. In this case, the layout will differ from the standard version. All edges will need to be drawn separately and “ears” for fastening will need to be added to them.
- Printing. This cardboard is denser. It is used to create hard bindings for books and notebooks, as well as for packaging small items. From such cardboard, you can assemble a tetrahedron from 25 to 45 cm high.
- Packaging. The most durable type of cardboard. It has a corrugated texture and consists of several layers. It is difficult to work with such material, but it produces strong figures. The size of the tetrahedrons can be more than 45 cm in height. Such figures can be used for home decor.
After assembling the tetrahedron, uncolored cardboard can be painted or covered with patterned paper. If you glue calendar sheets or photographs to the edges of a small figure, you can get an unusual decoration for your desktop.
Features of working with rigid cardboard
A tetrahedron made of cardboard (you can make a step-by-step layout without using templates) is made following these rules:
- It is more convenient to use a long ruler (about 30 cm) to construct a drawing. When making a development with a short ruler, you can easily make a mistake. It is very difficult to assemble an even figure from a development with errors.
- The workpiece should be cut out with a stationery knife, applying a ruler to the lines. Scissors can only be used for thin cardboard. You won't get even cuts on thick material. In some places, creases will form.
- To bend the packaging cardboard, you need to press it. It is not advisable to use a ruler or a pen rod for this purpose. These tools can damage several layers of cardboard, and with strong pressure, tear it completely. It is better to use the blunt end of a pen or dessert spoon. Then the lines will be thicker, but the cardboard will not tear.
- Once the part is cut out, it is necessary to inspect it from all sides and cut off small burrs.
- The "ears" for gluing must be fixed one by one. Before applying glue to a new "ear", you must wait until the glue on the previous one has completely dried.
It is most convenient to work with two-layer corrugated cardboard. It can be cut out of a large box in which household appliances are transported. It will be much more difficult to work with cardboard folded in 3 or more layers. Such material bends poorly and is difficult to glue.
Preparing and cutting out the template
A tetrahedron made of cardboard (can be made step by step in 1 hour) can be made using any type of scan. This master class describes the process of making a circular scan without using a template.
Procedure:
- In the center of the cardboard sheet, draw a horizontal line, the length of which will be equal to the size of the edge of the figure.
- Place a protractor on the left end of the line. Mark 60 degrees.
- Place the protractor at the right end of the line. Mark 60 degrees.
- Draw 2 lines through the marks until they intersect. You should get an equilateral triangle.
- From the top of the triangle, put aside 60 degrees on the left side. Draw a new triangle on the side. 1 of its sides will be common with the already drawn figure.
- Apply the protractor to the base of figure 1. Mark 60 degrees from both ends. Draw lines. You have the 3rd face of the tetrahedron.
- Draw the last edge by analogy, placing a protractor on the right side of the lower triangle.
As a result, you should get a pattern of 4 triangular faces. It remains to add "ears" for fastening. The wider the "ears", the more reliable the connection will be. The minimum width of these strips is 5 cm.

Where the "ears" should be located:
- on the lower side of the triangle on the left;
- on the left side of the upper triangle;
- On the right side of the triangle located on the right.
Cut out the pattern with a utility knife.
Connecting the edges
How to connect the edges of a figure:
- Sell all fold lines.
- Bend the pieces along the marked lines.
- Holding the edges with 2 hands (you can ask someone for help), examine the figure. All joints should be even, without burrs and gaps.
- Unfold the workpiece.
- Grease one of the "ears" with glue. It is advisable to use "Moment" glue so that you don't have to wait long.
- Press the eyelet to the inside of 1 of the edges. Press with your fingers.
- Glue another “ear” in the same way.
- The last place of connection should be well lubricated with glue, and carefully inserted into the figure, slightly pushing the wall with your fingers.
Wait until the glue dries completely. If there is any excess (hardened drops or cobwebs), you can carefully cut it off with a stationery knife.

Instructions, where all actions are described step by step, will help you learn how to make a tetrahedron from paper or cardboard. The main thing is to make an accurate drawing, and then carefully cut out the pattern using suitable tools.
Video about making a tetrahedron from cardboard
How to make a triangular pyramid: