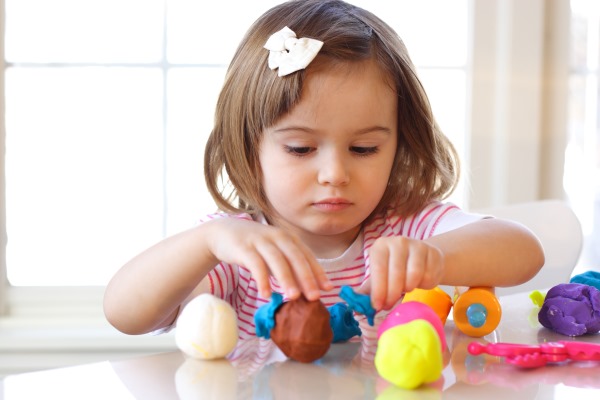
Dough modeling (dough plastic) is one of the popular types of creativity among children. It allows you to make an original and durable craft to decorate your home with your own hands, be it a New Year's toy, a picture or a cute figurine.
Benefits of modeling for children
Modeling has a very beneficial effect on the all-round development of a child of any age, namely:
- At the age of 1-3 years, fine motor skills of the hands are actively developed. Kneading the material, creating shapes, flattening, stretching, tearing off the dough develops the tactile sense (sense of touch) in the child, promotes the development of perception through finger touch.
- Teaches the child patience and the ability to concentrate on the figure being created.
- Develops creative abilities, figurative, logical and abstract thinking, especially in the process of mixing different colors and creating unusual shapes.
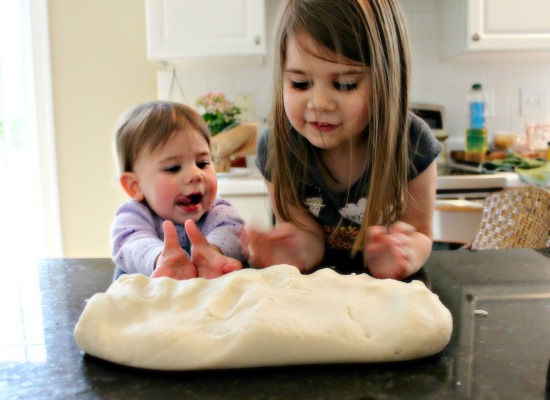
- Supports the connection between the two hemispheres of the brain (and subsequently develops memory) by using both hands simultaneously (rolling a sausage or creating a ball).
It is very useful to sculpt figures based on a drawing with contours (the so-called plasticine pictures, in which it is necessary to paint the figure with a sticky mass).
In this case, the processes of comparison, logic and concentration of attention on one image are established. This approach is recommended for children over 2 years old.
- Develops imagination (for example, if you ask a child to make a non-existent animal) and curiosity (make an insect and look for what it looks like).
- Promotes the development of perception and smell when working with colored material that has different smells. For preschool children, it is recommended to combine modeling (from a single-color mass) and painting the finished product with paints.
- Plays an important role in aesthetic education and understanding of the sense of beauty.
Medical experts have also noted the positive effects of modeling on children's health:
- Pleasant emotions during regular classes have a beneficial effect on the nervous system, calm the baby and normalize the mental state, which subsequently leads to a decrease in excitability, deep and restful sleep.
- Modeling with colorful dough is a great way to lift your spirits (especially if you involve all family members).
- If a child has some internal fears, it is worth offering him to mold his fear and study it more closely, making sure it is safe. In this way, you can help overcome a phobia associated with insects or animals.
- For special children (with a diagnosis of autism), modeling helps develop understandable speech, establish contacts and involve them in joint activities.
- with the teacher and other children.
- The process of creating complex figures from dough in combination with other materials (wooden skewers, toothpicks, beads, buttons, dry leaves, feathers) and demonstrating them to people around you helps to raise a child’s self-esteem and convince them of the importance and uniqueness of their child.
Advantages of salt dough for modeling
Modeling dough reminds children of the plasticine they are used to, but has a number of advantages:
- Dough is an affordable and natural material for children's creativity (if it is not available in the store, it can easily be made at home in 10 minutes from common products (flour, salt, oil and water).
- Does not stick to hands and does not stain objects and furniture around.
- Anti-allergenic (especially if you make it yourself, and if you have an intolerance to wheat, it can be easily replaced with corn starch).
- Always soft (if stored properly, in a cool place and in film).
- Odorless (you can add natural flavoring, vanillin or cinnamon to homemade dough to give it a baked goods aroma).
- The finished dough figure can be dried and painted, thus preserving it as a keepsake.
- The dough can be edible (unlike store-bought plasticine).
- Homemade salt dough is an ideal material for the first lessons with small children (from 1 year). If the child tastes it or swallows a piece of dough, it will not cause any harm to the young organism.
- Fresh dough is very flexible, it is pleasant to touch, and working with it brings only positive emotions.
Simple DIY Salt Dough Recipes
To make homemade play dough for children, you will need only 10-15 minutes of time and a few simple products that are usually available in any kitchen.
Products:
- Flour. For the sticky mass, wheat flour of excellent quality is traditionally used, since it contains the necessary gluten. If the dough is prepared without dye, the finished mass will be white, and after drying in the oven, the product will acquire a pleasant ruddy hue.

Some recipes use rye flour, so the mixture will be light brown. It is not recommended to use corn flour, as it does not contain enough gluten., and the dough will lose its elasticity.
- Salt. In dough, it is necessary to maintain shape during the molding process, and in finished products, salt protects against mold contamination and rodent infestation. It is best to use finely ground salt for dough. It is not recommended to use sea salt or rock salt (even ground in a coffee grinder), since it will still be felt in the dough mass.
- Water. This is the link between flour and salt. It is best to use clean filtered water of low temperature or ice water. The dough will be more elastic.
- Oil. This is an optional component of the dough for creativity. But if you add 1-2 teaspoons of any vegetable oil to the mass, the dough will become softer, more pliable and elastic. And the baby's hands will be moisturized during the work.
- Additional ingredients. These include various substances that can improve the quality of the dough or give it color.
They are:
- Potato starch, introduced into a regular recipe in the amount of 1 tbsp., significantly increases the plasticity of the mass.
- Wallpaper glue can increase the strength of finished products after drying if you add 1-2 tsp.
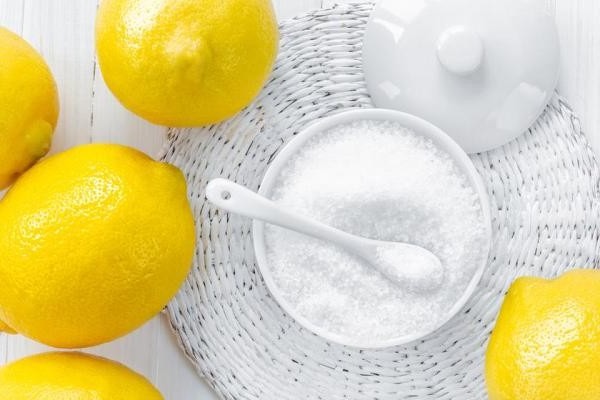
- Lemon juice or acid will become an excellent preservative and will allow you to extend the shelf life and use of the dough.
- Cream of tartar (this is the rocky structure that forms at the bottom of containers during the production of wine or grape juice) is a common ingredient in many children's craft dough recipes. It is added as a leavening agent. In stores, it is sold as a white powder in the spice section.
- Cinnamon or vanilla - aromatic additives.
- Natural dyes to give the dough different shades: turmeric or saffron powder (will give a yellow color), sweet paprika pepper (orange), coffee and cocoa (brown), dry ground spirulina or spinach juice (green shade), juices of different berries (from pink to burgundy).
- Food colorings or paints (gouache, watercolors) should be added to the dough only if a schoolchild or an adult will be working with it.
Some important points when mixing dough for creativity:
- The process of making the sticky mass is best done on the table, thoroughly kneading the dough with your hands and monitoring its consistency, removing lumps.
- The mass should have a thick structure; if it turns out too runny, add more flour and salt; if it is too strong, add water.
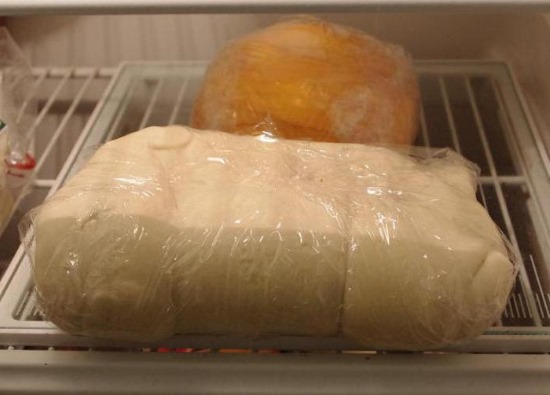
- The kneaded dough should be put away in the cold for 2-3 hours and only then offered to the child. Cooling will make the mass more homogeneous and plastic.
- Liquid dyes are added to water, helium dyes to the finished mass, and dry dyes to flour.
Classic Recipe for Play Dough
It is very easy to make play dough for children with your own hands.
To do this you will need:
- 1 cup wheat flour;
- 1 cup finely ground table salt;
- 0.5 cup chilled water.
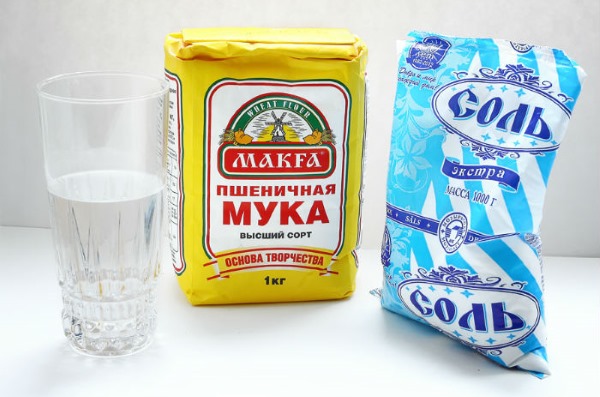
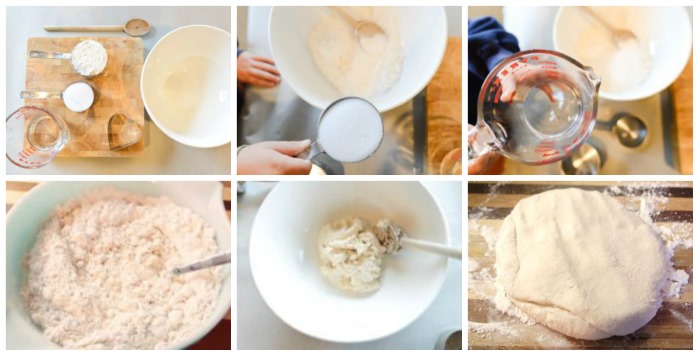
In a saucepan, combine flour with salt and pour in water in parts, stirring vigorously. Knead a stiff but elastic dough. It will be white. Cool for two hours in the refrigerator and you can start creating masterpieces. It is recommended to dry the finished figures and paint them with paints or felt-tip pens.
Recipe with PVA glue
Adding glue gives significant strength to finished dough products and promotes rapid drying. This recipe is interesting for those who plan to make Christmas tree decorations, figurines and keep the craft for a long time.
Incoming components:
- 1.5 cups wheat flour;
- 1.5 cups of water;
- 1 tbsp. fine salt "Extra";
- 3-4 tbsp. glycerin;
- 4 tsp PVA glue (or wallpaper powder);
- Dye optional.
Mix all ingredients, add glue last (if dry wallpaper glue is used, it should be diluted in water first). Knead the dough. Cool. Then you can make crafts.
Recipe with added starch
You can make homemade play dough for kids without using flour, replacing it with cornstarch.
This dough turns out snow-white (if you don't use dye) and is very pleasant to the touch. It is great for creating small figurines and small parts. Volumetric figures may crack when drying. Starch dough dries on a warm radiator for a couple of days.
Examples of two dough recipes with starch:
| Recipe without flour | Dough with butter and starch |
| 2 tbsp. baking soda | 1 tbsp. baking soda |
| 1 cup cornstarch | 1/2 cup cornstarch |
| 1.5 cups cold water | 1/2 cup cold water |
| rich hand cream | 1 tbsp. odorless vegetable oil |
| Pour the dry ingredients into a saucepan and add water. Place on the stove and bring to a boil, stirring constantly with a wooden spatula. Once the consistency becomes like thick cream, remove from heat and cool (cover the pan with a damp cloth to prevent a crust from forming). Knead the cooled mass with your hands, greased with cream (so that the dough does not stick). Keep the finished dough in the refrigerator. | Any dye |
| Flavoring as desired | |
| Combine soda with starch and water in a bowl, add dye. Heat the mixture on the stove until boiling, stirring continuously until the density increases.
Remove from heat, cool, covering with a damp cloth. Add butter, aromatic additive and knead the dough. If necessary, add a little starch. |
In these recipes, it is not recommended to replace corn starch with potato starch, otherwise the dough will turn out much worse.
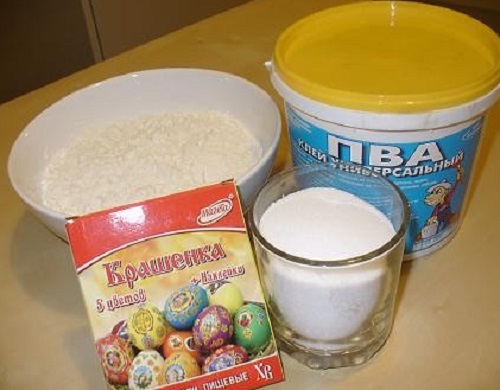
Recipe with food coloring
Children like bright colored dough much more than white, especially since it will help the child learn to distinguish shades faster. There are many options for making colored dough, it can be classic salty, starchy or rye. It is the last type of dough that is suggested to be made with the addition of food colorings.
Ingredients:
- 250 g rye flour (sifted through a sieve);
- 250 g wheat flour;
- 500 g fine table salt;
- 2 tbsp. refined vegetable oil;
- 250-300 ml of cold water.
- Several gel food colors (yellow, red, blue and green).
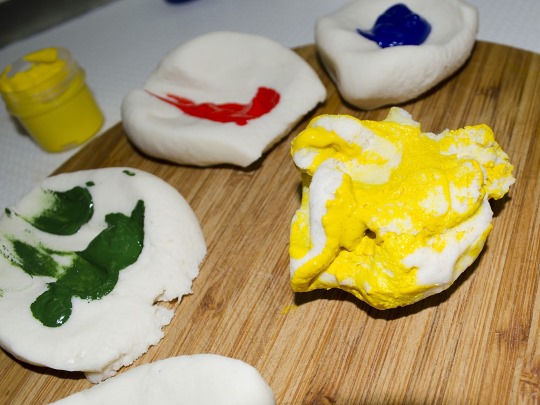
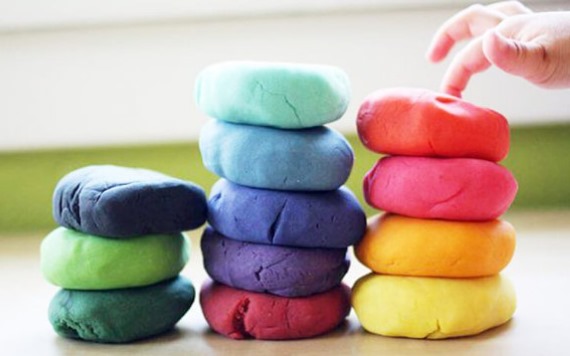
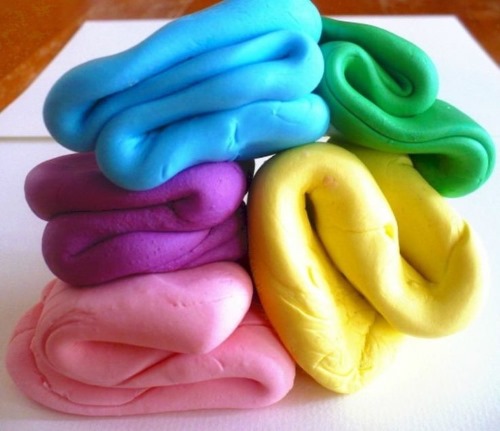
Mix the dry ingredients and add water and butter. Knead the dough vigorously until it becomes plastic. Divide the mass into 5 equal parts. Set one part aside (it will remain brownish), and add one dye to the others and knead again. As a result, you will get 5 pieces of dough for modeling in different colors. Store them separately from each other, wrapping each piece in cling film.
This is what multi-colored dough can look like if you use more food coloring.
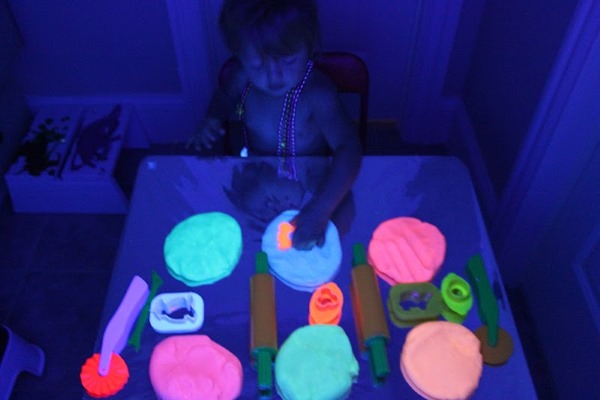
Glowing dough
You can make homemade play dough for kids that glows in the dark. However, this will only be noticeable under ultraviolet light. This kind of creativity will undoubtedly surprise and captivate the child. And parents should not worry, it is absolutely safe for children.
This is what it looks like:
Required ingredients for the glow test:
- 2 cups warm water;
- 2 cups wheat flour;
- 2/3 cup fine salt;
- 2 tbsp. any odorless vegetable oil;
- 2 tbsp cream of tartar (or apple cider vinegar);
- 2 ampoules of liquid vitamin B12 (cyanocobalamin for injection, purchased at a pharmacy).
Mix dry ingredients, add oil, water, vitamin and vinegar (or cream of tartar). Mix the mass thoroughly and cook on the stove until thick. Cool and can be used for modeling. The dough will glow yellow-green under UV light.
Dough with rye flour
Another version of children's dough using rye flour (it is better to mix wheat and rye flour, so the mass will become more plastic).
You will need:
- 3 cups wheat flour;
- 1 cup rye flour;
- 2 tbsp. salt;
- 1.5 cups ice water.
Preparing the dough:
- Sift flour and mix well.
- Add salt and pour in water.
- Mix vigorously: first with a spoon, then with your hands on the table.
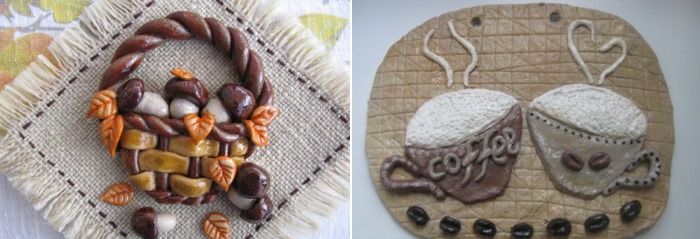
The finished dough has a delicate brownish tint, which can be used to make original vintage crafts for decorating the kitchen or various coasters for hot dishes.
Analogue of Play-Doh plasticine
"Play-Doh" is a brand of store-bought natural plasticine, which is more of a modeling dough., because it consists of flour, salt, water, citric acid and bright colors.
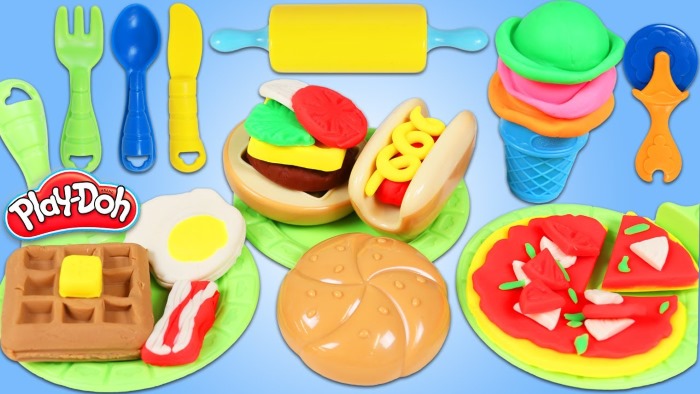
Its popularity among children is explained by the presence in thematic sets of molds for making different figures, templates, toys and, of course, the richness of the color range. The minimum cost of one set is about 1000 rubles.
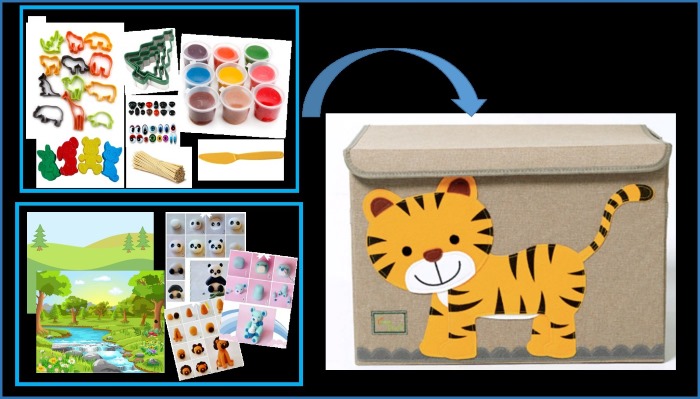
For thrifty parents, it is suggested to create a similar set at home, the cost of which will be several times lower, and the pleasure from modeling is just as much. You will need to look for some elements in stores, print out colored background pictures and make a suitable box (as an option, cover a shoe box with gift paper).
Example of creating a game kit:
- Prepare a variety of colored plastic mass and pack each color into a small plastic container with a lid.
- Purchase cookie cutters with the same theme.
- Take a few small sandbox molds.
- Print step-by-step templates for making figurines and backgrounds from the Internet.
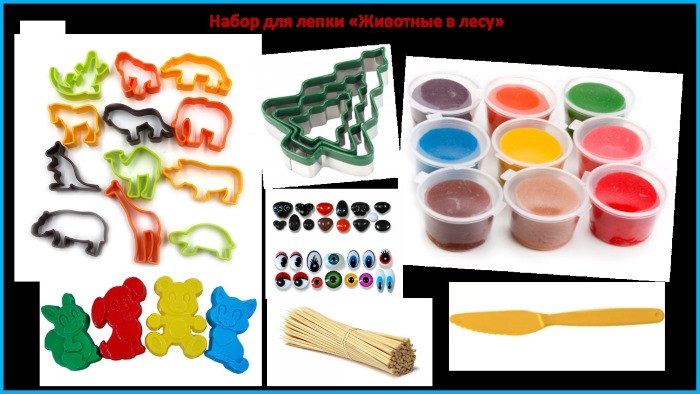
- Add missing elements to the set (according to the templates used). For example, if you choose the theme of "animals", you need to find confectionery and children's molds in the form of animals in stores. Also print out instructions for making animals and trees from dough with pictures that are understandable to the child. Add eyes, beads, toothpicks, sticks, a plastic disposable knife, and colored paper to the set.
- Place all materials in a large box for further storage.
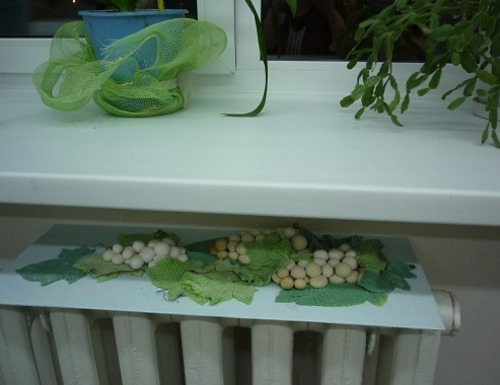
An example of a home kit "Animals in the Forest" is shown in the following photos:

To prepare a plastic mass for modeling, you will need:
- 2 cups sifted wheat flour;
- 1 tbsp. fine table salt;
- 1 tbsp citric acid (crystalline);
- 2 tbsp sunflower oil;
- 1 cup cold water;
- Bright food coloring in different colors (the more the better).
First, you need to prepare the colorless dough - the base. Mix the dry ingredients with butter in a saucepan and pour in water. Heat over a fire until boiling, stirring continuously with a wooden spoon. Remove from the stove when the mass thickens and becomes homogeneous.
Cool the mixture and knead it with your hands on a table sprinkled with flour. Divide the dough into equal pieces and add dyes to each part. Knead all the pieces separately. Place the finished material in containers and cool.
Salty mass in the microwave
DIY play dough for kids can be made using a microwave oven.
The process of heating the components of the sticky mass takes only 5 minutes. This is one of the fastest ways to create dough for creative crafts with children.
You need to take:
- 2 cups of water;
- 2 cups coarse flour;
- 1 tbsp. salt;
- 1 tsp olive oil;
- 1 tsp cream of tartar or apple cider vinegar;
- dye optional.
Sequence of actions: first mix all the dry ingredients, then pour in water, oil, and dye.
Mix thoroughly and place in the microwave for 5 minutes. Set the heating mode to medium.
Cool the resulting mixture and knead the dough with your hands. Keep the finished dough in the cold.
How to make edible play dough
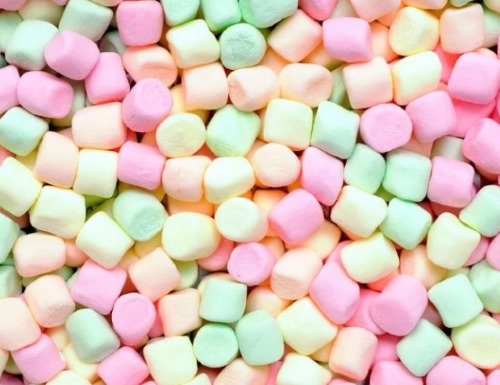
Often a child really wants to taste what he has just molded, especially if it is an ice cream or cake figurine. In this case, a wonderful alternative to salty dough is edible sweet plasticine, which is very easy to make at home.
The main ingredient is marshmallow - these are airy children's candies similar to marshmallows and pastilles., consisting of sugar (corn syrup), gelatin, dextrose and flavoring.
They look like this:
Necessary products for plasticine:
- 1 pack of marshmallows (it’s better to take plain or white candies);
- Powdered sugar (the amount will depend on the volume of the candy mass);
- Dye optional.
Algorithm of actions: put all the candies in a plate and melt them in the microwave at maximum power (it takes 1-2 minutes) until the consistency of thick cream. Then carefully mix with a spoon, making sure the mass is homogeneous, and let it cool.
Gradually add powdered sugar and knead with your hands. At the end, add the dye and knead again. If you initially take colored marshmallows (one color), then you can skip the dye.
The finished plasticine turns out sweet and very beautiful, with a noble pearl shine, as in the photo.
How to Make Choux Pastry for Modeling
To make crafts made from dough shine, professional craftsmen add glycerin to the recipe, and the sticky base is prepared using the custard method.
In a bowl, mix 2 tbsp. of vegetable oil with the same amount of cream of tartar, 400 g of wheat flour and 100 g of fine salt. Separately, boil 2 cups of water and add the mixture prepared in portions, 1/2 tsp. of glycerin and the coloring agent.
Next, boil the mass until it has a uniform consistency and cool. Finally, knead the dough well with your hands. If it turns out to be too runny, add flour. The dough for creative play with children is ready.
Drying salt dough at home
An unusual product molded by children's hands can be preserved as a keepsake if the craft is dried correctly.
There are several options for drying dough:
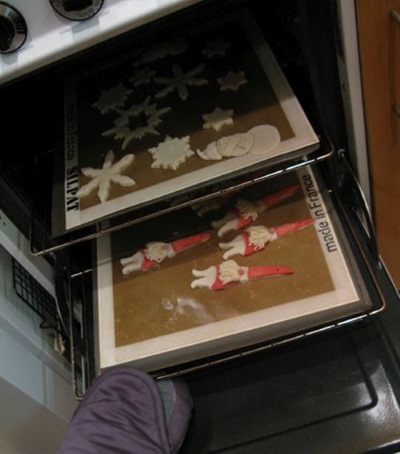
- In a preheated oven. The baking tray should be covered with baking parchment and the figures should be placed there. Place in the oven to dry at 80 degrees for 60 minutes. Important: the oven door should be kept slightly open.
- Drying in the sun. A longer, but natural process takes 3-4 days. To do this, place the craft on a wooden or plastic tray and make sure there is no rain.
- Drying on a radiator (an excellent method in winter). Place the form on paper and leave it on the radiator for 2-3 days.
If the basis of the craft is dough based on flour or starch, then drying with hot air can make the figurine more durable and protect it from cracking. But if the child used edible plasticine (based on marshmallow and sugar), drying is recommended at room temperature and on a flat surface.
How to Store Play Dough
The optimal storage period for homemade dough is on average 30 days. If you add citric acid (or lemon juice) to the recipe, the period will increase by another 2-3 weeks.
The correct way to store the dough to keep it fresh and soft is to wrap each piece (if the dough is multi-colored) in cling film or pack it in yogurt jars with a tight lid. The main task is to prevent moisture from evaporating and forming a crust. The packaged dough must be kept in the cold at a temperature of +5 degrees (the lower part of the refrigerator).
Modeling from dough is a great way to diversify children's leisure time, suitable even for long trips. Making a train or plane with your own hands during a trip will be much more interesting and useful for a child than watching cartoons on a phone screen.
Article formatting:Natalie Podolskaya
Video about play dough
Play dough for children - how to make at home, detailed video instructions: