Slippers are knitted on 2, 5 knitting needles or circular tools. Less often, a crochet hook is used. There are many models of slippers, the patterns of which are understandable even for beginner craftswomen.
What models of slippers are suitable for knitting for beginners
Speed and rapidity of execution, the possibility of choosing the knitting technique, the use of yarn remnants - these are the main features of knitted slippers. For work, you will need a minimum of tools to make them. Experienced knitters initially recommend choosing the simplest methods for creating slippers.
These can be models knitted with satin stitch, variations with or without seams.
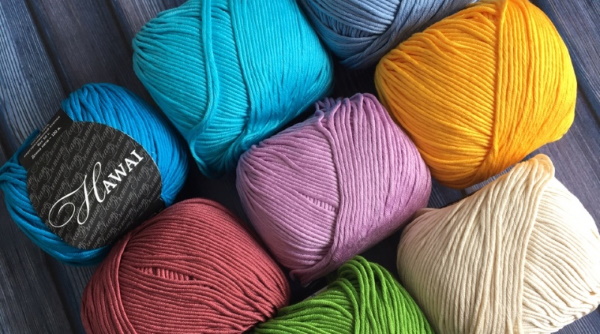
What kind of yarn should be used for knitting slippers?
Knitting of slippers is carried out using different types of yarn according to their composition, thickness, and shade.
Suitable are plain twisted thread and colored yarn made from natural or artificial fibers, for example:
- regular wool;
- mohair;
- angora;
- self-spun thread made at home;
- melange yarn;
- cashmere;
- silk, cotton, linen threads;
- "flame";
- "boucle".
When choosing yarn, first of all, pay attention to the structure and quality indicators of the thread. It is better to give preference to a breathable material that has high thermal-water properties, but has a low degree of electrification. Acrylic, linen or natural yarn, which has added synthetic thread in a ratio of 50X50, are suitable.
They also use leftover wool of different tones and densities. They are easy to put together and make multi-colored, quite modern slippers. Experienced craftswomen advise to thicken the heel and sole by adding a nylon thread. Then the product becomes more wear-resistant. And it is recommended to select yarn taking into account the seasons. Cashmere, wool, and semi-wool are suitable for winter. For spring, it is advisable to take acrylic, cotton, and bamboo.
The choice of material is very important. It should be soft to the touch, warm the feet well, and not irritate the skin. For knitting children's products, it is better to give preference to special hypoallergenic yarn of various colors.
Conventions and abbreviations in master classes
Legend:
| Designation | Definition |
| persons. | Face loops |
| r. | Row |
| out. | Purl stitches |
| vm. | Together |
| persons. art. | Face |
| last p. | The Last Loop |
| next r. | Next row |
| chrome. | Edge loop |
| v. p. | Air loops |
| platinum elm | Garter stitch |
| out. st. | Back side |
| nak. | Yarn over |
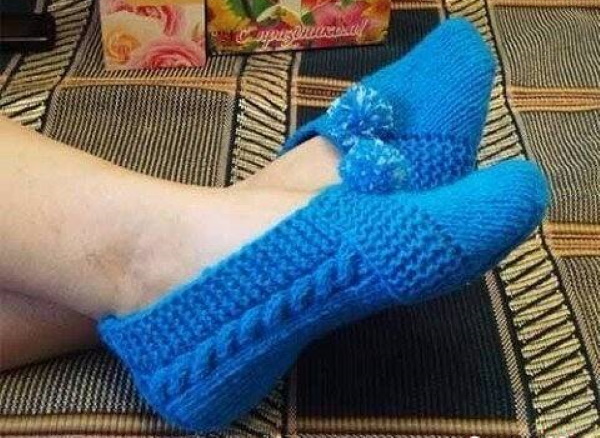
Master class on knitting simple slippers-footshoes
It is quite easy to knit slippers for beginners using this master class.
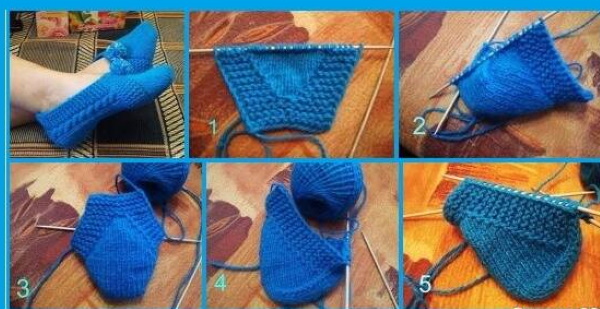
Initial order of actions:
- Cast on 32 sts onto the needles.
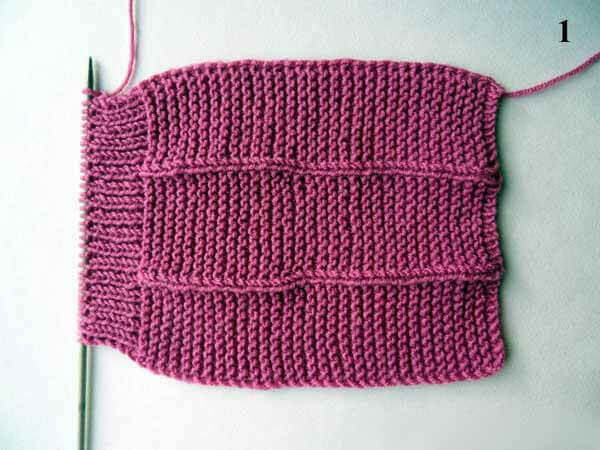
- 1st row – persons. p.
- 2nd row – knit 10 knits, every other 1 purl until the end of the row.
- The fabric is knitted to the height of the heel, alternating these two rows.
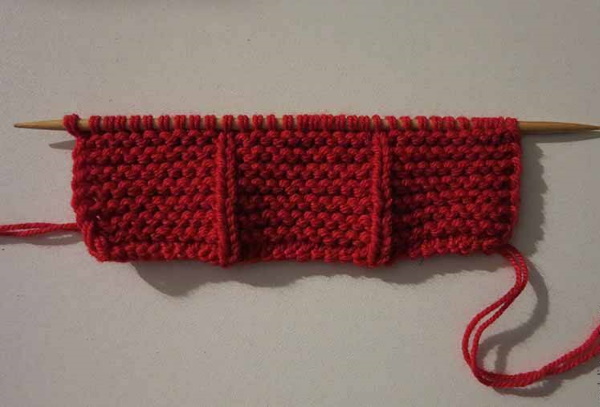
- In this model 15 p.
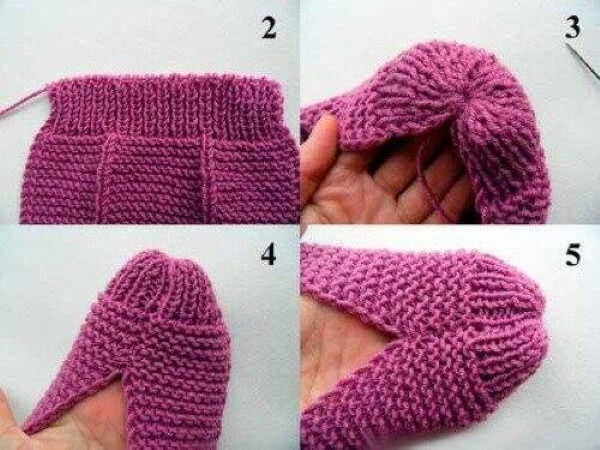
- Next, from row 16 (purl loops), begin to form the heel.
- That is, knit 10 knits (along the side), 1 purl, 10 knits, and 2 more together with the purl (central part).
- So we added 1 st of the side zone.
- The product is turned towards the face.
- From row 17 (front st.) knit only the middle (12 sts). Attach the side elements to it. Remove the 1st st, 10 front sts and the 12th st of the central zone. And knit the edge of the side part. The removed st is transferred to the knitted st.
Next, repeat rows 16 and 17, also attaching the side parts of the heel piece:
- There should be 12 sts left on the needle (front stitch). Cast on 10 sts along the side braid.

- The product is turned inside out again.
- Then the loops of the central and side parts are collected.
- Then, using the knitted chain on the other side, cast on another 10 sts.
- There are 32 sts on the needle again.
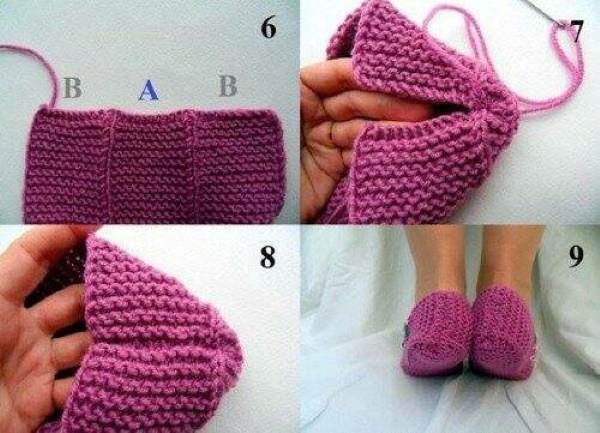
Next, continue knitting with the “garter stitch” in both directions:
- In the purl rows, 10 knits alternate with 1 purl.
- In the front rows, only knit stitches are knitted.
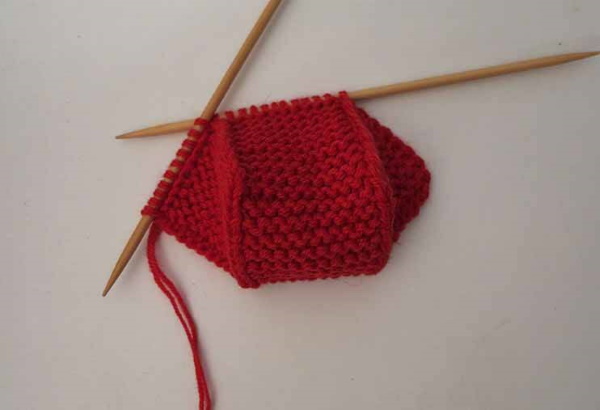
- The fabric is knitted to the “bone”, preserving the front “grooves” on the sole part.
- When you finish knitting, at the end of the row, cast on 8 ch on the knitting needle.
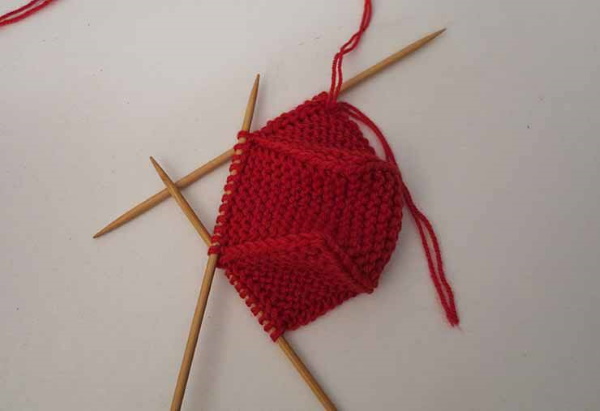
- Knitting is united in a circle.
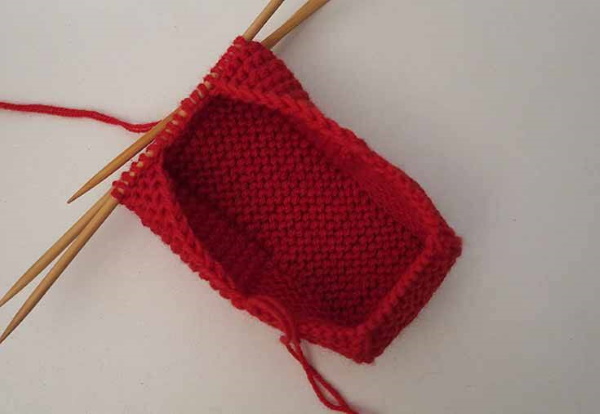
- The loops are distributed across 4 knitting needles.
- Next, knit in garter stitch in a circle until the little finger is hidden.
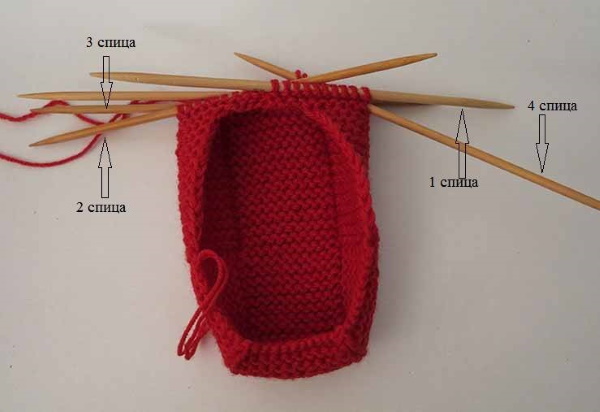
Sock Drop
It is done like this:
- Next, knit using the "stocking pattern".
- 1st needle – all persons. The 2nd st is removed. It is thrown onto the knitted one.
- 2nd needle – also knit only knit stitches until there are 3 stitches left on the needle. Knit 2 of them together, then 1 stitch.
- 3rd spoke – like 1st.
- 4th needle – repeats the 2nd.
- The loops are decreased every other row.
- There should be half of the initial amount left on each needle.
- Then the reduction is made in all rows.
- There will be 2 sts left on each needle.
- Then combine the loops of the 1st and 2nd knitting needles.
- And also connect sts. 3 and 4 of the knitting needles.
- The needles are placed parallel.
- And 2 together sts are knitted simultaneously with both knitting needles in 1 step.
- Then the loops are immediately closed as a sample.
- In other words, the removed stitch is transferred to the knitted one.
- The last loop is brought out to the wrong side and secured.
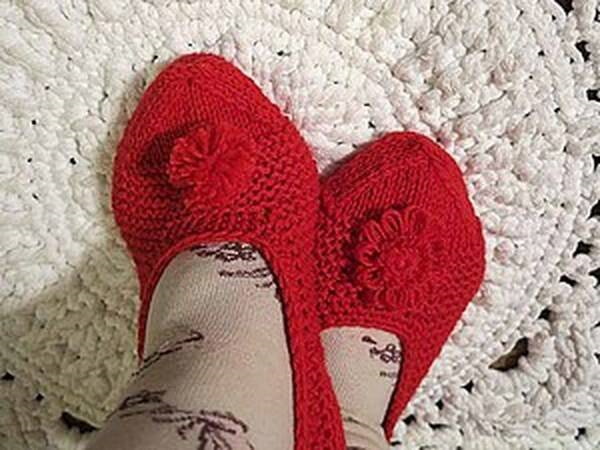
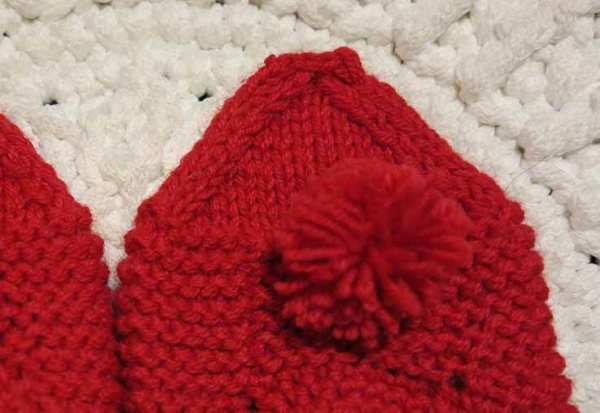
- Slippers can be decorated as desired, for example with flowers or pom-poms.
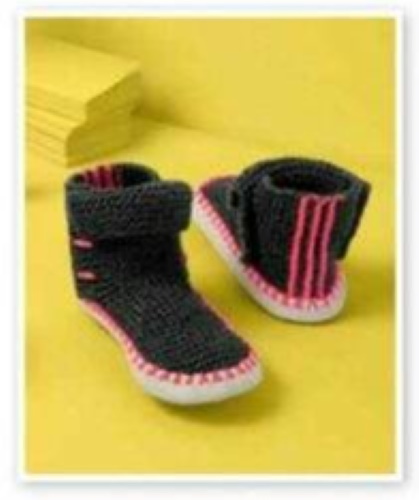
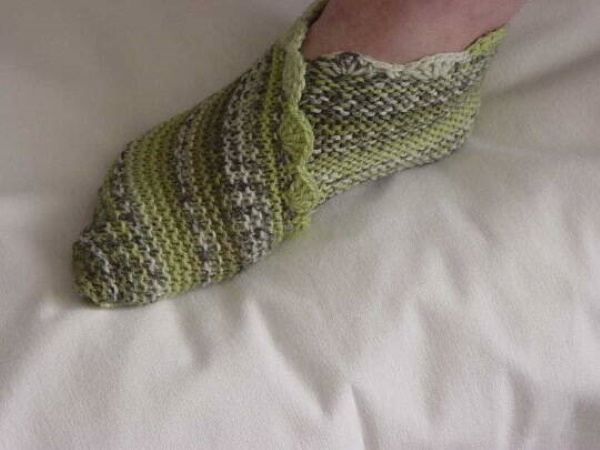
Slippers-boots
Slippers in the form of boots are easy to knit with knitting needles. This knitting method, described below, is suitable even for beginner needlewomen.
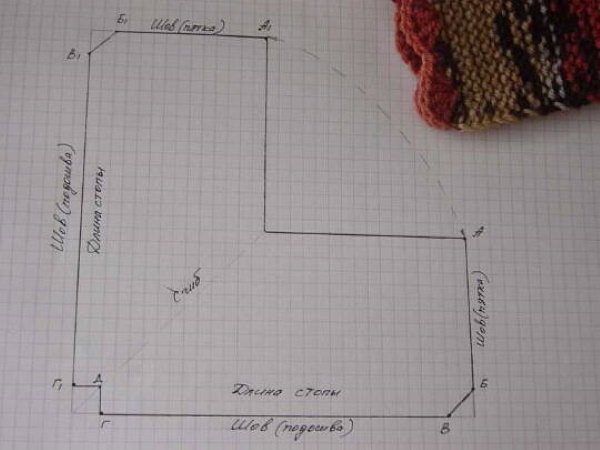
Part 1 (see diagram below):
Initial steps:
- Cast on 23 sts.
- Row 44 (15 cm) knit in garter stitch.
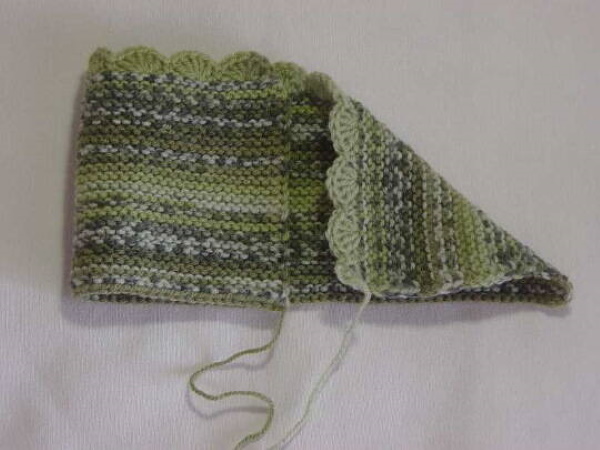
Part 2:
- In row 45, close 3 sts and knit the row to the end.
- In row 46, close 3 more sts. And the row is also knitted to the very end. 17 sts remain.
- 30/36/42 rows (which = 10/15/14 cm) are knitted in garter stitch.
Part 3:
- In the next 4 rows, close 2 sts, and knit the rows to the end = 9 sts.
- In the next 2 rows, close 1 st. In total, 7 sts remain.
- In the last row, all loops are closed.
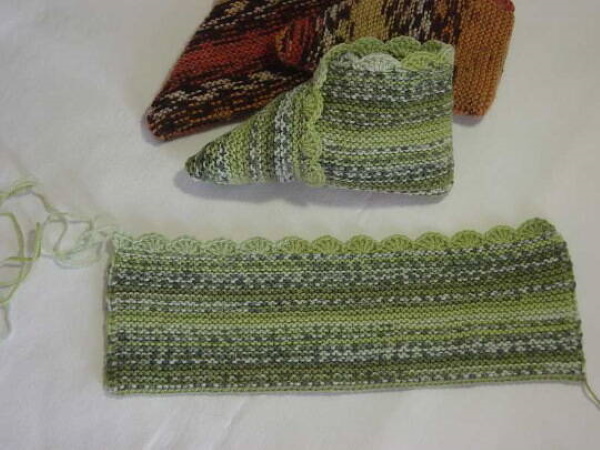
Part 4:
- Cast on 19 sts with the main color thread.
- With the same thread, knit 18 rows of garter stitch.
- The next 2 rows are knitted with yarn of a different shade.
- Then knit, changing threads every 2 rows.
- Knit 8 rows like this.
- Then knit another 18 rows with the main shade of thread.
- The loops are closed.
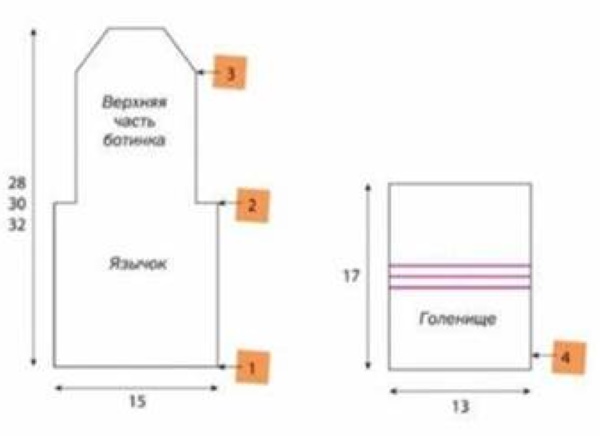
- The slipper parts are connected and sewn to a felt or any other sole of your choice.
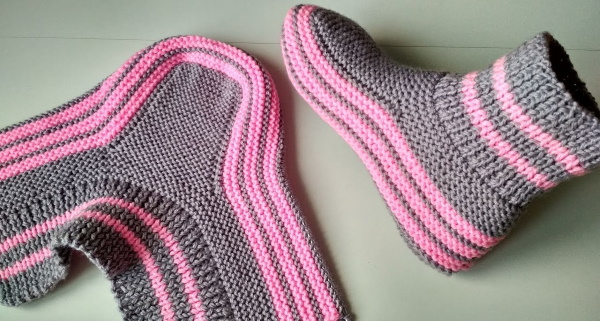
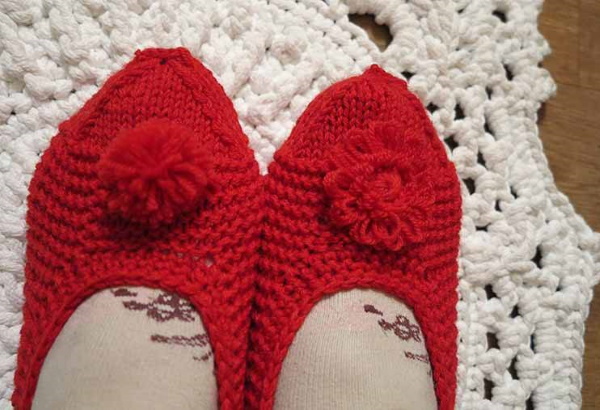
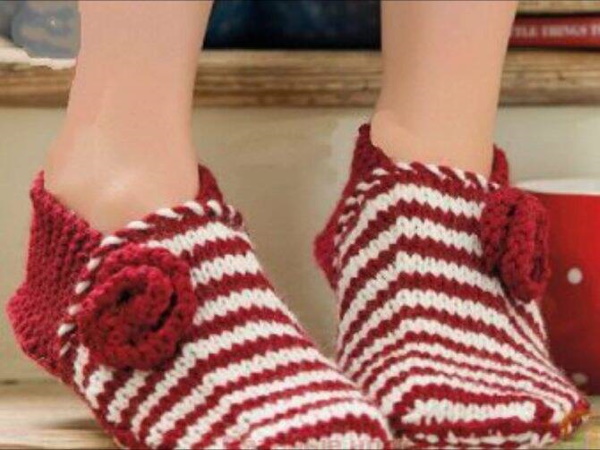
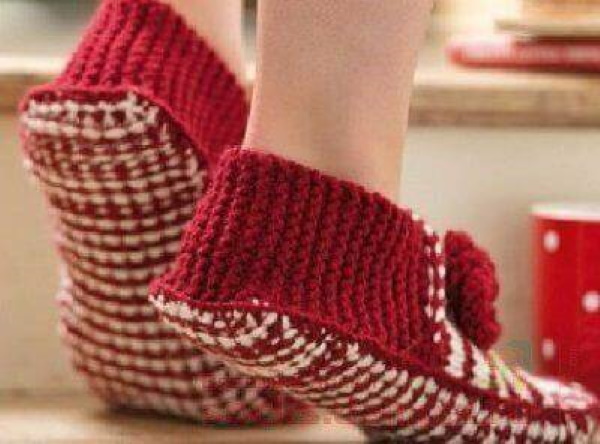
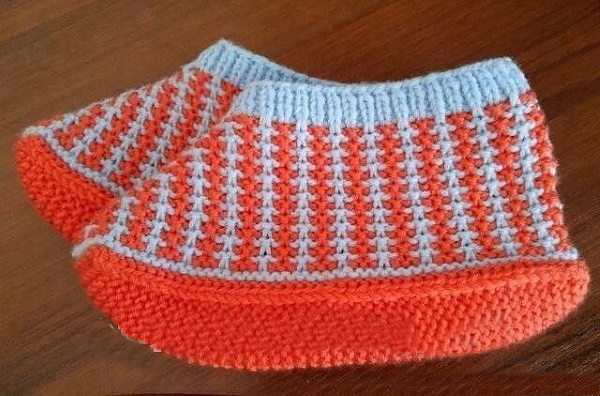
Two-tone slippers with separate soles
Knitted slippers for beginners can be made using yarn of different shades. The result is a striped pattern. It is advisable to choose one light color.
Knitting density: 18 sts in 25 rows. Sample – square 10/10 cm.
Sole
Start:
Cast on 11 sts onto the knitting needles. Knit using garter stitch (face stitch only).
1st row:
- Use burgundy thread. Remove 1 st.
- 11 sts remaining.

2nd row:
- Knitted with white thread.
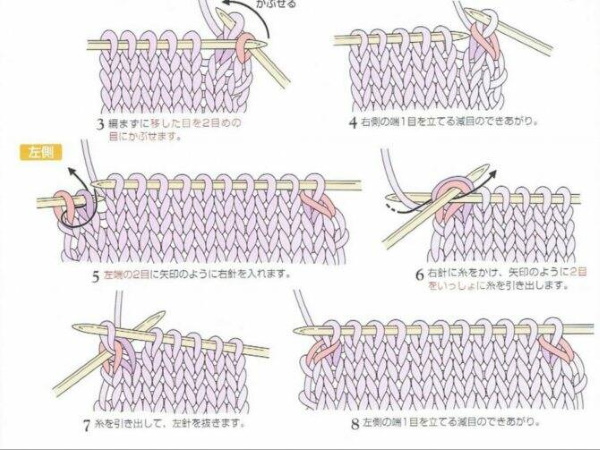
- The 1st st is removed to the right needle. However, it is not knitted. The loops are added from the previous row (see diagram).
- Knit until the last stitch.
- The penultimate st is also added from the bottom row, 1 purl.
- 13 p. are collected.
3rd row:
- Knit with burgundy thread, do not make increases.
4th row:
- White thread. Knit with faces.
- The 1st st is removed again, but not knitted.
- Increases are made from the previous row.
- Knit to the penultimate st.
- Then add st again from the bottom row, 1 purl.
- This makes 15 sts.
- The last one is knitted inside out so that the edge is beautiful.
- Repeat rows 1–4 until you have 23 sts on the needles.
- Continue knitting without adding sts.
- The length of the sole piece should reach 20 cm, counting from the beginning of knitting.
Next row:
- In all rows along the edges, decrease 1 st.
- Decreases are made in every 4th row until 17 sts remain on the needles.
- The last row is knitted.
- The loops are closed.
Top of the slipper
Procedure:
- Cast on 35 sts.
- 1st row: Knit with burgundy thread.
- Then knit with the front stitch.
- 2 rows are done with white yarn, the next 2 rows – with burgundy yarn.
- Then the shades alternate every 2 rows.
- 6th row: persons. Knit 12 sts, 2 together, 7 sts. Then 2 together, again 12 sts.
- This makes 33 sts.
- 7th row: no decreases.
- Row 8: knit again. Knit 10 sts, 2 together, 7 sts. Then 2 together, 10 sts.
- Got 29 p.
- Then the loops are decreased through every other row.
- There should be 23 points left.
- Then decreases are made in every 4th row.
- 15 sts remaining.
- Next come the persons.
- Next row: knit 2 together in a row, then 7 sts. Then knit 2 sl sts in a row again.
- This makes 11 sts.
- Next row: purl 2 together, 7 sts, 2 together.
- Total 9 p.
- These loops close.
Twist a maroon and white cord. Fix it and sew it on. This will make the top look neater.
Heel height
Sequence of actions:
- Cast on 11 sts with burgundy thread onto the knitting needles.
- A 20 cm strip is knitted using garter stitch.
- Then the loops are closed.
Assembly
Assembly process:
- The ends of the plain strip are sewn to the top of the slipper using a thick needle.
- The top piece is pinned to the sole so that the middle of the heel coincides with the center of the back edge of the sole piece.
- The middle of the top should be aligned with the middle of the toe.
- All elements are pinned and sewn together.
- The lower felt or leather sole is also sewn on.
Rose
Technique of execution:
- Cast on 10 sts with burgundy thread.
- 1st row: persons only.
- 2nd row: 1 knit alternates with yarn over, knitting to the very end of the row.
- 3rd row: purl only.
- 4th row: repeat 2nd row.
- 5th row: purl.
- Then the loops are closed.
- The created rose is twisted into a spiral.
- The flower is sewn onto the slipper.
Slippers made of rectangular fabric
Knitted slippers for beginners according to this master class are distinguished by their simplicity of execution. Use knitting needles No. 4. The product is suitable for foot size 36 - 40.
Procedure:
- Cast on 34 sts.
- All rows begin and end with edge stitches.
- 1st row: knit completely.
- 2 – 34th row: alternate 10 persons. with 1 out.
- Row 35: persons. Knit 11 sts, from the 1st knit 2 sts. Then 8 sts, again add the same number of sts and again 11 sts.
- Increases are made for the expanding area of the foot.
- Row 36: knit 10, purl 1, knit 12. Then knit in mirror image.
- Row 37: knit only faces.
- Rows 38 – 63: they are knitted in the same way as the previous two.
- Rows 64–72: alternate between front and back stitches.
- The loops are not closed.
- The thread is cut, leaving a small end.
- The result is a knitted fabric. When gathering it, the thread is passed through the unclosed loops.
- They are pulled together and fixed.
- The piece knitted with elastic + several rows is sewn with a needle.
- This determines the depth of the product.
Slippers with lazy jacquard
Slippers with knitting needles for beginners in the form of "lazy jacquard" are made using acrylic of different shades. It is preferable to choose one light tone.
Start:
- First, knit the cuff with a classic elastic band.
- Using a dark thread, cast on 71 sts.
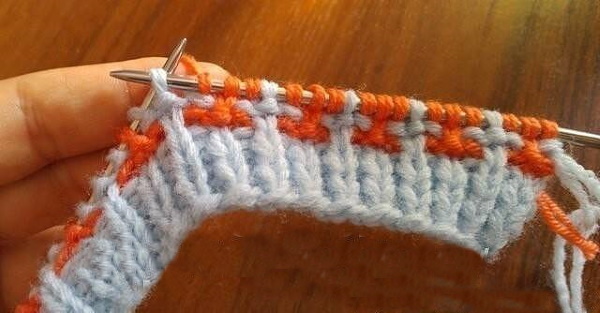
- Knit 5 rows.
Knitting the toe
Procedure:
- The 36th middle point is highlighted.
- In odd rows of any color, increases are made.
- On each side of the central loop add 1 st.
- This is done by knitting them from the broach.
- The middle loop is knitted with only one shade of thread.
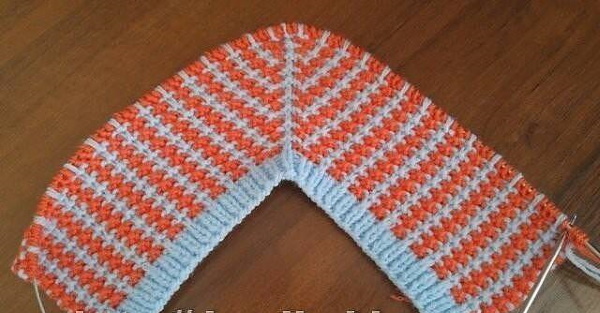
- In other cases it is removed.
- In the front row the working thread is left behind the st, and in the back row – in front of the st.
When the cuff is knitted, a "lazy jacquard" is knitted. A thread of a different tone is included in the work.
Technique of execution:
- 1st row: knit 3, remove 1 st. Knit like this to the middle st. From there knit in reverse order.
- 2nd row: the removed loops are removed again. The rest are knitted. The thread is changed to another.
- 3rd row: knit 1, remove 1 st, *3 knits. Then remove 1 again. From the "asterisk" sign, the sequence is repeated to the marked st. On both sides of it, add 1 st. Then the actions are repeated in reverse order.
- Row 4: knit as Row 2. Knit the loops added earlier.
- Next, 38 rows are knitted, repeating the pattern of the 1st – 4th rows.
- The side element is ready.
Knitting the sole
Execution technology:
- 4 rows are knitted, changing shades. The light thread is cut off. The end is secured.
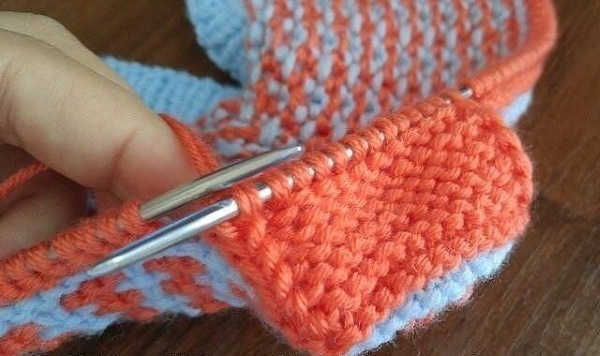
- In the next row, all loops are knitted up to the marked st., + 5 sts.
- One loop is removed from the left knitting needle. The second one is knitted.
- The 1st stitch is thrown onto the 2nd stitch on this needle.
- The product is unfolded.
- Then remove the 1st st, 11 knits, 2 together purl.
- There are 11 sts left in the work in the middle. From the wrong side, the outer loops are knitted together with the next one.
- From the front side, knit 2 sts together. front sts with a draw through.
- Turn the product again and remove the 1st stitch.
- On the back side, the thread is left in front of the work, and on the front side, it is left behind it.
- In this way, braids were formed on the sides of the sole.
- Continue knitting until there are 5 sts left on both sides.
- Add an additional abbreviation.
- 2 sts together, taken from the sides, knit 1 front.
- The loops of the sole part are reduced by 1 st. As a result, 1 st should remain in each row.
- The remaining loops are pulled together. The end of the thread is cut and fixed.
- The slipper is sewn along the back side - from the heel to the cuff.
Rectangular slippers
The slippers are made on the basis of a rectangular fabric knitted with garter stitch.
Method of execution:
- Cast on 50 sts.
- Knit a strip along the length of the foot, approximately 90 rows.
- Then the loops are closed.
- Then the sock loops are pulled together.
- The knitted fabric is folded in half, turning the front side down.
- Next, the seam of the heel piece is sewn onto the outer loops.
- On the reverse side, the knitted strip is divided into 3 parts.
- On the right 2/3 are pulled together with a thread. It is tied.
- The left end is placed on top and then sewn on. This is a slipper for the right foot.
The slipper for the left foot is assembled the other way around: 2/3 is pulled together on the left, but the right part is placed on top and also sewn on.
Ballet slippers
This model is best suited for pajamas or a tracksuit. It is not difficult to knit.
Execution technology:
- 34 sts are cast on onto the needles.
- In the 1st row, remove the edge stitch and knit 32 knits.
- In the 2nd row, remove the edge, knit 10 knits, 1 purl. Then repeat the pattern.
- Row 3 is knitted as 1, and row 4 as 2.
- In total, knit approximately 22 cm (65 – 70 rows), if the slippers are size 39.
- The pattern scheme is changed when the middle of the canvas is reached.
Finger extension
Next, add several loops:
- The 1st row of the nose part is knitted as follows: edge, 11 persons., 2 sts are knitted from 1. Then 8 persons., increase again. The sequence is repeated.
- 2nd row: knit edge, 10 persons, 1 out. Then comes 12 persons, 1 out, 10 persons. The final one is edge.
- 3rd row: 2 edge, 34 persons.
- Then these rows alternate.
- The last 2 cm are knitted with a 1X elastic band
- The loops are not closed.
- They are strung on the remaining thread and pulled together.
- The edges of the product are sewn together at 8–9 cm or crocheted.
Seamless slippers
These slippers are knitted without a seam. For work you should prepare semi-woolen or woolen yarn - 2 skeins of 100 g / 250 m, knitting needles No. 3.
Technique of execution:
- Cast on 13 sts.
- Row 8 is knitted with a garter stitch pattern.
- From row 9, the addition of loops begins.
- Knit 1 edge, 5 “garter stitches”, 1 front stitch.
- Again 5 "plait knit", yarn over, 1 person.
- Again 5 "plat. knit.", 1 edge.
- In the purl row, knit according to the pattern.
- All nak. are knitted with a purl crossed st.
- In subsequent persons rows, yarn overs are made.
- In other words, after the “plain stitch” and before it, there is an increase in loops.
- Repeat the rows until there are 39 sts left on the needles.
- Then separate the middle 9 sts. Round the toe in the same way as the heel.
- Knit 15 sts, knit 9–10 together.
- The product is turned.
- Knit 8 5, and 9, 10 again connect 1 st. and so on.
- There should be 9 central sts left on the needle.
- Then, on each side of the toe edge, cast on selvedge = 18 sts.
- In total there are 45 sts.
- They are distributed as follows: edge, 5 "garter stitch", 1 purl. Then 4 sts "cable", 1 purl, 21 front satin stitch.
- Then comes 1 purl, again 4 sts from the “tow”, 1 purl. Next 5 “garter stitch”. Edge stitches complete the row.
- In the “cord” the loops are shifted in every 4th row: 2 sts are left in front of the work on an additional knitting needle, then 2 persons.
- Then knit 2 sts from this needle.
- In the purl row, the loops are knitted according to the pattern.
- Total 36 – 40 p.
This model fits foot size 35 – 37.
The heel piece is knitted in the same way as the toe:
- To begin with, select the central 9 sts.
- At the end of row 8, knit with a “garter stitch”.
- Finally, the loops are closed.
- The slipper is decorated with a flower, bow or pompom.
Slippers knitted with your own hands are cozy and comfortable accessories for the home. The models presented here for beginners are not difficult. Such products are easy to knit with knitting needles in 2 - 7 days.
Video about knitting slippers with knitting needles for beginners
How to knit house slippers with knitting needles: