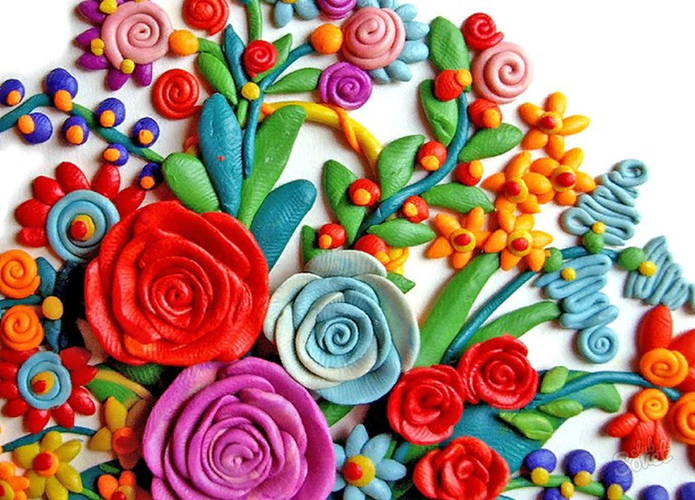
Preschool children love it very much sculpt all sorts of objects from plasticine. This plastic material allows you to do a lot. You can even make flowers from it. They can be placed in a small vase or included in a decorative composition, which you can give to your beloved mother or grandmother with your favorite lines of poetry.
Step-by-step instructions and master classes on modeling
First, you need to decide on the format of the finished product: will it be a single flower or a bouquet, a composition of different flowers or only spring (summer or winter). The article provides step-by-step master classes on making different flowers. All that remains is to choose and get to work.
What you will need for the work is shown in the table:
| Item | Purpose of the item |
| Plasticine (wax or classic) | Modeling of the product |
| Cardboard | Base for crafts using plasticine painting technique |
| Toothpick, wooden skewer | Solid base for the stem |
| Stack | Creating relief |
| Modeling board | For ease of sculpting and keeping the work surface of the table clean |
| Napkin | For wiping all tools and work surfaces from plasticine |
Orchid on cardboard
One of the popular flowers is the orchid. A branch completely covered with delicate buds will be a wonderful gift for any woman. The decorative composition can be made using the plasticine technique.
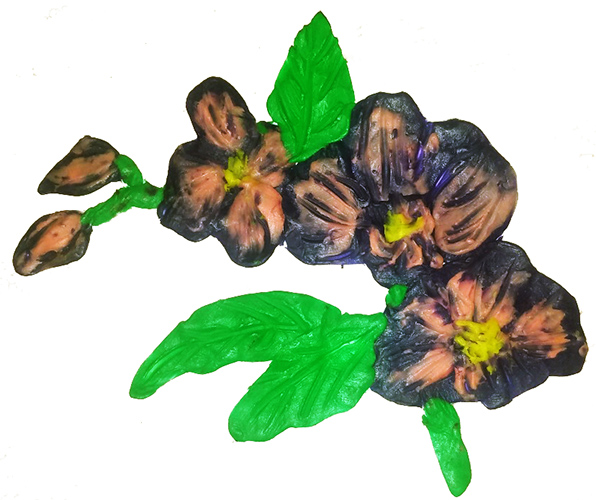
To work, you need to prepare plasticine, a stack and a base - cardboard.
How to make an orchid from plasticine on cardboard:
- Draw a branch of orchid with flowers on cardboard. You can print out a ready-made template, carefully cut it out and glue it to the cardboard.
- Roll out thin green sausages – the stems of the flower – and attach them to the base.
- Roll balls from purple plasticine, flatten them. Place the resulting flat cakes in the center of the petals and spread them out to the edges.
- Add a contrasting color (e.g. pink): place small balls on the petal near the middle of the flower and spread slightly towards the edge. Draw veins with a stack.
- Attach a yellow ball to the center – this will be the middle of the flower.
- “Draw” the leaves: smear green plasticine and make veins with a stack.
The work can be designed as a postcard with a beautiful shiny or plain frame.
Volumetric rose
The most popular flower is undoubtedly the rose. The flower looks equally beautiful both in a bouquet and as a single stem. Craftsmen have learned to make it from different materials so that it is impossible to distinguish the result from a real rose.
Of course, for preschoolers you need to choose a simple and quick option. After all, children are not yet assiduous enough to make complex crafts. For example, you can make a three-dimensional rose in a pot.
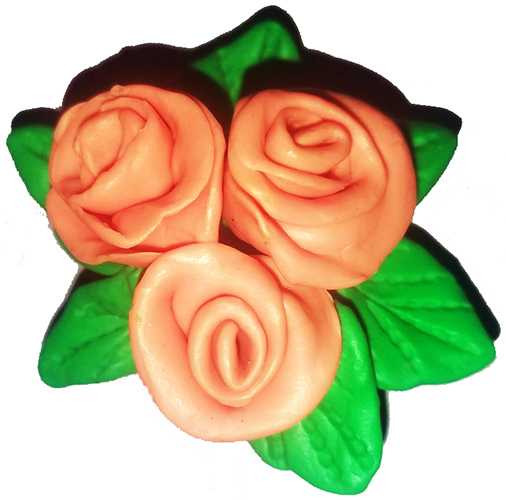
Flowers from plasticine for children are made step by step:
- Flower. Roll out a sausage from brightly colored plasticine, flatten it – you will get an elongated ribbon. Twist the ribbon into a spiral. When the last turns are twisted, you can bend the upper edge of the ribbon back a little. Then the petals of the finished flower will be slightly curled.
- Leaves. Divide the green plasticine into 6 equal balls, flatten them to form flat cakes, sharpen the edges. Use a stack to highlight the veins.
- Pot. Make a cylinder out of plasticine and place a sausage of a contrasting color along the top and bottom.
- Assembling the productPlace leaves on top of the pot, arrange roses beautifully on top, press lightly.
The simple and beautiful craft is ready. It can be placed on the windowsill next to your house flowers or on a shelf.
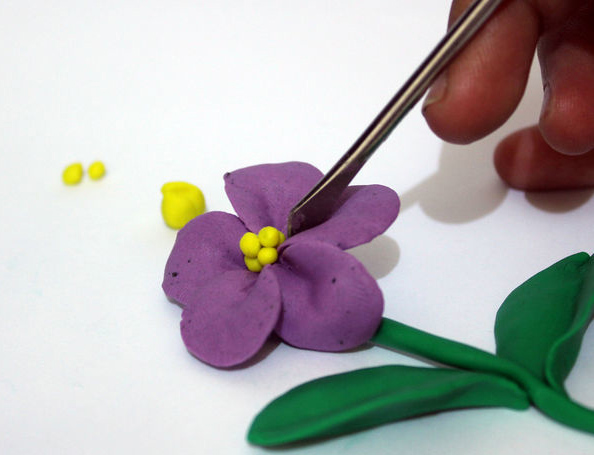
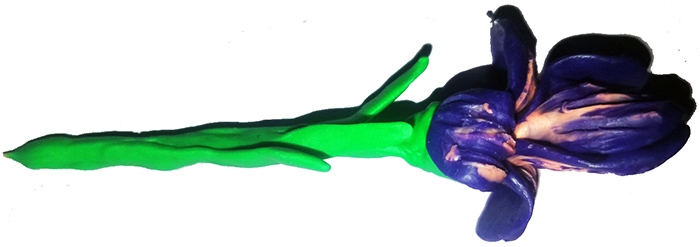
Iris
A flower that looks a bit like an orchid, the iris, fascinates with its color tints and aromatic scent. Irises come in purple, lilac, white, light blue, blue and even cream.
To work you will need plasticine, a stack and a toothpick or skewer.
To make iris you need:
- First make the petals: divide the purple plasticine into 6 parts, roll the balls, flatten them into a flat cake, sharpen one edge and stretch the other to get an oval-shaped figure with a pointed end. Make small flagella of a contrasting color (pink) and attach them to the sharp edge (bottom). Lightly smear with your fingers, draw the veins with a stack.
- To form a flower: first attach 3 leaves to the top of the toothpick with the smooth side inward, bring the upper edges closer to each other. Then attach the remaining petals with the veins inward and bend them outward.
- Roll the green plasticine into a flagellum, flatten it and wrap it around a toothpick – this is the stem.
- Roll out a smaller flagellum, press it lightly and wrap it around the lower part of the flower – this is the receptacle.
- Make the leaves from green flat strips, pointed at the top.
All that's left is to mold a pot and "plant" the finished flower. Or make a few more irises and collect them into a lush bouquet.
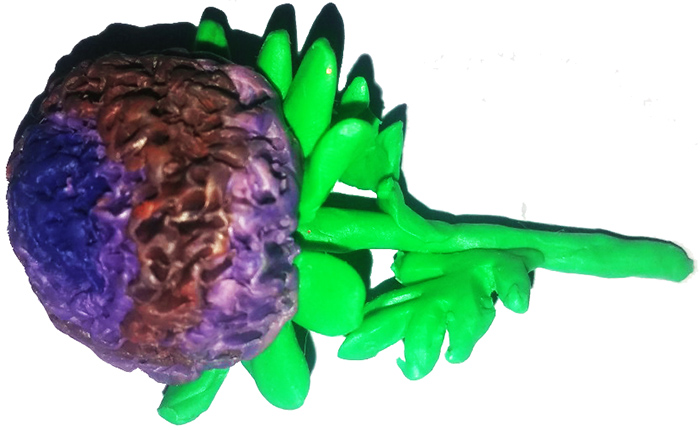
Chrysanthemum
Beautiful and bright autumn flowers delight the eye on a cloudy day, lift the mood. To sculpt a chrysanthemum flower, you need to select several shades of the same color. The stem and leaves will be green.
Plasticine flowers for children are easy to make:
- Take several shades of one color (for example, purple, light purple and lilac). The colors will be located from dark in the middle to lighter at the edge. Roll a purple ball. Make thick sausages from light shades, wrap them around the ball in rings.
- Using a toothpick, make deep holes all over the surface to imitate petals.
- Make a receptacle: roll out a green ball, flatten it, make cuts along the edge of the resulting circle with a stack, carefully form the petals with your fingers.
- Wrap a toothpick in green plasticine to create a hard stem.
- Form leaves from the green elongated flat cakes, make zigzag cuts along the edges.
All that's left is to assemble all the parts together and admire the resulting masterpiece. For decoration, the craft can be placed in a plasticine vase.
Another option for sculpting a chrysanthemum:
- Place petals along the edge of a circle of green cardboard - this will be the receptacle.
- Make many flagella from similar shades of plasticine. Lay them out in circular rows towards the middle.
- You can place several brighter flagella in the center, highlighting the middle.
Modeling a plasticine flower is suitable for diligent children, because here you need to mold a sufficient number of flagella: if there are not enough of these details, then the chrysanthemum will turn out wilted and not very beautiful.
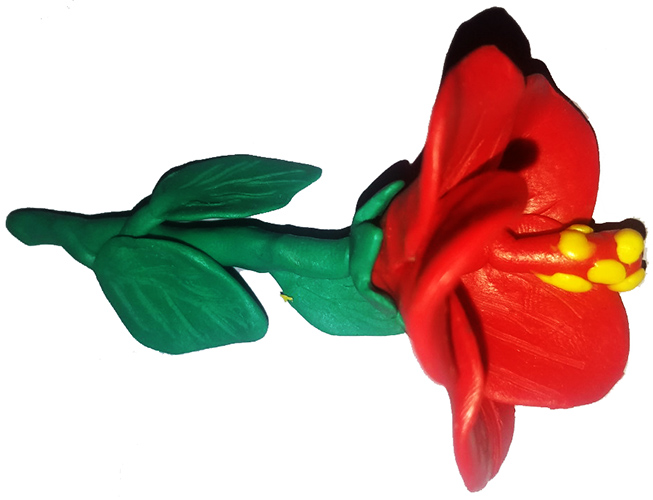
Hibiscus
The Chinese rose, as hibiscus is called, is good for the home and garden. When it blooms, it brings luck and happiness to the house.
For this you will need plasticine of red (or another bright shade), yellow and green colors, a toothpick and a stack.
Stages of sculpting hibiscus:
- First, make an elongated pistil (a thick flagellum with a thickening at the end), attach it to the upper end of a toothpick. Put yellow balls - pollen - on the upper part and press them lightly with your fingers so that they do not fall.
- For the flower, make 5 petals that look like a wide drop, use a stack to draw the veins, bend the lower sides towards each other without connecting them.
- Place the petals around the pistil and bend the upper half outward.
- Make a green circle, make triangular cuts along the edge. Put the resulting receptacle on the toothpick from below, pulling it to the top, press the edges to the flower.
- Wrap a toothpick in green plasticine.
- Leaves are made from flat green circles: sharpen one end, and attach a small flagellum to the opposite edge – the petiole. Then attach to the stem.
You can make a bouquet from several flowers and put it in a mini-vase. Such a flower without a wooden base is suitable for decorating boxes and cards.
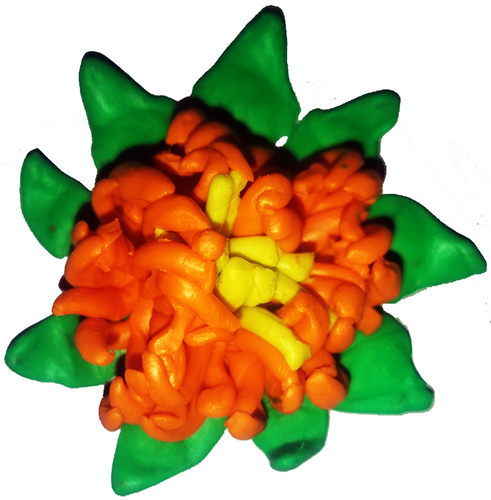
Chamomile
Plasticine flowers for children are the best option for developing modeling skills and imagination. If something doesn't work out, you can disassemble the craft and make it again. But it's better to start with something simple. For example, make a chamomile. It consists of a yellow center, white petals and a green stem with carved leaves.
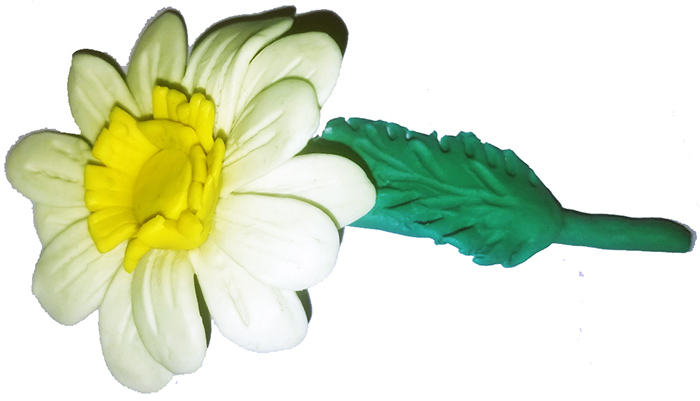
How to make chamomile:
- Roll out balls from white plasticine, stretch them out, flatten them. You will get white droplets - petals. Draw veins with a stack.
- Roll out a ball and a flat strip from yellow plasticine. Make cuts along one long edge of the strip and wrap it around the ball so that the fringe is on top. This will create a fluffy center.
- Wrap a toothpick in green plasticine, leaving one edge bare where the flower will be attached.
- Make a green flat cake - a receptacle, string it on the upper edge of a wooden base, and attach a flower on top.
- Make a droplet from green plasticine - a leaf. Make cuts along the edges, draw veins with a toothpick.
The flower is ready, it can be placed in a pot or added to the general bouquet.
Lily
Lilies speak of affection for loved ones and love. Orange flowers are a symbol of happiness and warmth.

To make a lily you need plasticine, a toothpick and a stack.
Stages of making a lily:
- Petals: take 6 identical balls, flatten them into an oval flat cake, sharpen one end. Put small brown balls in the lower rounded part, press them down so that they hold tighter. Connect the sides at the bottom, bend the upper corner.
- Stamens: attach brown ovals to the green flagella.
- Stem: wrap a toothpick with green plasticine, leaving the top edge (0.5 cm) unwrapped.
- Leaves: flatten the green flagella, sharpen the upper edge.
- Flower: Attach petals to the bare part of a toothpick, petals in 2 rows, put stamens in the center. Wrap a thin green plate (flatten the flagellum) around the lower part of the flower - this is the receptacle. Attach petals.
A beautiful delicate flower will take its rightful place in a plasticine bouquet.
Tulips
One of the first spring flowers – tulips – delight us with bright colors. To mold them, you will need plasticine, a stack and a toothpick.
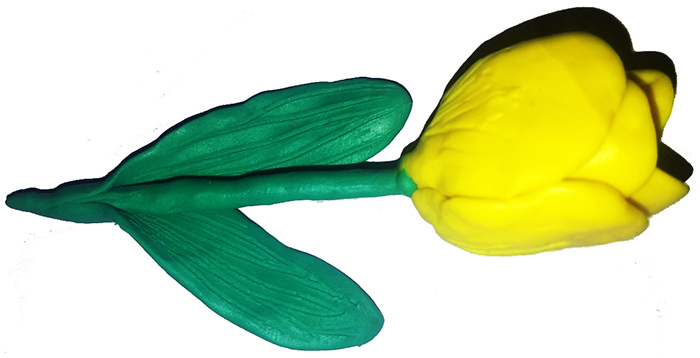
Stages of sculpting a tulip:
- Petals: make a wide flat cake out of brightly colored plasticine (yellow, red, pink or orange), sharpen one end, draw veins. Make 6 petals.
- Pestle: attach a cone of green plasticine to a toothpick with the tip down.
- Stamens: black short flagella attached at equal distances along the upper edge of the pistil.
- Flower: arrange the petals around the pistil in 2 rows. Bring the upper petals closer to each other.
- Stem: wrap a toothpick in green plasticine.
- Leaves: roll out thick sausages, flatten them and sharpen the top edge. Draw veins with a stack and attach to the stem.
You will get a blossoming flower that will remind you of spring.
Wisteria branch
The fragrant flowers of wisteria are noticeable from afar: the entire crown of the tree is framed by delicate purple, white, pink or blue clusters of small flowers. Even a preschooler can make a flowering brush.

For the craft you will need green, purple and lilac plasticine and a stack.
First you need to make all the parts of the future branch:
- Flower: Make a drop (the inner part of the flower) and 2-3 drop-shaped petals from purple plasticine. Wrap the petals around the bud so that the pointed end is on top. Flatten the lilac ball with your fingers into a flat cake and wrap it around the blank, bending the upper edge outward.
- Sepal: Bend the green plasticine flagellum in half, pressing the middle with your fingers. Bend the end of the flagellum to the sides. Attach the finished sepal to the bottom of the flower.
- Unblown bud - a lilac drop with a pressed groove (imitation of unopened petals).
- Stem - a green flagellum, thickening towards the bottom.
- Leaves - green flat cakes with a pointed end and a thin stem.
How to assemble a flower:
- Attach the lower leaves to the branch.
- Arrange the flowers beautifully and press them down lightly so that they stay in place.
- Distribute the unblown buds in the upper part so that the smallest one is at the top.
- Attach the leaves that are in front and slightly cover some of the flowers.
- Use a stack to draw veins on the visible part of the leaves.
You can decorate a postcard or a picture with such a branch. If you put a wire or a wooden skewer inside the stem in advance, then the brush can be placed in a plasticine vase.
Lilac
This is a rather difficult flower to make because of the abundance of small details. It is better for preschoolers to make such a craft using the plasticine technique.
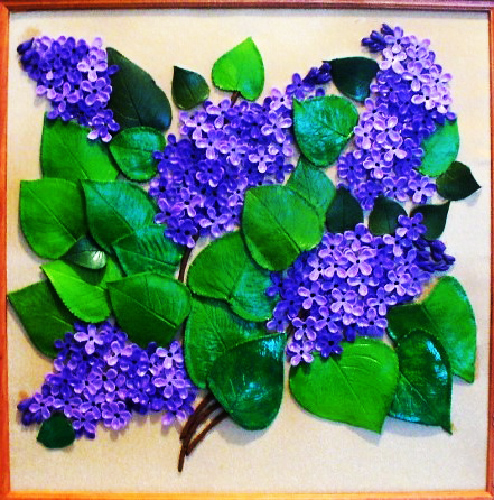
To work you will need green plasticine and several shades of lilac (you can use white), as well as a stack and cardboard.
What to do:
- Use a pencil to mark the location of the bunches and leaves on the cardboard.
- Place the green sausage stems.
- To make clusters, spread the plasticine in the designated area, trying to make the color change from dark to light.
- Press holes over the entire surface with a stack, tilting it in different directions to create the appearance of many petals.
- Make the leaves rounded with a pointed end, attach small petioles (green flagella) to them. Place them on a branch and press down lightly.
- Use a stack to draw veins on the leaves.
Plasticine flowers for children, made using the plasticine painting technique, can be framed in a plasticine frame and hung on the wall.
Knapweed
A common wildflower that will look good in a common bouquet is a cornflower. The upper part of the plant is made of plasticine of purple, lilac and blue colors, the stem and leaves are green, for making the receptacle you can take green or brown. To make the stem stable, a toothpick or skewer is installed inside the green flagellum.
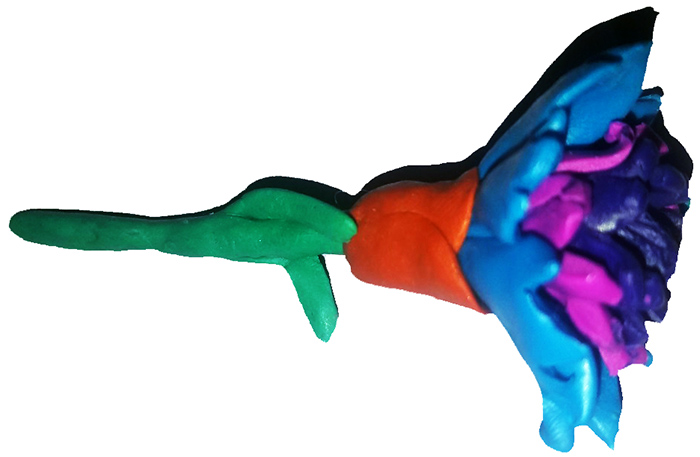
All parts of the flower are made in stages:
- Bud: attach a purple drop to a toothpick with the tip facing up, and use a stack to draw the veins.
- The petals are arranged in 3 rows. The first (inner) purple row and the second lilac row are made the same way: the sausage is flattened into a ribbon, the long edge of the ribbon is cut with a stack, not reaching the edge, to get a fringe, then these ribbons are wrapped around the bud so that the fringe is on top.
- The third row consists of blue petals. The plasticine is rolled into a drop, pressed down, a serrated top edge is made with a stack and the sides are fastened at the top. The petals are laid out along the bottom of the workpiece.
- A thin layer of plasticine is spread on the lower part of the wooden base (this is the stem).
- Then they make a receptacle: they wrap a brown (or green) ribbon around the junction of the flower and the stem.
- Along the stem are thin flagella – leaves.
That's it: the cornflower is ready to take its place in the bouquet.
Lily of the valley
There will be no particular difficulties in making another spring flower – lily of the valley. For this craft you will only need green and white plasticine.
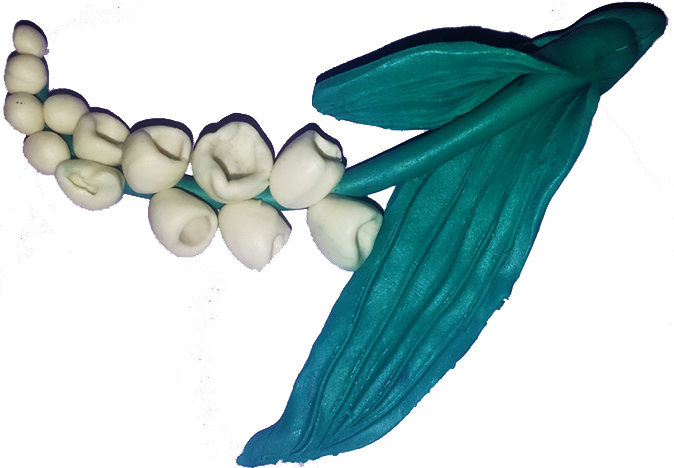
Stages of making a flower:
- Flowers. Roll out white balls of different sizes. The smaller ones will be unblown buds. In the larger balls, you need to make a blind hole with the back of the brush. These will be flowers.
- Stem. Make a tourniquet from plasticine, thickening towards the bottom.
- Leaves. Slightly stretch the green plasticine and roll it into an oval, flatten it, sharpen the upper end. Draw parallel veins along the workpiece.
- Assembling the parts. First, arrange the flowers on the stem in a checkerboard pattern from top to bottom, starting with the smallest ball. Then carefully attach the leaves.
A real spring flower is ready! It can be installed in a plasticine pot and placed on the windowsill.
Plasticine is a wonderful material that allows you to make almost everything: not only flowers, but also different animals, furniture, models of airplanes, cars, a miniature model of a house. Modeling for children is an opportunity to develop not only fine motor skills, but also fantasy and imagination.
Video about flower sculpting
Master class on making lily of the valley from plasticine:
Beautiful selection! I really liked it!