To create a still life, in addition to the basic tools, you will need a desk. Mastering the main techniques drawing for beginners in the future, it will make it easier to do other types of fine art. For example, if you learn how to draw a candy box step by step, you can cope with any other similar rectangular shapes.
What is still life
This term appeared thanks to the French language and is translated into Russian as "dead nature". Still life will be called the image of objects that are not alive. As a rule, in one picture the artist presents several objects at once.
These could be:
- vegetables;
- fruits;
- dishes;
- flowers;
- books;
- pieces of furniture.
The main task of an artist painting a still life is to reveal the beauty of form or color relationships of inanimate objects.
Still life step by step for beginners must meet the following requirements:
- All objects are ideally located and create a harmonious group.
- The colors in the production emphasize the placement of objects and place accents.
- A good still life has a high aesthetic concept.
How to draw without mistakes
Before creating a still life, you should know the basic secrets of drawing different textures and surfaces, as well as the main rules of painting.
Tools and materials
Before work, it is necessary to prepare tools and materials for drawing.
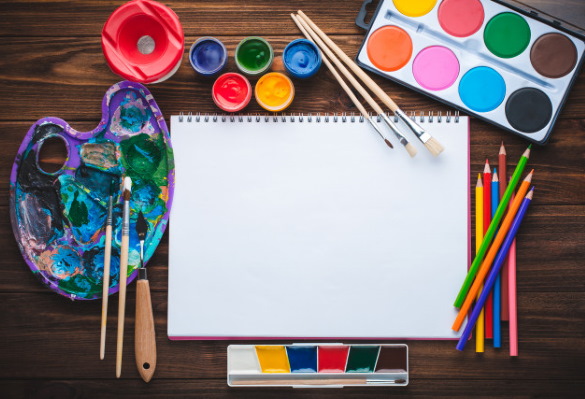
Namely:
- Canvas. It is recommended to use A3 paper. It is best to take Whatman paper.
- Brushes. You will need several of them. Flat synthetic brushes are mainly used. It is recommended to prepare 3 pieces, differing in size. You will also need 1 medium-sized bristle brush.
- Pencils. A simple pencil will be needed at the initial stage of work. You should choose a soft type: the softer it is, the easier it will be to make contours, which should be barely noticeable.
- Eraser and sharpener.
- Paint. It is recommended to buy it in specialized stores. It does not necessarily have to be branded and expensive, but you should not buy it in a store that does not specialize in selling art supplies.
How to Start a Still Life
Still life step by step for beginners includes:
construction of the composition.
To do this, you need to use a simple soft pencil:
- Mark the plane of the table with a horizontal line. When determining the height, it is better to rely on the first drawing. On the right side, the far corner of the table is slightly visible. It should be marked by drawing a diagonal line.
- Keeping in mind the rules of construction, place the objects on the surface of the table.
- Use light lines to indicate the location of the tablecloth covering the table and its main folds.
- When determining the location of objects, observe their relationship to each other and their shape.
- Think about how it is more convenient to arrange objects on a sheet of paper - lengthwise or widthwise. Try to make the objects even and stand straight.
How to make a painting in color
Once the pencil sketch is done, you can move on to coloring. It is recommended to start with objects that have a bright and clear color. Their colors can be taken in full force. Thanks to this, the general tone of the light range will be set.

Anyone who uses watercolors in their work should remember that this substance becomes lighter when it dries. To correctly display reality, the layers should be saturated.
Having laid the light, you can move on to setting up the penumbra, and at the next stage, start working with the shadow. The light can slightly capture the penumbra, and the penumbra - the shadow. Shadows on objects under the influence of reflexes will have different luminosity.
How to Finish a Still Life
Once the light and shadow have been defined, you can begin shading. It is important that the light and shadow is distributed according to the shape of the objects. When moving away in perspective, they should appear softer.
How to draw fabric
Wanting to draw beautiful still lifes, it is necessary to learn to depict fabrics, creating beautiful folds on them. After all, almost every still life has a tablecloth spread on the table.
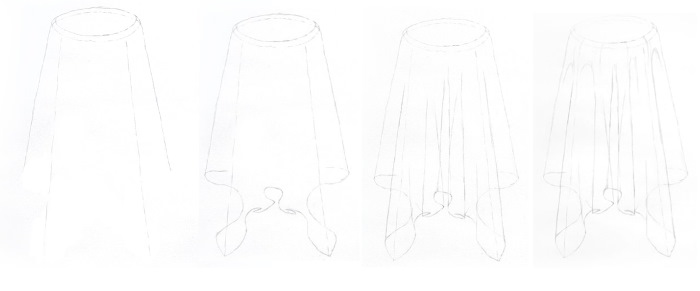

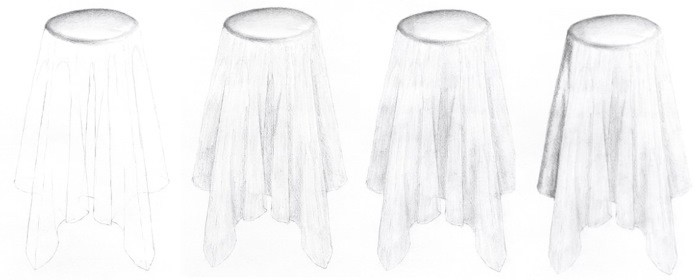
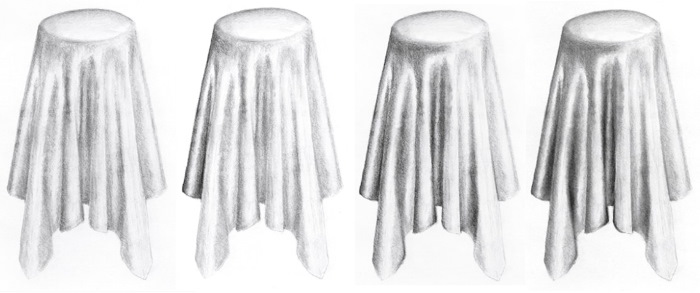
The main mistake beginners make when drawing fabric is the lack of form and character. The shape of the object it covers should always be visible through the fabric. This is the shape of the fabric.
As for the nature of the fabric, its folds fall in a certain direction, which can be changed by bends and kinks. There must be direction, dynamics, for example, if the fabric envelops a chair, the chair itself must be designated first. Then it is necessary to determine the nature and direction of the folds, their movement, which can be intense or sluggish.
Once everything is outlined, you can move on to detailed elaboration of the folds. The direction of light should be clearly visible on the fabric. It is necessary to highlight the foreground and add a background to make the object three-dimensional and realistic.
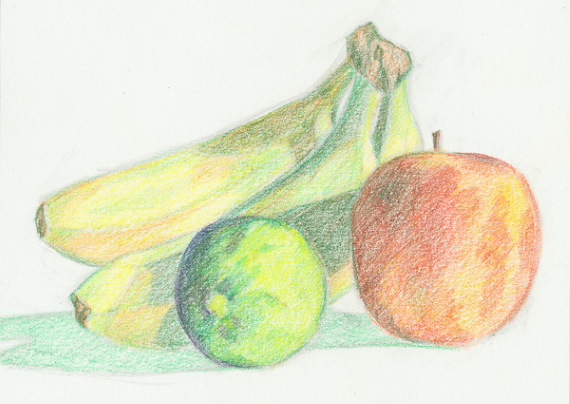
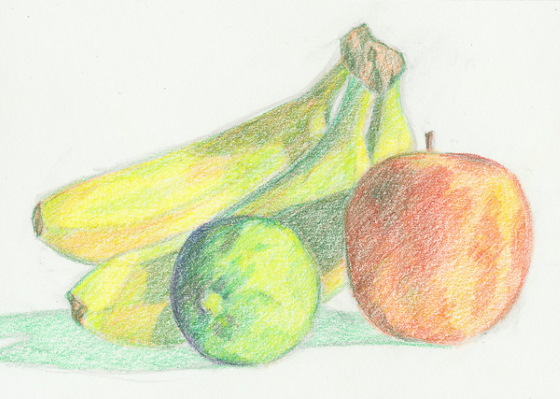
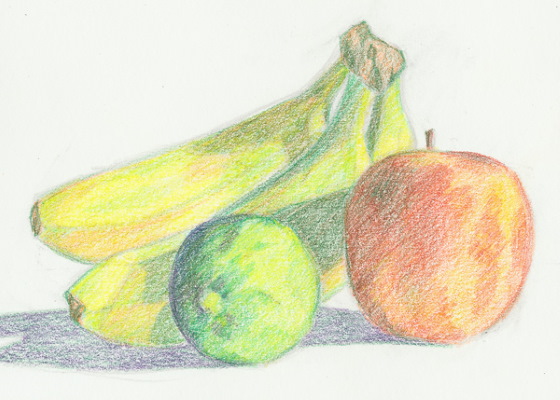
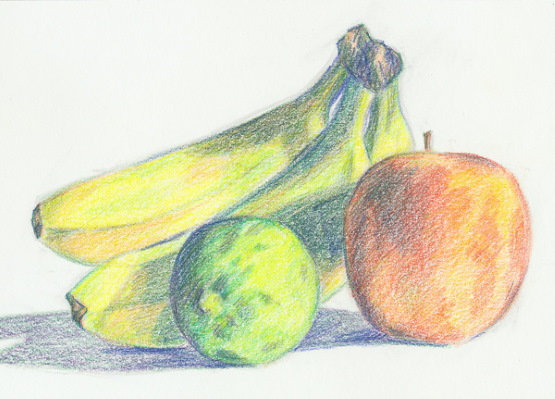
How to Draw a Still Life of Fruits
It is best to start still life step by step with larger objects. In this case, the probability of making a mistake will be lower. For example, you can depict pears, bananas, kiwi, grapes. All these objects have obvious structural details.
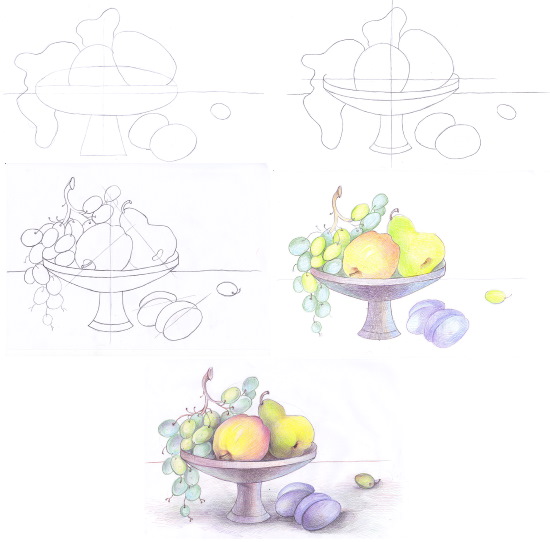
The general steps for creating a fruit still life are as follows:
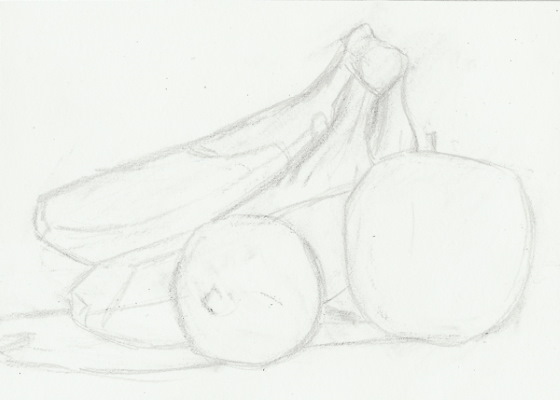
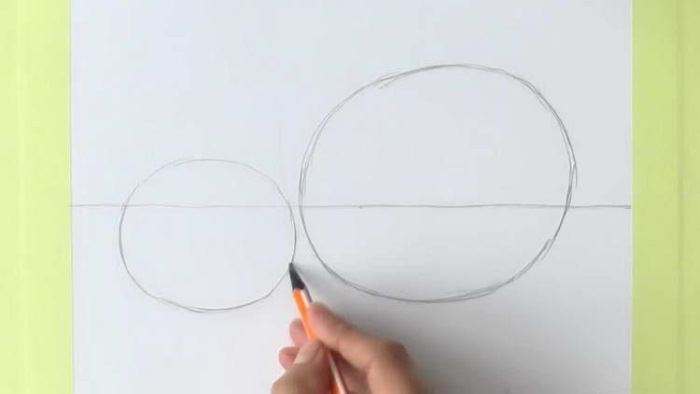
- Draw a sketch using a simple pencil. First, determine the location of each object using a triangle.
- Using random strokes, without pressing hard on the pencil, draw the fruit in circles and ovals.
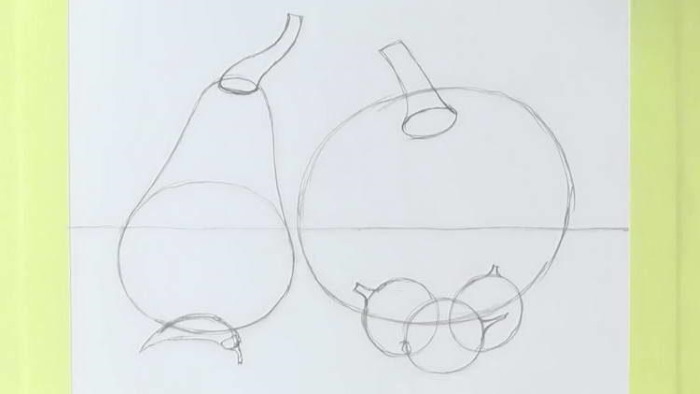
- Outline the contours with clear lines.
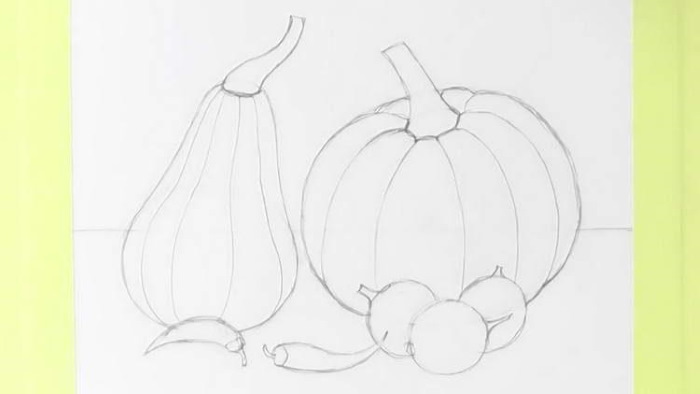
- Remove unnecessary lines that served as auxiliary ones.
- Create shadows. For this, it is better to use a hard or medium pencil.
- Draw the lines of the fruit structure.
- In the kiwi, shown in the picture in section, you need to make a core. It should be multilayered. Do not forget about the seeds.
- Blend the lines in the center. Use an eraser for this.
- Draw the main lines and delete the auxiliary ones.
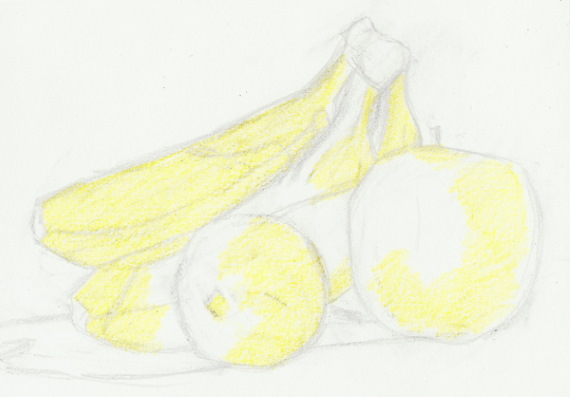
- Color the fruits.
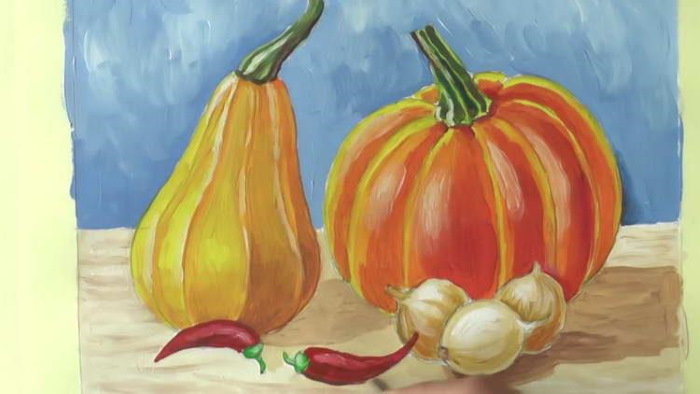
Still life with gouache
To draw a still life, you will need artistic gouache. Poster paint is not suitable for these purposes: it dries quickly, and as a result, numerous stains form on the surface.
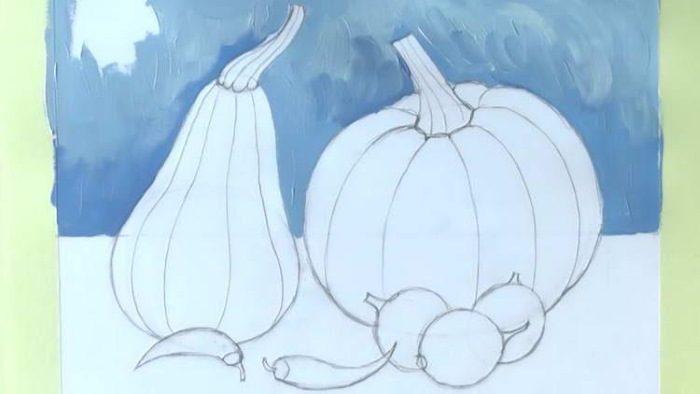

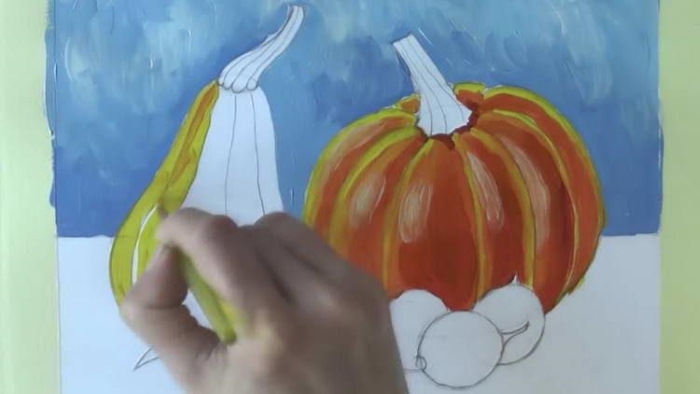
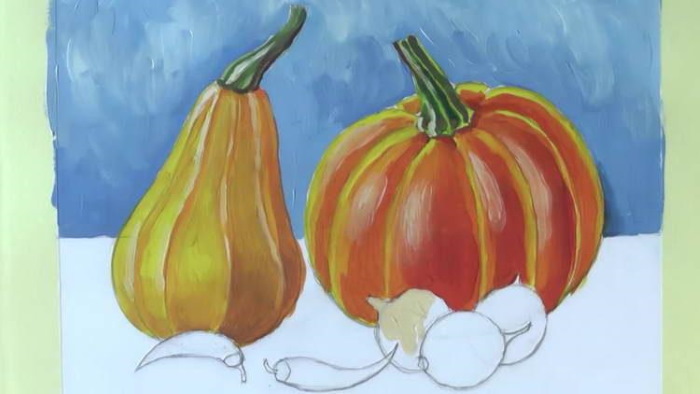
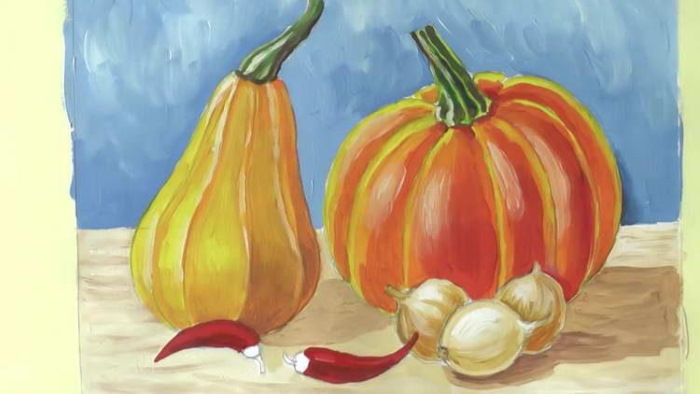
EThe steps to create a painting are as follows:
| No. | Stage | Description |
| 1 | Creating a sketch | You need to use a simple pencil with a soft lead for this. You need to draw a horizontal line right away, marking the plane of the table. Then you can create sketches of the objects on the table. This could be, for example, a plate of fruit, a jug. |
| 2 | Coloring the sketch | It is better to start with the general background. First, apply the 1st layer. Use a large flat brush, and the strokes made by it should be short. |
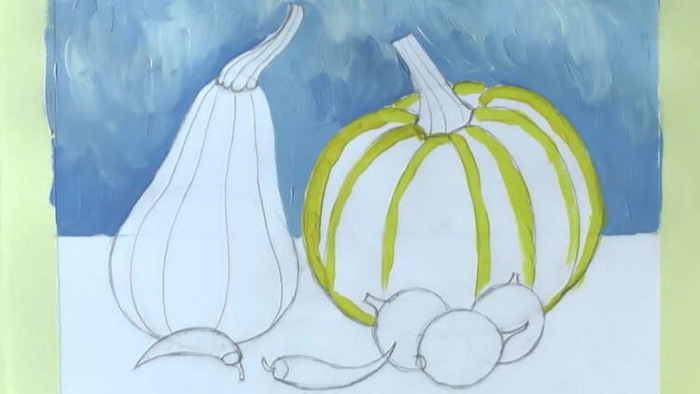
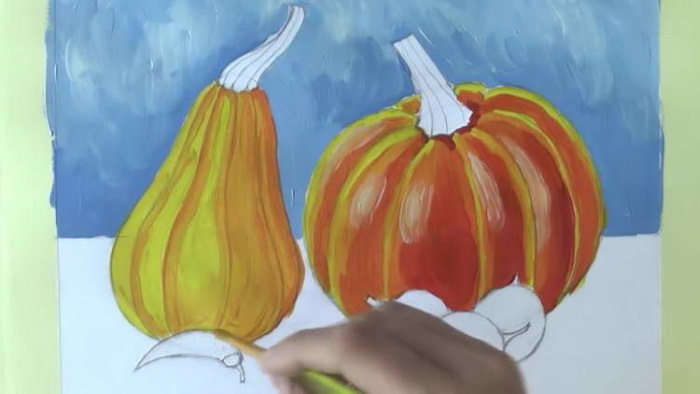
| 3 | Basic tones | They pounce on the objects on the table. It is important to remember that the transitions between shades should be gradual.
The lightest areas of round objects should have highlights. The sides that are not illuminated should be shaded accordingly. Darker shades are used for their shading. |
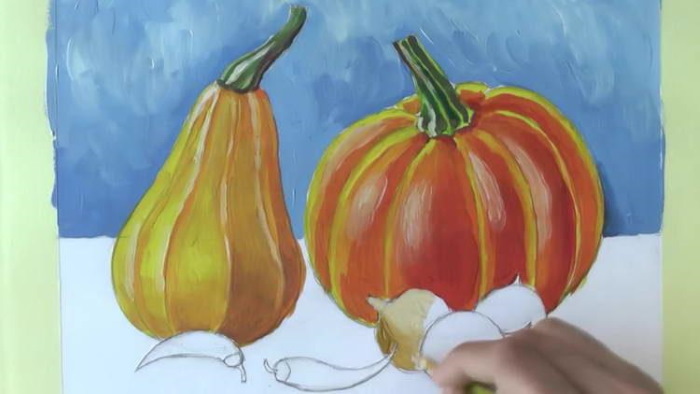
| 4 | Primary Color Overlay | To do this, you should remember that vertical planes should differ in light saturation from horizontal ones.
They (the vertical planes) are less illuminated, so they should be made darker. |
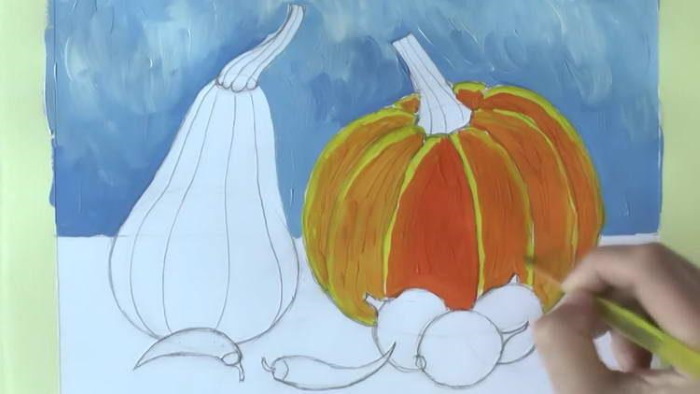
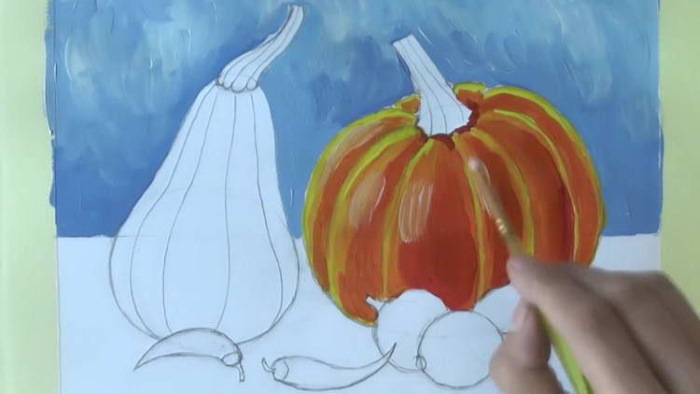
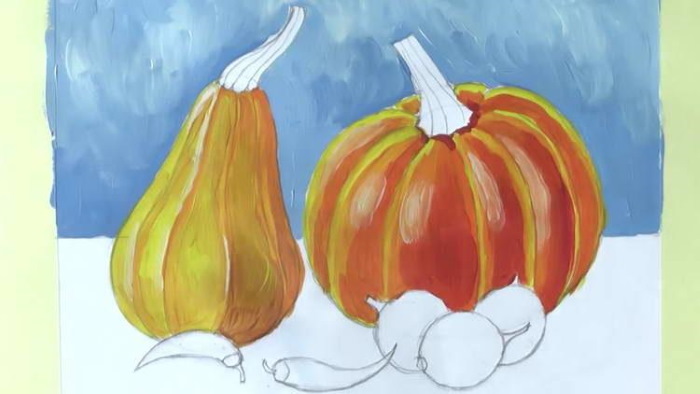
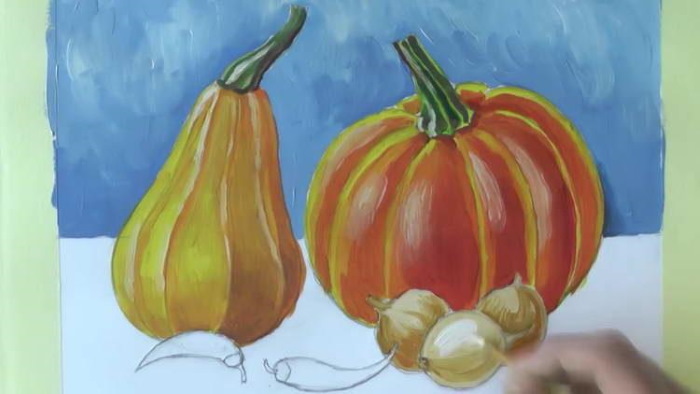
| 5 | Still life detailing | The first step is to work on the folds on the tablecloth. It is better to use more light tones. In this case, the image will look more natural.
The objects on the table cast a shadow on the tablecloth. It should be depicted using cold shades. The shaded areas should not be made bright or sharp. On the contrary, they should be diffused. |
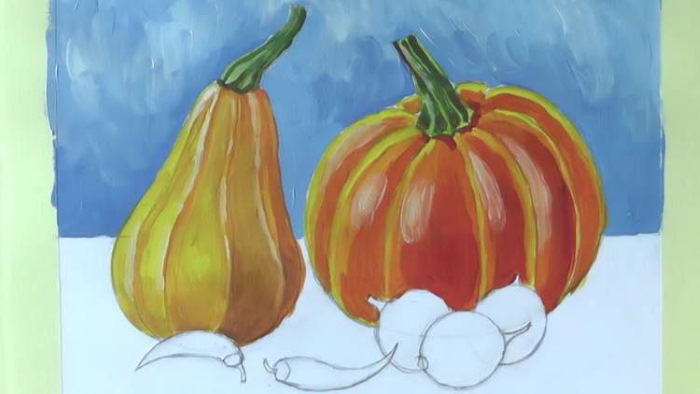
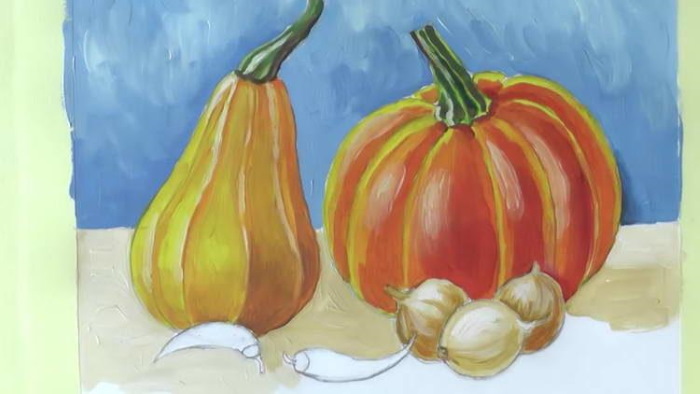
| 6 | Blurring the contours of objects standing on the table | This will give the created picture depth, make it more voluminous and monolithic, and the line of contact with the environment softer. |
Watercolor painting step by step
A still life can be done step by step for beginners using watercolors.
For example, the work on the image of a cucumber, eggplant and carrot lying on the table will be as follows:
- Make a sketch with a simple pencil. The lines should be barely noticeable.
- Move on to working with watercolors. First, you should choose 1 object and brush it with a wet brush. You can start, for example, with a cucumber. Apply light green paint to its surface. While it remains wet, you can darken it.
- Color the 2nd object, for example, a carrot. In this case, you need to act according to the same principle as with the cucumber. The figure should be depicted gradually, starting with light tones and ending with dark ones.
- Colour the eggplant using shades of purple.
- Return to the cucumber and create a dark shade that will make the vegetable look realistic.
- Using a similar method, convey the features of two other vegetables.
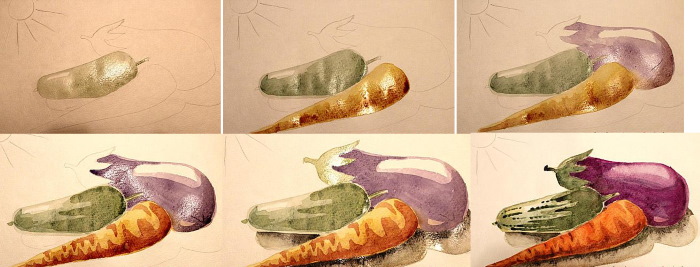
- To avoid the impression that the objects are hanging in the air when looking at the drawing, add shadows on the horizontal surface. The darkest areas will be under and near the vegetables. At this stage, you should also add a green top to the eggplant, represented by leaves.
- Add natural colors. To do this, apply rich orange paint to the carrot. Make dark green grooves on the cucumber, and the side of the eggplant that is not exposed to light should be darker.
- Wait until the paint dries and the drawing is ready.
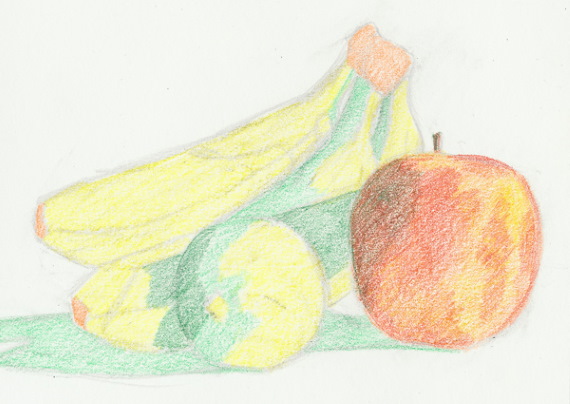
Drawing with pencil
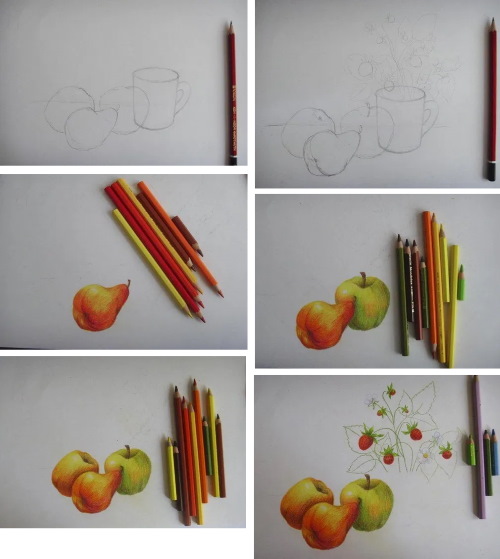
A still life that lifts your spirits can be drawn with pencils. For example, the depicted fruits and berries on the table will be a good decoration for the kitchen and will lift the spirits of all household members and guests.
Main objects:
- 2 apples;
- 1 pear;
- 1 mug with strawberry sprigs.
All this is located on a horizontal surface.
 The stages of creating a still life are as follows:
- Draw a horizontal line in the middle of the sheet with a simple pencil. This line will mark the edge of the table.
- Move on to the outline of the fruit and the circle next to it. All this is also done with a simple pencil.
- Draw a branch in the circle, and give the fruits a natural look by drawing their convex shapes more clearly with a simple pencil. It is important to remember that the obligatory elements of the fruits are the tails and dried sepals.
- Take an eraser and carefully run it over the sketch you have drawn. The result should be barely noticeable lines.
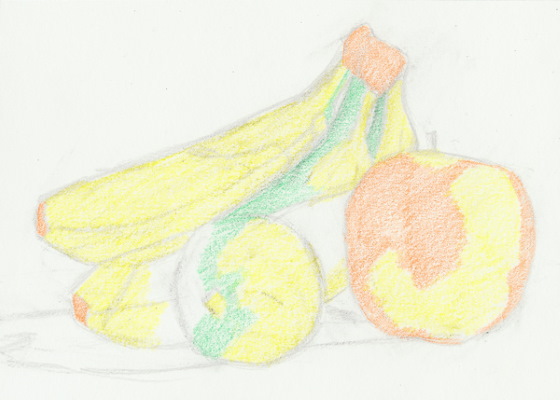
- Proceed to coloring the fruits, mug and berries with colored pencils. When coloring the fruits, it is important to remember that each of them should have highlights. They are easy to create on white paper. It is enough to leave unpainted those areas where they should be located.
- Considering that the pear is presented in a single copy, apply yellow, orange, brown, and red colors to it.
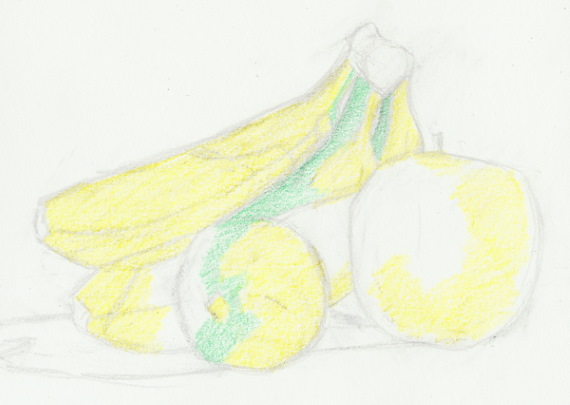
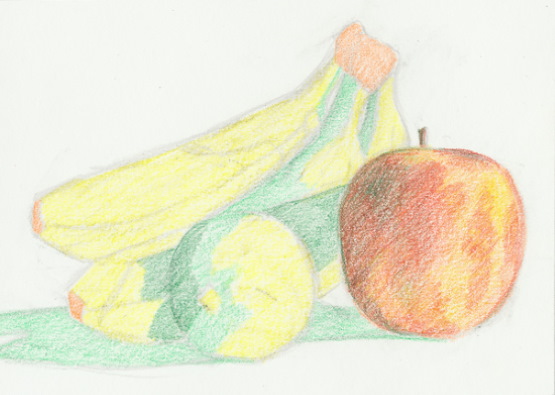
- Color the 1st apple. A green pencil is best for this. Apply color with strokes. There should also be yellow colors on the apple's surface. The stalk should be brown. To make the fruit more expressive and bright, apply a second layer of shading.
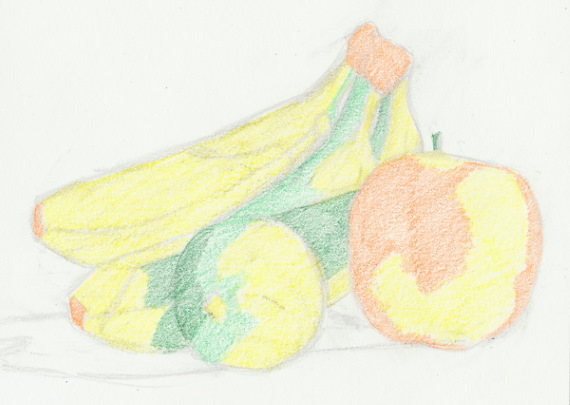
It is important to determine where the shadow is located and convey it with a brown pencil. Also, to convey the shadow on the apple, you should use dark green and swamp shades.
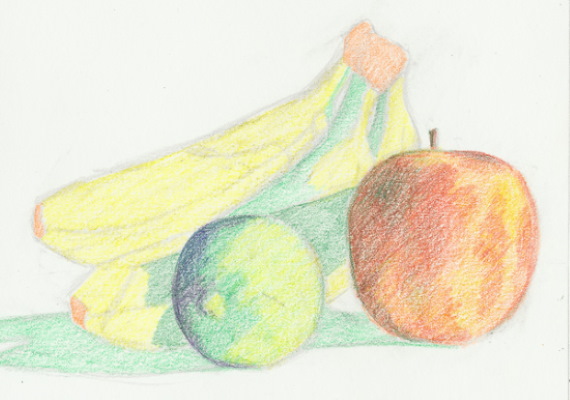
- The 2nd apple is shaded with green and yellow colors, leaving the place where the highlight is formed untouched. Apply shading to the apple again, but this time using red and brown pencils.
- Color the berries. Before you start with the red color, you need to use a brown pencil to draw small seeds in the berries, which are typical for strawberries.
- Shade the berries with red and cherry pencils. Don't forget about the leaves. They should be light green. Thin stems extend from the berries and leaves.
- On strawberry branches placed in a mug, depict ripe berries, flowers and large leaves.
- To color the large leaves, use green and yellow pencils. Use green to carefully go over the stems again.
- Apply strokes to the mug with a blue pencil. It is better to make its rim black, and the visible inner surface gray. Do not forget about the shadow, which should be dark blue. Strokes on the dishes should be applied according to its shape, they should be rounded on the walls of the mug.
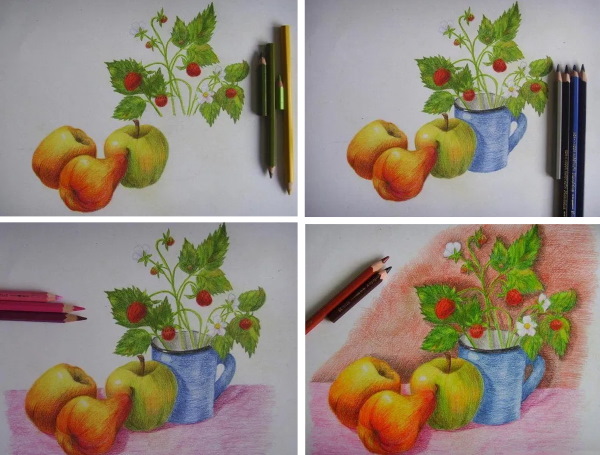
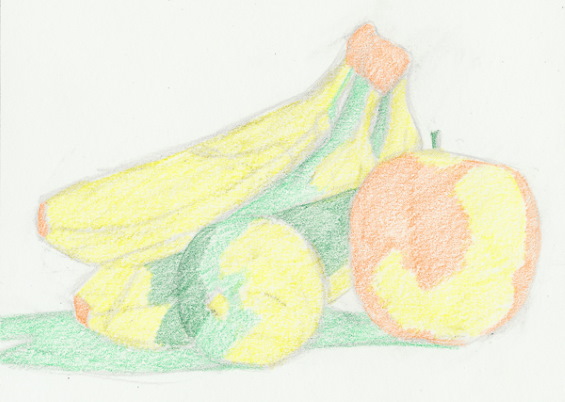
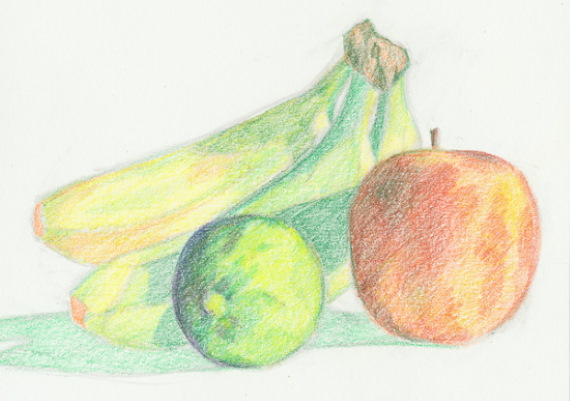
- Finish the table surface on which the mug with berries and fruits are placed.
- Paint the tablecloth pink, and make the areas where the shadows from the objects fall darker.
- Shade the vertical surfaces. They can be made brown, with the light areas shaded in red-brown and the shaded areas in dark brown.
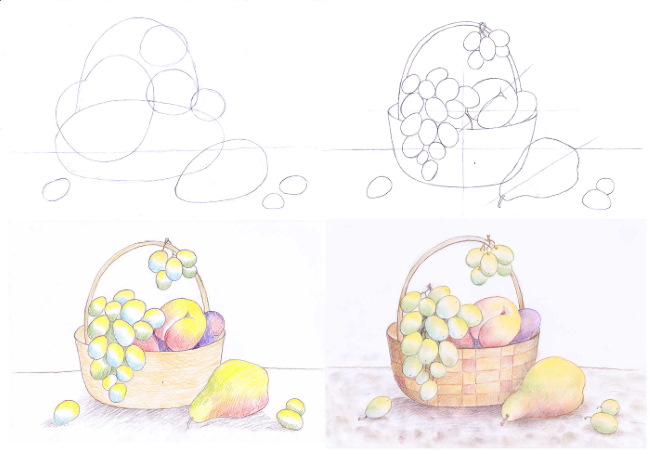
A still life step by step for beginners with a pencil in the form of a vase with flowers and a basket with berries on a table can be done as follows:
- Imagine objects as simple shapes. So, a vase will be represented by a cylinder, and a basket filled with berries - by a rectangular parallelepiped. It is important to ensure that the objects are correctly positioned on the surface. They should stand straight and not roll off the table.
- Visually bend the lines to obtain the necessary shapes. At the same time, a handle should be depicted above the basket so that this object does not remain a simple geometric figure.
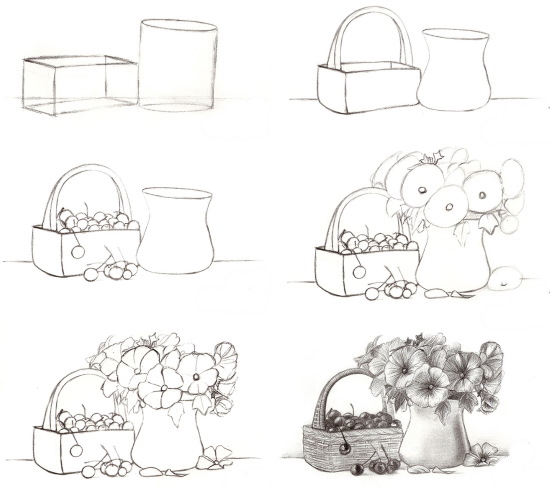
- Draw the berries in the basket as circles and sticks. These will be cherries. They should overlap each other. There is no need to try to make them perfectly round, because such berries do not exist in nature.
- Proceed to work with the flowers that are in the vase. It is necessary to mark the flowers themselves and their centers with circles. Drawing the petals at this stage can be omitted, leaving this work for later, but the leaves should be added.
- Draw the petals.
- Shade the entire drawing. As a result, the surface of the basket should acquire a woven texture. The berries lying in it should be shaded with circular movements of the pencil. To make them look juicy, you should leave more highlights on their surface. The highlight should also be on one side of the vase. But only in the case of this object it should be represented by a strip.
- Shading of the main elements of flowers in a vase – petals and leaves – should be done from the center to the edges.
- Since the light rays in this example are falling on objects from the left side, horizontal shadows will be added from the right side.
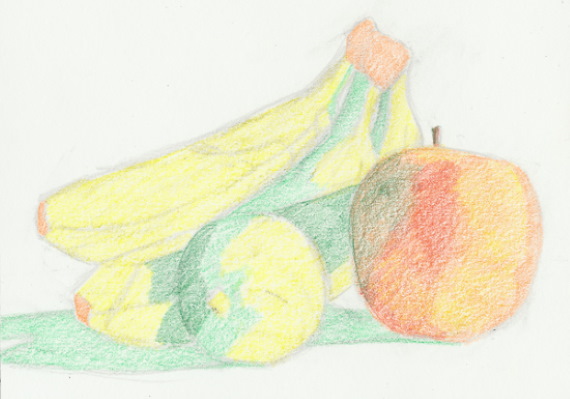
Vigilance and the ability to notice small details are the main qualities on which the classical still life is built.
A successful nature is considered to be the one that attracts attention more than others and makes you want to depict it on canvas or a sheet of paper. It is better to start drawing step by step and with familiar objects that are often used in everyday life.
Video about drawing still life
Still life for beginners step by step:
super
I liked it, it was interesting
I'm amazed, did I really draw like that in 3rd grade? The only thing I remember is that everyone licked my honey paints. The material is excellent.