Beginners in knitting, having mastered the basics of performing basic loops, in 90% proceed to making slippers. This choice is practical, since in addition to creating a useful thing, you can practice skills on them, learn how to perform complex types of loops.
Before work, you should already be able to understand crochet patterns, follow step-by-step descriptions and instructions. If a mistake is made while knitting, you need to correct it by unraveling the thread to the incorrectly knitted element. This develops attentiveness and accuracy in work.
What kind of slippers can be crocheted
Slippers are knitted in different models:
- wide socks;
- slippers and ballet flats;
- slap and flip flops.
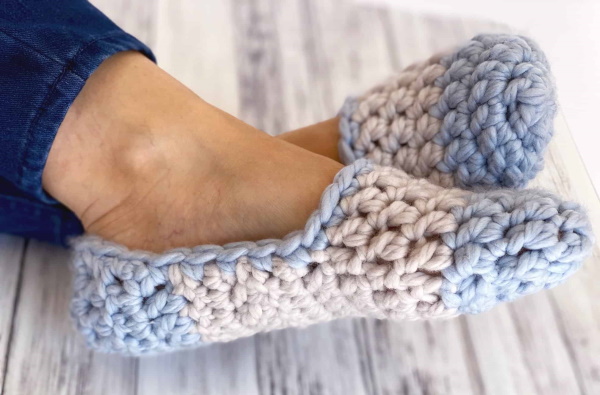
You can make home shoes with soles, seamlessly, in the form of sneakers or toys. Knitted slippers are soft, fit well on the foot, hugging it tightly. At the same time, the material lets air through and keeps warm. Such shoes are also convenient to wash in a washing machine.
Crochet slippers (it is better to print out the patterns and descriptions so that you can check the pattern at any time) are dense and do not stretch well, so the size should be selected accurately, carefully calculating the number of loops.
Loop symbols in master classes
The following abbreviations are used in knitting instructions and master classes:
- R – row;
- P – loop;
- VP - air loop;

- SS – slip stitch;
- PS – half-column;
- PshS – lush column;
- СбН — single crochet;
- С1Н — a column with one yarn over.
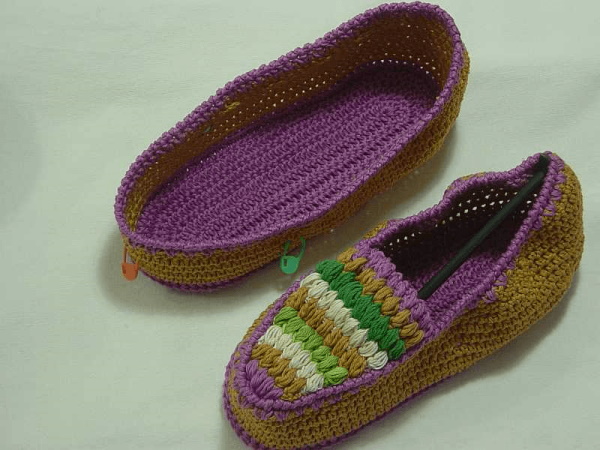
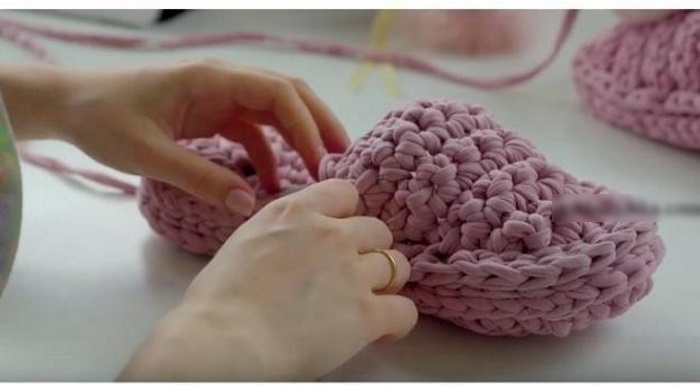
Moccasin slippers
For work you will need about 80 g of yarn (it is better to choose acrylic threads, as they are less susceptible to wear than others). The length of the yarn in 100 g should be 200-250 m. Also for work you will need a hook No. 4.
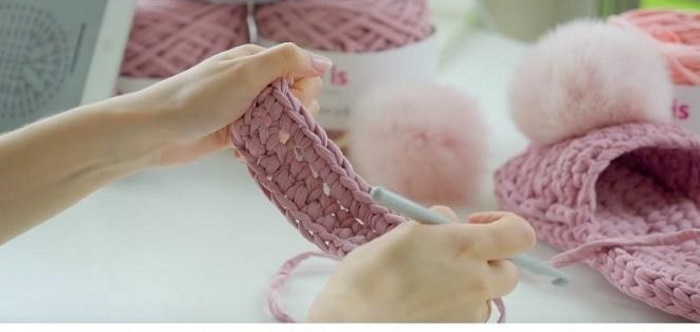
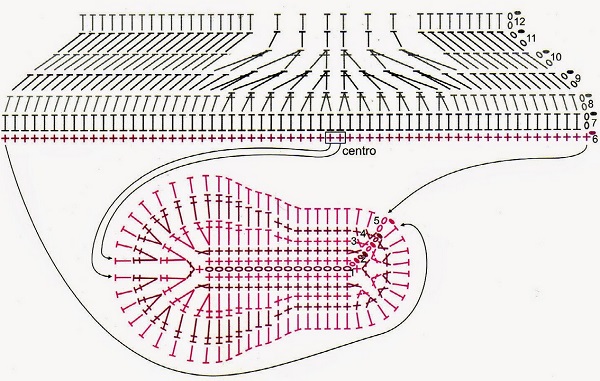
The calculation of the number of threads and loops in the master class is given for foot size 37-38. If necessary, you can add or reduce the number of loops in proportion. Knitting slippers begins with knitting the upper triangle. It consists of lush columns made in a checkerboard pattern.
Knitting instructions:
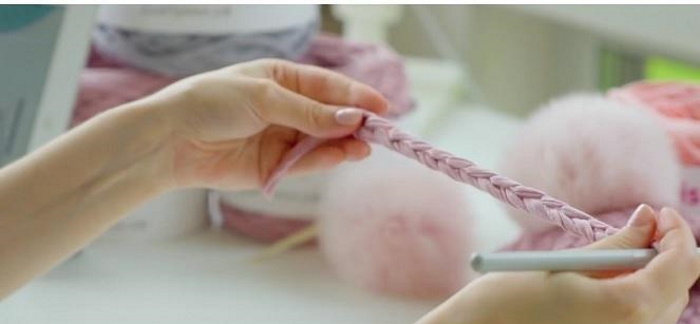
- Make a chain of 15 VP.
- Knit 3 lifting VP.
- In the 4th P from the hook, make a PshS (it consists of 3 lifting VP and 2 C1H). In each row, the first lush column is crocheted in the same way.
- Then knit 1 VP.
- The next PshS is performed through 1 P of the bottom row (it consists of 3 C1H).
- Again knit 1 VP.
- After 1 P of the first row, knit the next PshS.
- Continue working similarly to the end of the row. In 1 R there should be 8 PshS. When knitting the last one, change the color of the yarn.
- Perform 2 lifting VP, turn the knitting.
- In the space between the lush columns, knit the first PshS of the 2nd row. It also consists of lifting loops and 2 C1H. Knit them together.
- Make VP.
- Knit the next PshS in a checkerboard pattern between the 2nd PshS of the previous row.
- Continue knitting in the same manner until the end of the row.
- Change the thread to a different color.
- Knit in the same way for 7 more rows until there are 2 PshS left at the top of the triangle.
Next, we begin knitting the sides:
- Insert the hook from the right side of the triangle, knit 31 or 35 VP (the number of loops depends on the size of the foot, but should always be odd).
- Attach the chain of VP (this is the back of the slipper) to the second side of the triangle using SS.
- Perform 2 VP lifts.
- Knit 1 row of C1H from each loop of the air chain.
- Knit the first C1H into the loop from which the lifting loops were knitted, so that there is no hole left. Then do 35 C1H.
- Next, knit 3 C1H into each side loop of the PshS.
- At the top of the triangle, make 3 C1H from the side loop of the PshS.
- Work the next 3 C1H in the space between the 2nd PshS.
- Knit the next 3 C1H again from the side loop PshS.
- Continue knitting to the end of the row in the same manner.
- In the last column, knit only the yarn over, do not finish knitting the column.
- Insert the hook into the first P of the row and change the color of the thread. Knit everything together in one loop.
- With a new color, knit 2 lifting VP and 1 C1H in the same loop in which the previous row was connected.
- 2 and 3 Rows knit without changes using C1H in each column of the previous row.
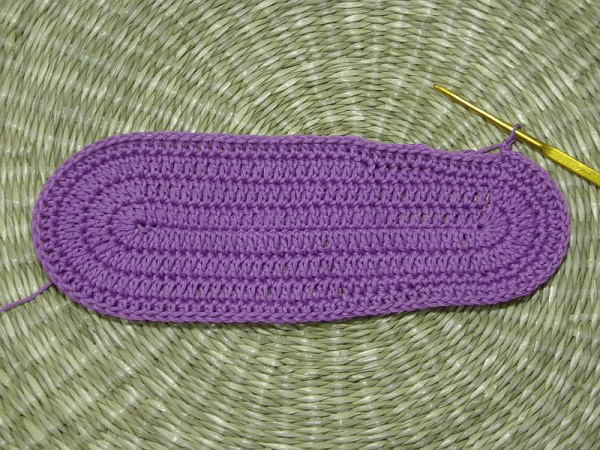
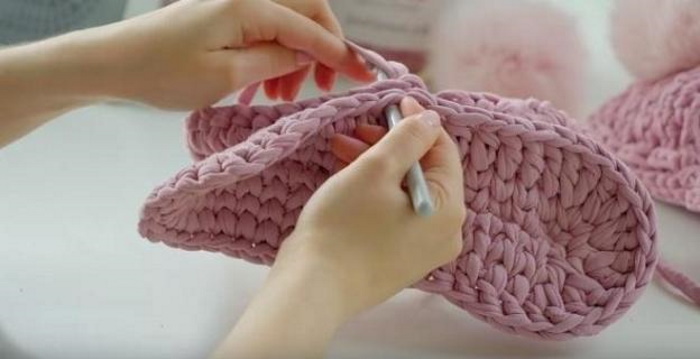
Next you can start knitting the sole:
- Fold the slipper blank in half, find the middle of the back, put a marker.
- Place a second marker in the middle of the sock.
- Next, knit C1H to the middle of the back.
- At the marker place, make 3 stitches together in one loop.
- Next, knit C1H to the middle of the sock.
- Without finishing knitting 1 st before the marker, make a yarn over, insert the hook into the loop of the bottom row, yarn over again and pull the thread through the next loop of the bottom row, yarn over again and insert the hook into the next loop of the bottom row. Knit all 6 sts on the hook in one loop.
- Knit to the end of the row C1H without changes.
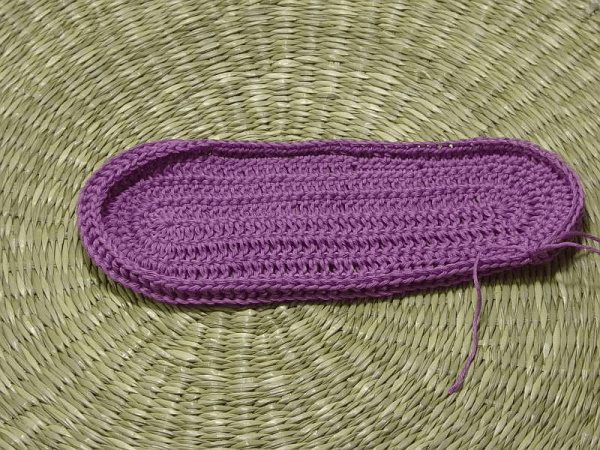
The sole consists of 4 rows. The remaining 3 R are made in the same way as the first, reducing 2 P on the back and on the toe. At the end of the work, the thread is secured and cut off. Its end is hidden in the knitted fabric. Using a tapestry needle, sew the sole with a seam through the edge, loop to loop. The thread is hidden on the inside of the slipper.
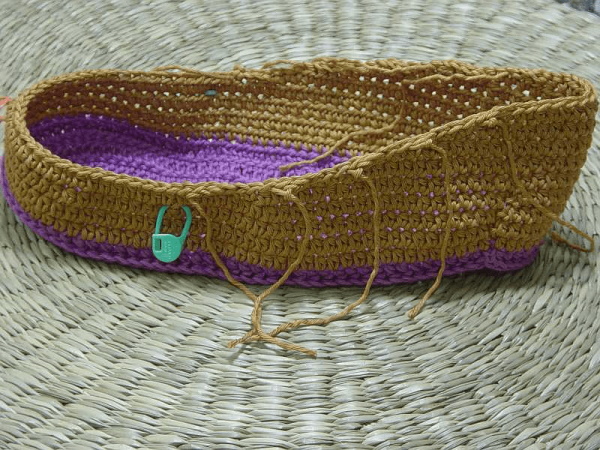
All that remains is to tie the moccasin:
- Start tying from the middle of the back. Make 1 VP of lifting, knit the first row of SC from the columns of the lower row.
- When the triangle loops begin, knit, alternating 1 sc from the PshS, 1 sc from the yarn over between the PshS.
- Finish the first row with SS.
- Perform 2 VP lifts.
- Next row, make PS with yarn overs.
- When the triangle loops begin, to round the corners, knit 3 dc together.
- Knit without changes to the 2nd corner of the triangle.
- In the 2nd corner of the triangle, to round it off, also knit 3 SS with a yarn over in one loop.
- Knit PS with yarn overs until the end of the row.
- The last crochet stitch with a yarn over is not finished, the hook is inserted into the first loop, and the color of the thread is changed.
- The last row is tied with a crab step. The usual sc are performed, but not from right to left, but from left to right.
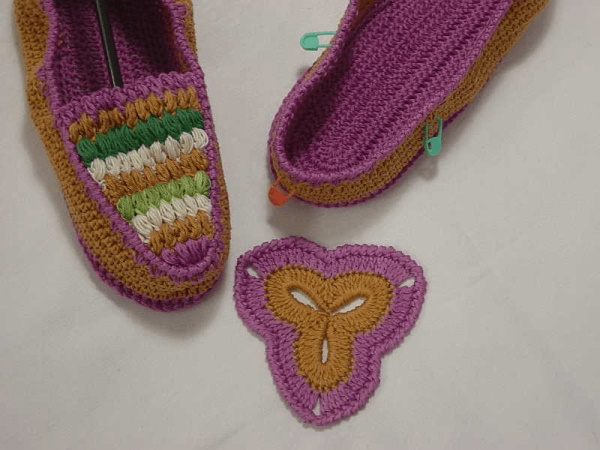
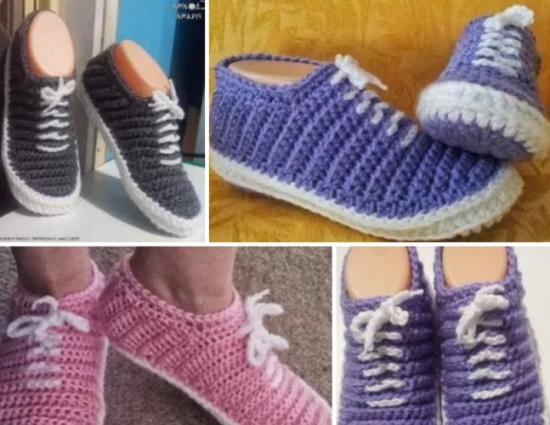
The second slipper is made in the same way as the first. They are not divided into right and left. Based on this master class, you can knit slippers in the form of sneakers.
Instead of a knitted insole, you can use a ready-made felt lining.
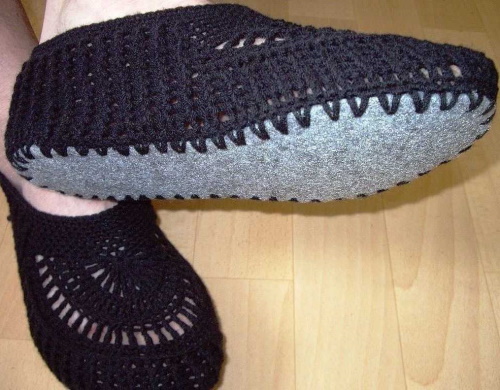
Such a sole will last longer. If you sew several insoles for one slipper, you can get a soft sole and warm house shoes.
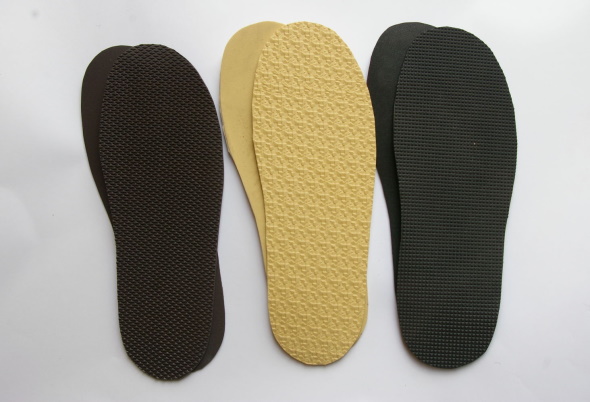
The sole can be made different by gluing it with a special thin microporous rubber.
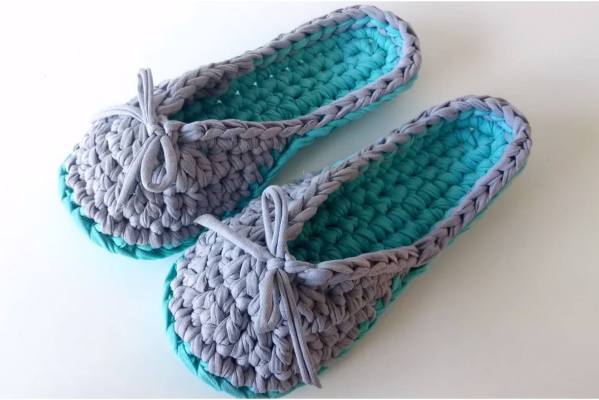
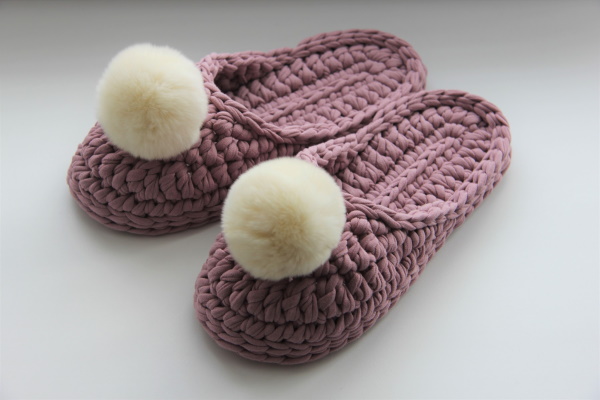
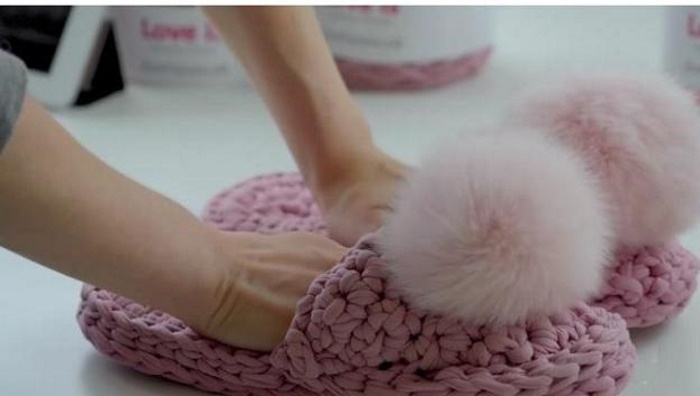
Crochet Pompom Slippers
Crochet slippers, the patterns and description of which are suitable for beginners, can be made from knitted yarn. Such shoes are soft, pleasant to the touch. Slippers sit comfortably on the foot, do not fall off. They are silent when walking, do not scratch the floor, as is the case with ordinary slippers with a hard sole.
The master class provides calculation of loops for foot size 37. If necessary, you can add or reduce the number of loops in accordance with the length of the foot.
For work you will need knitted yarn, hook No. 7. For decoration use pompoms, which can be replaced with a knitted flower or bow. You can also make a simplified version of slippers without decorations.
In flip-flops, a double sole is made to make it softer and keep its shape. To do this, 2 insoles are made for each slipper and sewn together.
Knitting instructions:
- Cast on 16 VP (approximate chain length is 16 cm, which will equal 24 cm in finished flip-flops).
- Skip the first loop of the chain (this is the lifting loop), knit the next 14 sts with sc in the opposite direction with the dialed VP.
- In the last 15 sts knit 3 sc.
- Next, knit another 14 sc in the opposite direction.
- Knit 3 sc into the lifting loop.
- The next row is moved on without performing SS. After 3 sc, the hook is immediately inserted into the first P of the previous row and sc is performed.
- Make 13 more sc.
- In the place of increase from 3 sc in each P make 2 sc (total 6 sc in 3 loops).
- Next, knit another 14 sc.
- At the place of addition, again perform 2 sc 3 times.
- Next, perform 9 sc.
- Then knit 5 C1H.
- In the places of increases, make 2 C1H in each loop (from 6 P you will get 12 P).
- Knit 5 C1H.
- Next 9 sc and close the last loop.
- The thread is secured, cut and hidden inside the knitted insole.
Similarly, you need to knit the second sole for the slate. The finished 2 insoles need to be connected. They are folded evenly and knitted together along the edge using SS.
Next, start knitting the upper part of the slipper. You need to find the widest place on the toe. From there, on both sides to the center of the toe, there should be 5 sts. It is better to place markers in the outer loops (in the 1st and 10th) so as not to get confused.
Next, knit the top of the slate according to the instructions:
- Attach the thread to the first loop and make 9 sc.
- Insert the hook into the 10th loop, grab the thread, and pull it through the loop on the hook.
- Fasten the thread and cut it. The ends of the yarn are removed at the end of knitting, but for now they are left as is.
- From the first loop, with which the previous row began, step back 2 P.
- Thread the thread into the marked loop, grab the working thread, leaving the end inside the slipper, pull the thread out. This will be the first loop of the row.
- Perform 2 sc.
- The ends of the thread from the previous row are placed on top of the loops to immediately hide them inside the knitting.
- Perform 1 C1H into the corresponding loop of the bottom row.
- Next, decrease. Yarn over the hook, insert the tool into the loop of the bottom row, pull the thread, insert the hook into the next loop of the row again, pull the thread and knit 3 P, and then 2 more P together.
- Perform 1 C1H.
- Next 2 sc.
- Make 1 sc in the base of the first row and 2 more sc in the edging row of the insole.
- Knit the last loop of the row as in the first row using SS.
- The thread is secured and cut.
- The next row begins by stepping back 3 sts from the attachment in the previous row.
- Start the row with 3 sc.
- Make 1 sc at the base of the previous row.
- Next make 2 sc, 2 dc.
- You need to make 2 decreases with yarn overs similar to those in the previous row.
- Next 2 C1H, 1 Sc in the base of the previous row, and 3 Sc in the insole edging row.
- For the next row, step back 2 sts from the beginning of the previous one.
- Make 5 sc (the 3rd one is at the base of the previous row).
- Next 3 C1H and 1 decrease with a yarn over, another 2 C1H and another 1 decrease, 3 C1H, 5 Sc.
- The last loop is knitted as CC.
- The last row of the top begins by retreating from the base of the previous one by another 2 P.
- Make 5 sc, 2 dc, 5 decreases in a row, 2 dc, 5 sc.
- The thread is secured and cut.
At the end, you need to check whether all the ends of the yarn are hidden. Slippers can be decorated if desired.
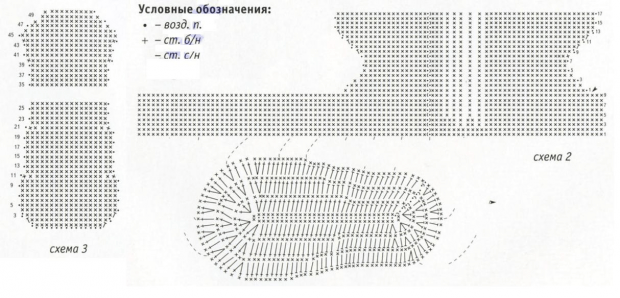
Knitting patterns for interesting crochet slippers
Crochet slippers, the patterns and descriptions of knitting the upper of which differ, are most often made by tying to the insole.
The sole is made according to the standard scheme:
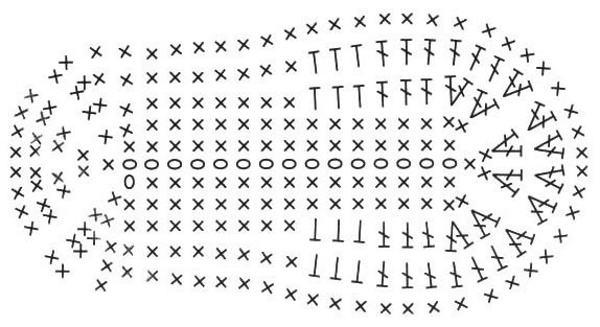
The size of the insole is adjusted by adding or subtracting the number of air loops.
Table of schematic symbols:
| Symbol | Designation on the diagram |
| Air loop | |
| Single crochet | |
| Half-column | |
| Column with one yarn over |
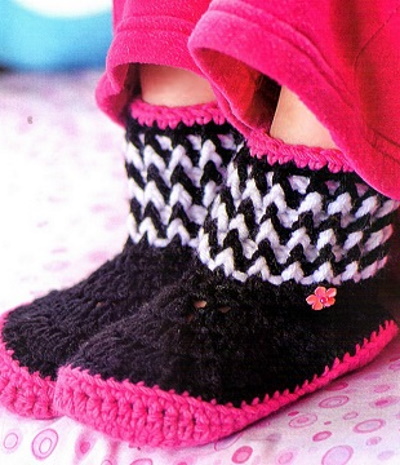
Knitting pattern for slippers in the form of boots
Slippers are knitted in the same way as footsies, to which a high top is then attached.
Knitting pattern of the base:
The upper part of the boots is made according to the following pattern:
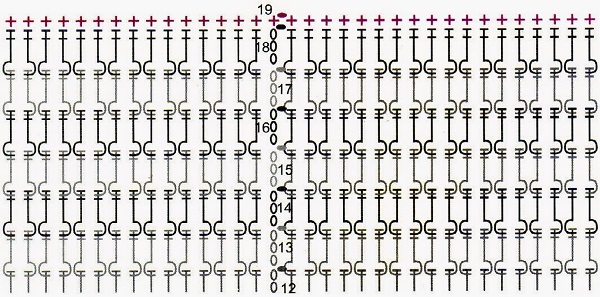
Explanation of symbols:
| Symbol | Meaning |
| The "before work" sign means inserting the hook under the loop of the previous row from the front. | |
| The "at work" sign means inserting the hook under the loop of the previous row from the back. | |
| The number of divisions at the top of the symbols indicates the number of yarns on the hook. | |
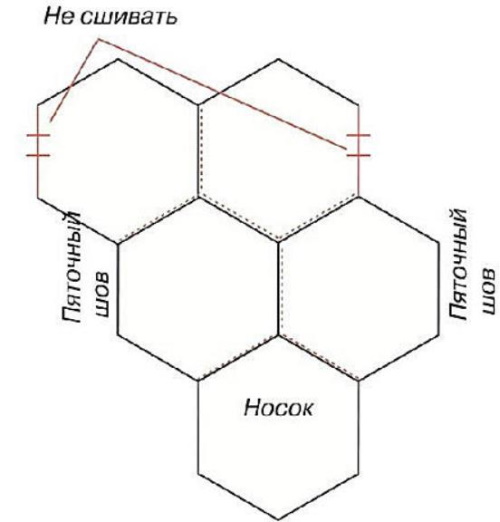
Hexagon Slippers
Crochet slippers, the patterns and descriptions of which are presented below, are unusual, as they are made from identical hexagonal motifs that are sewn together, forming the top of house shoes. You can choose any pattern, observing the size ratio of each element.
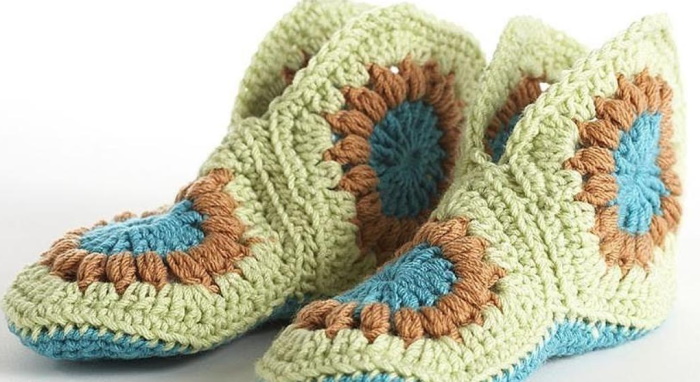
For the slippers, 5 identical motifs are made, which are sewn according to the pattern:
Each hexagon starts with a ring of 5 VP.
Knitting pattern:
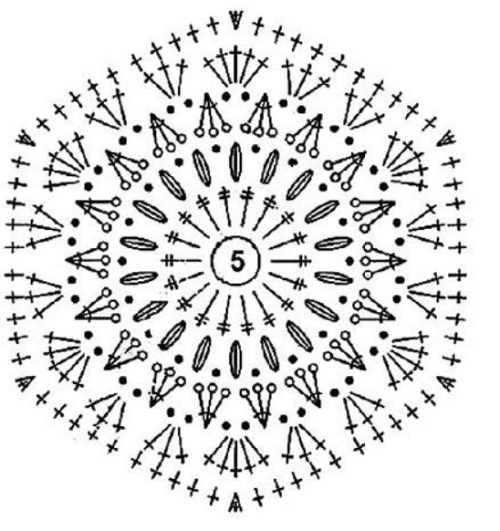
The schematic pattern uses all the basic elements of crocheting, so beginners can create slippers from hexagons. Since the motifs contain different types of loops, working on them will also help to practice the skills of performing elements and reading diagrams with descriptions.
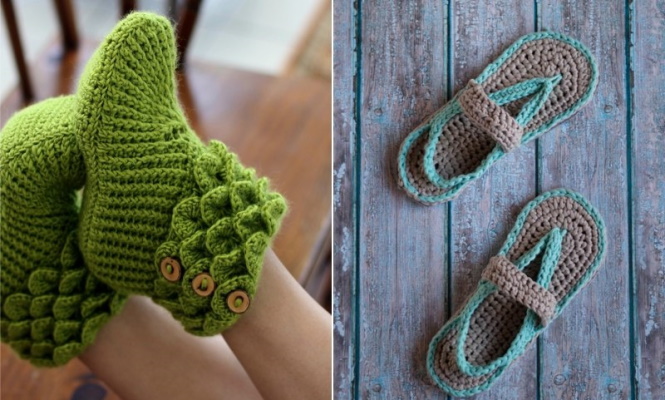
Hedgehog slippers
Original slippers in the form of animals and cartoon characters can be knitted even as a gift to friends and loved ones. For work, it is better to choose acrylic yarn, which does not wear out over time, does not lose shape after washing.
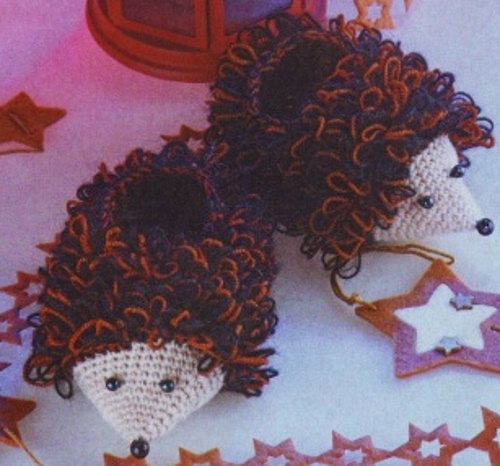
To decorate home shoes, they use the technique of knitting elongated loops, which in the finished work replace the hedgehog's needles.
The scheme of work itself is simple:
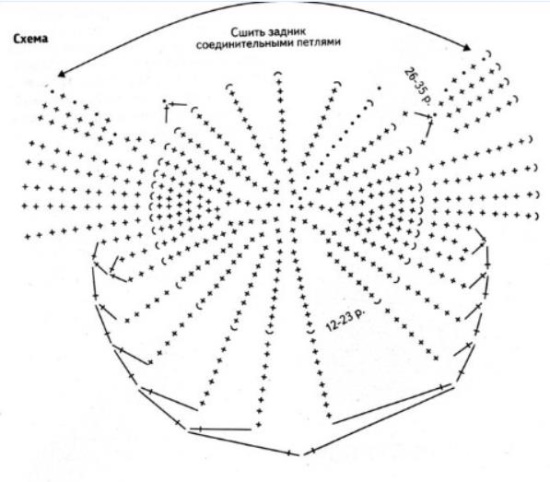
The difficulty of knitting slippers is that the visibility is poor due to protruding threads. Inexperienced beginners can make mistakes in their work. Therefore, this scheme is more suitable for knitters with practiced skills.
Slippers-footprints from granny square
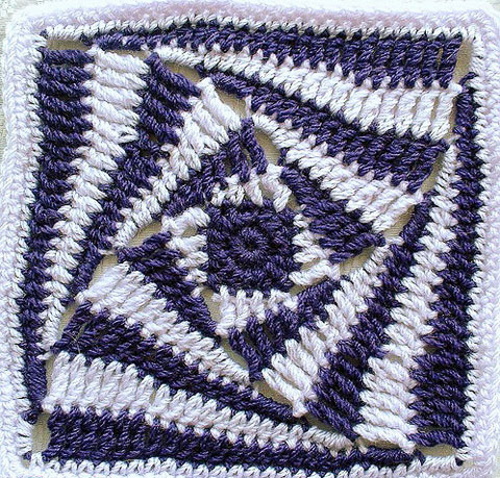
This is one of the easiest ways to crochet slippers. You can use a square with any pattern as a basis.
Examples of motives:
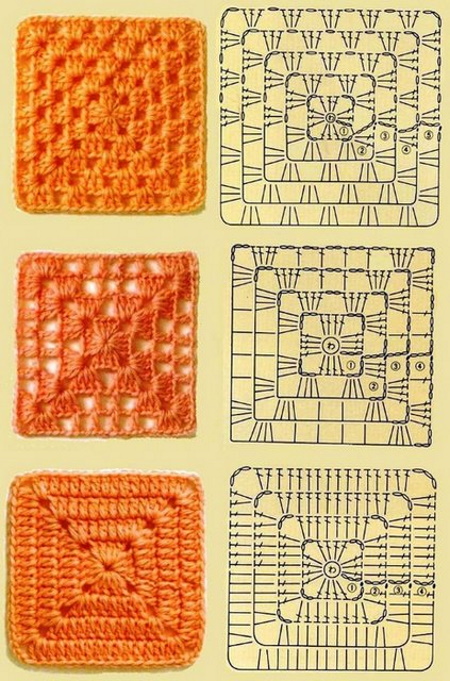
The denser the pattern, the more comfortable it will be to walk in house shoes. When the sole is loose, the loops press on the foot, which is why the feet get tired and hurt. To get a high knitting density, you can use yarn in 2 folds.
But such slippers will not stretch, so you need to select the exact number of loops and the length of the shoes, otherwise you will have to re-knit the squares again.
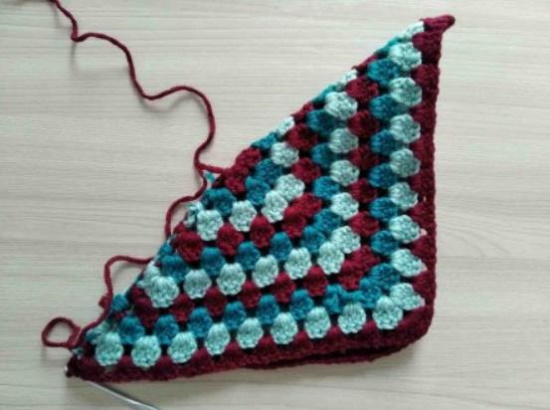
To get a full-fledged slipper from one motif, you need to fold the square diagonally and sew it along one connecting line completely and go 3-4 cm onto the other to get a seam on the heel.
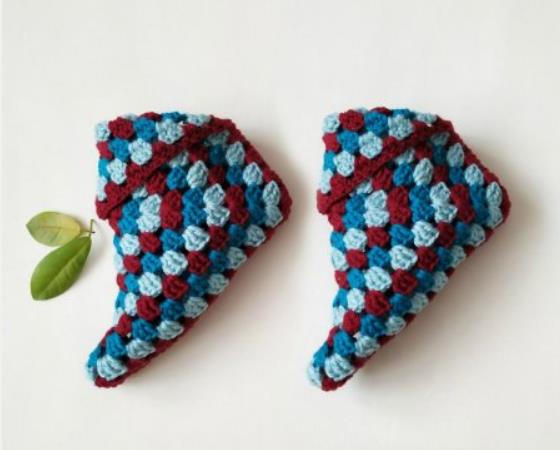
The upper free corner should be turned outward to form a decorative flap. It can be secured with a thread so that it does not turn away, or a decorative element can be sewn onto it: a bow, a pompom, a button. The advantage of knitting slippers from squares is variability and adaptability to the skills of beginner knitters.
You can choose any mastered pattern and create unusual slippers based on it:
Shoes can be single-color, melange or colored.
You can even knit some funny elf boots:
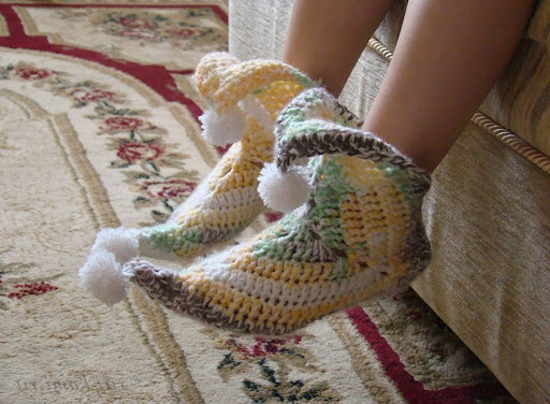
They can become an element of a child's costume for a matinee. It will take 2-3 hours to create the boots.
Using diagrams and descriptions, you can learn how to crochet complex slippers made of several elements or with openwork patterns. Beginners should first make 2-3 pairs of simple shoes to master the principles of work and execution of different types of loops.
Slippers quickly wear out on the floor if you use natural yarn for knitting. Therefore, you should choose threads based on acrylic, which should be at least 70% in the composition.
Video about knitting
Crochet slippers: