One of the basic seams - forward needle - is very important in needlework. It is considered a basic stitch, on the basis of which many products are created. It does not take much time to learn how to do it according to the pattern. Both children and adults will be able to understand the principle of doing the stitch.
Basic rules for hand stitching
Hand stitches are very important in embroidery, they help to fasten the parts together, make the edges of the work more neat. For example, with the help of a hemming stitch, you can invisibly connect the parts together. The overcast stitch, in turn, allows you to avoid fraying of the edges of the fabric that the craftswoman uses. Also, hand stitches can be used for those fabrics on which the lines made by a sewing machine would look less neat.
Seams, including those using the forward needle pattern, are made according to the following rules:
- The work surface must be clean, level and flat.
- The thickness of the needle for hand stitching must match both the thread and the fabric.
- To speed up the work and not injure your fingers, you can use a thimble. It is put on the middle finger of the working hand.
- The thread should not be pulled too tightly during sewing, as this will spoil the appearance of the product.
- To avoid damaging your teeth and injuring your gums, do not bite off the floss with your teeth. If you bite off the floss or simply tear it off with your hands, it will be difficult to thread the end of it into the needle.
- The most suitable thread length is no more than 70 cm. If it is too long, knots will appear on it during the sewing process.
The forward needle stitch, the pattern of which is very simple, is discussed in the table below. It shows the varieties of this stitch and the cases in which it can be used. In addition to this stitch, other basic hand stitches are also indicated.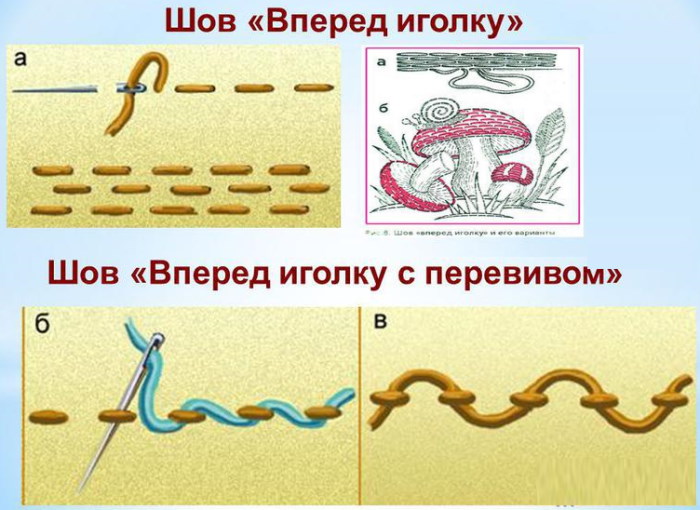
| Seam name | Application |
| Forward the needle | It gets its name from the direction of the needle – it should always point in the direction of the stitch. Running stitch can be used in the following cases:
|
| Back the needle | The name of the stitch is also associated with the direction of the needle - it returns to the end of the penultimate stitch. From it, a new stitch is made, from the point where the thread has just been pulled out. In addition, the back stitch can be used in places where working on a sewing machine is impossible, for example, when replacing a zipper on a leather jacket. Also, this type of hand stitch can be used if the machine stitch has come apart at a small distance. The reason for replacing a machine stitch with a hand stitch is to save time, since it takes a long time to thread the machine and turn it on only to process a few centimeters of fabric.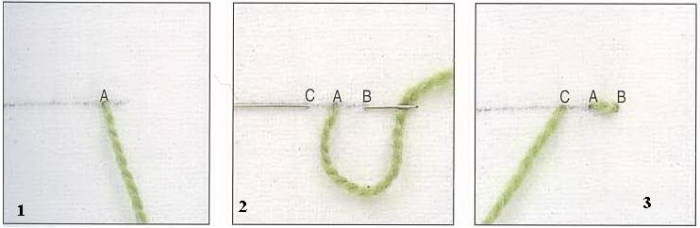 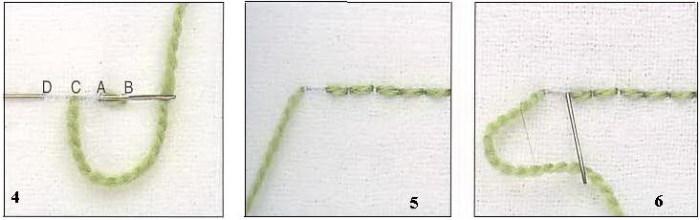 |
| Loop stitch, overlock stitch | This type of hand stitch can be used in the following situations:
|
Materials and tools
The running stitch can be done on any fabric. However, it is easier and faster to do the stitch on fabrics whose threads are evenly intertwined. Canvas is also considered a suitable material for the work.
When choosing threads for stitches, you should remember what function the seam will perform. For example, if the seam is a basting one, you can buy simple sewing threads. To make this seam more visible when creating clothes, it is recommended to use contrasting thread colors.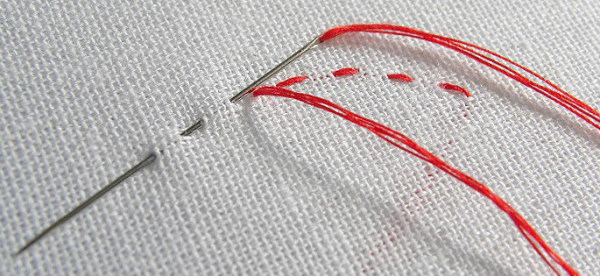
If the seam is part of the decor, for example, it is used to process the edges of clothing, the most suitable threads are floss or wool threads. They will help to give the seam volume and expressiveness.
The running stitch, the pattern of which has become widespread among craftswomen, must be made with a needle that matches the threads and fabric. The choice of such a tool as a sewing needle is very important, since incorrectly selected threads, needle and fabrics can worsen the appearance of the finished stitches. Thus, a thick needle can leave too large holes in thin fabric. If the needle is too thin, and the thread, on the contrary, is thick, the craftswoman will not be able to thread such a needle.
Execution order
The running stitch begins with securing the working thread. It can be secured in several ways. You can fold the thread in half, thread it through the needle so that a loop is formed at one end. The fabric is pierced at the beginning of the stitch.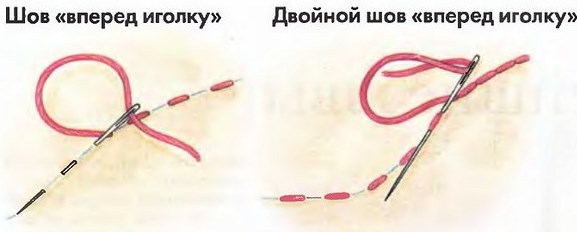
In this case, the loop should be held so that it does not unravel. Next, you need to make a stitch in the direction of the line, pass the needle to the back side, threading it through the loop. One of the advantages of this method is the absence of a knot on the fabric. However, if the seam is used to create a basting, this option for securing the thread will not work, since it will make it difficult to remove the thread.
The difference between the 2nd method of securing the thread and the 1st is that when securing the thread to the fabric, a loop is not formed. The needle should be brought out to the front side, leaving a small part of the thread on the back side. After this, it is necessary to sew 3-4 small stitches in the direction of the beginning of the line.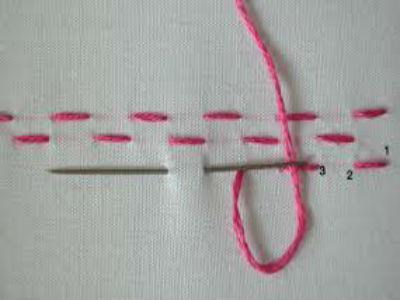
Method 3 is less neat, since the end of the thread should be wound around one of the fingers. Twisting the wound thread, remove it from the finger and pull it off. As a result, a knot is formed, which will help the embroidery not to unravel, and the threads will not slip out of the hole left after the needle. This option for securing the thread is suitable for stitching a basting seam, since the knot can be easily unraveled by pulling on it.
Before starting work, it is necessary to take into account that the techniques of performing the seam differ depending on the purpose of the running stitch. Thus, there are 3 ways of performing the running stitch.
In method 1, the layers of fabric are joined together perpendicularly, at a right angle. The needle with the working thread is inserted from top to bottom, then after the length of the stitch it is inserted again on the front side. The disadvantage of this method is the low speed of work. However, in this case, the fabrics are sewn together without any shifts in the layers (if several layers of fabric are sewn together).
Option 2 of the forward needle seam – sewing puncture. The difference between this technique and 1 is that the fabric is placed on the needle. It is important to ensure that the needle enters the fabric through intervals of equal length. It is recommended not to make more than 3 folds of fabric so that it does not stretch too much. Using this technique, you can save time.
Technique 3 – improvement of stitch option 2. Its essence is that 3 stitches are formed at a time, then the thread is pulled out by 5 – 10 cm, after that another 3 stitches should be made, and then this procedure is repeated throughout the work.
The running stitch, the pattern of which is understandable to both children and adults, can also be used to sew parts of a finished product. To sew parts together for a long time, you should slightly change the technique of the running stitch.
So, after every 2-3 stitches it is recommended to secure the thread by inserting the needle with the working thread into the place where the last stitch begins. The seam is repeated from above, since the needle passes through the end of the last stitch. The advantage of a seam with a fastening is that such a stitch allows you to avoid using a sewing machine if you need to sew any small product.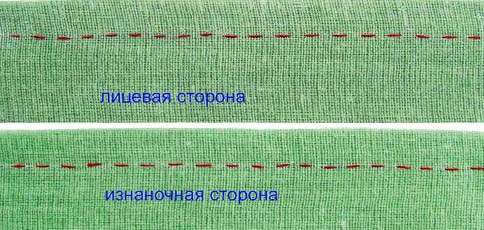
There is also a decorative stitch option - with a skipped thread. The principle of making the stitch is that you first need to stitch a row with a regular stitch forward needle, then skip the 2nd thread under the already stitched stitches. The second thread forms waves. In this case, you need to ensure that the needle does not catch the threads of the fabric and the stitches already made.
When finishing the work, it is recommended to leave a small reserve, about 7 - 8 cm, to avoid difficulties with tying a knot or other finishing of the line. When finishing sewing, you can also pass the needle with the thread under the last stitch, pull it out to the other side so that a loop is formed from the working thread. Pass the needle through the loop, tighten it.
The forward stitch pattern is one of the basics of sewing. This stitch is easy to unravel, since it requires pulling the thread out of the fabric with a little effort. To speed up the work, these stitches are made on fabrics before stitching the product on a sewing machine. The stitch can also serve as a decorative element, for example, on napkins.
Video about running stitch
Seam before needle: