The French knot stitch is often used in embroidery. It allows you to create a spectacular texture and small accents. If you place the stitches in this technique very rarely, they will make the work lighter and airier. This embroidery method is suitable for both beginners and experienced needlewomen.
Features of the French Knot
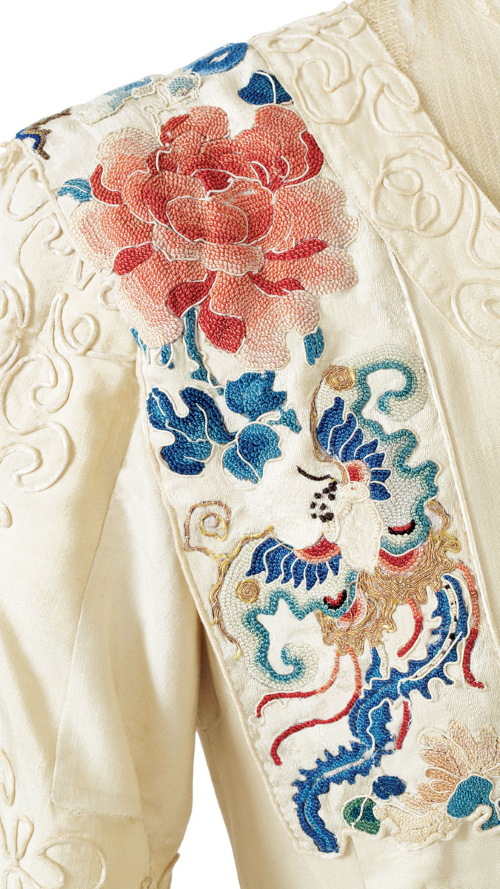
Loops in the French embroidery technique are also called Frenchies or frouzels, allowing you to add volume to embroidered items. This type of creativity came to European countries from China. It received its name thanks to French women who liked to embroider using this method.
The works brought by merchants from China, which were embroidered in this technique, were widely popular among seamstresses. They began to widely spread this idea of embroidery among needlewomen.
As a result, individual elements of knot embroidery began to appear on the items of representatives of the aristocracy and monarchy. Satin ribbons, silver and gold threads were used for decoration.
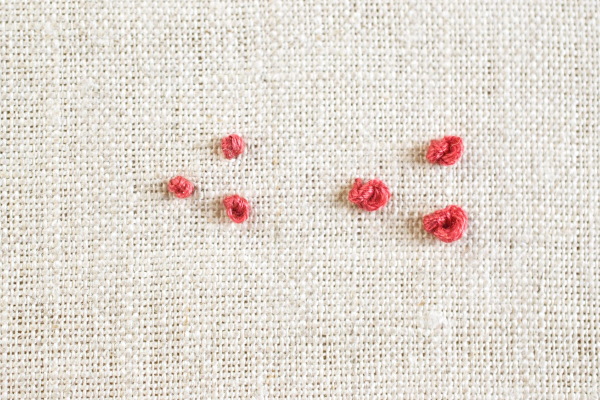
The French knot is a round stitch that protrudes above the fabric. In the center it has a small depression. Such a loop looks like a small bead or seed bead. Its parameters will depend on the number of folds, quality and thickness of the threads. Particular attention was paid to the tension force and the number of turns of the thread around the needle.
Each knot must be made separately so that different details can be highlighted, such as flower stamens or snowflakes. Loops can also be collected in groups to create clouds or tree crowns.
In this case, the picture can be embroidered exclusively using this technique, which will make the pattern more effective, original and expressive, especially when using a variety of color combinations.
There are quite a lot of ideas for creating a French knot, which makes it possible to create various effects using such stitches:
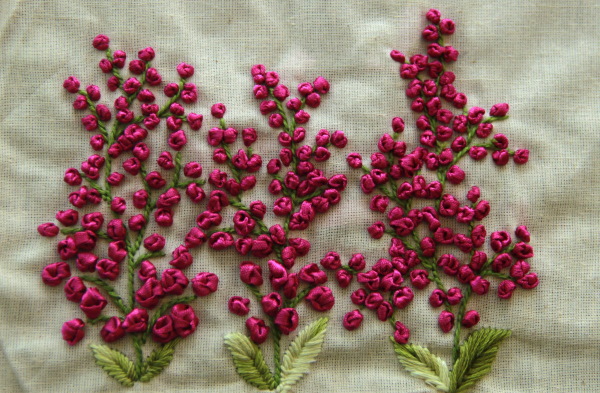
- To create inflorescences on individual canvases, French stitches are made with thick threads or ribbons. Hyacinths and lilacs look especially beautiful.
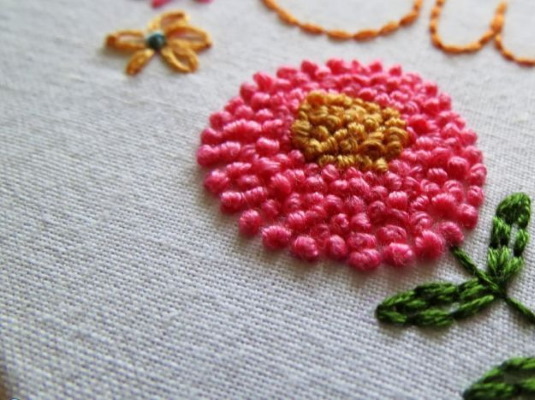
- Often the technique is used to highlight floral patterns on finished embroideries. Small knots are used in the background to highlight flowers, and large stitches are used to highlight floral arrangements in the foreground.
- In one picture, usually only 2 objects are decorated with such stitches. Works made exclusively in this technique turn out to be spectacular. Outwardly, they resemble beadwork or cross stitch, but they turn out to be much more voluminous, unlike these techniques.
To embroider the entire canvas, use bead embroidery for this purpose, where the latter will be replaced by French stitches. You can also make knots of flowers that were planned to be executed with a cross. For this, you can use a regular pattern.
- Knotted embroidery, developed from a contour embroidery sketch, looks unusual. You can find special patterns designed for French stitch embroidery. Sometimes the knotted technique is included in the work to achieve the effect of perspective on large compositions.
- The stitches on the finished embroidery can imitate small falling elements like snow or grains for birds. Knot groups give the work more volume, so they are mainly used when decorating curly hair, lush animal fur, trees and clouds.
The French knot stitch is quite easy to make if you follow a number of rules:
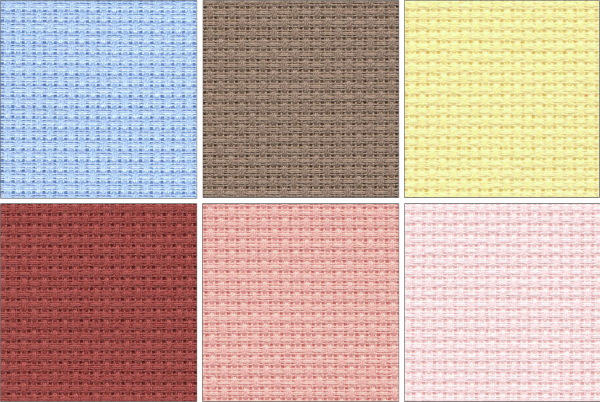
- It is recommended to use a fairly dense fabric for the base, which will have the same weave over the entire area. When using loose material with holes, the knot may stretch a little to the wrong side.
- To make a large stitch, the winding of the threads around the needle must be done in 4 turns. To make a small knot, there can be no more than 2 turns. It is necessary to try to equally pull the thread from which the winding of the stitch will begin. Thanks to this, the elements will be identical.
- To secure the knot tightly on the fabric, it is recommended to pull the thread tightly enough. To get a large stitch, instead of winding the thread around the needle more than 2 times, it is advisable to use thick threads.
- For ease of work, it is recommended to enclose the used section of fabric material in a hoop. In this case, the material must be strongly stretched.
- Needles and threads must match each other in thickness. If you make a knot with one thread and a thick needle, it will not look very neat and vice versa.
- The threads must be pulled carefully, constantly adjusting the knot so that it does not go to the side.
- When using multiple stitches, wind the thread onto the needle in one direction.
- When creating a beautiful French stitch, the types of threads are of particular importance. For creating small elements, it is best to use cotton mercerized threads, such as floss. Wool threads will make the knot larger.
- When framing a work with a large number of knots, it is recommended to make a double or triple passe-partout. This is necessary to prevent the glass from crushing the embroidery.
- Stitches should only be made on washed and ironed fabric.
If you follow the above recommendations, the French knot will be easy to make, it will not unravel, and will give the composition a neat appearance.
Where can the French knot embroidery technique be used?
The French knot stitch allows you to make various unique items. Craftswomen can make bags, blankets or towels using this technique. Stitches can be used to decorate hairpins, brooches, icons and entire picture compositions.
Products that have been embroidered with satin ribbons will look unusual and elegant. Their width should be selected according to your own idea. To obtain small elements, it is necessary to use narrow stripes, which in the end will be lush and convex, attracting attention.
Ribbons in the knot technique can be used to decorate clothes, pillows, knitted items and interior details. French stitches are also suitable for decorating various accessories, such as necklaces and bracelets.
Compositions that were partially created using this method look impressive. Paintings designed entirely using this technique also look original and unusual. Works that were supplemented with a contour image have a modern look.
Quite often, the knotting technique is used to emphasize only small individual details of the plot: clothing decor, drawings of animals or people, tree leaves. Larger objects embroidered with French stitch may also be present in the paintings.
There are several types of French seam:
| Type | Features of the seam |
| Loop | The step length will be significantly less than the number of turns. When laying the seam, a fairly voluminous detail is obtained at the exit. The seam is suitable for creating multi-colored petals. |
| Straight stitch | The numbers of turns will correspond to the size of the step of the working thread. Such a seam is used to create thin branches and petals. |
| Knot | Characterized by 2 thread turns, the length of which is small. The stitch is suitable for decorating the core of flowers. |
It is quite difficult to find patterns that are developed exclusively for French knot embroidery.
However, this problem can be solved:
- You can draw the plots of future compositions yourself using a simple pencil.
- The selected designs are transferred to the surface of the fabric material. Then the patterns are stitched along the contour or filled with colored French stitches.
- When using ribbons, you can use patterns designed for satin stitch embroidery.
- French stitches are suitable for patterns intended for cross stitching or beading. The areas reserved for beads or crosses are simply filled with knots.
Necessary accessories for embroidery
The French seam requires a certain amount of skill from the needlewomen, as well as the preparation of the necessary embroidery accessories. Thanks to this, the stitches are even and neat.
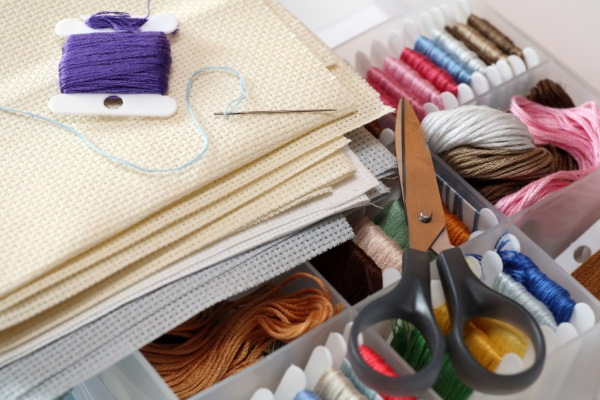
To make knots, you should prepare the following materials and tools:
| Accessories | Which ones to choose? |
| Needles | Tapestry needles are often used for ribbon embroidery, as they have a blunt end and a wide eye. For thread embroidery, it is recommended to use sewing needles and beading needles with a pointed end. |
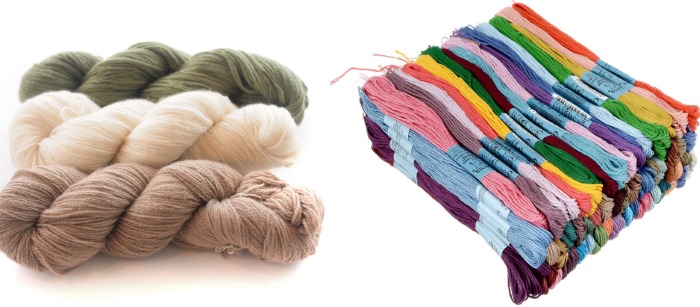
| Threads | Threads of dark shades are suitable for decorating foreground objects. Thanks to this, the drawing will be more voluminous. When using a wide color palette, you can achieve very unexpected results. For embroidery of small elements of the picture it is better to use floss. For large details wool yarn is suitable. For decoration of voluminous flowers use satin ribbons. It is not advisable to use very long threads, because they will constantly get tangled. The optimal length should be about 30 cm. |
| Fabric material | For embroidery of flowers or pictures it is advisable to take a dense canvas. Otherwise, the knots will fall apart or fall through due to the loose structure of the material. The surfaces of any canvas are suitable for the knot technique.
The main thing is that the fabric material is dense enough. For finishing with ribbons, it is acceptable to use knitted or jersey products. |
Additionally, you will need to prepare the following inventory:
- ruler;
- markers, felt-tip pens and pencils of various shades;
- carbon paper;
- thimble;
- scissors;
- hoop;
- square frames;
- image schemes.
Master class for beginners
When using French stitches when embroidering a picture, they add splendor and beautiful texture. Rarely placed details are light and airy.
However, when working in the knotting technique, needlewomen often encounter some difficulties with stitches:
- come in different shapes and sizes;
- they are tied on the working thread very early, so it does not have time to pass to the wrong side;
- are pulled completely to the wrong side.
A master class for beginners will help prevent any mistakes at the embroidery stage:
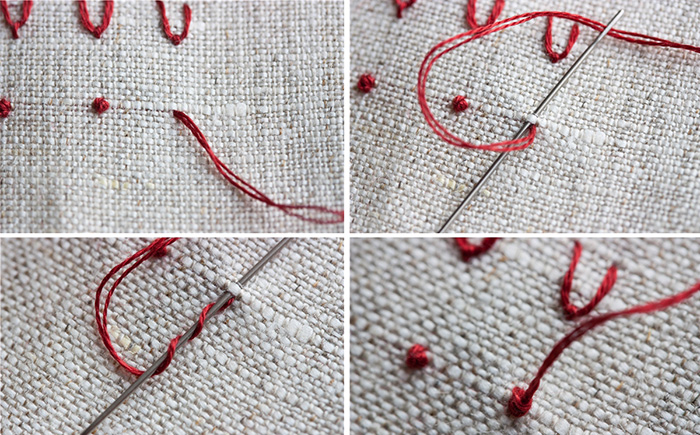
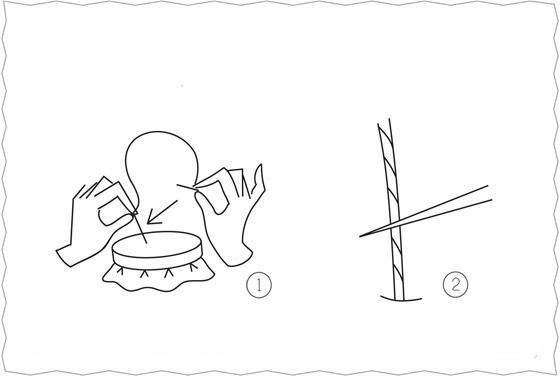
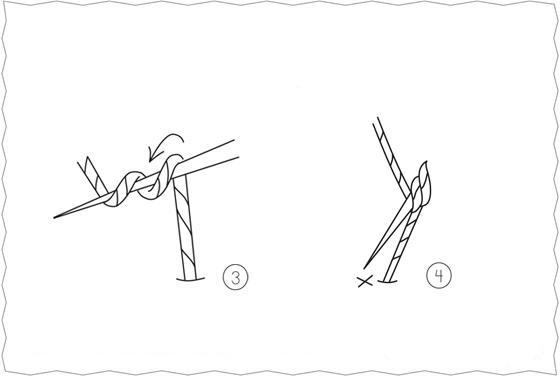
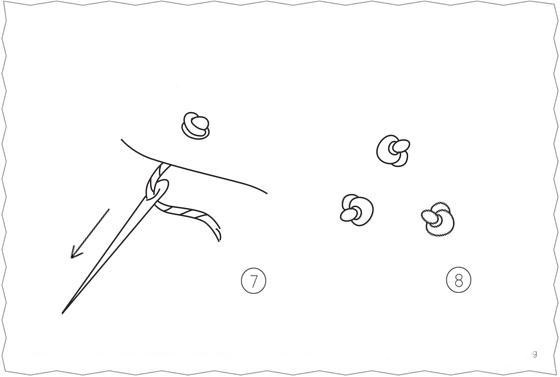
- Take a needle with a sharp end. Place the thread on the front side, wrapping it around the needle 2 times. To change the stitch parameters, you need to change the number of turns around the needle: for large ones - 3 times, for small ones - 1 time. It is not advisable to do more than 3 turns, because the knots will lose their shape.
- Insert the needle near the area where the thread passes to the face of the design. Do not insert the needle into the grip area where the thread is located, since the stitch will pass to the back side along with the thread.
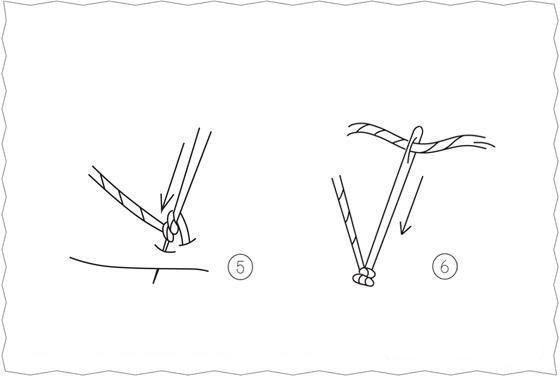
- Carefully pull the thread to the wrong side. Keep the end of the thread opposite the needle taut.
- Hold the thread taut until there are 2 cm left. Release the thread, pulling it to the wrong side.
The end result should be neat knots.
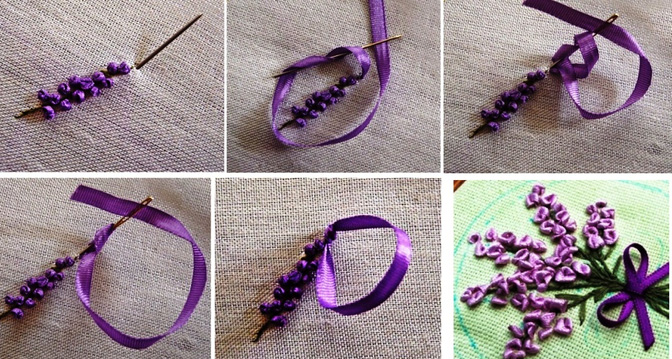
You can make a French knot stitch using satin ribbons:
- Attach the satin fabric strip to the fabric from the inside. Bring it to the front area.
- Pull the tape tight and place it underneath the needle. Make one tape turn clockwise around the needle.
- Step back a little from the initial puncture point. Insert the needle into the place located near the initial puncture.
- Move the ribbon to the edge of the needle, pull it tight, forming a not very tight French knot.
- Pass the needle through the stitch and pull it out from the wrong side.
- Pull the satin ribbon tight, completing the creation of the decorative element. The size of the satin ribbon bead will be affected by the width of the strip.
Features of working on different fabrics
The French knot stitch can be done on embroidered fabric or on thick fabric. This is because on plain fabric a small stitch can go to the wrong side.
If you need to work on a sparse fabric, the thread turns should be at least 3. Thanks to this, the stitches will not fall through. However, if the output element is very large, you can insert 3 threads into the needle, reducing the number of turns.
On dense fabrics such difficulties do not arise. In this regard, the stitch size can be changed only for decorative purposes. Thanks to this, you can focus on one item without highlighting the rest.
Secrets and tricks of execution
Secrets and tricks of performing the French knot technique:
- To create a more precise and clear knot, it is recommended to make 1 turn, but use thicker threads.
- If the stitch threads are sticking out or sticking out, they need to be pulled out one by one to correct the situation.
- It is necessary to leave a small distance between the beginning of the knot and the area where the needle is inserted into the fabric so that the stitch does not go to the wrong side.
- During the embroidery stage, the thread should not twist. It should remain straight and even.
- It is recommended to hold the threads with your hands until the very end. If you make a knot near the canvas, it will end up being neater and smoother.
- The thread must be pulled out to the wrong side carefully and slowly. Otherwise, knots will appear on it that are very difficult to untangle.
- After the stitch is brought out to the back side, it needs to be pressed down a little. This will ensure that it is evenly positioned on the fabric and will have a neat appearance.
- The thickness of the thread and needles should match. When embroidering a stitch in one thread with a thick needle, it will not have a very neat appearance. It is recommended to wrap the needle with thread very close to the surface of the fabric.
- It is recommended to do French stitches at the very end, when all the other seams have been embroidered.
- To avoid difficulties with the needle coming out on the other side, it is recommended to pull the thread very hard when turning the needle. For this reason, the knot will be untidy.
- In order for the needle to be easily inserted into any part of the fabric, it must have a sharp tip. A tool with a blunt edge will only pass between the warp threads.
- To prevent the thread from getting tangled during embroidery, it is necessary to constantly hold it under tension. Thanks to this, the stitches will take the correct and clear shape.
- To prevent the stitch from losing its shape, unraveling, or looking untidy, it is not advisable to wrap the thread around the needle more than 3 times. To get a larger knot, it is better to fold the thread several times, making 2 standard turns.
Embroidery in the French knot technique is suitable for beginners, because the algorithm of work is quite simple, although it requires a short training of skill at first. Such a stitch decorates the composition, making it voluminous and giving depth.
Video about seams
French knot: