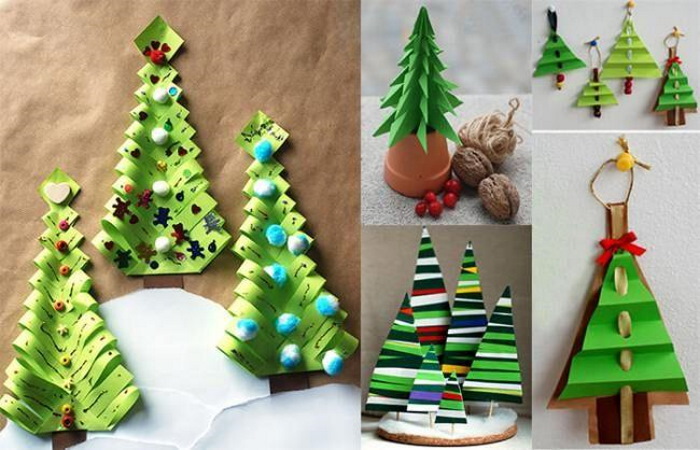
A DIY Christmas tree will be a wonderful souvenir or home decoration. You can create it from scrap materials. Crafts of this theme are ideal for a New Year's interior.
Christmas tree made of cardboard
For a simple version of creating a Christmas tree from cardboard you will need:
- Scissors. Can be replaced with a stationery knife.
- Thick cardboard from a box.
- Ruler.
- PVA glue.
- Wide brush for glue.
- White thin napkins or toilet paper.
- Sponge.
- Paint of any color for the tree frame + white for the cones.
- Silver glitter.
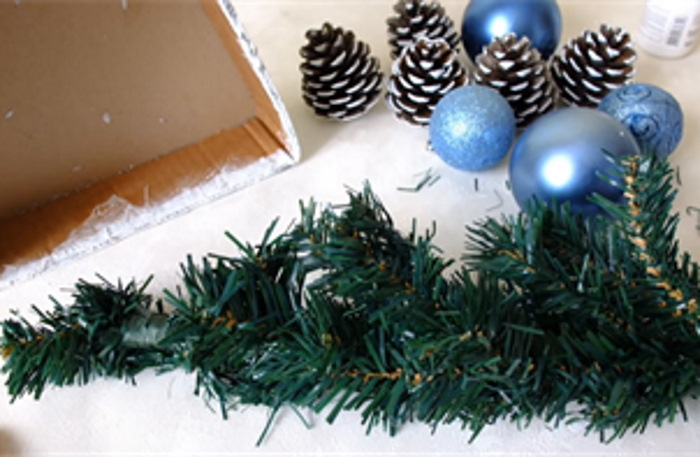
- Artificial pine branches.
- Christmas tree decorations – balls.
- Pine cones.
- Acrylic paint.
Sequence of actions:
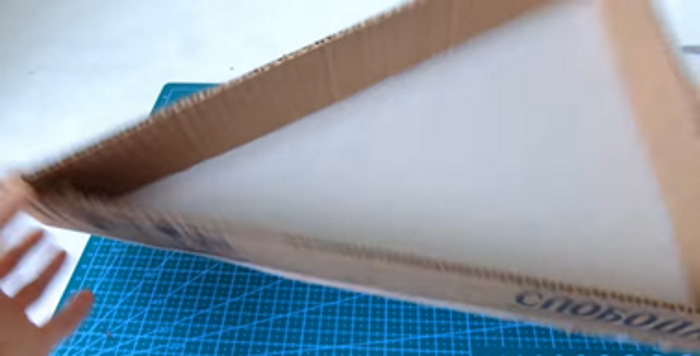
- A strip 6 cm wide and 95 cm long is cut out of cardboard.
- A triangle is made from the strip. Its base is 25 cm, and the sides are 35 cm each. The strip is simply bent to give it the required shape.
- Place the resulting triangle on a sheet of cardboard and trace around it with a pencil.
- Cut out a triangle shape from cardboard – this will be the back of the future Christmas tree.
- Glue the triangle from the strip so that it holds its shape.
- The ends of the form made from the strip are coated with hot glue and a solid triangle cut out of cardboard is attached to it. You will get a box with a bottom.
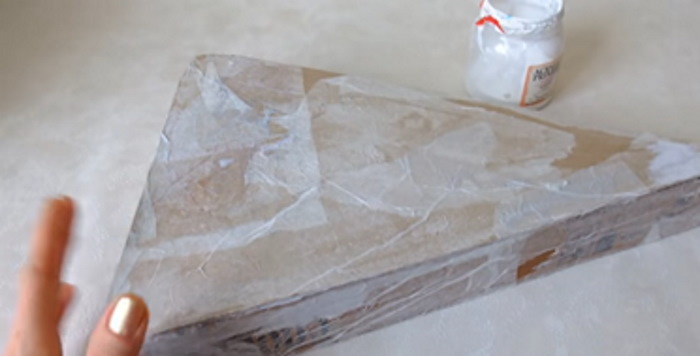
- The frame of the future Christmas tree is pasted over with white napkins or toilet paper. To do this, the sheets are placed on the cardboard and generously coated with PVA.
- Cut off a piece of sponge, dip it in paint and cover the entire workpiece with it. The master class uses white, but it is allowed to replace it with another. The paint is applied only to the outer part. The interior of the future Christmas tree is not affected.
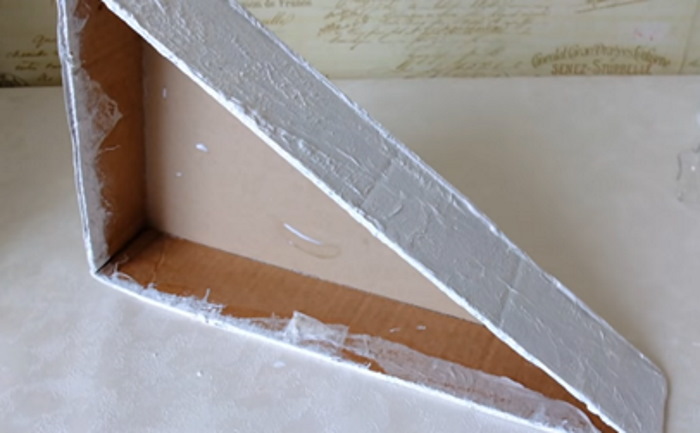
- Silver glitter is sprinkled onto the wet paint.
- Take open pine cones - the fluffier they are, the more attractive the tree will be. The tips of the natural material are painted white.
- They take Christmas balls and pine needles.
- A large coniferous branch is cut into small pieces.
- Heat up the hot glue.
- Apply glue around the entire perimeter of the triangle.
- Sprigs of pine needles are laid out on a layer of hot glue.
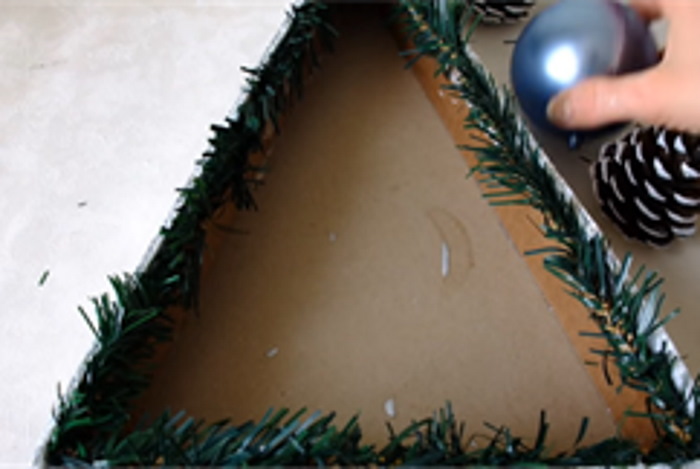
- They take cones and balls.
- Place a pine cone in the lower corner of the triangle, then a ball. Alternate materials, filling the inner space of the frame. To avoid large voids, use balls of different sizes. Each item is fixed with glue.
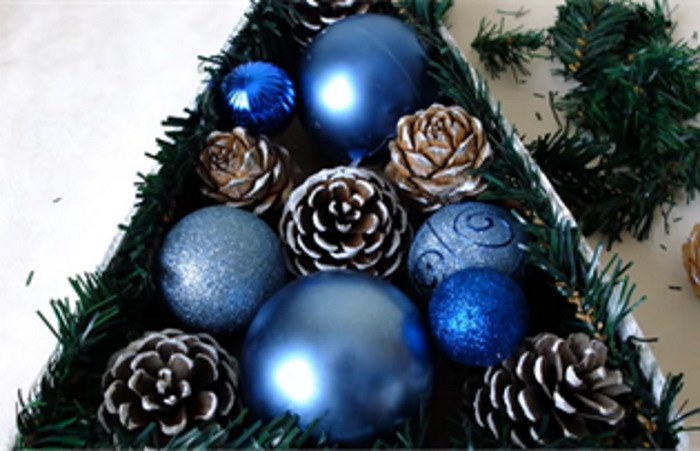
- The voids are filled with pine needles by gluing them on.
- Using acrylic white paint, the tips of the needles on the tree are covered with snow.
- Decorate the tree with small details. In the master class, white snowballs were used. But they can be replaced with berries, beads. The material is selected based on the possibilities.
A DIY Christmas tree can even be made from a candy box. Confectionery products are often produced in triangular packages. For example, some sweets from the Novgorod Factory, AVK and Toblerone are sold in such boxes. The candies can be eaten, and the mold can be used to create a craft.
From paper and cardboard
Materials:
- Cardboard for the base of the tree.
- The paper is multi-colored and double-sided.
- Scissors.
- PVA glue.
- Ruler.
- Compass.
- Tinsel for decoration.
Sequence of actions:
- Using a compass, draw ¼ of a circle on cardboard.
- Cut out the shape.
- The shape is twisted into a cone with a sharp tip.
- Glue the edges of the form together, securing it.
- Place the cone on the cardboard.
- Trace the circumference of the bottom of the cone with a pencil.
- Cut out a circle.
- Glue the circle to the bottom of the cone, thereby closing the hole in it. This will give the future tree stability.
- Circles are drawn along the entire height of the cone. The first one is drawn, retreating from the bottom of the workpiece by 38 mm. Between the next ones, a gap of 2 cm is maintained. There should be 9 rows.
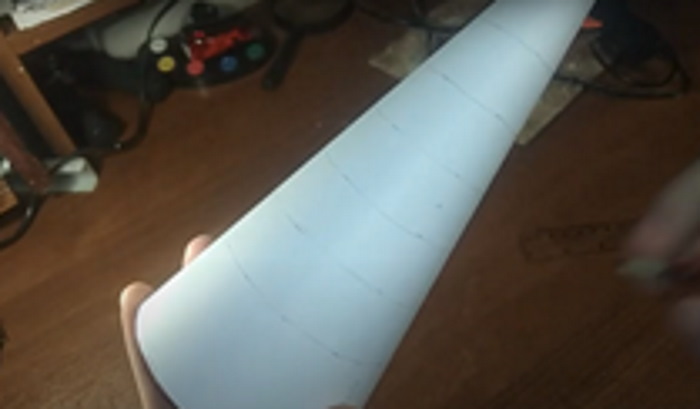
- Cut out strips 1 cm wide from pieces of colored paper. Their dimensions are:
| Row number from bottom | Length in cm | Quantity |
| 1 | 10 | 21 |
| 2 | 9.5 | 19 |
| 3 | 9 | 17 |
| 4 | 8.5 | 14 |
| 5 | 8 | 11 |
| 6 | 7.5 | 9 |
| 7 | 7 | 7 |
| 8 | 6.5 | 5 |
| 9 | 6 | 3 |
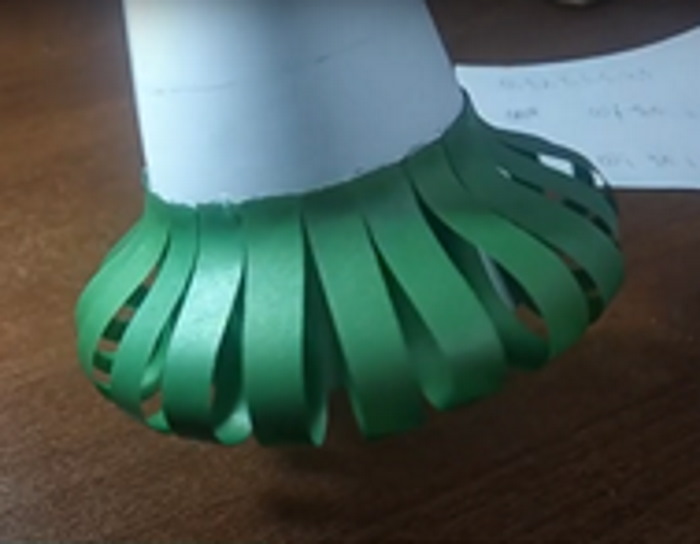
- The strips are used to make semi-ovals. To do this, the ends of the sections are connected and fixed with glue.
- The stripes of the 1st row are used to decorate the bottom of the tree, gluing them in a circle.
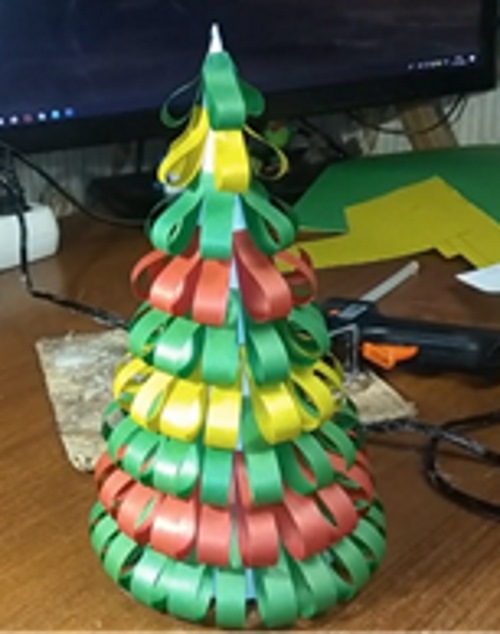
- Glue the remaining strips.
- A star is cut out of red cardboard.
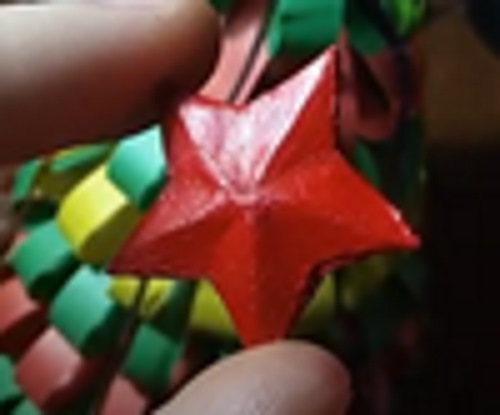
- Glue the star to the top of the Christmas tree.
They decorate the Christmas tree with tinsel.
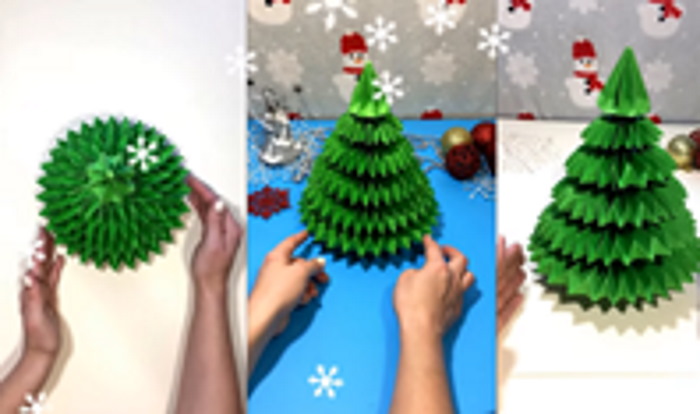
Volumetric Christmas tree
A DIY Christmas tree looks impressive if you make it three-dimensional. However, such work requires diligence. Without needlework skills, it will be difficult to make such a tree. But if you follow the master class, you will get an unusual and beautiful craft.
Materials:
- Sheets of green paper, A4 size.
- Scissors.
- PVA glue.
- Brown and yellow paper.
- Beads for decoration.
Sequence of actions:
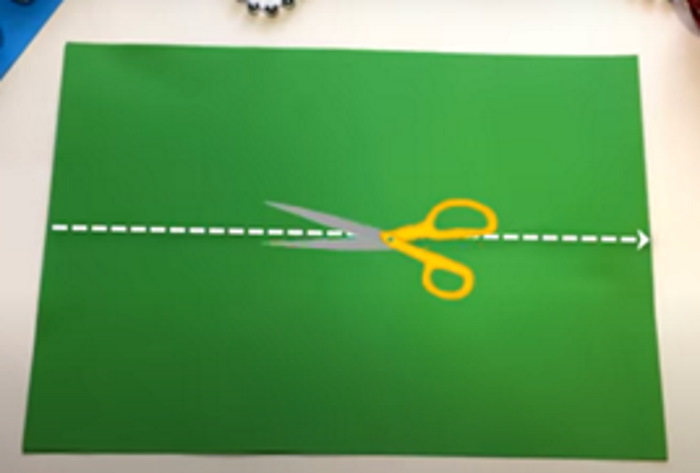
- Take 2 sheets of green paper and stack them.
- Bend in half.
- They straighten it out.
- Cut along the crease line. You should get 4 equal strips.
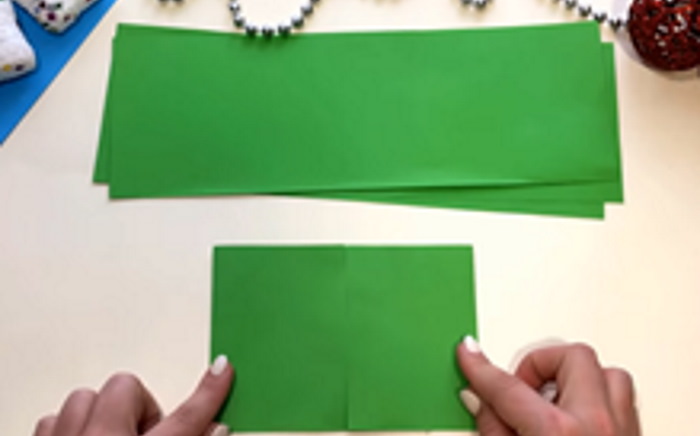
- Take 1 strip.
- Fold it in half and unfold it. A crease mark should remain on the paper.
- The ends of the strip are bent towards this crease. The result is the shape of a window covered with shutters.
- Bend the ends again towards the middle of the strip.
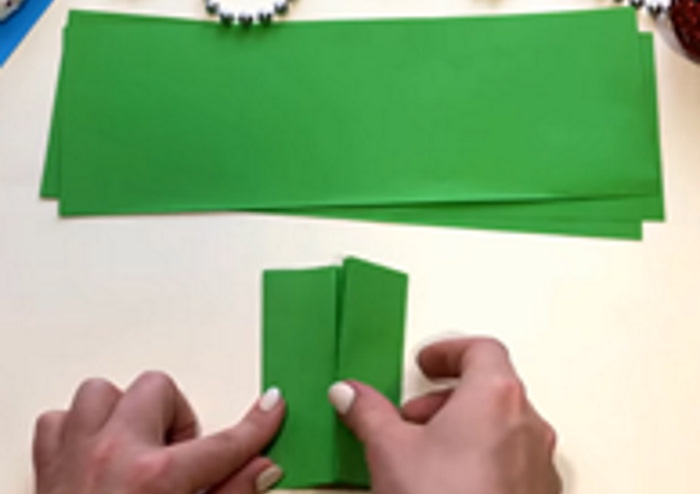
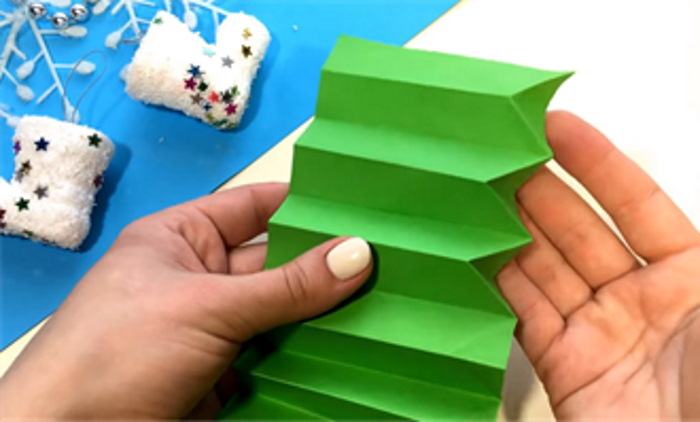
- Repeat step #8. You should end up with a narrow strip folded many times.

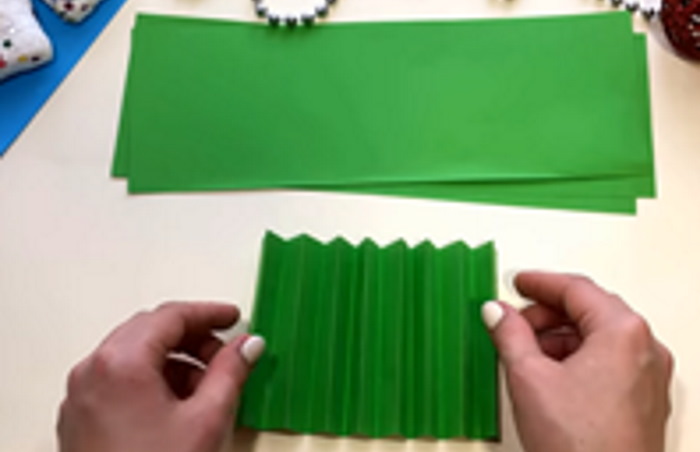
- Unfold the strip.
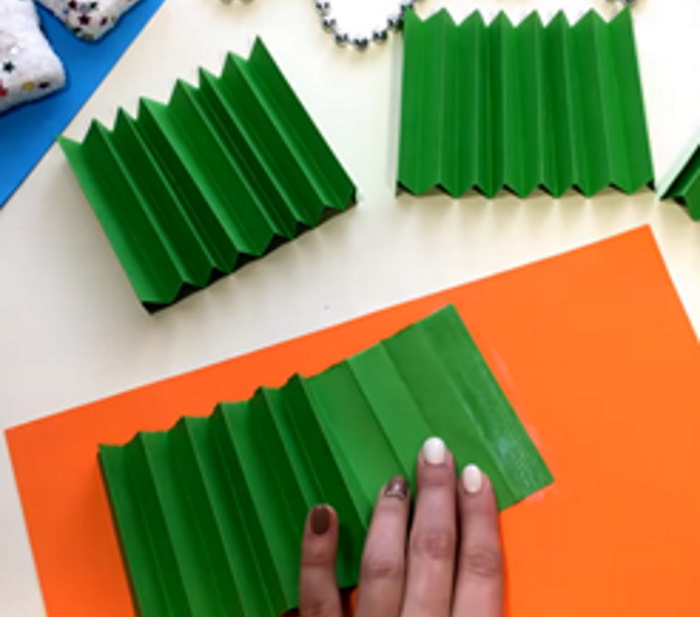
- They fold it like an accordion.
- They unfold again.
- Perform steps #5 through #12 with the remaining 3 strips.
- When all the strips are processed in this way, they need to be glued together. To do this, the edge of the accordion is lubricated with a binding material (PVA, for example).
- Glue a strip to the edge, thus connecting 2 pieces together.
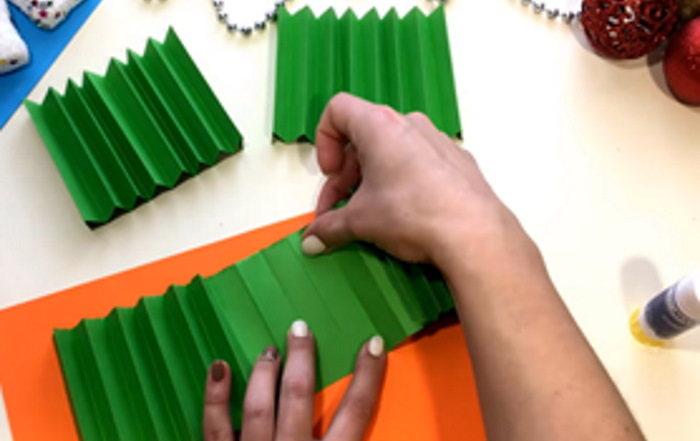
- In a similar way, the remaining shapes are connected into 1 large strip.
- The corners of the resulting strip are folded on one side. There is no need to fix them. It is enough to simply fold and then unfold the corner. A trace of the fold should remain on the paper.
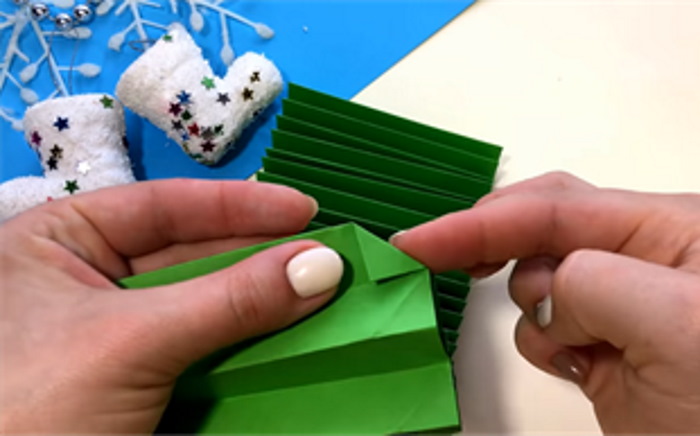
- Make creases along the entire length of the strip on one side to create a characteristic pattern.
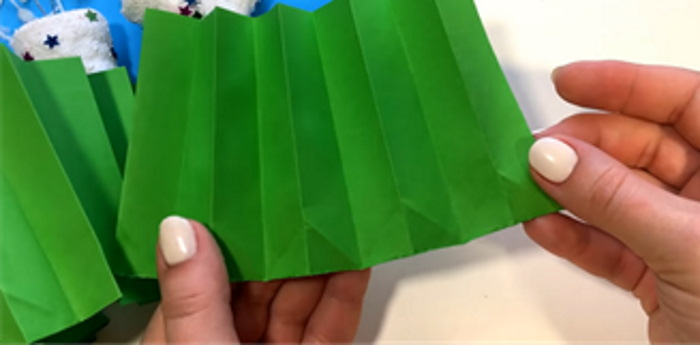
- In places where creases have formed, dents are made along the fold lines. Characteristic triangles should be obtained.
- Fold the strip.
- Coat one side with glue.

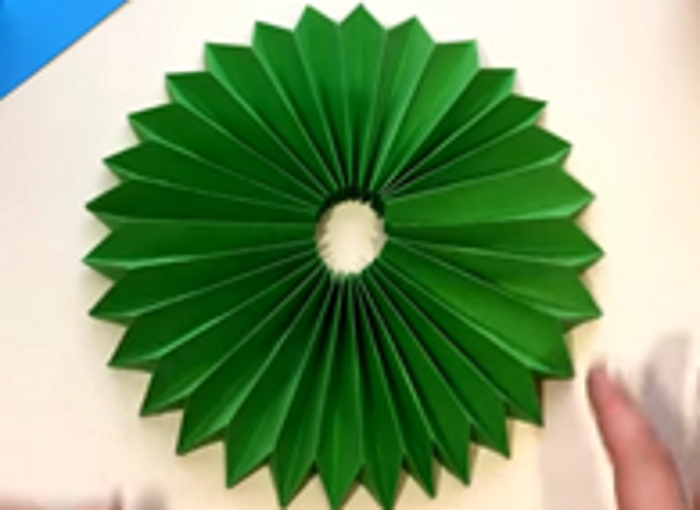
- Shape the strip into a circle and glue the ends together to secure it in place.
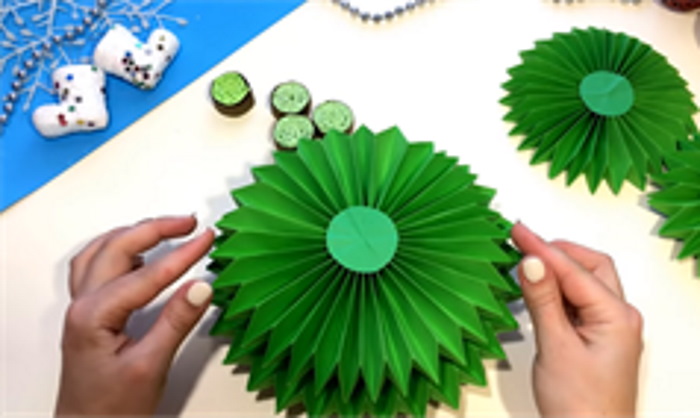
- Cut out 2 small rectangles from green paper.
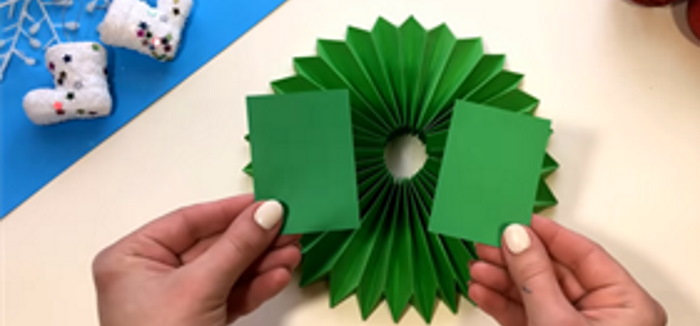
- They are stacked in a pile.
- Cut out 2 circles.
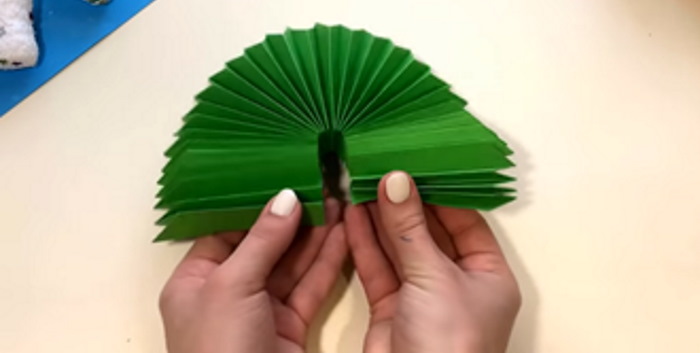
- Spread 1 circle with glue.
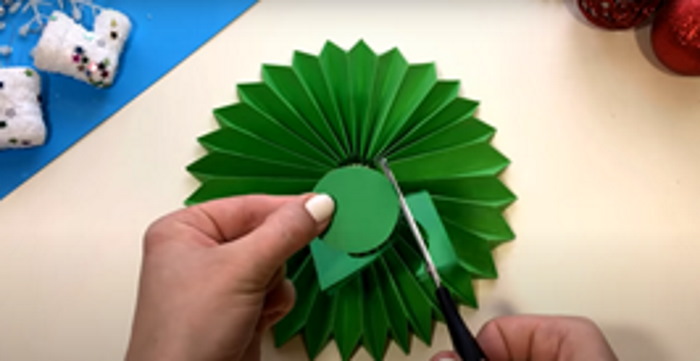
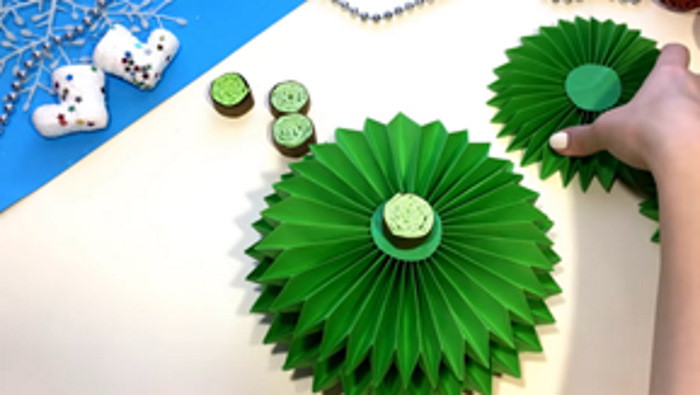
- The shape obtained from the accordion is squeezed so that the hole in the middle disappears.
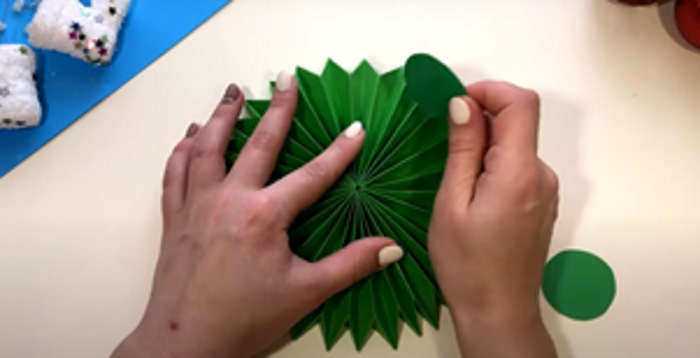
- Glue a circle in the middle.
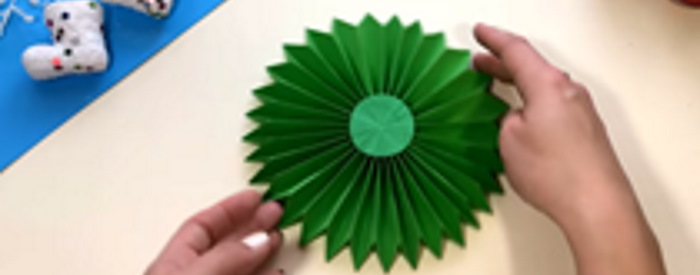
- Turn the form over and glue the 2nd circle, but on the reverse side.
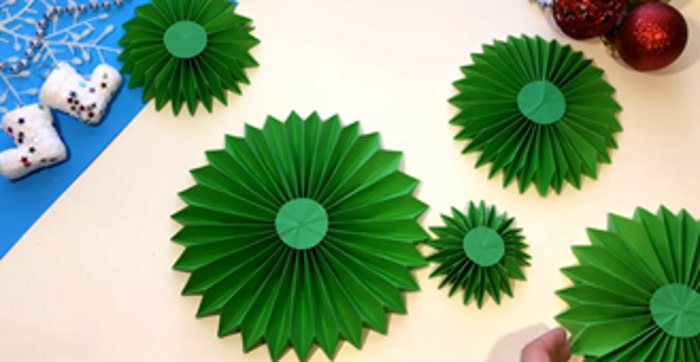
- From green paper, cut out 4 strips 9 cm wide and 30 cm long.
- Perform all steps from #5 to #29 with them.
- Cut out 4 strips of green paper, 7.5 cm wide and 30 cm long.
- Perform all actions with them from No. 5 to No. 29.
- Cut out 3 strips of green paper, 6 cm wide and 30 cm long.
- Perform steps #5 through #29 with them.
- Cut out 3 strips 4.5 cm wide and 30 cm long. Also make blanks from them. You should get 5 forms of different sizes.
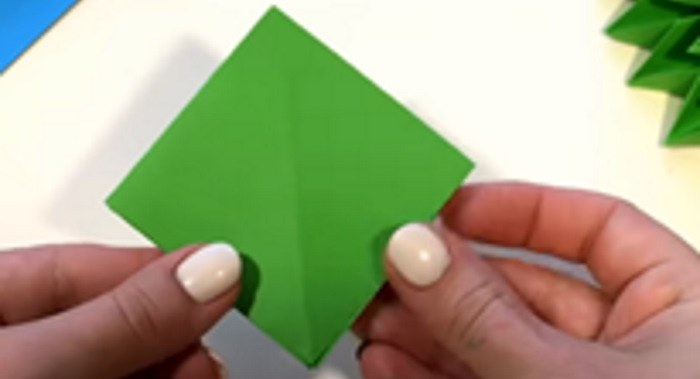
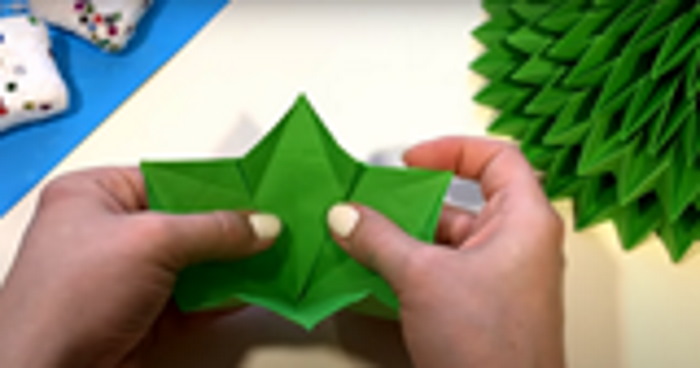
- Cut out a 13x13 cm square from green paper.
- Fold it to form a triangle.
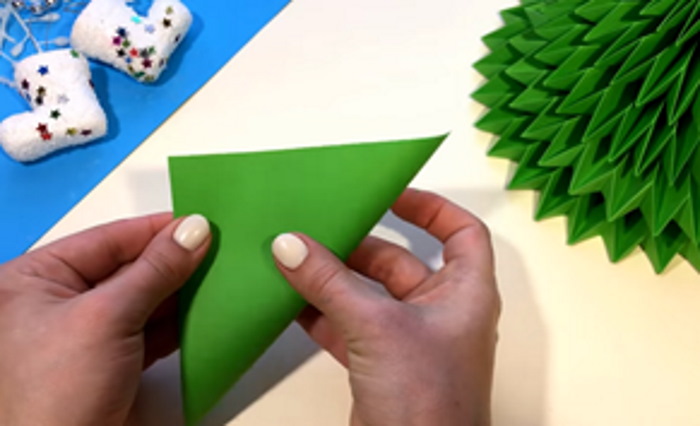
- They are unfolding.
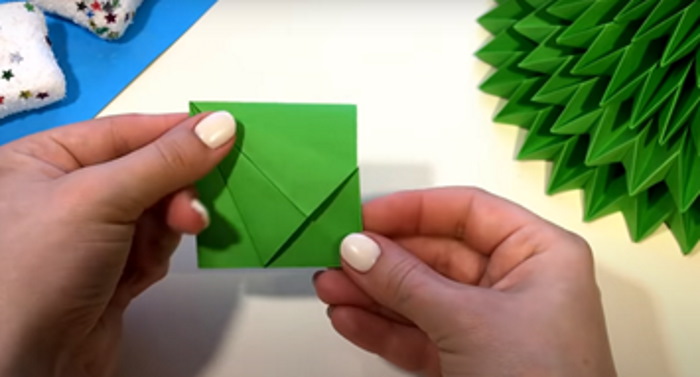
- Fold it into a triangle again, but from the other side. It is necessary that a cross-shaped crease remains on the square.
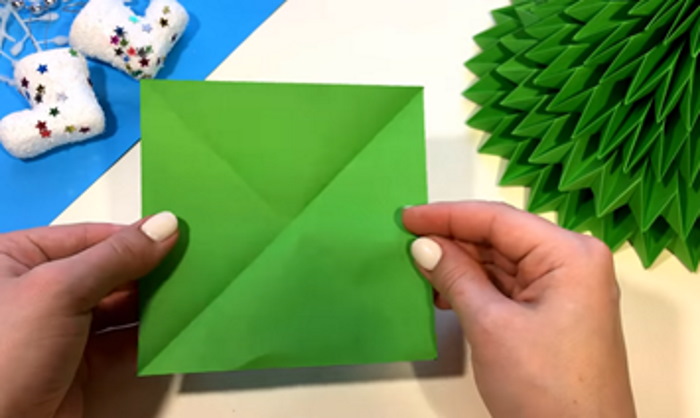
- The unfolded square with a pattern in the middle is folded in half to form a rectangle.
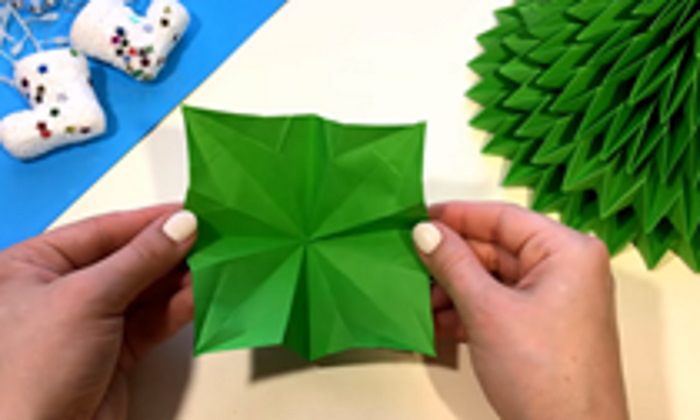
- Unfold the square. A snowflake-shaped pattern should already be formed on it.
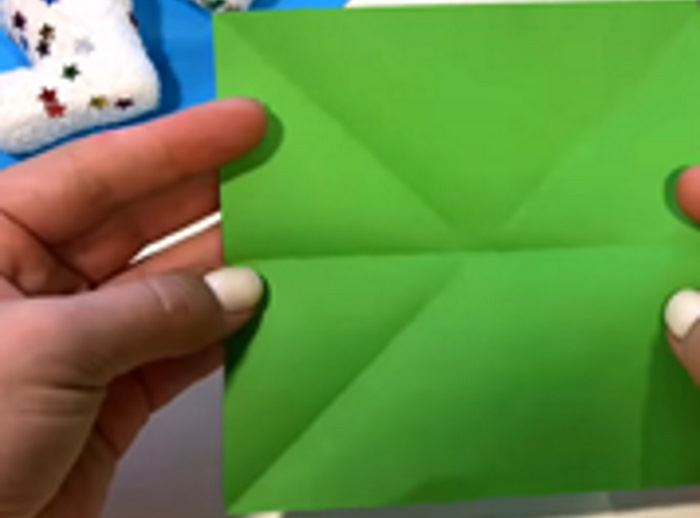
- Fold it again to form another crease.
- They are unfolding.
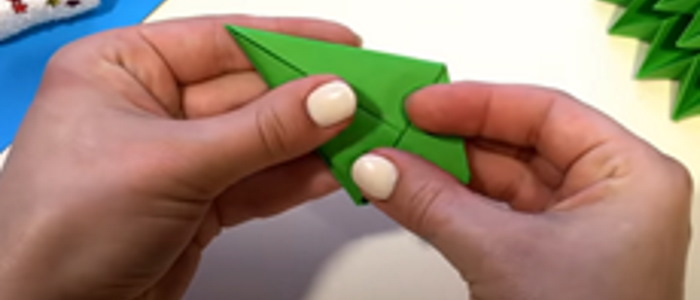
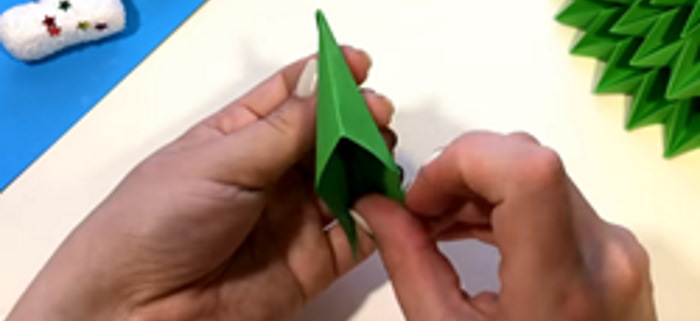
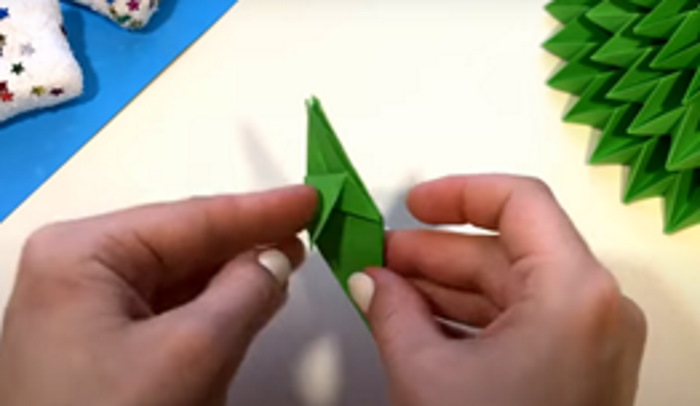
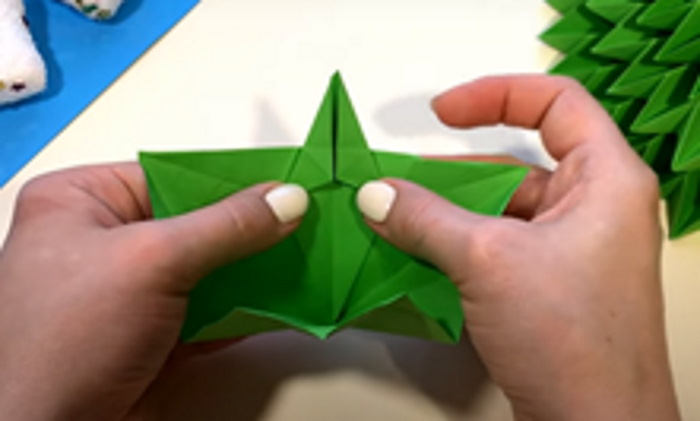
- Fold the rhombus along the crease lines. A crease line should run through its middle from top to bottom.
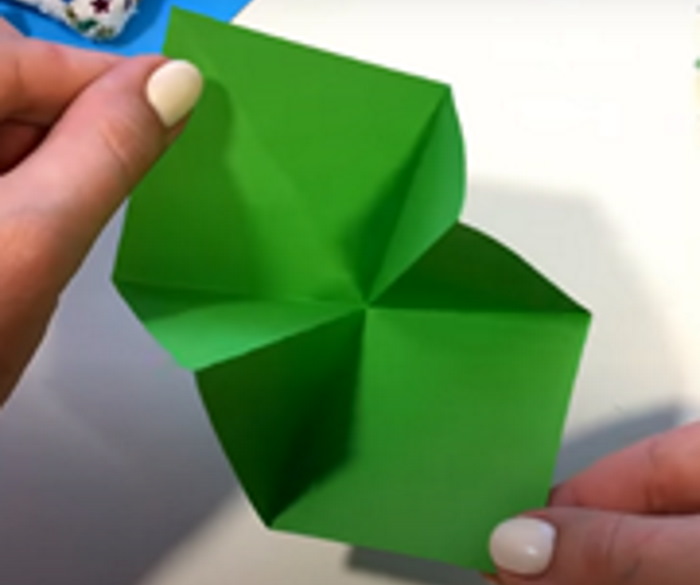
- Fold the 2 corners of the diamond to the middle of the form. You should get a triangle inside.
- Turn the workpiece over and fold the corners on the other side. You should get an elongated rhombus.
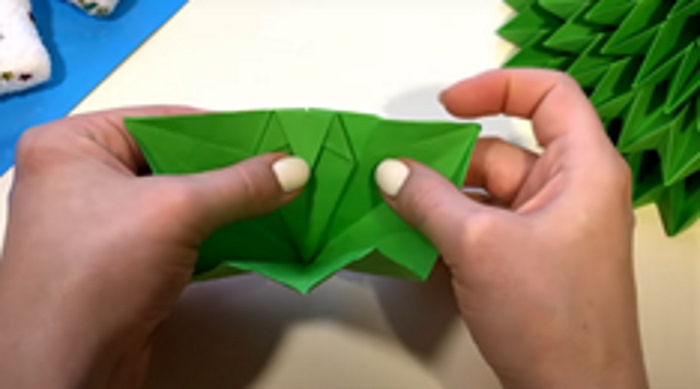
- Unfold one corner.
- Along the bend line, press the corner into the rhombus.
- Repeat the same steps with the second corner.
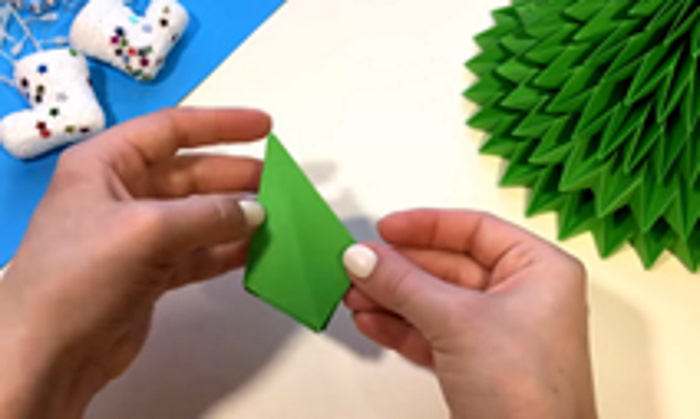
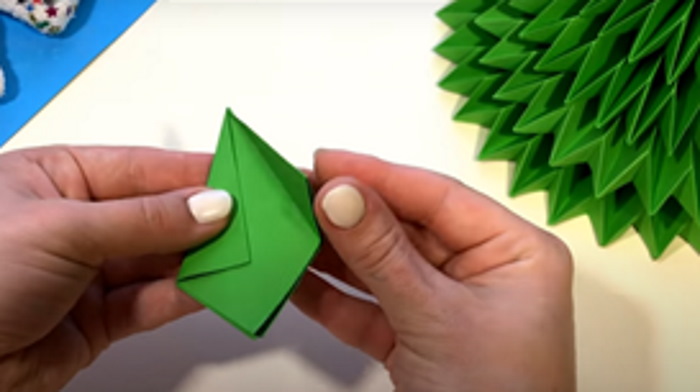
- Turn the mold over with the long end down and the wide end up.
- Bend the corners of the wide base of the rhombus to the middle of the shape. Do the same on the other side of the figure. After that, unfold the sides of the rhombus, finding flat areas. On them, fold the corners to the middle as well.
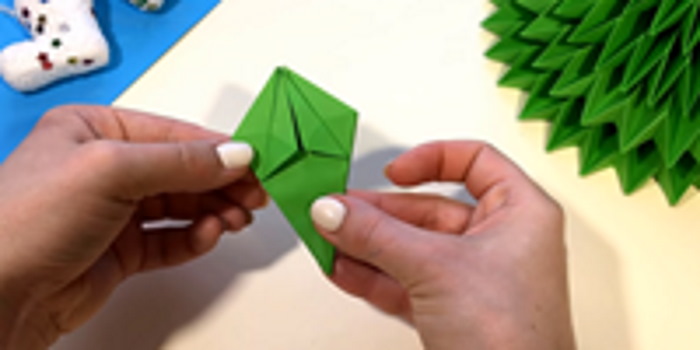
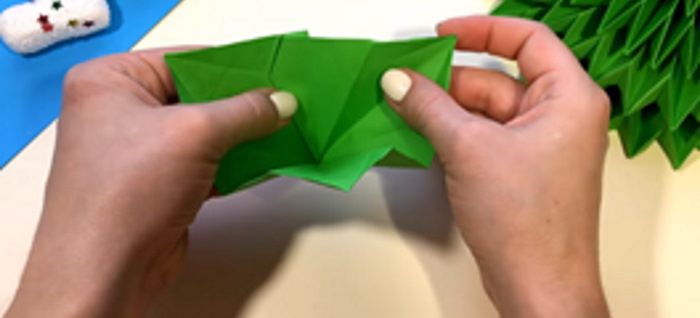
- Thanks to these actions, you will get a narrow rhombus.
- The tops of the rhombus are bent.
- After folding the vertices of the rhombus, the shape of a polygon is obtained.
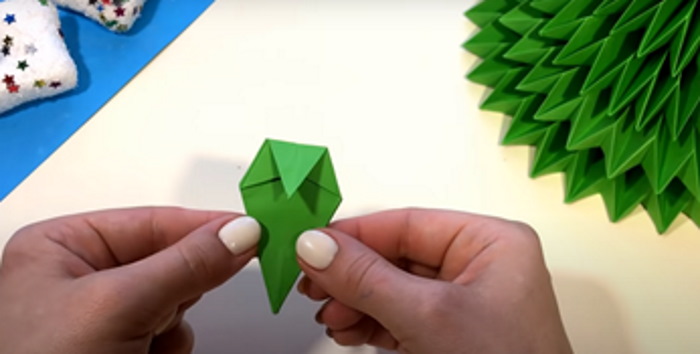
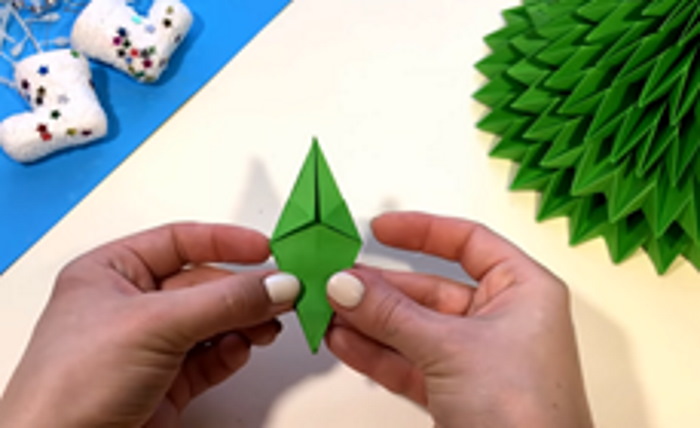
- Carefully unbend the form.
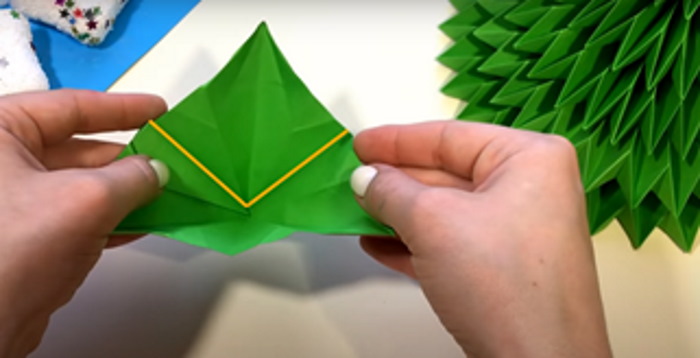
- Take the blank in your hands so that it takes the shape of a rhombus. It is necessary to fold it. The fold points are indicated by an orange line.
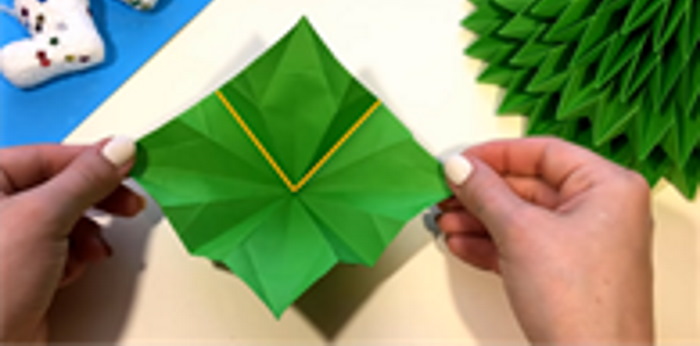
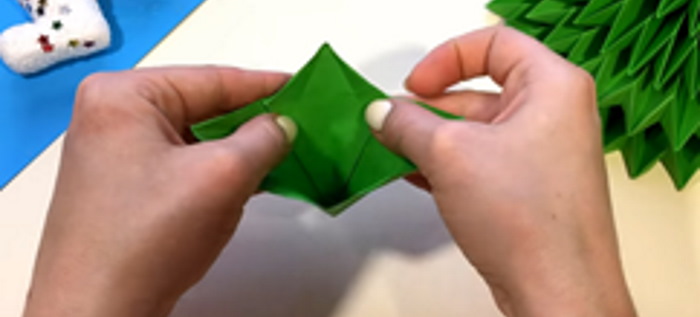
- The adjacent sides are placed under the protruding area.
- The corners on the protruding top are folded towards the middle.
- The top is bent downwards.
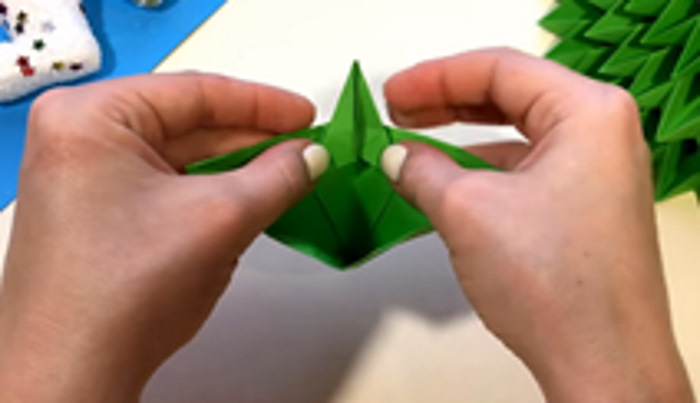
- The right part (away from you) is folded to the left.
- Fold the paper along the line shown in the picture. An internal diamond should form.
- Fold the corners together again.
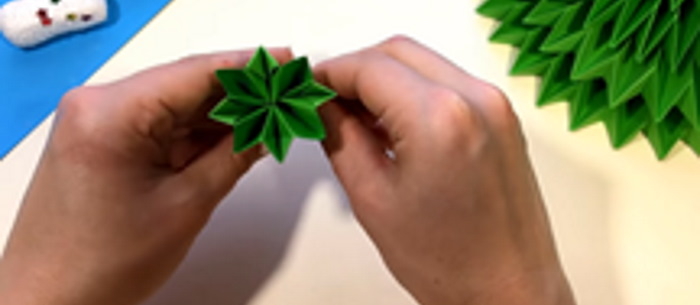
- Repeat folding in a similar manner, moving in a circle. The result should be the top of the Christmas tree.
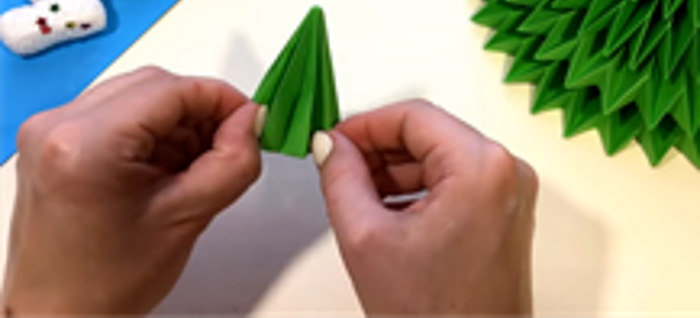
- Take a sheet of green A4 paper.
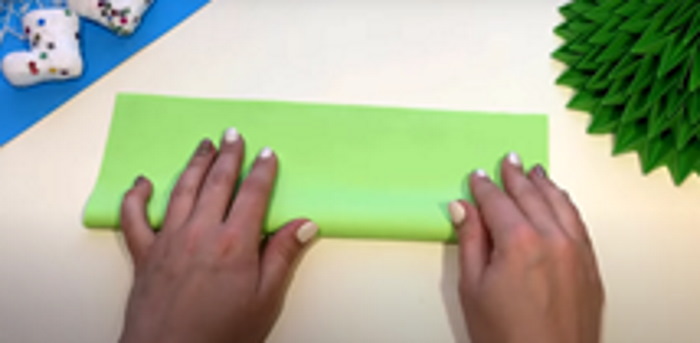
- They fold it.
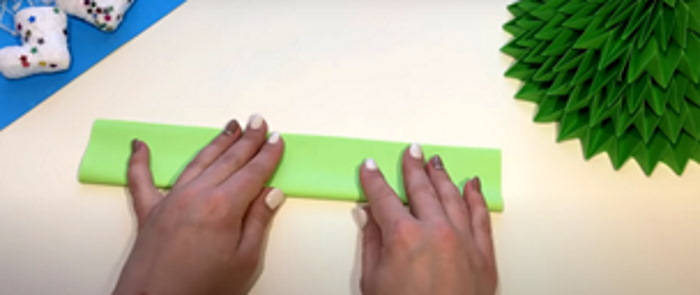
- The resulting strip is folded again.
- Repeat the folding process until you have a narrow strip of paper.

- Twist the strip from the edge.
- At the end, the strip is coated with glue and the paper is twisted, giving it the shape of a spiral.
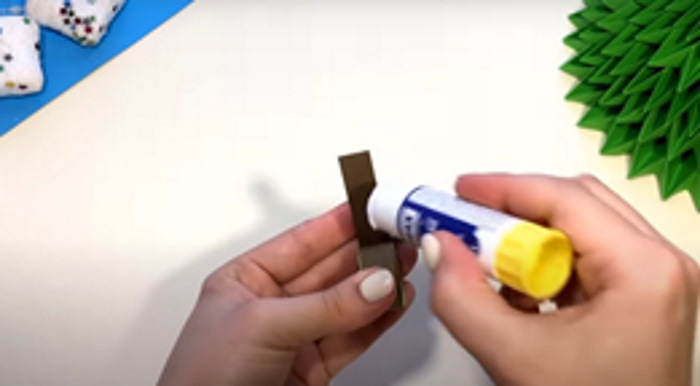
- From brown paper, cut out a strip equal to the thickness of the side of the green spiral.
- They coat the spiral with glue and stick a strip of brown paper onto it.
- According to this principle, 5 more blanks are made:
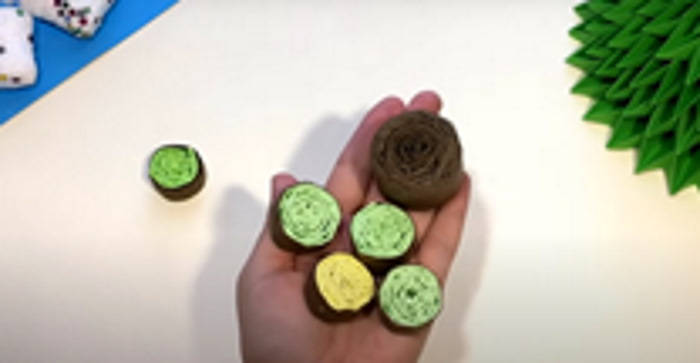
Their description:
| Form | Parameter |
| Yellow and green paper | You need to make a strip 1.5 cm wide out of it. |
| Brown paper | A 3 cm wide section is made from it. The brown spiral will be the largest. |
The DIY Christmas tree, when assembled according to this master class, is similar to the origami technique. This is a complex art, so the craft may not turn out right the first time. The most difficult stage is to fold the shapes.
Let's move on to assembling the Christmas tree:
- Take the widest circle and glue a brown spiral into its middle.
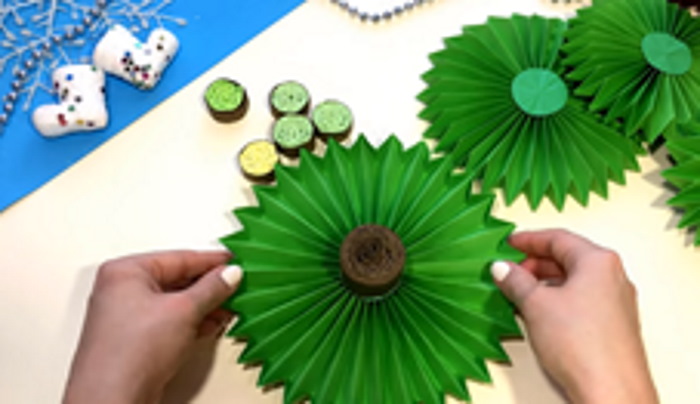
- Turn the circle over. Glue a yellow spiral onto its untouched center.
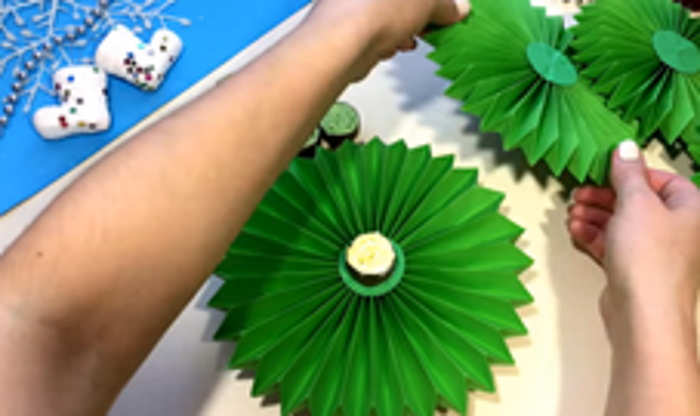
- The top of the yellow spiral is generously coated with glue and the middle of a circle, smaller than the base of the tree, is glued onto it.
- A green spiral is glued to the middle of the circle.
Assemble the tree completely: alternate circles with spirals. Glue the top at the end. Decorate the tree with beads if desired.
From paper and beads
Materials:
- Ruler.
- Scissors.
- PVA glue.
- Pencil.
- Compass.
- The paper is green and white.
- Beads.
- Hot glue.
Sequence of actions:
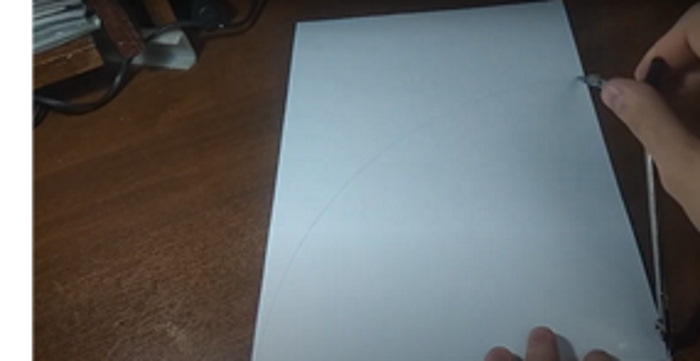
- Take a white sheet of A4 paper.
- Place it horizontally in front of you.
- A compass is placed in the lower part of the sheet, in its middle.
- They draw a semicircle.
- Cut a circle out of paper.
- Roll into a cone.

- They glue the cone.
- Take a green leaf.
- Cut into strips 4 cm wide.
- The strips are cut along their entire length.
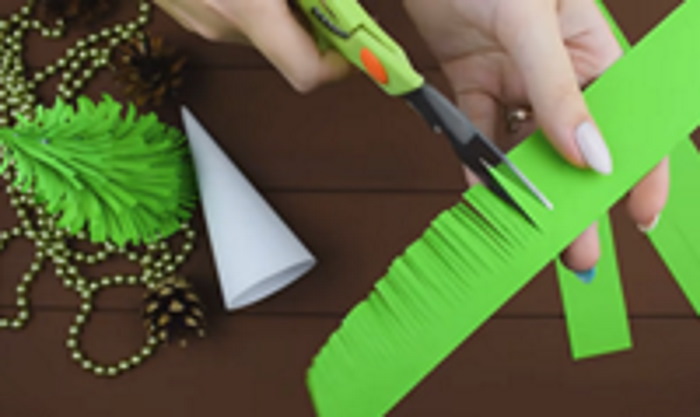
- Using the blunt edge of the scissors, bend the cut fibers onto the strips.
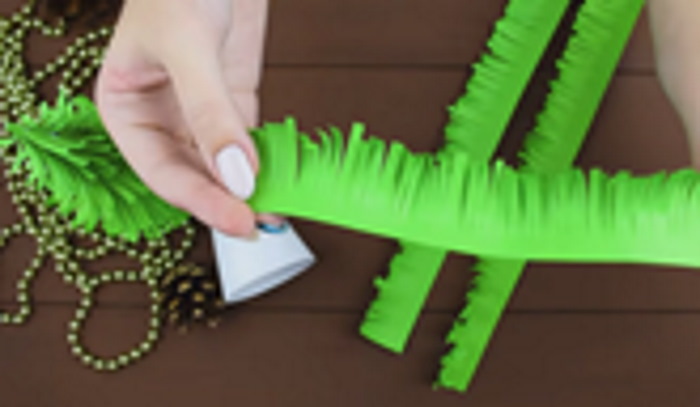
- The bottom of the cone is coated with glue.
- Glue a strip onto the cone. Cut off the excess if necessary. Decorate the entire tree using a similar method.
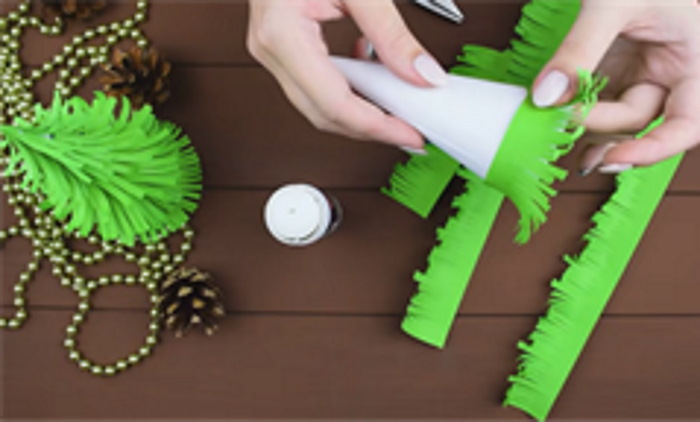
At the very end, warm up the hot glue. Glue beads onto the protruding paper needles.
Made of paper and tinsel
New Year tree with your own hands made of tinsel and paper looks elegant. This craft is associated with the main winter holiday. The advantage of the product is its simplicity. To create it, you will need ordinary materials.
Details:
- Fluffy tinsel.
- Cardboard for the base of the craft.
- Colored green paper.
- PVA glue or hot glue.
- Scissors.
Sequence of actions:
- Draw the outline of a Christmas tree on green paper.
- Cut out the shape from paper.
- The Christmas tree is glued onto the cardboard base of the craft.
- The Christmas tree is covered with tinsel along its outline.
- Decorate the interior of the tree with beads or thin tinsel.
To make the tree look more realistic, draw green needles on the paper tree using a dark felt-tip pen.
You can make a convex tree. To do this, place the paper blank on the foam rubber and trace its contour. Cut out the shape from it. Glue the foam rubber blank onto the cardboard, and then glue the paper figure of the Christmas tree onto it.
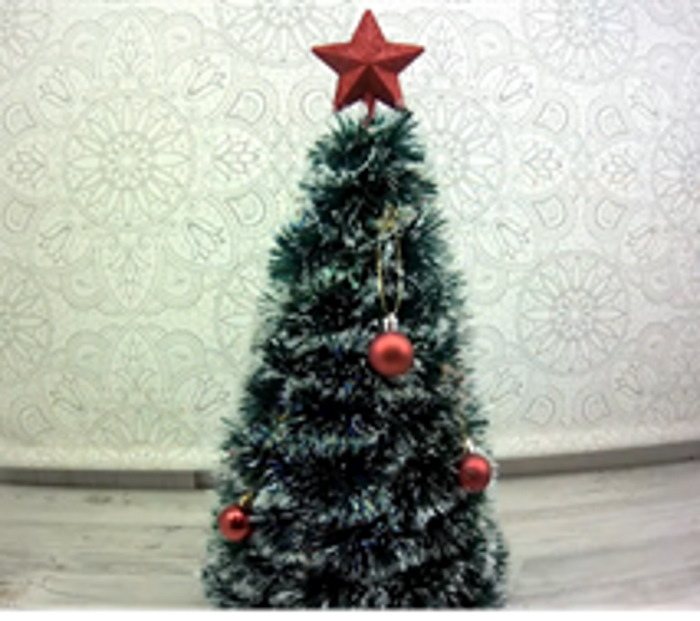
From cardboard, tinsel and garlands
Materials:
- Cardboard.
- The paper is green.
- Wooden sticks 40 cm long.
- Ruler.
- Pencil.
- Scissors.
- Garlands.
- Foamiran green color.
- Small balls for decoration + a star for the top of the tree.
- Glue.
- Tinsel.
Sequence of actions:
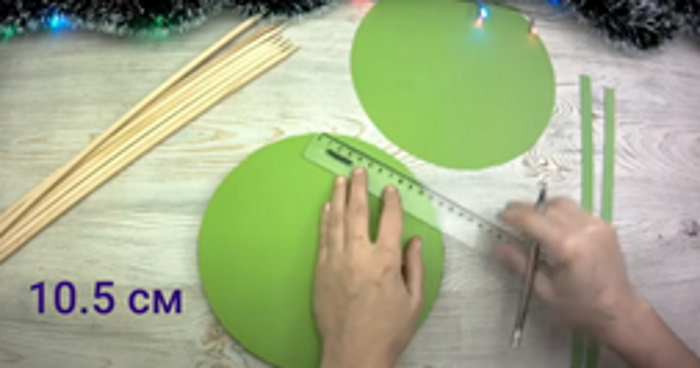
- Cut 3 circles out of cardboard, each with a diameter of 21 cm.
- Cut out 2 circles from green paper, 21 cm in diameter.
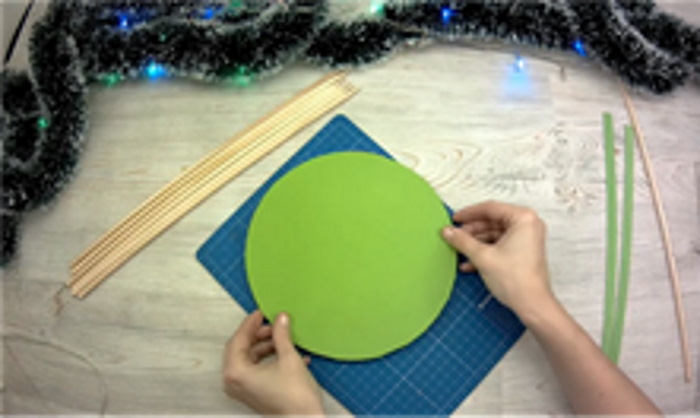
- Glue cardboard circles together.
- The green circle is glued onto the cardboard.
- A dot is placed in the middle of a green circle glued to the cardboard.
- They make markings on the circle. They put dots along its edge. The interval between them is 10.5 cm.
- Take a wooden stick. Place the blunt end on the point and circle it. Cut holes for the sticks around the entire circle, not forgetting the middle.
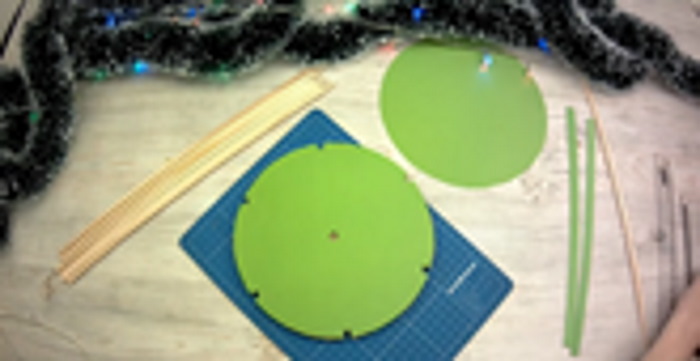
- Turn the circle over and glue the remaining green shape onto the cardboard.
- Heat up the hot glue.
- Coat the sides of the circle with hot glue.
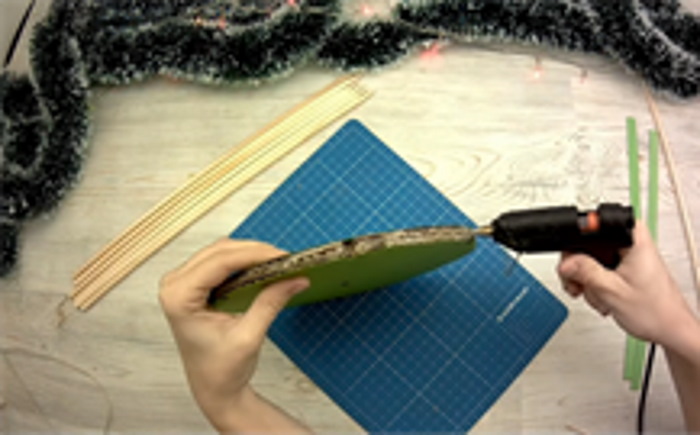
- Cut a thin strip out of foamiran and glue it onto the cardboard.
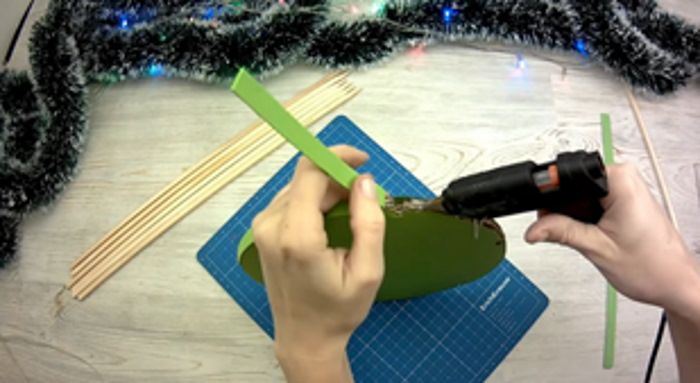
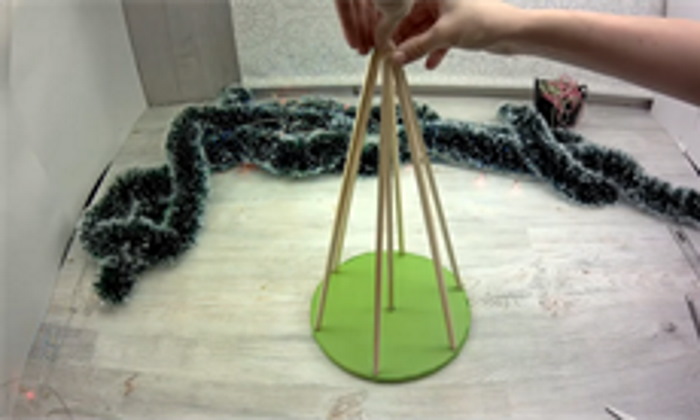
- Fill the slots for the sticks with hot glue and insert them into them. The rods are connected at the top so that the workpiece takes the shape of a cone. To do this, their ends are connected at the top and fixed with glue.
- The garland is wrapped around the tinsel.
- Starting from the base of the cone, wrap the tree with tinsel. To make it hold tightly, you can glue it.
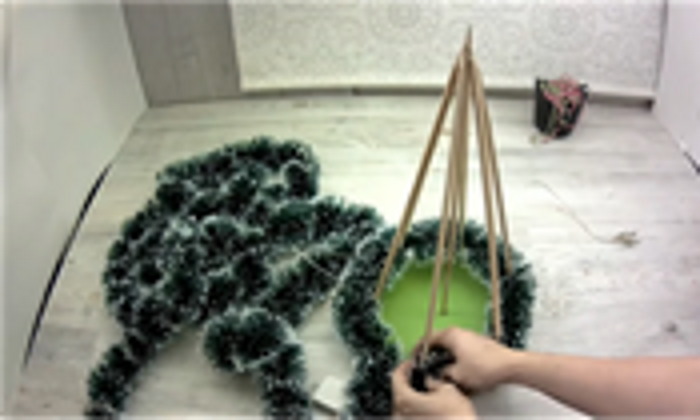
- They decorate the tree with balls. They hang a star on its top.
Christmas tree (fir tree) New Year's craft with your own hands
You can choose any decorations.
Christmas tree made from scrap materials
For Christmas trees made from scrap materials, you will need to make universal decorations.
To create them you will need:
- Hardening modeling paste of different colors.
- Glitter of different colors.
- Toothpick or needle.
They make jewelry:
- Open all the jars of glitter.
- The paste is rolled into a ball.
- They string the ball onto a needle.
- Dip the ball into the glitter so that it tightly covers its surface.
- Carefully remove the ball from the needle or toothpick onto a flat surface.
Leave the balls. They should harden. Later, they decorate the Christmas trees, fixing them to the product with hot glue. If desired, you can make different toys from the modeling paste.
From sponges
You can make a New Year tree with your own hands from the simplest material - sponges. You will need ordinary foam rubber products, sold in any hardware department of the store.
Materials:
- 2 sponges for washing dishes.
- Scissors.
- Skewer.
- The paint is green.
- The glue is hot.
- A glass of water.
- Brush.
- Tape brown.
- A cork from a plastic bottle.
- Pebbles for filling the cork.
- Artificial snow.
- Beads.
Sequence of actions:
- The hard thin layer is carefully removed from the sponges.
- Cut each sponge into 2 halves. Make one part slightly smaller.
- The resulting shapes are rounded off by cutting off sharp corners with scissors.
- Place the resulting shapes on a skewer.
- The top of the tree is cut out from the scraps and placed on the tip of a skewer.
- The brush is dipped into paint and the workpiece is covered with a green layer.
- Tape is wrapped around a skewer under the tree. This will be the trunk.
- Place the skewer-stem into the cork and secure it with glue.
- They cover the pebbles in the cork with artificial snow.
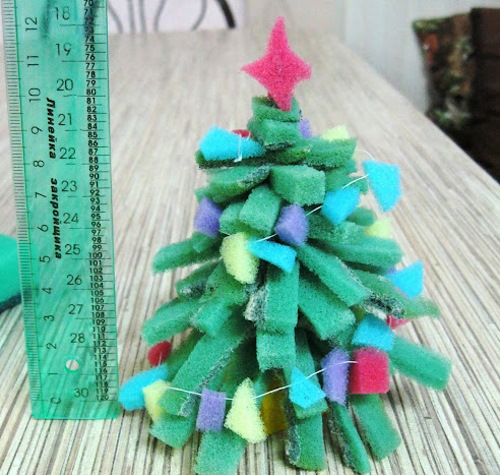
Beads are glued to the tree in random order. They imitate New Year's decorations. To make the tree easier to create, it is worth using green sponges. Then you won't have to paint them.
From a toilet brush
Materials:
- An elongated toilet brush.
- Scissors.
- Moss, artificial or natural.
- Green paint (you can use gouache).
- PVA glue and hot glue.
- Hairspray.
- Glitter.
- Artificial snow.
- Brush.
- A glass.
- Ribbon for decoration.
- Clay or pebbles.
- Alder cones.
Sequence of actions:
- The length of the brush is removed, leaving only the pile and 2-3 cm of the stick.
- The bristles are cut off with scissors, giving the brush a cone shape.
- Mix paint with PVA glue 1 to 1.
- They cut moss.
- Using a brush, paint the brush with paint mixed with PVA glue.
- Sprinkle the brush with chopped moss.
- They leave the tree to dry.
- They take a glass.
- Wrap it with tape, securing it with hot glue.
- Pebbles are poured into the glass or it is filled with clay.
- They insert the brush into the glass.
- Stones or clay are sprinkled with artificial snow.
- They take alder cones and, using a brush coated with white paint, cover them with snow.
- Let it dry.
- Alder cones are inserted into the bristles of the brush. If necessary, they are fixed with glue.
- Spray the tree generously with hairspray.
- They sprinkle glitter on the tree. They decorate it.

From cardboard and threads
Materials:
- Cling film.
- A sheet of cardboard.
- White cotton threads.
- Pink glitter.
- PVA glue.
- Scissors.
Sequence of actions:
- A shape is cut out of cardboard to create a cone.
- Fix the edges of the cone so that it does not spread out to the sides.
- The threads are soaked in PVA glue.
- Wrap the cone in several layers of cling film.
- The cone is tightly wrapped with thread.
- Sprinkle the cone with pink glitter.
- Leave to dry.
- When the threads are dry, carefully remove the cone.
- They are decorating the Christmas tree.

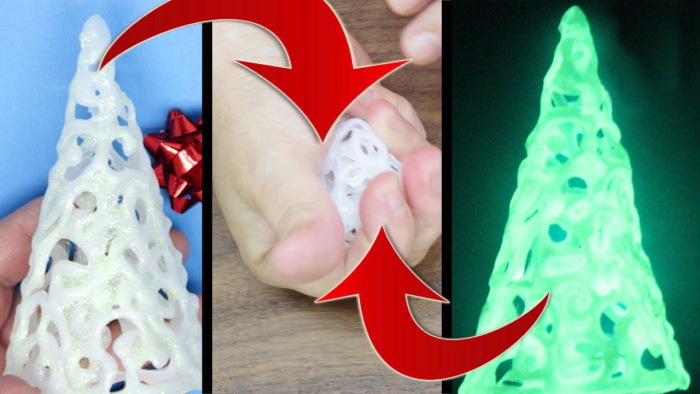
Hot Glue Christmas Tree
A DIY Christmas tree made from hot glue is easiest to make from hot glue. At the same time, the craft will become a decoration for a festive interior.
To make it you will need the simplest parts:
- Fat cream or petroleum jelly.
- Plastic cone (you can take it from the children's toy "Pyramid").
- Green glitter.
- A glass. It is selected to match the size of the cone so that its lower part covers the container. The glass will become the future stand for the tree.
- Ribbon for decoration.
Sequence of actions:
- Apply cream or Vaseline to the cone.
- Heat up the glue.
- Using glue, draw different patterns all over the cone.
- While the glue is still wet, sprinkle it with green glitter.
- Leave the craft to dry.
- The glass is decorated with a ribbon.
- Carefully remove the cooled glue from the cone. You should get a Christmas tree shape.
- They are decorating the Christmas tree.
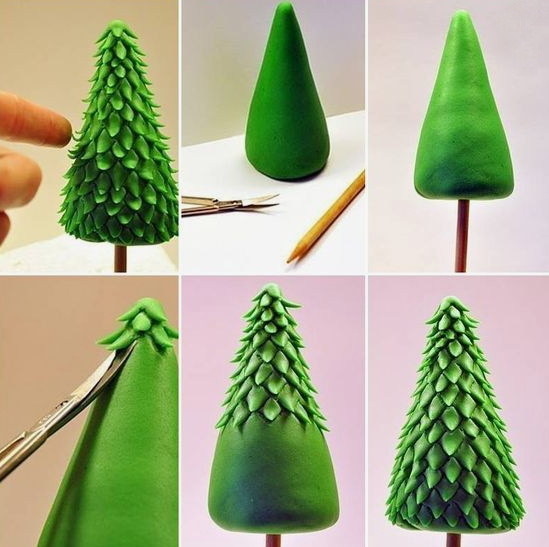
Christmas tree made from modeling paste
The main material is modeling paste. You can buy it at a children's craft store. Choose a product with hardening properties.
Other components for the craft:
- Skewer.
- 2 packets of green paste.
- Manicure scissors.
Sequence of actions:
- A piece of paste is wound around the tip of a skewer – this will be the lower part of the trunk of the future Christmas tree.
- Form a cone from the remaining paste.
- Cuts are made on the cone from the bottom up, lifting the corners - these will be the needles.
- The skewer is inserted into the middle of the cone, from its wide part. The green tip should become the base of the tree.
- They are decorating the Christmas tree.
Mixed Materials Christmas Tree
Materials:
- Thick cardboard.
- Scissors.
- Hot glue.
- Cones.
- Newspaper.
- Volumetric cotton flowers.
- Burlap. Can be replaced with any other fabric.
- White paint.
- Beads.
- Brush.
- Artificial rowan berries.
- Christmas tree balls.
Sequence of actions:
- A cone is made from cardboard. Height – 29 cm, diameter of the bottom – 10 cm.
- The inside of the cone is filled with newspapers to make the product dense.
- The cone is covered with burlap. The excess material at the bottom is not cut off, but folded inward.
- Cotton flowers are glued randomly along the bottom of the cone.
- Red balls are glued between the cotton flowers.
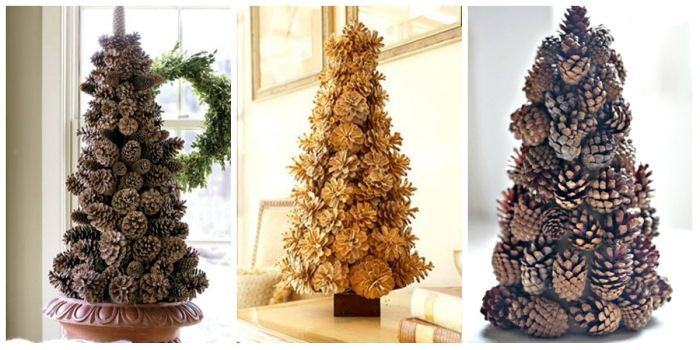
- Snow is applied to the cones using white paint. They are given time to dry.
- They glue the pine cones onto the cone.
- Fill the empty spaces on the cone with balls and beads. At the end, glue 1-2 rowan branches.
Tips and tricks
Useful information:
- Cutting with a stationery knife is easy if you use a metal ruler. Apply it to the line drawn on the cardboard and move the knife along it. You get an even cut.
- The cones should be prepared in advance. If they are collected raw, they need time to open.
- A Christmas tree for a gift can be made from candies. To do this, the cone is covered with confectionery without removing the wrapper.
The New Year tree is one of the main attributes of the winter holiday. A tree made with your own hands will become a decoration of the house. The advantage of the craft is the ability to adjust its size, color and even shape. Therefore, the tree can be created for a specific interior.
Video on how to make a Christmas tree with your own hands
The video shows how to make a fluffy paper Christmas tree.