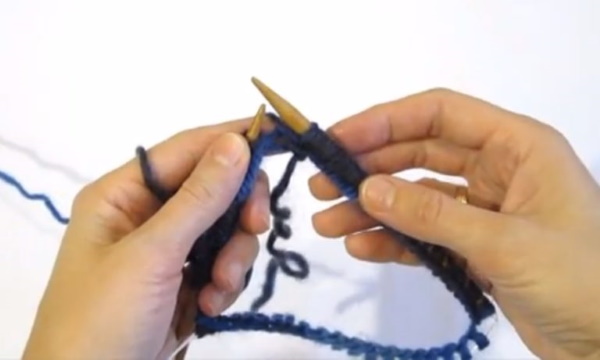
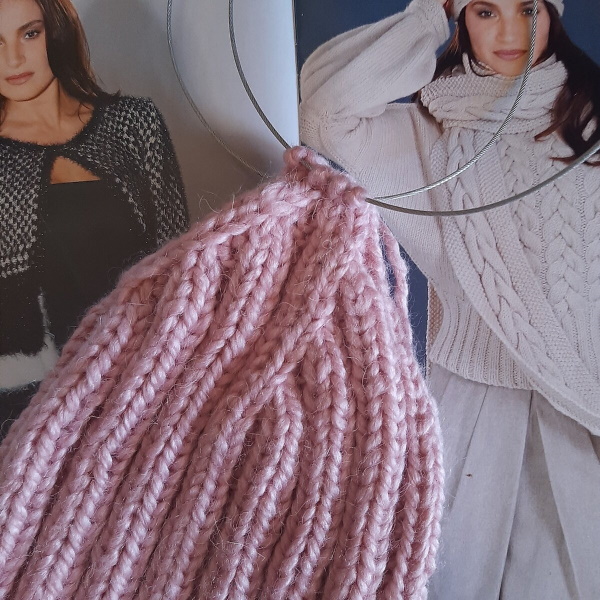
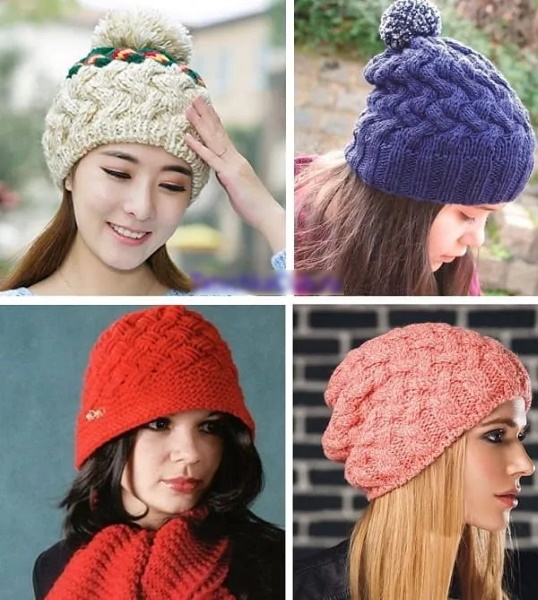
The technique for making the Acorn hat is no different from knitting a classic headdress with knitting needles. The only peculiarity is the method of decreasing loops, which allows you to form a pointed crown. To knit this model for women, it is enough to be able to knit the main loops (front (LP) and back (IP)). Experienced knitters can make a product with a complex pattern.
How to choose knitting needles and yarn?
The Acorn hat for women can be knitted from any threads, depending on the preferences of the needlewoman. Before you start knitting, you need to select yarn and knitting needles. The choice of threads depends on the season for which the model will be made. Wool, angora or mohair are ideal for winter, since products made from them are especially warm. Cotton, acrylic or silk are suitable for the off-season.
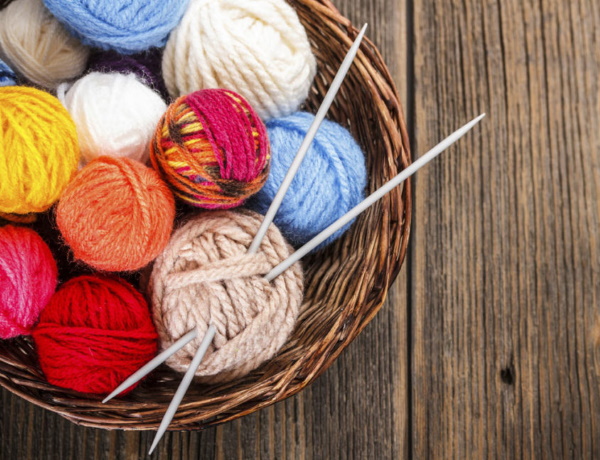
When choosing knitting needles for knitting a hat for women, you need to focus on the thickness of the thread. The tool should be one size larger, for example, for 1 mm yarn, knitting needles No. 2 will do.
Classic Acorn Hat Knitted for Women
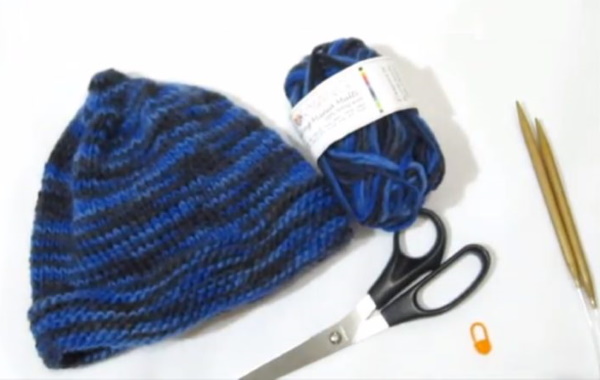
The simplest model is the classic one. It can be knitted from any medium-thick yarn. Ideally, use wool or semi-woolen threads. The master class is designed for a head circumference of 56 cm.
For this option you will need:
- wool yarn - 50 g - 55 m;
- scissors;
- markers;
- circular knitting needles No. 7.
Step by step production:
- Cast on 72 sts, join in a circle (mark the beginning of the work with a marker).
- Row 2. Knit all loops ip. The following rows alternate LP and ip.
- Row 3: Knit all sts, inserting the knitting needle under the thread located at the back of the work.
- Row 4. Perform a single crochet, inserting the needle under the thread on the front side of the work. Knit to a height of 5 cm, alternating rows.
- The main fabric of the product is made with the front surface. To do this, first knit 21 knit stitches, inserting the needle under the thread on the front side of the work. Make a decrease, remove 2 loops on the left knitting needle, turn them over and throw them back, knit knit stitches, inserting the needle under the thread located at the back of the work. Repeat the decrease. Continue knitting knit stitches, picking up the thread from behind. Again, make 2 decreases in the same way. Continue knitting until the end of the row.
- Complete subsequent rows without decreasing. Knit another 10 cm. The height of the product from the cast-on row should be 15 cm.
- In the next row, make 2 decreases by knitting 25 stitches as front loops, inserting the needle into the yarn on the front side of the work. Make a decrease, knit the next 2 stitches as front loops, inserting the needle under the yarn on the front side of the work to create a rightward tilt. Knit 25 more knit stitches, make a decrease by knitting 2 stitches together as front loops, inserting the needle under the yarn on the front side of the work to create a rightward tilt. Knit to the end of the row.
- Start forming the crown. Divide all the loops on the knitting needles into 6 (you get 11 loops). Make a decrease in every 10-11 loop. First knit 9 LP, and knit the next 2 together LP, inserting the knitting needle under the thread on the front side of the work to get a tilt to the right. Knit in this way until the end of the row.
- Decrease the following rows by 6 loops and knit 1 less loop in each one until the decreases are made.
- In the 2nd row of the crown, knit 8 knit stitches, inserting the needle under the thread on the front side of the work, knit the next 2 together knit stitches, inserting the needle under the thread on the front side of the work to create a tilt to the right, and so on until the end of the row.
- In the 3rd row of the crown, knit 7 knit stitches, make a decrease.
- Continue knitting with a decrease in the 6th loop until there are 12 loops left on the needles.
- Finish by working 3 rows of stockinette stitch without decreasing. Cut the yarn to a length of at least 15 cm, use a needle to move the loops onto it, tighten and bring the yarn to the wrong side.
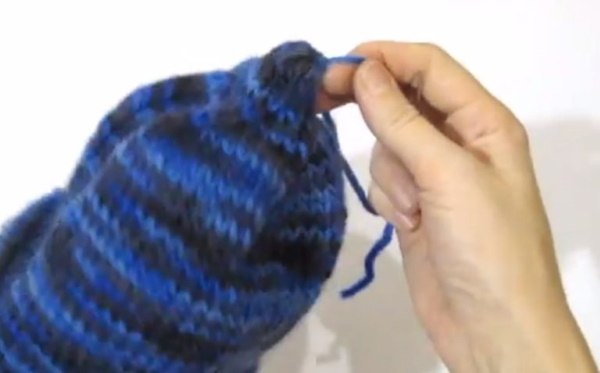
- Hide the ends of the threads.
Acorn hat with knitting needles for women - step-by-step knitting instructions. - The hat is ready.
Made from thick yarn
The Acorn hat knitted for women, made of thick yarn, is suitable for wearing in the cold season. It is quite easy to knit such a product if you master the basic techniques. This master class is designed to make a model for a head circumference of 54-56 cm.
The following tools and materials will be required:
- wool yarn, 34 m per 100 g;
- knitting needles No. 11.
Step by step instructions:
- Cast on 28 stitches. Knit 1 row with knit stitches. Remove 1 stitch, knit, inserting the knitting needle under the thread from the front side of the work, continue until the end of the row. Remove the last stitch, passing the thread around it.
- Knit 2 row LP. Knit the last loop in this row.
- Row 3. Knit 25 stitches with the front surface. Mark the 26th stitch with a marker and draw the thread around it. Turn over, leaving 2 stitches on the needle, remove the 26th stitch without knitting, continue with the front surface pattern.
- Row 5. Remove the loop, knit 23 loops with the stockinette stitch pattern, wrap the thread around 24 loops, turn (5 sts remain unknitted, remove 1 st to the opposite needle, resulting in 6 sts).
- Row 6. Knit with stockinette stitch pattern.
- Row 7. Remove 1 st, knit the next 21 sts, wrap the 22 sts with yarn, turn over and start knitting Row 8. Leave 8 sts unknitted.
- Perform increases in the 9th and subsequent rows. To do this, remove 1 loop, knit 23 knit stitches, wrap the 24th loop again with yarn. Turn the 10th row over, remove the loop, continue knitting.
- Row 11. Knit 25 stitches in stockinette stitch, draw the 26th stitch with yarn, turn it over and remove it, knit row 12.
- Row 13. Knit 27 stitches in stockinette stitch, wrap the last one with a thread, turn it over and, having removed it, complete the last 14th row with 1 wedge.

- Similarly, make 3 more wedges. Connect the edges with a knitted seam. The headdress is complete.
Made from thick yarn with a turn-up
This model is suitable for winter, the lapel will protect the ears even from the most severe frost. At the same time, even a novice needlewoman can knit it.
To make this model you will need:
- yarn 80-100 m per 100g;
- markers;
- scissors;
- knitting needles 4.5 - 6 mm (the knitting density depends on the thickness).
Step by step production:
- Cast on 64 sts and join them into a ring.
- Knit the lapel in a circle with a 2 x 2 elastic band, the lapel is approximately 7 cm high.
- When the lapel reaches the required height, knit 1 row of sts.
- Continue working with a 2 x 2 rib pattern, but this time knit over 2 ip - knit stitches, and over 2 kp - purl stitches.
- Continue knitting in a circle until the hat reaches a height of 27 cm.

- Divide the work into 4 parts. Each will have 16 loops, mark the parts with markers. The loop before and after it is the place where you need to make decreases, knit these 2 sts together, inserting the knitting needle under the thread on the front side of the work to get a tilt to the right.
- Thus, in the places marked with markers, decrease 2 loops. Continue knitting until there are 8 sts left on the needles. Cut the thread, tighten the crown. The hat is ready.
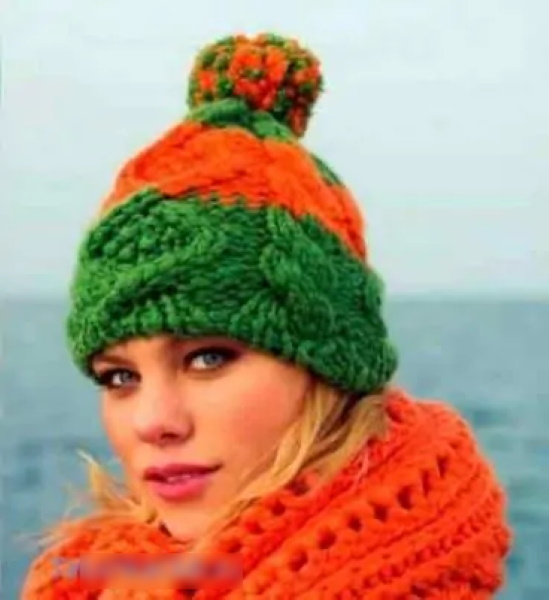
From bright threads
The Acorn hat knitted for women from multi-colored yarn will look stylish, regardless of age. If desired, you can choose the shades as desired. This description is designed for a headdress of head size 52-56 cm.
Materials required:
- Softy yarn, 98% wool, 2% polyamide, 53m in 50g, green shade - 100g;
- orange threads - 50 g;
- thick needle with a blunt end;
- double pointed needles #8 and #10
Step-by-step master class:
- Cast on 44 stitches with green thread on #8 knitting needles, close the knitting and continue knitting with a 2x2 elastic band to a height of 2 cm.
- Place the stitches on #10 knitting needles and knit 1 row knitwise, adding 16 stitches in the following order: alternately 10 times after each 2nd and 3rd st, then after each 3rd st make increases 6 times. As a result, there should be 60 sts on the knitting needles.
- Knit 13 rows in stockinette stitch.
- Change the thread to orange. Knit another 13 rows and continue with green thread.
- Continue decreasing to shape the crown:
- 1st row: decrease evenly until 48 sts remain on the needles;
- Rows 2-4: knit without decreasing;
- Row 5: decrease to leave 36 sts;
- Rows 6-7: knit without decreasing;
- Row 8: decrease evenly to leave 18 sts;
- Row 9: knit all stitches.
- Place the remaining loops on the thread using a needle, pull it tight and secure.
With a turn-up pattern of braids on two knitting needles
The Acorn knitted hat for women with a turn-up is a great option for a cold winter. This model is quite complex, so you need to have certain skills to make it. The description is designed for a product of size 54-56.
For knitting you will need the following materials:
- wool yarn 210 m per 50 g – 3 skeins;
- 40 cm long knitting needles, No. 2.5 and 3;
- large pins;
- centimeter;
- thick, blunt-ended needle;
- markers.
Braid pattern
On 6 sts with a left tilt:
- Leave the first 2 sts in front of the work, remove them with a pin, remove the next 2 sts with a pin and leave them behind the work. Knit the next 2 sts.
- Knit ip 2 loops from the pin, located behind the work.
- Knit LP 2 loops from the pin left before work.
For 6 loops with a right tilt:
- Slip the first 2 stitches onto a pin and leave behind the work, slip the next 2 stitches onto a pin and leave in front of the work. Knit the next 2 stitches.
- Knit ip 2 loops from the pin behind the work.
- Knit 2 sts from pin before work.
Step by step production:
- Cast on 133 sts using 2.5 mm needles. Knit 35 rows with 2/2 rib pattern.
- Form a fold for a good bend of the lapel. For this purpose, it is necessary to knit 1 row in reverse: lp - purl, and ip - front.
- Knit 16 more rows with a rib pattern. Remove the loops onto knitting needles No. 3 and add another 19 loops for the main pattern. Make increases as follows: knit 7 sts of rib pattern, increase, next 7 sts of rib pattern, increase – and so on until the end of the row, 19 times. There should be 152 sts on the knitting needles in total.
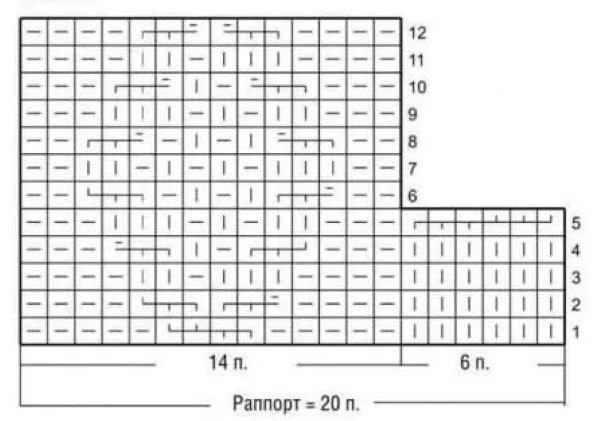
- Go to the main pattern. Form 2 braids on the purl surface background. To do this, divide 152 sts into 8 rapports of 13 loops each. For the purl surface pattern, 48 loops remain. They must be distributed as follows: 6 purl + rapport. Do this 8 times. Knit as follows: *6 ip, (6 lp, 1 ip, 6 lp)* – complete 8 rapports.
- Knit the next row: *6 knit stitches, (6 ip, 1 knit stitch, 6 ip)* – complete 8 rapports.
- Continue: *6 ip, (knit a braid of 6 sts with a tilt to the right, 1 ip, a braid of 6 sts with a tilt to the left)* – repeat 8 rapports.
- Start forming the crown. To do this, divide the total number of loops by 6.
- Make a decrease in every 10-11 loop. Knit 9 sts according to the pattern, and knit the next 2 loops together knitwise, inserting the needle under the thread on the front side of the work to create a tilt to the right. Do this until the end of the row.
- Decrease the following rows by 6 sts, knitting until the decreases in each row are 1 st less.
- In the 2nd row of the crown, knit 8 sts, inserting the needle under the thread on the front side, knit the next 2 sts together sts, inserting the needle under the thread on the front side to create a tilt to the right, and so on until the end of the row.
- In the 3rd row, knit 7 sts, decrease. Continue like this until the end of the row.
- Continue decreasing by 6 sts until 12 sts remain on needles.
- Finish by knitting 3 rows in stockinette stitch, without decreasing. Cut the thread, use a needle to pull it through the remaining stitches and tighten. Bring the thread to the wrong side.
Braided pattern
The Acorn hat with knitting needles for women with a braided pattern is knitted single or double. There can be an elastic band at the bottom, or the edges can be made twisted. This master class involves knitting a double hat for a cold winter. The model turns out very warm and beautiful.
The following materials and tools are required:
- thick yarn 100 g in 100 m - 200 g;
- circular knitting needles No. 5;
- additional spoke;
- thick needle with a blunt end;
- centimeter.
Step by step production:
- Cast on 96 sts and knit 8 cm in stockinette stitch pattern until folded. Knit the lining on #5 double-pointed needles and then sew it together.
- Transfer the stitches to circular knitting needles No. 5. Form a bend by knitting 1 row of ip. This will allow you to get a neat start to the hat.
- Braided pattern 4 x 4. Make increases every 3 sts. After the fold row, knit 2 rows of stockinette stitch. In 3, start making increases every 2 sts.
- When you have 144 sts on your knitting needles as a result of the increases, start knitting the braided pattern. For a 4 x 4 pattern, the number of loops should be a multiple of 8.
- Continue knitting:
- 1 row. 4 knit stitches, 4 knit stitches leave behind the work, remove to an additional knitting needle, 4 knit stitches, knit stitches from the additional knitting needle.
- 2 and all subsequent even rows knit ip.
- From the 3rd to the 5th row knit.
- Row 7. Remove 4 knit stitches onto an additional needle, leave on the front side of the work, 4 knit stitches, knit 4 knit stitches from an additional needle.
- From rows 9 to 11. Knit LP.
- Repeat rows 1–11.
- Mark the beginning of the row with a marker. This will help you avoid confusion. Continue knitting to the desired height, usually 20 cm is enough. Start decreasing 5 cm before the end.
- Start forming the crown. Divide the total number of loops into 6. In each 10-11 st. make a decrease. First knit 9 sts according to the pattern, and knit the next 2 loops together LP, inserting the knitting needle under the thread from the front side of the work to create a tilt to the right. Repeat until the end of the row.
- Decrease subsequent rows by 6 sts, knitting 1 st less in each row before decreasing.
- Knit 8 sts in the 2nd row, inserting the needle under the thread from the front side of the work, knit the next 2 sts together, inserting the needle under the thread from the front side of the work to create a tilt to the right, so on until the end of the row.
- Knit 7 sts in the 3rd row and decrease.
- Continue decreasing by 6 sts until 12 sts remain on needles.
- Finish by knitting 3 rows without decreasing. Cut the thread, leaving a length of at least 15 cm. Transfer the loops to it with a needle. Tighten the crown well and bring the thread to the wrong side.
Advice from needlewomen
Before you start knitting an acorn hat, you need to carefully think over the pattern that the model will be made with and carefully study the diagram so as not to unravel the product during the process, since in this case the quality of the yarn deteriorates significantly.
Adviсe:
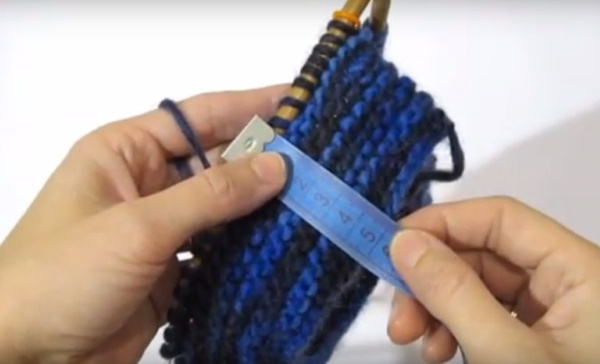
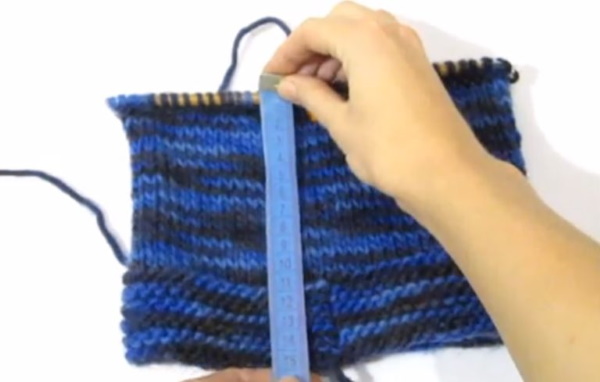
- To correctly calculate the required number of loops, you need to knit a sample and determine how many loops are in 1 cm, then multiply the resulting number by the head circumference measurement taken.
- Having finished the work, it is necessary to hide the threads, this can be done with a special thick needle with a blunt end or a hook. The ends should be removed to the wrong side.
- The finished hat must be washed according to the yarn manufacturer's recommendations and dried horizontally.
- The product can be additionally decorated with beads, a brooch, beads, or a fur pompom can be sewn on.
This model looks especially interesting when made of thick yarn. The Acorn hat is an elegant wardrobe item. The product, knitted with knitting needles from mohair, wool or angora yarn, perfectly retains heat, warming even in the most severe frosts. This model can be knitted for women of any age.
Video on how to make a hat Acorn with knitting needles for women
How to knit an Acorn hat with knitting needles: