Clay modeling is an interesting and exciting activity that can become a great hobby for both adults and children. This art is easy to learn on your own or at numerous master classes for beginners.
Natural and polymer clays for modeling
There are two main types of clay – natural and polymer. Natural clay is of natural origin. It is a mineral formed as a result of weathering of rocks.
According to composition, color and purpose, natural clay is divided into several types:
- Blue clay It is used to make small sculptures, dishes, and folk toys. When fired, the products usually acquire a dark brown color.
- Red clay used to create small sculptures.
- White clay has a light gray color. After firing, the objects acquire the color of ivory. This type is used to make dishes and clay plates.
- Clay for porcelain After firing it becomes white. Due to the high density of the material, it is not recommended for use on a potter's wheel.
- Porous clay mass In its natural form it is white or greenish-brown in colour. This type of clay is excellent for the production of ceramics.
Professional sculptors prefer to use two main types of natural clay in their work: red and white.
The advantages of natural clay include low cost, safety, hypoallergenicity, and environmental friendliness.
The disadvantages include a poor color palette, difficulty in making small parts, and a denser consistency than polymer clay.
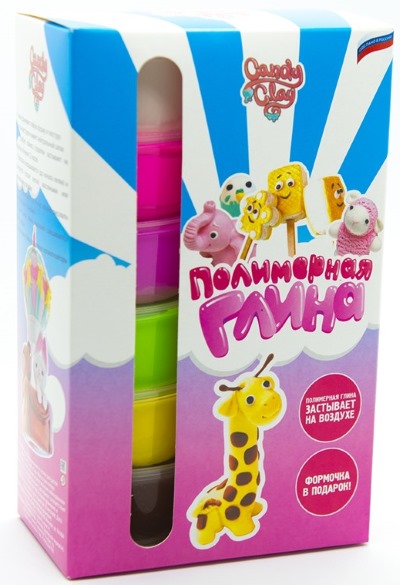
Polymer clay is divided into 2 main groups: baked plastic and self-hardening clay. Baked plastic can be hard and soft.
Hard plastic is used to make small parts and jewelry. Soft plastic is used to make large items. Sculptors usually combine them when working on a project.
Self-hardening mass can be divided into 3 main types:
- Heavy plastic surgery.
- Light plastic surgery.
- Cold porcelain.
Heavy plastic can be waterproof or non-waterproof. Its plastic properties resemble natural clay. This type of polymer clay is more suitable for making small sculptures.
Lightweight plastic is well suited for ceramic floristry, making small figurines and panels. It is very elastic, soft, dries quickly, but after hardening it shrinks a lot.
Cold porcelain is flexible and can be easily rolled into thin sheets. Perfect for creating elegant jewelry, decor, flowers. Products made from this material can be damaged by moisture and direct sunlight, so it is recommended to varnish them.
Advantages of polymer clay: a variety of colors, a wide range of plastic and structural properties. Disadvantages: chemical smell of some brands of clay, high price, easily soiled colored clay.
What clays are suitable for children's creativity
Clay modeling (a master class for beginners will help you choose safe materials) is a great way to develop your child's creative abilities.
For children to learn how to model, natural clay is best suited as an inexpensive and environmentally friendly material. The most accessible option is simple white or blue clay, which you can buy at any craft store or dig up yourself. This clay is soft and flexible, which is very important for small children.
Polymer clay is well suited for teaching children aged 3 and over how to model. Manufacturers such as FIMO, Artifact produce special children's sets that are distinguished by bright colors and safe composition. It is better to buy them for training, and as the skill grows, you can choose more suitable materials in accordance with the child's ideas.
Purchased materials
Materials for modeling can be purchased in art salons, craft stores ProdaLit, Leonardo, in online stores Ozon, Art-quarter, Mir lepki and others. The choice of clay brand depends on the purposes of using the clay and the budget.
The most popular brands of self-hardening plastic:
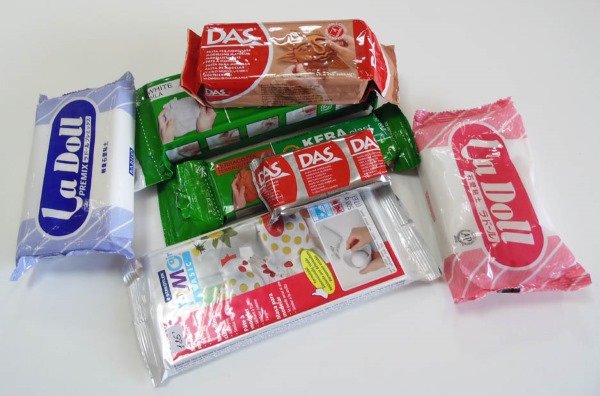
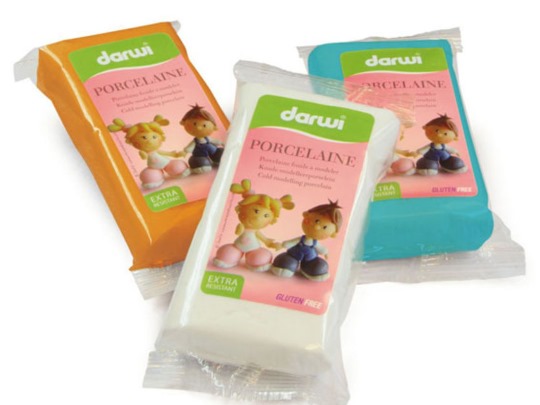
- Heavy self-hardening: FIMO Air, Keraplast, Darwi.
- Lightweight self-hardening: ClayCraft Deco, Artista soft, Hearty soft, Modern Clay.
- Cold porcelain: Modena, Modern, Bella Rosa, Daisy clay.
Brands of baked polymer plastic:
- Liquid plastic in gel form: Artifact, Translucent Liquid Sculpey, Fimo Liquid
- Hard plastic: FIMO Classic
- Soft plastic: FIMO Soft, Original Sculpey
Comparison table of different types of clay
| Name | Release form | Price per 1 kg | Color | Purpose |
| Self-hardening polymer clay | ||||
| Darwi Classic | Briquettes of 250, 500 and 1000 g | 500-600 rub. | White | Making dolls; miniatures; children's creativity. |
| FIMO Air Basic | Briquettes 500 and 1000 g | 500-700 rub. | White, flesh, terracotta | Making dolls; modeling large objects |
| Modern Clay | Briquettes of 200 and 250 g | 1400-1600 rub. | White, green | Ceramic floristry; production of small parts. |
| Baked polymer clay | ||||
| Original Sculpey | Briquettes of 454 and 794 g | 1500-1700 rub. | White, terracotta | Modeling large objects; children's creativity |
| Sonnet | Briquettes of 56 and 250 g | 1800-2000 rub. | 24 colors | Making jewelry; children's creativity |
| FIMO Soft | Briquettes of 85 and 350 g | 2600-2800 rub. | 30 colors | Making jewelry, sculptures; children's creativity. |
| Natural clay | ||||
| Invest- technologies | Packing 1000 g | 90-100 rub. | Natural | Children's creativity, modeling of dishes and decorative items. |
| ArtSpace | Briquettes of 1000 g | 100-200 rub. | Blue | Children's creativity; modeling dishes; modeling Dymkovo toys. |
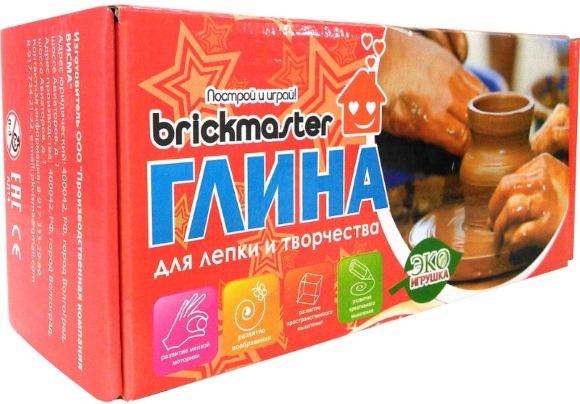
| Brickmaster | Briquettes of 500 and 1000 g | 200-300 rub. | Natural | Children's creativity, sculptural modeling; working on a potter's wheel. |
Where to find clay for free
Natural clay can be found in places with high humidity. For example, along the banks of reservoirs, in quarries, ditches and on the slopes of ravines.
When extracting natural raw materials, it is important to determine their plasticity and binding properties by conducting several tests. A small piece should be rolled into a sausage and made into a ring. If the clay is sufficiently plastic, there will be no large breaks or cracks on the ring.
To check the fat content of the material, wet a small area of the surface, let the water soak in, and then press. If the clay is fat enough, a shiny mark should remain. As an additional test, you can drip diluted acid onto the clay. Boiling does not occur on high-quality raw materials.
Before working with natural clay, it must be thoroughly cleaned of foreign impurities.
The material should be diluted with water to the consistency of liquid sour cream and left to settle. When foreign inclusions settle, the top layer should be carefully removed and dried. The raw material can be stored in any container, filled with water and covered with a lid.
Polymer modeling for beginners
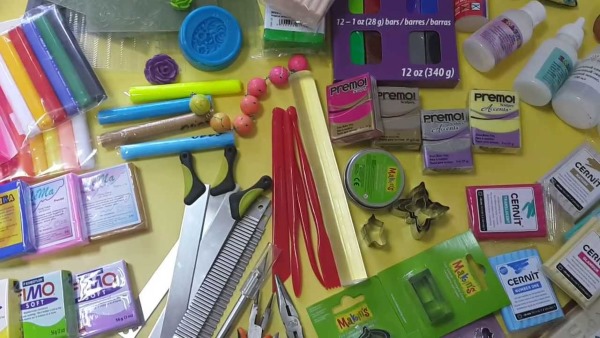
To master modeling from polymer plastic, complex technical skills are not required. Before starting work, you need to prepare materials and tools suitable for creating the intended product.
Tools
To work with polymer clay you will need the following tools:
- Working surface (glass or plastic).
- Stationery knife with spare blades.
- Pasta machine that can be replaced with a roller or rolling pin.
- A long needle and a few toothpicks to secure the pieces and make holes.
- Sandpaper for sanding the product.
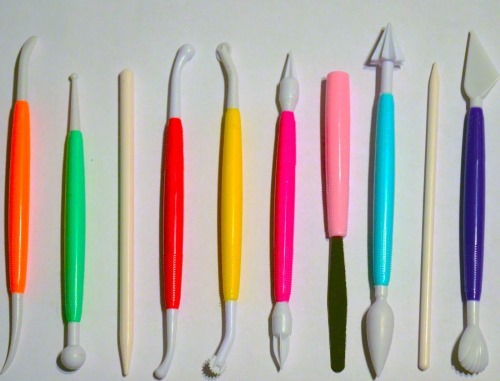
A drill with a 2-3 mm drill bit may also be useful for making holes in beads. To make jewelry, you may need fittings, clasps, cords, and chains.
Sculpting techniques
There are many techniques for modeling with polymer clay.
The most popular of them are:
- Skinner Blend.
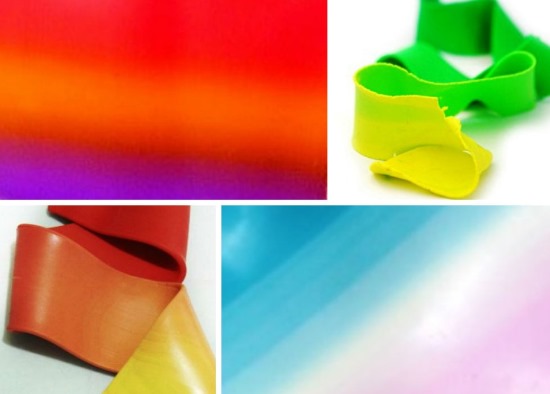
This method can be used to create smooth color transitions of 2 or more colors. To do this, triangles are cut out of polymer clay sheets of the desired colors and connected into a rectangle. Then it is folded and rolled on a pasta machine. The process should be repeated until the transition is smooth.
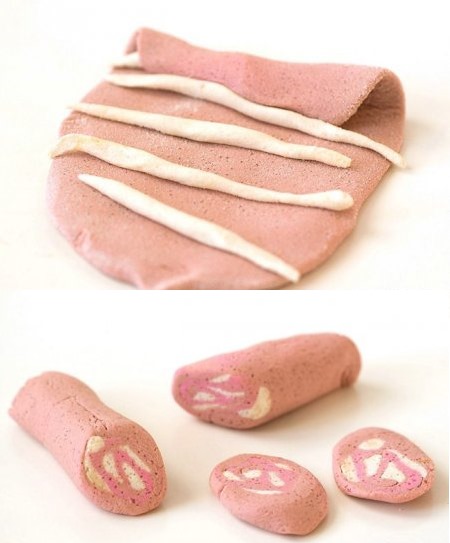
- Sausage (Millefiori).
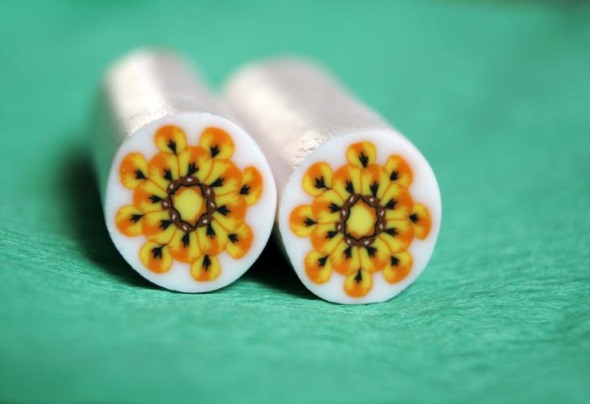
The technique involves combining several layers of plastic of different colors and rolling them into a roll. This way, complex patterns can be created.
- Kaleidoscope.
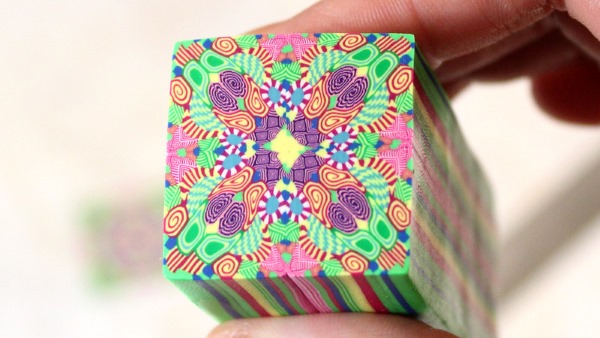
This technique is similar to the previous one. Individual rolls are cut and shaped into different shapes. The result is a symmetrical multi-colored pattern.
- Watercolor.
Layers of plastic of different colors are placed on top of each other, then rolled out and cut into small pieces. Then they are placed in a chaotic order on the workpiece and rolled. An unusual abstract drawing is obtained.
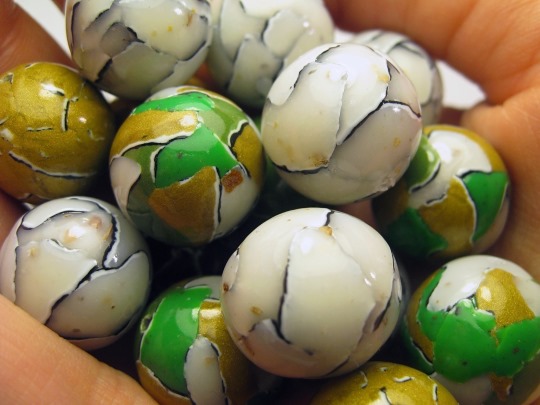
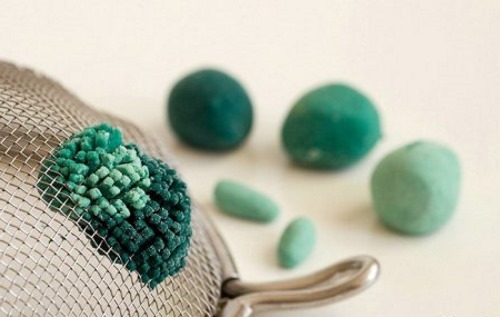
- Salt.
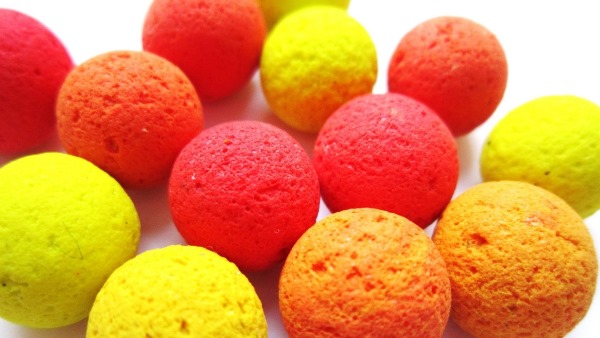
This technique is usually used to make beads. Before baking, the beads are rolled in coarse salt or sugar and baked. After that, the finished beads are dipped in water. When the salt dissolves, their surface will become textured.
- Mica Shift.
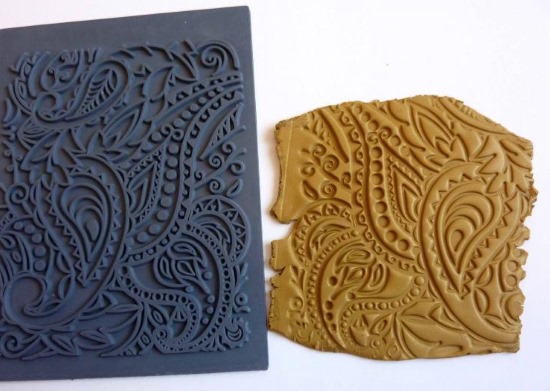
To work in this technique, you will need metallized clay containing mica particles. A piece of clay should be rolled out, then a pattern should be created using a stamp. Then remove the top layer of clay and bake the product. The shifted mica particles form a three-dimensional pattern.
Baking
Before you start baking the items, be sure to read the manufacturer's recommendations on the packaging. If the baking temperature is violated, the plastic may become brittle or not bake.
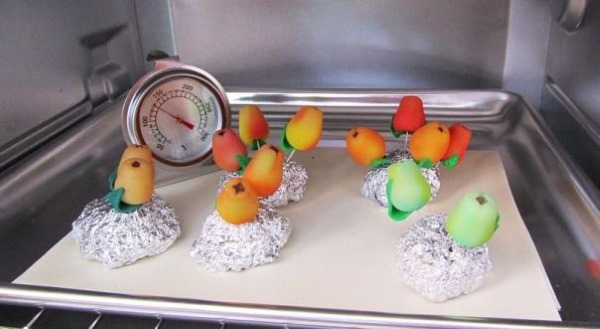
The products must be baked on a flat surface, for example on a baking sheet covered with parchment paper. You should not bake all the items at once, it is better to do a test bake of a small piece of clay. Complex figures can be baked in several stages. If the oven is to be used for cooking, it must be washed after firing.
Varnishing
After baking, it is recommended to coat polymer clay products with varnish. Varnishes can be glossy or matte. Some clay manufacturers, such as FIMO, produce special varnishing compounds. Such varnish will not fade or lose its properties over time.
You can also use parquet varnishes such as Tikkurila Parketti Assa, Tikkurila Unica Super, Synteko Pro. They dry quickly and create an even, durable coating.
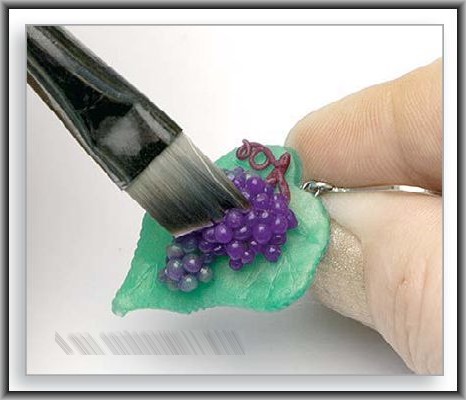
It is convenient to coat products with varnish using a brush. Small figures can be dipped into the composition entirely, so the coating will be more uniform. It is recommended to varnish the crafts in several layers, carefully drying each of them in accordance with the instructions.
Easy Polymer Clay Crafts
Clay modeling (a master class for beginners contains recommendations for making clay products) can be an interesting option for joint leisure with children.
A wide variety of items can be made from polymer clay: figures of people and animals, architectural models, jewelry, refrigerator magnets, dish decor, flowers, and much more.
It is better for beginners to start with sculpting simple objects. This will help you to feel the material better and master the technique. For classes with a child, you can choose to model beads or small souvenirs. After mastering simple techniques, you can move on to creating more complex and interesting figures.
Natural Clay Sculpting for Beginners
Modeling from natural clay is an ancient art that has its own characteristics. From natural raw materials you can make dishes, original souvenirs, toys and interior items.
Preparing for work
When using purchased material in briquettes, first you need to knead it well and beat it, throwing it from one palm to another for 10 minutes.
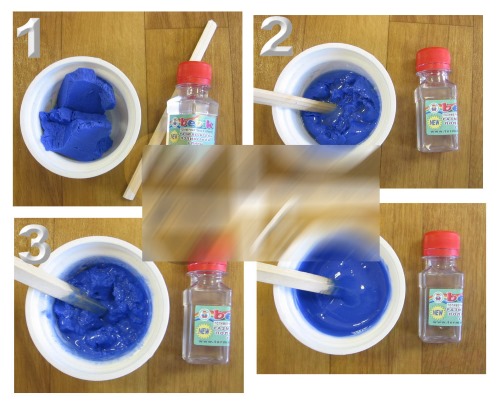
Powdered clay must be filled with water at a rate of 200 ml of water per 0.5 kg of clay. Then the mixture should be mixed well. The consistency of the composition should resemble dumpling dough. After mixing, the mass should be beaten well. In addition to clay, you will need a cup of water, oilcloth or another substrate, brushes and stacks.
Methods of sculpting
Basic methods of modeling from natural clay:
- On a potter's wheel.
- Hand molded from a single piece.
- Casting into a mold.
- Layer technology.
- Tape-and-tow technique.
- Knead into shape.
Decorating techniques
Decorating clay products includes painting, glazing, milk firing, blackening and other techniques.
Paints for ceramics can be divided into 2 main groups:
- those that are applied to the raw product and baked together with it,
- applied to the finished product.
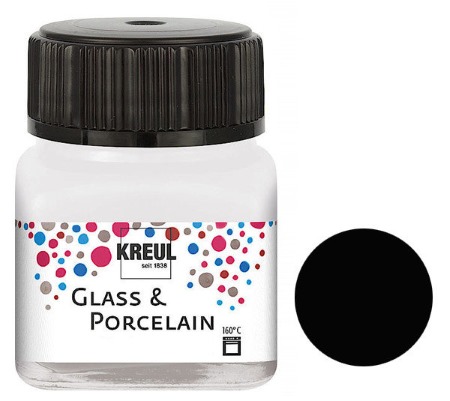
The first group includes, for example, cobalt coating, which is used to create Gzhel painting. Paints of the second group are more common. These are special acrylic paints for glass and ceramics.
High-quality coatings are produced by the German company C.KREUL. Decola and Hobby deLUXE paints from domestic manufacturers are well suited for decorative purposes - they form a coating of bright and rich colors.
In addition to painting, ceramics can be decorated in other unusual ways, such as milking or blackening. The milking process involves immersing the fired product in milk and then re-firing it at a lower temperature.
Ceramics acquire a noble dark brown shade and water-repellent properties. Dishes intended for storing food should not be milked from the inside. After milking, it is recommended to cover the surface with ganosis, which consists of a mixture of resin, linseed oil and wax.
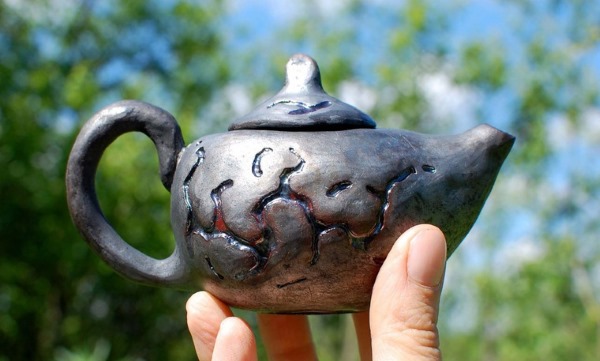
Decorating with blackening is a technically complex process. It can be implemented in several ways. One of them is to dip the fired product into sawdust until it cools completely.
Another method is to add firewood, rubber, resin directly into the kiln during firing. In this case, all openings in the kiln must be hermetically sealed. Products decorated in this way acquire a color from dark brown to black, depending on the temperature, clay composition, and the reducing agent used.
The blackening method goes well with grouting. After firing, the ceramics are covered with a layer of light paint, and then the paint is rubbed off. Thus, the surface becomes visually embossed: white in the recesses and black on the protruding parts.
Burning
Before firing, molded objects should be dried away from heating devices and direct sunlight for several days. The drying time depends on the size of the product.
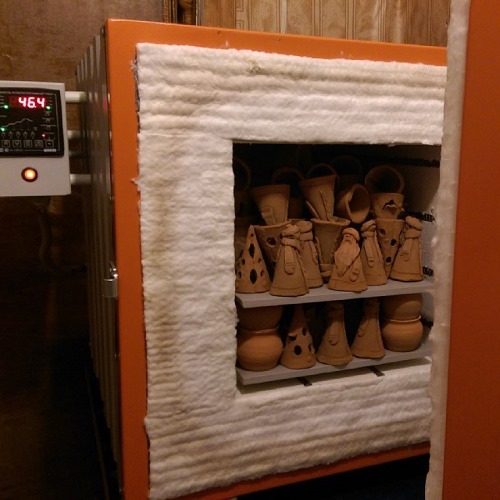
It is best to fire clay crafts in a muffle furnace, which allows you to regulate the temperature. A simpler and cheaper option might be an oven, brick stove or barbecue.
To prevent the clay from cracking, it is important to follow the correct firing regime. The heat should increase gradually and then decrease gradually. The temperature should vary between 300-1000 degrees. The duration of firing can be from 8 hours to several days.
Grinding
After firing and cooling of the products, their surface can be polished. Polishing allows you to remove irregularities, fingerprints and give the surface an even shine. To remove large irregularities and defects, coarse-grained sandpaper No. 220 is used. To remove small irregularities and scratches - No. 400. Paper No. 1000 and finer is used to give the product a shine.
Quality of the finished product
The quality of the finished product depends on both the composition of the clay and on proper drying and firing. After firing, objects may shrink in size, which is important to consider when choosing a clay grade. Clays with a low sand content are more susceptible to compression.
Quality ceramics are lightweight, have a uniform color and structure, and produce a ringing sound when lightly struck.
Master classes for children and adults
Clay modeling (a master class for beginners will help you master the technique of making various figurines from polymer and natural materials) allows you to create a variety of objects: sculptures of animals and people, jewelry, floral arrangements and much more.
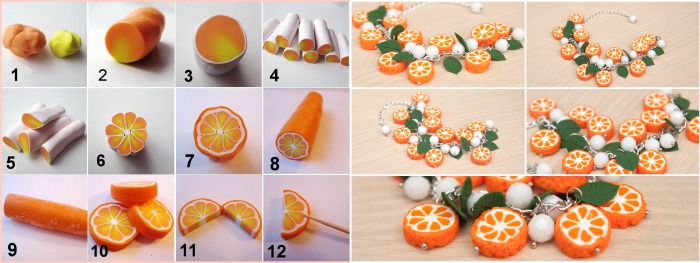
Food
It is better to master culinary miniatures with simple objects. For example, such as vegetables and fruits, which consist of simple geometric shapes.
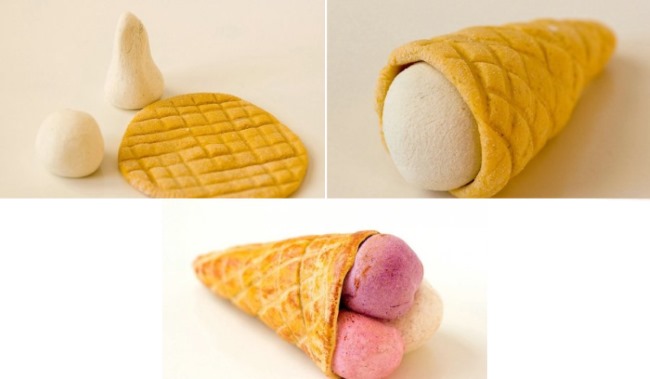
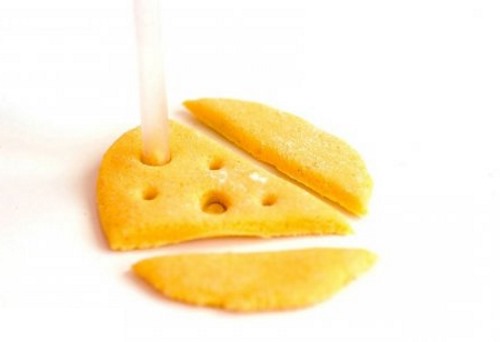
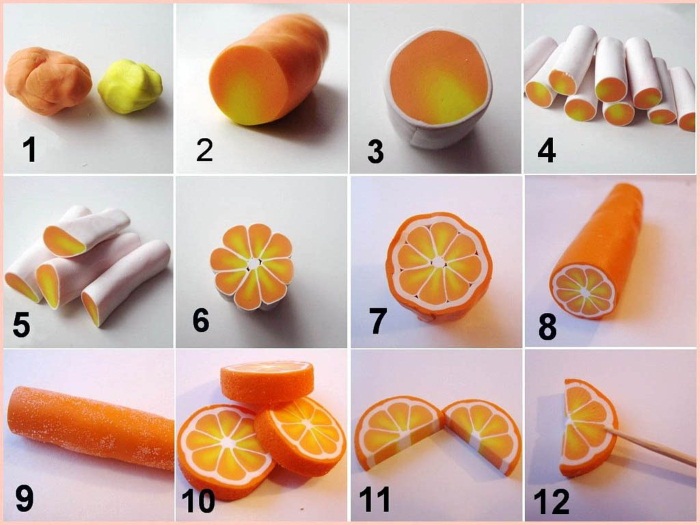
To make plastic food look natural, it is important to choose the right colors and create smooth transitions between shades. For those who have already mastered fruit sculpting, you can try sculpting confectionery: pastries, cakes, gingerbread.
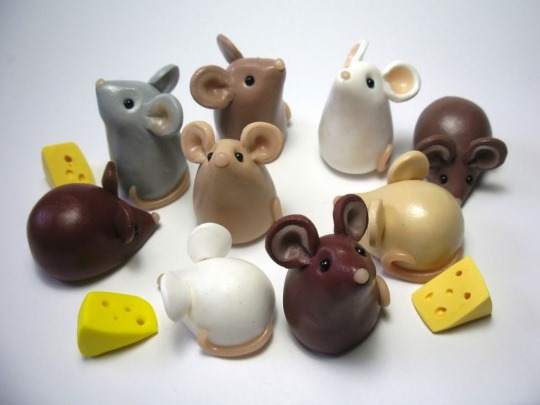
Animals
Polymer baked clay is well suited for sculpting small animal figures. It is better to start the work by searching for photographs and diagrams in front and profile. To sculpt a realistic figure, you need to calculate the proportions of the animal's body parts.
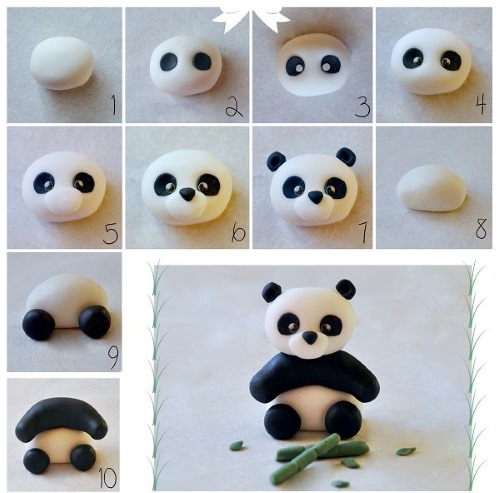
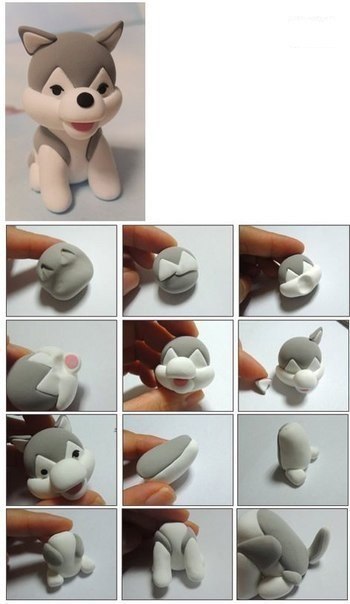
Depending on the complexity of the intended craft, it can be created from a single piece of plastic or folded from separate fragments.
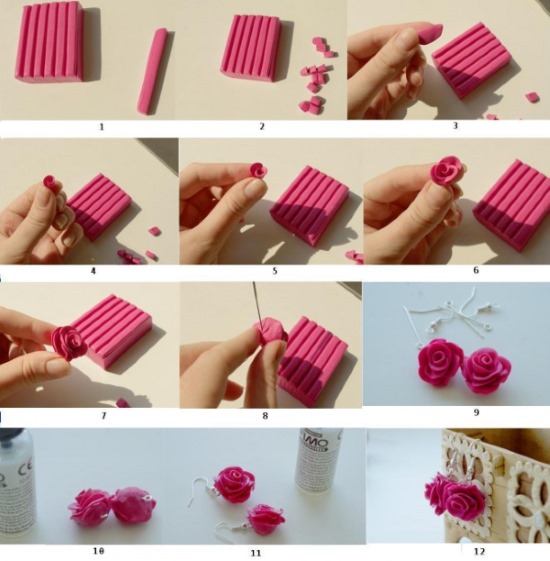
Flowers
Polymer self-hardening clay is usually used to make flowers, as it is more flexible and allows for finer details. Some sculptors prefer cellulose-based clay, others prefer "cold porcelain".
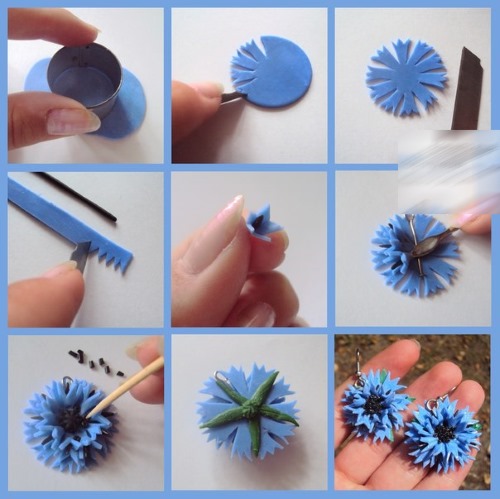
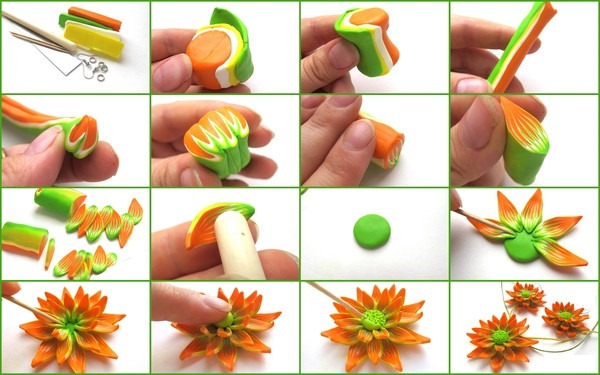
It is better to start with modeling flowers that are not false in shape - roses, daisies, tulips. Those who have mastered simple crafts should try more complex techniques and tools: special forms for cutting out petals, molds and stacks. With their help, you can create very realistic floral sculptures.
Bijouterie
Clay modeling (a master class for beginners will help you make a simple bracelet) allows you to create original jewelry without large financial costs.
To make a simple bracelet, you need to roll 3 long tubes of plastic of different colors, braid them into a braid of the required length and carefully connect the ends of the bracelet. Then bake the product according to the instructions on the package with clay, and then cover the finished product with varnish.
Baked polymer clay is best suited for making jewelry, as it is durable and does not deform over time. A wide range of jewelry can be created from polymer plastic: rings, pendants, beads, earrings, brooches.
Pottery training
Clay modeling on a potter's wheel is one of the most interesting ways of working with natural material. You can learn pottery from books, video tutorials or by attending master classes for beginners in pottery.
Learning this art includes mastering the following skills:
- Correct hand positioning.
- Centering the clay on the wheel.
- Stretching of vessels.
- Processing of dishes.
- Decorating.
- Different types of firing.
Pottery is a complex skill that is best learned under the guidance of an experienced craftsman.
How to store materials and finished products
Natural clay cannot be stored raw for a long time, as it may turn sour. If the material is not planned to be used soon, it is better to dry it, crush it and store it in a dry place in powder form.
Polymer clay will last much longer in the refrigerator than at room temperature. Opened packages of clay can be stored in plastic or metal containers with tight-fitting lids. If you need to sort the clay by color, it is convenient to use multi-section plastic boxes or transparent zip-lock bags for storage.
It is recommended to protect polymer clay products from direct sunlight and dust. Items made from self-hardening plastic must also be protected from high humidity.
Clay modeling can be a pleasant hobby that will distract you from your daily routine. Starting with mastering simple techniques using video tutorials and master classes for beginners, you can, with some effort and constantly improving your professional level, become a real master of sculpture or pottery.
Article formatting:Natalie Podolskaya
Video about making clay products
Clay modeling for beginners:
Great article!
Sanding fired natural clay items with sandpaper is something. In order not to swallow dust, ZAMBYVKA was invented. This is when a dry or almost dry item is wiped with a damp sponge, not wet, but damp! As a result, almost all the unevenness is carefully rubbed off and your item acquires a very pleasant appearance. Although some continue to sand, only before firing, not after. Simply because it is easier, but if you like such ceramic experiments, try both options. See for yourself.