The Northern Lights are a unique natural phenomenon that often becomes the subject of drawings. By depicting the multicolored northern sky, children learn to create unique patterns, study the principles of color combinations, and master artistic skills.
How to draw the northern lights
Northern Lights (a drawing for children made in a simple technique) is one of the topics of creative lessons. The natural phenomenon is described in detail by scientific researchers, and is also used to create artistic descriptions in literature. The basis of the drawing is glare on the main background. To achieve this effect, it is necessary to follow certain rules and the order of work.
The phenomenon can be depicted in different ways:
| Method of representation | Peculiarities |
| With pencils | The method of hatching is used for drawing, creating different shades by pressing on the pencil. When using colored pencils, the wave or diagonal method of coloring is used. |
| With watercolor or gouache | Working with water-based paints begins with the background. For a watercolor painting, the sheet is first wetted with a damp brush. To create a gouache painting, a dark background is taken, onto which strokes of paint are applied. |
| With oil paints | An oil painting is painted on canvas. Most of the work is done with a palette, mixing shades and choosing the right ones. |
There are several options for depicting the northern lights on a sheet. Flashes of light can be depicted by directing the main lines diagonally. Most often, the highlights extend from the right corner of the painting to the center. In this case, a dark background of the night sky is depicted around them.
In the second case, the lines of light are depicted vertically. The colored stripes do not have a starting point, they appear unexpectedly. This approach is most often used for painting with watercolors.
The third method involves horizontally depicting colored lines. This technique is suitable for pencil drawings or marker drawings, when children shade the stripes.
Depending on which method is used, materials are selected:
- rounded brushes 3.12;
- flat brushes;
- watercolors, gouache, oil paints;
- graphite pencils for sketching;
- colored pencils;
- water containers;
- napkins;
- masking tape;
- color mixing palette;
- drawing sheets of any chosen format.
The list of materials can be adjusted depending on the choice of the main tools. It is better to draw with watercolor paints on a special A3 sheet, for drawing with colored pencils, an A4 sheet from a drawing album will do. One of the conditions is that the paper should be thick, not leaving paint marks on the second side.
Northern Lights (a drawing for children is presented below in the text) is a theme that promotes the development of artistic skills. When working with children, teachers highlight the main tasks. They consist of the comprehensive development of artistic thinking. At different stages of creating a drawing, the child gains new knowledge and skills.
He is studying:
- design your own idea, present the result on paper;
- combine colors, create a unique image with different highlights;
- convey an understanding of a natural phenomenon through an image on paper using artistic techniques.
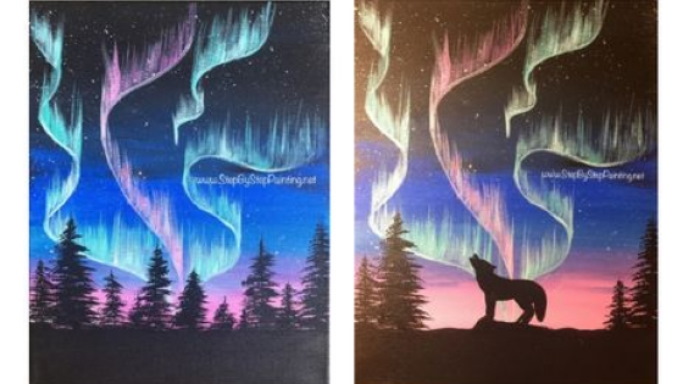
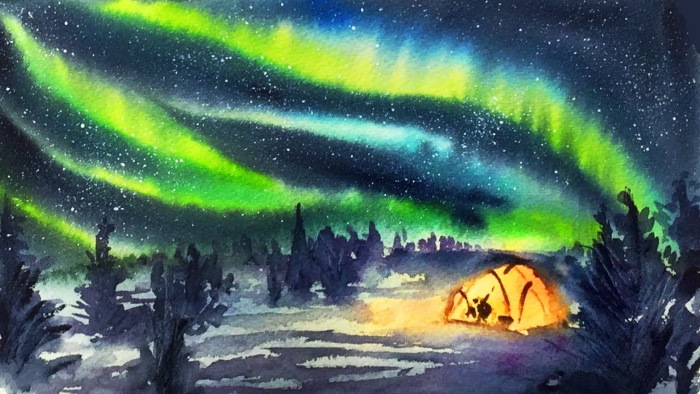
The northern lights can be depicted in one of the following ways. The sheet can be completely filled with colored highlights, while the author tries to create a rich color scheme. In the second case, the northern lights are one of the elements of the drawing. The artist chooses the option of creating a landscape, where against the background of a beautiful sky with northern lights he depicts houses, mountains or trees.
In terms of complexity, the second option is considered more labor-intensive. It involves applying landscape elements to the sheet one by one, as well as taking into account the time allotted for drying different parts of the painting.
Most often, the subjects for paintings are images of houses against the backdrop of mountains, drawings of lonely trees, or images of northern animals against the backdrop of a multi-colored sky.
Pencil drawing
When creating a pencil drawing, the technique of shading is used. It allows you to depict the northern lights with a simple pencil, changing the tilt and pressure on the pencil.
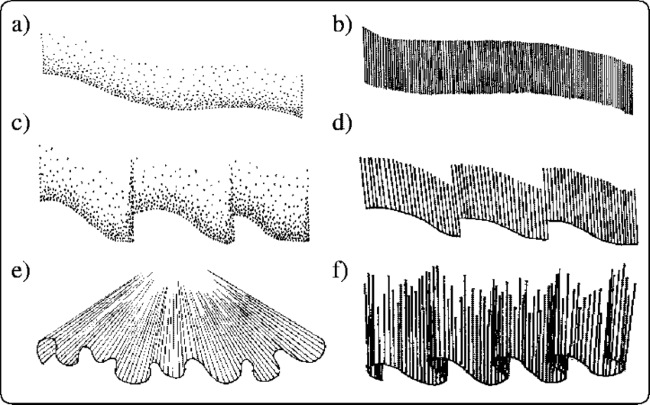
Working on the image of the northern lights with a simple pencil involves creating light and dark areas that convey the difference in shades. The drawing is done using the technique of classical or academic hatching.
In doing so, the following basic rules are observed:
- the strokes are applied as separate lines; they should be as close as possible to each other, but not touching;
- there should be no bends or zigzags at the ends of the lines;
- the strokes of the next layer overlap the strokes of the previous one at a slight angle.
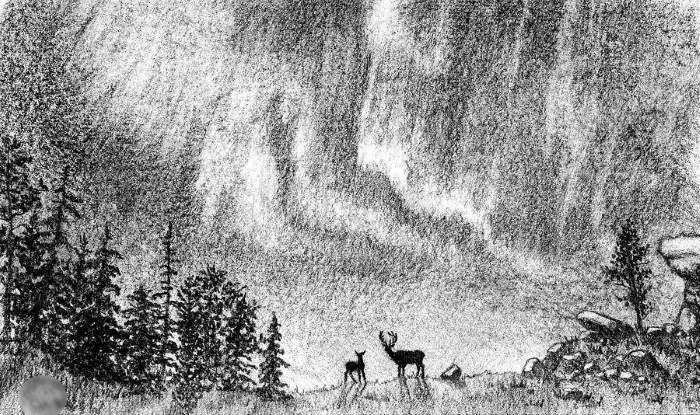
Following these rules will result in smooth hatching without gaps on the sheet. When depicting the northern lights, the flashes are drawn using long strokes starting from the right corner of the sheet and moving towards the center. The pressure on the pencil should be as strong as possible.
Then move on to shading the light areas, touching the paper only with the tip of the pencil. This way you get a light, subtle shading.
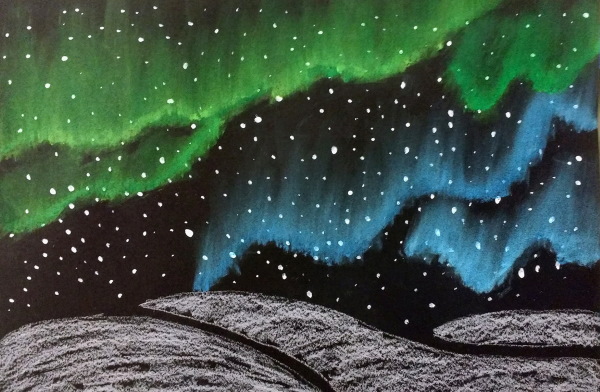
Working in the hatching technique is quite complex. To obtain a drawing of the northern lights as a result, it is necessary to completely paint the sky area using multidirectional flashes. Children find it much more interesting to draw with colored pencils.
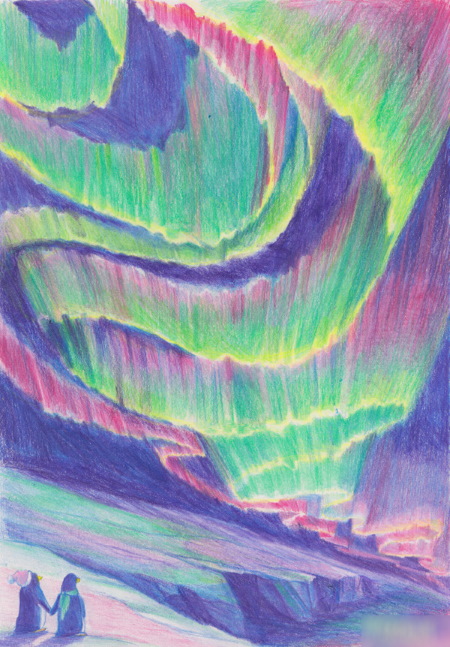
Step-by-step instructions for drawing the northern lights using colored pencils:
- First, the central zone is determined on the sheet. Wide lines of blue, light blue or turquoise cover more than half of the sheet. For example, you can make lines from the center of the drawing to the upper right corner.
- Between the main lines, as well as on the sides, add additional strokes of a different color (green, yellow, orange). The intensity of the color is changed by changing the pressure on the pencil.
- The final stage is the design of the sky. For this, a black or dark blue pencil is selected. With its help, the gaps between the colored lines are carefully painted over.
It is more difficult to depict the northern lights above a house or a tree. First, you should completely draw the front part of the picture, then start painting the upper part. It is recommended to use colored pencils with a hard core or combine work with slate pencils and wax crayons.
Water based paints
Northern Lights (drawing for children) can be created using watercolor paints. This method is better than others for depicting a multi-colored natural phenomenon. Watercolor can be used to create lines of smooth transitions between shades.
In some cases, it will be easier to work with gouache. Thick gouache will lie well on a dark background and will be a good basis for creating a multi-colored drawing. With the help of watercolors, you get rich shades that are not always possible to get with gouache.
Step-by-step instructions for working with watercolor paints:
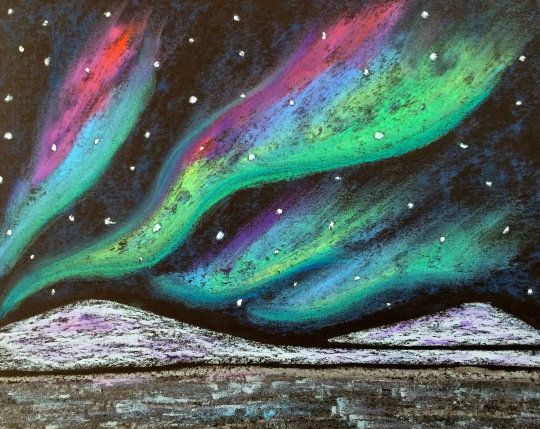
- First, a pencil sketch is created on a sheet of thick paper. In the foreground, mountains with peaks of different heights are depicted, and the horizon line is determined.
- The second step is to wet the area where the sky is with a wide brush. The paper is carefully moistened to begin working with watercolors.
- Using a round brush, apply lemon, green and azure watercolors to the top of the wetted area. Tilt the sheet of paper so that the watercolors begin to flow naturally downwards.
- After the watercolor of the selected shades flows down, almost touching the horizon line, the sheet is turned over again to the other side. This technique creates a sense of natural transition of lines, makes the boundaries of color mixing smooth.
- On the surface of the palette, mix red and emerald green. The resulting mixture is applied to the upper part of the sky with a round brush. The sheet is tilted again, allowing the watercolor to spread diagonally.
- Red is mixed with ultramarine. The resulting mixture is carefully applied with a thin brush to the areas that have formed between the color zone and the mountain peaks made with a pencil. This is the border of the sky, which is colored with an unusual shade due to the northern lights.
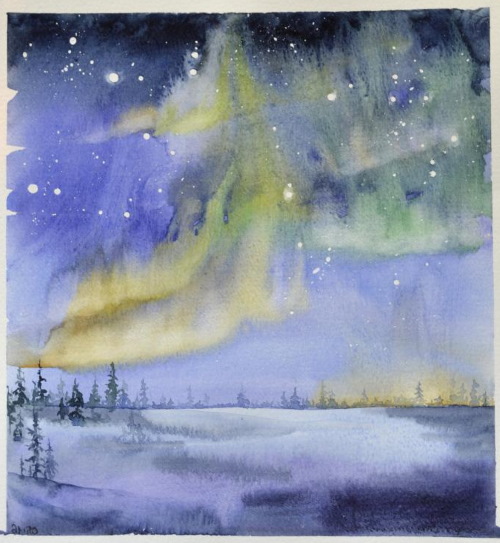
- Azure blue watercolor is slightly diluted with water, and a thin brush is used to create an outline between the resulting colored background and the mountain peaks.
- The next stage is working on the highlights and reflections of the northern lights. To do this, take a little azure paint on the brush and shade it in certain areas of the sky. Emerald green highlights the darkest areas, making them more saturated.
- The final stage is the depiction of stars in the sky. For this, lavender watercolor is used. This paint contains white, so it will stand out against the dark background of the sky.
Lavender watercolor is applied to a wet drawing drop by drop. The drops spread out, taking shape with fuzzy contours. After the drawing is completely dry, lavender watercolor is applied to the same points again to refresh the color.
The drawing of the northern lights is complemented by the introduction of different colors that match each other in terms of color scheme. Children can select them themselves, pre-mixing the shades on the palette.
The next step is to fill in the foreground. To paint the mountains, choose shades that echo the colors used to create the glow in the sky. This is necessary to unite both parts of the drawing. The reflections that form on the top are reflected below, giving the landscape uniqueness and grandeur.
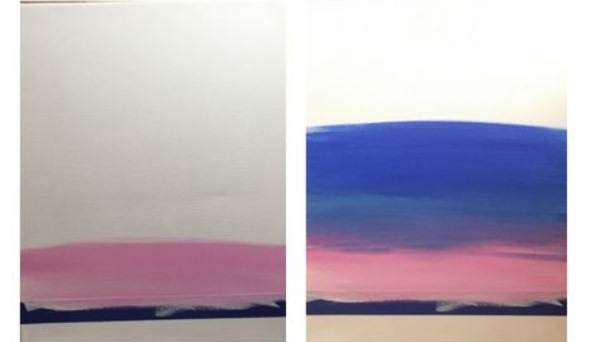
It should not be forgotten that the main color of the landscape is light, since the northern lights as a natural phenomenon are possible only in winter, when there is snow in the mountains or on the plains. The northern lights are painted differently with gouache. For this, paper with a dark background should be used. You can buy a sheet for drawing a dark shade in a store or make it yourself.
The work begins with preparing the base. A sheet of any format is tinted with black or dark blue. Teachers advise using the method of successive shading. The sheet is painted with a dark color, then using a damp brush with a different color, saturated shades are created on different areas of the sheet.

One option is to use a dark sheet with factory coloring. Work on the drawing begins after the dark background has completely dried.
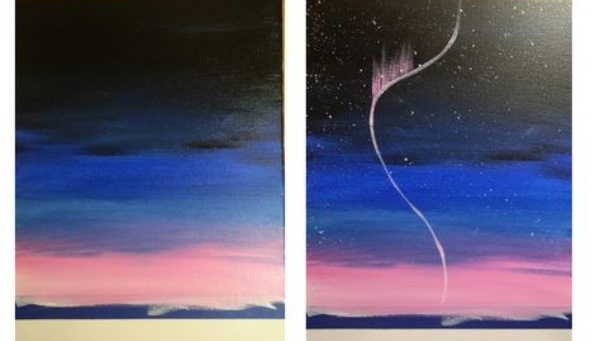
Step-by-step instructions for creating a drawing of the northern lights using gouache:
- First, draw a random horizon line with white gouache. The layer should be thick so that the white completely covers the dark main background.
- Mountains are depicted on the horizon. Small elevated areas are painted with dark blue gouache.
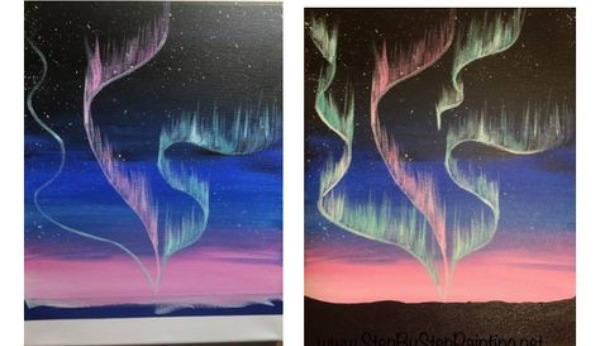
- After the paint has set, begin to paint the sky. First, use dark paints. Dark green or purple colors are applied diagonally, observing the order. With their help, paint the far part of the sky, moving from the right corner of the sheet of paper to the central part.
- The rest of the sky is filled with lighter colors. The brush is loaded with yellow, orange or red. The strokes are made in random order, trying not to create overlap.
The advantage of using this technique is that the spaces between the strokes are already filled with a dark blue or black background. After the gouache strokes of different colors have dried, highlights are added to the drawing. They are applied with white paint, then shaded with a dry brush, creating small spots with fuzzy contours.
The first method of applying gouache is the same as the technique of applying watercolor paint. Both options involve diagonal application. Gouache can be used to create the northern lights by applying paint in rows. To do this, lines are marked on the base in advance, gouache is applied parallel to each other, then the boundaries are shaded with a dry brush.
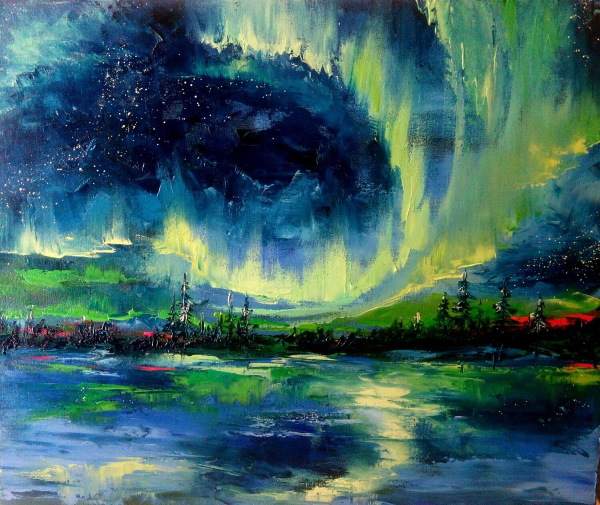
With oil paints
Northern Lights (painting for children with oil paint requires some skills) is done with several colors. For oil painting, you need a canvas and a palette for mixing paints.

Step-by-step instructions for carrying out the work:
- The upper part of the sky is painted with dark blue and indigo. The paints are diluted with water until they become like thick gouache. Some of the paint is applied to the canvas, then the brush is dipped in water, and the paint is shaded over the surface marked in advance.
- On the palette, mix sky blue and light green. The resulting shade is picked up on the brush, and a smooth line is made from the corner of the canvas to the center of the painting. The line is widened with short, deep strokes.
- The middle and lower parts of the sky, which are not affected by light colors, are painted with dark blue and indigo, to which violet paint is added. This technique creates a sense of color transition.
- Light green paint is mixed with white, and short strokes are used to mark the center of the northern lights. The addition of a light area should create the necessary glare.
- The transitions are shaded with a dry brush, making careful upward or downward movements.
- To create the lower glow, mix white and yellow on the palette. Carefully apply the resulting paint with a brush. Create recesses in the light yellow highlights with purple paint.
Using oil paint requires certain skills. The main work is done on the palette. The paints are mixed to obtain the required shade. The second rule when working with oil is to follow the order.
First, liquid bases are applied to the canvas, that is, paints diluted with water. Most often, the necessary background is created in this way. Then they begin to work with thick strokes, choosing colors obtained as a result of mixing on the palette.
The final stage is adding white strokes to the sky. They need to be given an irregular shape, making the outline a little blurry. These are the stars in the sky, which are often visible during the manifestation of the northern lights.
The advantage of working with oil paints is the ability to correct the painting over a long period of time. Oil paints take a long time to dry, a painting on canvas dries completely only after 3 or 6 months.
Creating a picture of the northern lights is of great importance for the development of creative thinking in children. At the stage of planning the picture, the child learns to predict the result. While drawing, he mixes shades and gets unusual colors, which makes his work unique.
Video about drawing
Northern lights drawing: