Chamomile is a simple and bright plant that can be used for children's drawing. It has recognizable features - a thin long stem, numerous white petals and a yellow center, so it can be easily drawn even with a small child. This article discusses both simple master classes for younger children and more complex ones, made in a realistic technique using gouache.
Pencil drawing
A daisy (a drawing for children with pencils begins with creating a sketch or a preliminary draft) can be drawn with a simple graphite pencil, which is pre-sharpened to a height of 1-1.5 cm. Such sharpening will not work in a regular sharpener; a knife is used for this. Small children should be assisted by adults to avoid cuts. A pencil of TM (HB) hardness, which leaves thin lines, is suitable for the sketch.
If you take a pencil that is too soft, then after removing the auxiliary lines, "dirt" may remain on the paper. You will also need an eraser and colored pencils for the work - yellow, black, blue and green.
The step by step process of drawing a daisy with pencils is given below:
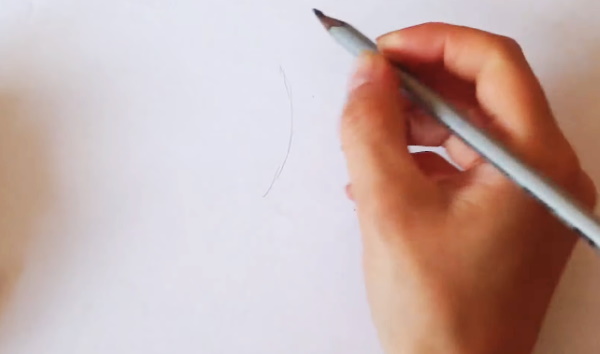
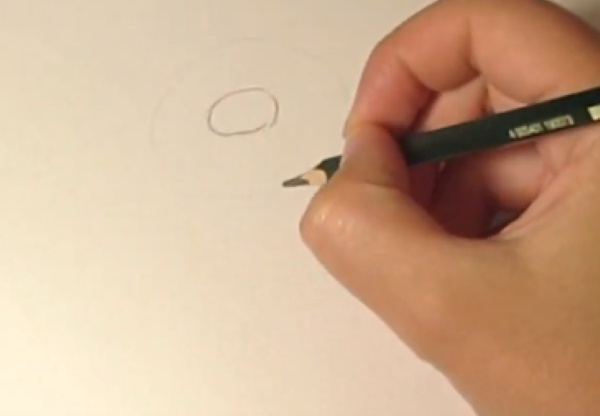
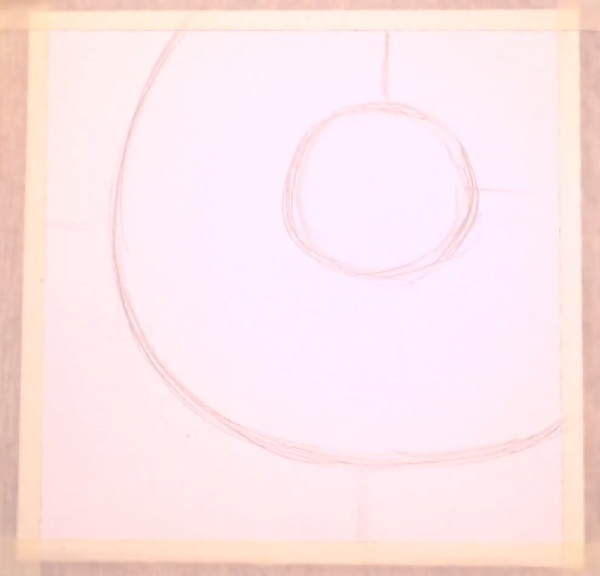
- Draw a curved line approximately in the middle of the sheet – this will be the stem of the chamomile.
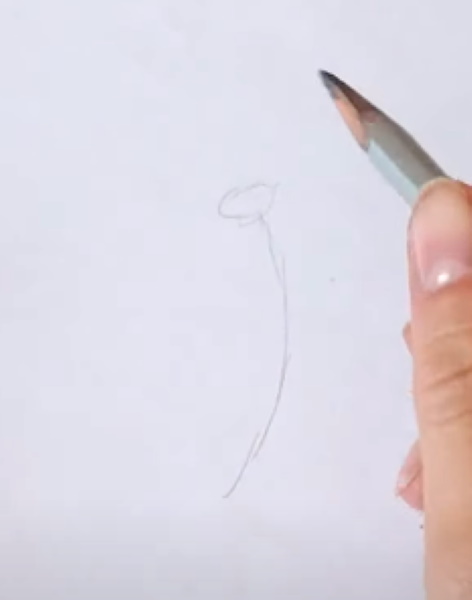
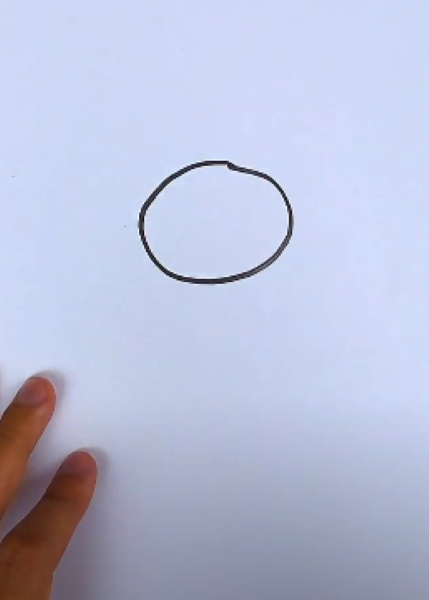
- Make a small oval on top. The flower will be positioned at an angle to the viewer, so the center of the chamomile is depicted as an oval rather than a round shape.
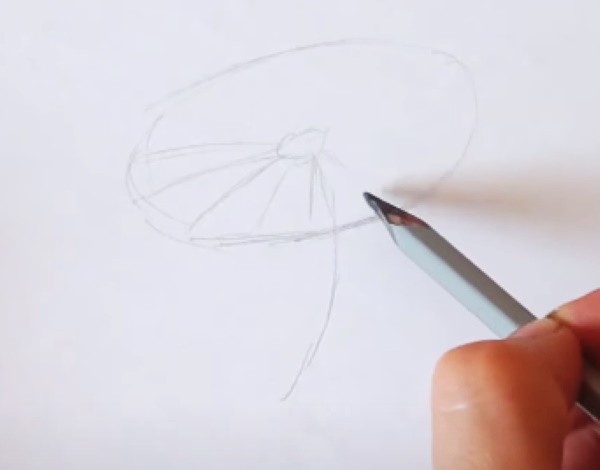
- Draw a second oval, the center of which should coincide with the first. The petals will be along the outer contour of this figure. This drawing technique allows you to get a more symmetrical arrangement of the flower parts.

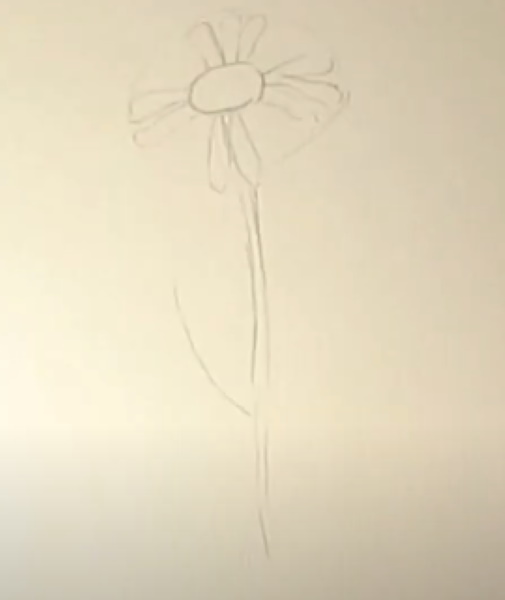
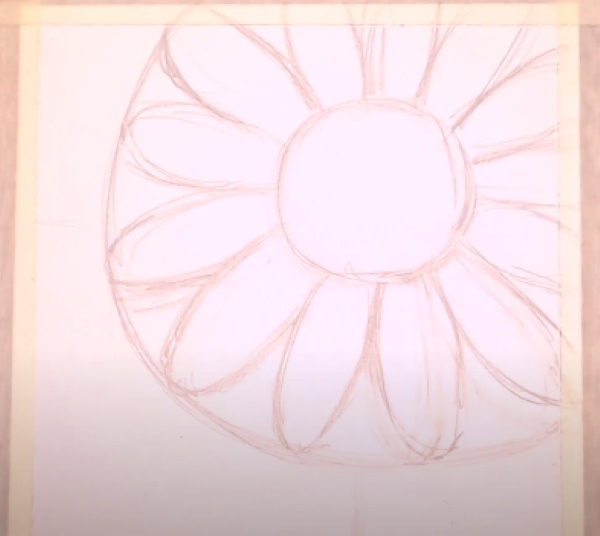
- Between the two ovals, draw lines – the petals of the daisy. They should be approximately the same distance from each other. The lines should be slightly curved to create a more realistic image.
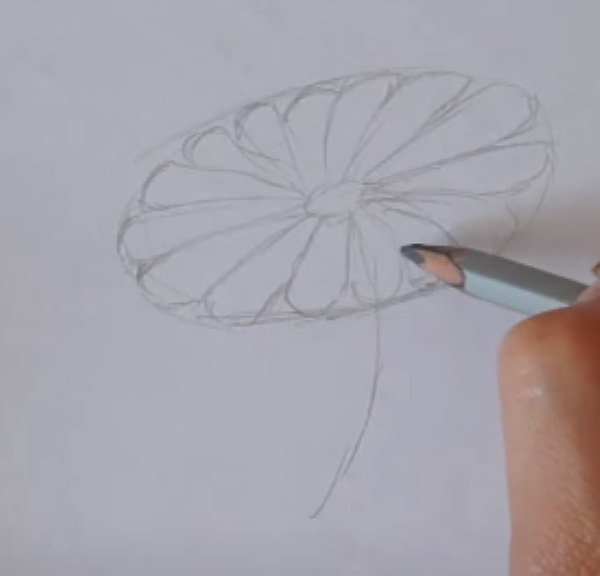
- Fill all the space between the ovals with these lines.

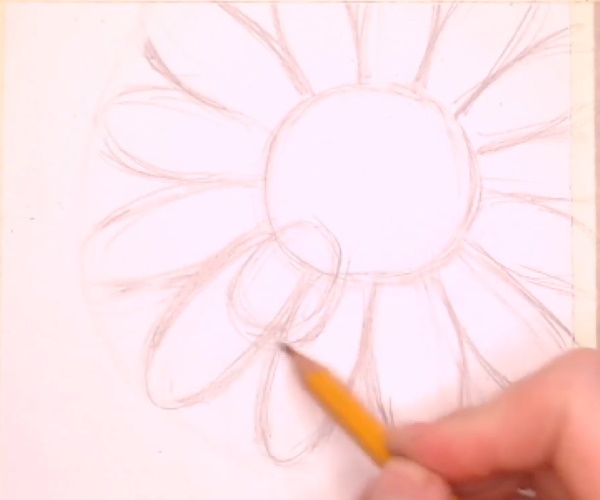
- Round the edges of each petal into arcs.
- Erase the construction lines with an eraser. Also make the contours lighter.
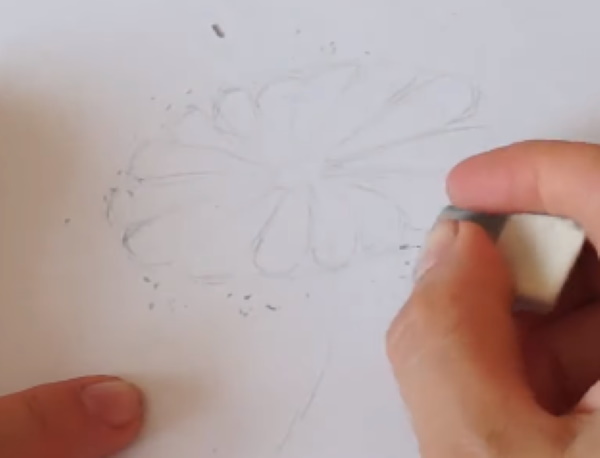
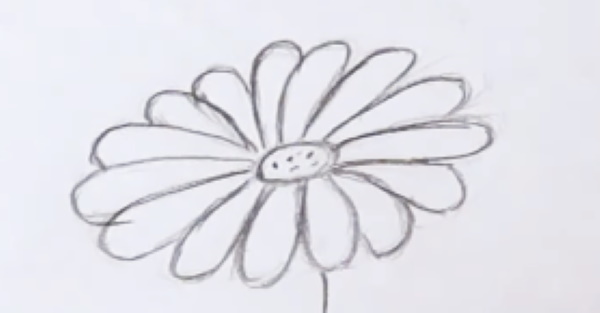
- Outline the petals with a sharp black pencil.

- Outline the center of the flower and make several black dots in it.
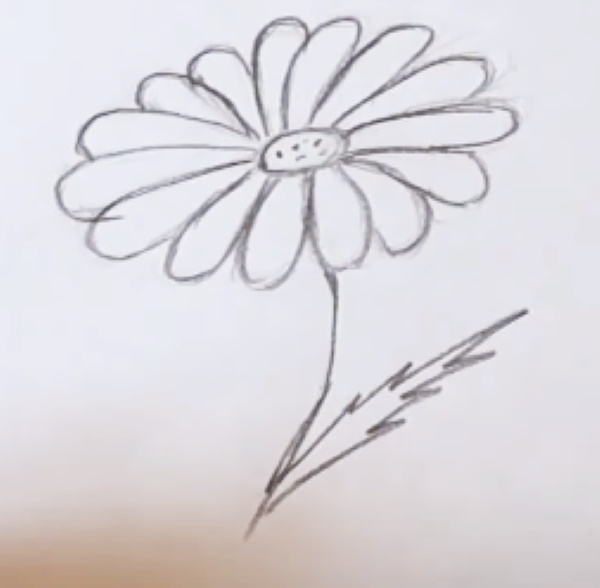
- Trace the stem and draw one leaf using jagged lines.
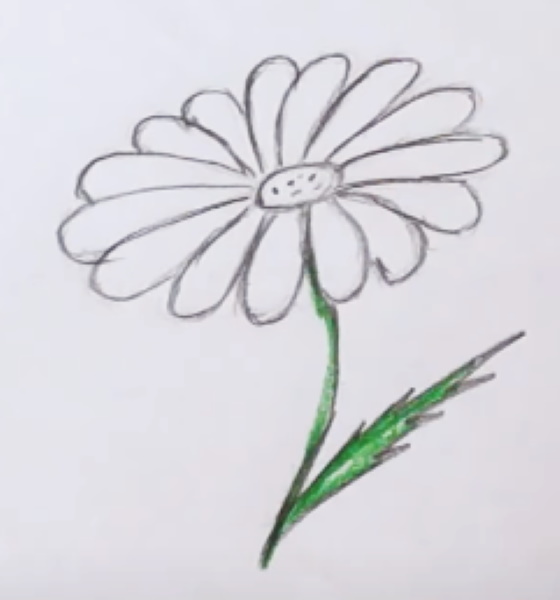
- Color the leaf green and draw the stem. Make the edges of the leaf darker than the middle.
- Color the center of the flower yellow and darken it a little at the bottom. On the petals, make hatching in blue, intensifying it in the background to give volume to the flower.
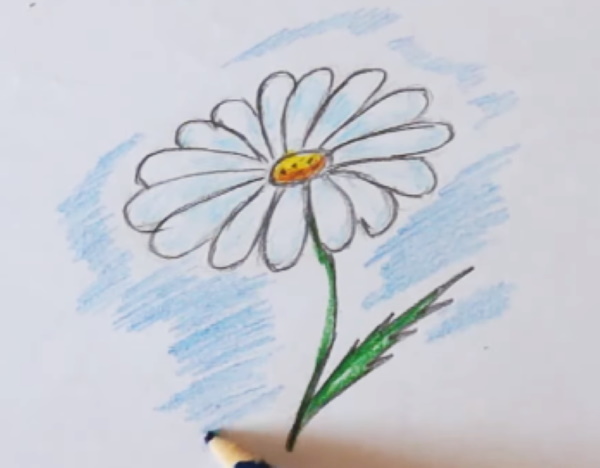
- Shade the space around the chamomile with a blue pencil.
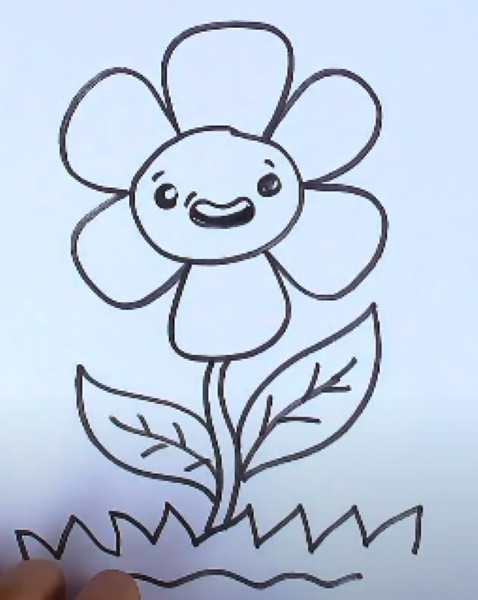
Simple drawing with wax crayons
This example shows the simplest version of drawing a daisy in a cartoon, kawaii style for small children. But to create the drawing, wax pencils are used instead of traditional colored pencils. Their lead is much softer, and the colors are brighter. Such pencils are convenient for making wide lines and shading over a large area. To draw the contours of the flower, you can use a black marker or felt-tip pen. The contour of the daisy will be depicted in the most simplified way.
You can use regular paper, but wax will stick better to rough paper. Wax crayons should be handled with more care, as they break easily, for example, when dropped from a table or when pressed hard.
Drawing a chamomile step by step in a simple way is as follows:
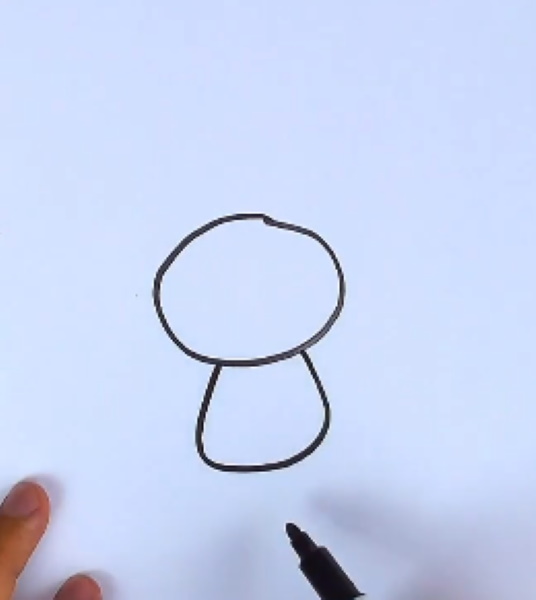
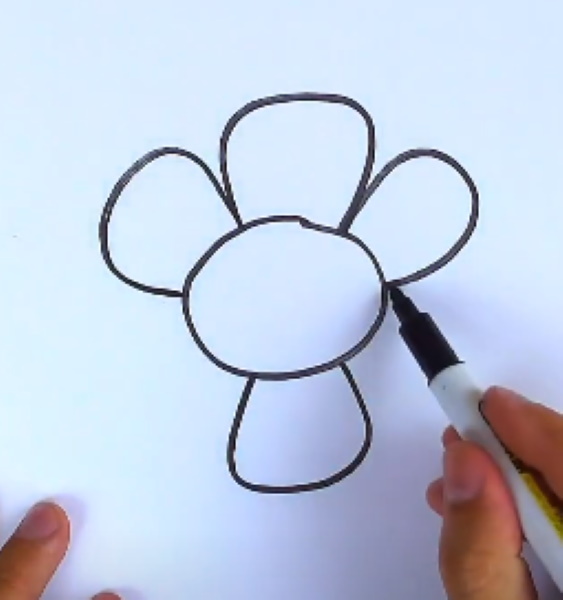
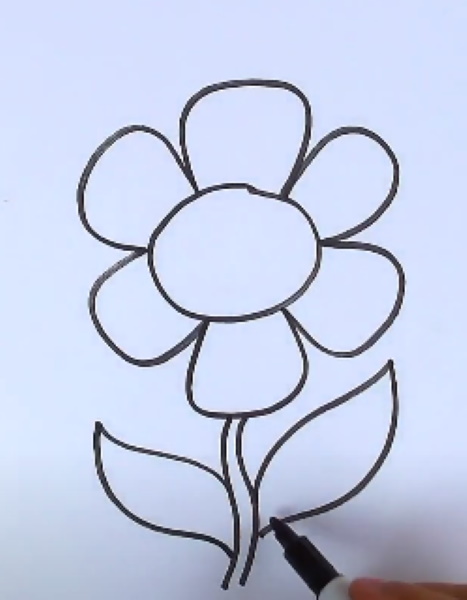
- Draw a large oval in the center of the sheet – the core of the flower.
- Make a large petal at the bottom. In this example it is shown with a flattened outer side, but you can also depict it traditionally – rounded.
- Make a second petal symmetrically on top.
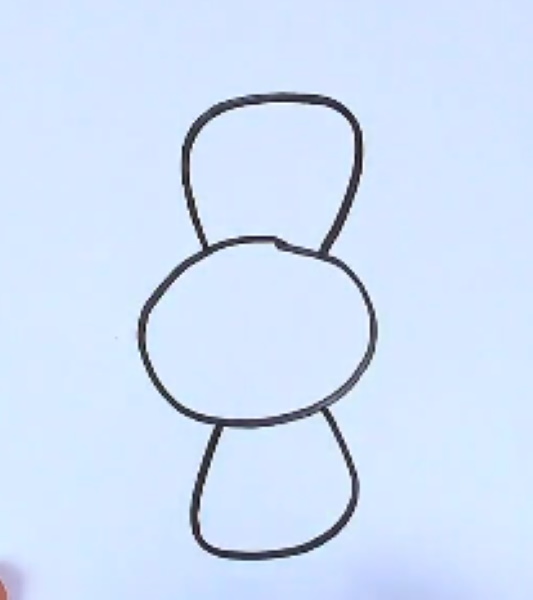
- Add 1 petal to the right and left of the top one.
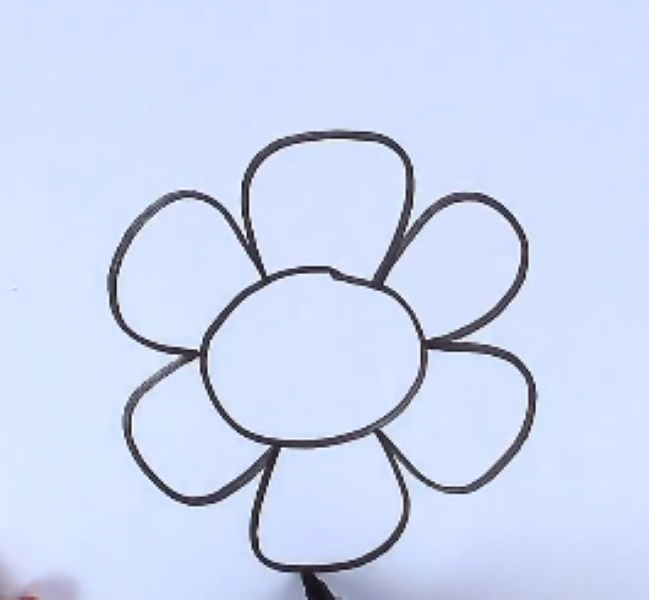
- Draw the lower petals in the same way. It's okay if they are different sizes. In this drawing, the flower will be "cartoonish".
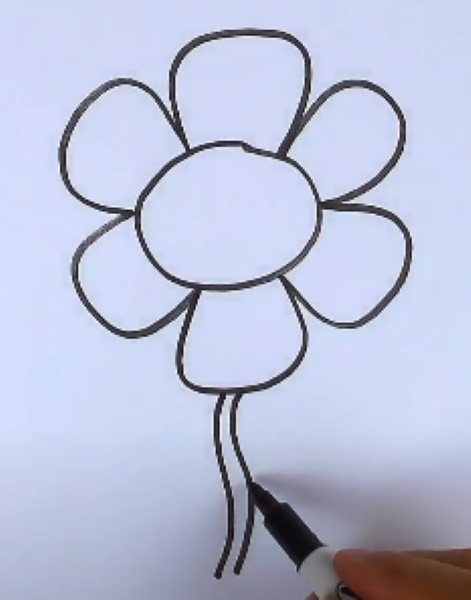
- Draw 2 wavy lines parallel to each other. This will be the stem of the plant.
- Draw a large leaf on the right with arcs from one point.
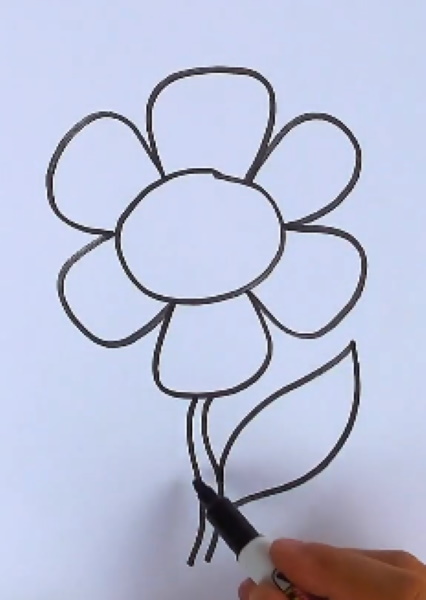
- On the left, depict the same leaf. In fact, the chamomile has pinnate leaves consisting of thin, numerous lobes. But this drawing is done in a simplified technique.
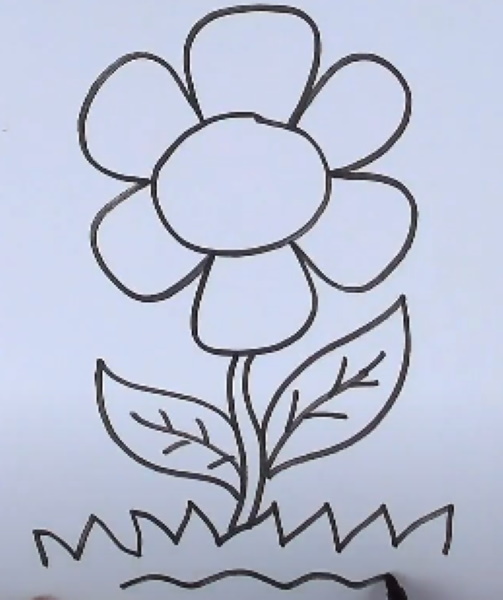
- Draw veins inside the leaves.

- Draw two lines under the daisy - one zigzag, this will be the grass, and the other wavy. It will show the ground level.
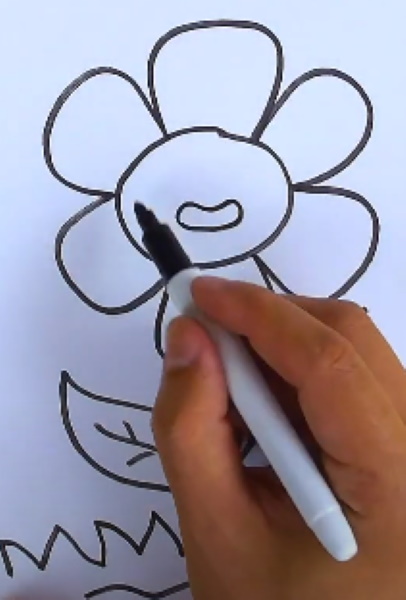
- Draw the open "mouth" of a cartoon daisy in the form of a bean.
- Draw the eyes round, make another circle inside, leaving it unpainted. This will be a highlight.
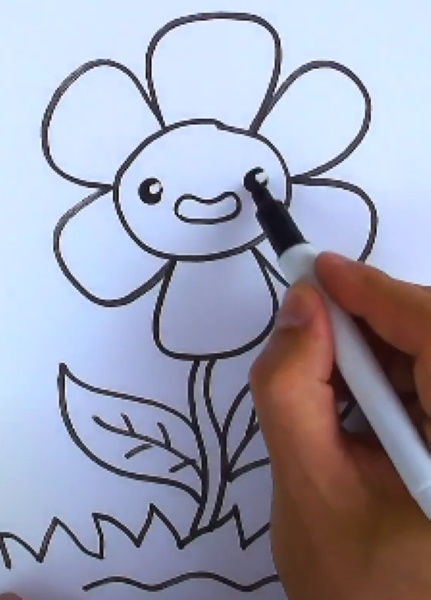
- Show the eyebrows as short raised arches. Draw "teeth" in the mouth, paint the inside of the mouth black.
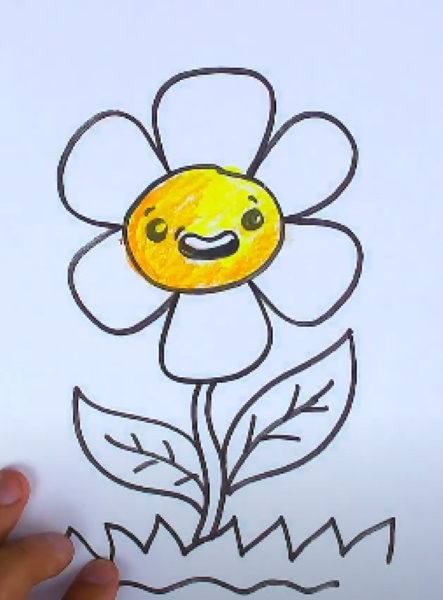
- Color the center of the flower with a yellow pencil.
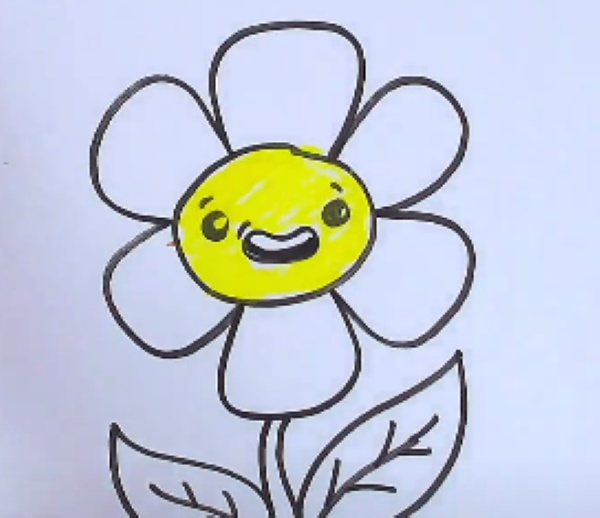
- Color the left side of the middle orange.
- Color the petals along the edges with a blue pencil.
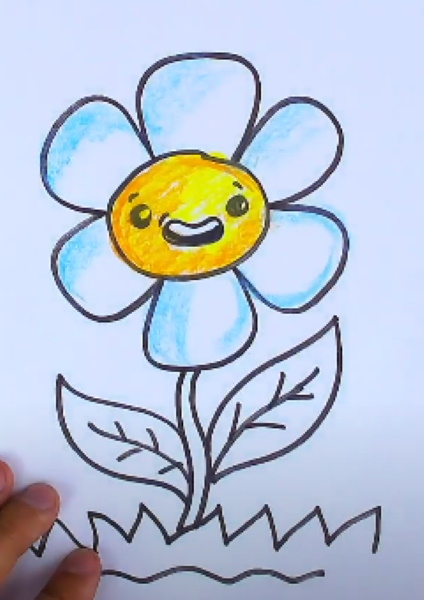
- Draw lines with a blue pencil in the center of each petal.
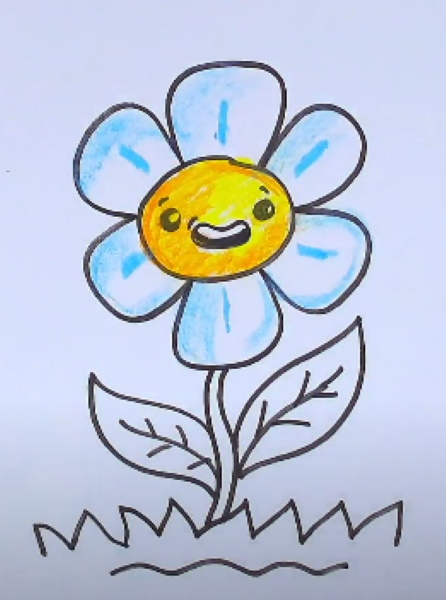
- Paint the leaves, chamomile stem and grass green.
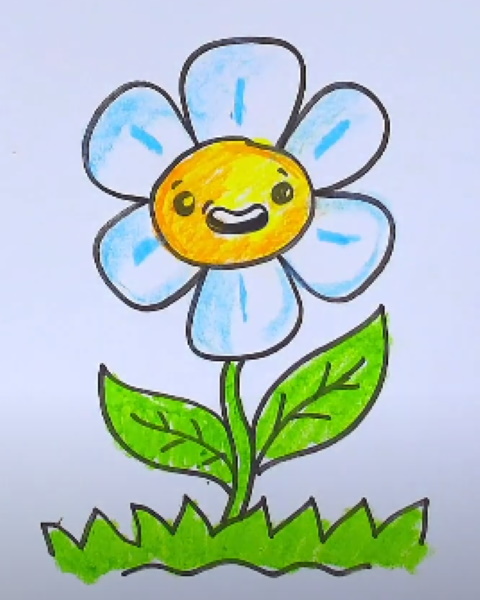
- The space under the wavy line can be colored light brown.
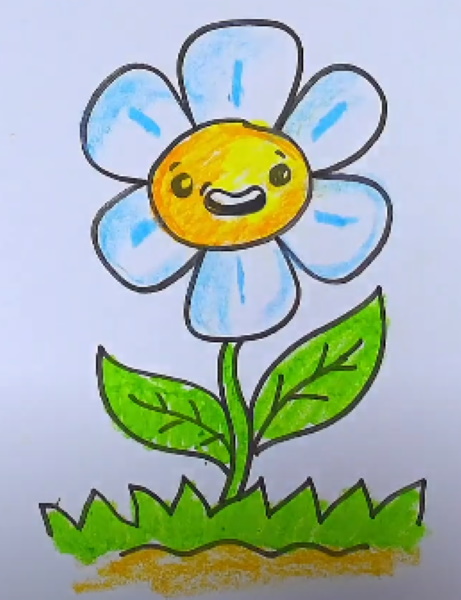
- Add a second layer of dark brown. The drawing is ready.
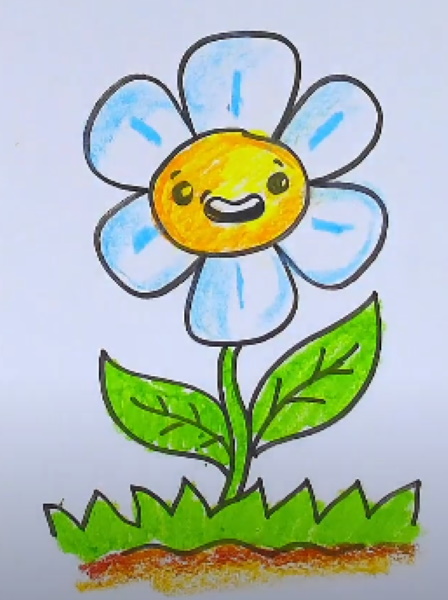
Despite the fact that wax crayons lay down quite a thick layer on paper, the colors can be mixed. If you make several layers, you get almost the same effect as when using oil paints.
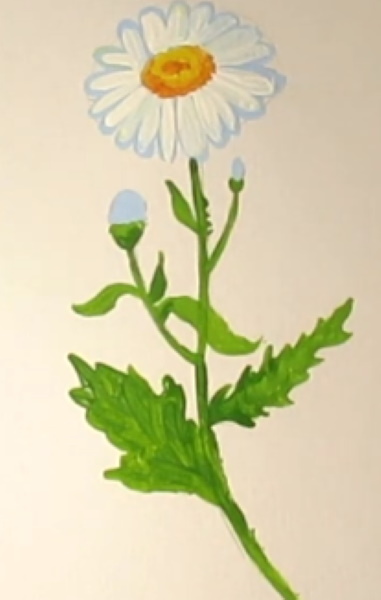
With paints
The chamomile (the drawing for children in this master class is done using gouache and brushes of different thicknesses) is first created using a pencil sketch using the same technique that was described in the first example.
Gouache and watercolor are very similar in their properties, but the former is thicker and provides a more opaque coating. Therefore, the drawing is brighter and more saturated. To prevent gouache in a jar from getting dirty from other shades, you can put it on a palette before drawing. This drawing is more complex and is made in a realistic technique, so it is suitable for children of middle school age.
Step-by-step drawing of a chamomile with gouache is described below:
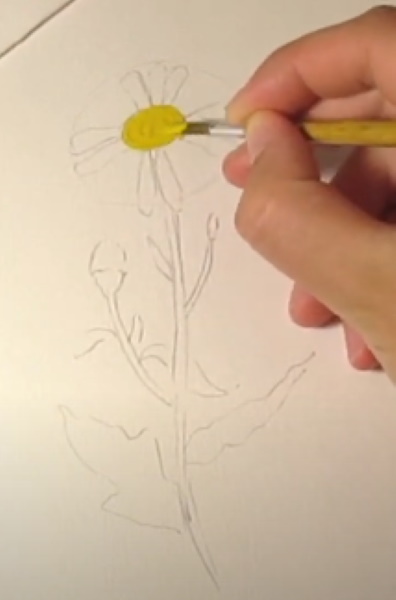
- Using a simple graphite pencil, draw 2 ovals – the middle of the flower and the outer contour of the petals.
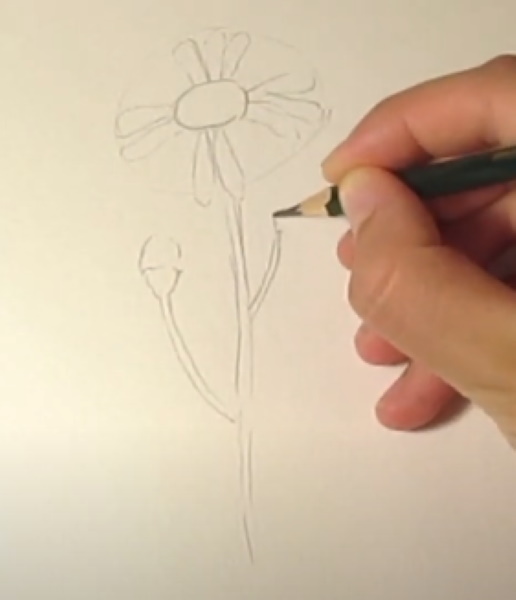
- Use a pencil to outline the flower petals, its stem and the branch on the left, on which the unopened bud will be located.
- Draw the bud as shown below. A little higher on the stem, draw another branch for a smaller bud.
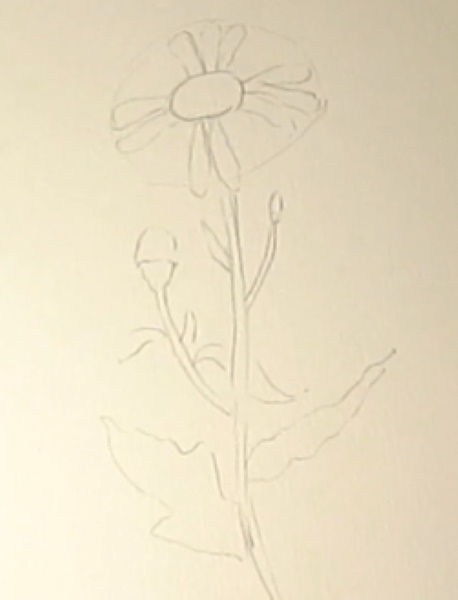
- Outline the contours of the leaves. Show the edges of large leaves with wavy lines.
- Paint the middle of the opened chamomile with yellow gouache.
- Mix blue and white gouache on a separate sheet of paper or on a palette to get a blue shade. Paint the petals.
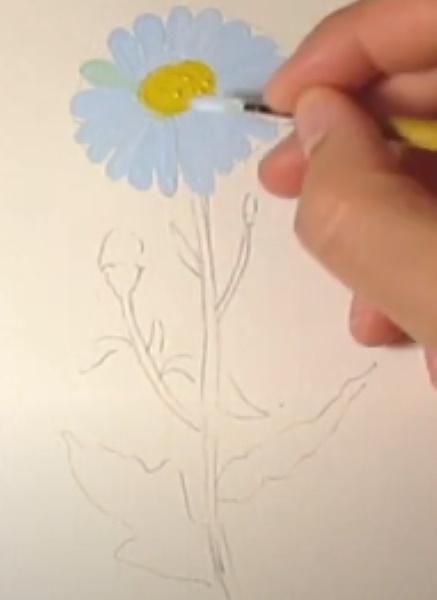
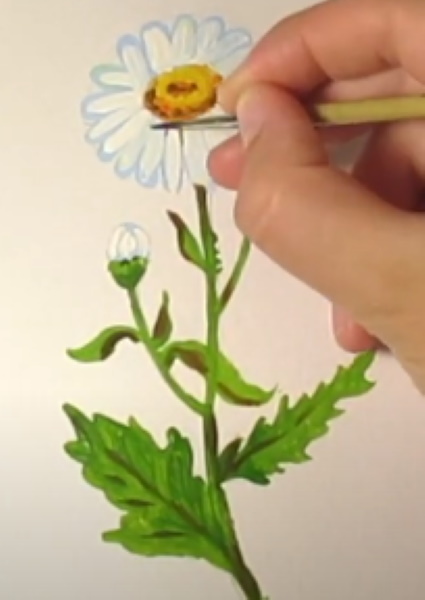
- Similarly, paint the upper parts of the unopened buds. Mix green separately with a small amount of yellow to get a grassy shade. Paint the stems, leaves and the lower part of the buds. To give a darker shade on the large leaves, add more green gouache to the paint on the palette.
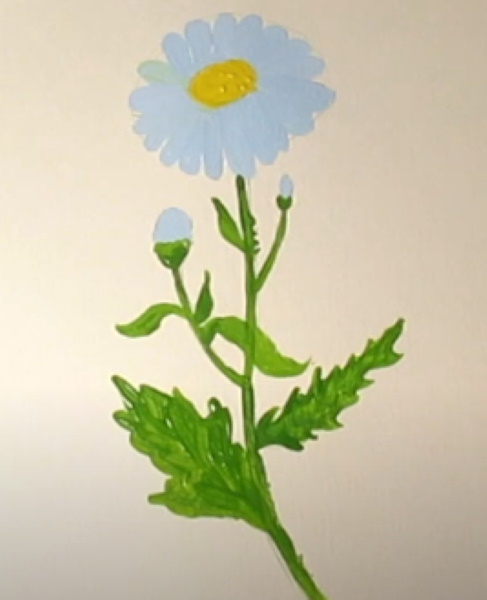
- After the blue gouache has dried, apply white stripes on top of it to the petals.
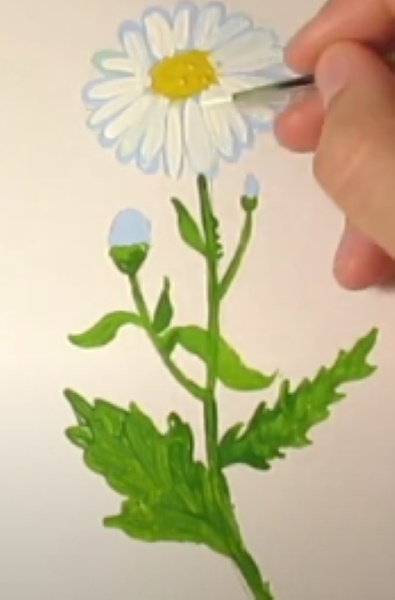
- Mix red and yellow gouache to get orange color. Apply it to the lower part of the flower core.
- Apply white strokes to a large unopened bud to show petals folded toward the center. Add brown to the orange paint and mix. Make brown shadows on the center of the daisy, and also draw them on the stems and leaves.
- Using a thin brush and blue gouache, outline the petals, “separating” them.
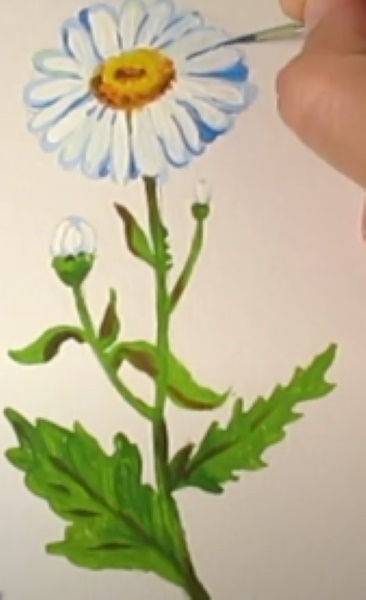
Ready.
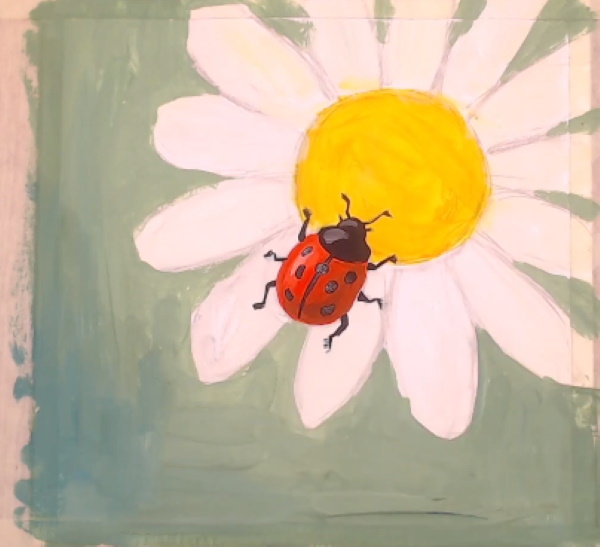
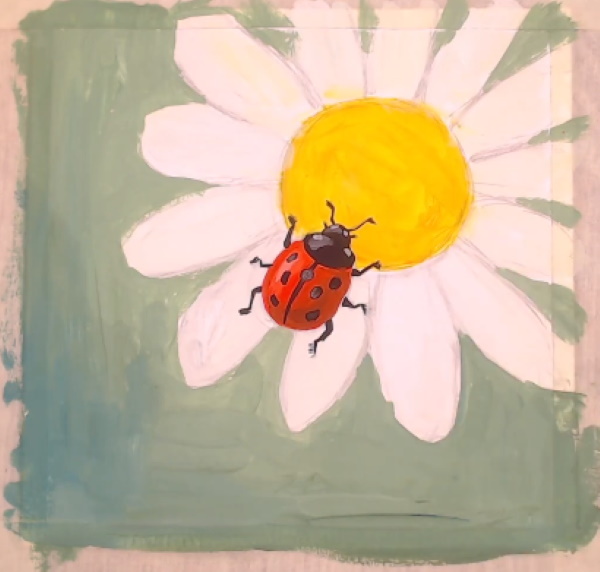
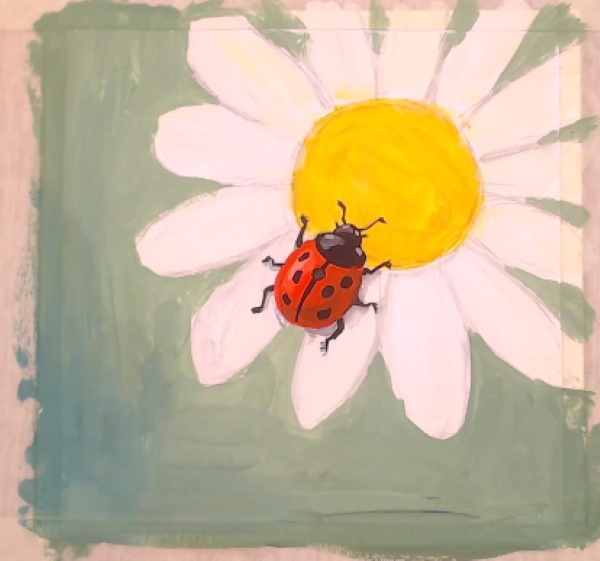
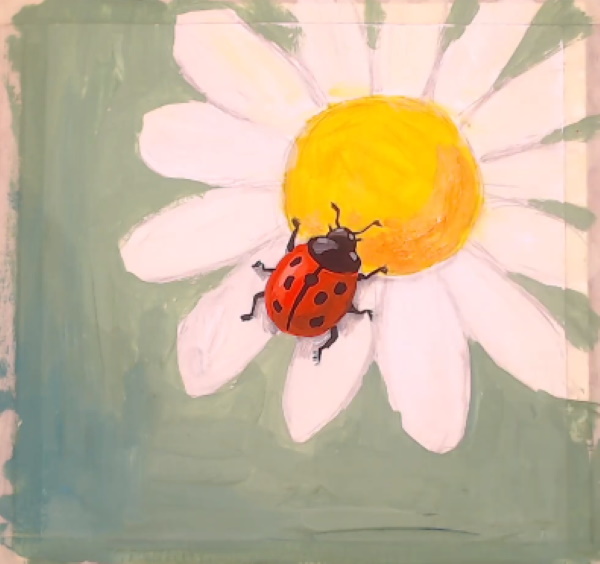
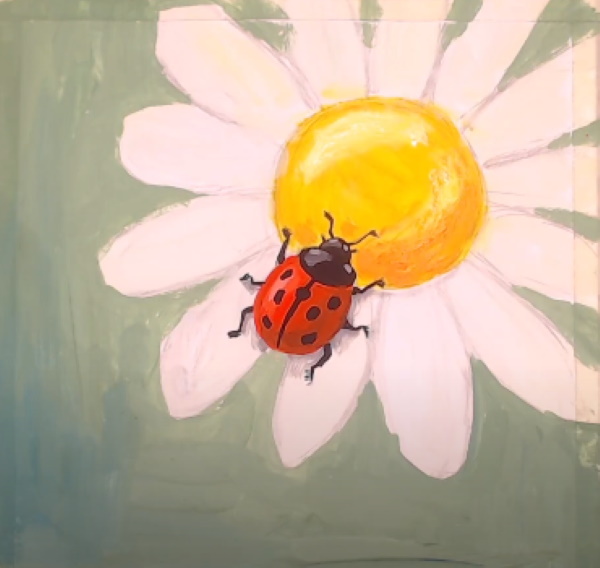
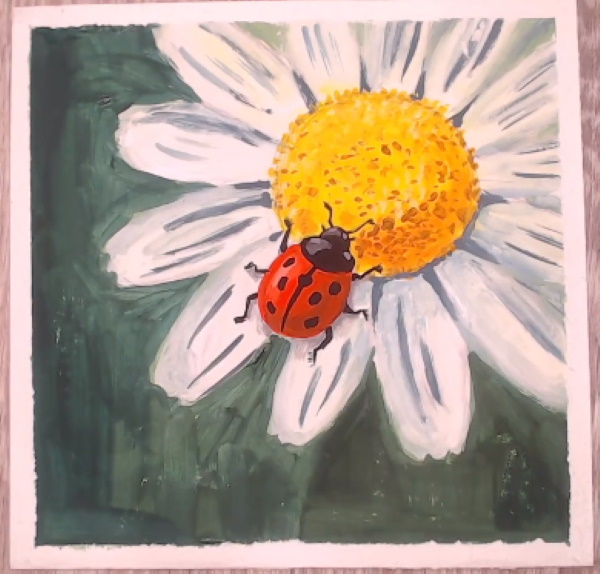
With a ladybug
The chamomile in this master class is also made with gouache. The flower will be shown in close-up in the picture. In addition, a large ladybug will be depicted on it. The technique has much in common with the previous examples for children.
The contours should be preliminarily marked with a simple graphite pencil. The lines are applied without pressing, since otherwise they will show through the paint and even stain the drawing. Therefore, for drawing contours (sketch) it is best to choose a hard pencil.
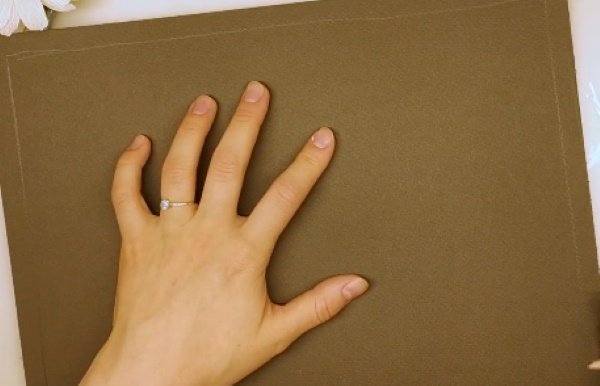
For convenience, you can first secure the paper to the table using sticky paper tape. After removing it, you will get a smooth white frame framing the composition. It is best to choose a special tape for artists, since regular tape can damage the paper.
The step-by-step process of drawing a daisy with a ladybug consists of the following steps:
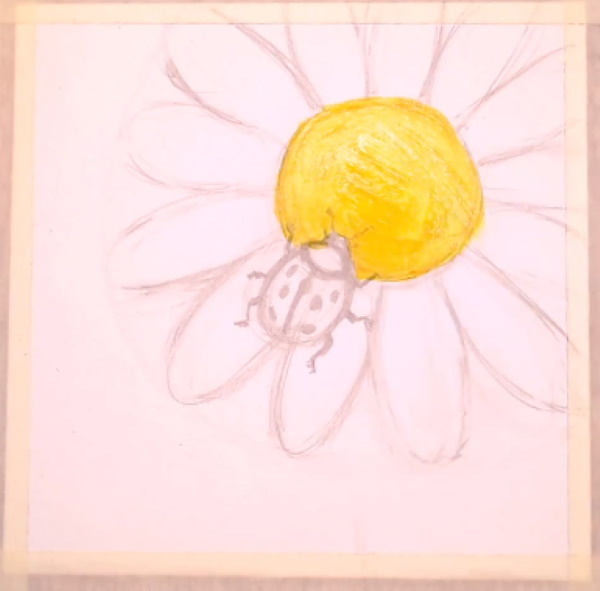
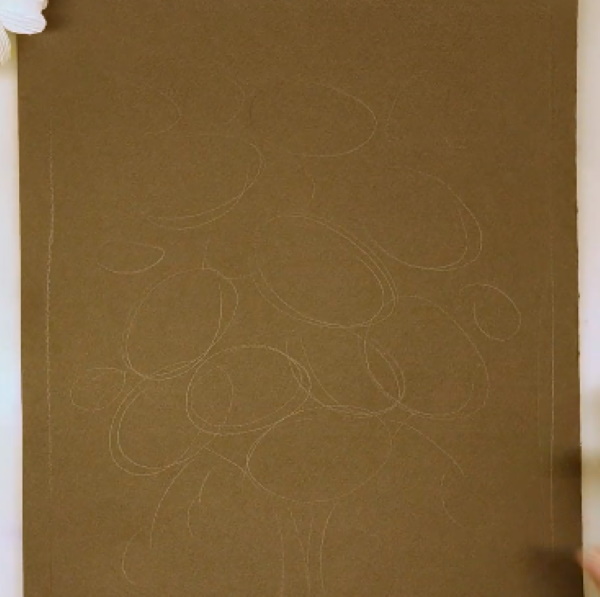
- Use a pencil to mark the outer contour of the flower. It should take up a large area of the drawing.
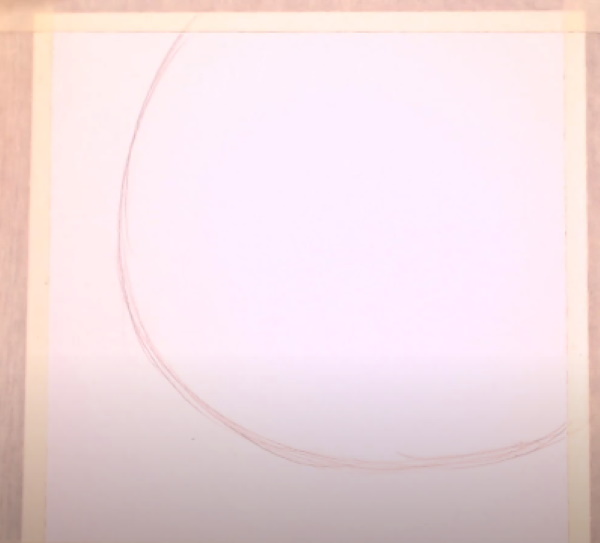
- Draw the middle of the flower.
- Draw oval-shaped petals between the marked contours.
- Draw an oval-shaped outline of a ladybug with a pencil.
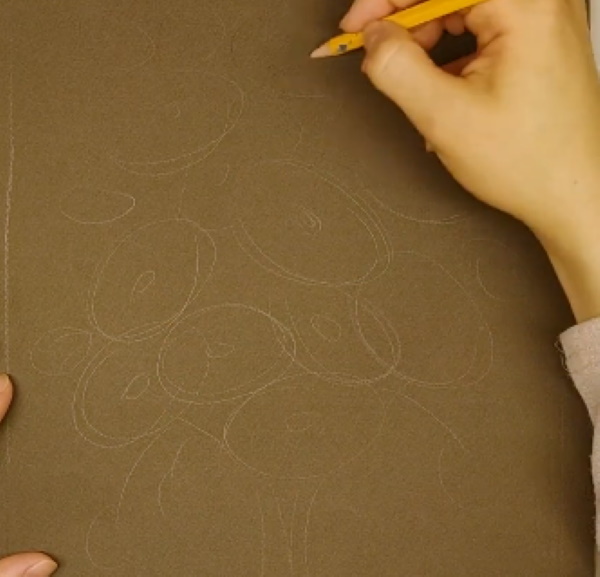
- Draw the outline of the insect's thorax at its top.
- Draw the head in the form of a smaller oval.
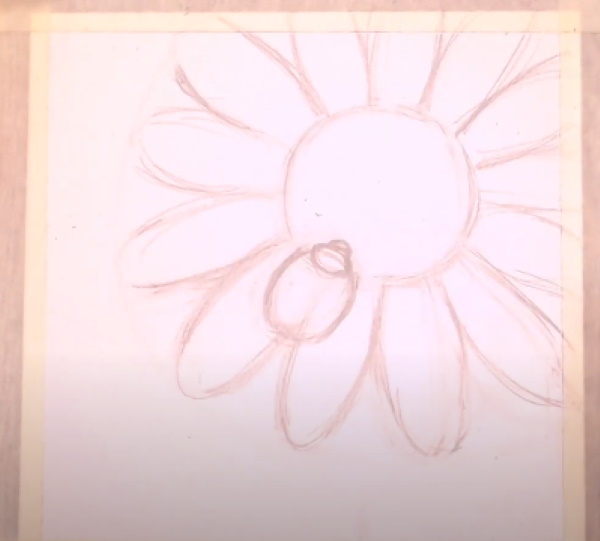
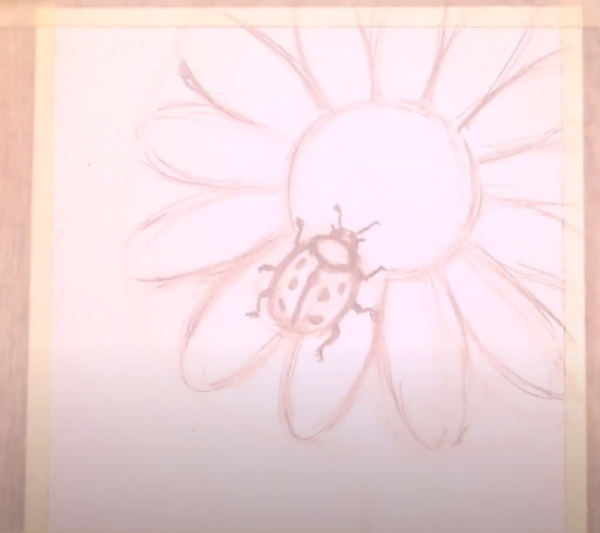
- Mark short antennae and spots on the elytra on the head. They should be located symmetrically.
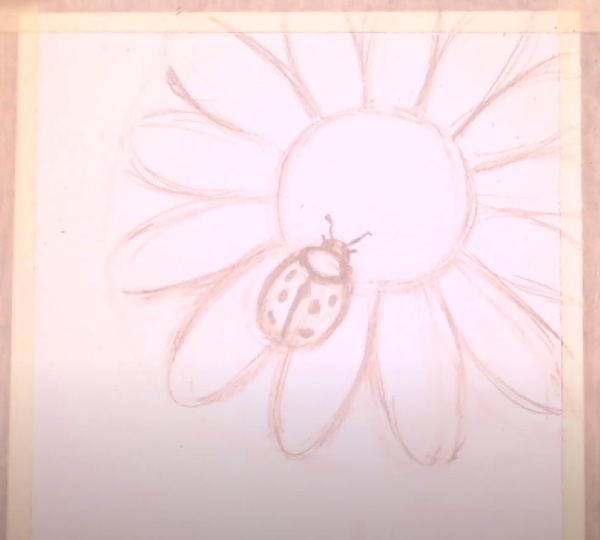
- Draw 3 paws on each side of the body and erase the extra lines. Leave only thin outlines.
- Paint the middle of the flower with yellow gouache.
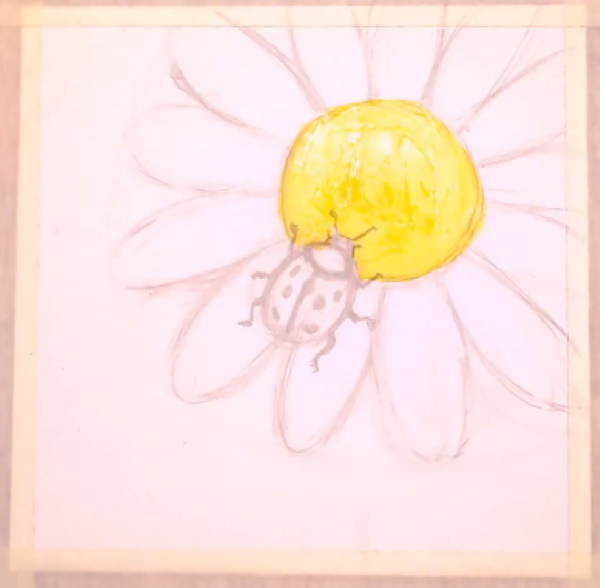
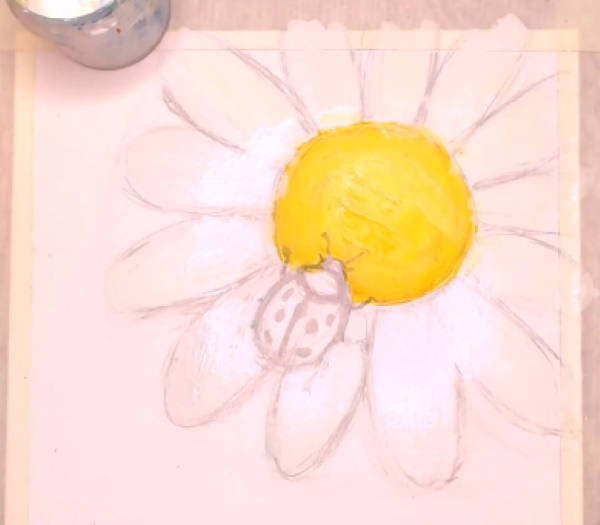
- Mix yellow gouache with a small amount of red on the palette and apply strokes of orange to the center of the chamomile.
- Apply a layer of white gouache to the petals.
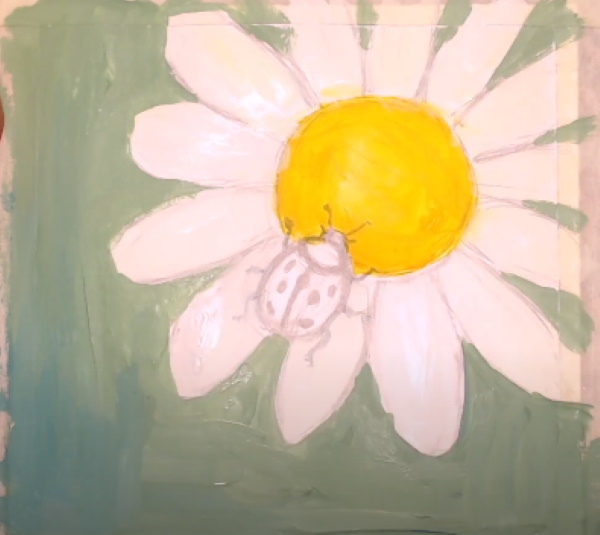
- Paint the background with green gouache with some white added. It doesn't have to be uniform, you can add shades of other colors (for example, blue), make it lighter in some places and darker in others.
- Color the ladybug's body red.
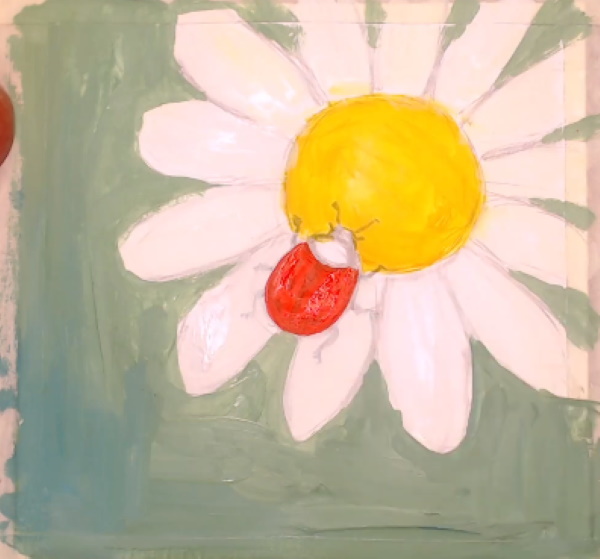
- Paint the insect's head and chest black with a thin brush.
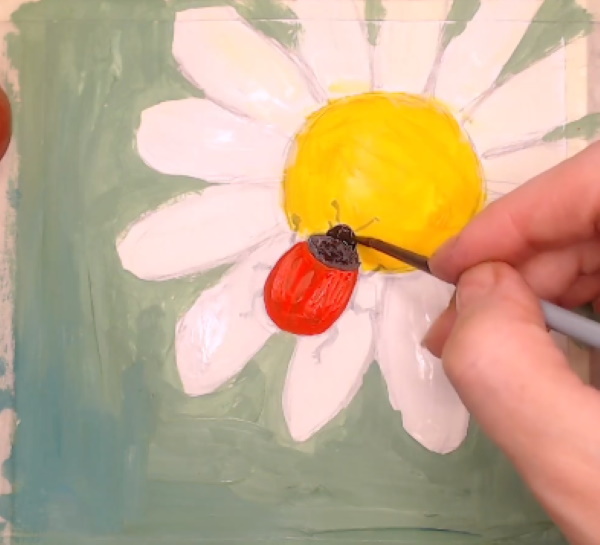
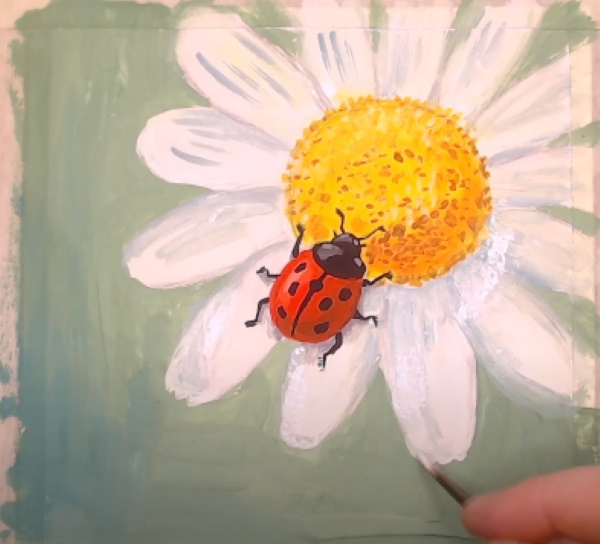
- Mix red gouache with a small amount of black on the palette. Use this shade to give volume to the ladybug, applying strokes on the sides of the body on the right. On the left, you can add white strokes (light glare).
- Using grey (a mixture of black and white gouache), make a few strokes on the upper part of the black chest and on the head.
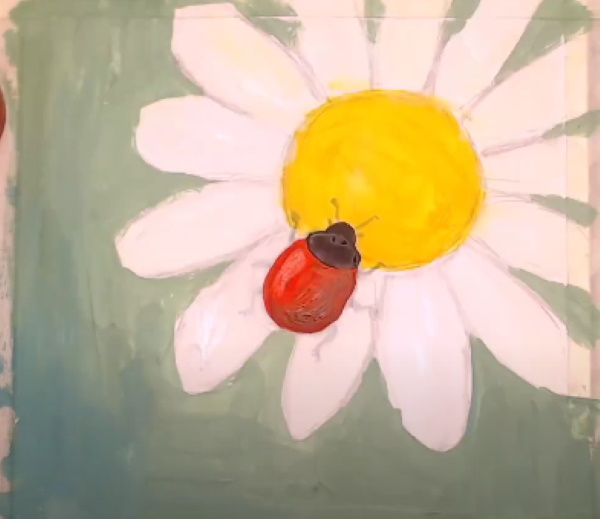
- Using a thin brush (or felt-tip pen, liner, gel pen), outline the ladybug's legs and antennae.
- Draw dots on the insect's back in grey.
- Add more white to the grey gouache on the palette, mix and paint small eyes on the head, as well as small spots on the sides of the chest.
- Apply a drop shadow on the petals under the ladybug and distribute it with a brush dipped in water.
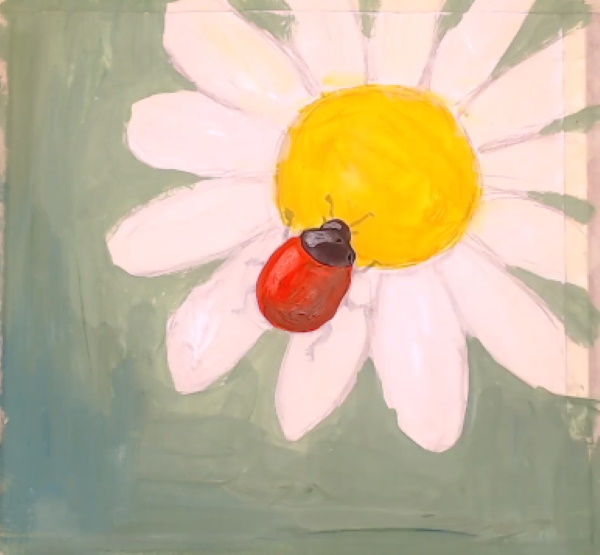
- Mix red, yellow and green gouache on the palette to get brown. Use this color to make dots in the center of the daisy.

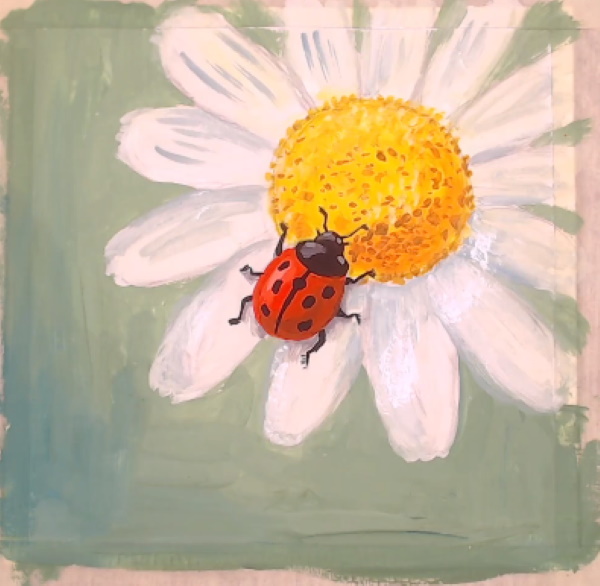
- Make a darkening of the middle of the flower with the same color along the bottom edge. This will add volume.
- Mix white and yellow paint on the palette and apply light strokes to the upper part of the middle. In the center it should appear protruding forward.
- Using brown color, make dots throughout the entire volume of the flower's center.

- Mix white, black and blue gouache on a palette to obtain a light grey-blue colour. Using a thin brush, apply shadows between the petals and strokes in the middle (depressions in the petals).
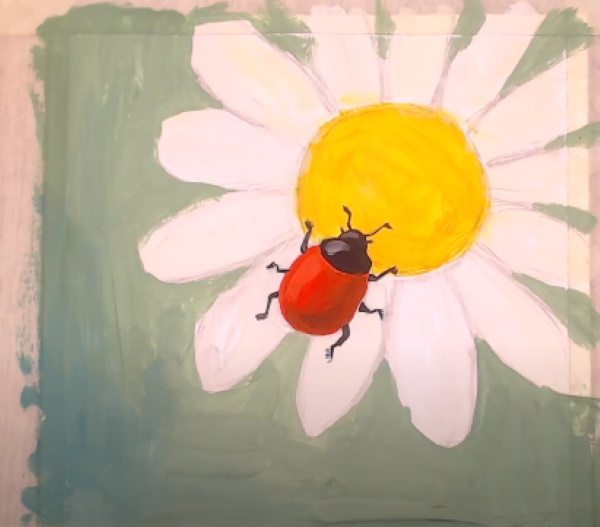
- Use white paint to make jagged edges on the ends of the petals.
- Add more blue paint to the grey-blue on the palette, mix. Draw darker strokes on the petals.
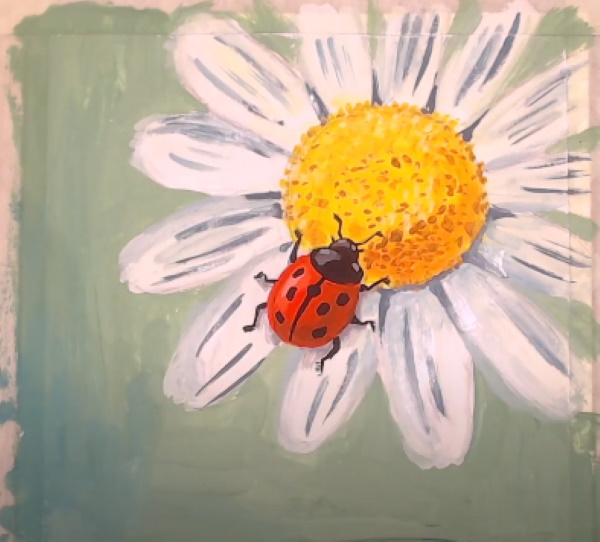
- Mix green, blue and a small amount of black gouache on the palette. Paint the background with a darker color.
- Remove the paper tape from the edges of the paper.
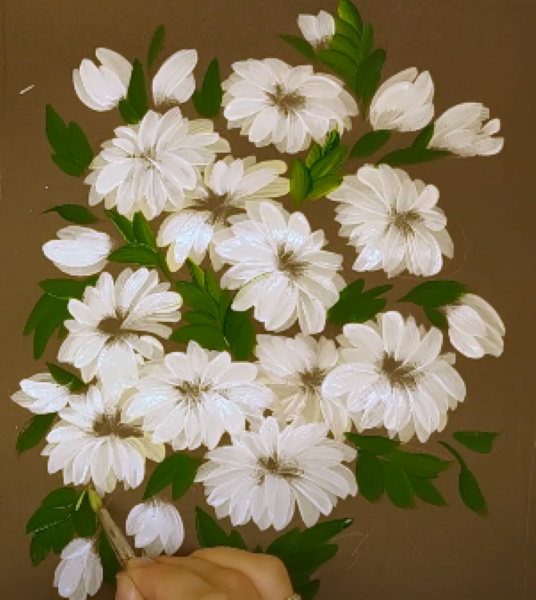
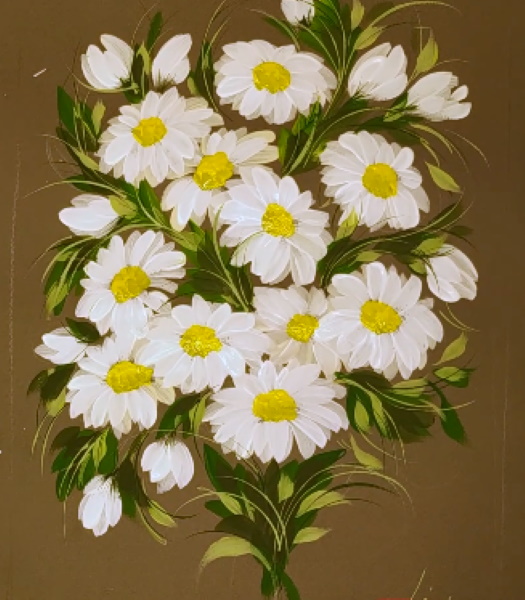
Bouquet on dark paper
The daisy (a drawing for children will be brighter if drawn on dark paper) in this example is done on brown pastel paper, which can be purchased at an art supply store. The flowers themselves are done with gouache using the double stroke technique, and the contours will be created in advance using a simple graphite pencil. Acrylic paints can be used instead of gouache.
You will also need 2 brushes with synthetic bristles - one narrow and thin, and the other slightly wider, with a rounded end. White, yellow and purple gouache will be used for coloring. You can use blue instead of purple.
How to draw a bouquet of daisies step by step is discussed below:
- Draw a frame with a pencil, stepping back about 1 cm from the edge of the sheet. With a frame, the flower composition will look more beautiful.
- Mark the location of the flowers on paper by drawing several large ovals (open flowers) and small ovals – buds.
- Draw the centers of the flowers as small ovals.
- On a palette, mix white gouache with a small amount of yellow. Add a drop of violet and mix. Make strokes with a wide brush, directing it from the edges of the oval to its center. For ease of drawing, the paper can be rotated. The strokes should be of different lengths, since the flower is depicted in perspective. This will be the first layer, on top of which a lighter shade will be applied later.
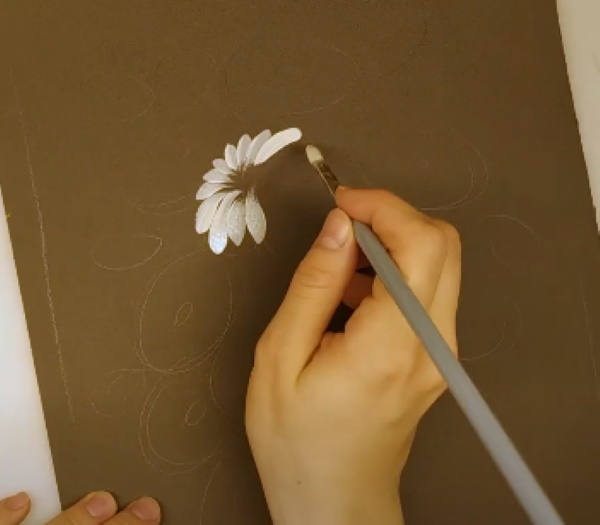
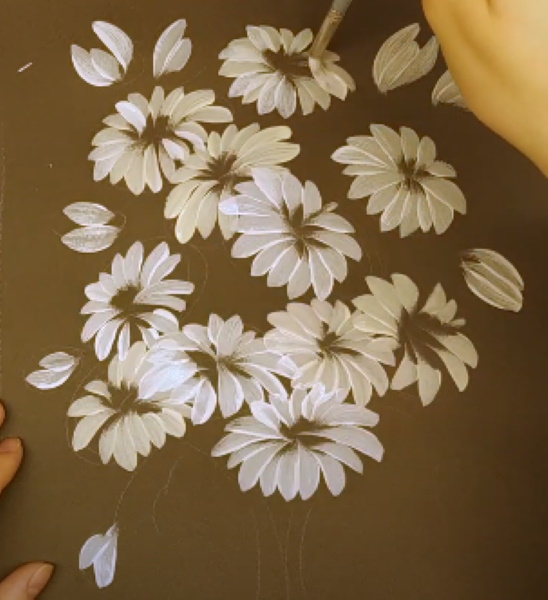
- Similarly, make the petals of the other daisies. Those flowers that are in the background should be drawn with the addition of purple gouache (it should also be mixed on the palette). Pure white does not exist in nature, so its various shades are also used in this drawing. Draw the buds in the form of 2-3 closely spaced petals.
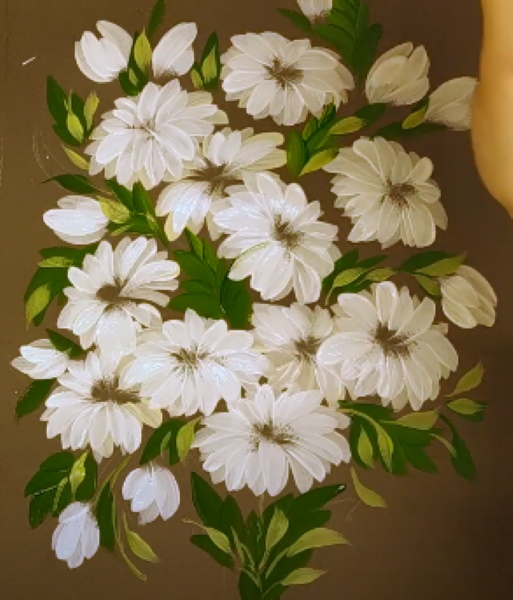
- While the layer of white gouache is drying, mix green paint with a small amount of yellow on the palette. Use strokes to show branches with leaves, making strokes in the same technique as the petals.
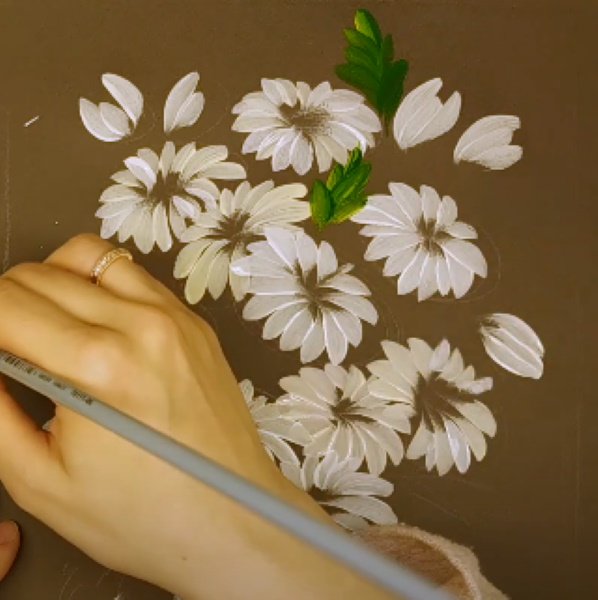
- Draw leaves over the entire free area, periodically changing their shade by adding yellow gouache.
- While the leaves are drying, apply a second layer of pure white gouache to the petals of the daisies without adding any other color. Also make strokes from the edge to the center to get pointed, tapered ends at the center of the daisy.
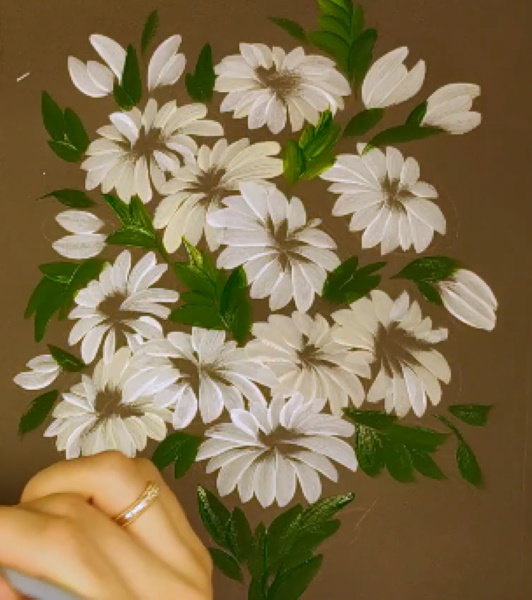
- On the palette, add yellow and green to the white paint and use this color to add strokes to the leaves.
- Paint the daisy centers with yellow gouache.
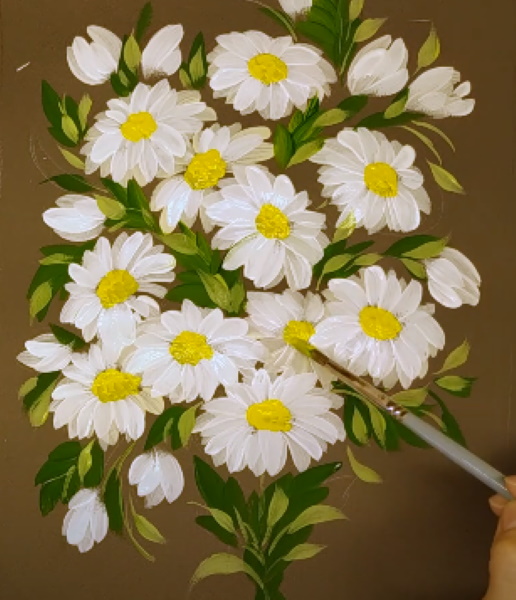
- To add more volume, mix yellow with green and make strokes along the edges of the centers.

- Add 1 drop of violet to the green gouache on the palette, mix and add this dark shade to the leaves.
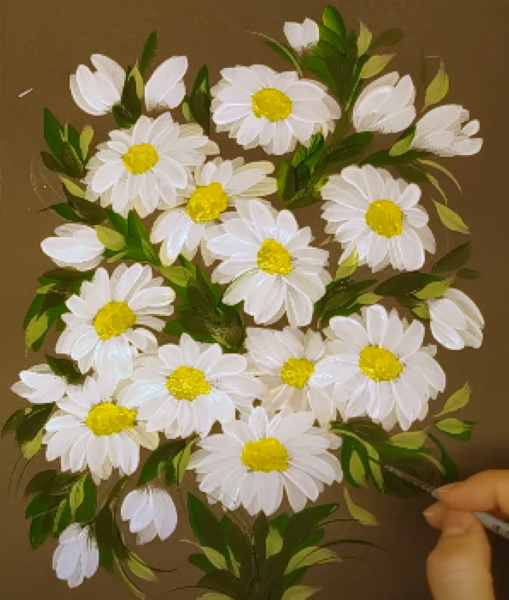
- Using a thin brush, paint the blades of grass in a bouquet of light green and dark colors in random order.
- The finished drawing can be framed.
Landscape with daisies
The chamomile (a drawing for children can also be done in the form of a landscape) in this example will be on a bright background. For work you will need gouache (yellow, green, brown, blue), paper, 2 brushes (thin and medium width).
You can draw a landscape with daisies in the following way:
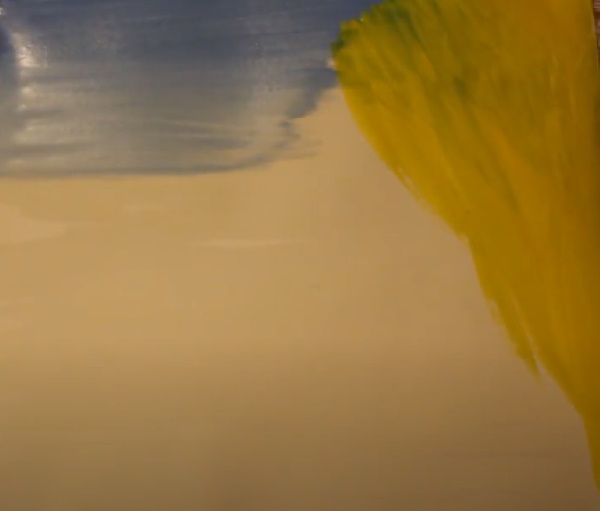
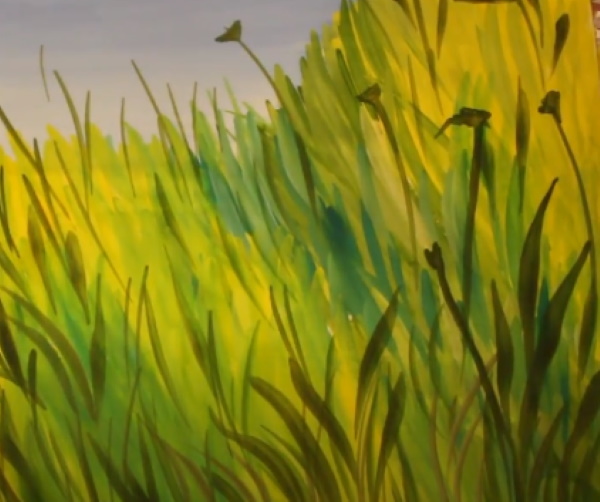
- Cover the paper with a layer of white gouache, which acts as a primer. Thanks to this, the color will lay down more evenly. Paint the upper left corner with blue gouache, diluting it with water in the lower part. This will be the sky area in the landscape.

- Paint the right side of the sheet with yellow gouache. The grass will be here.
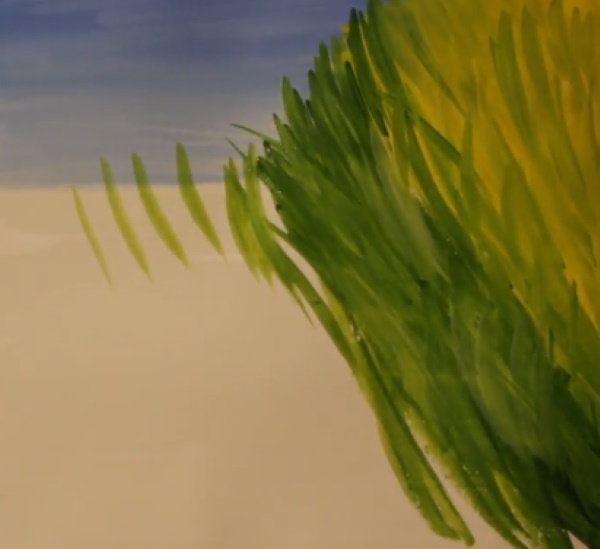
- Then add strokes of light green paint.

- Add strokes of dark green to the top of the drawing.
- Alternating shades of green (you can also add emerald) and yellow, paint the entire surface of the sheet at the bottom.
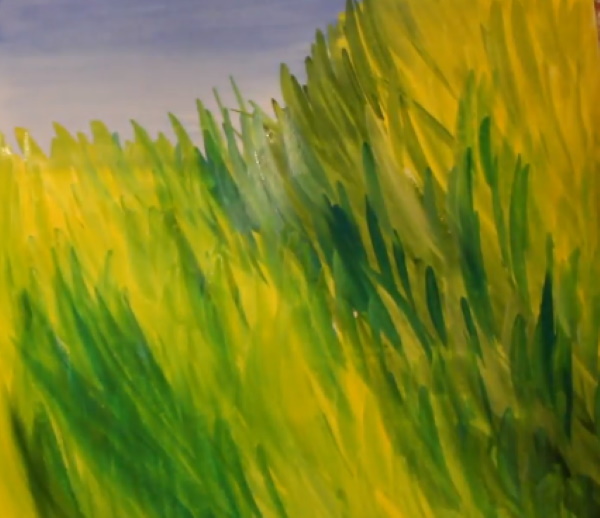
- Mix green and brown (in small quantities) and paint blades of grass with a thin brush.

- Draw the stems of the daisies in dark colors.
- Draw white daisy petals with white gouache.
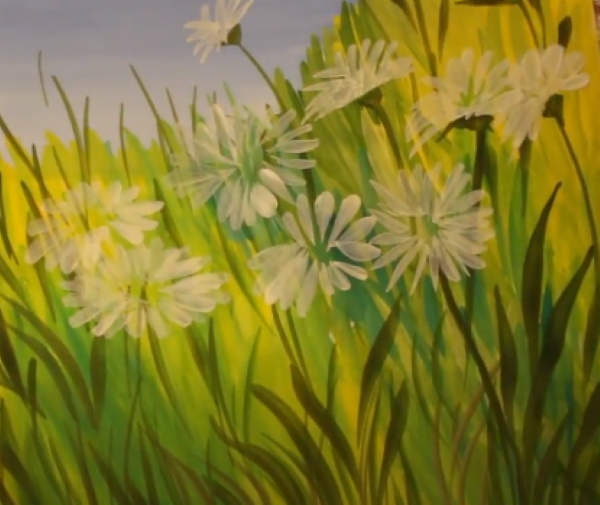
- When the first layer of white gouache dries, apply a second one to make the flowers brighter.
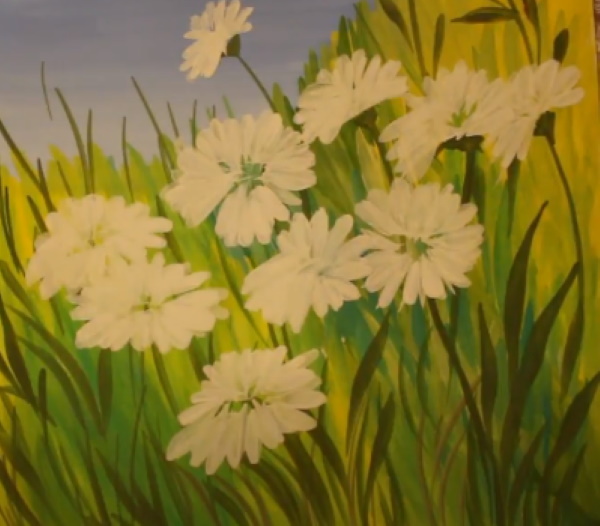
- Paint the centers of the daisies with yellow gouache. Give them volume with brown at the bottom and in the center.
- Mix blue gouache with white to obtain a light blue color and apply shadows to the petals.
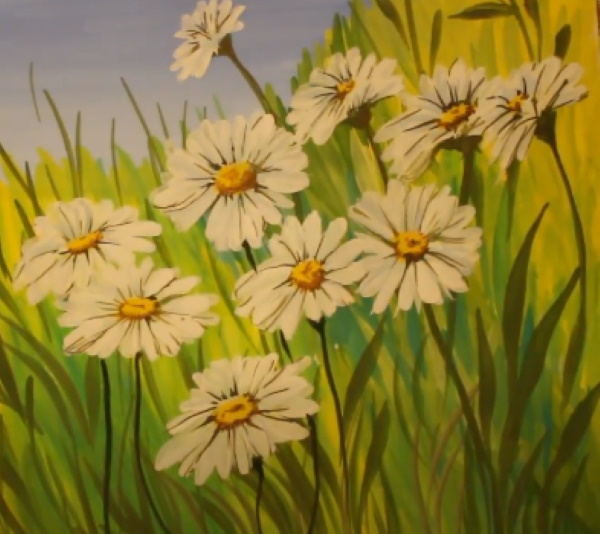
Chamomile drawing for children - step by step the child will be able to do everything correctly. - Use dark grey to draw the daisy petals more clearly.
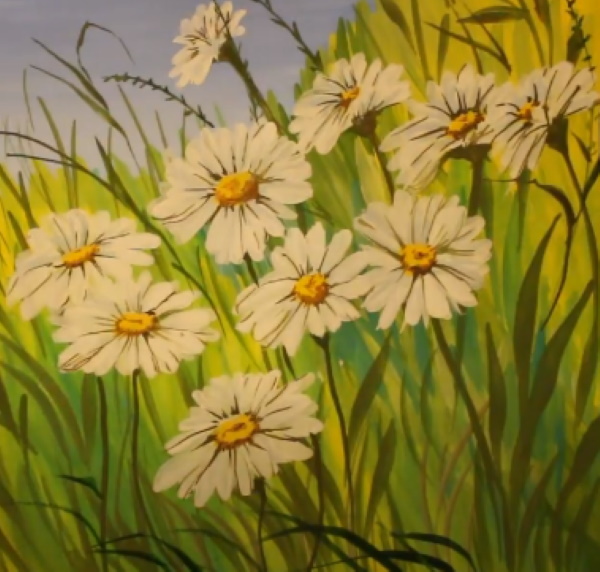
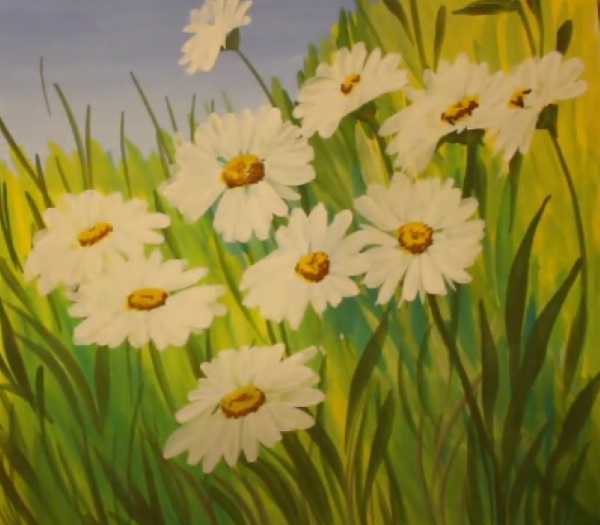
- Using a thin brush, draw dark blades of grass against the sky at the bottom of the sheet.
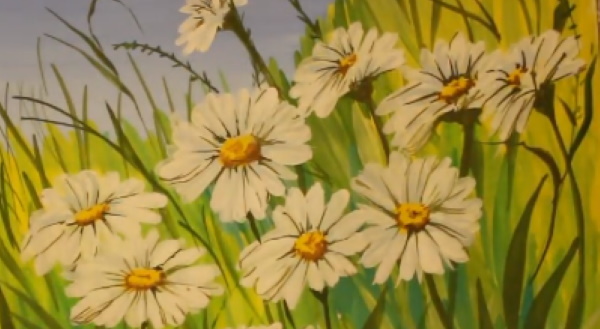
- Add some light colored grass as well. Now the drawing is ready.
Other options for drawing a daisy for children include: a postcard with daisies (to do this, fold an album sheet in half), flowers with a butterfly, a daisy in chalk against a blue sky, a daisy-sun.
The simplest drawing option is the image of a flower from above, when all the petals are symmetrical relative to the middle. A naturalistic drawing requires a more complex approach, when the outline of the flower is made oval, and the petals are of different lengths.
Video about drawing daisy for kids
How to draw a daisy for kids: