Violet is a flower that combines beauty and tenderness. It is well known to both adults and children. Image of a flower On paper it also turns out special, because bright colors are used for drawing.
General rules for drawing violets
It is better to draw the violet contours with a simple pencil. Thanks to this, the picture will be neat and its edges will be distinct.
Violets (a drawing for children can be simple or complex) on paper can be depicted as follows:
- Choose good, thick paper - one that will easily absorb paint and which won't be damaged by an eraser. It's important that it doesn't bend.
- Prepare paints, a simple pencil and an eraser.
- Decide what kind of violet it will be: decide whether it is domestic or wild. The first grows in a pot or other similar container on the windowsill, and the second - in open ground outside.
- Start the image by drawing the top of the flowers. The petals should be lush.
- Draw the stems and leaves. Remember that the flowers should be the center of attention of the person looking at such a picture. The greenery should also be lush, but not cover the flowers.
- Draw the container in which the flower grows. As a rule, at home it is grown in a pot. If it grows outdoors, you need to draw the soil.
- Detail the image. To do this, add a few missing elements.
How to draw a violet in a pot with a pencil step by step
Violets (a drawing for children can begin with an image of a houseplant), which are grown in an apartment on a windowsill, are usually small in size. They are placed in a small pot.
The color of the petals can be:
- white;
- pink;
- raspberry;
- yellow;
- purple;
- blue.
An important aspect of painting violets is to create beautiful shades that smoothly transition into each other: light should gradually turn into dark and vice versa.
To work you need to prepare the following:
- a simple pencil as the main drawing tool;
- an eraser, which is necessary for removing unnecessary lines;
- a piece of paper on which the violet will be depicted;
- felt-tip pens or pencils for coloring.
The stages of work will be as follows:
- Draw a pot. To do this, draw a cylinder: draw vertical side lines of the future pot, and at the bottom, an arc line connecting them, which will become the bottom. At the top of the sheet, draw an oval. This completes the outline of the pot.
- When the container for the ornamental plant is drawn, begin to determine the general outline of the flowers. To do this, several lines of different lengths are drawn above the pot, which are connected to each other at their ends. As a result, a lush figure should be formed, consisting of a large number of straight lines. This will be the outline of all the flowers.
- Draw leaves around the pot. They are almost oval in shape for violets, so you need to draw several ovals. They should be located under the outline of the flowers created in the previous step.
- When all the contours are ready, start drawing the flowers. It is better to start from the bottom - where the leaves are already outlined. Each violet flower is a small central circle and 4-5 petals located around it. This is how they are drawn with a simple pencil.
- When several lower flowers are drawn, move higher. There, the flowers are drawn according to the same principle: a small circle and petals located around it.
- Start refining the contours of the leaves. Their edges should not be quite oval, but slightly wavy. At the same time, each leaf should have veins. They are also drawn with wavy lines: one runs along the leaf in the middle, and from it another 4-5 lines branch off in different directions.
- Work with the eraser, removing the common borders for the flowers.
- Refine the contours of the flowers.
- Colour the resulting pencil drawing. For this, use blue, yellow and green colours.
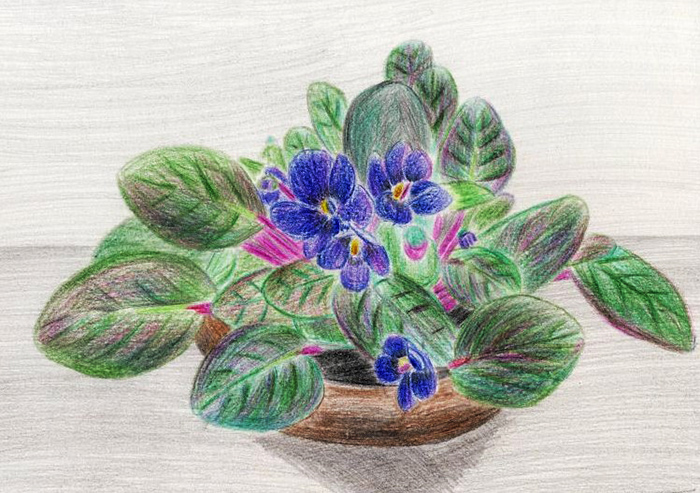
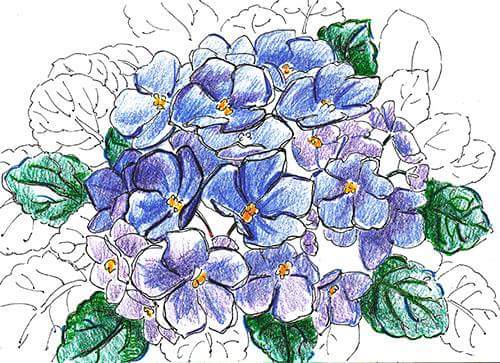
With colored pencils
Before starting creative work, prepare the following:
- white cardboard;
- simple pencil;
- several colored pencils;
- eraser.
Once everything is prepared, you can start drawing.
The work takes place in the following stages:
- Draw the contours. To do this, draw 4 circles. These will be the shapes for the future flowers.
- Add the remaining bud silhouettes.
- Draw leaves under the flowers that have the shape of a ball.
- Mark the petals on the flowers.
- Remove unnecessary lines using an eraser.
- Use blue pencils for the violets. The color will be concentrated mainly in the center of the flower, with only a small amount of it on the edges.
- To add volume, add purple color.
- Use a black pencil to create the outline and passages.
- Add a yellow tint to the middle of the flowers.
- Take a green pencil and start coloring the lower part of the drawing, represented by the stems and spherical leaves.
- Add dark green color to the leaves.
- Use a black pencil to create contours and shadows.
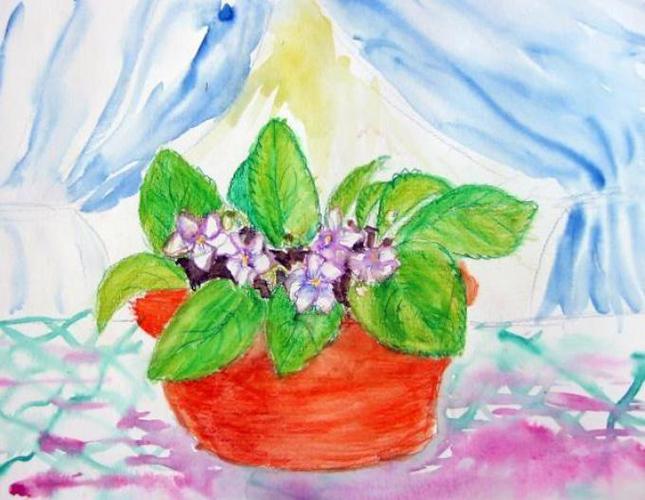
Violet from watercolor
To draw you will need the following:
- watercolor;
- a sheet of watercolor paper;
- brushes;
- container with water;
- simple pencil;
- eraser;
- black liner or marker;
- palette.
The steps to create an image will be as follows:
- Define the general outline of flowers, leaves, stems and roots. If desired, the flower can be placed in a drawn pot.
- Draw each flower separately within the outline of the overall composition.
- Refine the outline of each leaf and add veins to them.
- Refine the outline of the stems and roots.
- Use the eraser to remove unnecessary elements.
- Proceed to coloring. Color the violet flowers with a light pink shade, color the leaves with yellow and green tones.
- To indicate shadows, add darker shades to the petals and leaves.
- Draw the roots in brown. If the flower is in a pot, choose a shade for it.
- Let the painting dry, and then outline the contours with a black marker or liner.
With acrylic paints
Violets (a drawing for children can be drawn with paints, pencils, crayons or felt-tip pens) in a bouquet can be depicted using acrylic paints.

Before moving on to the creative process, you need to prepare acrylic paints of the following tones:
- white;
- black;
- dark purple;
- yellow;
- light green;
- chromium oxide.
Step-by-step instructions for drawing a violet and creating a panel on a wooden square blank are as follows:
| No. | Stage | Description |
| 1 | Drawing one flower | This step will help you understand the basic idea of drawing and shape. First, the outlines are created with a pencil, and then blackberry color is used to color the petals. Each petal must be painted separately: 1. Using black paint, draw light, long strokes, starting from the center of the flower and ending at its edges. 2. Add light lilac strokes, starting from the middle of the flower. 3. Add highlights that should be present on the edges of the petals. The highlights are created with white paint. 4. Highlight the center of the flower more clearly by using black paint to color it. 5. Draw the core with yellow. Use white paint to add a small highlight in the form of a simple dot. |
| 2 | Prepare a wooden blank | Apply white acrylic primer to the prepared wooden canvas. There should be several layers, and after applying each one, you should wait until the previous one dries. The workpiece should be sanded until it becomes sufficiently smooth. |
| 3 | Create a sketch of a bouquet | A simple pencil is used for this. All you need is to draw a light line with it. |
| 4 | Get started with paints | After completing the sketch, move on to working with paints.
To do this: 1. Apply strokes to different areas of the canvas to create the volume of the bouquet. 2. Draw the foreground using blackberry paint. 3. Draw the background using blackberry and black shades. 4. Add a small amount of light lilac tones. 5. On the side of the bouquet that is not exposed to light, add a few blue strokes. 6. When the backgrounds are drawn, move on to working with the lower part of the bouquet - with the stems and leaves. Here, the green color will be a priority. First, you need to draw the shadow sides of the leaves and stems in dark green, and then, adding a little white to the same color, begin drawing those sides of the leaves that are under the light. You need to draw the stems with the same light tone. 7. Draw the flowers themselves. To do this, make short strokes of light lilac paint. The strokes that are present in the foreground should repeat the shape of the flower. 8. Dilute the light lilac paint with white and draw highlights on the petals. 9. Use black to draw from the central part of the flowers. In the background, put a few dotted strokes of black paint. The viewer cannot see the flower completely, only its core. 10. Mark the cores with a yellow shade, and use green to add greenery between the flowers. 11. Draw a ribbon using yellow color. 12. Slightly tone the background directly around the flowers. To fill it, use a mixture of yellow and light lilac paints. Mix these two colors to the state of watercolor. 13. Using a thin brush and black paint, add detail to the bouquet. You need to lightly trace the outline of the flowers, leaves, stems and the recently painted yellow ribbon. 14. Make the bouquet more "alive". For this, use white paint. It is also applied with a thin brush. With this paint, you need to create highlights. They should be present on the surfaces of the leaves, stems and petals. Then, applying wider strokes, draw the highlights on the yellow ribbon. 15. Make a small splash on the whole work. For this you can use white, yellow and light lilac paints. |
After completing the described steps, you should get a lush, lively bouquet of violets. This panel will perfectly decorate the wall of an apartment or house.
With foam brushes
Violets (a drawing for children can be done in various techniques) on paper using a foam sponge:
- introduce young artists to the plant;
- will draw their attention to its structure and characteristic features;
- will help develop a sense of composition and color.
The following items will be required for this work:
- flower or its image;
- sheet from a drawing album;
- gouache and watercolor paints;
- wax crayons;
- foam sponges.
You can also prepare several felt-tip pens by attaching small pieces of foam rubber to their ends.
Once all this is ready, you should move on to the image.
The stages of its creation will be as follows:
- Look at the object you are going to draw. Pay attention to the leaves, petals and stems of the violet.
- Having examined the flower, begin to transfer the image to the album sheet. The first object on the sheet will be the pot, in which the flower is comfortably located. Wax crayons and watercolors are used for drawing. The color of the pot can be any - the way the artist wants to see it in his drawing. You can make it, for example, red, brown or yellow.
- When the pot appears on the paper, move on to drawing the flowers themselves, as well as their leaves and stems. They are created using the poking method. The centers of the flowers are drawn with brushes.
- To make the drawing more beautiful, apply some pattern to the pot. This can be done with brushes. The pattern can be represented by wavy lines, for example, black or blue. You can also add other simple decorations.
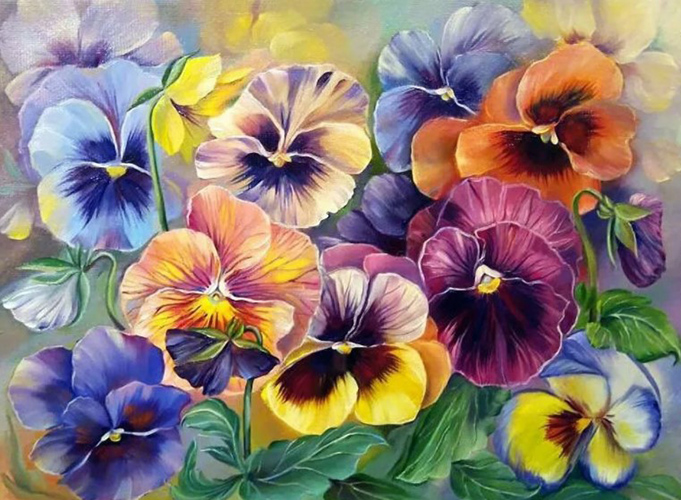
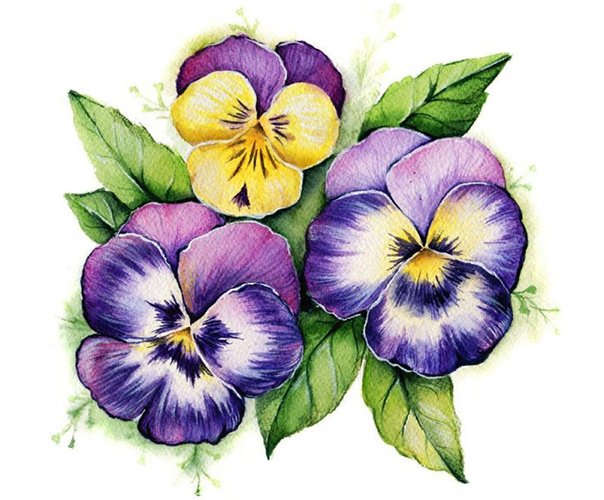
How to draw a tricolor violet
Viola tricolor or pansy has a botanical name - "Viola". It smells nice and is often found in meadows and gardens. Having seen it, creative children will want to capture it on paper by creating a drawing.
To do this you will need:
- paper;
- simple pencil;
- eraser;
- several colored pencils.
The creative process is most conveniently divided into the following stages:
- Draw a large circle schematically – almost the entire prepared sheet of paper. If you have difficulty drawing a circle, you can use a compass or a hard round object of a suitable size. Thanks to this, the edges will be even.
- Divide the circle drawn in the first stage into 4 identical sectors by drawing one horizontal and one vertical line. Both of them should pass through the center of this circle.
- Draw the violet petals that will be located inside the circle. There should be only 3 of them, and they are located around the bottom 3 lines, and connect approximately in the center of the circle. This is where the intersection point of the lines drawn in the previous step is located. The bottom petal, the middle of which will be the lower half of the vertical line, should be the largest. Its lower border runs along the lower border of the circle, but it should be wavy.
- Draw one more petal on the left and one on the right of the circle. They should be smaller in size than the bottom one just drawn. The middle of the left petal should be the left half of the horizontal line, and, accordingly, the middle of the right petal should be the right half of the same horizontal line. The borders of these two petals should also be wavy and run along the borders of the circle.
- Add a couple more petals on top – there is some free space left for them.
- Draw several leaves at the bottom, their borders should also be wavy.
- In the 3 lower petals, which were drawn first, it is necessary to draw shapes that look like small petals.
In the very center there should be a stamen, made in the form of a small circle, and several strokes should be applied to the leaves and petals. - Remove unnecessary lines with an eraser, which were previously used as auxiliary ones. First of all, those contours that were created at the earliest stage of this work are subject to removal.
- After removing the lines, outline the contours of the leaves and petals again.
- Colour the flower using pencils and markers.
Violet is a delicate indoor plant with velvety leaves and multi-colored petals. It is pleasant to look at both live flowers and painted ones.
If you don't have the opportunity to grow a flower in a pot, you can simply arm yourself with pencils and brushes and create a stunningly beautiful picture. It won't take much time or effort. Even children can handle such simple work.
Video about drawing
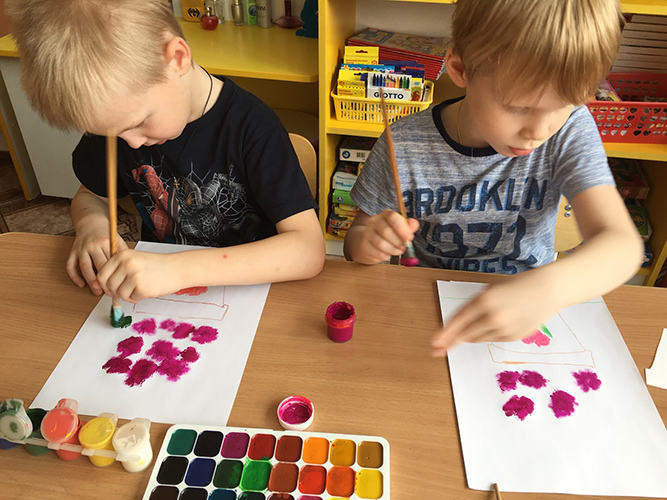
Master class on drawing a violet with a 3-year-old child: