The image of a rocket carries the idea of reaching new heights, symbolizing progress and technological breakthrough. The theme of space exploration remains relevant, especially among creative people, including artists.
Drawings of this device require knowledge of the laws and principles of perspective, as well as mastery of graphic tools. This is a complex process that requires attention and accuracy.
Necessary materials and tools
Drawing requires a set of tools and materials that allow the artist to realize his idea.
The basic ones include:

| Tools and materials | Brief description |
| Paper | For beginner artists, it is recommended to use thick types that hold paint well and allow you to easily correct mistakes. Smooth paper is suitable for creating precise lines and details, while rough paper allows you to achieve the effect of rough texture and volume. |
| Graphite pencils | Graphite pencils can be used to create fine lines and strokes, as well as to shade them, creating smooth transitions. It is resistant to light. Tonal variations are achieved only due to the thickness and intensity of the strokes. For drawings that require special clarity and saturation, it is recommended to use harder types of graphite, while softer types are more suitable for soft contours and shading. There are several manufacturers of graphite pencils: · Koh-i-Noor Hardtmuth; · Erich Krause; · Nevskaya Palitra; · Mapped; · Faber-Castell. |
| Charcoal pencils | This drawing tool has a softer, thicker stroke than graphite pencils. Charcoal pencils also allow you to vary the tone and intensity of the lines, creating different artistic effects. Their softness makes them especially suitable for sketches and quick drawings. |
| Sanguine, sepia, sauce | These materials are used to create drawings, engravings and sketches. They have a rich color palette and wide possibilities for rendering various shades. |
| Colored pencils | When choosing, you should consider their hardness - it is indicated on the body and is designated by the letter "H" for hard and the letter "B" for soft pencils. Softer pencils allow you to create darker lines and strokes, and hard ones - thin lines with minimal stress on the paper. By changing the pressure, you can vary the thickness of the lines. |
| Erasers | They are used to correct errors and change details of the drawing. They can be soft or hard, depending on the task and style of drawing. |
| Klyachki | They are used to soften contours, create soft transitions and blur details. They are used to lighten dark areas of a drawing and, if necessary, to copy a drawing. |
| Stencils | These are ready-made templates that allow you to create a repeating pattern or outline. They are often used to speed up the drawing process and create stylized images. |
| Rulers, compasses | Provides precision and accuracy of work. The ruler allows you to draw straight lines, control distances and scaling of the drawing. The compass is used to measure and draw circles and arcs. |
| Sharpeners | They are designed to sharpen pencils and maintain the sharpness of the lead. Sharpeners can be manual or mechanical. |
| Brushes | The size of the brush determines the coverage area and the intensity of the color - larger ones allow you to apply broad strokes and create large color spots, small ones are suitable for fine lines, details and contours. The shape of the brush is important: flat ones are used for broad strokes, round ones - for small details and fills. The material of the bristles can be natural (for example, pig bristles) or synthetic, which affects the stiffness of the brush and its ability to hold paint. |
| Gouache | A water-based paint that dries matte. It produces vibrant, rich colors, but requires special techniques to ensure smooth transitions and gradients. |
An important tool for painting is the palette, which is a flat surface for mixing paints and selecting the desired color shades.
Every artist's arsenal may include a palette knife - a thin metal or plastic spatula, which helps to apply paint in an even layer, create interesting textures and fix the work with varnish. Cotton swabs and applicators are suitable for applying paint.
Master classes
A rocket is a special aircraft that is used to launch into space. It contains fuel and oxidizer.
When they mix and burn, they create a gas that shoots out of the rocket and creates an incredible force called thrust. This is what propels the rocket into space.
Some rockets help satellites stay in orbit, others send spacecraft to other planets, and there are some that can become satellites themselves.

Creating a rocket drawing is a subjective creative process, each artist can interpret the theme of space and rockets in their own way.
The main thing is to be attentive to details and artistic laws, and then you will get an effective and aesthetic drawing that expresses all the harmony and grandeur of the cosmos.
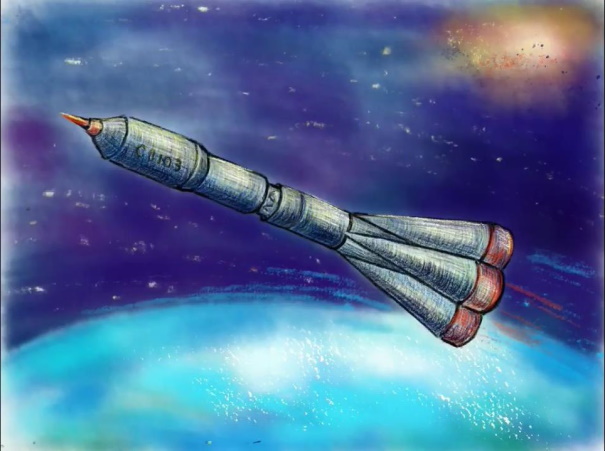
"Vostok-1" (the first manned rocket)
"Vostok-1" is the first launch vehicle developed to deliver humans into space. With its help, the USSR achieved one of the most significant milestones in history: for the first time, humans were able to leave Earth and make an orbital flight around the planet.
"Vostok-1" was a 1-stage launch vehicle with a liquid rocket engine. It consisted of 3 main parts: a nose fairing, a transition section and an instrument section with a pilot's cabin.
The cabin housed the only crew member, Yuri Gagarin, the first person to fly into space.
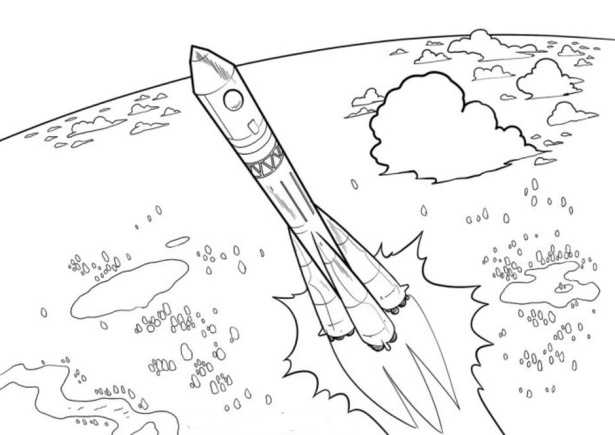
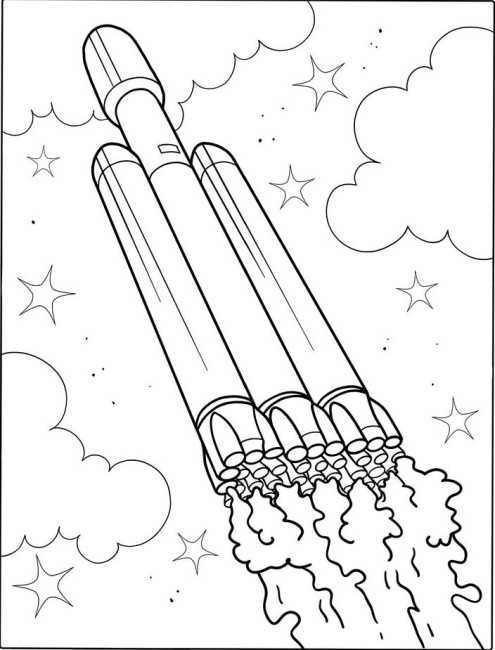
A rocket in space can be depicted in a picture using a certain sequence of actions:
- A sketch of a rocket on paper. At this stage, there is no need to detail the drawing, the main thing is to outline the main lines and proportions of the rocket.
- Draw the body, which should be in the shape of a cylinder with a pointed nose.
- Draw an arc symbolizing the Earth. The planet is depicted as an oval, which partially covers the horizon and creates the effect of depth of space.
To add realism to the picture, it can be made with a slight tilt, since in reality, when looking at the horizon from space, it appears as if the Earth is tilted.
- Add stabilizers to the bottom of the rocket.
- Draw the nozzles. They should be located at the bottom of the rocket body and look like cones or cylinders. You can add details around the nozzles, such as flames or sparks. These elements will help create the impression of the engine working.
- Draw a porthole.
- Add details to the tail of the rocket such as steering engines and stabilizing fins.
- Draw clouds in a spiral shape around the Earth.
- Add details that will help imagine a rocket in space: rivers, lakes, forests.
- Choose colors that match the Vostok rocket. Their combinations can affect the perception of the drawing, so you should choose shades that will create the necessary visual effect.
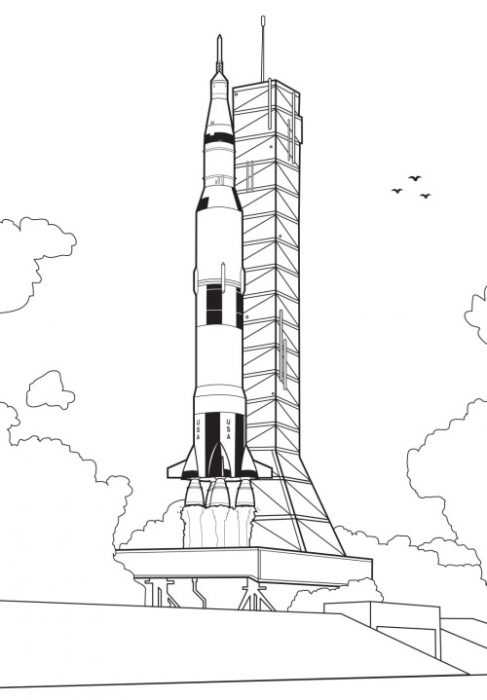
Saturn V (American super-heavy launch vehicle)
The rocket was developed by NASA USA to carry out the Apollo program. Saturn-5 is a 3-stage system designed to deliver payload into space. It has a total length of over 100 m and is capable of launching up to 140 tons of cargo into orbit.
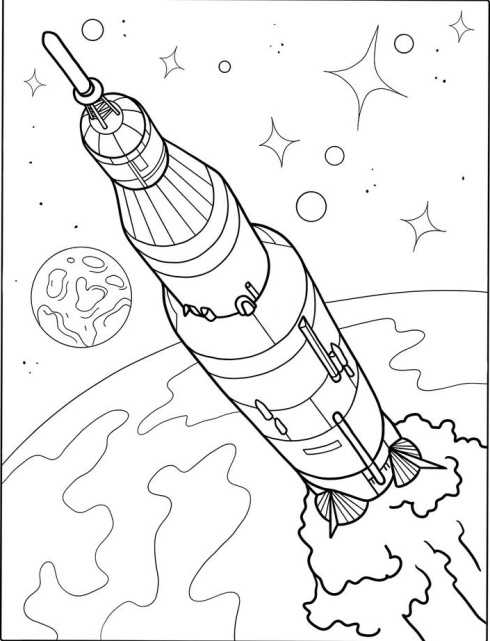
The first stage of the rocket consists of 5 engines, runs on liquid oxygen and kerosene and provides the initial lift of the rocket into the atmosphere. The second stage is also equipped with 5 engines, which continue to accelerate the rocket in the upper layers of the atmosphere, where air resistance is minimal.
The 3rd stage, the smallest in size, is equipped with 1 engine and provides the final acceleration to the speed required to reach orbit.
Rocket in space in the picture using several steps:
- A schematic sketch of the Saturn V rocket. Indicate the general proportions, location and size of the stages and engines, and the position of the rocket nose.
- Draw a rocket that rises vertically into the sky with a slight tilt from the vertical axis. You can use straight lines to draw the steps to show their length and height.
- Draw an arc under the rocket, symbolizing the Earth. It should be wide at the base and narrow at the top, creating the effect of the planet's remoteness.
- Add an image of the Moon and some stars in the night sky to emphasize the space setting. Outline their main outlines and location relative to the rocket and the Earth.
- Add schematic images of continents, oceans and some islands on planet Earth.
- Work out the details of the rocket, including the engine stages, nose, and other structural elements. Pay attention to the detailing of each stage: they should vary in size and shape. Add small details such as antennas, engine nozzles, and hatches.
- You can add color by using dark colors for space and the Earth, and bright colors for the rocket, moon, and stars.
"Heavy Falcon" (American launch vehicle SpaceX)
"Heavy Falcon" belongs to the class of heavy launch vehicles, which are capable of launching significant masses of cargo into orbit. The rocket consists of 3 stages, each of which performs its own function during the flight.
The payload capacity of the Heavy Falcon allows launching spacecraft weighing up to 20 tons into low Earth orbits and up to 7 tons into geostationary orbits. The rocket's flight range is several thousand kilometers.
The rocket in space in the picture is depicted with the help of a master class:
- Create a basis for future work sketch. Draw several rectangles that will be the basis for the rocket. They should be located one above the other and slightly tilted to the right. This will help give the rocket volume and movement.
- Draw the rocket body. It should have the shape of a cone or cylinder with a tapered end. The rocket body should be divided into 3 stages. Make the top stage of the rocket the narrowest. The bottom should be wider than the top, and the middle one should be of medium width.
To show that the rocket is moving vertically upward, its bottom should be slightly lower than the top. Connection lines can be drawn between the stages.
- Add a background for the rocket. Draw clouds that can be located in the background. They should look like fluffy lumps of cotton wool, slightly stretched horizontally. Add stars. They can be located randomly.
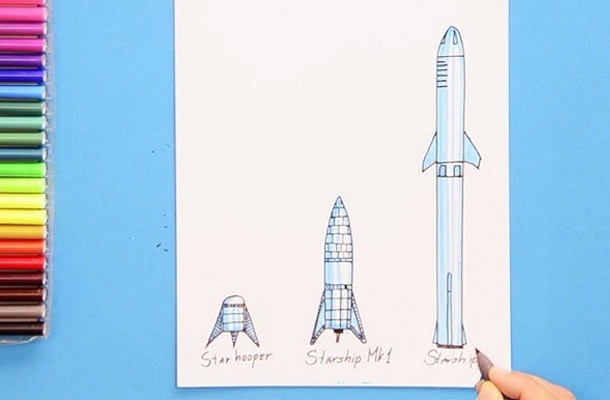
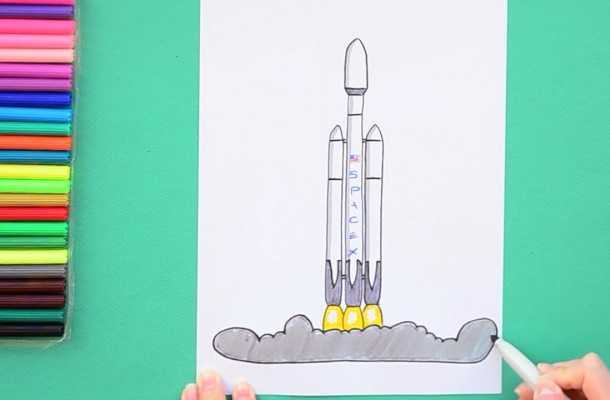
- Draw details on each stage of the rocket. Place 9 engines on the lower stage. They are shaped like cylinders, with fire and smoke escaping from them. You can also place an engine on the middle stage, which will be smaller than the engines on the lower stage.
Draw it in the same way as the lower engines. Leave the upper stage without details to emphasize that it is the smallest and lightest. Do not overload the upper stage with unnecessary details, this can destroy the integrity of the image.
- The drawing can be colored.
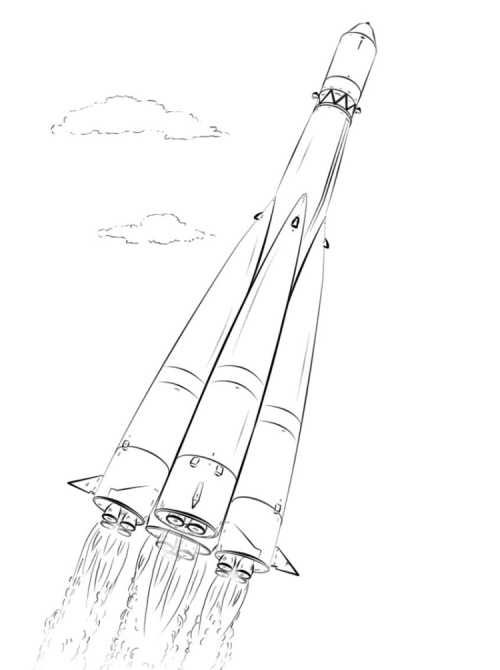
"Union"
Soyuz is a family of space launch vehicles developed in the USSR. They are used to launch cargo and manned spacecraft into low Earth orbit and to the International Space Station (ISS).
The Soyuz-2 rocket is the main launch vehicle for Russian spacecraft. It is a 3-stage rocket with liquid rocket engines. The length is about 45-50 m, the diameter is about 10-12 m.
The rocket is capable of launching into orbit a payload weighing from several hundred kilograms to several tons.
Step-by-step instructions for creating a rocket drawing:
- Decide on the proportions and dimensions of the future rocket. Outline the main elements of the rocket, such as its body, nose, stages and engines.
- Start with the body, which is a long horizontal line. Add the nose of the rocket, which should be slightly higher than the main line of the body. Draw the stages of the rocket. There should be 3 of them, and each stage should be slightly smaller than the previous one.
The 1st stage has 2 engines, the 2nd and 3rd have 1 each. The engines should be symmetrically located on each stage. Draw a line from the nose of the rocket to each stage to make the design more realistic.
- To create the impression that the rocket is flying above the Earth, draw an arc to represent the horizon. Place it at an angle to show that the rocket is moving forward.
A slope that is too steep will make the rocket appear to be falling, while one that is not steep enough will make it appear to be standing still. The angle of the slope depends on the perspective of the drawing. The ground should not look like a flat surface, so add some unevenness to it.
- Draw additional details of the rocket. You can draw windows or portholes, antennas or other small elements that will make the drawing more interesting.
- You can add shadows and volume to make the rocket look 3-dimensional. The shadows should fall in the direction of the light source.
- Color the picture.
Schematic for preschool children
The rocket in space in the picture can be created using the following steps:
- Start by making a light sketch of the rocket. This will help determine the location of the rocket, as well as the locations of Jupiter and Saturn.
- Draw a rocket so that it moves from the bottom of the sheet to the top.
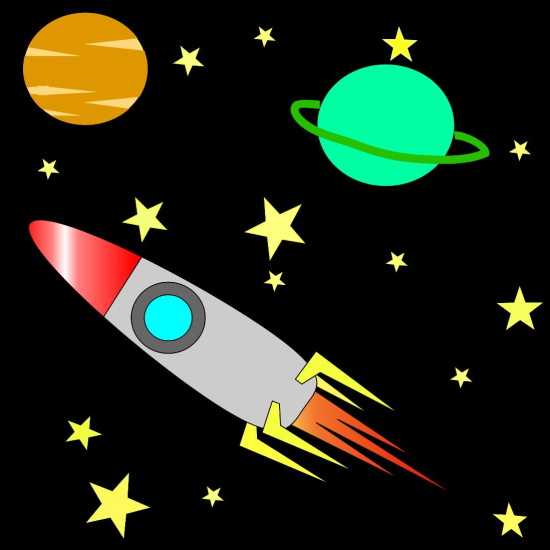
- Jupiter and Saturn are 2 bright planets of the Solar System. Place them on the background, observing the perspective and proportions relative to each other and the rocket. Depict them with simple forms.
To indicate the presence of Jupiter's famous bright stripes and the Great Red Spot, and Saturn's characteristic rings.
- Draw stars as dots or small circles of varying sizes and brightness. You can add larger and brighter ones to the foreground.
- Mark the engines. Draw them as narrow, elongated figures, directed in the direction opposite to the direction of the rocket's movement. Draw a round porthole.
- Color the picture.
An astronaut in outer space near a rocket
A rocket in space is available for drawing by beginners and the youngest artists:
- Make a sketch that will serve as the basis for the drawing. Use simple lines and shapes to create the basis of the drawing, including the outline of the rocket, the figure of the astronaut.

- Draw the basic shape of the rocket - an elongated oval. This will be the body of the rocket, which is located almost vertically at a slight angle.
- Draw an astronaut waving his right hand. It can be represented as a circle with 4 elongated lines going from it in different directions (the astronaut's legs and arms). Pay attention to the pose - it should be natural and easy.
- Draw a cable from the astronaut to the rocket. It can be depicted as a thin line or a wider strip, depending on the desired effect.
- Add a schematic representation of the stars. They can be located in the background or on the periphery of the drawing.
- Place schematic engines on the bottom of the rocket. These can be short vertical lines located on the sides of the body. Add stabilizers to the bottom of the rocket, which will be depicted as small wings located at an angle to the body.
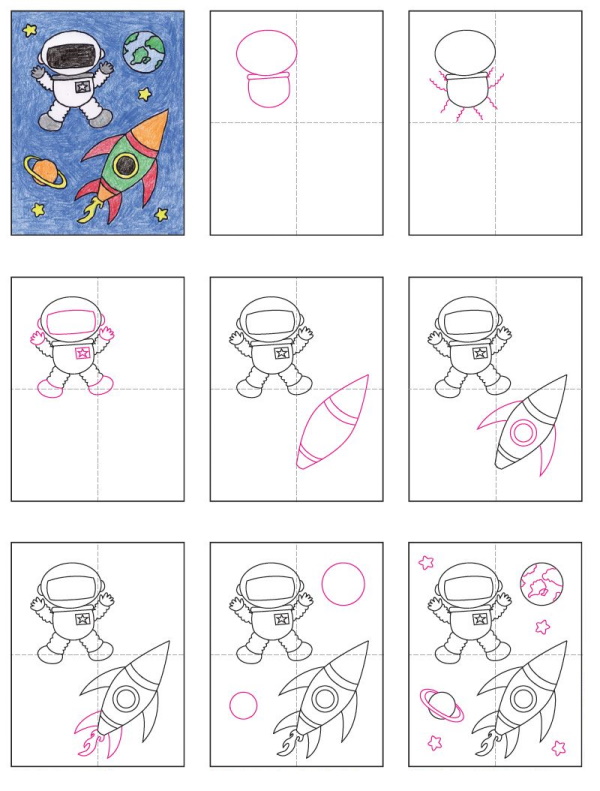
Draw a small nose at the front of the rocket, and a schematic porthole above the body.
- Draw an astronaut's spacesuit with buttons and other details. Add a helmet to his round head that will resemble a circle. Add schematic buttons to the spacesuit, drawing them with short vertical lines on the front of the figure.
- Color the drawing, for which you can choose any colors.
Tips for Beginners
There are general recommendations, tips and approaches that will help in drawing a rocket in space, will create the necessary base for beginning artists. Rendering space, arranging elements of the image, working with color are fundamental aspects of a successful drawing.
| Basic principles | Brief description |
| Selecting a composition | It is important to decide on the angle. This can be a view of the rocket from afar or a close-up image of it. The exact location of the object in space is no less important. It is worth paying attention to the features of perspective and lighting. For example, you can depict a rocket against the background of the Earth or stars, which will convey a sense of depth of space. |
| Color palette | The colors of space can be different - from blue-violet to dark blue, gray, black shades. Space objects look contrasting against the background of airless space. When choosing a tone, you need to add more cold or warm shades to achieve harmony in the composition. Light effects and glare will help make the image more realistic. You should avoid too bright points or areas. Instead, create soft gradients and shades. |
| Proportions | It is necessary to learn the basics of perspective in order to correctly convey 3-dimensional objects on the plane of paper. |
| Detailing | You can depict traces of rocket engines, light reflections from portholes, antennas and other elements. This will give the drawing completeness and depth. You can draw fuel tanks, engines, solar panels and other elements. If the rocket is against the background of dark space, then portholes and flashing lights on the body will add dynamics to the picture. |
| Backgrounds and textures | You should choose suitable background textures and backgrounds for greater persuasiveness. You can draw space with shining stars, bright magical clouds of cosmic dust and gas. Depict distant planets or galaxies. |
| Shadows and Light | It is necessary to create volume and depth in the work using shadows and light. It is necessary to think about what light sources can illuminate the rocket and how this affects its appearance. |
One of the most interesting objects to draw is a rocket in space. Tips from master classes will help develop creative skills, improve the technical characteristics of the work, make the image more realistic and professional.
It is necessary not only to study the theory and technical side of the issue, but also to practice, using recommendations, studying works of art and analyzing their structure.
Video about drawing
Rocket - drawing: