Creativity helps children develop their thinking and skills in handicrafts with their own hands, and adults - to distract themselves from everyday difficulties and is a way to earn additional income. Many handicrafts made with their own hands, for example, drawings with paints and thread, become almost works of art.
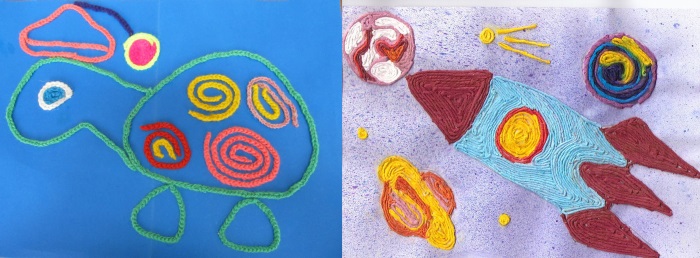
Drawing with threads and paints is called threadography. This technique is simple and very exciting. Pictures and diagrams for beginners and children in master classes will further help to understand the principles and features of such a wonderful fine art.
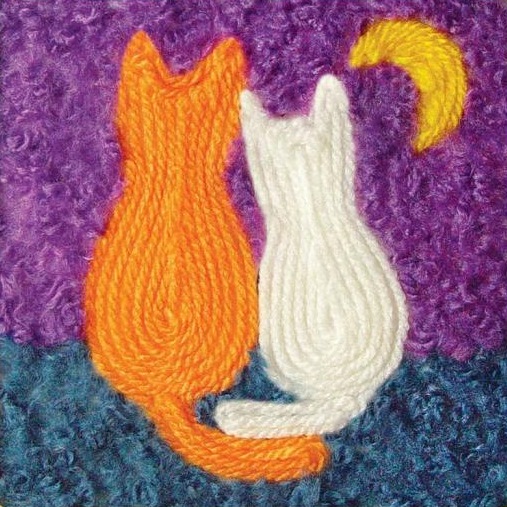
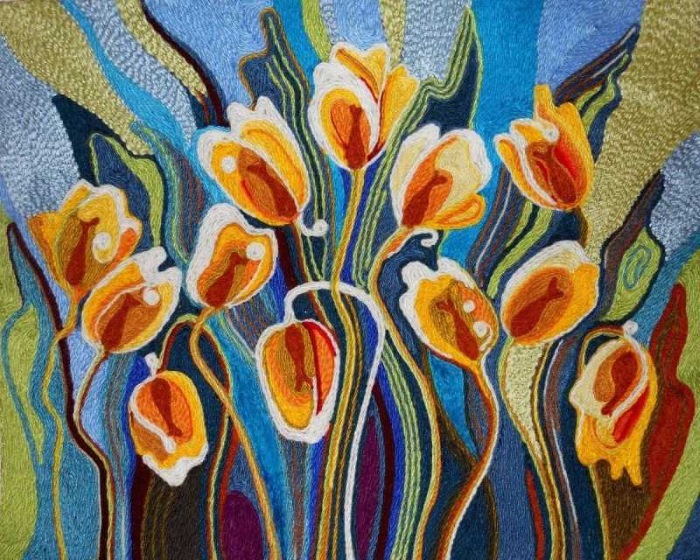
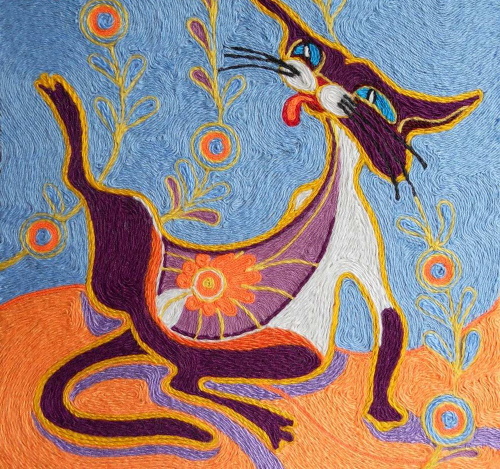
Pictures with threads. Examples


Drawing tools
Drawing with thread and paints is a technique that is not particularly difficult. Skills are acquired quickly and do not require long training. The creative imagination of a person is of particular importance.
For such work it is necessary to prepare the following:
| Material or tool | Description |
| Whatman paper or thick sketchbook paper for drawing | They can be polished or rough. In the first case, the paint is applied evenly, in the second, an interesting structure of the drawing is obtained. |
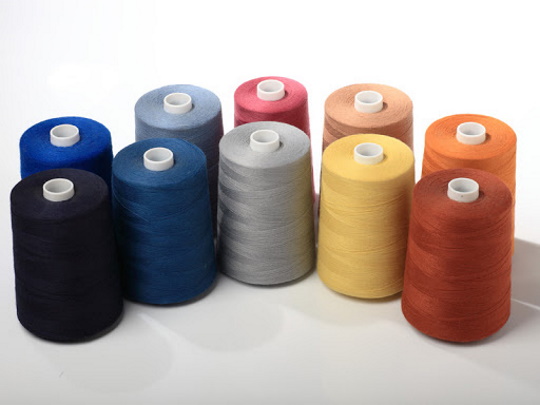
| Thread | It's better to take several different ones and try to use them for work on a rough sheet. |
| Paints | They can be watercolor or gouache. Once you develop drawing skills, you can purchase more expensive materials. |
| A container for diluting the color, where the working thread will be dyed | Experts advise against using disposable dishes for this purpose. Their surface is not very smooth and this affects the quality of the dyeing. The thread may lose its shape and the pattern will be blurred. |
| Brush | Necessary to facilitate the work of absorbing the dye into the thread. |
Additionally, you will need PVA glue and a container for storing used threads so as not to stain the table. In addition, they can be used again, so you should not mix the colors.
When creating colorful canvases using threads with paints, it is necessary to adhere to the following recommendations:
- It is better to choose white threads so that you can see how their color changes when dyed.
It is best to use reinforced ones: they leave clearer marks on the sheet. Their thickness should not exceed 60 mm. Woolen ones are not very good for such work: they leave barely noticeable villi, and the pattern seems unclear;
- the pieces of thread should not be too small or too long (40-45 cm). Too short ones will not give the desired pattern, and long ones will be inconvenient to work with;
- You need to take the thread in a special way: lightly squeeze it between your thumb and index finger. If you need to lay out the turns, you can fix it with one turn on your finger;
- one blank may be enough for several drawings, then it will become shapeless and will have to be thrown away. It is better to use ink or mascara to apply the color. They contain a little alcohol, which helps them dry quickly. It is most convenient to pour the coloring composition into a saucer;
- It is better to use a correction marker of a different shade to get a clear picture of the drawing.
The technique of drawing threadography is interesting for its unusualness and the opportunity to show creative vision. Painting with threads attracts with the opportunity to create bright forms with simple paints and uncomplicated tools.
Master classes
Drawing with thread and paints is not very popular yet, but every year the number of people who use it increases. The works that are obtained when drawing with threads are distinguished by their originality and diversity.
Each image created is unique and depends on the vision of its author. Often in kindergartens, classes are held to master the techniques of this technique.
Thread painting with children develops not only their imagination, but also:
- figurative vision;
- perseverance;
- fine motor skills of the fingers.
Basics of the process
It is better to start mastering the technique by creating simple images. After mastering the rules of thread management, you can make more complex plots. The glue should be thick, liquid will quickly be absorbed into the paper.
The main stages will be as follows:
- Cut the thread into small pieces – 30-40 cm.
- Dye the threads in different colors. After dipping them in the paint, make sure the ends are clean.
It is easier to work this way and you don't have to worry about leaving extra marks on the picture. If there aren't enough colors, you can create the desired shade by mixing paints. The color is applied to the thread using a brush, soaking it as much as possible.
- Fold the sheet in half and lay out the threads on one side according to the author's fantasy and vision of the image. Experienced artists can lay out on both sides.

To do this, you need to have confidence and experience in this technique, because when bending the sheet, the threads can slip out of place. The details of the layout can be different in shape and style. Circles, loops, stripes and zigzags will give an interesting pattern.
- Bring the dry ends of the threads beyond the sheet at the bottom. Cover the top of the drawing tightly. Bend the sheet and press it to a flat surface with a weight. It is better to use a board or a book.
- Pull the threads out one by one. The resulting pattern depends on the sharpness or smoothness of this process. You can pull by 1-2 ends.
- Unfold the sheet and evaluate the resulting image.
- Make a drawing of the created image. To do this, the missing segments are drawn using paints, markers or colored crayons.
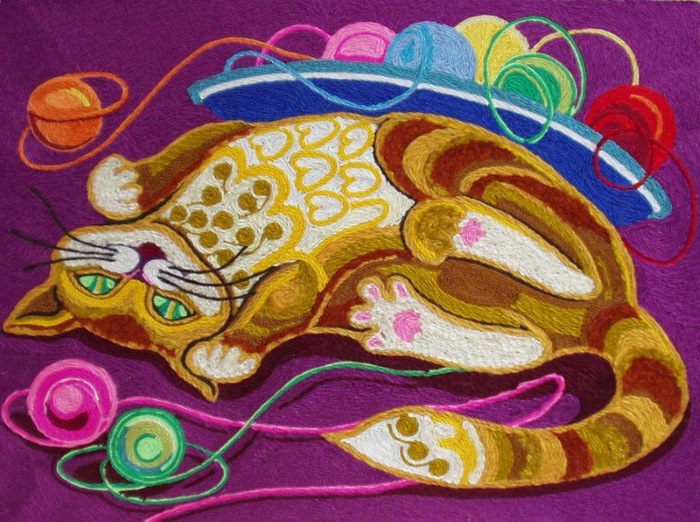
Thread painting develops the imagination of not only children, but also adults. Threads will help make the picture more diverse in texture. Wool, silk or linen threads will give a different image. Mouline or iris will create smooth, delicate lines, and wool will make the picture three-dimensional.
However, you need to make sure that the material does not differ greatly in thickness. To prevent thinner lines from blurring, work with different textures is carried out in several stages. After working with one type, the drawing is allowed to dry. Then another pass is made with other threads.
You can use different colors and their combinations to create paintings.
Threadography can be done in a variety of techniques. One requires glue and scissors to create an outline onto which colored threads are laid. Another uses only threads coated with color pigment and an album sheet.
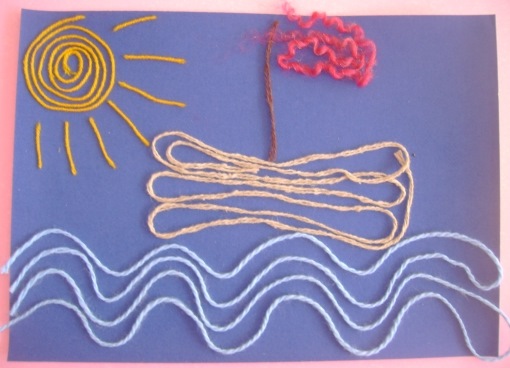
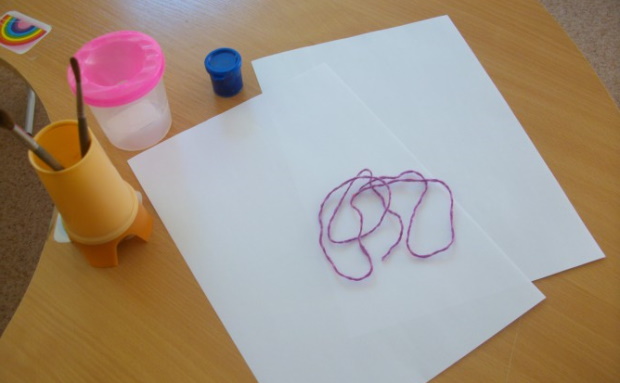
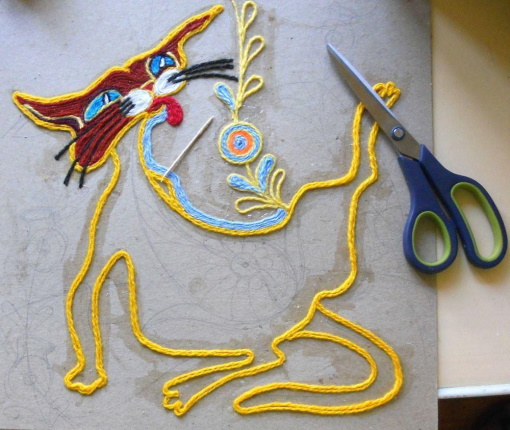
Master class: creating a picture with threads
To realize the creative ambitions and abilities of children and adults, you can engage in non-traditional drawing techniques.


To work with threads and paints you will need:
- a piece of cardboard or a sheet of paper;
- simple pencil;
- PVA glue with a convenient dispenser;
- threads of different colors;
- watercolor paints or gouache;
- brush, scissors, napkin.
After this, you can select a drawing and start working on the painting.
The step-by-step instructions are as follows:
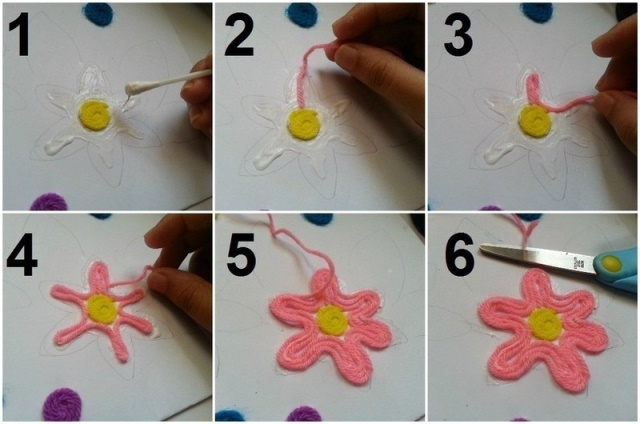
- Together with your child, draw the outline of the future painting with a pencil.
- Apply PVA glue along the outer edge of the painting with a thin thread.
- Select threads of the desired color that will match the design you have in mind.
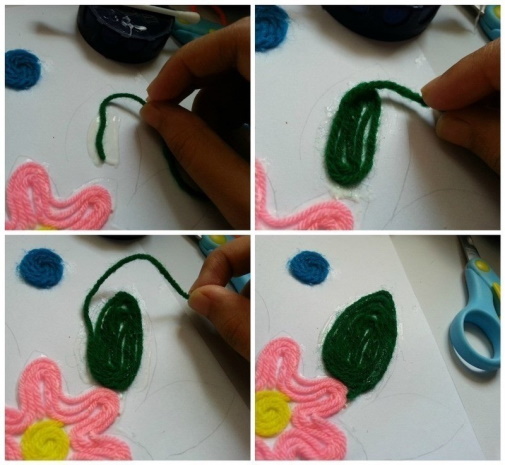
- Along the glue line, lay out the threads as carefully as possible, cutting the thread when necessary with sharp scissors. Perform all the details of the design according to this principle.
- For greater brightness, use paints and markers for coloring after the work has dried.
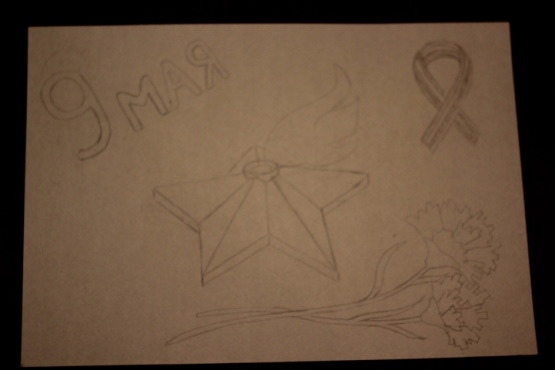
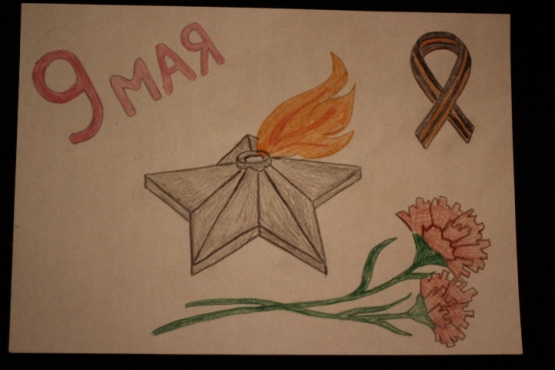
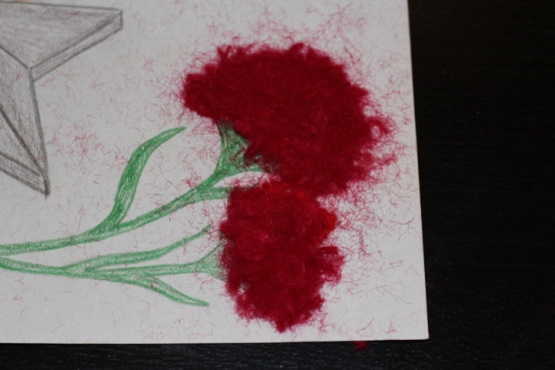
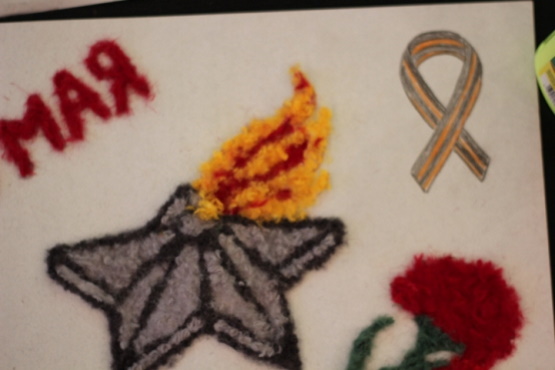
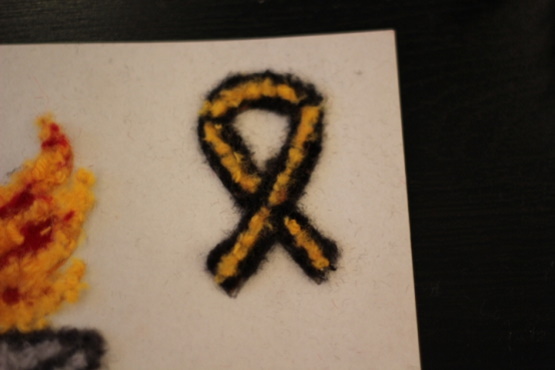
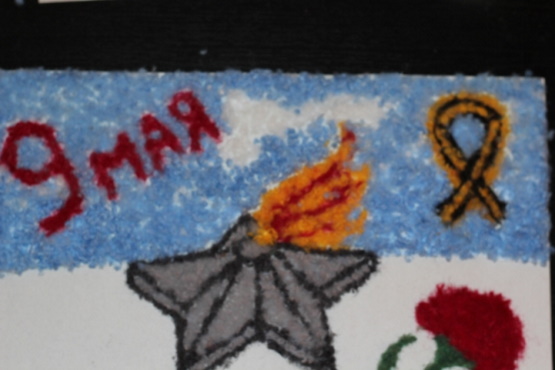
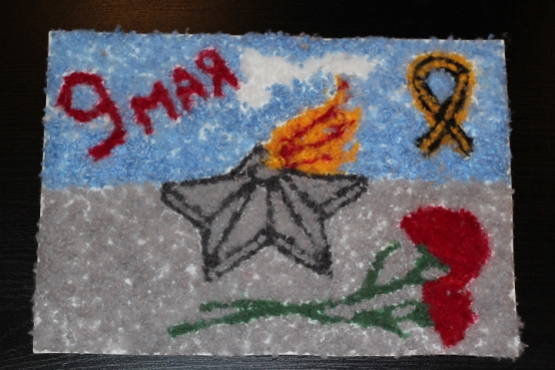
Master class: drawing "May 9" made with threads
A beautiful composition can be made for any holiday, including the Great Victory Day. The picture can be made in class with children or independently. If drawing takes place in class, the teacher can first draw a sketch with all the details.
To work you will need:
- threads (preferably wool);
- PVA glue;
- a piece of cardboard;
- scissors.
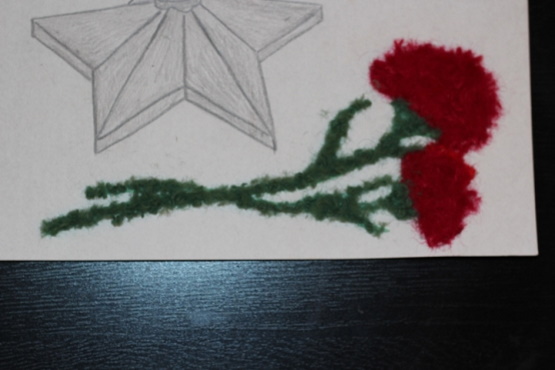
Drawing with thread and paints a picture for Victory Day will be done in the following stages:
- Draw a sketch with a simple or colored pencil.
- Color with pencils to make it clear what colors to use.
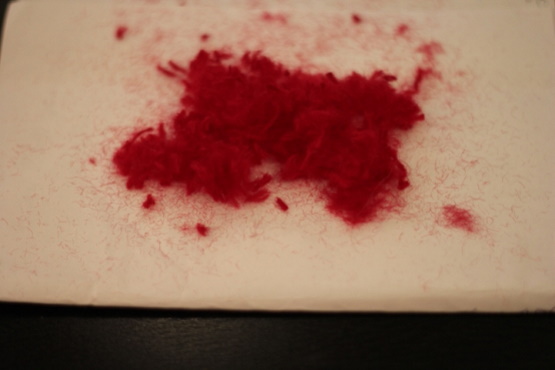
- Cut the yarn into segments. You can fold them several times and cut several pieces at once.
- Grease the cardboard surface with glue. You can do this in parts so that it does not dry too quickly.
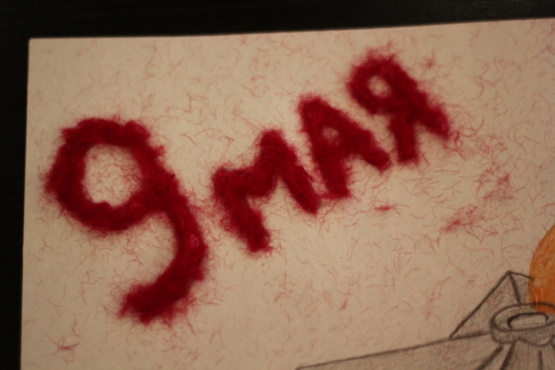
- Place the threads on the adhesive base along the outline of the sketch.
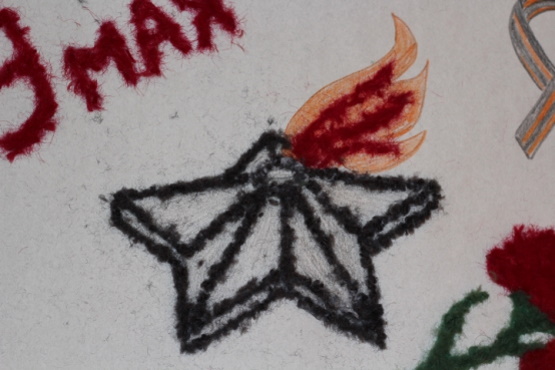
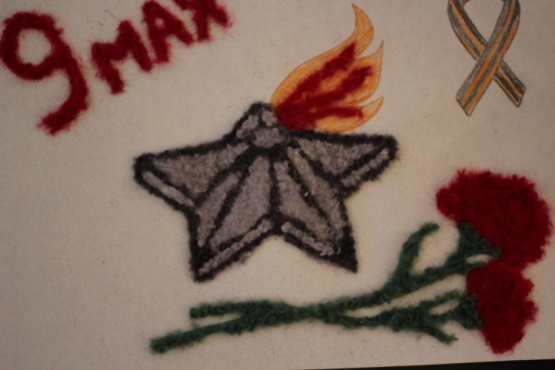
- Having laid out the numbers and the date of May 9, proceed to decorating, for example, with carnations. Here the main difficulty will be the selection of colors.
- Make the image of the Eternal Flame and the pedestal with dark gray threads. Then, make the sky with clouds in blue.
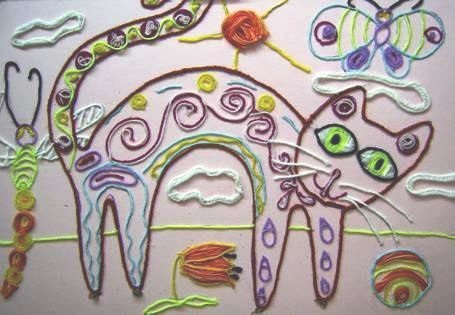
Master class: "Whimsical patterns"
This work will be interesting for the development of children's creative thinking.
To create a painting, you need to prepare the following:
- paints or gouache;
- threads;
- album sheet;
- containers for water and paints.
The step-by-step execution will be as follows:
- Cover the center of the sheet where the drawing will be done with white paint as a primer. It should be dense, so it is better to take acrylic and paint in 2 layers.
- Place the instruments on a table covered with protective film.
- Cut threads of not too great thickness. Each piece should be about 40 cm, then it will be enough to lay out the pattern and there will be an end left, which you need to pull at the end. Their number and color depend on the chosen pattern.

- Place the threads in a container, bending them several times and leaving the ends on the surface.
- Fill the threads with acrylic paint in stripes. Use a brush to push the color inside.
- Cover the paper with a layer of white acrylic, smoothing it out thoroughly with a brush.
- Carefully take the ends of the threads, lift them one by one and lay the base in beautiful zigzags.
- When the artist is satisfied with the configuration, slowly or sharply pull the thread off the canvas. Work with the remaining threads in the same way.
- Correct minor defects and leave to dry.
When the canvas is dry, you can show it to others and put it in a frame.
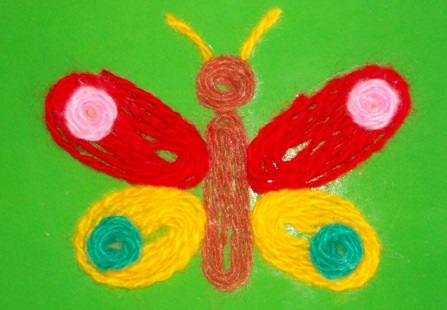
Master class "Ripe cherry"
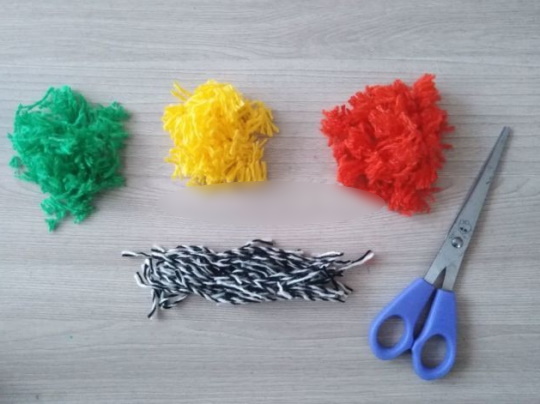
To work in the threadography style you need to prepare:
- solid foundation;
- thin and slightly pointed sticker;
- PVA glue;
- scissors;
- pencil;
- threads of several colors (black, green and light green, red and brown).
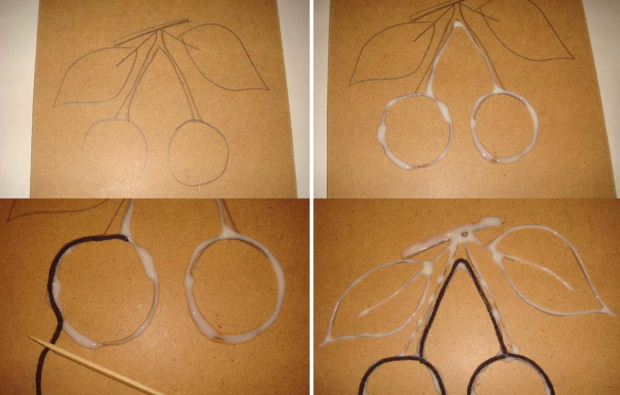
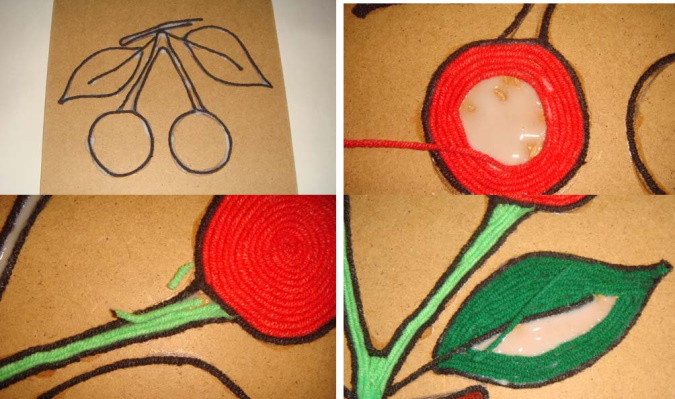
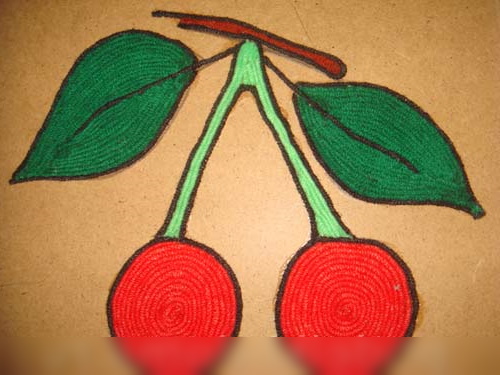
The procedure is as follows:
- Take a piece of cardboard or wood and draw some cherries.
- Proceed to create the desired shape. To do this, apply a little glue to the drawing.
- Attach a black thread to the glue. Use a sticker to lay it out exactly according to the drawing and lightly press it to the board or cardboard.
- When the glue dries, proceed to finishing the interior. To make it dry faster, you can put it next to a heating radiator or on a sunny windowsill.
- After applying glue to the edge, put a red thread on it and straighten it with a sticker. It is better to put it closer to the black thread and press them together.
- Place the turns at an angle to the right and secure them at the edges with green thread.
- Create a branch. It will be brown. Make the leaves dark green. Attach all this with glue.
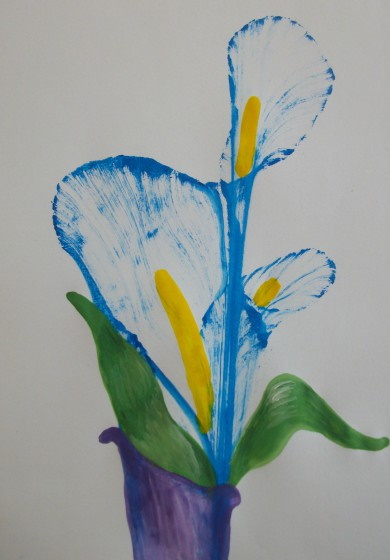
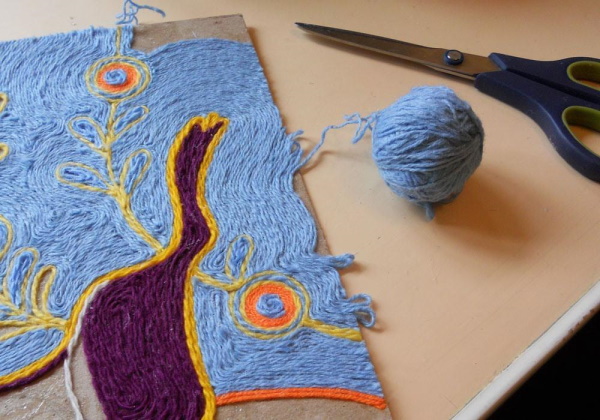
Master class: "Autumn tree"
To work you will need:
- medium thickness cotton threads;
- newspaper;
- album sheet;
- watercolor paints or gouache;
- brush and container for mixing colors.
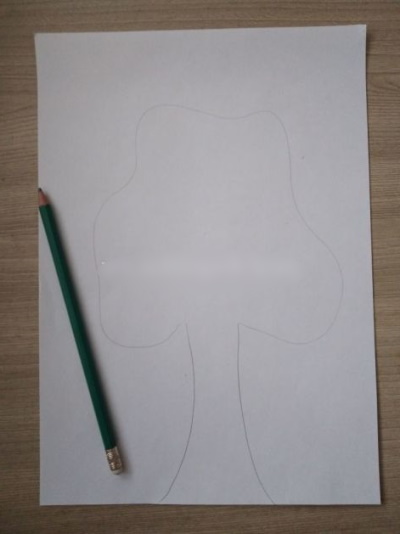
The order of execution of the image is as follows:
- Take a sheet of paper and fold it in half along the long line. After that, you can unfold it.
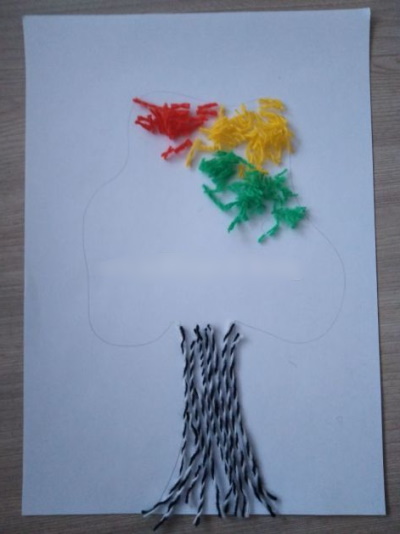
- A piece of thread cut from a skein is stretched out on a newspaper and coloring pigment is applied to it using a brush.
- Leave the ends clean and paint the middle several times.
- Carefully lay the dyed thread on a sheet of paper so that the tails hang down slightly.
- Fold the halves. The sheet on which the thread remains on the backing, and the free one covers it. So the thread will not slip from its place.
- Holding the sheet with one hand, pull the thread out through the clean tail with the other.
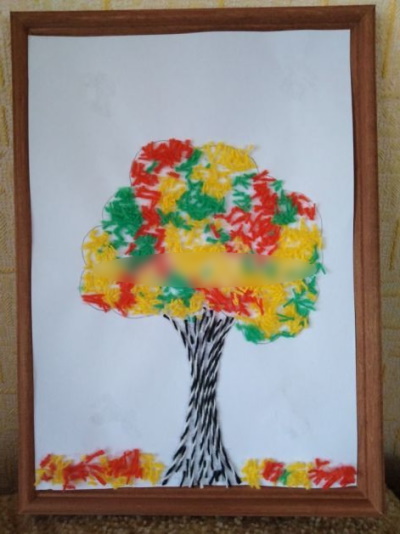
- Dye the thread again. If the color is the same, then it is not necessary to change it. For a different shade, you need to take a new one, as well as a base for dyeing.
- Repeat the procedure until the image resembles an exotic flower.
If several people work in a class, they will not be able to create the same image. Each artist will do it the way he likes and the picture will reflect his efforts.
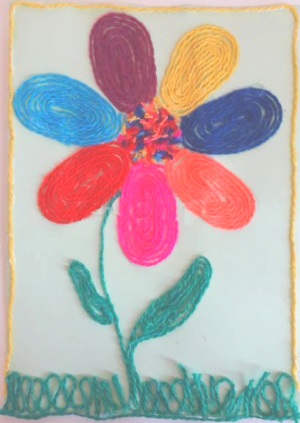
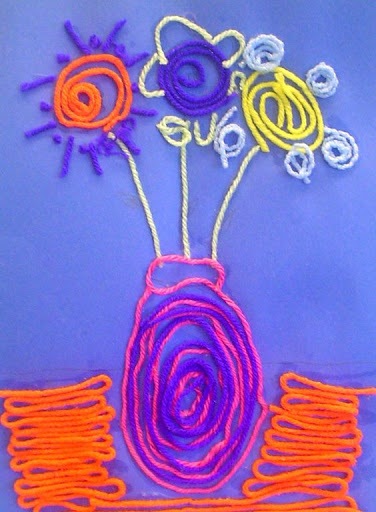
Creating flowers
Drawing flowers with threads and paints is a fascinating and educational activity. The artist must think through the scheme of the picture in advance and act, keeping it in his imagination.
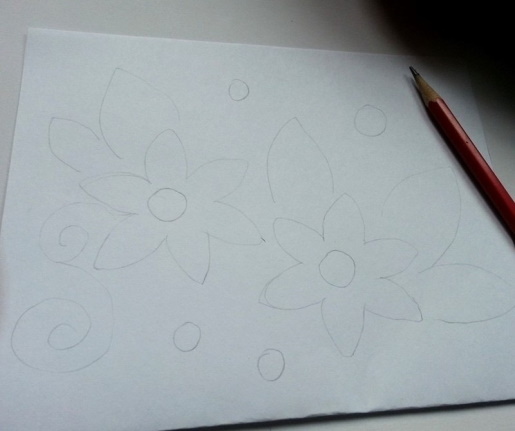

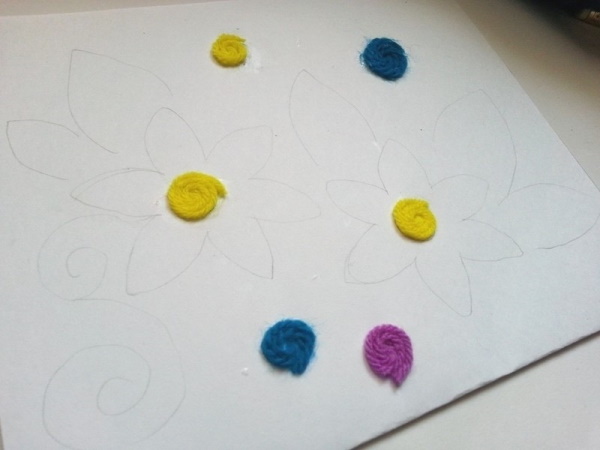
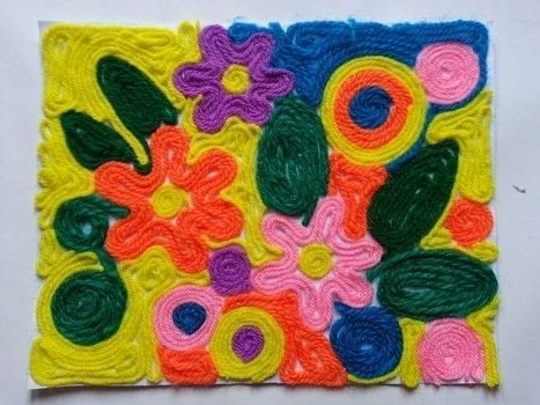
The image can be made with threads using various techniques. Monochrome (one-color) coloring or the use of several colors is allowed. However, it should be taken into account that to create a certain pattern, it is necessary to choose colors suitable for creating a beautiful canvas.
For example, to design a flower, the outline is laid out with threads that are pulled from the base in a special way. It is necessary to pull down, to the sides or to one of the sides, creating the desired configuration.
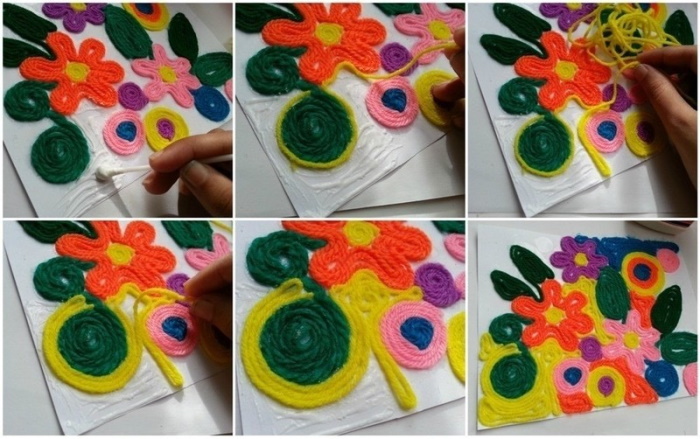
With this type of work you can experiment with shapes and colors. Paints that are superimposed on each other can take on a variety of incredible shades that do not exist in nature.
The picture can be painted in its entirety at once and then redrawn as the artist wishes. The use of applique is allowed.
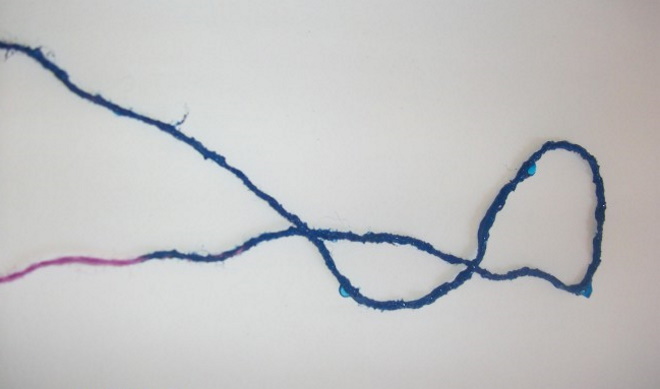
Features of the isoniti technique
Another technique of painting with threads is called isonity. It is more difficult to work with than painting with paints.
To complete the work, you need to additionally prepare:
- awl;
- polystyrene foam;
- needle;
- a board with nails;
- backing;
- picture diagram.
There are several options for making such paintings:
| Option | Description |
| 1st | 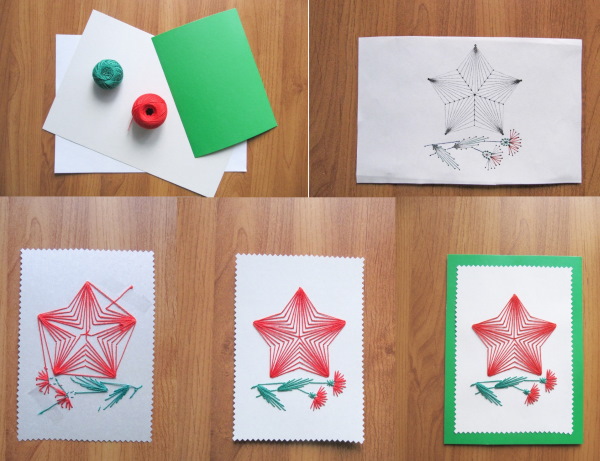 Close to embroidery. For this, a pencil drawing is created on cardboard. Then, according to the pattern, the corresponding holes are pierced with an awl. In order not to get confused and get a drawing, the holes are numbered on the back of the work. After completing the preparatory actions, a thread is inserted into the needle with a wide eye, and embroidery begins from the back side of the work. At first, it is better to use light patterns. You do not need to pull the thread too tightly or make the tightening loose. The stitches should be even and beautiful. This allows you to get an excellent result. |
| 2nd | 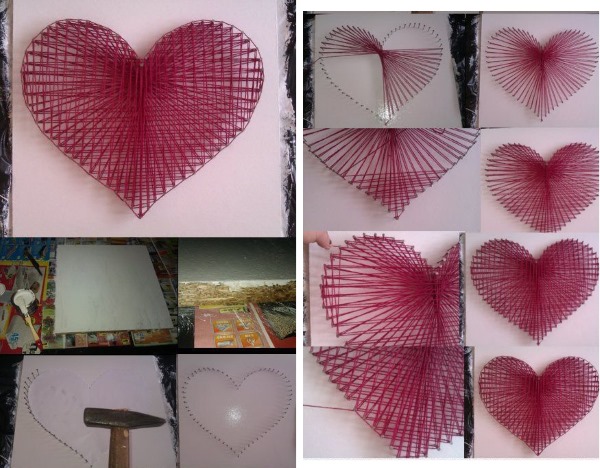
This option involves pulling a thread between nails in a special board. This creates the desired shape, which is then soaked in glue after being lowered. A cellophane backing is laid out on the board. Nails are inserted according to a given pattern, and a thread, previously coated with glue, is wound. Volume can be achieved if you do not press the thread too hard against the board and do not stretch it too much. Leaving the created form on the nails until it dries, then it can be removed and inserted into a frame, like a picture, or used as a decorative element of the interior |
Thread and paint painting techniques are a type of art. To achieve good results, you need to train hard and long. Then the canvases you create will delight those around you with their originality and freshness.
Video about drawing
Drawing with thread and paints: