A dinosaur drawing is an attractive thing for children of any age. Little ones can look at illustrations of lizards for a long time, older children love them color, add details, and, of course, create your own dinosaurs (copy or invent them).
Materials and tools
Before starting to draw dinosaurs and other representatives of prehistoric fauna, a novice artist needs to decide on the choice of the following items.
Scroll:
- Paper.
- Pencils, markers, crayons and felt-tip pens.
- Brushes and paints.
For the first experiments, it is best to take watercolor paper, even if the artist does not plan to work with paints. This is a fairly thick paper with a rough structure. It does not get wet, like printing paper, and auxiliary lines can be easily erased from it, unlike glossy drawing paper.
The pencils should be soft enough and marked (HB or TM), also for drawing darkened areas it is convenient to use a very soft pencil (2B), in addition, it is easy to shade with a piece of paper or a cotton pad.
Colored pencils also need to be checked before you start drawing, they are rarely marked with a softness rating, but very hard pencils are not suitable for coloring a large image or creating a background.
Drawing a dinosaur is not just a way for children to practice their skills; it is a journey into a magical prehistoric world.
Therefore, oil pastels are ideal for drawing with children, they give a very bright saturated color. As a substitute for pastels, you can use soft wax crayons. Thick triangular crayons are best - they do not break and lie firmly in a child's hand.
When choosing felt-tip pens and markers, first of all, you need to pay attention to their quality - a good felt-tip pen releases ink evenly, without forming stains at any point of contact with the paper. To draw dinosaurs, you may need both thick flat brushes for the background and very thin ones for drawing small details.
You can paint dinosaurs with either gouache or watercolor. To mix the paints, you will need a palette, it is better to take a white plastic palette, since painting the background with watercolor requires adding a lot of water.
Master classes
The pencil drawing of dinosaurs can also be distinguished by more original tools and materials: plasticine, a poke, cotton swabs, threads.
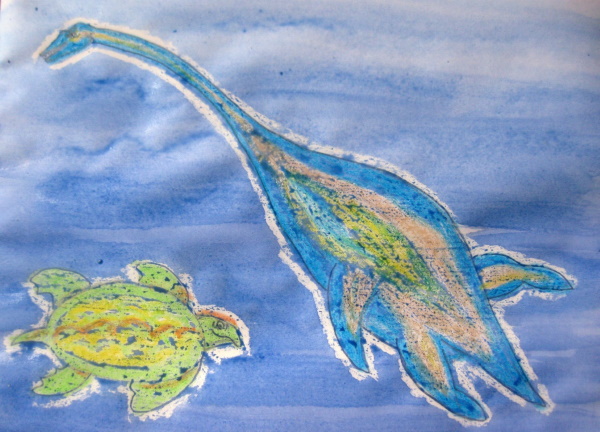
Plesiosaur and Archelon
Simple drawing.
Materials and tools:
- Drawing paper (not glossy).
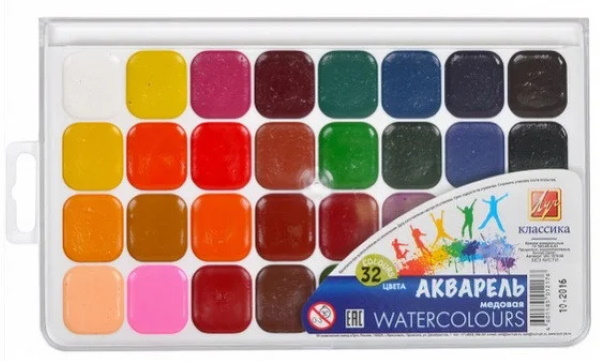
- Watercolor paints.
- Thick flat brush.
- Oil pastels or wax crayons.
- Simple pencil.
Work process
Before drawing, you need to spend a few minutes learning about the aquatic representatives of the dinosaur world. Plesiosaurus and Archelon belong to the Cretaceous period.
Plesiosaurs could be more than 15 m long, they fed mainly on fish and shellfish, but thanks to their necks they could even catch a flying dinosaur. Archelon is a giant ancestor of the modern turtle. The prehistoric "Tortilla" was more than 4.5 m long, weighed 2 tons and had flippers resembling wings.
After the conversation, the work proceeds according to the following algorithm:
- First of all, you need to mark the composition on the sheet with thin lines - where the dinosaurs will be and what size they will be. The plesiosaur's neck takes up half of its body, and the other half is everything else.
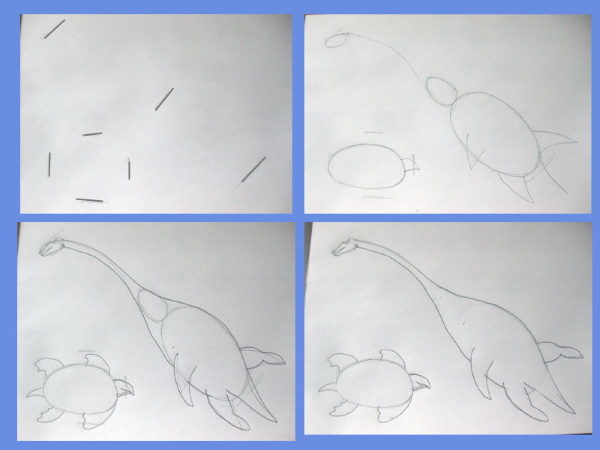
- Next, using geometric shapes and lines, outline the head, body, neck and limbs.
- The next step is to draw the body with a pencil, using the sample as a reference. You shouldn't press hard on the pencil, as the pencil lines may show through the base tone.
- After this, all auxiliary lines are carefully erased.
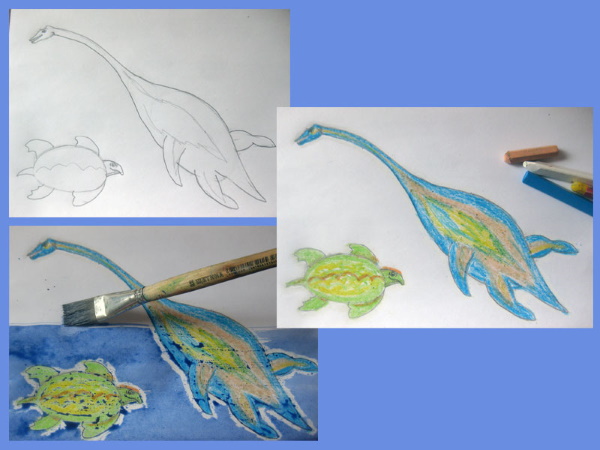
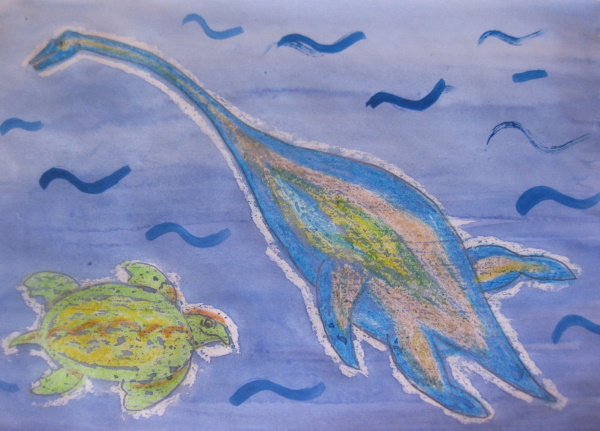
- Next, mark the color zones and choose pastels or crayons to color the dinosaurs. For the plesiosaur, it is better to take a blue-light blue range, for the archelon - green and brown shades.
- When coloring a dinosaur, it is important to apply the color very intensively, with pressure. It is worth starting with a bold outline. It is better to combine 2 - 3 colors, making smooth transitions from one to another. There may be gaps between the strokes. To highlight the silhouette of the dinosaur, you can outline the figure in white or yellow. At this stage, you can also draw stones, seaweed, and waves with crayons.
- The next step is to apply the background. To do this, mix a suitable shade of blue or violet on the palette and apply the background with smooth movements with enough water over the dinosaur images. Oil pastels and wax crayon show through the watercolor.
- After the background has dried, you can add seaweed and waves with a thin brush, if this has not been done previously with chalk.
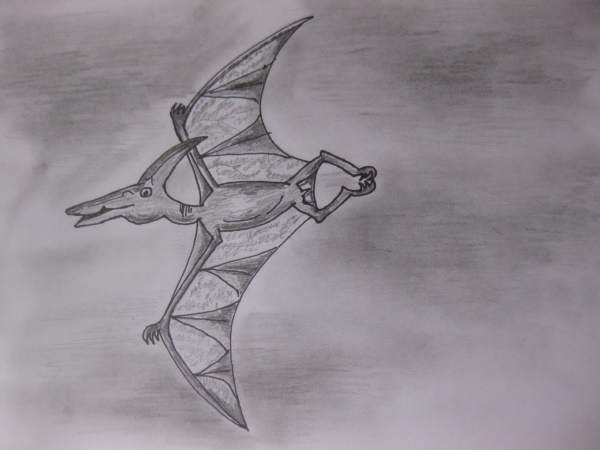
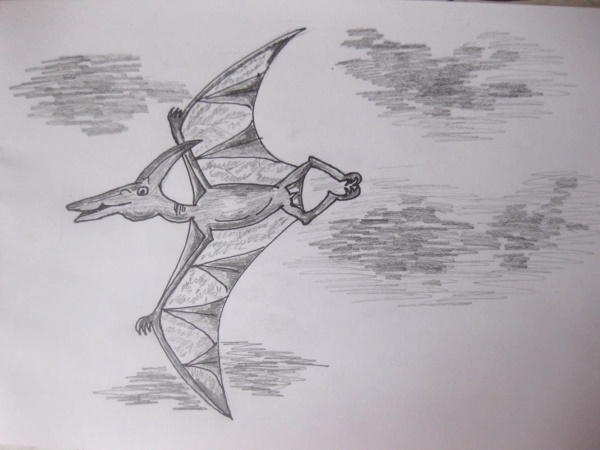
Pteranodon
Materials and tools:
| Name | Quantity |
| Drawing paper (not glossy) | 1 pc. |
| Simple HB pencil | 1 pc. |
| Black felt-tip pen, thin marker or liner | 1 pc. |
| Cotton pads | 2 pcs. |
Work process
Drawing a dinosaur – for children can be not only entertainment, but also a way of learning. Before drawing, you can tell children about flying lizards, look at illustrations, photographs of skeletons and plastic figures.
Scientists do not classify pteranodons as dinosaurs, they call them pterosaurs, the ancestors of birds. The wingspan of large pteranodons was more than 6 m, there was a crest on the head, which played the role of a rudder during flight. Pteranodons fed mainly on fish and crustaceans.
After the story, the work is structured according to the following plan:
- First of all, you need to outline the position of the pteranodon on the sheet with thin lines. The wingspan is twice the size of the flying lizard's body.
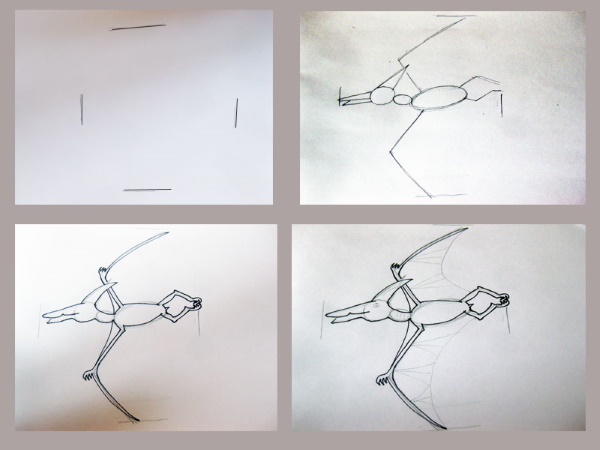
- Next, use ovals to outline the head and body, and mark the wings and paws with lines.
- At the next stage, the shape of the head, body, wing membranes and paws are drawn with a pencil.
- Then erase all auxiliary lines.
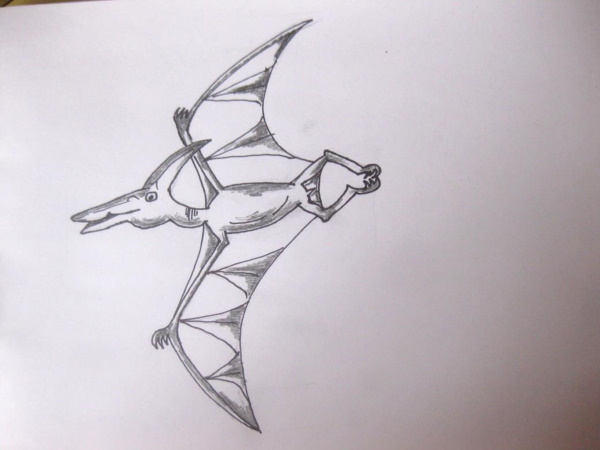
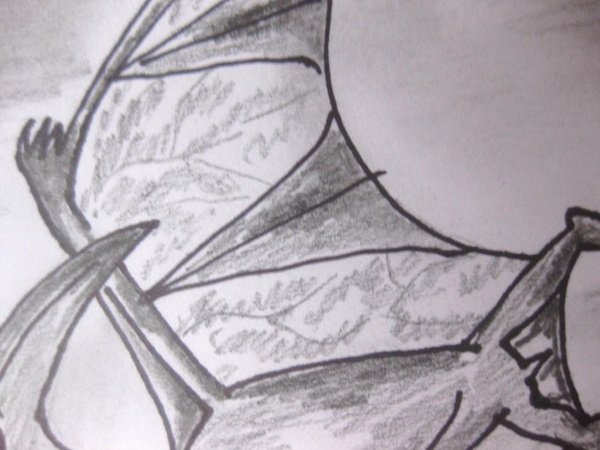
- Next, the dinosaur is colored. The work is done with a simple pencil. Along the main contours of the body, the shading is made darker and more intense, and all the bends and corners are also darkened. At the next level, the pencil is no longer pressed, the shading is done with smooth flying movements.
- The wing membranes can be painted with small zigzag strokes.
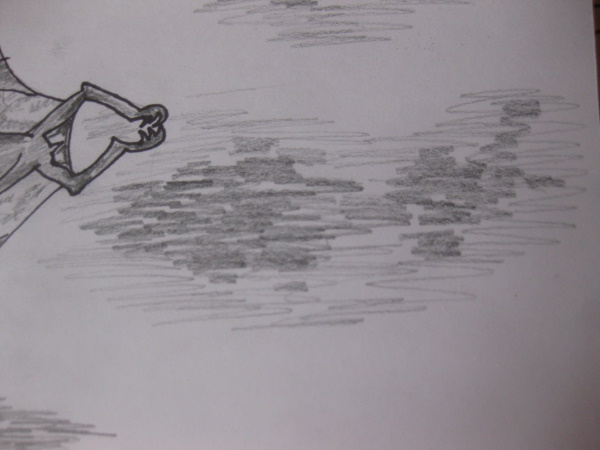
- The next step is to work on the background. Around the pteranodon, clouds are drawn with rough, frequent strokes. The body of the cloud is darker, and the shading is paler at the edges. The clouds can be rubbed with a cotton pad, then the background will look more natural.
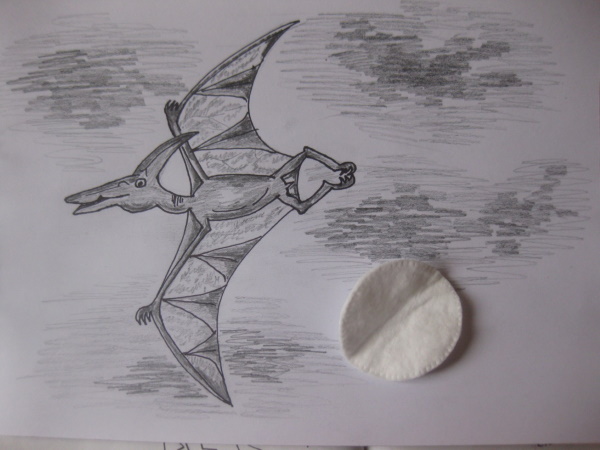
- At the final stage, some lines of the pteranodon are highlighted with a black felt-tip pen or marker. Experienced artists initially draw the outline of the dinosaur with a felt-tip pen or marker.
Brachiosaurus and Stegosaurus
Simple drawing.
Materials and tools:
- Drawing paper (not glossy).
- Paints (watercolor or gouache).
- Pokes (15-20 mm).
- Thick flat and thin brushes.
- Simple pencil.
- Cardboard – 2 sheets.
- Manicure scissors.
Work process
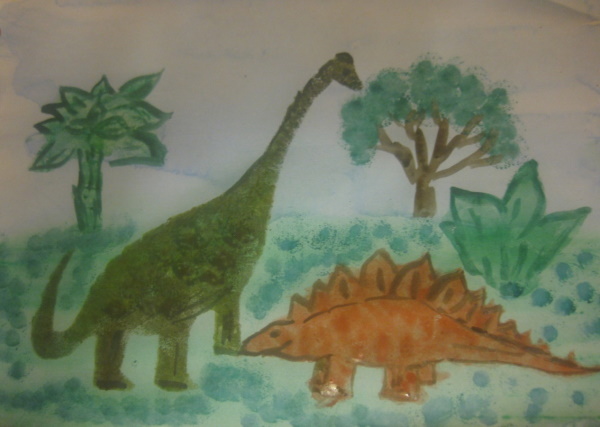
At the beginning of the lesson, you can tell a little about the brachiosaurus and stegosaurus, look at the illustrations and plastic figures. For example, you can mention that the brachiosaurus was taller than a 4-story school building, and it was very difficult for it to find enough plants to feed such a huge body. About the stegosaurus, you can say that it was as long as a classroom (8-9 m), and its brain was a little more than 5 cm.
It is important to pay attention to the coloring of herbivorous dinosaurs., scientists suggest that it was close to the landscape surrounding the reptiles (green, brown) to make it easier to hide from predators.
Sequence of work:
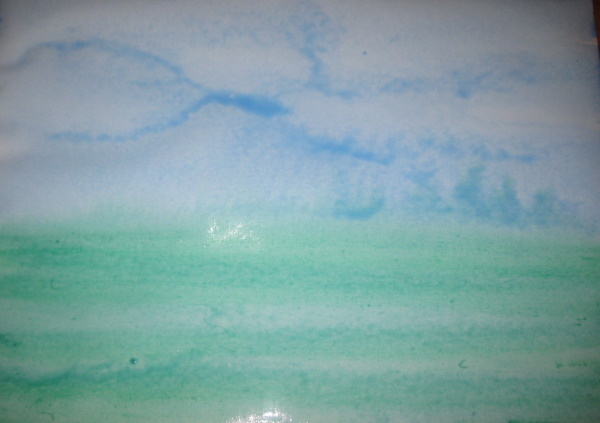
- The first step is to create a background for the drawing. For this purpose, take paints, a palette, and a thick flat brush. Mix two shades on the palette - blue and greenish. Then apply the background to the sheet with soft horizontal movements, generously wetting the brush with water. Work with green up to the horizon line, then with blue. The color is more intense closer to the edge of the sheet. After this, the sheet with the background is left to dry on a straight surface so that there are no smudges.
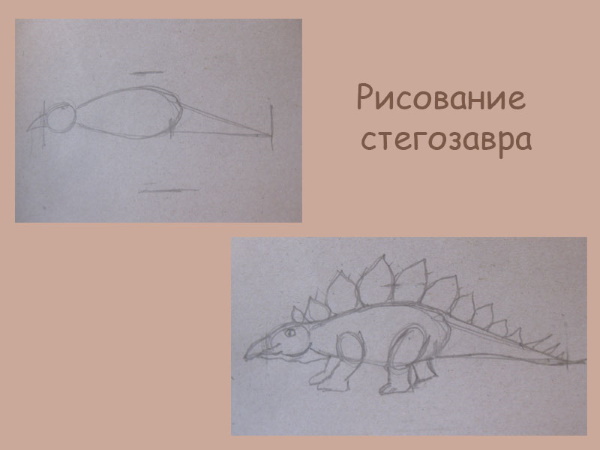
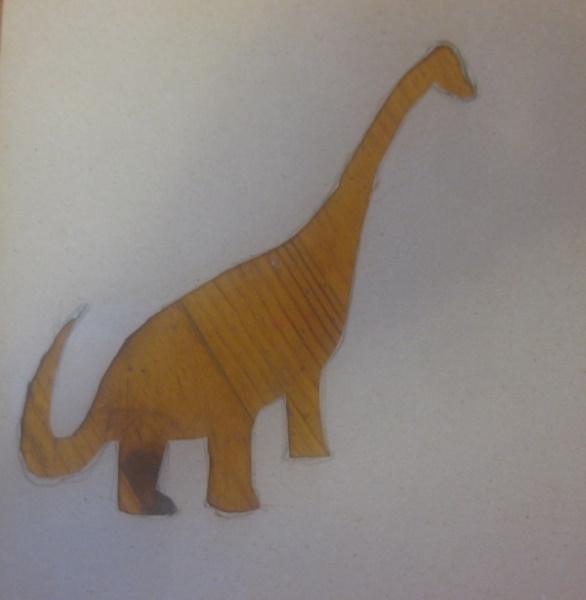
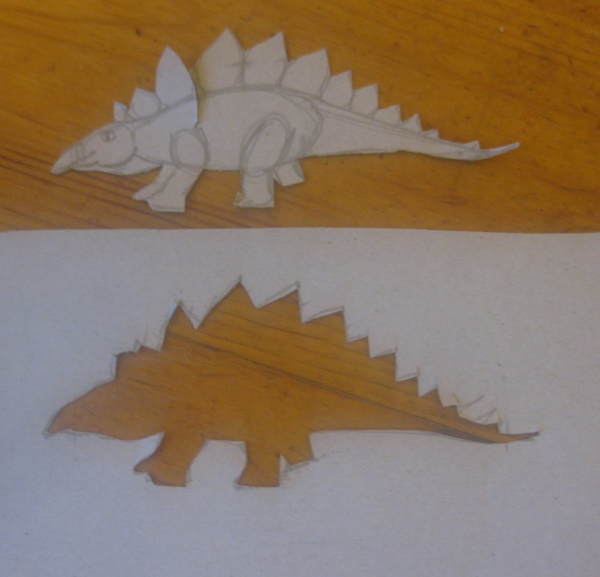
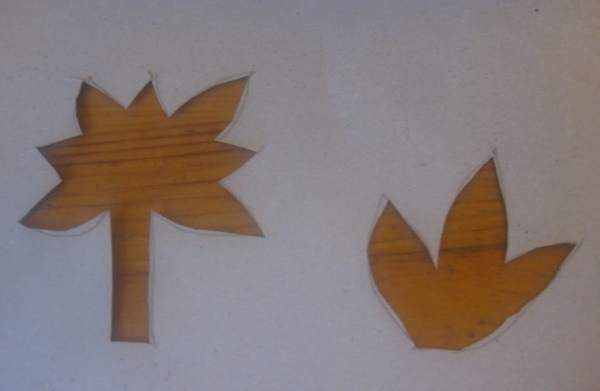
- While the background is drying, work begins on the stencils of dinosaurs and prehistoric plants. The sizes of dinosaurs and plants are marked with lines on sheets of cardboard. It is also important to mark the middle of the figure for dinosaurs; the body of the brachiosaurus takes up half of the image, and the tail of the stegosaurus. The dimensions of the stencils must be correlated with the main sheet on which the composition will be.
- Next, using simple geometric figures, outline the body parts of the dinosaurs: circles and ovals – head, body, upper parts of the legs, squares and lines – limbs and neck. The drawing is done very thinly, with a simple pencil.
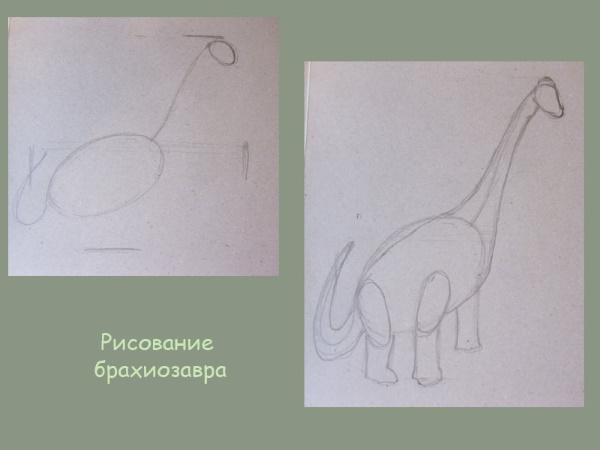
- The next step is to draw the silhouette of the dinosaurs using the sample as a reference. Small details – eyes, teeth, scales – do not need to be drawn, as the entire inner part of the image will be cut out.
- Next, use thin scissors to make a hole inside the dinosaur image and cut it out from the inside, paying attention to the fact that the outline is neat. If the work is done with small children, then this stage is done by an adult, and children can be trusted to make templates of prehistoric plants.
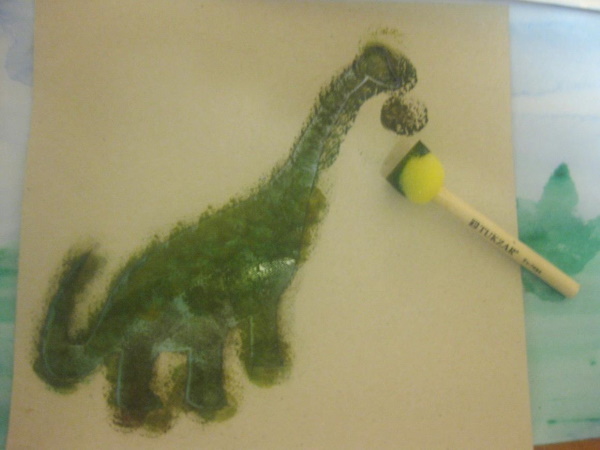
- Then, on the palette, mix the appropriate shades (green and brown are suitable for the brachiosaurus, and red, yellow and brown can be used for the stegosaurus). It is important that the paint is thick enough and not watery.
- The next step involves working with a poke. A homemade poke made of foam rubber or a store-bought one (1.5 - 2 cm) will do. The poke needs to be dipped in paint, and then a test blot is made on a separate sheet of paper. If the imprint resembles the structure of a sponge, and not a blot, then you can start working. The stencil is pressed tightly to the background, and they go over the entire body of the dinosaur with quick, abrupt jabs. When changing the color, the poke needs to be washed under running water and squeezed out well, and it is better to have several poke. You can also use a poke to draw grass and tree crowns.
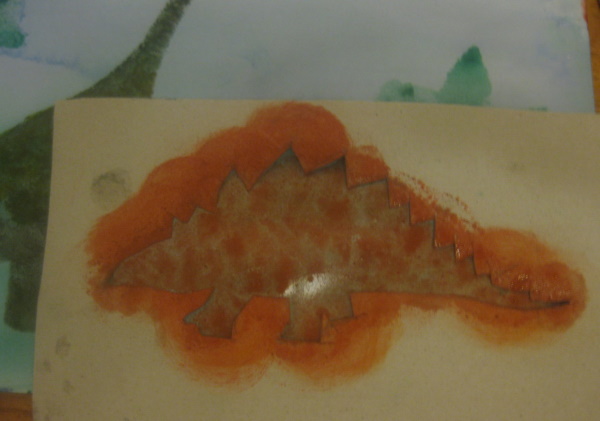
- The next stage involves drawing small details (eyes, contours, leaf veins) with a thin brush.
The dinosaur drawing in this technique can be applied to any lizard. The only limitation (very important for children) is that the prehistoric reptile must have a simple, but at the same time recognizable silhouette.
Another point to take into account is the time period. When placing different dinosaurs on one sheet, it is better to take reptiles from the same era. For example, brachiosaurus and stegosaurus are from the late Jurassic period.
Buddy from the cartoon "Dinosaur Train"
Interesting drawing.

Materials and tools:
- Drawing paper.
- Felt-tip pens, colored pencils.
- Cotton pad.
- Razor or knife (for an adult).
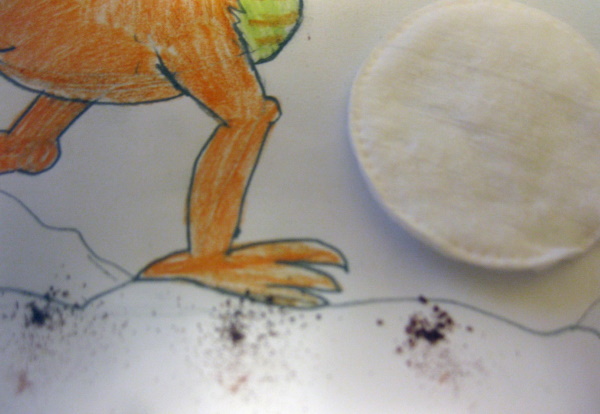
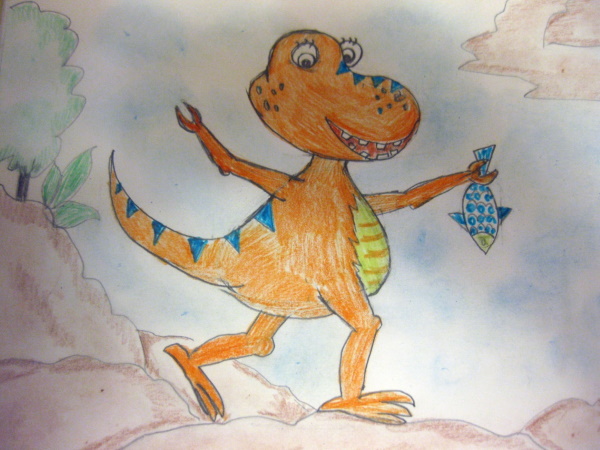
Drawing a dinosaur is not only a paleontology lesson for children, but also a recreation of their favorite cartoon characters. At the beginning of the lesson, you can remember or watch with your children the episode in which the little Tyrannosaurus Buddy, adopted by a family of pteranodons, tries to catch fish.
Next, you can highlight the main features of tyrannosaurs - sharp teeth, a large head, thin forelimbs. You also need to pay attention to the color scheme in which the animator painted Buddy, and choose the appropriate colors.
Further drawing is constructed according to the following scheme:
- On the sheet, the position of the tyrannosaurus figure and its dimensions are marked with thin strokes. The small tyrannosaurus fits perfectly into a square. The body is divided vertically into three equal parts - the head, belly and legs.
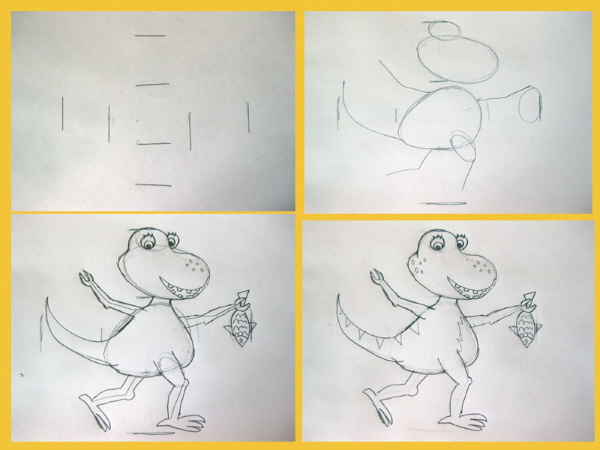
- At the next stage, geometric figures and lines define the main parts - two ovals for the head, an oval for the body, lines for the tail and limbs. The oval of the head is brought forward in relation to the body.
- Next, the details are drawn using the sample as a reference. At this stage, it is important to pay attention to the characteristic features. The dinosaur's muzzle resembles an asymmetrical pear with a thickening on one side, you could say that Buddy has a "potato" nose. The body is also pear-shaped. You should also talk to the children about how Buddy walks, and what is in the artist's field of vision, and what is not visible. To do this, you can ask the child to repeat Buddy's pose and look at himself in the mirror.
- Once the drawing is complete, you can erase all auxiliary lines, outline the coloring areas and background elements.
- Then they begin to color the central figure of the dinosaur. Large parts are shaded with a pencil, small parts are colored with felt-tip pens.
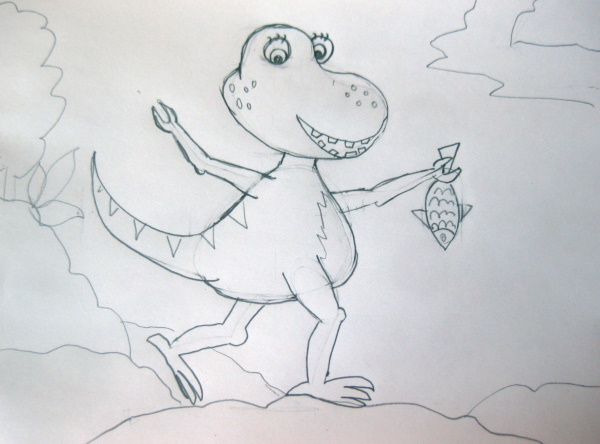
- Then you can work on the background - you can place Buddy against the background of water, rocks or forest. To do this, it is enough to sketch out the lines of stones and trees.
- Children do not like to color large details, so when filling the background, it is enough to apply pencil shading in only a few places, the rest of the space can be filled using the rubbing method. To do this, an adult crushes the pencil lead with a razor or knife, and the child rubs the powder with a cotton pad.
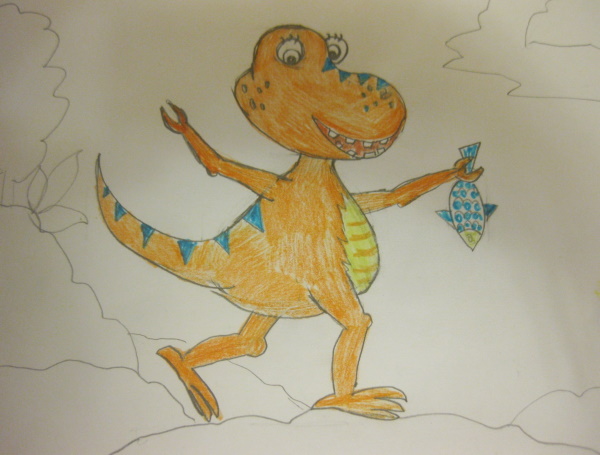
- In the final step, you need to highlight the main lines with a black felt-tip pen or marker, paying special attention to small details - eyes, teeth, patterns, twigs, veins.
In the same way, you can draw all the characters from Dinosaur Train, using stills from the film as a reference.
Dimetrodon
Tools and materials:
- Drawing paper (not glossy).
- Wax crayons or oil pastels.
- Simple pencil.
- Plasticine.
- Stack.
Drawing a dinosaur for children can be one of the options for developing fine motor skills; making details with plasticine trains fingers perfectly. Before starting to draw, you can introduce children to interesting facts about the life of the dinosaur Dimetrodon, look at its images and plastic figures.
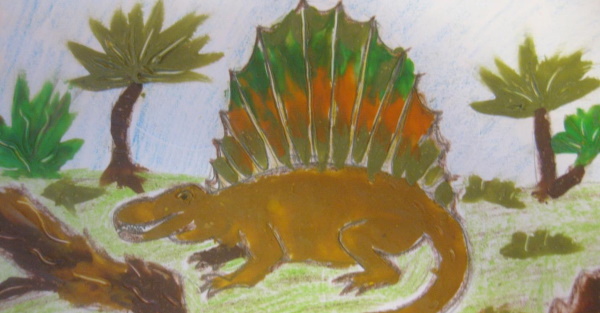
Dimetrodon could be up to 4 m long, in the Permian period it was the largest predator. The most remarkable part of the body of Dimetrodon is a kind of sail, stretched between the long outgrowths of the vertebrae. First of all, this adaptation was necessary to regulate body temperature, with the sail the dinosaur warmed up in the sun twice as fast.
The "sail" also helped dinosaurs hide in the thickets they most often lived in. Although outwardly Dimetrodon is very similar to a monitor lizard, it is no longer a reptile, belongs to the transitional link of evolution and could not survive in the desert.
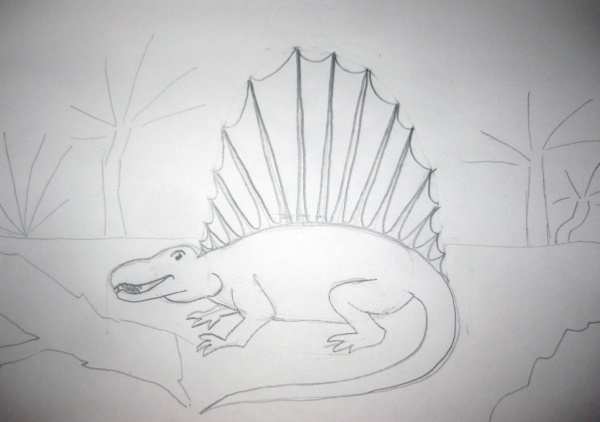
After the introductory conversation, the work is structured according to the following plan:
- Fine strokes mark the position of the dimetrodon in the painting, its length and height.
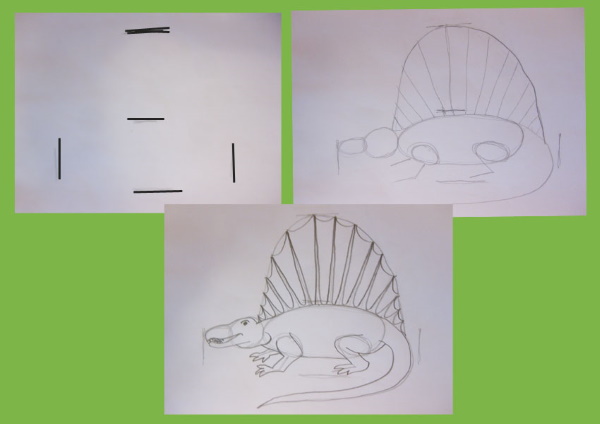
- Next, using geometric shapes and lines, make a sketch of the dinosaur: two ovals for the body and head, lines for the limbs, and straight lines - the rods of the dorsal "sail".
- The next step involves drawing the body and limbs using the sample as a reference. Very small details should be avoided when drawing a dinosaur.
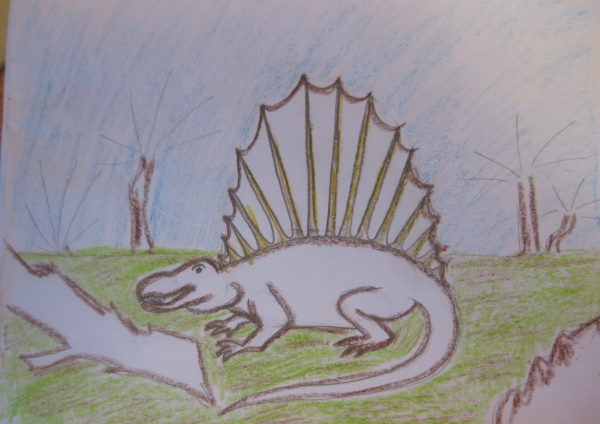
- Then erase all the auxiliary details and use a pencil to outline the background – the horizon line, a few simple plants, stones.
- At the next stage, the main lines of the dinosaur's body and relief are outlined with chalk or a felt-tip pen. The background and soil are shaded with a pencil or wax crayon, without touching the plants and the dinosaur itself.
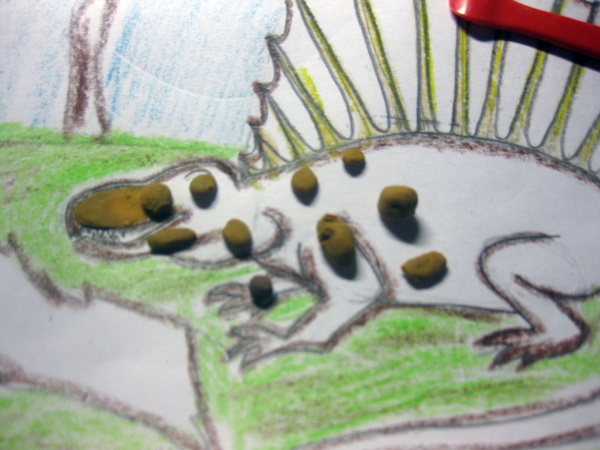
- Dimetrodon and plants are painted with plasticine. For the dinosaur, it is better to choose brown and green as key shades. Children need to be shown how to use the material sparingly so that the image does not turn out cumbersome. To make a plasticine stroke, you need to roll a small 4-5 mm ball between your fingers, stick it on paper, flatten it and grease it on one side. Particular attention should be paid to the sail pattern: you can alternate two colors in waves, the membranes can not be covered with plasticine or roll thin sausages and emphasize the lines. Plants are made in a similar way in the plasticine technique.
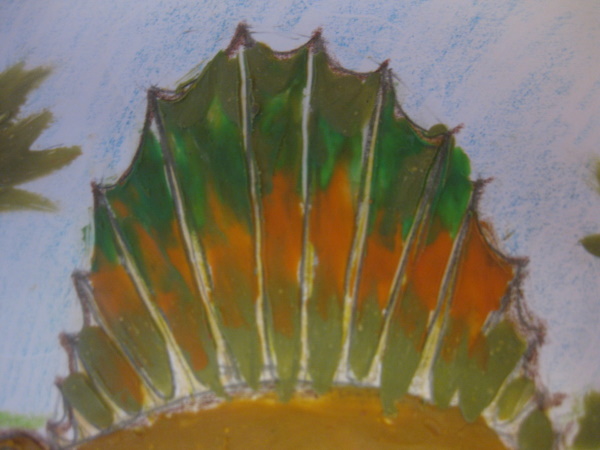
- It is best to attach the finished work to a sheet of cardboard so that it does not bend. Small details or patterns can be cut over the plasticine with a stack. The same tool can be used to draw the rods of the "sail" if they were covered.
If you look at the drawing of a dinosaur made with plasticine, slightly from the side, the lizard seems three-dimensional and seems to come to life. For children, this moment is so important that they ask to return to this technique again and again.
Dinosaur Drawing Video For Kids
How to draw a velociraptor for kids:
This is my article, I hope it will help everyone who reads it) I tried very hard)