Every year schools and institutes hold drawing competitions on the theme “Take Care of Plants.” These events help children understand why they need to treat plants with care, and remind adults of the rules of behavior in nature. Before you start creating, you need to read several step-by-step master classes and find out what tools and materials you may need.
What do you need for drawing?
The table shows what pencils you might need for drawing.
| Pencil hardness rating | Marking | What is it used for? |
| Very hard | From "3H" to "9H" | Applying subtle shadows |
| Solid | "N" and "2N" | Creating a sketch |
| Average | "F" | Working out small details |
| Hard-soft | "NV" | Designation of dark and light areas |
| Soft | "B" and "2B" | Shadow casting |
| Very soft | From "3B" to "9xxB" | Applying shadows, darkening the background and final tracing |
You will also need a double-sided eraser for this work. An eraser with a red and blue side will do. The rougher part removes marks from hard pencils well, and the soft part erases graphite from pencils "3B" - "9xxB".
All pencils should be sharpened. For drawing with a simple pencil, you can use regular album paper, or you can buy special thick sheets with a rough surface.
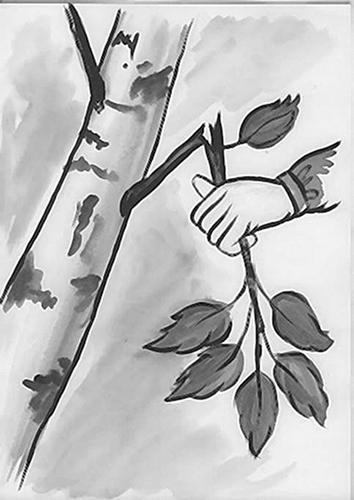
Step-by-step instructions for drawing an image on the theme "Take care of plants" with a pencil
The drawing on the theme "Protect Plants" in this master class demonstrates that you can't break tree branches just like that, without special need. The picture will show a birch trunk with thin branches and leaves, as well as the outstretched hand of a person who broke this rule and broke off a branch. The caption will be placed above: "Don't break branches! Protect plants!"
Sketch
You can use any format of paper for your work. A regular A4 sheet will do. The sketch should be done with a hard pencil.
Procedure:
- Place the paper vertically on the table.
- On the top edge of the sheet, mark the middle with point “A”.
- From the lower left corner, draw a thin, smooth line to point “A”.
- From the lower left corner, along the side of the sheet, measure up 15 cm. Put point “B”.
- Step back from point "A" 7-10 cm to the left and draw a line parallel to the one that is already there. It should reach point "B".
- This will be the tree trunk. The letter markings need to be erased with an eraser.
- Draw 2 branches on the tree. One of them should be on top. It should be depicted as if it continues beyond the drawing.
- Draw another branch on the opposite side of the trunk, slightly lower than the first. This branch will be short, since it will need to be depicted as broken later.
- Draw the edge of the 2nd branch with a zigzag line, as if it split into fibers when broken.
- Draw the 2nd part of the branch at an angle, lowered downwards. There should be a small distance between these parts. The lower edges of the fracture can be connected with a thin line. As if the branch is broken, but the bark has not yet separated.
- The broken piece also needs to have a jagged edge to simulate damaged wood fibers.
- Draw a human hand holding a broken branch. Approximately in the middle of the broken part, mark the joints of the fingers with 4 circles, located close to each other.
- Draw the hand.
- The fingers should be depicted as clenched. Their tips will not be visible.
- Draw the thumb protruding forward. The hand should look as if it is clenched into a fist. The branch will pass through the fist. If there is a short part of the branch left at the bottom, it needs to be drawn.
- A part of the sleeve with cuffs needs to be added to the arm. The cuff can be depicted as a rectangle.
- Draw the sleeve with 2 smooth, parallel lines.
If there are any extra strokes in the drawing, they need to be erased with an eraser.
Shading the background and indicating shadows
At this stage you will need a hard-soft pencil.
Procedure:
- Shade the background behind the tree. The strokes should be applied diagonally, without pressing on the pencil. They can be long or short. When all the empty space is filled, they will need to be shaded. This can be done with your fingers or a cotton pad.
- Show the shadow on the right side of the tree trunk. It needs to be shaded horizontally, using long lines. The pencil should be pressed lightly so that the strokes are darker than the background. The pressure should be less intense closer to the center of the tree.
- Blend all strokes with a cotton pad.
- Color both branches with a pencil.
- Shade the sleeve.
All strokes should be shaded lengthwise, not crosswise.
Detailing
Using a pencil marked "F", you need to draw all the details.
Procedure:
- On the sleeve, closer to the cuff, depict small folds.
- Draw several small shoots with leaves to the broken part of the branch. Birch leaves have a teardrop shape and jagged edges. They can be depicted with a zigzag line.
- Draw veins inside each leaf.
- Use vertical strokes to depict spots on the trunk, imitating birch bark. You need to press lightly on the pencil so that the strokes are clear.
- Change the pencil to another one, marked "H". Shade all the leaves with it, and also, without pressing, shade the hand.
- Blend the strokes.
- Take a hard-soft pencil and mark the dark areas along the edges of the leaves and show the shadow on the underside of the palm.
- Using a soft pencil “B2” or “B3”, outline the drawing with a thick line.
With a hard pencil, make an inscription in 2 rows on the upper part of the drawing: "Don't break branches! Take care of plants." Outline the letters with a soft pencil.
Pattern variations
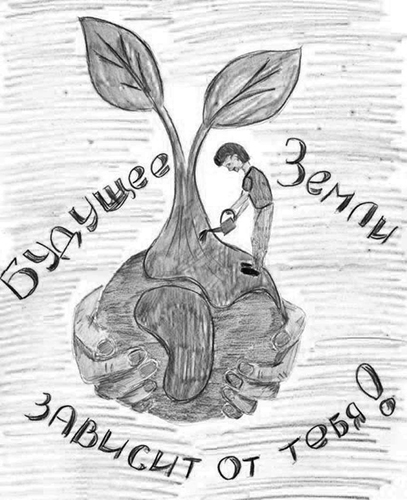
A drawing on the theme "Protect Plants" should clearly convey the idea that plants should not be damaged. You can show human hands in the picture, which carefully protect a small sprout. You can also use prohibition signs, for example, crossed-out circles, inside which human actions are depicted that harm trees and flowers.
The meaning of the drawing on the theme of "plant protection" can also be conveyed by depicting the consequences of violating the rules of conduct in nature. How to draw these and other pictures can be read further in the article.
Contour drawing
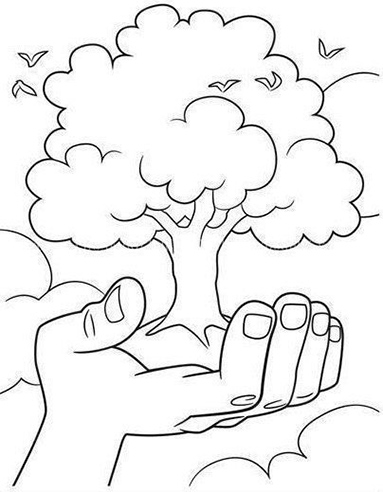
For those who do not like to spend a lot of time on the designation of shadows and highlights, the contour drawing style is suitable. For work you will need only a hard-soft and soft pencil. This master class describes a drawing, which depicts a human palm holding a tree with a lush crown. The drawing can be accompanied by an inscription suitable for the topic.
How to draw:
- Using a hard-soft pencil, draw 2 parallel lines at an angle from the lower left corner. They should not be very long, 5-6 cm will be enough. This is a human hand.
- Draw a thumb slightly tilted to the left.
- Draw the rest of the fingers half-bent. The middle finger should be the tallest. The rest should be drawn smaller.
- Mark the bumps on the soft part of the palm.
- Draw semicircular nails.
- Draw small wrinkles on the bends of the fingers.
- In your hand, draw a small hill on which the tree will grow.
- Draw a tree trunk with roots schematically indicated.
- Divide the top of the trunk into 4 thick branches. They should be of different thicknesses. 2 branches will be located in the center, and the other 2 - on the sides. They should deviate slightly to the sides.
- Depict a lush crown with a wavy line.
- Add a few more wavy and semi-circular lines inside the crown. They will depict protruding groups of leaves.
- Draw several large clouds in the background and depict flying birds in the form of check marks.
- Use an eraser to erase all unnecessary lines.
Use a soft pencil to outline the entire drawing.
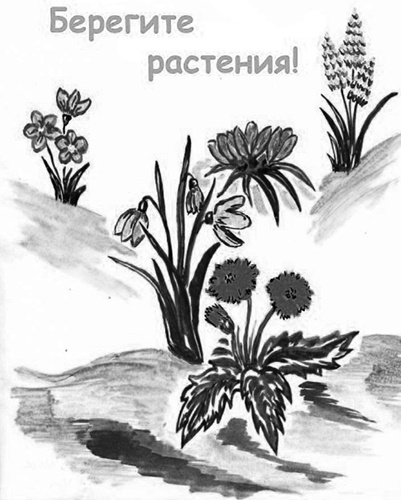
Picture in minimalist style
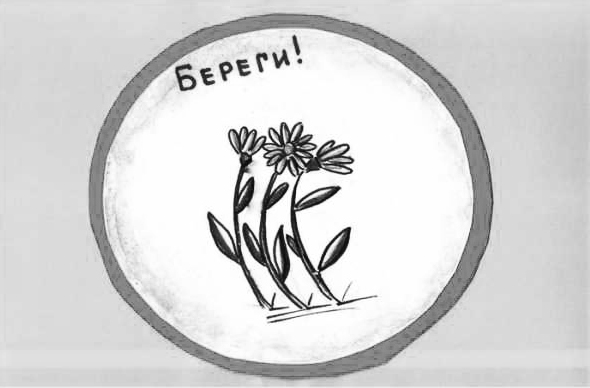
A drawing on the theme "Take care of plants" can be done in 10 minutes. The minimalist style assumes the absence of unnecessary details. This drawing technique allows you to express the idea clearly and understandably. This master class will describe a simple picture: a circle with a thick frame, inside which flowers are schematically depicted. The drawing can be accompanied by a short inscription "Take care!"
How to draw:
- Draw an even circle 15-20 cm in diameter. You can use a compass or trace a glass on paper.
- Using a hard-soft pencil, draw 3 stems coming out of 1 point.
- Draw 1 elongated leaf on each stem.
- Draw small circles at their tips.
- Draw thin, sharp petals along the outline of each circle.
- Show the seeds in the center of each flower as dots.
- Draw the veins on the leaves and petals.
- Add a 5 cm thick frame to the large circle in which the main picture is depicted. Shade it completely.
The background can be shaded with diagonal lines and shaded. At the top of the drawing, make an inscription corresponding to the theme of the drawing, using a soft pencil.
Drawing divided into sectors
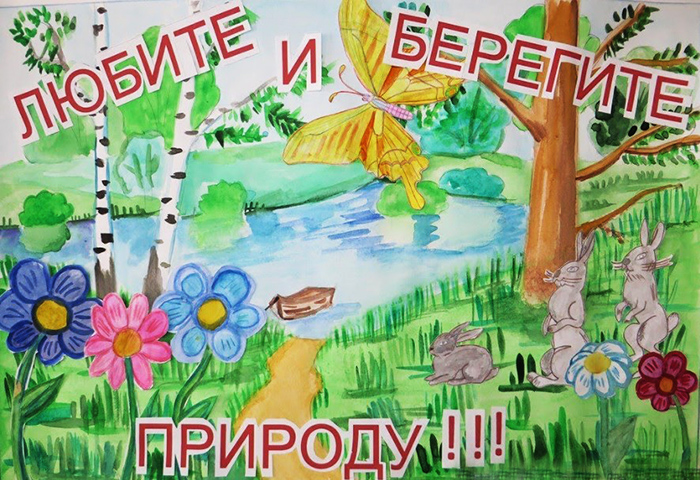
The drawing can be divided into sectors. In each part of the sheet, depict what you can’t do with plants in nature. Each picture should be accompanied by an explanatory caption explaining why nature should be protected. In the center of such a drawing, you can depict the result of following the rules on the topic of “Plant Protection”, for example, a flowering field or a globe in a cartoon style that will smile.
Procedure:
- Using a hard pencil and a long ruler, divide a sheet of paper into 4 equal parts. First, draw a horizontal line from one edge to the other. Then a vertical one.
- Where the lines intersect will be the center of the drawing. Place the sharp leg of the compass at the point of intersection and draw a large circle about 20 cm in diameter.
- Erase the extra lines inside the circle with an eraser.
- Number the sectors starting from the upper left corner. The numbers should be written very small and placed in the corner of each sector, so that it will be easier to erase them later.
- In part 1 of the drawing, you can depict a human shoe that is about to step on a small flower. First, depict the shin. Then draw the shape of the shoe.
- Mark the sole.
- Add some folds in the arch area of the foot.
- Finish drawing the “tongue” and laces on the shoe.
- At the bottom, draw 3 thin stems, slightly tilted to the left.
- Draw 1 elongated leaf on each stem.
- The buds can be depicted as balls, outlined with a zigzag line in a circle, as if they were fluffy dandelions.
- On one of the flower heads you can depict a ladybug.
- Using a hard pencil, shade the top of the shoe and color in the leaves and flower heads.
- Use a soft pencil to color the sole and outline the entire drawing.
- Make a sign nearby: “Do not trample plants and treat the small inhabitants of the forest with respect!”
- Now you can move on to the design of sector 2. There will be a picture of a fire left unattended in the forest. You need to schematically depict 4-5 trees of different shapes.
- Draw the crowns of deciduous trees as lush caps of wavy lines, and coniferous trees as triangles. Outline each triangle with a zigzag line to show the thorns.
- In the center of the forest, draw several logs laid crosswise.
- Draw a large flame with 4-5 tongues on top.
- Draw individual small “tongues” inside the flame.
- Use wavy lines to depict smoke.
- Add some tufts of grass at the roots of the trees.
- Shade the crowns of the plants with “curly” strokes using a hard-soft pencil.
- Paint the top of the flame.
- Shade the logs.
- Using a hard pencil, color in the tree trunks, grass, and inner flames in the fire.
- Make a sign: “Unattended fires pose a threat to several hectares of forest!”
- In sector 3, you can depict a boy who hits the tree branches with a stick. First, you need to schematically draw a tree trunk with roots.
- Draw a few thin branches.
- Draw a boy next to him, his back turned. Draw a round head, add a neck. Finish drawing a T-shirt and pants. Draw his arms thrown back, as if he were swinging.
- Draw a long stick in your hands.
- Draw short, tousled hair on the head.
- Draw broken branches with leaves flying in different directions in the air near the stick.
- Add some branches lying on the ground.
- Shade the boy's clothes and hair with a hard pencil. Use a soft pencil to mark the shadows and show the folds on the things.
- Add caption: "Because of such fun, trees die!"
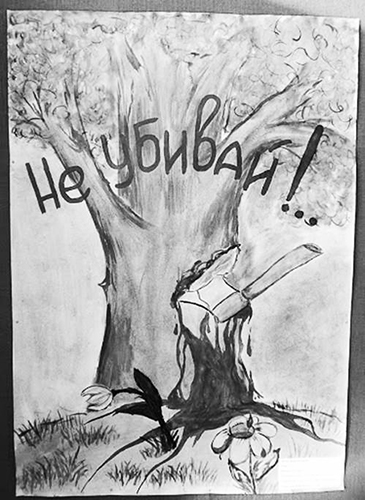
- In sector 4, a person will be depicted cutting down a fir tree. The fir tree can be depicted schematically, as a triangle with jagged edges.
- Draw snowdrifts around the fir tree in the form of arcuate lines. The man can be depicted in the same way as the boy in sector 3 of the drawing. He can be turned with his back, only the clothes should be drawn more voluminous, winter ones. On the head, depict a hat with earflaps. Instead of a stick, draw an axe in the man's hands.
- Make a caption: “Don’t cut down live trees, it’s better to buy an artificial one!”
- Inside the circle, draw a flower field or a meadow with trees, depicting all the elements of the picture schematically. At the top of the circle, you can make an inscription: "Touch the beautiful with your heart, not with your hands!" or "Take care of the plants!"
Some elements of the picture can be outlined with a soft pencil if they look too faded.
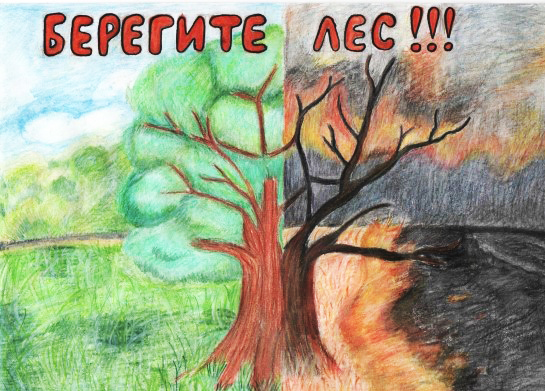
Pictures in the style of "2 realities" or "The choice is yours!"
A drawing on the theme "Take care of plants" can display the consequences of good and bad attitudes towards wildlife. Further in the article there are 2 master classes on drawing such pictures.
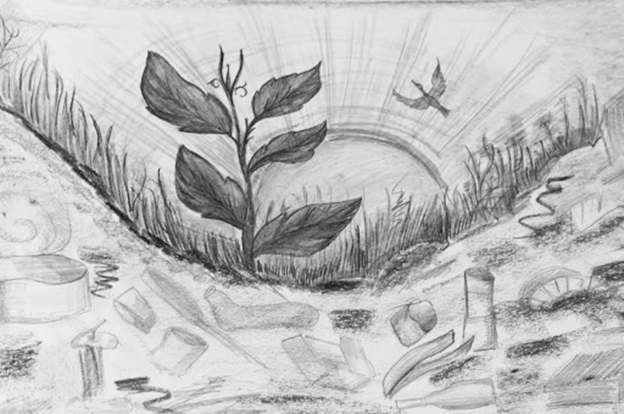
The drawing "The Choice is Yours" is conditionally divided into 2 parts. On the left will be depicted a blooming and green world, and on the right - a withering plant and the consequences of human pollution of nature.
How to draw:
- Place the A4 sheet of paper horizontally on the table.
- Using a hard pencil, divide the paper into 2 parts with a very thin line. Then you will need to erase it.
- Using a hard-soft pencil, draw a semicircle at the bottom. It will imitate part of the globe.
- Where the sheet was divided into 2 parts, you need to draw a tree trunk.
- On the left side of the tree, depict a voluminous crown, and on the right, dry and broken branches hanging down.
- Now on the left you need to depict a river, a field of flowers and flying butterflies.
- On the crown of the tree, draw small leaves in the form of inverted drops.
- The tree trunk can be shaded diagonally with a hard pencil or you can draw spots on it, like on a birch tree.
- Draw tufts of grass and decorate flower petals.
- You can add a few birds in the sky in the form of check marks.
- On the right side, schematically depict a factory with tall chimneys from which black smoke comes out. You can draw smoke in the form of "curly" lines, using the softest pencil.
- Finish drawing the piles of garbage. They can be depicted schematically, drawing only their shape, but to make it clear what these mounds are, you need to draw a few details more clearly. For example, tin cans, cigarette butts and scraps of paper.
- Objects located far away should be shaded with a hard-soft pencil. Objects drawn closer can be shaded with a hard pencil or not shaded at all.
- At the top of the sheet, above the tree, write the following: “The choice is yours!”
Trace the outline of the picture with a soft pencil.
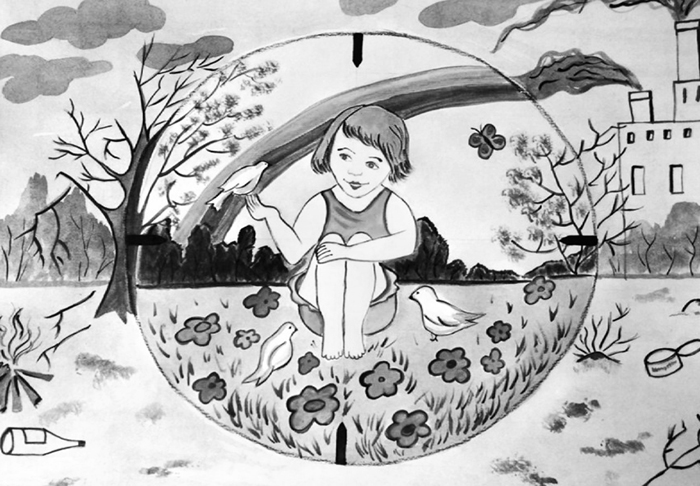
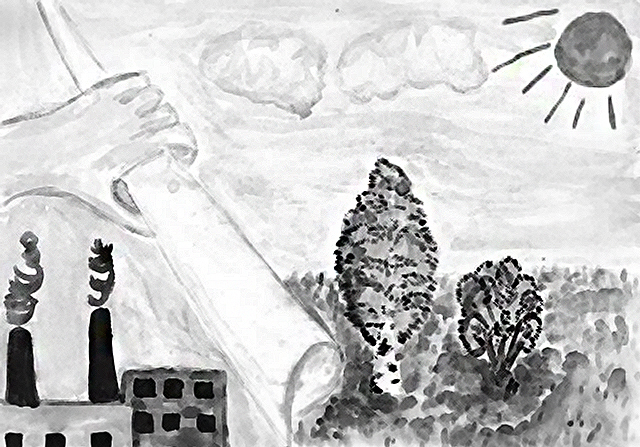
The drawing called “2 realities” has the same meaning as the previous one, only it is done a little differently:
- Place a sheet of A4 paper horizontally on the table.
- Step back 15 cm to the right from the lower left corner. Put a dot.
- Using a hard pencil, draw a line from this mark to the upper right corner.
- It is necessary to depict a sheet of folded paper. Therefore, next you should draw a parallel line, which will smoothly deviate to the right side, in the downward direction.
- At the bottom you need to draw a twisted layer of paper in the form of a loop.
- Now you need to draw a hand that twisted the sheet of paper in this way.
- The wrist starts from the left edge of the sheet. The thumb will be hidden under the drawn paper. The remaining fingers should be depicted as if they were grasping the drawn roll. Erase the extra lines. In this unusual way, the drawing will be divided into 2 parts, one of which will show the "bad" reality, and the other "good".
- On the left side, the smaller one, schematically depict a factory with pipes from which black smoke comes out, polluting the nature. There is not a single plant around. You can draw a few stumps nearby. As if there were trees, but they were all cut down.
- On the right side of the drawing, show a flowering meadow and several trees, depicted schematically.
- Using a hard pencil, shade the sky in 2 parts of the drawing. Blend all lines.
- Using a hard-soft pencil, color in the grass and tree trunks, as well as the houses and pipes on the left side of the picture.
Use a soft pencil to show the leaves on the tree crowns, draw the smoke and outline all the elements of the drawing that look too pale.
Examples of images for copying, tips for beginners
Tips for aspiring artists:
- The contours of various objects, including plants, should be drawn with short, broken lines. This makes it easier to maintain proportions and correct errors.
- You should always place a clean sheet of paper under your hand to avoid rubbing away the details you've already drawn.
- When using a coarse eraser, you need to erase the graphite smoothly, without sharp or intense movements.
- Drawings made with simple pencils should be covered with special sprays for fixation. They fix the graphite layer and prevent it from smearing and being imprinted on other sheets during storage. If you don’t have such a spray, you can use hairspray.
You can draw a picture on the theme "Take care of plants" together with children. To make it easier for the child, you can simplify some of the picture options by removing the stages of detailing and designating shadows. During the creative process, parents should explain why plants need to be taken care of and what will happen if this is not done.
Video about drawing
How to make an eco-poster on the topic of nature protection: