You can draw a bright ladybug not only with a simple pencil, but also using a marker or paints. To create this drawing no special skills or much time are required. Following the simplest algorithms, both a child and an adult with no previous drawing experience will be able to depict the insect in question.
Drawing with a simple pencil
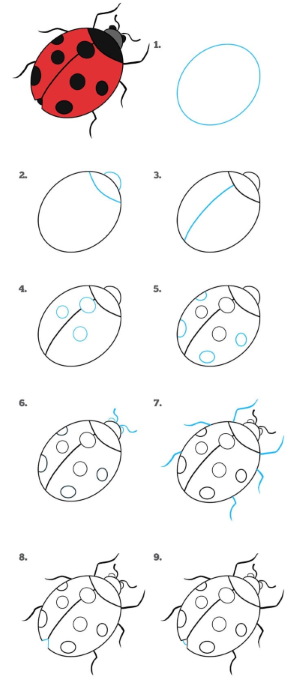
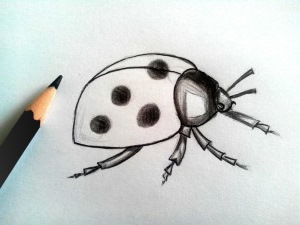
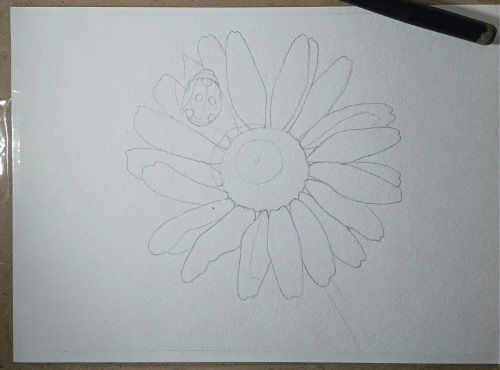
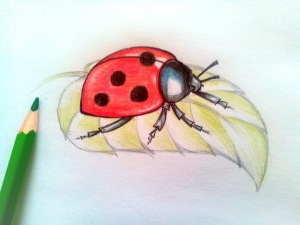
A ladybug drawing made with a pencil can vary in level of complexity.
Ladybug Drawing
The way it is depicted
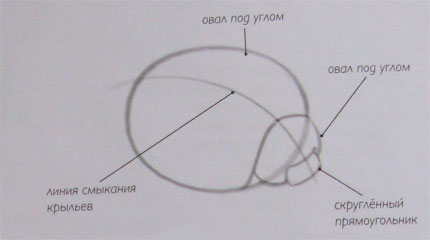
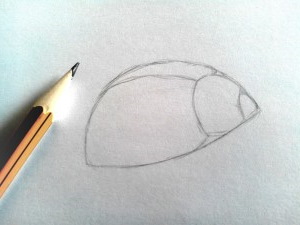
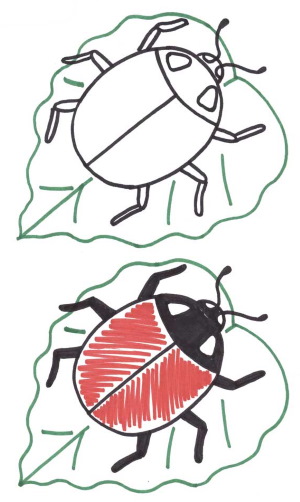
In the middle of the working plane, draw a rounded oval, placing it vertically.
Draw a vertical line inside the main shape, dividing the working plane into 2 halves.
Step back 4-5 cm down from the upper border of the figure and draw a semicircle so that its extreme points extend beyond the edge of the oval by 1-2 cm.
Connect the extreme points with a smoothly curved line.
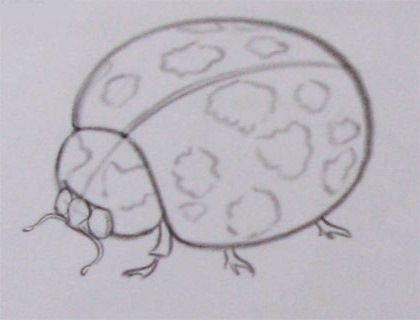
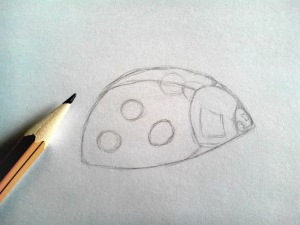
Draw 5 small circles inside the oval, using them to evenly fill the inner plane of the figure.
Inside the top figure, draw 2 small circles at the same level.
On top of the small figure, draw a small semicircle, drawn in the shape of a moon, placing it horizontally, with the curve downwards.
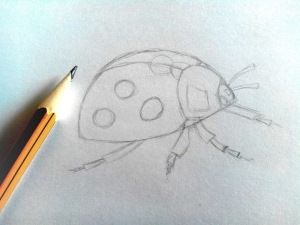
Draw thin lines (whiskers) on the sides of the moon.
Draw 6 thin curves, placing 3 on each side (insect legs).
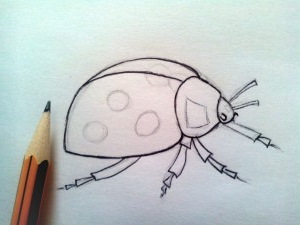
Color the picture.
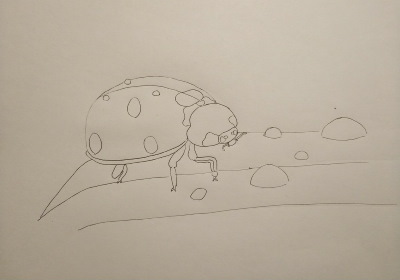
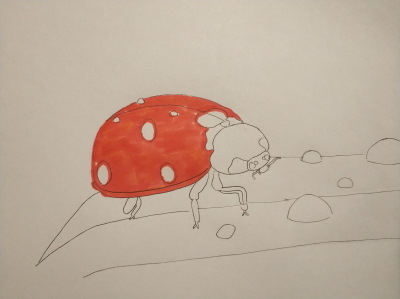
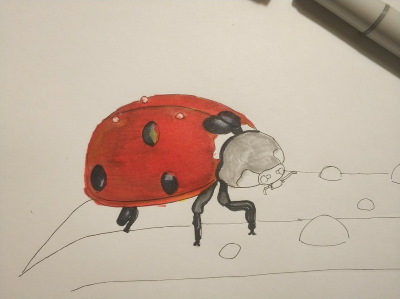
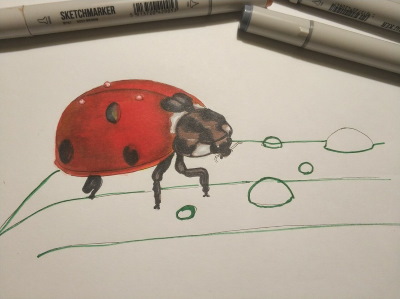
Draw a small circle to the right of the center of the sheet of paper you are using.
Crossing the boundaries of the main circle, draw 2 more small circles (eyes).
Erase the minor lines inside the circles.
Draw 2 additional circles (pupils) inside the small circles.
Between the eyes, draw a semicircle curved downwards (mouth).
From the right border of the circle draw an oval (the body of the insect).
Draw another oval, similar in shape to the first, placing it 2-3 cm higher.
Erase minor lines.
Draw another wing by drawing a semicircle from the upper edge of the oval drawn earlier.
Draw 3-4 short curves (ladybug legs) at the bottom of the insect’s body.
Add detail to the image by filling the inside of the wings with small circles.
Colour the picture using red, brown and blue.
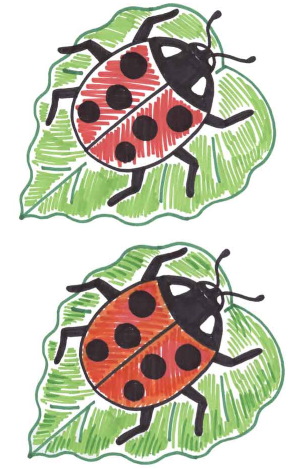
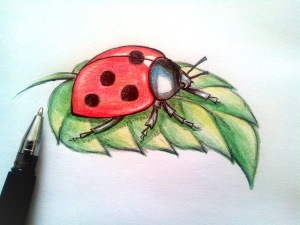
In the center of the working plane, draw a rounded oval, placing it vertically.
Divide the inner part of the figure into 2 halves using a vertical line.
Inside the oval, at the top, draw a semicircle curved downwards.
From the upper border of the main figure, draw a semicircle curved upwards (the head of the ladybug).
Draw slightly curved lines (whiskers) on top of the head.
Along the entire length of the lateral borders of the image, on both sides, depict short curves directed downwards (insect legs).
Fill the inner area of the image with circles of different sizes, located symmetrically, on both sides of the previously drawn vertical line.
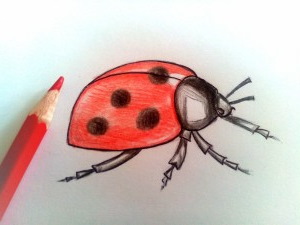
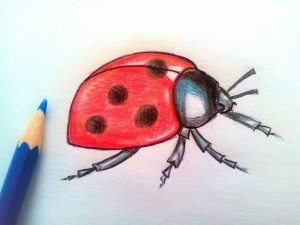
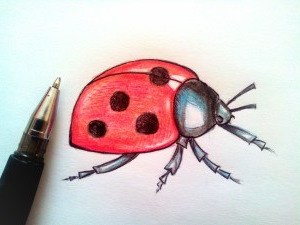
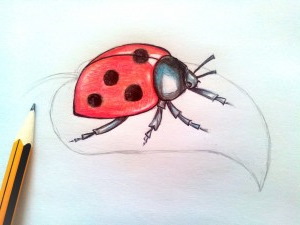
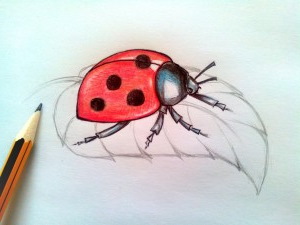
With colored pencils
You can draw a ladybug with colored pencils like this.
Ladybug pencil drawing
Ladybug Drawing
The way it is depicted
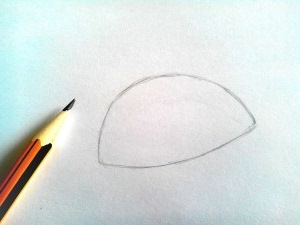
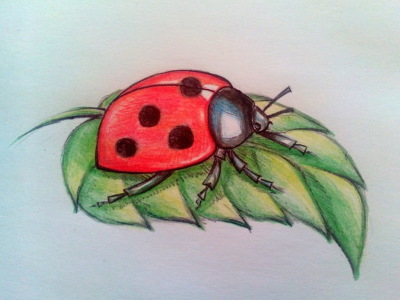
Draw an even circle in the middle of the sheet of paper you are using.
Draw a vertical line in the middle of the circle, dividing the figure into 2 halves.
From the upper edge of the circle, draw a small semicircle so that its middle is located above the end point of the vertical line.
In the upper half of the semicircle, draw 2 small circles (the insect’s eyes).
On each half, on both sides of the dividing line, draw 3 small circles.
From the side edges of the ladybug’s body, draw 3 straight lines on each side (the insect’s legs).
Colour the image with coloured pencils, using black to colour the insect's head and the spots on its back, and red to fill the background of the body.
In the center of the working plane, draw a medium-sized semicircle with an upward bend.
Inside the semicircle, draw 2 medium circles with smaller diameter circles inside (eyes). Paint the inner circles black.
The area inside the semicircle is also painted black.
From the semicircle, draw 2 smoothly curved in opposite directions straight lines (antennae). Draw small circles at the ends of the antennae.
Draw a large circle under the semicircle.
Having determined the center of the base of the semicircle, draw 2 straight lines from this point, directed diagonally to the lower corners.
Connect the extreme points of the lines with the center of the base of the semicircle with smoothly curved lines. When drawing the right wing, the semicircle should be curved to the right, when drawing the left - to the left.
Color the space between the wings with a black pencil.
Draw several small black circles on the wings, then paint them black and the space around them red.
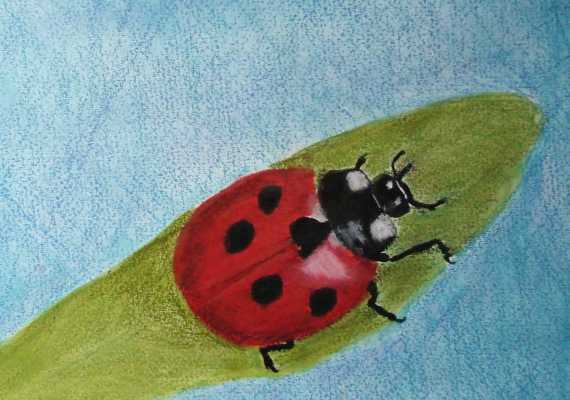
If you wish to refine the drawing, adding secondary objects to the composition, such as leaves, flowers, grass, etc. To color the background, use contrasting shades, such as green, orange, brown.
With paints
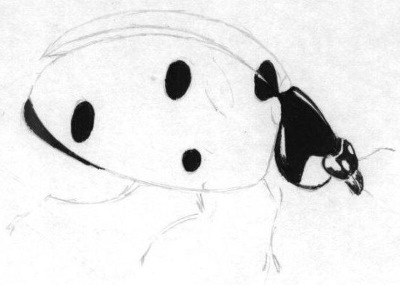
The ladybug drawing is most often painted with paints. Gouache or watercolors allow not only to add brightness to the image, but also to make the outline of the main details of the object clearer.
According to the rules of fine art, a beginner is recommended to first draw the outline of a ladybug, and then paint the inside and draw the outlines with paints, but children, working on creating a picture of an insect, most often do the opposite.
Ladybug Drawing
The way it is depicted
Children aged 4-6 years draw a ladybug like this:
Paint the sheet of paper you are using with green paint. Let the paint dry.
In the upper right corner, draw a yellow semicircle with straight lines located randomly (the sun).
In the upper part of the working plane, draw a small black circle (the head of the ladybug).
From the upper border of the head, draw 2 smoothly curved lines (the insect's antennae).
Draw a rounded oval at the bottom of the circle, placing it vertically (the body of the insect). Color the inside of the oval red.
Divide the inner part of the oval into 2 halves using a vertical line drawn in black.
In each of the resulting halves, draw 3 black circles.
On each side of the body, draw 3 straight lines (insect legs).
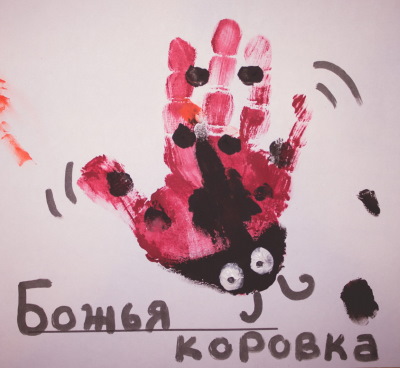
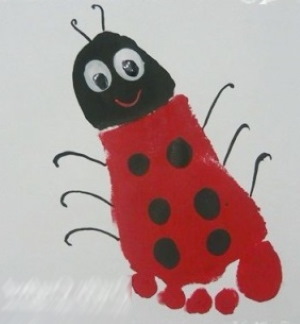
The most unusual way to depict a ladybug:
Spread the red paint evenly in a thick layer over the child's foot.
Press the baby's foot firmly onto a sheet of paper and make an imprint.
Paint the heel area with black paint (the insect's head), and paint the body more thoroughly with red.
At the top of the drawing, draw 2 identical ovals at the same level with white paint. Let the paint dry (eyes).
Draw a small black circle (pupils) inside the white oval.
Under the drawn eyes, between them, draw a semicircle curved downwards (mouth).
From the border of the image, draw 2 lines upward, smoothly curved at their extreme points.
Fill the lower area of the print with black dots located along the entire length of the foot opposite each other.
From the side edges of the print, draw 3 smoothly curved lines to the sides (insect legs).
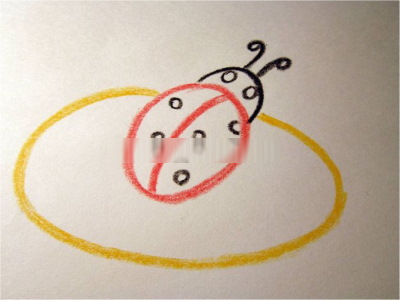
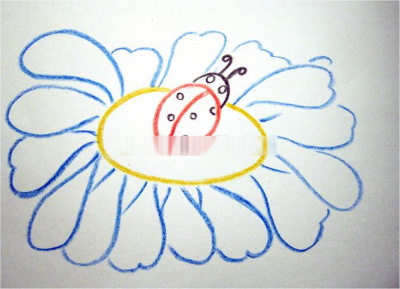
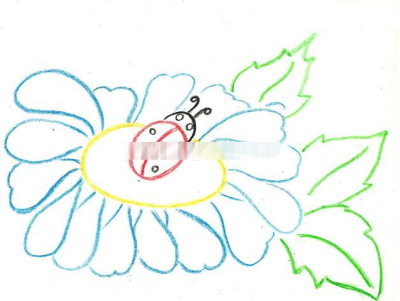
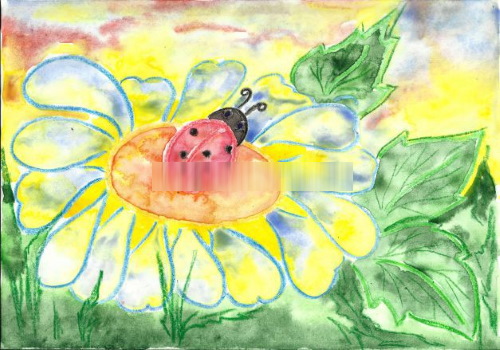
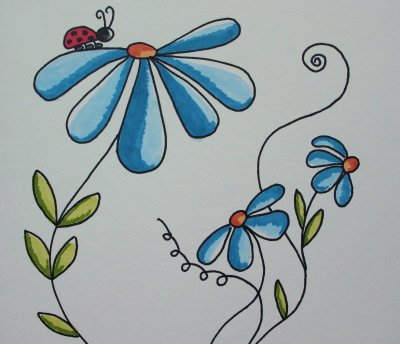
How to draw on a daisy
Drawings of a ladybug sitting on a daisy are used not only as an independent image, but also as a sketch for a tattoo.
Ladybug Drawing
The way it is depicted
Take a sheet of green cardboard or green colored paper. Alternatively, you can paint the surface you are using yourself, but when drying the paint, in this case, the paper should be placed under a press.
Draw a circle of small diameter at the right border of the working plane. Paint it yellow (the middle of the flower).
From the edges of the circle, draw ovals of the same size and located at approximately equal distances from each other. Paint the ovals with thick white paint, preferably gouache. Let them dry.
On one of the ovals, draw a small red rounded oval, placing it vertically (the outline of the ladybug’s body).
Draw a black semicircle on top, then paint over the space between the main shape and the secondary line.
Paint the inside of the oval red, then draw a thin black line along the body.
Draw black dots on both sides of the vertical line.
If desired, indicate the angle of the color by making one side of the ladybug's body darker.
From the bottom edge of the sheet of paper used, draw 2 smooth curved lines that repeat each other’s contours (the stem of the chamomile).
Color the distance between the points green.
The extreme points of the stem must be positioned approximately in the middle of the working plane.
Stepping back 3-4 cm from the extreme points of the stem towards the upper right corner, draw an oval with a diagonal orientation.
From the side edges of the figure, draw a multitude of ovals, located close to each other and approximately the same in size.
On one of the petals, draw a small semicircle (the outline of the insect's body). Paint the distance between the petal outline and the border of the semicircle red.
Place small dots inside the resulting figure, arranging them randomly.
Draw a small circle on the left (the insect's head).
Mark the angle of incidence of light by drawing shadows on the resulting image.
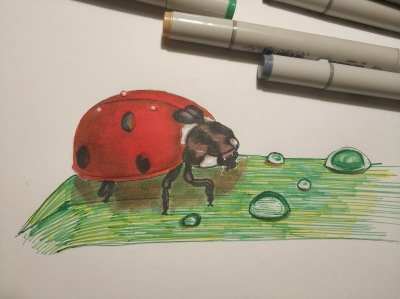
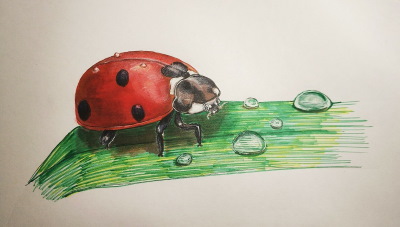
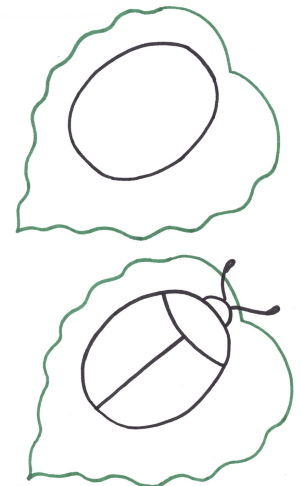
On the sheet
The drawing "Ladybug sitting on a leaf" is a compositional image and requires detailed drawing of at least 2 objects.
Ladybug Drawing
The way it is depicted
Fill the middle part of the working plane with an image of a leaf, drawing it using 2 smoothly curved lines located horizontally.
On the right, the extreme points of the semicircles that form the outline of the sheet must be brought together into a small rectangle (tail).
Paint the inside of the leaf with green paint. Let dry.
Divide the inner area of the sheet into 2 parts using a vertical line drawn with green paint or a pencil of a darker shade.
From the dividing line, draw smoothly curved lines in both directions, thus drawing the skeleton of the plant. Let the paint dry.
Draw a circle in the center of the drawn sheet, then color it red.
Inside the circle on the right, draw a semicircle curved to the left.
Color the space between the right border of the circle and the outline of the semicircle black.
From the semicircle, draw a black line to the left.
From the borders of the circle, draw several straight lines, directing them in different directions (insect legs).
On a red background, inside a circle, place a lot of black dots, placing them randomly.
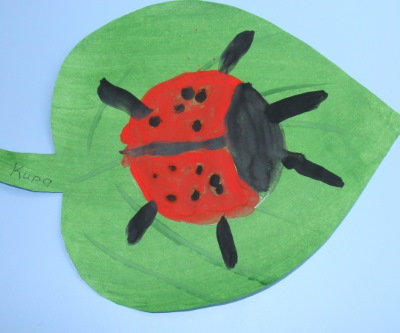
In the center of the working plane, draw an oval with pointed edges (the outline of the sheet).
Divide the inside of the pictured sheet into 2 halves. Paint each half a different shade of green.
Draw a circle in the middle of the drawn sheet, then paint it red.
Divide the inner part of the circle into 2 parts with a semicircle curved upwards.
On both sides of the dividing line, inside the circle, draw 3 medium-sized black dots.
Draw a semicircle curved upwards towards the upper right corner (the insect's head).
Place 2 small black dots (eyes) inside the semicircle.
Draw 6 small semicircles along the outline of the ladybug’s body, placing them on the outside, 3 to the right and 3 to the left of the dividing line.
On the flower
The design "Ladybug sitting on a flower" is usually used not only to decorate notebooks or personal diaries, but also to decorate residential or commercial premises.
The advantage of such images is that the artist himself can choose the color scheme, based on the intended location of the work.
Ladybug Drawing
The way it is depicted
In the area of the lower left corner, draw a small semicircle, then paint the inner part of the resulting figure yellow (the middle).
From the border of the yellow figure, draw 3 rectangles so that as they approach the center of the flower, they become narrower (petals). The petals should be made different in size, based on their distance from the viewer.
Paint the inside of the petals with any color, outlining the relief of their surface.
In the middle of one of the petals, draw an oval, placing it diagonally.
Sharpen its side edges, then divide the inner surface of the figure into 2 halves using a thin black line.
Paint the inside of the oval red, and then randomly draw black dots of different sizes over its entire area.
Draw the ladybug's head on top of the figure.
From the outline of the insect’s body, draw curved lines (ladybug legs).
The ladybug can also be drawn sitting on a flower stem:
From the upper left corner draw 2 smoothly curved lines directed to the lower right corner (the outline of the flower stem). The extreme points of the lines should not be connected.
At a distance of 3-4 cm from the upper border of the stem, draw 2 ovals connected to each other so that their edges intersect each other on one side. The oval located below should be smaller in size.
Draw slightly curved lines (paws) at the bottom.
Add detail to the image by drawing the eyes, whiskers, spots on the body and the lower part of the insect's body visible from under the wings.
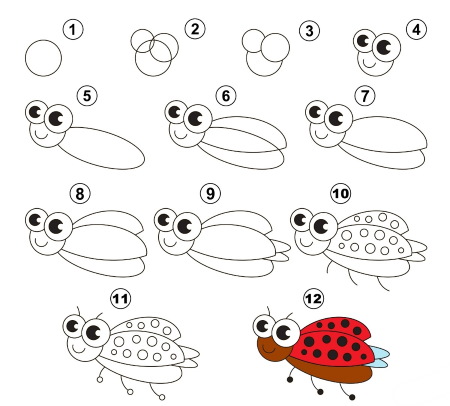
Cartoon ladybug
A drawing that involves the depiction of a ladybug in a cartoon style is, in the vast majority of cases, chosen by young artists or people who create illustrations for children's works and teaching aids for their development.
Ladybug Drawing
The way it is depicted
Schematically depict 3 ovals (2 wings and a body), one of the edges of which should be located close to a small circle (head).
Inside the circle, draw a semicircle with a bend to the right so that the distance from the edge to the semicircle is equal to 1/3 of the total internal area.
Inside the resulting figure, draw a black dot (eye) and a small semicircle (mouth).
Draw a small circle (nose) to the left of the circle on the outside.
From the upper border of the circle, draw 2 smoothly curved lines upwards (insect antennae).
On the 2 ovals – wings directed upwards, draw small circles.
From the lower main oval (body), draw 6 smoothly curved lines, at the ends of which draw a small circle.
Color the image.
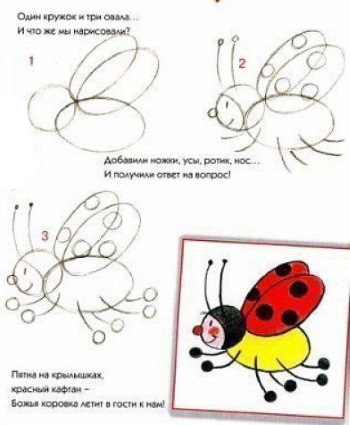
Draw a rounded oval in the center of the working plane.
Draw a semicircle inside the oval on the right, thus indicating the outline of the insect’s head.
Paint the space inside the head black, then draw 2 large circles inside, in each of which draw another circle of a smaller diameter. Paint the smallest circles black.
Draw a small semicircle (mouth) between the circles at the bottom.
From the upper border of the head contour, draw 2 lines, twisting the ends into a spiral.
Paint the body red, highlighting the small triangle located in the center near the top edge in black.
Fill the inner area of the body with small black circles.
From the lower border of the ladybug’s body, draw 4 smoothly curved lines, at the ends of which draw small circles (the insect’s legs).
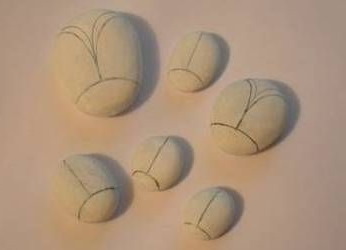
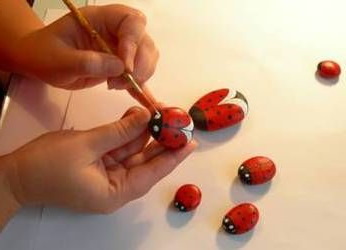
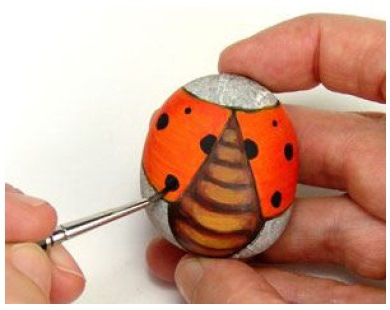
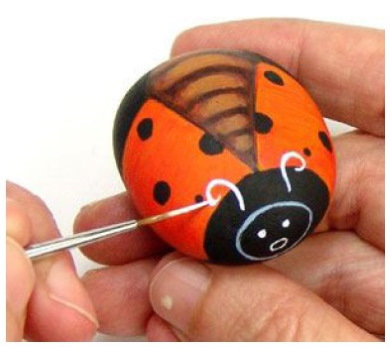
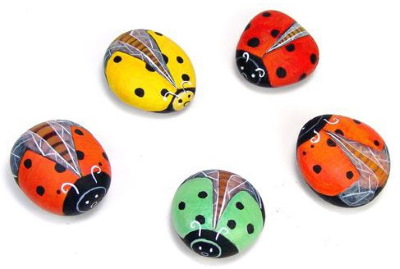
Painting on stones
To paint the stones to look like a ladybug, follow these steps.
Ladybug Drawing
The way it is depicted
Sand the surface of the stone on both sides.
Spread the paint of the chosen color evenly and thickly over the entire surface of the stone.
Draw a semicircle, stepping back 5-6 cm from one of the edges of the stone. Paint the resulting small figure black.
Using a thin black line, divide the upper surface of the stone into 2 halves (wings).
Place many neat black dots to the right and left of the line.
On the black figure, draw 2 white circles with black dots inside (eyes).
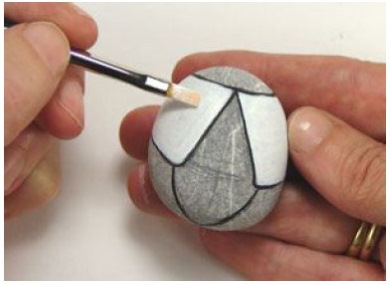
Grind the surface of the stone used.
Paint the top of the stone in any bright color, applying the paint in a thick, even layer.
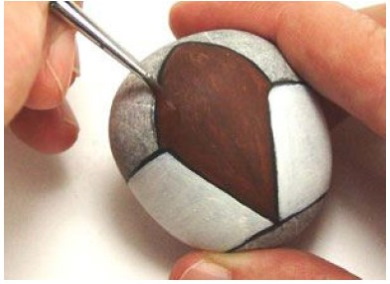
Step back 3-5 cm from one of the edges of the stone and draw a semicircle. Paint the resulting small figure black (the head of the ladybug).
Place 2 white dots (eyes) inside the black figure.
From the middle of the semicircle, draw 2 straight lines so that the result is a triangle.
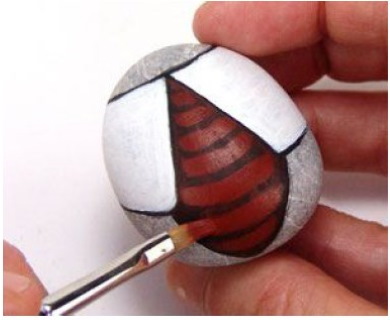
Paint the inner part of the triangle yellow, then fill this area with parallel horizontal lines located at a distance of 0.5-1 cm from each other (the body of the insect).
Fill the area around the body with many small black dots located at equal distances from each other.
Refine the image.
Despite the apparent primitiveness of its appearance, the ladybug can be drawn in various styles. Due to the absence of many small details, as well as the simplicity of the insect's appearance, the process of creating such drawings will take an inexperienced artist no more than 1-2 hours, provided that he follows the main stages of the working algorithm.