Popular style Minimalism is characterized by expressiveness and conciseness. This combination of qualities allows even those for whom school drawing lessons were torture to create paintings.
The birth of style, idea and purpose
Minimalism was first discussed in the 1960s. Its homeland was America, and its founding father was Frank Stella. He was a famous artist from Massachusetts, a master of abstraction. In 1960, he presented to the public a collection of works called “Black Lines,” painted in a laconic manner unusual for that time, using black as the dominant color.
Stella's ideas were to the liking of other avant-garde artists:
- Rayman;
- Le Vittu;
- Flavin;
- To Malevich.
Thanks to them, minimalism was initially regarded as one of the directions of avant-garde painting, since it had many common features with:
- abstractionism;
- constructivism;
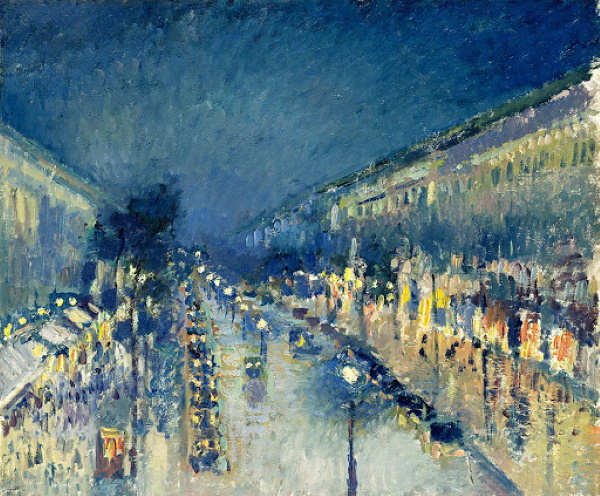
- impressionism.
Later, it became a separate, full-fledged direction of art. Today, minimalism in painting is a style in which the main principle is the maximum simplification of the image, getting rid of secondary, insignificant details, while preserving the main essence of the work. This style is a philosophical contemplation of the subject, reflection on its essence.
Expressive features
Minimalists gradually moved away from the canons of avant-garde painting, creating a new, unique style that denies existing dogmas and rules.
He gave the artist and the viewer the opportunity:
- show your imagination;
- to reflect;
- analyze;
- philosophize.
The main features of minimalism include:
- a complete rejection of the canons of the classics, in particular, of realism;
- ignoring minor details that do not carry any semantic load;
- a small number of colors: usually no more than 3 are used, but more often minimalist paintings are monochrome. Preference is given to black, red, yellow, green;
- lack of smooth light transitions;
- schematic images, wide use of geometric shapes;
- use of zoning of space to create the appropriate mood;
- asymmetry of images.
Minimalism drawings are characterized by their incompleteness and understatement. The author does not try to impose his vision on the viewer, giving him the right to independently "finish drawing" what was left "behind the scenes". Minimalism is the complete opposite of classicism, with its precise drawing of details, smooth color transitions, variety of colors, and realistic images.
Minimalism style drawings for copying
The style's inherent laconicism of images, their conventionality, the possibility of using clear straight lines and the absence of strict requirements for the color palette create ideal conditions for self-expression.
The master will need:
- fantasy;
- desire to create;
- knowledge of drawing techniques, which largely depend on what kind of tool he is going to use to paint his masterpieces.
With a pencil
For a beginner artist, a pencil is the best tool, because it allows you to correct mistakes, and the drawings, despite inexperience, turn out neat, easy, clear. But there is one condition: the right choice of tool.
To work you will need:
| Material | Description |
| Pencils of different hardness | The following options will be required: · H – hard – for preliminary sketching; · HB – medium-hard – for drawing contours; · B – soft – for applying retouching. Pencils will need to be sharpened so that they do not cut the paper. The tip of a soft pencil should be slightly rounded. |
| Pencil sharpening knife | It is better to choose a model with an anti-slip coating on the handle. A good option is a wallpaper cutter with a retractable blade. |
| Eraser | Without a good eraser, you'll get nothing but a dirty spot on the paper.
It would be even better if there were 2 erasers: · normal – with a hard and soft side; · klechka – an eraser that can easily take any shape. With its help, you can remove unnecessary lines in hard-to-reach places. |
| Paper | The thin paper used for printers will not work: you need thick Whatman paper. You can buy a school drawing album, the optimal format is A4. On good Whatman paper, the lines are clear, if necessary, they are easily removed without leaving marks, and the paper does not crumble or stretch after the pencil. |
Once you have acquired everything you need, you need to learn how to hold a pencil correctly.

It depends on what it was picked up for:
- Traditionally, a pencil is held like a pen when it is necessary to outline a contour or draw a smooth line.
- Hand over pencil: the pencil is guided by the index finger, located along it. It is used for coloring and for applying shadows
- Hand under the pencil: the pressure is controlled by the index finger and thumb. This position will be needed at the sketching stage, to create thin, barely distinguishable lines.
Minimalist pencil drawings will also require mastering the following techniques:
| Technique | Description |
| Hatching | These are short thin lines that are applied by lifting the pencil from the paper at approximately the same distance from each other. Hatching allows you to get different color saturation and emphasize the texture of the object. |
| Shading | This is the smearing of pencil strokes to obtain a uniform tone, which will give a sense of volume. The shading is done along the strokes with a special tool. Even and zigzag strokes are first applied to the paper with a soft pencil. |
You should not neglect the basic laws of drawing, which state:
- the closer an object is, the larger it appears;
- the closer the object is, the lower it should be in the drawing;
- of the two objects, the one whose contours are overlapped by the other object is further away;
- a horizon line drawn on paper will enhance the illusion of space;
- objects located further away are drawn in less detail, they are lighter, and their contours are slightly blurred;
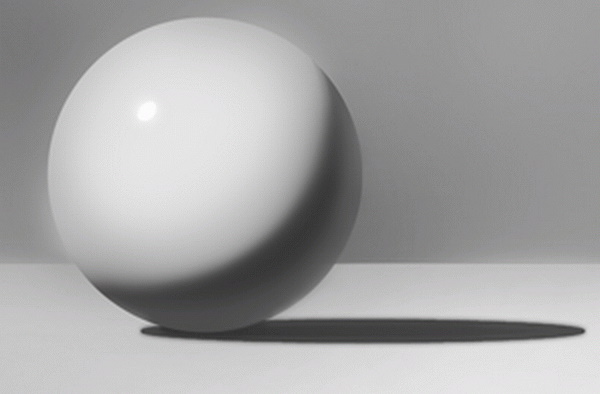
- to show volume, it is necessary to make the part of the object that is closer to the light lighter;
- A shadow will help to emphasize the volume of an object.
Warming up before drawing is a must. To do this, you can draw a few lines on a clean sheet of paper, experiment with shading, using pencils of different hardness and holding them in different ways: under your hand, above your hand, traditionally.
Initially, a beginner should not take on complex canvases. Children's drawings are best suited for training. They can be attributed to the minimalist style due to the simplicity of the form and the absence of secondary details.
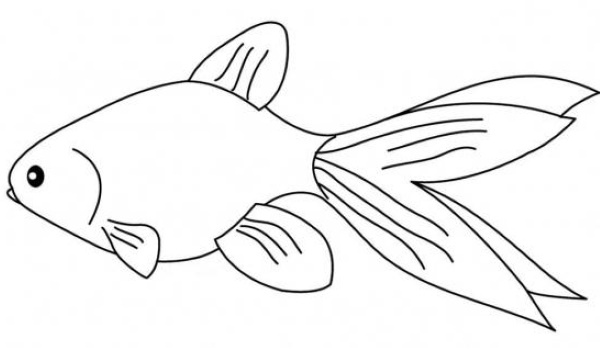
For example, to draw a fish, you can break the work down into the following steps:
- Draw a circle and draw a horizontal line dividing it into 2 halves.
- Using the boundaries of the circle and the line as a guide, create the outline of the fish.
- Draw the fins.
- Add an eye and a few strokes to show the texture of the fins.
- Use an eraser to remove all unnecessary areas.
Afterwards, you can move on to more complex drawings, but the drawing principle remains the same:
- break down a complex image into simpler ones, based on geometric shapes;
- First draw the main outline, and then add characteristic elements inherent to the object.
At first, you can take ready-made samples for copying, and later - draw everything that catches your eye, removing secondary details and simplifying the form.
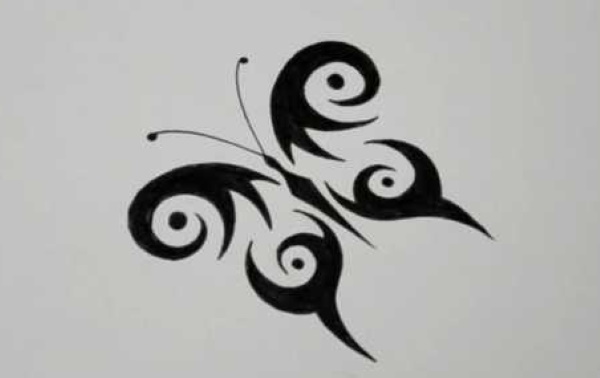
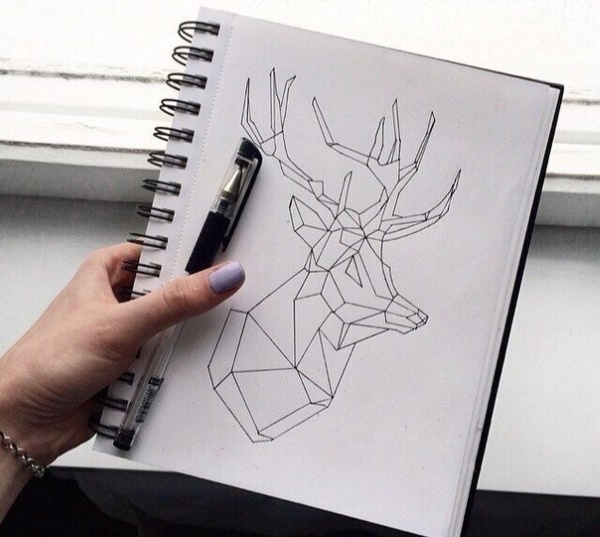
With a black pen
Minimalist pen drawings are suitable for artists who have drawing skills, since it will be impossible to correct what has been drawn. With a certain amount of experience, the images, in comparison with pencil ones, turn out to be more expressive and bright.
When choosing a pen, it is necessary to consider that a ballpoint pen is not suitable, since it can stop writing at a crucial moment or, on the contrary, leave too bright, greasy marks on the paper. A gel pen is free of these disadvantages.
When drawing with a gel pen, remember: the softer the surface on which the sheet of paper lies, the thicker the mark left will be. You can vary the thickness of the line by placing the drawing either on a hard table surface or on a stack of paper. The second option is a liner (rapidograph), designed for drawing in ink. This tool will cost more than a gel pen.
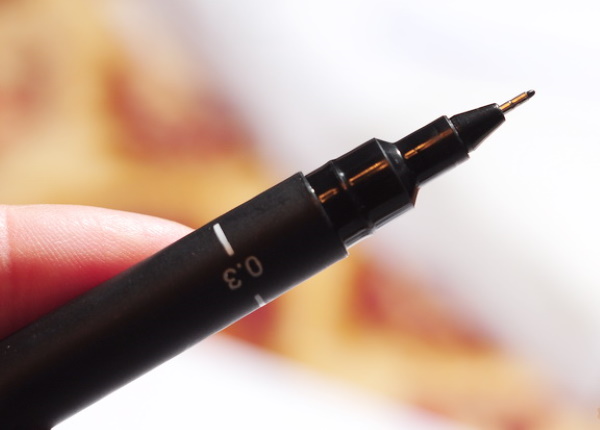
Also, to create a full-fledged drawing, you need to purchase it in 3 different diameters of the writing rod:
- for the main design – 0.3 mm;
- for shading shadows – 0.8 mm;
- for depicting objects located in the background – 0.1 mm.
However, it does not have the disadvantages of a gel pen:
- does not get dirty;
- writes on the pencil and on the edges;
- the lines are clear and soft.
Any paper will do - for the printer, school notebooks, notepads. Only textured, embossed, glossy sheets are undesirable: the lines will lie unevenly on them. The best option is smooth, thick paper with A3 or A4 sheet format. The drawing process begins with transferring the contours of the drawing to the paper. To do this, you can mark the contours with dots.
The method is good because it allows you to easily estimate the size of the drawing and avoid an unpleasant situation when it suddenly turns out that part of the drawing goes beyond the sheet. Dots can be applied manually or you can use a simple device called a light board. You can make it yourself by placing a lamp in a parcel box and covering it with glass from above or by leaning the drawing against a window pane.
For simple drawings you will need:
- Create a dotted outline.
- Connect the dots with lines.
- Paint the required areas.
For complex drawings or if you can’t get the dots right, you can make a pencil sketch in advance and then follow the pattern.
She's like this:
- Make a frame and outline the drawing.
- Create a background.
- Apply small details, create texture.
- Get a minimalist design.
It is important to follow these guidelines:
- Draw lines with quick and confident movements.
- For this style, it is acceptable if the image has minor flaws. For example, crooked lines, some asymmetry, broken proportions make the drawing original.
- If you don't like the image, you need to finish it. Sometimes the results of such experiments are unexpected.
- Apply shading with intersecting lines. The denser they are, the darker the shaded area will be. By changing the frequency and direction of the lines, you can achieve the effect of volume and play of shadows.
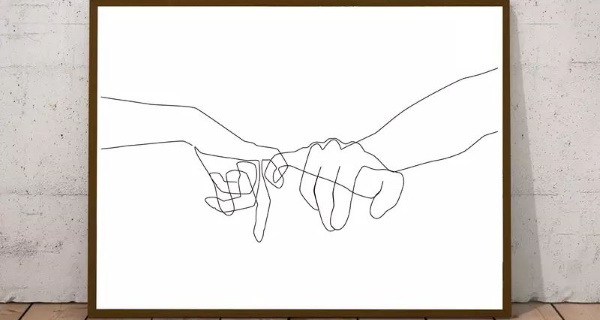
Once you have mastered the art of pen drawing, you can try the continuous line method developed by Canadian artist Joseph Slater.
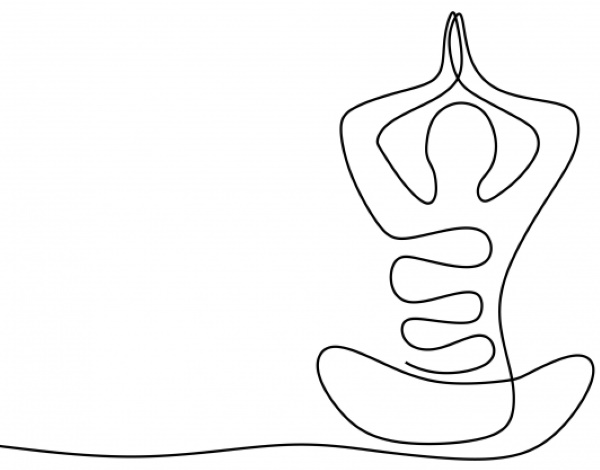
Minimalism drawings created from 1 line look original and bright. It is worth starting with simple images, for example, try to draw a fence and trees.
To do this you need:
- Draw a line on paper consisting of longer vertical and shorter horizontal sections. To visually create a sense of volume, the fence should be gradually lowered from the middle to the bottom of the sheet.
- Draw the trunk and crown of the first tree by twisting the line into a spiral, moving clockwise from the trunk.
- Smoothly move to the trunk of the 2nd tree.
- Having drawn the crown of the 2nd tree, go down again to depict some flowers and blades of grass.
The drawing is done with quick, confident movements, the pen does not lift off the paper, geometric precision is not required.
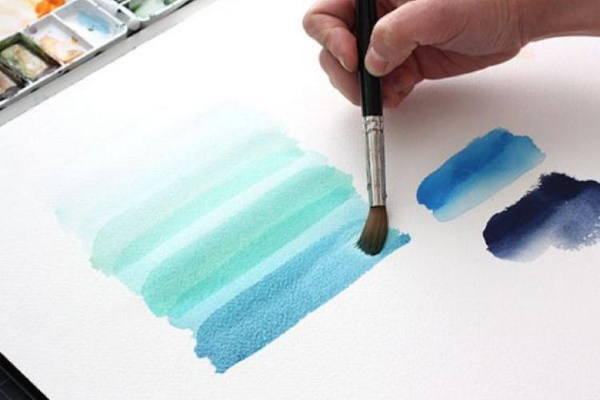
Watercolor
With the help of watercolor paints you can draw almost everything and convey any emotions. However, working with them will require skills, attention and accuracy. First, you should choose the right paper. If you choose poorly, it will get wet and warp. If you have little experience, you can buy several different sheets and try each of them.
You should not buy paper with a density below 300 g/m2. Professionals mainly use sheets with a density of 600 g/m2.2. For inexperienced artists, paper such as "shell", "canvas", "linen" is not recommended, since working with it is difficult. In addition, it should be taken into account that watercolors are not painted on small sheets, the minimum size is a standard album sheet.

It is not advisable to buy cheap amateur paint sets: it is better to buy professional ones that will lie beautifully on paper and not spread on it. You should avoid samples of pastel shades or with an admixture of white. You will also need brushes of different sizes, designed for drawing.
Before you start working, you should experiment with paints and learn how to mix them to get different colors and shades.
Having chosen the object from which the painting will be written, it is necessary:
- Take a close look at it.
- Mentally break it down into individual parts.
- Make a pencil sketch.
Professionals advise beginners to use watercolors in their first works only as an auxiliary tool for creating accents. Having gained experience, move on to watercolor canvases. A landscape with a pencil (pen) and watercolors in a minimalist style for those who have picked up a brush for the first time can turn out well if you follow the advice.
They are like this:
- If the paper is too smooth and the watercolor does not stick to it, you can add a little washing powder or soap to the paint. It will stick to the surface of the sheet more easily.
- To remove dried paint, you should first apply liquid primer to the paper. It is important to consider that the surface will become more slippery, so it is advisable to practice a little first.
- It is necessary to master the technique of glazing. This application of a translucent finishing layer over the main one allows to convey the subtlest nuances of light.
- To draw the fur of an animal or the "velvety" texture of fruit, the "dry brush" method is used. To do this, paint is applied to the brush, the excess is removed with a napkin and the hairs of the brush are straightened, then the paint is applied to the desired area, already painted in the main color, with short, light strokes.
- There is no need to be afraid of unusual color combinations, carelessness and unfinishedness. In minimalism, all this is welcome.
- You should not mix watercolour with white to create a lighter shade: it will make the paint cloudy. It is better to add water to the watercolour, making it translucent, and the paper will complement it with white.
- When applying one layer to another, you should go from light to dark, and not vice versa.
- The more layers you put on paper, the duller the color of the paint will be. If you want to make a bright image, you only need to do 1 layer.
- You should start working with light and more distant areas, gradually moving to darker and closer ones.
- It is necessary to take into account the ability of yellow to completely cover all other colors. For example, if you want to make the sky partly yellow and partly blue, you should first put yellow, and then blue on top of it.
- It should be taken into account that opposite colors (green and red, purple and yellow, blue and orange) when mixed give a gray color. Do not place them next to each other, and if necessary, be careful.
- If there is not enough water in the mixture, the strokes will be clearly visible, which is not always desirable, and if there is too much, the watercolor will become transparent. It is important to practice determining the optimal amount.
- There is no need to dilute a lot of paint at once.
- It is better to use 2 containers with water: 1 – for cleaning the brush, 2 – for diluting the paints.
- The paint should be diluted only in white containers, otherwise mistakes are inevitable.
- When you open a new set, you need to apply samples of each of the paints to a clean sheet of paper to evaluate their color.
- Brushes should be washed with cold water and soap. This will make it easier to remove any remaining pigments;
Interesting Sketchbook Drawings for Beginners
The word "Sketchbook" means "book for sketches". This is a notebook or notepad not for business notes, but for the soul, reflection, creativity and drawing. Unlike a regular notebook, the sheets in a sketchbook are not lined. Sketchbooks differ in purpose, which affects their size and paper density.
There are copies for:
- letters;
- graphic images;
- watercolor sketches;
- marker drawings.
A beginner who has not yet decided which tool to use to create drawings is better off buying a watercolor version, which is suitable for both pencil and pen. Themes can be taken from the Internet, the surrounding world, photographs.
In the minimalist style, you can draw animals, birds, people, household items or abstract paintings with the 1st line. Minimalism is also great for children's creativity. The appropriate subjects, simple images are selected, and together with the children, the basics of drawing with a pencil, pen, and watercolor are learned.
Those who have picked up a sketchbook for the first time and look at the blank pages with fear, afraid to ruin them with an awkward stroke, should remember:
- Minimalism is a special style in which the important thing is not the ability to draw an absolutely straight line, to draw a perfect circle, but imagination, originality of thinking, the ability to think in laconic images.
- There is no need to try to create a masterpiece the first time, choosing a complex plot for the drawing: with a high degree of probability, the attempt will not be successful. It is better to start with simple images.
- You shouldn't be afraid of mistakes. Everyone makes mistakes, even brilliant artists. There will be failures, and that's normal. A "bad" drawing will add experience and help you learn something new. The main thing is to analyze what's wrong with it afterwards.
- There is no need to compare your work with others.
- You should set only realistic goals, for which you should soberly assess your personal capabilities and not demand the impossible.
- Drawing should be done with pleasure: when you enjoy the activity, then learning progresses more successfully.
It is also necessary to take into account that too frequent postponements, a persistent reluctance to pick up a pencil, pen or paints will lead to the fact that the skatebook will be abandoned.
You need to draw regularly, only then can you expect results in the form of original, capacious and laconic paintings in the style of minimalism. Everyday work will develop such qualities as courage, self-confidence, inspiration and the desire to create.
Video about minimalist drawings
Beautiful drawing in minimalist style: