Both drawing styles discussed below in the article are relaxation techniques. They help a person to relax, stop the flow of anxious thoughts, and tune in to a positive mood. At the same time, doodling is an unconscious drawing patterns, strokes, curls, and zentangle is work according to clear requirements for drawing schemes.
Recommendations for Beginners
Before you start drawing in any of the chosen styles, you will need to purchase all the necessary accessories for the process. If you like doodling more, then a notepad, notebook or just a sheet of paper will be enough. Preferably thick. You will also need to purchase a pen or pencil.
Writing instruments can be either black, plain, or colored. You can take several pencils of different thickness and softness at once to experiment.
Drawings in the doodling style do not require much thought. You will not need to think too much. You just need to trust your inner feelings, start listening to your intuition. There are no strict rules and requirements. The artist's imagination will not be limited by the type of drawing, the shapes and sizes of lines, or the preferred colors.
If you choose the zentangle style, you will need to prepare more thoroughly for the process. In this case, you will need to buy watercolor paper and cut it into cards. The optimal size of each is 12 by 12 cm. Such drawings will be done exclusively in two colors - black and white.
The lines will need to be clear and even, but abstract. There is another important requirement – to finish the drawing from all sides so that it becomes a single picture.
In both techniques, the most important thing when drawing is to listen to your inner feelings. A person must be completely relaxed and interested in the process.
Straight lines, dots
Drawings in the doodling style do not require preparation. If you choose zentangle, then first you will need to make a frame on a sheet of paper of a suitable size. It is drawn with a pencil using straight, strict lines. Be sure to leave small margins. To do this, you should place dots in the corners and draw thin pencil lines around the perimeter to them.
This stage is especially important for beginners in drawing. It will allow the beginning artist to navigate in space on the sheet. Gradually, it will be possible to abandon the frame. This will come with experience, when it will be possible to navigate "by eye".
Next, you should delimit the zones with a pencil. Together, they should make up a complete harmonious picture in the end. It is important to create all the strokes smoothly and without lifting your hand. Gradually, all the segments will be filled with patterns. This should be done one by one.
Once one drawing is finished, you can move on. When creating your own picture, you can also create unusual shapes and curls. You can add shades to the drawings with a simple pencil. Each stroke can be made several times.
Before moving on from dots to drawing straight, clear lines, it is best to practice on a separate sheet of paper. This is true for both styles.
It is convenient to draw dashes first and gradually with each new one start its thickness, add shadows. The already obtained broken blanks can easily be made voluminous. Shadows and colored strokes are also suitable for this. You can then try to thicken the stripes in different directions with a cone.
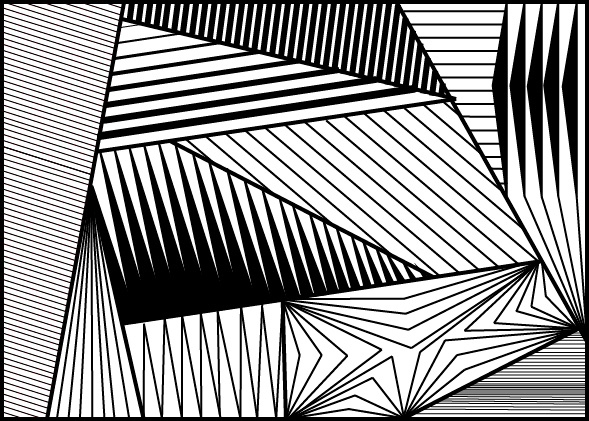
It is important to learn how to correctly direct the lines in the process. To do this, you need to master straight strokes. The lines are drawn from one point and will eventually resemble a fan.
There is an interesting exercise. For it, you need to draw several fans at once on one sheet (according to the scheme described a little higher in the article). But they should be located in different directions. At first, the fans will go in a straight line - right-left, up-down. Then you need to master the other available directions in the same way.
Curved lines
It is quite easy to create wavy stripes, waves and arcs in the drawing. For example, to do this, you should draw 2 even straight lines on the prepared base. They will be located parallel to each other.
New straight lines are drawn between the neat lines that have been obtained. They must be placed at the same distance from each other. In the future, it will be necessary to gradually decrease it. And then - increase the distance.
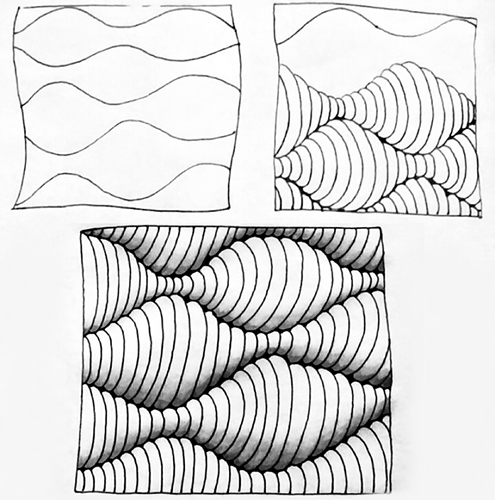
You can also curve the lines beautifully. For example, make it in the form of the letter S. And then repeat the exercises described above with the resulting drawing. Then you will need to draw arcs, gradually increasing and decreasing the distance between them. It is very easy to give the lines a shadow here. In the process, you need to press the pencil/pen on the lines, experimenting with their thickness and the force of pressing.
A spectacular result can be achieved if you draw several squares on the base at once. And then divide each into 4 parts. They should be identical. A dot is placed in the center of the square and straight stripes in different directions will be created from it. But you can also start from the walls of the figure.
Curved arcs and lines are allowed to be created in all directions, as your imagination suggests. These features should be made wider and narrower.
Drawing rings
Drawings in the style of doodling and zentangle can include rings. They are created on paper quite simply. First of all, two straight lines will also be drawn on the base. Between them there are already rings. They should be narrowed, then expanded. At the same time, it is necessary to regulate the distance between them. This can be done by changing the width of the lines. The distance will decrease, then increase.
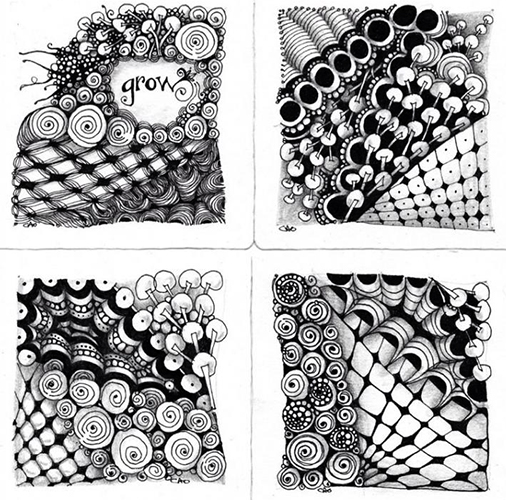
After the ring, you need to try to draw one in the other. This is already a more difficult level. But it allows you to get a spectacular interesting drawing in the end. It is permissible to create rings not close, going further and further from the first one after another. As a result, the drawing will have a tunnel of the discussed figures.
Volumetric figures
Drawings in the doodling style are usually very simple. And by choosing zentangle, you can create three-dimensional figures.
The table below will help you understand them:
| Figures | Peculiarities |
| Scales | It is enough to stock up on a simple pencil of maximum softness. |
| Stones | During the drawing process, figures overlap each other. This is how shadows are created. |
| Lanterns | It is easiest to draw such three-dimensional figures using notebook cells. |
Such details of the drawing as scales allow you to make it voluminous, maximally effective, realistic. To create a pattern, you will need only a simple pencil. They will be able to create dark and light shadows. To do this, you will only need to control the degree of pressure on the pencil.
A very simple version of a three-dimensional drawing are stones. They are usually created in the zentangle style. To depict stones, figures of an uneven rounded shape are drawn. To get a three-dimensional drawing, they are superimposed on each other. It is also worth shading the figures using the selected pencil or pen.
There are special recommendations for creating stones. You should start filling the outline on the base from the corner. This is how stones are created. The effect of the fall becomes noticeable on the paper. After that, you can try to carefully shade them.
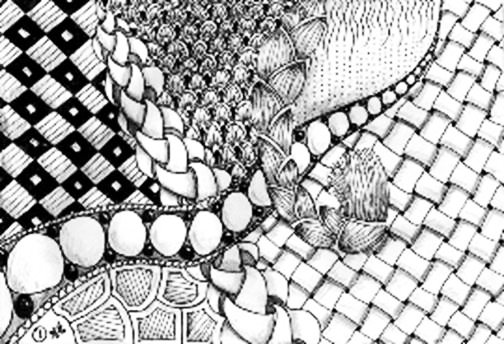
For drawing lanterns, it is best to choose a sheet of notebook paper in a grid. With its help, it will be especially easy and simple to create three-dimensional realistic drawings. Arcs should be drawn from one end to the other. They will be created on both sides. These arcs should eventually connect. In this way, you will be able to draw a kind of lantern.
You can repeat these steps an unlimited number of times. To make the lanterns look three-dimensional, the parts inside them are shaded with a pencil or pen.
A beginning artist should regularly practice and improve his skills. It is recommended to devote at least half an hour a day to patterns. Then gradually the sketches will become more perfect and accurate. All the lines and figures will begin to become more spectacular and clearer.
Gradually, you will be able to abandon the preparation of the base and simply draw for your own pleasure on any piece of paper.
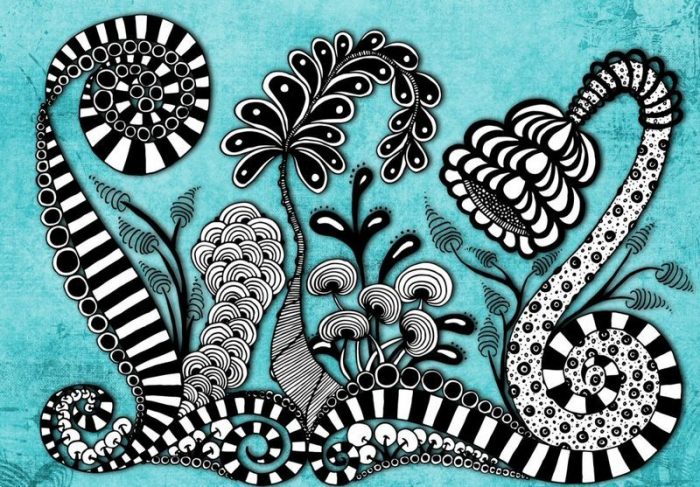
Drawing in doodling style
Even a beginner can easily work in the doodling style. Of course, the drawings will not be perfect from the first minutes. But this is not at all necessary. There are no special rules and requirements in the discussed drawing style. It is enough to simply give free rein to your own imagination and not worry about how it should be and correctly.
In the process, not only the simplest, uncomplicated lines will be created, but also more interesting patterns, ornate lines. Such drawings are great for helping each person relax. If the artist feels an inexplicable anxiety or restlessness inside, then creativity will help to cope with them.
But don't expect obvious results in the first minutes of work. First, you'll need to relax and try not to think about anything except the sheet of paper. All the emotions you experience will pour out onto it.
It is interesting that you can draw not only on the usual sheets of an album, notebook or notepad. Even glass will do for this purpose. Some artists prefer to experiment with wooden platforms, walls, floors. If you practice first, and only then start creating unusual drawings, then with their help you can decorate even the rooms in your own home.
It is convenient to use pencils in the process - simple, colored, as well as:
- ballpoint/gel pens;
- drawing markers;
- liners.
It is worth starting with simple drawings. But these do not necessarily have to be banal houses and five-pointed stars. You can experiment with unusual objects.
To create a voluminous intertwined star you will need:
- Draw a rhombus on the base and shade its 4 corners with any color in the form of neat triangles.
- Draw a line from the top corner down the edge of the figure and go beyond the border of the second corner by about ½ the size of the line.
- Repeat the steps with each corner. As a result, you will get 4 straight lines, strongly protruding downwards or upwards from the figure itself.
- From the end point of each line, draw another one down to draw a kind of letter P. Repeat the steps with each one.
- Connect the ends of the last lines with the whole figure in such a way that you get something like a star.
- If desired, draw additional rays of the figure - 4 pcs.
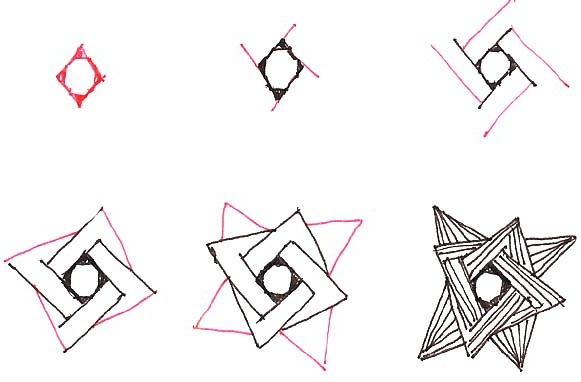
All that remains is to decorate the drawing by painting it to your taste. For example, with straight, even strokes, directing them up and down.
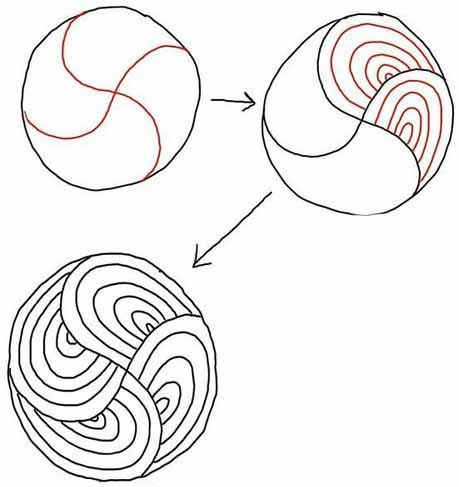
To create a figure with intricate patterns inside, you will need:
- Draw a circle in the center of the chosen base.
- From any part of the circle, draw a wavy line to the opposite edge. It should be made in the form of the letter S. In total, there should be two such lines in the drawing, intertwined with each other. In the middle, they should intersect, forming a cross.
- After that, each resulting share needs to be filled with arcs of different sizes. Let them be located one above the other. First, a miniature arc is drawn at the bottom of the selected sector. Another larger one is located above it. The drawings should be repeated until the entire space is filled. Arcs need to be drawn in each segment.
The owl looks interesting in the doodling style.
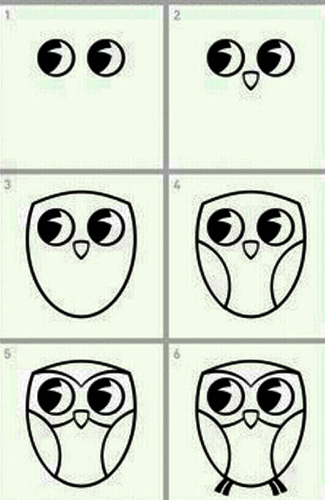
To draw it, you need:
- On the chosen base, depict 2 circles - eyes. In them, you need to shade a semicircle. This will create unusual bright eyes.
- The nose will be depicted in the form of a triangle. Let it be located between the edges of the circles.
- When the size of the future owl is already determined, from the bottom to the top of the eyes you can depict half an oval and draw a line between the line of this unfinished figure. It should be slightly angular so that you can immediately depict the owl's ears.
- There will be 2 arcs on the sides of the drawing – the bird’s wings.
- Next, you can highlight the eyes. To do this, draw arcs on one side of the ear and below them. The upper ones connect between the eyes, and the lower ones - under the nose.
- The easiest way to depict paws is with two stripes.
- All that remains is to shade the drawing using the indicated technique.
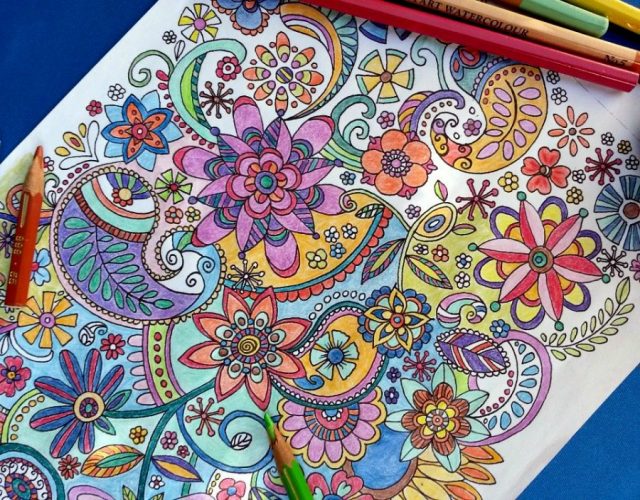
In zentangle style
This style of drawing can be used not only to calm the nervous system, but also for more unusual options.
For example, with its help you can decorate dishes, clothes, Easter eggs or make an unusual manicure. It is best to start with the simplest drawing. In the process, both your hand and imagination will be trained.
Drawing monsters
Monsters are often drawn by schoolchildren and students in their notebooks during lectures. Often, beginning artists do not even realize that they are working in a certain style.
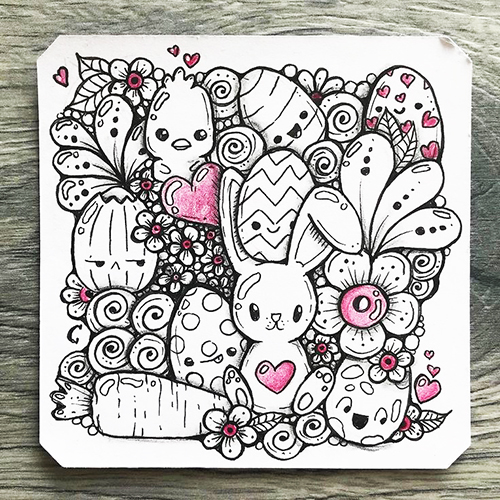
For such drawings, it is worth using a large square sheet of paper. First, the first monster is drawn in the middle. For example, in the form of an egg with a funny face. Next to it, there will be another one, as if peeking out from behind the first one. This way, it will be possible to fill all the space on the paper. The drawing will look voluminous and complete.
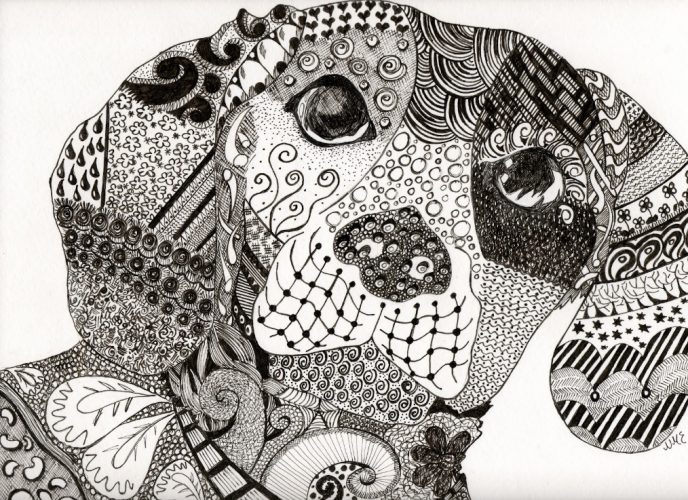
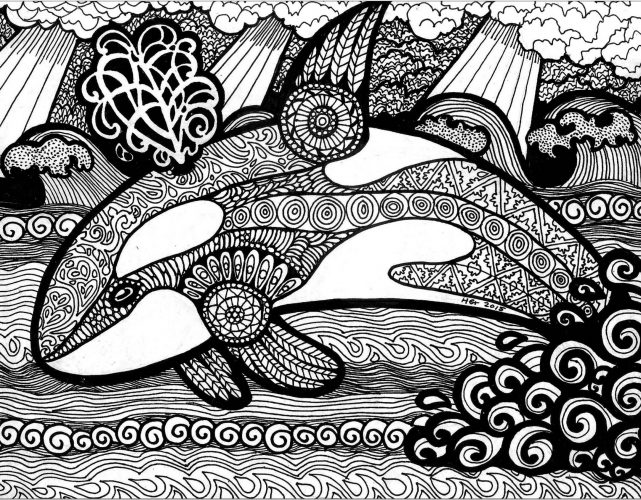
Animals
Lions, wolves, cats, hares and dogs are often drawn in the zentangle style. But you can also depict any other animal in this way. So, the easiest one for beginners to cope with is an owl.
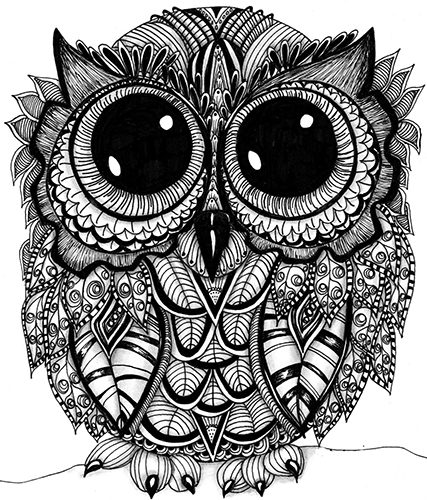
You can draw it step by step:
- First, you need to draw eyes in the middle of the sheet of paper. For example, make two circles and paint them black.
- Any design will look spectacular around the eyes. It can be neat waves in several layers, creating a three-dimensional pattern.
- Gradually and step by step, the head is created around the eyes using strokes, waves or any shapes.
- Next, you can move on to the plumage. The more different figures it includes, the more beautiful the drawing will be in the end.
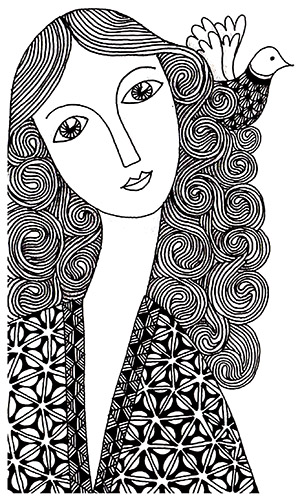
Young woman
The hardest thing is to draw people in the style under discussion. It will be quite difficult for beginners. To draw a girl in this way, you should simplify the drawing as much as possible. Especially the face.
In the process you will need:
- Draw an oval on the upper side of the sheet. This will be the girl's face. You can draw a very simple nose, lips, eyes on it, without paying special attention to details.
- Let the neck be represented by two lines going downwards.
- The rest of the drawing will be a little more complicated. The top part of the hair will be depicted with wavy lines that imitate bangs.
- Neat curls of different shapes and sizes below will help to draw a beautiful voluminous hairstyle.
- Experimenting with the girl's clothes is allowed. Here you can try different patterns, volumetric figures. For example, her robe or dress will be depicted in this way.
- To decorate the drawing, you can draw a bird, butterfly, or flowers on the girl’s hair or shoulder.
If you plan to first draw a diagram of the future drawing on paper, then at this stage it is recommended to use the thinnest pencil. Then it will be easy to disguise it later. It is not recommended to use an eraser in the process, removing parts you don't like or sloppy curls, as this can ultimately ruin the drawing.
It is very convenient to buy liners with rods of different thickness for creativity. They will help to create the most unusual bizarre drawings. Such writing instruments can be found in any office supplies department.
It is important to try to relax and distract yourself from the outside world when creating drawings in the style of doodling or zentangle. It is worth concentrating on your inner feelings. It is not necessary to try to finish the picture at once. It can be drawn even over several months.
Video about drawing
7 differences between doodling and zentangle styles: