The palm tree is a symbol of hot countries, warm sea, recreation and tourism. In ancient times, it also symbolized time, as its leaves grow with a certain periodicity. In drawings for small children, it can be shown in a simplified manner, taking into account the features of this tree. For older children, this article provides examples for copying with detailed pencil elaboration.
Simple drawing
A palm tree (a drawing for children in this example is depicted in the form of the simplest lines and figures), made in this version, is suitable for kids and does not require special drawing skills. To do it, you will need colored pencils (you can take any - regular, watercolor, wax, pastel) or felt-tip pens (markers).
The step-by-step drawing process is carried out in the following sequence:
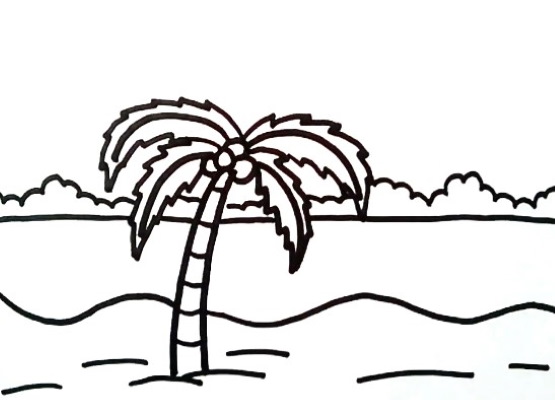
- Draw an arc at the bottom of the drawing – the ground level on which the tree will stand.
- Draw a vertical curved line – the trunk of the palm tree.
- Draw another line next to it. The trunk should be shown as widening downwards. This tree is very tall – up to 30 m. But the trunk of a palm tree is relatively small in diameter – 15-45 cm, so it is drawn narrow.
- Mark the center from which the leaves will “grow” at the top of the trunk.
- From this point draw a line curved downwards to the left.
- Draw a similar arc on top and close the outline.
- Draw the second similar branch on the right. It is not necessary to draw the edges of the leaves in detail in the form of teeth.
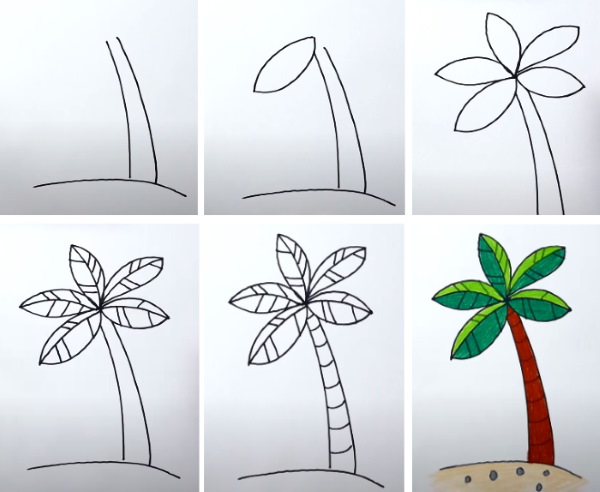
- Similarly, draw 3 more such branches emanating from the same point.
- Draw a slightly curved line just above the center of the first sheet.
- Make the same lines on the remaining leaves.
- Draw transverse veins on the palm tree branches (not along their entire length, but in separate areas), which will give the drawing a recognizable resemblance to a tree. Real palm trees have only one apical bud, from which the leaves grow, and the trunk is bare and smooth.
- Draw rings on the trunk of the palm tree in the form of short arcs. These rings on the trunk of the palm tree are formed from fallen leaves as the tree grows. The number of rings can be used to estimate the approximate age of the palm tree, since each month they lose 1 leaf, that is, 1 ring is formed on the trunk.
- Draw several circles on the “ground” – these will be pebbles.
- Color the trunk of the palm tree brown. Leaves, at the top - light green, and at the bottom - dark green. Color the sand under the palm tree with a yellow or light brown pencil, and the stones - with a black or simple graphite pencil.
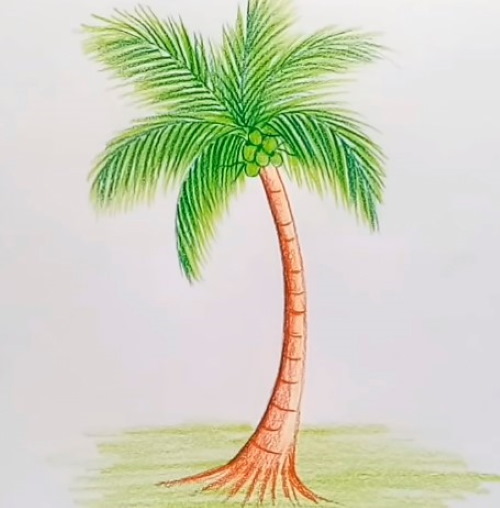
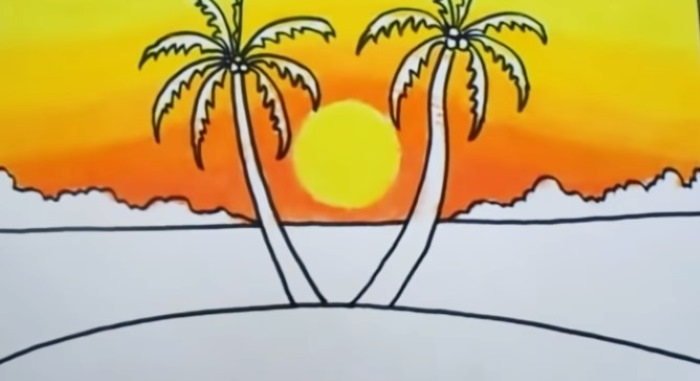
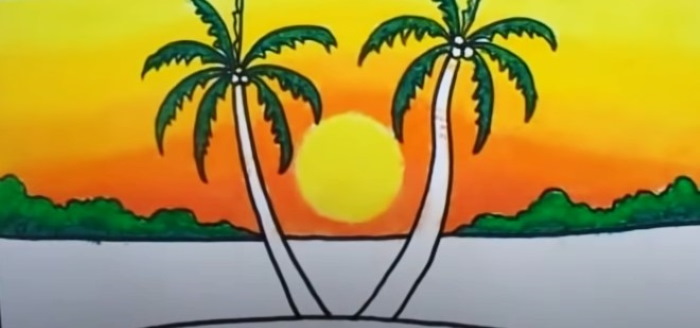
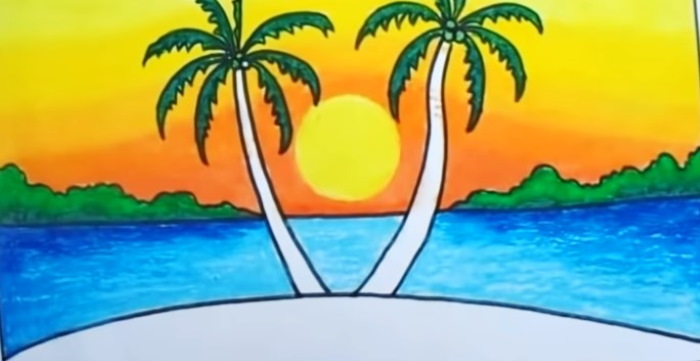
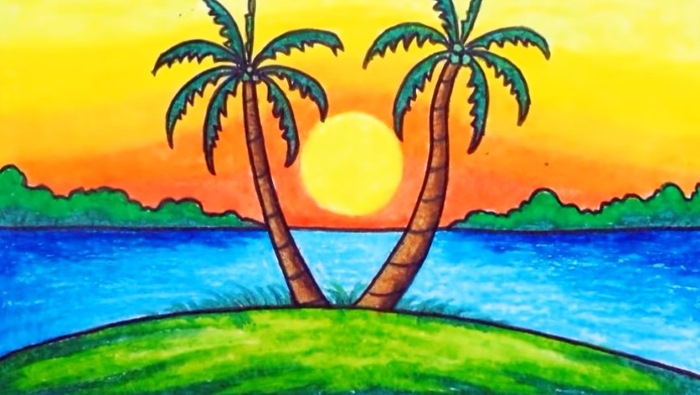
Coconut tree on the beach
The palm tree (the drawing for children in this master class is depicted in a simple technique) will have more detailed leaves. Additional objects are also depicted in the background. This option can be drawn with children from 3 years old. To complete the drawing, you will need colored pencils or felt-tip pens.

Below is a step-by-step drawing process:
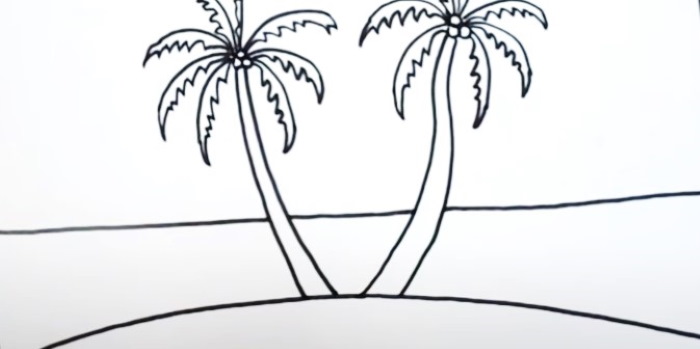
- Draw 2 arcs on the left side of the sheet – the tree trunk. Almost all real palm trees are slightly tilted at their base, so they are drawn curved.
- Show the ground level with several horizontal strokes.
- Draw several circles – coconuts – at the top of the trunk.
- From the coconuts, draw 4 arcs – palm branches.
- Show the edges of the sheet with two jagged lines.
- Draw the remaining branches in the same way. In adult palms, the number of such leaves can reach 40 pieces, but in simple drawings their number can be reduced.
- Draw palm tree rings in the form of stripes on the trunk.
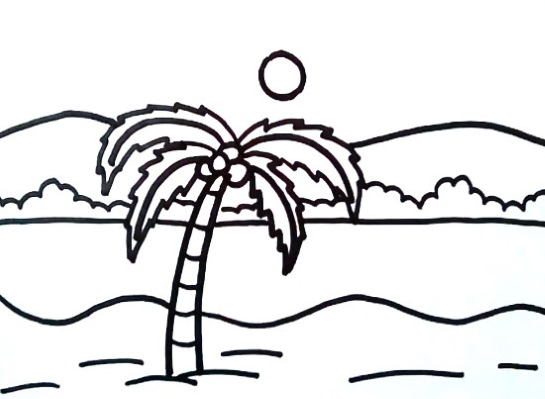
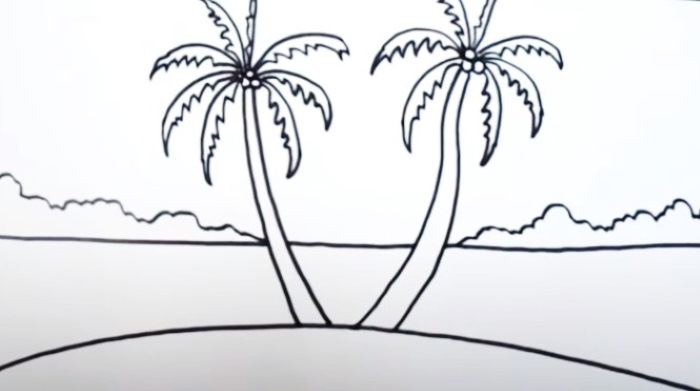
- Draw the sea level as a wavy line behind the palm tree.
- On the horizon, draw a coastline in the form of a horizontal straight line.
- Just above this line, draw the outline of the trees in the form of a wavy line.
- Draw the outlines of two mountains above.
- At the top, approximately in the middle of the sheet, make a circle – the sun.
- In the sky, depict clouds and birds in the form of “check marks”.
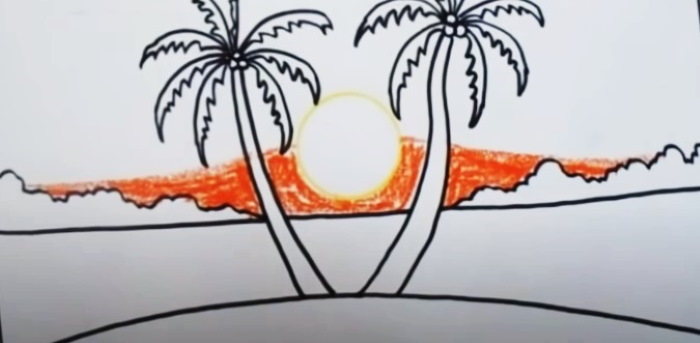
- Colour the drawing: sand – light brown or yellow pencil, palm tree trunk – brown, coconuts – dark brown, leaves and trees in the background – green, sea and sky – light blue or blue, hills – light green.
To obtain different shades, pencils are used to paint in several layers. It is also important to remember that light objects seem closer to the viewer than dark ones.
Detailed drawing with colored pencils
In this example, the palm tree is depicted with more detailed drawing, which makes the image more realistic and convincing. The technique for making the illustration is not very complicated, and all you need for the work is colored pencils and a sheet of paper.
Step by step drawing process:
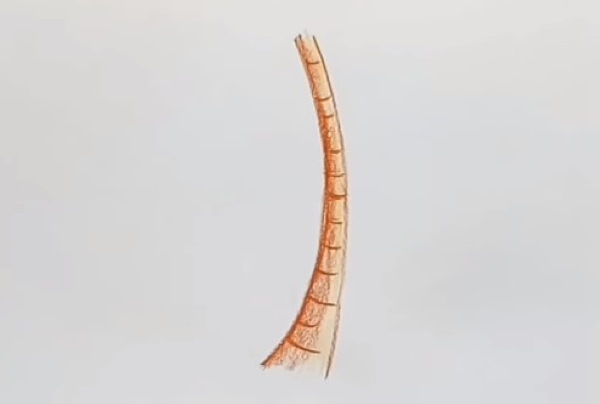
- Approximately in the center of the sheet, draw two arcs with a brown pencil to represent the trunk of a tree.
- On the left side of the trunk, draw “rings” in the form of stripes.
- Paint the left side of the trunk and leave the right side white, as this is the side from which the light will fall in the drawing.
- Paint this area on the trunk with a light yellow pencil.
- Using a dark brown pencil, draw the outline of the trunk on the left more clearly.
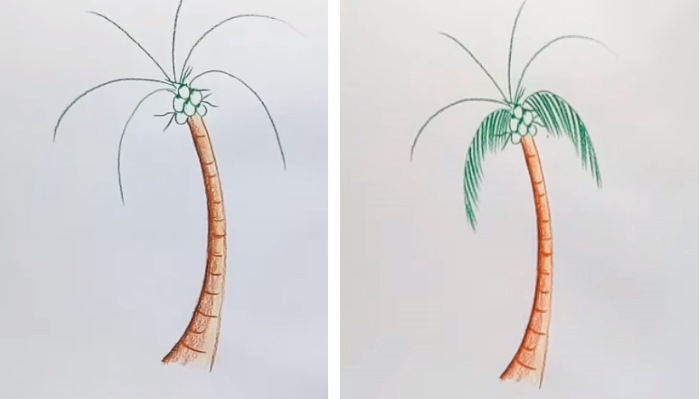
- Use a green pencil to draw oval-shaped coconuts on top of the trunk. Coconuts can reach 40 cm in length, but since the tree itself is very tall, they are depicted as small. The outer layer of the coconut can be not only brown, but also green or yellow.
- Draw a few branches at the base of the fruit, on which new coconuts are formed.
- Make long arcs - palm tree branches diverging from the trunk downwards. Palm tree branches reach 6 m in length, they are quite heavy and therefore hang down.
- Using a dark green pencil, draw leaves from each branch; there are up to 200-400 of them on one branch of a real tree.
- Draw such leaves on all branches. They need to be done as hatching, in the direction from the center of the branch, with a downward slope.
- Color the palm fruits with a light green pencil.
- Using the same pencil, make strokes on the leaves, duplicating the dark green pencil.
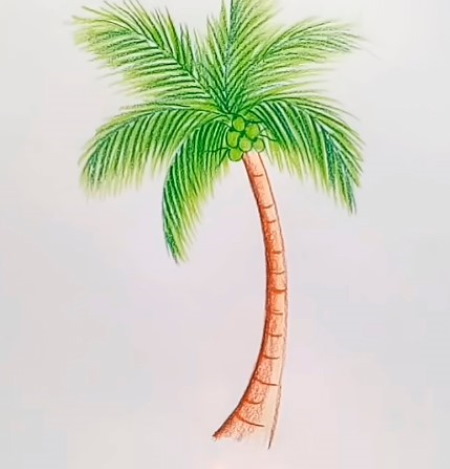
- Along the edges of the leaves, make longer strokes of light green color, which will show their translucency in the sun.
- At the bottom, at the base of the trunk, draw clear diverging strokes with a brown pencil. In nature, the main root of the plant quickly dies off, and in its place a large number of adventitious roots appear, growing from the base of the trunk. Most of them grow superficially.
- Show the ground level by shading with a light green pencil.
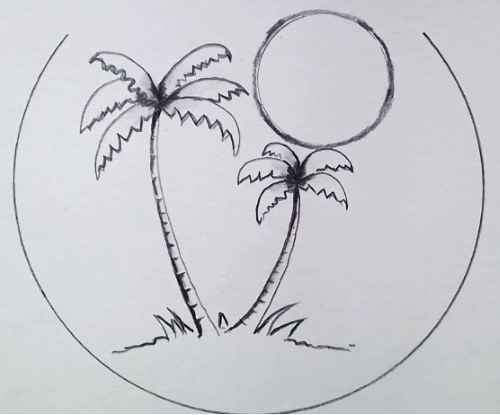
Palm tree in pencil
A palm tree drawn with a simple graphite pencil can be no less expressive than a color drawing. This master class for children will also show the shading technique, which allows you to get smooth transitions in shading.
You can do the shading with a ready-made cardboard stick, which are sold in art stores, a cotton swab, a piece of paper or a cotton pad. And although in the theory of academic drawing this technique is considered unprofessional, it allows you to achieve interesting effects on paper.
To work you will need a simple graphite and black pencil, as well as a sheet of paper.
The step-by-step process of creating such a drawing is described below:
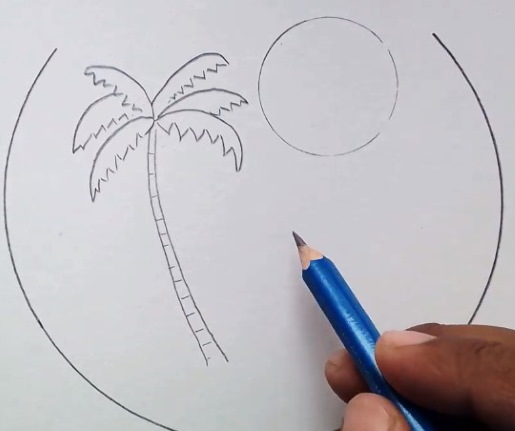
- Draw 2 circles - one large one in the center of the sheet, and the other smaller one inside the first circle.
- Draw a thin palm tree trunk to the left.
- Draw a palm leaf from the growth point - first an arc, then add a jagged line to it from below.
- Draw 4 more leaves in the same way.
- Draw parallel stripes on the trunk – its rings.
- On the right, draw a second palm tree trunk, smaller in size.
- Draw the leaves in the same way as for the first palm tree, but smaller.
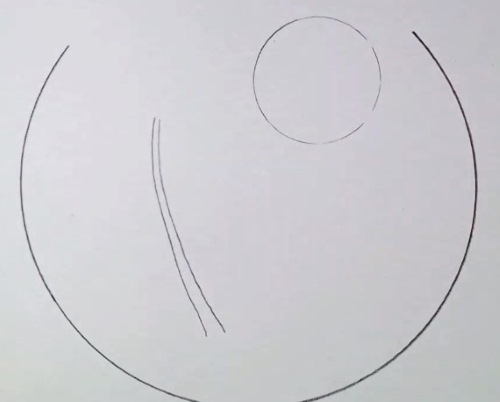
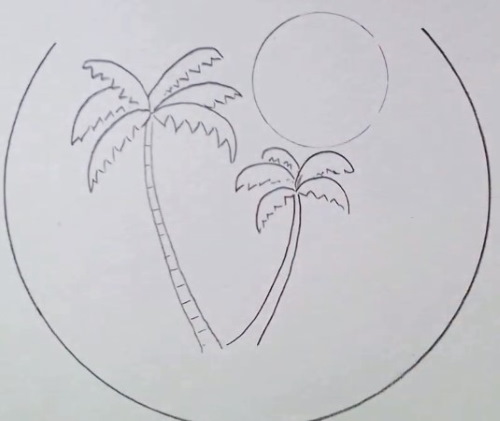
- Make rings on the right edge of the trunk of the second palm tree, add grass in the form of sharp corners to the base of the trees.
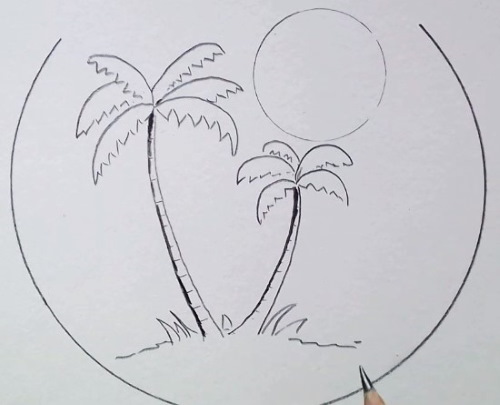
- Draw the left edge of the trunks more clearly with a black pencil, showing the shadow.
- Shade the tops of the palm trees with a simple graphite pencil.
- Blend the shadows on the trunks and tops of the trees.
- Draw the jagged edges of the leaves more clearly using a soft graphite pencil (4B hardness or lower).
- Using the same pencil, outline the outline of the sun.
- Blend the outline. You can also do this for the grass under the palm trees and add some strokes to the sky.
Palm trees at sunset
The palm tree (a drawing for children in pencil in this master class, made using the same techniques discussed above) will be colored with oil pastel pencils. The contours of the main objects can be made with a simple pencil, felt-tip pen or marker.
It is not recommended to use black pastel for these purposes, as the colors will mix and the drawing will become “dirty”.
The surface of the finished drawing will resemble classical painting. Oil pastel pencils have another advantage - they are easy to apply and have a bright color. It is better to choose paper for oil pastels with a rougher surface so that the paint penetrates deeper and can be applied in several layers.
Step-by-step process of drawing:
- Draw an arc along the bottom edge of the sheet of paper to show the ground level.
- Draw the trunk of the right palm tree and coconuts at the top using curved lines.
- Draw the leaves using the same technique as in the previous example – with jagged edges.
- Draw the same palm tree next to it, curved to the left.

- Draw a horizon line as a straight line just below the middle of the palm tree trunks.
- Draw trees on the horizon line as jagged wavy lines.
- Draw the sun with a yellow pastel pencil and add a line under which to color the sky orange up to the outline of the trees on the horizon. You can use a small coin to outline the sun.
- Draw another line on top that will pass over the sun, and color the area underneath it in a lighter shade.
- Similarly, color two more stripes in the sunset sky light orange and dark yellow.
- Paint the remaining space at the top of the sheet light yellow, then blend the pastel layers to create smoother transitions between shades. For blending, you can use a small piece of paper folded in several layers. In narrow areas, you need to rub the pastel with its sharp edges.
- Color the sun with a light yellow pencil and also blend it slightly.
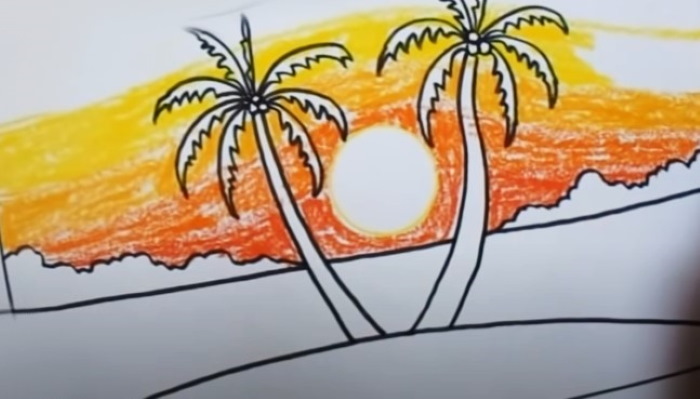
- Color the trees in the background along the bottom edge with an emerald pencil, and above with a green one.
- Paint the palm leaves emerald green.
- Use a blue pastel pencil to color the central part of the water, and a darker blue color along the edges of the drawing.
- Blend the transitions between the shades of blue a little.
- Add some dark blue pencil strokes near the trees in the background. This will be the shadow they cast on the water.
- Use a dark brown pencil to color the right side of the palm tree trunks. It will be more shaded than the left.
- Paint the left side of the trunks light brown and draw rings on them.
- Paint the foreground last, so the drawing doesn't get dirty. Paint the edges of the sheet a darker color.
- Blend the green colors in the foreground, and draw some grass under the palm trees with strokes.
When applying oil pastel to paper, it is not recommended to press hard on the pencil; it is better to make several strokes instead. If you press hard, you can also “push through” the previous layer of pastel, so you need to “smear” it.
If you don't have the above shades, you can mix other colors, for example, to get emerald green, apply a layer of light green and blue. You can also mix colors with the crayons themselves, if you draw in circular motions. It is recommended to combine no more than 2-3 colors, since a larger amount can result in a dirty color.
Palm leaf
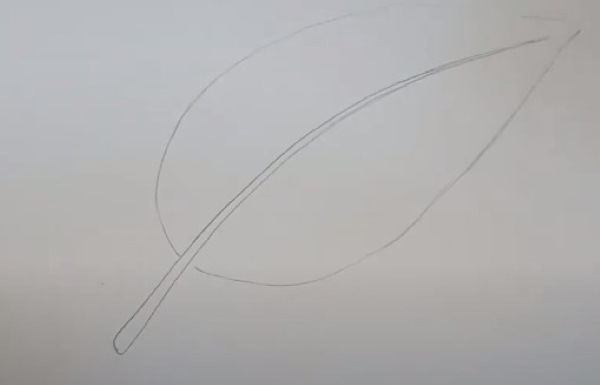
Palm (drawing for children in pencil) can be done with varying degrees of detail. This master class examines in detail how to realistically depict a separate palm leaf. It can be used to create a composition with a coconut, the drawing of which is discussed in the article below.
The sketch of the drawing will be done with a simple graphite pencil, and the outline will be in black. If desired, it can be colored with colored pencils.
The step by step drawing process is as follows:
- Draw the central vein of the palm leaf in the middle of the album sheet in the form of curved lines.
- Outline the general outer contour of the teardrop-shaped leaf.
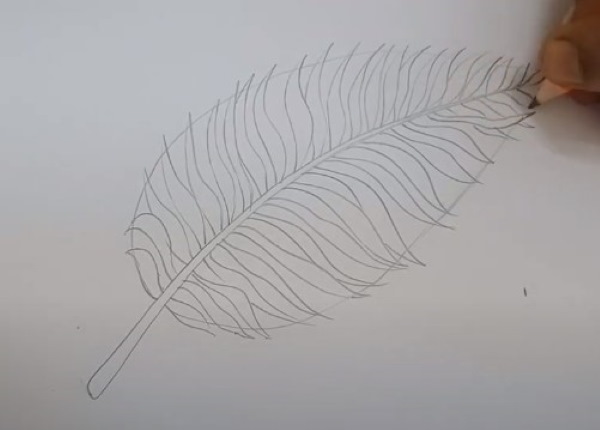
- Draw the leaflets that make up the leaf in the form of stripes. Their contours do not have to be identical, it is enough to follow the general direction. At the base of the leaf and at its end they should be smaller.
- Do the same with the second half of the sheet. The leaves should bend approximately in the middle of their length.
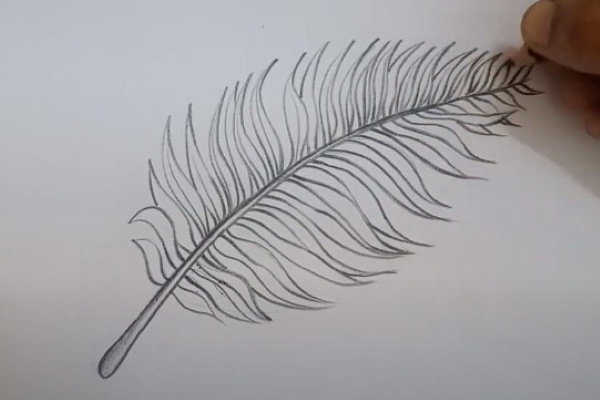
- Erase the auxiliary lines with an eraser, make a bright outline with a black pencil. Some of the leaves can overlap each other, this will create a more realistic image. Increase the pressure on the pencil at the base of the leaves.
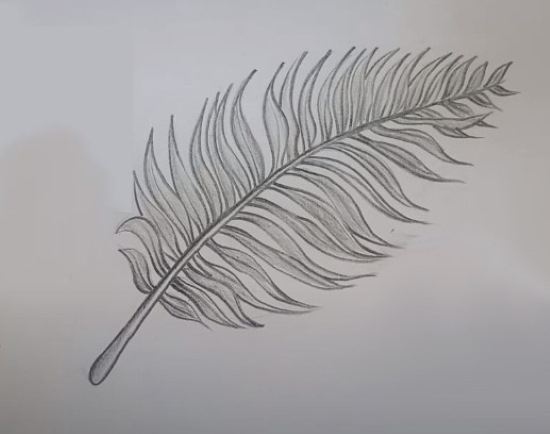
- Draw a thin line along the center of each leaf and do some light shading with a simple pencil. The shadows should be applied closer to the edge of the leaves, leaving the middle lighter. On the lower half of the leaf, make the shadow mainly on the left.
Coconut with colored pencils
This tutorial will show you how to make a realistic image of a coconut. Its outer shell is made of fibers (coir). This texture can be depicted using shading.
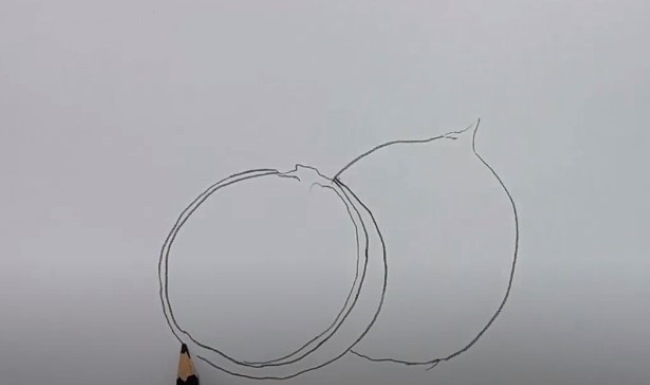
The drawing process consists of the following step-by-step actions:
- Sketch an oval outline of the coconut with a black or simple graphite pencil. Draw a small point at the end of the nut.
- To the left, draw an arc on the basis of which the half of the cut nut will be constructed.
- Duplicate this line inside the outline.
- Complete the left edge of the cut nut.
- Draw another outline to show the thickness of the peel.
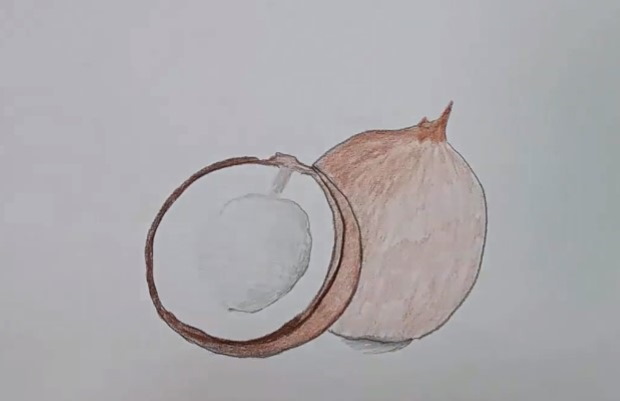
- Color the coconut shell with a dark brown pencil, leaving it lighter on the left. Sketch the outline of the nut kernel.
- Shade the core, applying a darker color along its edges.
- Color the outer surface of the nuts with a brown pencil. The background surface should be darker. The shading can be applied in sections of uneven brightness, which will give the coconut a fibrous structure.
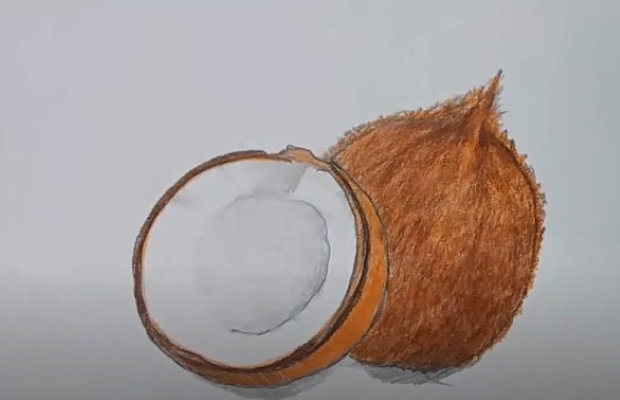
- Apply a second layer of shading to both coconuts with an orange pencil. The skin of the cut nut should be darker.
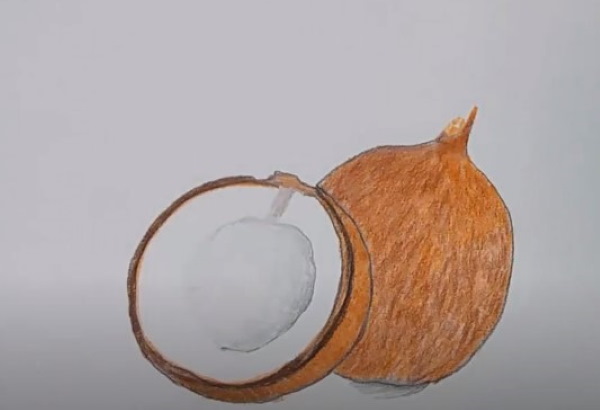
- On the whole nut, make another layer of shading in bright orange.
- Apply a layer of shading with a brown pencil on top of it.
- Outside the outline, also add some orange and brown shading to give a realistic look to the uneven, “hairy” surface of the coconut.
- Add rougher strokes at the bottom and top with a dark brown pencil.
- “Even out” the color of the nut with an orange pencil.
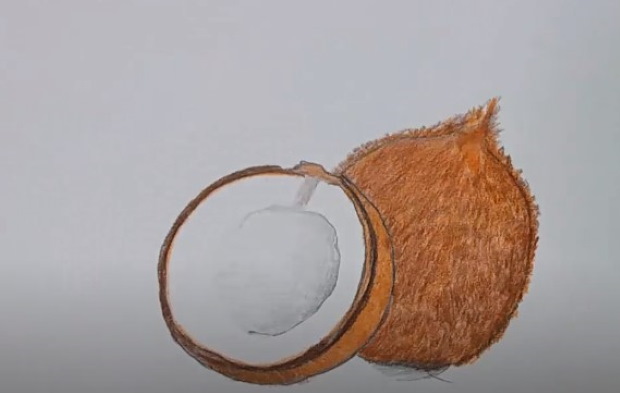
- Shade the falling shadows at the bottom with a simple or black pencil.
- On a whole coconut, apply a dark brown shadow to the bottom.
- At the top, where the coconut is pointed, also add some dark brown strokes.
The palm tree in the drawings can also be depicted growing on a small lonely island in the middle of the ocean, as an oasis in the desert or with a chest filled with treasures. For small children, shading a large area of the sheet with a pencil can present certain difficulties. Therefore, graphics can be combined with watercolors, painting the sea and sky with watercolors.
Video about drawing
Palm tree drawing for kids: