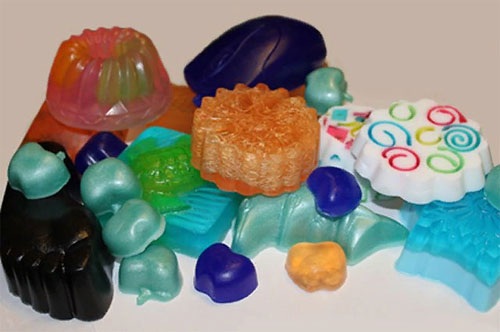
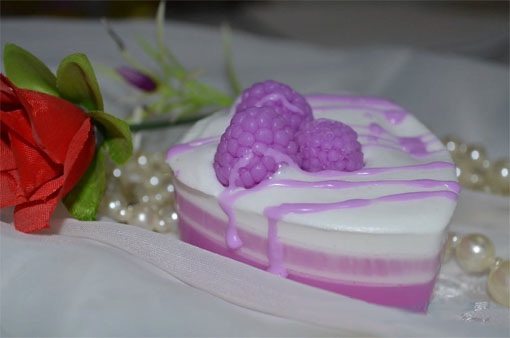
Making handmade soap as a gift to loved ones, and especially at home, is within everyone's power. Such a product will not only decorate the bathroom interior, but will also give special pleasure from its use.
Why homemade soap is better than store-bought soap
Handmade soap, prepared at home, is the complete opposite of store-bought products. Such a product receives incredible beneficial properties for the body due to the use of natural ingredients in the preparation process, healthy oils, as well as vitamins of groups A, E, B, D, F.
Homemade soap often contains essential oils., which have a relaxing or toning effect, improve the emotional background, rejuvenate, regenerate and restore damaged areas of the skin.
| The benefits of homemade soap | Disadvantages of homemade soap |
| beneficial effect on the skin | buying ingredients for production will cost more than buying finished products in the store |
| simple manufacturing process | strict adherence to the recipe and safety precautions during preparation |
| made to order, which may include preferred ingredients | To make quality products you will need extensive experience in soap making |
| no synthetic additives | |
| the ability to use the products even for people with allergies and small children |
What ingredients are used?
Handmade soap can be made at home using the following ingredients:
- factory-made baby soap or ready-made mixture for soap making;
- base oil or carrier oil (almond or olive oil are best);
- essential oil with your preferred scent;
- dyes to give the finished product a certain color;
- additives that give homemade soap an additional aroma or effect (scrub components).
Tools and instruments
The right choice of tools will help make the process of homemade soap making easier and faster.
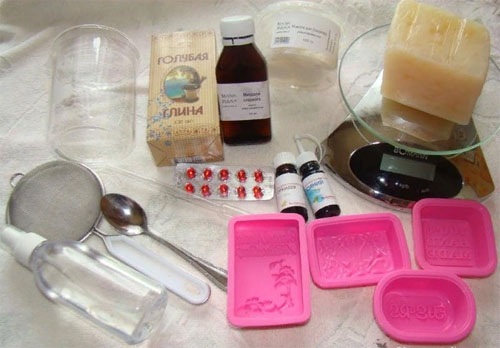
The list of required items is as follows:
- kitchen scales that will be used to weigh the ingredients;
- container for mixing components;
- several stainless steel pots;
- skimmer;
- measuring spoons, knife and pipette;
- food thermometer;
- oil sprayer, funnel;
- grater;
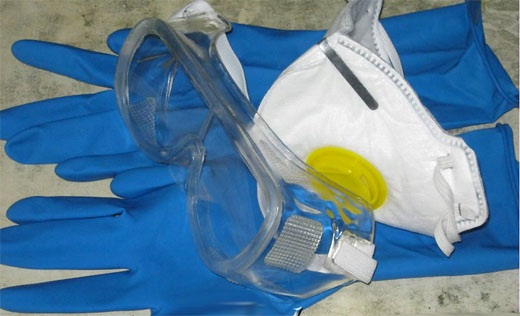
- respirator, gloves, cape and glasses;
- rags for wrapping finished soap.
Security measures
Handmade soap at home, to which essential oils are added, must be prepared in compliance with safety regulations.
In the process of soap making you should:
- do not overdo it with the dosage of the component indicated in the recipe;
- avoid contact of ether with exposed skin and mucous membranes;
- Avoid using oils whose smell causes a gag reflex or an allergic reaction.
When working with dyes, safety rules are as follows:
- use dyes without synthetic additives, such as cosmetic or food dyes;
- strictly follow the dosage instructions.
And the general rule for all stages of work is to always use gloves, a respirator, a gown and other protective equipment.
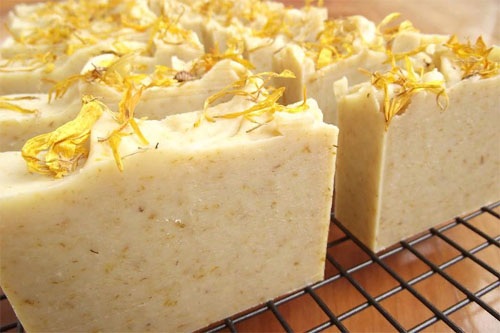
Making hard soap at home from a soap base
The process of making any homemade soap begins with preparing the ingredients., according to the selected soap-making recipe. This will save you from unnecessary fuss. To determine the required amount of base, just pour water into the future soap mold, and then pour it into a measuring cup.
- To prepare solid soap, its base is placed in a water bath and brought to a liquid state. It is important to keep an eye on the base and not let it boil., as air bubbles will be visible on the finished product.
- Next, you need to add all the components according to the recipe. You should start with the base oils.
- Then the mixture is supplemented with dye and brought to a homogeneous mass.
- The final components will be essential oils and aromatic additives. If you mix them at the very beginning of the process, they will evaporate quickly, and the finished homemade soap will have virtually no smell.

If scrub components are added to the soap, it should be allowed to thicken a little. This way, the scrub particles will not settle to the bottom, but will be evenly distributed throughout the bar.
Cold and hot manufacturing from scratch
To make soap at home, you can use the hot or cold method of preparation.
Cold process
You should start with the cold method, because the hot method is a continuation of it.
- The cold option involves preparing two solutions: hot oil and alkaline.
- When the solutions are ready, they need to be mixed together at a temperature of at least 40, but not more than 60 C.
- The resulting mass, by means of thorough and intensive mixing, must be brought to a state called "trace". Doing this manually is long and difficult. It is better to use a blender. "Trace" is the state of the soap mass in which the alkali and fats are unable to separate. That is, the mixture turns into a thick mass of uniform consistency.
- As soon as the oils combine with the alkali, a chemical reaction called saponification begins in the solution. As the ingredients interact, the release of thermal energy increases, and the temperature of the mixture itself rises. This leads to the transition of the soap into the gel phase.
To complete the saponification process and transform the soap mass into a finished product, it is not necessary to wait for the gel phase to occur. It is only an accelerator of saponification.
Hot method
Cold process soap making produces either a finished product or a soap base that can then be used for hot process soap making. Traditionally, the hot method involves cooking soap in a double boiler., and the process itself lasts at least 4 hours.
You can also use an oven. The main nuance is that the temperature inside should not exceed 100 degrees. The cooking time is reduced to 2 hours.
Children's
The ideal base for making baby soap is an organic soap base that does not contain any chemical additives. It is best to entrust the role of dyes to herbal decoctions or freshly squeezed carrot juice.
The recipe for baby soap looks like this:
- melt 100 g of the base in a microwave oven or in a water bath, without allowing the liquid to boil;
- add 0.5 tsp of carrot juice and 4 drops of almond oil;
- stir the mixture and fill the prepared molds halfway;
- spray the surface with alcohol (this will help remove bubbles);
- melt another 150 g of the base and add 1 teaspoon of herbal decoction along with 4 drops of almond oil;
- After the first layer has dried, it must be scraped with a knife to achieve better adhesion;
- pour the second part of the prepared solution into the molds;
- If necessary, treat the surface to remove bubbles using alcohol.
All that remains is to wait until the product is completely dry.
Tar
It is very easy to make handmade soap at home with the addition of tar.
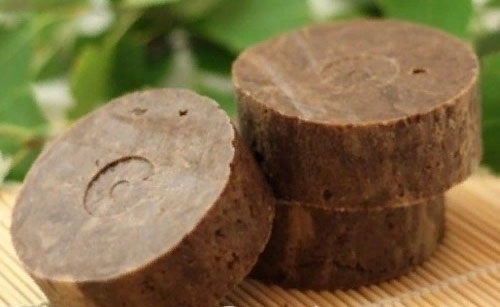
To do this you need:
- melt 100 g of the base in a water bath, without bringing the liquid to the boil;
- add 1/2 teaspoon of scented cosmetic oil;
- turn off the heating and let stand for a few minutes;
- add 1.5 teaspoons of tar;
- pour into a mold and wait until it hardens completely.
remove the finished soap from the mold and enjoy the product you made with your own hands.
Honey
The recipe for making homemade honey soap is no more complicated than its tar counterpart.
You can learn how to make honey soap at home by watching this video:
- The first step is to melt the base in a water bath.
- Next, add honey. How much of this ingredient is needed is up to you. But when the ratio of the base to honey is the same, the finished product will not be hard enough and will be extremely difficult to use. If you take 100 g of base, then it is better to take 60 g of honey.
- The mixture is thoroughly mixed with a wooden spoon. This is the most important moment in the entire recipe. If you use an iron spoon, the honey may react with the iron and lose its beneficial properties.
- After obtaining a homogeneous composition, all that remains is to add oil and stir.
At the final stage, the mixture is poured into molds, and the surface of the future soap is treated with alcohol to remove air bubbles.
Coniferous
To prepare pine needle soap, it is important to cool the water in the refrigerator, since when adding alkali to it, the solution will quickly gain temperature.
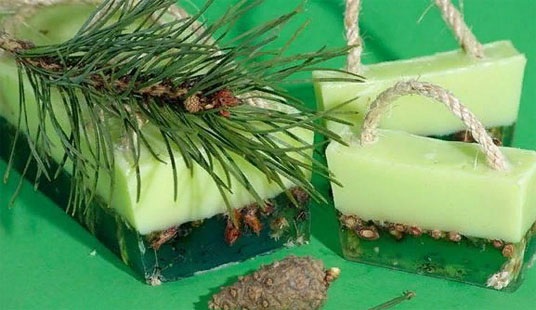
- The first stage of work involves melting the base and oils in a water bath. When the mixture is of uniform consistency, it must be cooled to 55C. At this time, you should mix the cooled water and alkali. Do not forget about strong heating of the liquid and compliance with safety measures.
- The resulting solution of alkali and water should be cooled to the same temperature as the base.
- Next, both liquids are mixed.
- The whole process is accompanied by constant stirring. When the soap mass is brought to the state of medium trace, the pigment is introduced.
- At the last stage, essential oils are added.
All that remains is to pour the liquid into molds and let it sit for several days.
With citrus aroma
You can make handmade soap with a citrus aroma yourself and at home. To do this, you need to prepare a base, pour essential and base oils into it, and mix until smooth. Finely grated lemon zest is poured into prepared forms.
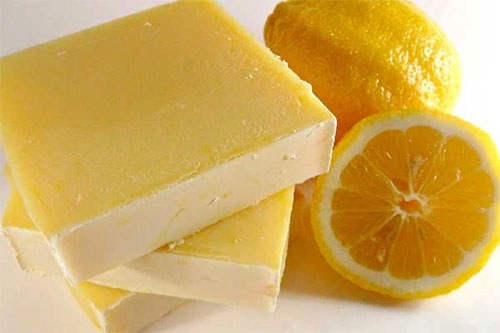
A soap solution is poured on top. It is important to pour the mixture from a small height., to prevent the formation of empty areas in the finished product. The hardening time of lemon soap is 2 hours. Then it needs to be removed from the mold and left to lie for another day.
Coffee
You can find a recipe for homemade coffee soap for both experienced soap makers and beginners. The ingredients that will be needed in the process may differ slightly. However, the result will always be the same - such soap perfectly copes with neutralizing odors and does not allow the skin on your hands to dry out.
The preparation of such a product takes place in several stages:
- brew coffee and let it cool;
- pour the liquid into a glass jar and add alkali to it;
- melt the butter over low heat;
- add a mixture of lye and coffee;
- Stir the mixture constantly with a spoon, avoiding splashes. At this point, the mixture should resemble thick pudding;
- cover the liquid with a lid and leave it on the fire until it boils and becomes a gel-like consistency;
- Use litmus paper to check for readiness. If the litmus paper turns colored when a drop of phenolphthalein is added, the process is not yet complete;
- stir the mixture until the litmus becomes neutral in color, and the consistency of the solution should resemble mashed potatoes;
- cool the soap solution for 30 minutes;
- add castor or almond oil and add ground coffee beans.
then mix the mixture thoroughly, place it in molds and set aside for several days.
Glycerin
The recipe for glycerin soap is quite complex and is only suitable for experienced soap makers. However, everyone can try their hand.
- First, you need to bring the soap base to a trace.
- Next, pour in a small amount of olive oil (about 20 g) and melt the remaining oils in a water bath.
- Pour in the previously diluted alkali at the same temperature and beat the solution with a blender. When diluting alkali, do not forget about safety measures!
- At the next stage of work, it is necessary to bring the mass to the gel phase. To do this, place the container with the solution in a water bath for 40 minutes. It is necessary not to forget to stir the composition.
- The preparation of the syrup begins. To do this, you need to dilute stearin in glycerin and dissolve sugar.
- After passing the gel phase, pour 3/4 of the volume of alcohol into the solution with extreme caution and close the lid for 5 minutes.
- Next, pour in the syrup, glycerin, and the remaining alcohol, and mix well.
- After 10 minutes add the separated olive oil. Foam should appear in the pan, which should be removed by spraying with alcohol.
- The finished soap mixture must be removed from the heat.
- After 3 minutes, you should check it for foam. If it appears again, you need to spray it with alcohol again.
The liquid without foam is poured into molds and left for several days until completely dry.
Liquid soap from soap scraps
To get a good consistency of homemade liquid soap made from soap scraps, you need to collect at least half of a 0.5 l jar of such pieces. If you have the required volume of the main ingredient, then you can start cooking.
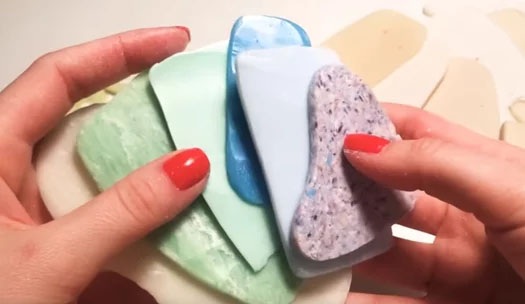
- First, you need to grate the soap scraps on a fine grater.
- Next, the shavings are placed in an old bottle of liquid soap and a small amount of lemon juice and a cap of glycerin are added.
- The resulting mixture is poured with boiling water.
- The bottle with the solution is placed on a shelf for several days until the soap shavings are completely dissolved.
The ideal ratio of soap scraps to water for homemade liquid soap is 1:3.
Gift soap
It is unlikely that anyone would not be pleased with such a New Year's gift as homemade soap.
To make such a surprise, it is enough to perform the following sequence of actions:
- melt the base and pour the resulting liquid in a thin layer into the prepared form;
- Place the pre-prepared pictures of New Year's landscapes face up and spray with alcohol;
- pour the next layer of the base;
- melt the white base, add coloring components and essential oils to it;
- wet the dried form with the picture with alcohol and pour the colored soap base on top;
- leave the product until it dries completely.
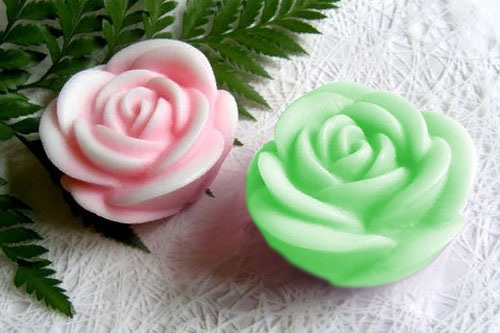
Souvenir soap
There are many variations of homemade souvenir soap. But there is one that will not leave anyone indifferent. The finished product is called "Green Rose".
To prepare it you will need the following ingredients:
- 1 g green dye;
- 50 g transparent soap base;
- 100 g white soap base;
- 3 drops of peppermint oil;
- 3 drops of lavender fragrance;
- 1 drop of oil solution of vitamins A and E;
- golden mother-of-pearl;
- 2 drops of cosmetic grape seed oil.
You can purchase the specified components in specialized stores or on the Internet.
- First, you need to prepare a transparent soap base by melting it in a water bath. When ready, pour it into a bottle and add a drop of dye.
- Next, vitamins and all remaining components are added.
- The prepared mixture is poured onto a flat surface and coated with vegetable oil. The liquid needs some time to solidify.
- Next, you need to arm yourself with a toothpick and use it to cut out circles from which the rose will be created. To create a unique image of the finished product, you can also make several fir branches from the dried soap base.
- At the last stage, you need to treat the edges of the branches with golden mother-of-pearl using a dry brush.
It is not so difficult to make soap with absolutely any aroma, handmade and at home. The main thing is to stock up on tools, ingredients and patience while waiting for the finished product to dry completely. Also, do not forget about observing personal safety measures.
Article formatting: E. Chaikina
Useful video about making soap at home
A story that lists everything you need to make soap at home:
My neighbor makes this soap, she says it sells very well - she gives it to someone at the market to sell. She has never given it to me just like that, although we have known each other for 16 years.
This is work and materials?