Step by step drawing of patterns on cells in a notebook is an exciting and useful activity. The child develops not only motor skills, directly related to the development of speech functions, but also thinking, counting, spatial orientation, memory, and spelling vigilance.
Teachers call such activities graphic dictation, which preschoolers regularly perform in classes to prepare for school.
Rules of execution and tips
Drawing by cells in a notebook can begin at 5-6 years of age.
This class requires:
- notebook in a box or sheet;
- a simple pencil. You can use felt-tip pens or colored pencils to color the drawn patterns and pictures;
- an eraser so that you can correct a wrong line.
Before starting a graphic dictation or drawing, you need to count a given number of cells down and to the right. Otherwise, the drawing will not fit on the sheet. When drawing, it is important to be able to use a pencil, pen or felt-tip pen correctly.
If a child develops a habit of holding a writing instrument incorrectly, in the future, when writing, the hand will get tired from excessive tension, the handwriting will be spoiled, and the writing speed will be reduced. The fingers of the hand should hold the pencil or pen like this: the thumb and middle finger of the hand on the side, the index finger on top. To teach a child, you can use a napkin, holding it with the ring finger and little finger.
The hand should be an extension of the arm. The tip of the pencil "looks" at the shoulder.
It is important to remember that it will be difficult to retrain the child later. It is also necessary to pay attention to the "landing". The back should be straight, the chair should be moved to the table, the soles of the feet rest on the floor. It is important to remember that a straight back when writing is a preventative measure against scoliosis.
The correct distance from the eyes to the notebook is the key to good vision. You can check it by placing your hand on your elbow and stretching out your palm. If the fingertips touch the eyes, then the distance is correct. If the head is higher or lower, increase or decrease the distance.
Drawing by cells in a notebook is done in several ways:
- Provide a sample of the work to be copied.
- Draw the initial pattern and the child will continue it.
- Dictate the drawing sequence in the cells of the drawing in the notebook.
- Provide a drawing model diagram where the number of cells is indicated by a number and the direction by an arrow.
You need to start the lessons from simple to complex. At the beginning of training, it is better to use notebooks with large cells, then complicate it by drawing in a regular notebook. It is important to monitor the accuracy of the child, so that he does not draw lines several times, maintains cleanliness, performs all actions correctly, does not turn the notebook.
The time for completing the work is strictly defined by the Sanitary Norms and Rules for kindergartens:
- children 5 years old – no more than 20 minutes;
- children 6 years old – no more than 25 minutes;
- children 6-7 years old no more than 30 min.
Kindness and patience of an adult are very important. If at first it is difficult for a child to count cells or choose a direction, you need to help him and explain how to do it correctly. During classes, it is necessary to praise the child, to make him feel supported. Before classes, an adult reminds him where the right side is, where the left is, where the top and bottom are.
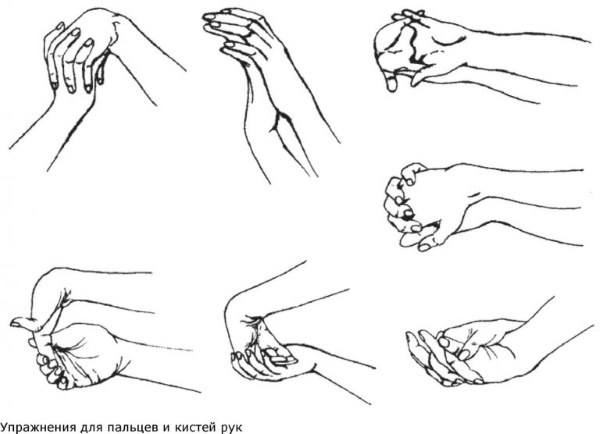
It is better to warm up the muscles of the hands and do finger exercises. It is desirable that it be combined with the theme of drawing. For example, before drawing vegetables, you can use finger exercises "We chop, chop cabbage...". Finger exercises use different types of movements: tension, relaxation. The child should do exercises with all fingers on the hands.
You should also tell your child that there are drawings, but there are also graphic images of objects - diagrams. They indicate the features of a particular object, by which one can determine what or who it is. For example, a wolf has sharp teeth, a lion has a lush mane, a snake has a long body, a giraffe has a long neck.
The diagrams suggested in the article can be drawn on a sheet of paper for the child to copy, or dictated to the children. Using them for independent work, designate them as a diagram, indicating them with numbers and arrows. The algorithms for completing the work provide scope for joint creativity of children and adults: first the adult draws: creates a diagram, then the child.
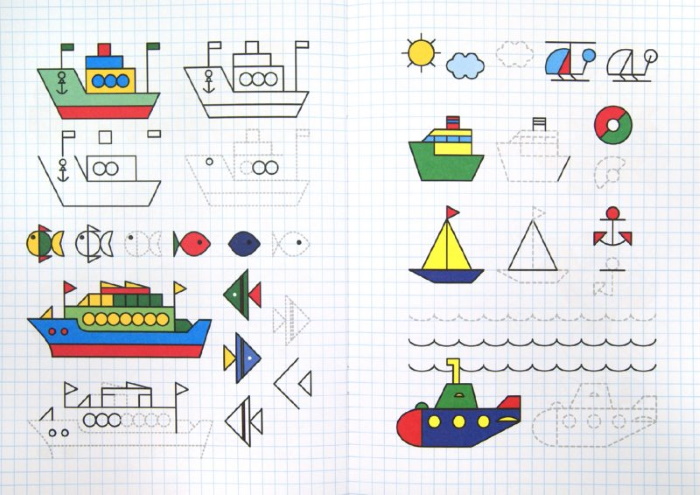
Easy and beautiful drawings on cells for children 6-7 years old
Drawing on squares in a notebook is fascinating for both boys and girls. But since children of different genders have different interests, the patterns for girls may differ from those for boys.
For girls
Preschool girls like to play "family", "house". They are more tender and sensitive. Therefore, it is worth offering them to draw hearts, girls, cats, butterflies.
Gymnastics for fingers:
So we built a house,
We will feel comfortable in it.
Here is a window, here is a pipe,
Door, porch and wall.
Here is a fence and a vegetable garden,
The sun shines all year round.
First, bend your fingers one by one, then show a square with your fingers - "window", straighten your palm - "pipe", fold into a fist - "door", place your fists on top of each other - "porch", stretch out your palms - "wall", "sun" - fold two hands into a circle.
"Heart"
Start: 1 down.

"Doll"
Start: 1 down, 5 right.
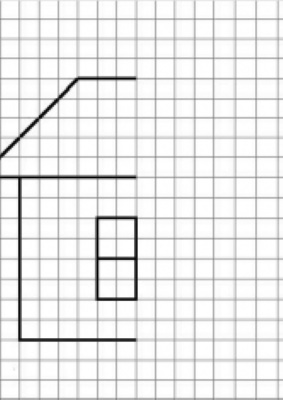
"Little House"
Start: 10 down, 3 right.

Draw a window in the middle of the resulting drawing.
"Umbrella"
Start: 2 right, 10 down.

The picture can be colored with colored pencils or felt-tip pens without going beyond the outline of the drawing.
For boys
Boys prefer to draw robots, cars, dinosaurs or any other animals in preschool age.
Gymnastics for fingers:
Robot - one,
Robot - two.
Here is a big head.
Arms, legs - he goes,
But it just doesn't grow!
We bend our fingers one by one. Boys will be happy to draw using these patterns.
"Robot"
Finish drawing the robot's eyes and mouth.

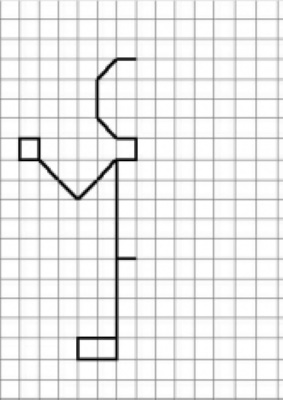
"Boy"
Start: 7 right, 6 down.

Draw the eyes, nose, and mouth of the person. Color the suit.
"Little Ship"
Move 10 steps to the right, 2 steps down.

Color the sail and flag.
Food
Children can come up with and draw food options themselves. Anything goes: vegetables, fruits, fish, food from a cafe.
Gymnastics for fingers:
One, two, three,
We will collect all the mushrooms.
Aspen mushrooms in a basket,
Birch boletus in a basket,
You shouldn't take the fly agaric,
It will be exactly five.
"Mushroom"
Start: 3 down, 4 right.

Review which mushrooms are edible - which ones can be eaten, which ones are inedible, they cannot be eaten. Draw several mushrooms and color them according to the name. Say what can be made from mushrooms: mushroom soup, russula, mushroom pie.
"Pear"
Start: 9 right, 6 down.

Say what is made from pears: pear compote, pear jelly, pear jam, pear preserves, pear juice. You can try to copy from here:

Animals
Both boys and girls like to draw animals: cats, dogs, camels, tigers. The topic "Animals" helps to introduce children to the world around them, learn to use adjectives in speech, including possessive ones.
Therefore, after the drawing is drawn in cells in a notebook, you can discuss what the cubs of this animal are called, describe the structure and appearance, habits, habitat and nutrition.
Finger gymnastics:
Bunny - jump,
Bunny - jump,
Under the bush, under the bridge.
The hare is not too lazy to hide,
Foxes walk every day.
"Deer"
Start: 4 right.

Count: one deer, two deer, three deer, four deer, five deer. You can count animals, vegetables, fruits.
"The Merry Hare"
Start: 2 down and 5 right.

Finish drawing the mouth, mustache, and eyes.
"Squirrel"
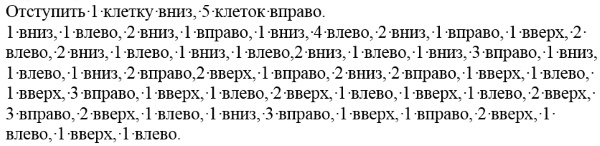
We start by stepping back from the edge of the sheet 5 to the right, 6 down. We put a dot.
Draw the eyes, whiskers, mouth. Discuss that the squirrel is a wild animal because it lives in the forest. People do not take care of it.
"Cat"
Start: 1 right.

Draw eyes, nose, mouth and whiskers. Say that the cat is a domestic animal because a person takes care of it.
"Elephant"
Start: 1 right.
![]()
Finish drawing the eyes. Discuss where the elephant lives, in which countries. What other animals live in these places, habits, behavior. Is it a wild or domestic animal.
Flowers
There are many options for drawing flowers. You need to start by following the same rule: from simple to complex.
Here is a wild flower,
Grew up in a clearing.
We'll take him home,
Let him live in a bank.
The child shows with his hands how a flower grows (opens his palms), then how it is picked, and then closed palms - “jar”.
"Wildflower"
Move 3 steps to the right, 3 steps down.

Talk about the structure of a flower: root, stem, leaf, petals. Mark the middle. Discuss what other flowers there are: field, forest, garden, meadow. Name the flowers that grow in these places. Talk about why garden flowers do not grow in a field or forest.
"Chamomile Flower"
Move 5 right 5 down.
Talk about the structure of the plant. Draw the middle of the flower.
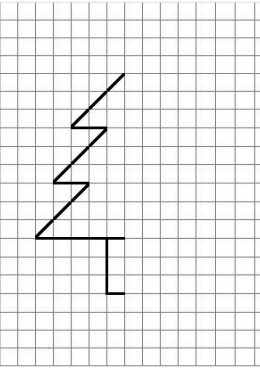
Complex drawings
Drawing by cells can be complicated after the child has learned to make simple patterns according to the diagrams in the notebook. You can copy pictures like these, in which the lines go diagonally:
Or you can introduce the concepts: 1 diagonally to the left up, 1 diagonally down to the right, 1 diagonally to the left down, 1 diagonally to the right up. And draw such patterns and pictures:
"Pattern for rug #1"
1 diagonally up, 1 diagonally down. Draw to the end of the page.
"Pattern for rug #2"
2 up diagonally to the right, 2 down diagonally to the right. Continue.
"Pattern for rug #3"
2 up diagonally to the right, 1 down diagonally to the right. Continue.
Next, the child comes up with patterns for the rug with complex moves himself.
Then more complex tasks are performed, for example, this one.
"Chick"
Gymnastics for fingers:
Here's a chicken,
Chick, chick, chick,
He's having a fun time.
Here's a chicken,
Chick, chick, chick,
Collects crumbs.
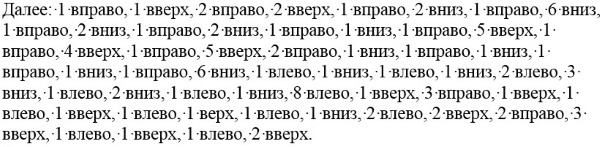
4 to the left, 2 up to the left diagonally, 2 up to the right diagonally, 4 to the right, 8 down, 6 cells to the right, 8 up, 4 to the right down diagonally, 8 to the left.
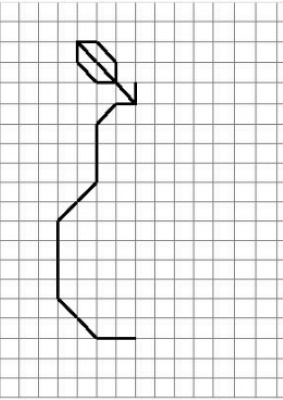
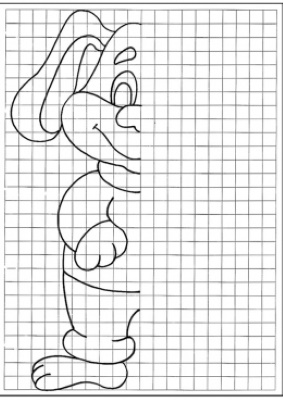
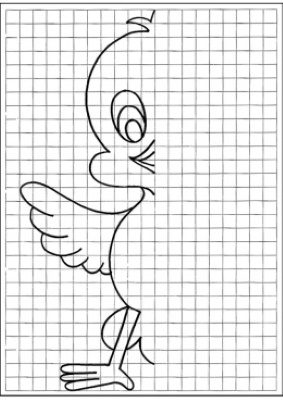
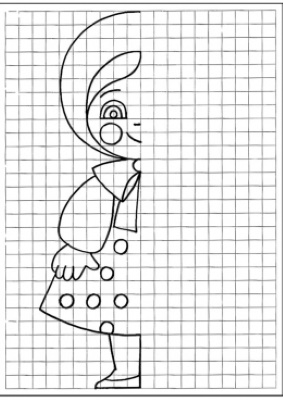
Symmetrical (mirror) drawing by cells
Symmetrical or mirror drawing on cells in a notebook is called drawing pictures, the first part of which is on the sheet, and the second is drawn as if reflected in a mirror. At the beginning it is not finished, but if you put a mirror in the middle of the drawing, then the expected result of the work will be reflected in its entirety.
Children really like these tasks, because they can see the picture at the very beginning and then check the correctness of the work without any help from an adult.
Examples of symmetrical additions:
"Human"
"House"
"Little Bear"
"Hare"

"Car"
"Pear"
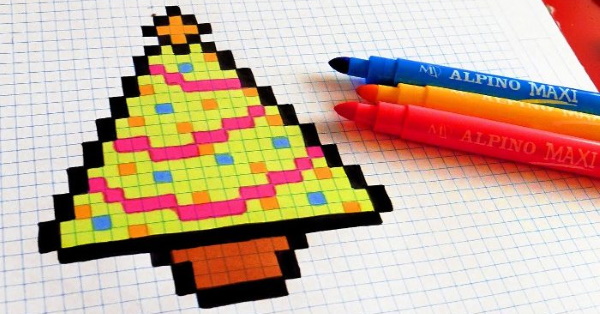
"Christmas tree"
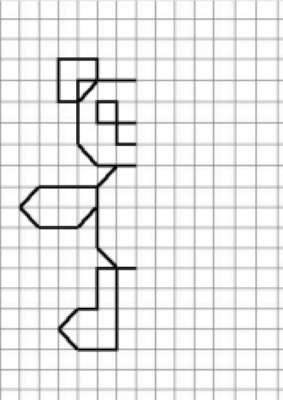
More complex symmetrical drawings that require a developed eye, hand muscles, and thinking.
"Bunny"
"Chick"
"Girl"
After children have learned to draw on the squares, they should be encouraged to come up with patterns, drawings and moves themselves.
Both children and adults find drawing on squares in a notebook very exciting. This “learning with passion” can be useful on a long journey, when you need to keep your child busy, or it can help in creating embroidery patterns. Preschool children enjoy doing this type of needlework, especially if they come up with the patterns themselves.
Video about drawing by cells
An example of simple drawing by cells:
Drawing by cells is a very exciting and useful activity for children. This is a playful way to develop a child's spatial imagination, fine motor skills of the fingers, coordination of movements, and perseverance. Graphic dictations can be successfully used for children from 5 to 10 years old.