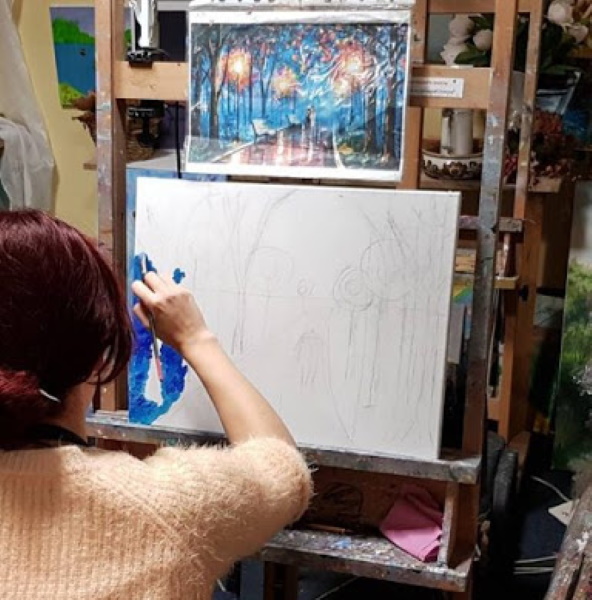
Unusual right-hemisphere drawing is the name given to a technique fine art, in which the artist stimulates the work of the right hemisphere, while artificially suppressing the activity of the left.
It is recommended to change the direction of thinking in stages, regularly performing special exercises. Otherwise, the body will experience stress, which will negatively affect not only a person's creativity, but also his physical condition.
What is right-brain drawing?
Right-hemispheric drawing (the method should gradually change the activity of the brain, artificially correcting the direction of impulses) is based on the theory of functional specialization formulated by Roger Sperry.

He claims that the left hemisphere is responsible for logical thinking, precise calculations, rationalism, while the right is activated when looking at colors, comparing their sizes, and also during creative activity.
Technique
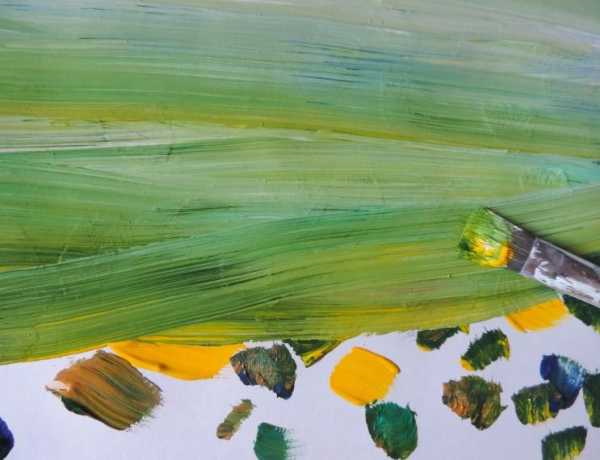
The technique of right-brain drawing differs from traditional fine art in that it sets the task for a person to observe and visually perceive a specific object, rather than to depict it on a sheet of paper. Artists who practice this method of work abstract from logical thinking, focusing exclusively on their emotions and intuition.
The result of right-hemisphere drawing is usually unusual images, looking at which it is impossible to say for sure what is drawn on them. One of the advantages of practicing this type of fine art is that the interpretations of visual perception are transferred to paper in a short time.

Artists who are inexperienced in this technique spend from 30 minutes to 1 hour creating a picture, while professionals spend no more than 20 minutes.
Although right-brain drawing does not imply adherence to one clear technique for creating images, artists most often use basic techniques in their practice.
They are like this:
- creating a mirror image;
- image of an object upside down;
- copying the outline of a drawing, relying on intuition;
- creating a drawing using the viewfinder.
Right-brain drawing is also called working in “P-mode,” in which the artist not only has the opportunity to reveal his creative potential, but also reduces tension in the nervous system, gains inner confidence and is charged with optimism.
Methodology
The right-hemisphere drawing technique is based on the physiological characteristics of the brain. Artists who create paintings using this technique are sure that it is precisely because of the inability to switch the direction of brain impulses during the creative process that many beginners fail to draw images that match their chosen style.
Understanding the basic principles of this method of fine art, any person, regardless of age, can learn to draw beautifully, without having any creative experience. The method in question was developed in the 70s of the 20th century, but it gained particular popularity only in the 2000s.
Its main ideas today are considered to be:
- the opportunity for a person to see the versatility of solutions;
- acquiring the ability to control one's emotions;
- a chance to direct your energy in the right direction;
- stabilization of the nervous system.

The practice of right-hemisphere drawing is especially relevant among the elderly and pregnant women, whose psyche is prone to exhaustion and excessive emotionality due to natural physiological changes in the body.
Within the framework of the considered methodology of fine art, artists:
- create finger paintings;
- they draw, abstracting from the awareness of the boundaries of the working plane;
- create the appropriate atmosphere by listening to special musical compositions and doing breathing exercises;
- practice unusual methods of using paints and brushes in the work process.
Drawing rules
The basic rules of right-hemisphere drawing are:
- Use those stationery items that will help convey the artist's current mood. Often, beginners, being still inexperienced in switching off the left hemisphere, analyzing the upcoming work process, make a choice in favor of simple pencils, believing that it will be easier to draw with them for the first time. In the process of learning the technique, as well as increasing their passion for drawing, novice artists change pencils to brushes with paints, which is acceptable within the framework of the considered technique for revealing creative potential.
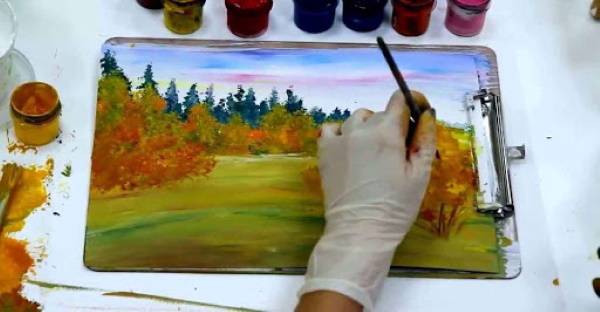
- Draw on thick, large-format paper, such as Whatman paper. For right-brain drawing at home, it is recommended to use unnecessary wallpaper. By laying a piece of paper on the floor, it will be easier for the artist to reproduce images without being limited by the strict framework of the working surface.
- Do not use an eraser or other objects that help correct a previously drawn image. The desire to redraw often arises due to the activation of the left hemisphere, responsible for logical thinking. Ignoring such urges, the artist learns to listen to intuition, to trust his imaginative thinking.
- Do not divide the work on one painting into several days. In creating an image using the right-hemisphere technique, it is recommended to adhere to one line of emotional flow, which cannot be maintained by interrupting for several hours.
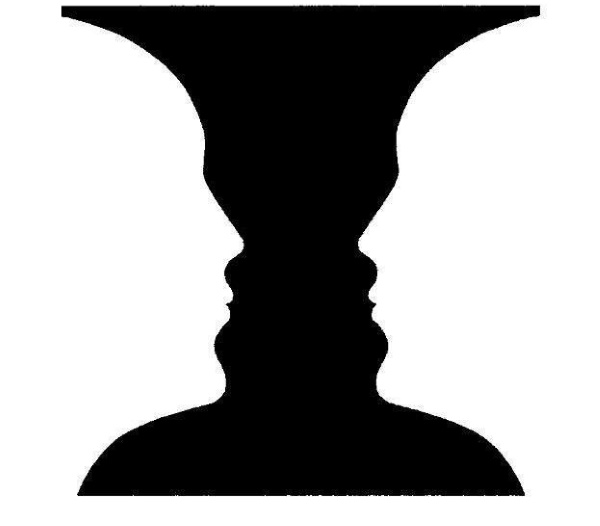
How to determine the work of the hemisphere?
Right-hemisphere drawing (the method gradually teaches not only how to create beautiful images, but also how to listen to your own feelings) involves an initial determination of which hemisphere predominates in a particular person.
Usually it is done like this:
- You need to print out a black and white image showing the profile outline of two people facing each other.

- The drawing should be folded exactly in half, and then cut along the fold line.
- People whose dominant hand is the right should henceforth use only the left side of the picture, and those who primarily use the left hand should use the right side of the image.
- The picture must be placed in the center of a sheet of white paper, after which, tracing the outline with a simple pencil, speak out loud the parts of the face located in profile.
- Next, you need to finish drawing the second part of the picture, repeating the parts of the face in the primary sequence. At this stage, a beginner will have difficulties, since not everyone can draw contrary to the spoken words, focusing only on visual memory.
If, despite the difficulties of creating a mirror image, the artist managed to draw a mirror picture, it can be considered that the right hemisphere was the leader in this work. If it was not possible to abstract from the instructions of the brain, pronounced aloud, the left hemisphere worked.
What are the benefits of right-brain drawing?
Right-brain drawing (a method that gradually teaches a person to increase the potential of their brain) has a number of officially recognized positive effects on a person who regularly practices it.
Namely:
- Develops cognitive functionsThe artist's visual perception improves, memory is trained, and fine and gross motor skills develop.
- Reveals creative potentialRegular right-brain drawing exercises develop the imagination, distract from pressing problems, and also provide an opportunity to see familiar things from a new angle, teaching a person to find a way out of the most difficult life situations.
- Strengthening self-confidence. The artist manages to increase his self-esteem, bringing it to a "healthy level" due to the fact that in the process of transferring visual images to the working plane, he demonstrates his inner world and mental state. Seeing the result of his creativity or hearing praise from others, he is convinced of his abilities, gaining confidence in his own inner strength.
- Relief from nervous tension. According to psychologists, drawing helps to distract from routine matters, as well as temporarily abstract from existing problems, which together reduces the level of anxiety and stress in the artist, regardless of his age and the characteristics of his current state.
How to learn this?
The easiest way to learn right-hemisphere drawing is to take specialized courses and trainings. Experienced teachers will not only tell you the basic principles of the type of fine art in question, but also teach you the secrets and subtleties of drawing, but will also monitor the correctness of the exercises by each of those present.
To be prepared for the challenges you will face in a right-brain drawing course, the first steps in learning should be taken at home.
To do this, it is recommended to study the history of the type of creativity in question, visually evaluate finished works of varying levels of complexity that are publicly available on the Internet, and also try to independently perform the simplest exercises, the technique of which is described in the reports of experienced artists.
The main disadvantages of home schooling are:
- lack of control on the part of the teacher, who is able to remind in time about the need to ignore the signals of the left hemisphere;
- the likelihood of a sudden switch in attention (for example, if the artist is distracted by relatives living with him);
- the inability to relax and abstract from existing problems and tasks in life.
Right-brain drawing exercises
Right-brain drawing (a method that can gradually teach even a novice artist to draw realistic images, based solely on visual perception) involves artists regularly performing a number of standard exercises.
Upside down
It is recommended to create an upside down drawing as follows:
- Print any drawing in which objects are designated exclusively by outlines.
- Carefully study the picture, paying attention to every bend and smoothness of the line transitions.
- Next, you need to turn the image upside down, and then redraw it on the working surface, doing this sequentially. You need to copy each line, as if placing the next line to the previous one, as if the artist were assembling a mosaic.
It is important in this case not so much to copy the image, but to do it step by step, mirroring it. It is not recommended to first copy the outline, and then move on to drawing small details. To make the task easier, the novice artist can cover the lower part of the image with his hand or another object.
This will help to avoid uncontrolled scattering of attention when copying a picture. The purpose of this exercise is to learn to copy objects, realizing that each of the contour lines is part of the overall image.
By ceasing to differentiate the details of a picture into primary and secondary, the artist will be able to create complex drawings in a short amount of time (40-60 minutes).
Contour drawing
Contour drawing is the most popular exercise for training the right hemisphere, which can be done at home.
The technique of this method looks like this:
- Secure the sheet of paper to the work desk by taping its corners.
- Turn sideways to the table so that your leading hand is positioned on the work surface.
- Place your other hand on your knees, turning the back of your palm towards you. Fold your fingers together to create as many wrinkles and folds as possible on your hand.
- Without moving your gaze to the work plane, slowly trace each section of your hand lying on your knees with your eyes. In parallel with visual perception, you should reproduce what you see on a sheet of paper with your other hand. The speed of gaze movement should be no more than 1 mm/sec.
- Maintain the position, recreating what you saw, for 5 minutes. For convenience, before starting the practice, it is recommended to set a timer that will notify the artist of the need to complete the exercise.
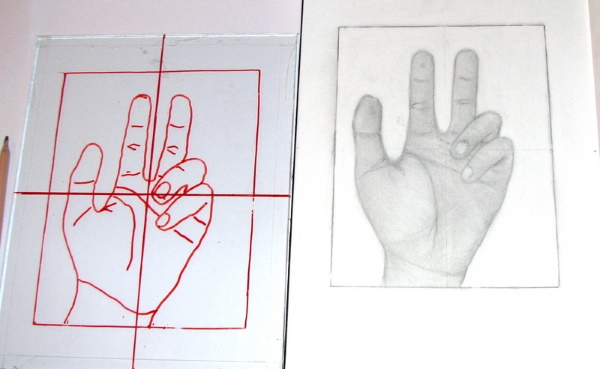
The accuracy of the image recreation in this exercise is not important, since the goal here is to train the ability to listen to one's own intuition and the ability to copy images from the head, focusing on the activity of the right hemisphere.
Viewfinder
It is also possible to create a drawing step by step, in accordance with the right-hemisphere drawing method, using a secondary tool - a viewfinder. You can make it yourself by inserting glass or a piece of transparent plastic into a small sheet of cardboard.
When the tool is ready, you can start doing the exercise:
- Aim the viewfinder at any object close to the artist, then secure it with tape.
- It is important to ensure that only the hand of the leading hand of a particular person remains mobile during the exercise.
- Close one eye and then use a marker to trace the outline of the object visible in the viewfinder on the surface of the glass or plastic.
- Next, the drawn outline must be copied onto a white sheet of paper, doing this sequentially, regardless of the order in which the secondary and main lines are transferred.
The viewfinder exercise allows the artist to learn to perceive the object itself visually, rather than storing in memory the strokes and lines that make it up. This practice can also help a person become more purposeful in life, ceasing to dwell on secondary circumstances.
Optical illusion
This exercise will help artists learn to go against the images in their heads, abstracting themselves from the usual impulses sent by the brain.
It should be carried out according to the standard scheme:
- Print out a picture, the object on which must be depicted exclusively by a solid outline. In this case, the outline should be curved, but with a minimum number of drops (the more experienced the artist becomes, the more bends will be acceptable in using this exercise).
- Cut out the picture along the main outline.
- Place the template on a sheet of white paper, then use a simple pencil to trace one of the sides, making note of which direction the bend is directed.
- Next, the template must be put aside and, at a distance of 4-5 cm, recreate the same line, but placing it in a mirror image. The difficulty lies in the fact that while drawing the reflection, it is necessary to reproduce from memory the sequence of bends of the template.
- Once you have managed to depict one of the lines of the main contour, you need to repeat the above steps, drawing the remaining sections of the object’s boundaries.
It is important to pronounce the direction of the bends out loud. Otherwise, the effectiveness of the exercise is significantly reduced.
How to apply right-brain drawing and how to develop in it?
An artist who has decided to practice right-hemisphere drawing should remember that images will only be better and faster with continued practice. A successful result of the first lesson of this type will be considered an image created in a short time without doubts and precise calculations.
It is possible to develop in the considered direction of fine art by performing more complex exercises and recreating the figurative perception of multi-component pictures. Right-brain drawing will teach the artist to intuitively combine colors, feel symmetry and analyze perspectives.

For a person who has no experience in fine art, it is recommended to begin their development in right-hemisphere drawing as follows:
- Draw 4-5 images in the creation of which the left hemisphere was not used. All the objects depicted should be copies of figurative perceptions from the head.
- The next 4-5 pictures should be drawn using one of the generally accepted methods.
- Draw images by intuitively combining different methods of creating them.
The principle of right-hemisphere drawing is used not only in general education classes, but is also actively used by psychologists to bring their patients out of a state bordering on depression.
The methodology of the type of practice under consideration assumes that a person, step by step following the instructions of his mentor, learns to control the work of the hemispheres of his brain, depending on the situations, switching between them.
Video about the right-brain drawing technique
What is right-brain drawing:
Thank you for such clear material, I really liked the article, it was straight to the point, everything was interesting and informative.