Any Organizers are suitable for storage any small things. It is recommended to make such a craft with your own hands from available materials. The process itself will not take much time, but as a result you will get an original and functional item.
Fabric organizer options
There are different types of storage organizers. They differ in their area of use, the type of fastener, and the purpose for which they are used.
Depending on whether the module will move in space or not, they are divided into:
- Mobile boxes that can be moved to different locations (jewelry box).
- Stationary options that are permanently in one place. They are fixed in a specific area (cabinet door, wall, car seat).
According to the type of fastener, the following varieties are defined:
- Floor or tabletop.
- Built into a specific location. For example, organizers placed on a furniture shelf or in a desk drawer.
- Hanging options that are fixed to the surface of the selected area.
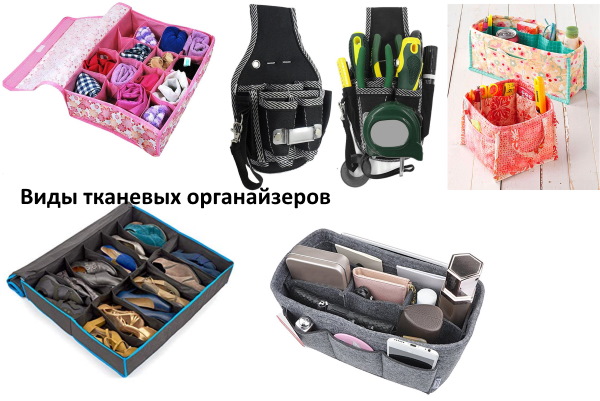
If we consider models created to contain a certain group of objects, we can distinguish:
- Boxes for underwear are a fabric structure with a solid base. There may be varieties made of transparent material, plywood or cardboard. The sections are located mainly vertically, and the partitions are often made of felt and corrugated cardboard. For bras, practical models are created with compartments located lengthwise.
- Tools are made in the form of holders (when special brackets are fixed to the wall) and a wall-mounted plywood module. Field technicians prefer to take stationary or removable boxes with compartments with them. To store a small set of tools, a backpack in the form of a fabric organizer or a duffel bag is used.
- Stationery are laid out in combined or simple boxes made of wood, plastic or metal.
- For shoes a device made like a stationary furniture structure will do. There are horizontal and vertical variations. The first type can hold up to 20 pairs of shoes, and the second - about 4. The module, which provides for a vertical position, is attached to the wall, floor, door, in a closet or any niche of the appropriate size.
- For cosmetics, documents or small items use portable boxes.
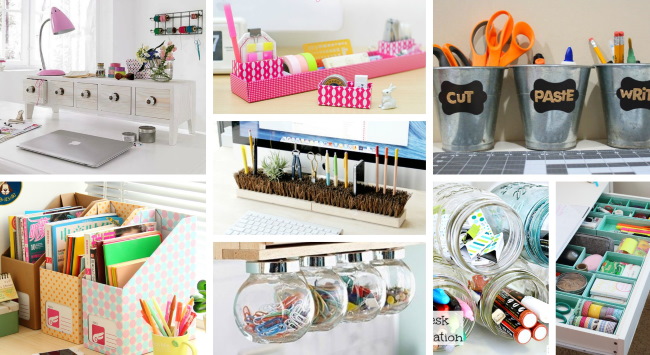
List of original ideas for an organizer:
- key holder (key hanger);
- a mat bag for storing toys;
- various containers for small items;
- multi-tiered cosmetics plate;
- pockets hanging on the wall;
- hanging toilet paper holder;
- hanger with rings for scarves and shawls;
- wall module for cups;
- a grid in the hallway for placing keys, glasses and flower pots.
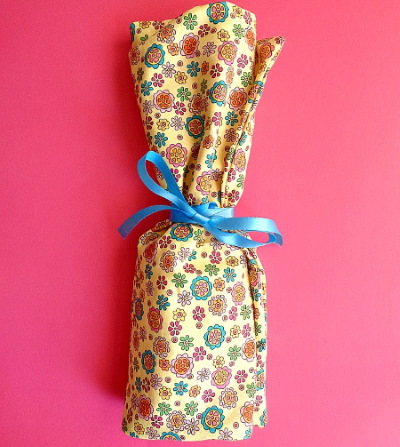
Textile organizers with pockets
Organizers for storing things with pockets are not difficult to make. To make a basic version, you will need simple materials.
This:
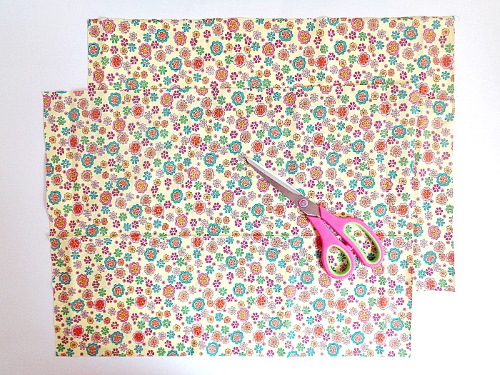
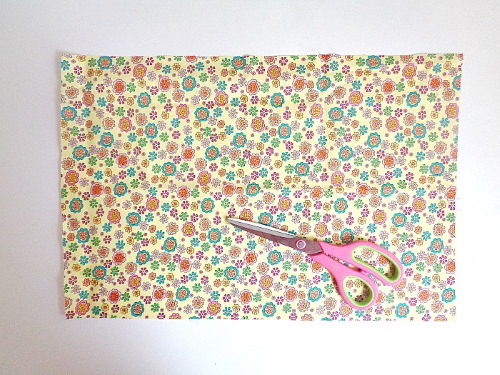
- a large piece of fabric for the 2-sided base of the craft;
- smaller fabric for pockets;
- durable thin plastic for attaching parts (replaced with interlining, which is glued with an iron);
- bias tape or tape for finishing a product;
- eyelets.
Procedure:
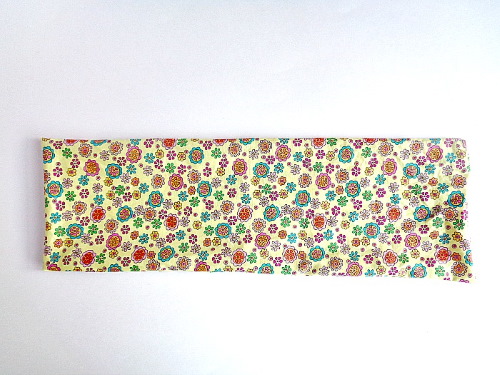
- Sewing is done by hand or on a sewing machine.
- First, it is recommended to decide on the size of the fabric model and the size of the pockets. A 4 sheet is used as a standard template.
- Cut out rectangular figures of the appropriate scale from the plastic material, and blanks twice as large from the fabric. Leave 2-3 cm for the volume of the parts and take into account seam allowances.
- Fold each pocket segment in half with the right side facing out, place a piece of plastic inside and stitch along the top.
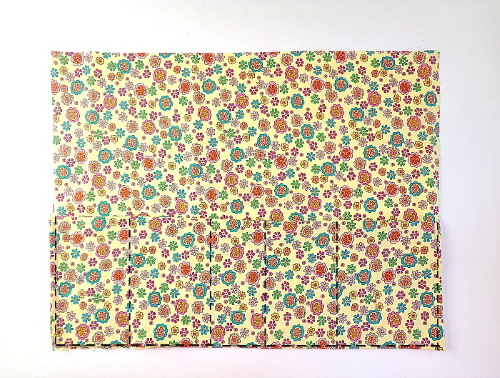
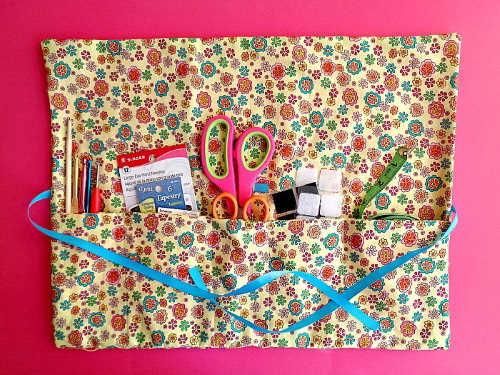
- Iron the material on the sides outward in an accordion shape so that allowances remain on the side.
- Next, you need to stitch the edge folds of the pocket. Process each pocket in a similar way.
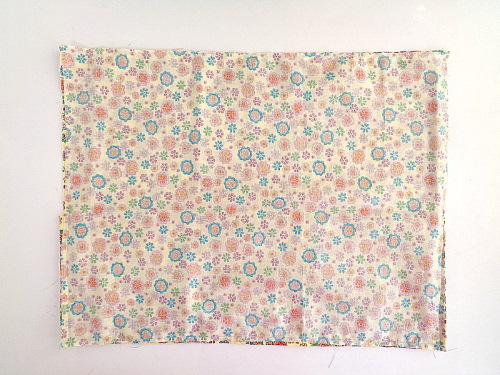
- To make the base of the organizer, you need to place a piece of plastic between layers of double fabric.
- Place small parts on the created base and secure them with pins.
- Sew pockets to the main module.
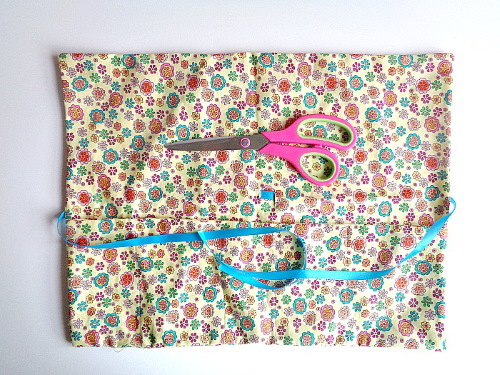
- Then take a round object and use it as a template to round off the corners of the base.
- Finish the craft with piping or ribbon in a circle.
- Mark the location for installing the eyelets and attach them.
 Option for making an organizer for the hallway:
- The first stage involves cutting out 2 rectangles from a dense material, measuring 80x40 cm (you can choose any size you want).
- Sew the created segments first with the wrong side up, then turn them right side out and stitch along the edges.
- From this or other suitable fabric, cut 4 strips.
- From the strips, make 4 pocket lines, each with 2 pockets.
- Next, fold the upper edges of the fabric track and trim it with colorful braid or decorate it with an applique.
- Each pocket should be given depth by using 2 folds that are not secured at the top.
- Sew the strip with creases on 3 sides and between the pockets.
- At the bottom, the lower edge of the sewn-in bags is finished with a finishing material or tape. It will cover the edge and secure the folds.
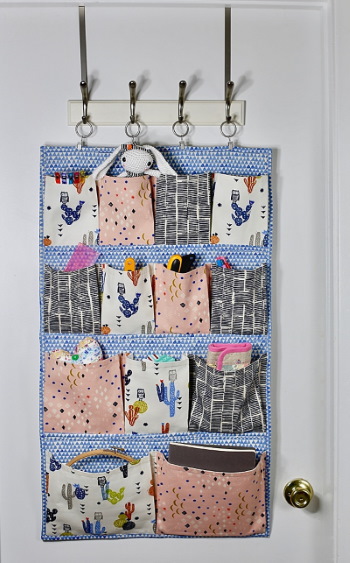
Hanging organizer
Method of making an organizer for needlewomen:
- Steam the fabric piece with an iron and cut out 2 rectangular shapes from it, the width of which is 5 cm + (2 cm for allowances) larger than the hanger, and the length is designed as desired.
- Attach the hangers to the upper central area and trace them along the contour (as an option, attach half of the item, then fold the material in half lengthwise). Step back 2 cm upwards and cut out the detail.
- Place the cut out segment on the 2nd piece of material and cut it to the silhouette.
- Next, round off the bottom corners (you can use a plate to create a smooth rounding).
- The next step involves calculating the location of the pockets and their number. Draw lines on the fabric with chalk.
- Then you need to calculate the width of the strips of thick transparent film.
- To form the volume of the pockets, it is necessary to make folds. They are laid on both sides of the part, about 2 cm of polyethylene length is laid on each fold.
- If there are 4 pockets in a tier, then the length of the polyethylene strip will be calculated as follows: the width of the fabric blank + 8 folds of 2 cm each. Total 16 cm. Adjust the depth up or down as desired.
- Next, cut out the required number of rectangles from the film; their height is determined by the size of the pockets (markings on the fabric + seam allowances).
- Finish the top part of the film with ready-made bias tape.
- Finally, hang the organizer on a hanger.
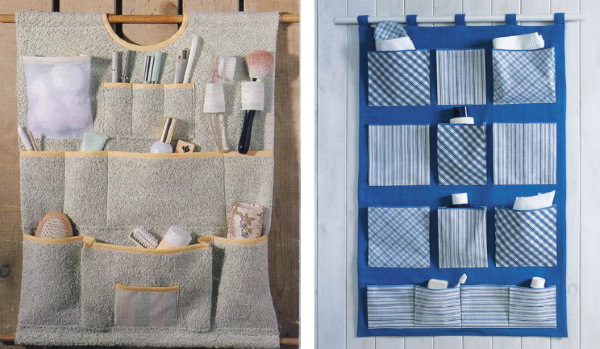
The necessary components for making a hanging fixture for the bathroom:
- oilcloth;
- pencil;
- ruler;
- scissors;
- dense material;
- fixation rod;
- sewing machine;
- hooks.
Design methodology:
- Take a piece of fabric, the scale of which depends on the object where the organizer will be placed.
- Using a pencil and a ruler, divide the fabric into a number of segments equal to the number of pockets. As an example, you can take 9 bags.
- Next, take measurements on the oilcloth. It is also worth considering that the pockets should be 2 rows wider than the marked rectangles.
- After this, cut off a piece of oilcloth of the required size and divide it into 3 strips, which in turn are divided into 3 more pieces.
- Using pins, attach the oilcloth strips to the fabric, leaving 3 pockets on top.
- Cover the rod with material and sew on the side.
- Attach the hooks to the door and hang the craft on them.
From cardboard
Storage organizers help organize your space.
To make a simple craft that folds underwear, you will need the following materials:
- knife or scissors;
- pencil;
- drawer from a cabinet;
- ruler;
- cardboard along the width of the secretary.
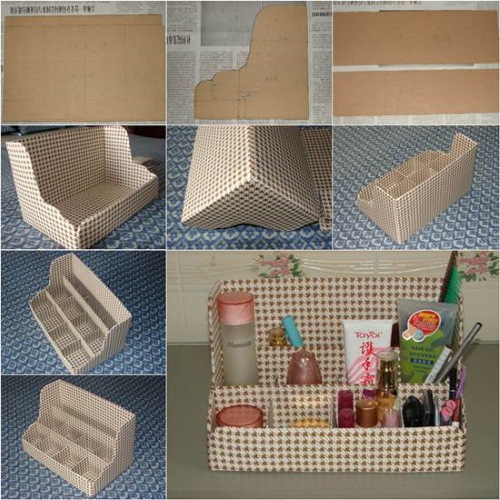
Procedure:
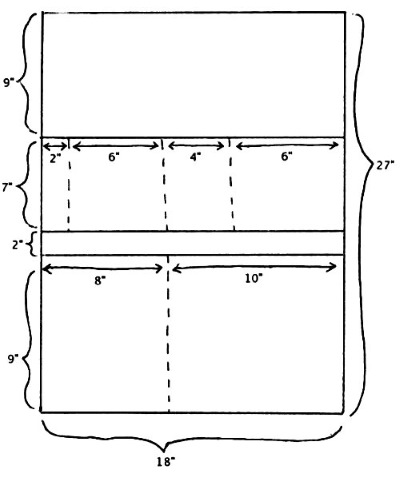
- Measure the parameters of the finished box, then calculate how many cardboard strips should be inserted into it. This factor is determined by the desired size of the cells.
- All strips must be the same width, which corresponds to the height of the box.
- Mark the long pieces on the cardboard, then cut them out along the marked lines. You will get 2 long and 3 short tracks.
- Next, you need to mark the cut lines according to the diagram below:
| Strip size | Number of cuts | Length | Section width |
| Elongated | 3 | ½ the height of the partition | Equal to the wall thickness |
| Shortened | 2 |
- It is recommended to cut the workpiece carefully; it is better to first make a small cut and then finish it off to the desired size as you work.
- To strengthen the partitions and prevent creases, it is advisable to varnish the tracks or wrap them with tape. If desired, the parts can be covered with colored paper.
- Install the membranes into the furniture drawer – install the short strips on top of the long pieces.
From the boxes
To create a practical device for storing socks and underwear, you will need the following tools:
- shoe box;
- pen;
- ruler;
- glue;
- decorative paper;
- glue.
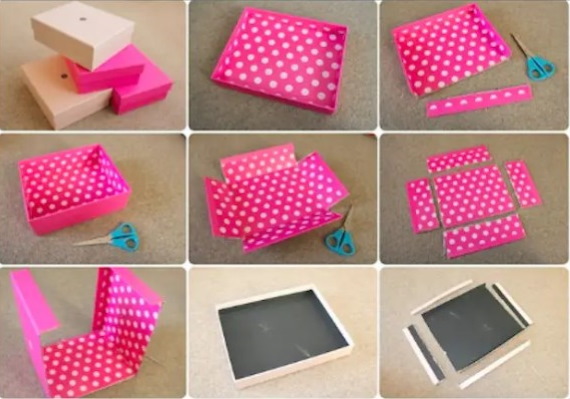
Step-by-step creation of the craft:
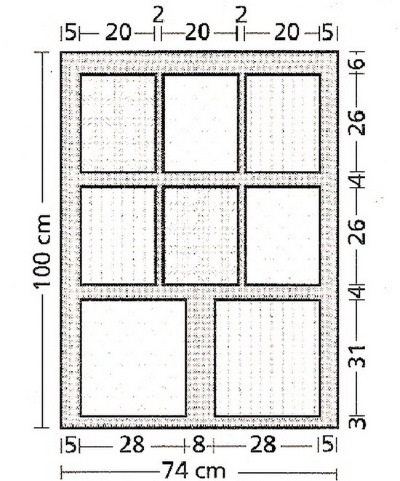
- First, you need to decide on the size of the linen box, decide how many things will be placed in it. This determines what size box to choose and how many sections to divide it into.
- The lid from the package should be put aside, it will be needed later.
- Mark the height of the future product on the side walls. It is recommended to take into account the size of the closet in which the underwear will be stored.
- Next, mark the cutting lines, then cut off the excess.
- From the lid and the remaining fragments of the box, make internal partitions. To do this, you need to calculate how many parts need to be made. Based on the calculation of the optimal space of the section, this will be 7-8 cm2.
- The height of the walls is made equal to the level of the box or slightly lower, and the length will be 2-3 mm less than the box itself. In this case, things in folded form will easily fit into the sections.
- Now it is advisable to decorate the blanks on all sides with wrapping paper or simple white sheets.
- Place them under a press for 2-3 hours to dry.

- Next, decorate the sides with fabric, thick multi-colored packaging or scrapbooking paper. For long-term use, the raw material must be durable.
- For decoration, make an allowance of 3-4 cm on both sides. It is better to glue the sheets after "trying them on" to avoid unevenness and creases. First, bend the sides for convenience, then make sections on the fold lines at the corners of the box so that the material lies flat. Finally, glue the decor.
- Decorate the bottom in the same way.
- On the planks dried under the press, mark the locations of the future cells.
- On long strips, make a mark on the side of the glued edge, and on short parts - on the opposite edge. Then the assembled lattice will acquire a neat appearance.
- Make cuts along the marked contours to the middle of the cardboard. The width of the section corresponds to the thickness of the strip.
- Finally, assemble the grill and insert it into the box.
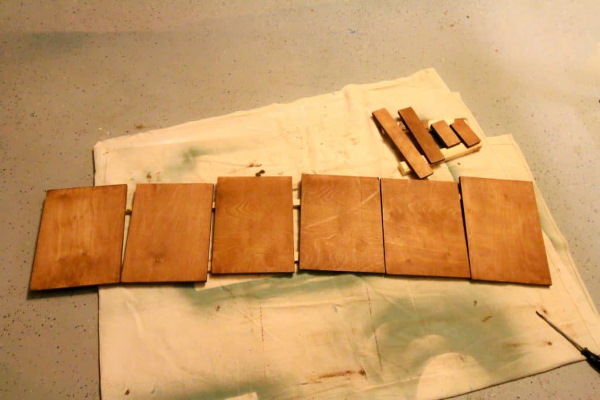
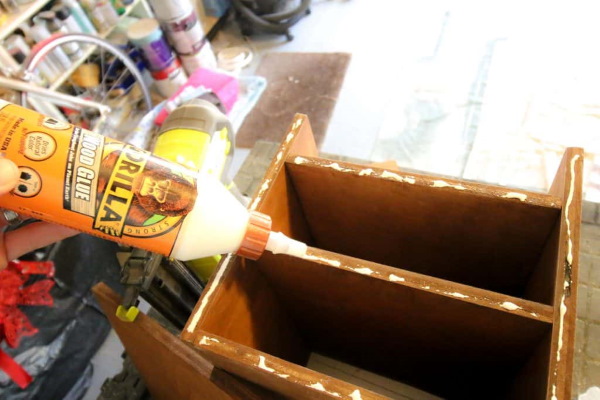
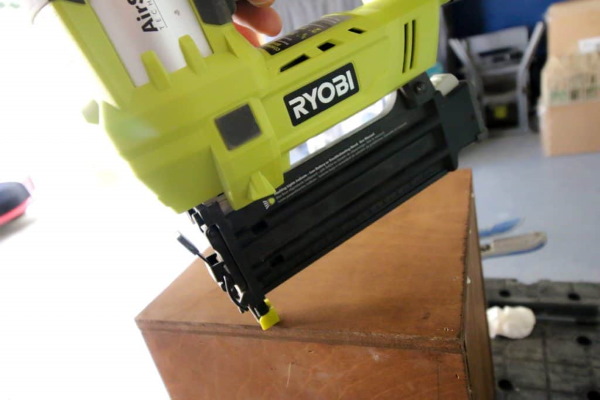
Made of plywood
Storage organizers are made from plywood.
To create a useful craft for the bathroom and fold towels in it, you will need the following tools:
- self-tapping screws;
- plywood sheet;
- metal cans from pickled pineapples;
- brushes;
- glue gun and PVA glue;
- acrylic paint;
- colored wallpaper or decorative napkins.
Step-by-step method of formation:
- Wash the jars thoroughly, then mix the paint with PVA and paint them. It is recommended to use a light color scheme or tones that go well with the tiles in the bathroom.
- Dry the tin container and decorate it in the decoupage style, apply any image. It is allowed to make an illustration using paint of a different shade.
- Use a glue gun to apply glue to the edges of the iron container and glue a satin ribbon of a suitable color there.
- Allow time for the tins to dry.
- Paint the plywood in a suitable tone and cover the entire length of the perimeter with the same edging.
- Place the cans parallel to each other on a plywood sheet and secure them to the base with short screws.
- Make a hanging mechanism on the back surface and insert special hooks into the wall of the bathtub.

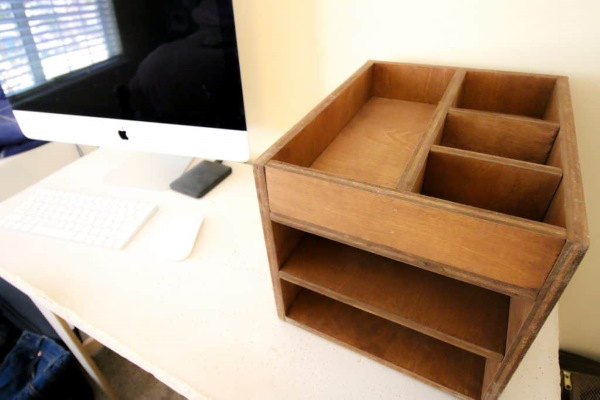
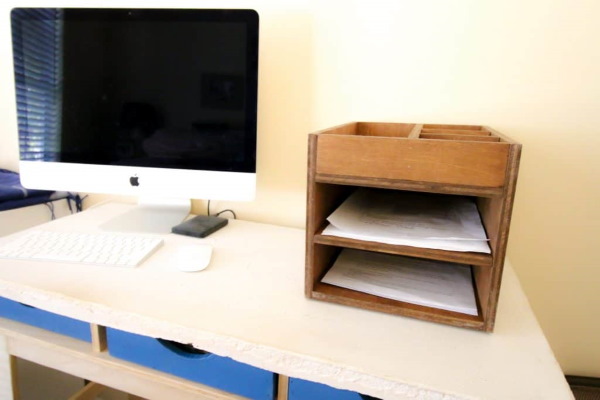
Options for plywood organizers:
- Magazine and letter holder They are made from 10-15 sheets, fastened at the bottom with pencils and screws inserted into drilled holes.
- For a mirror with shelves You will need a large rectangular veneer sheet, on one side of which you attach a long dressing table, and on the other edge you nail several small wooden shelves.
- Drill many round holes on a large plywood sheet and insert wooden dowels of a suitable size into all or some of them. Various kitchen utensils are hung on the inserted bushings.
- Make stable triangular stands from plywood, and hang chains, necklaces or beads on top of them.
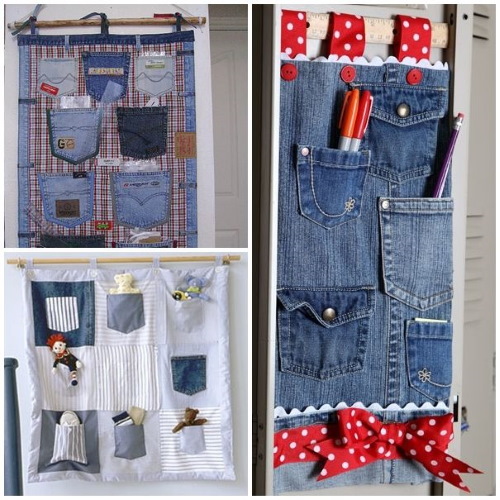
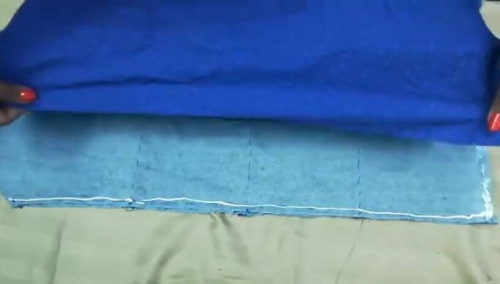
From jeans
To store things, organizers are made from durable denim fabric.
Materials needed to make a stationery stand:
- cardboard tubes and tin cans of various diameters and shapes;
- denim cuts;
- lace;
- cardboard;
- braid;
- glue gun;
Manufacturing method:
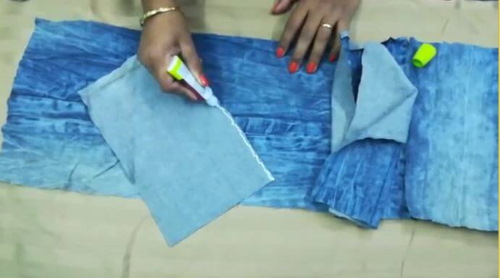
- Cut a strip of denim to the size of each tin or tube. Leave 3-4 cm allowances for the hem and side seams.
- Make vertical cuts in the bending area and glue them to the bottom of the can with a glue gun.
- Then process the top part of the dense mold.
- Cover all the jars in a similar manner.
- As decoration, decorate each denim piece with ribbon and lace as desired.
- Glue the decorated pieces together.
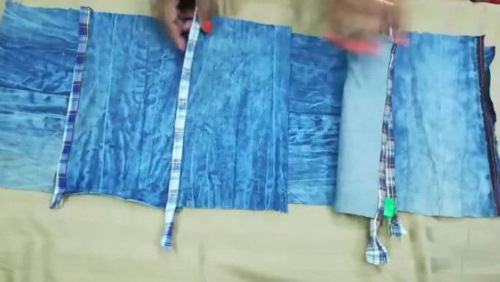
- Place the resulting structure on thick cardboard and trace the outline with a pencil. Cut out the drawn template.
- Place the cardboard base on the denim fabric and glue it. Make cuts on the fabric edges, fold them to the wrong side and glue them.
- Attach the base with the reverse surface to the cans using glue, and decorate the joint areas with twine.
- If desired, the craft can be decorated with flowers made from denim.


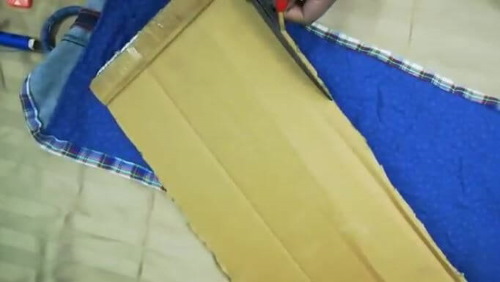
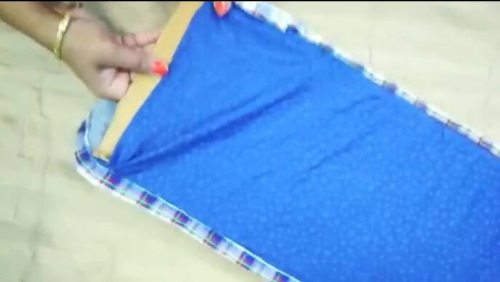
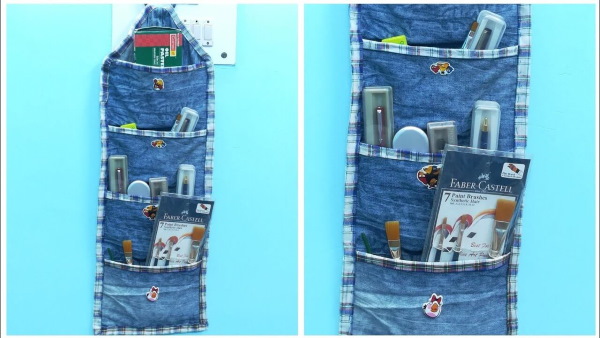
Step-by-step method for making a practical organizer:
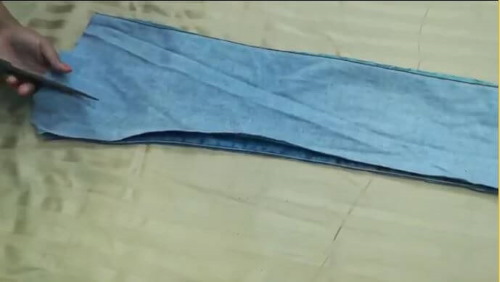
- Cut up some old jeans, then rip one galosh lengthwise and secure its edge to the back of the board.
- Repeat the same steps with the 2nd leg. As a result, the entire front surface of the board will be covered.
- Rip off the denim pockets and attach them to the wooden blank. You can cut out denim squares along with the pockets, so you will have more storage space.
- It is advisable to sew the entire front panel before attaching it to the board. This means that you need to sew on the pockets, and then secure the whole piece from the inside with a furniture stapler.
- A rope is attached to the sides of the finished product, then the organizer is hung on a nail driven into the wall.
Options from improvised means
To create an original desktop organizer, you need to select the following items:
- PVA glue;
- scotch;
- small scissors;
- jute thread;
- cardboard sheets and cores;
- food foil;
- brushes;
- toothpick;
- acrylic paints.
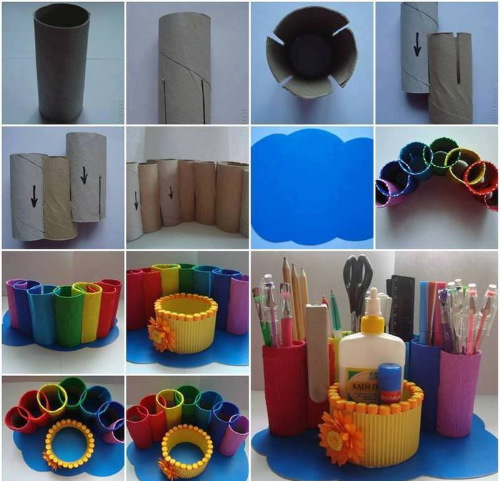
Procedure:
- Make a sketch of the craft.
- Select suitable cardboard tubes left over from the tape and paper towels. Trim them to the desired height.
- Paint the inside of the cardboard blanks with acrylic.
- Cover the outside of the parts with twine.
- Cut a stand of suitable configuration and size from a thick sheet. Glue jute thread to it from the middle to the edges in a spiral.
- Form a cat figure from foil according to the drawn diagram.
- Use twine to create decorative elements for the animal in the form of curls and spirals.
- Cover the cat with twine from start to finish, then decorate with the decorative components you made.
- Glue the processed bushings and the figure to the base.
- Decorate the product with decorative beads and glitter.
Method for making a children's organizer for storing bottles and small toys:
- Measure the parameters of the rear upper part of the front seat of the car and cut out a corresponding rectangular shape from the main fabric.
- Next, take the material with children's illustrations and cut out rectangles from it, then sew them onto the base in any order.
- In the upper area, make an insert from mesh, stitch it at the bottom, then divide it into small sections in which small toys are placed.
- Finally, sew the elastic: one piece to the 2 upper ends, the second piece to the bottom line. These will be the loops that attach the craft to the seat.
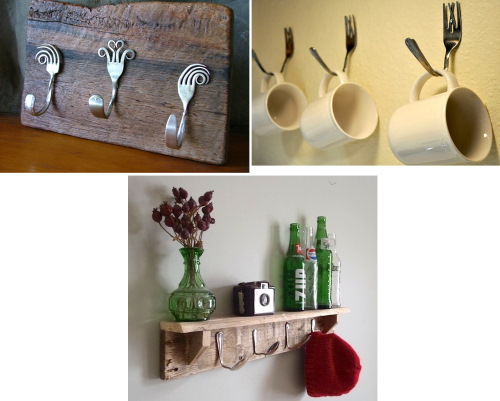
To make a device for hanging kitchen napkins and towels, you will need the following materials:
- dye;
- varnish;
- Double-sided thick tape or self-tapping screws;
- unsuitable forks (except for aluminum devices);
- an aged board from a bench or chair.
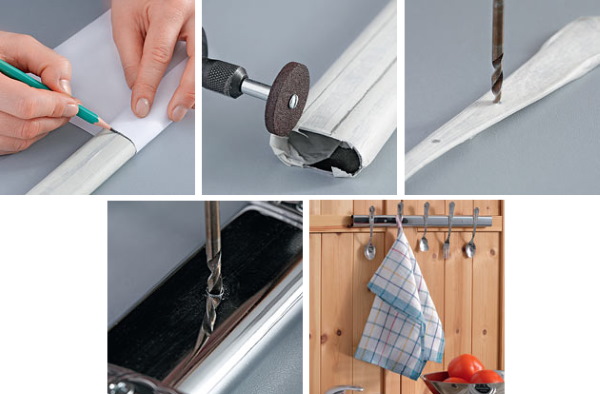
Method of execution:
- The selected board is sanded and painted, then varnished.
- Next, the surface is dried.
- Take 3 forks and twist the tines in an interesting way. Bend the handle, thus forming a hook.
- Attach double-sided adhesive tape divided into 3 pieces to the wooden blank and remove the protective coating from it.
- Attach the turned-out cutlery to the tape one by one. If necessary, secure them with screws.


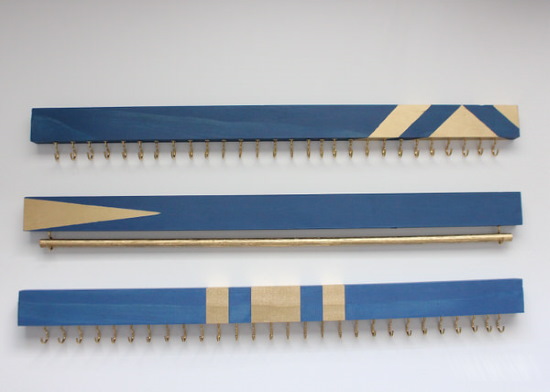
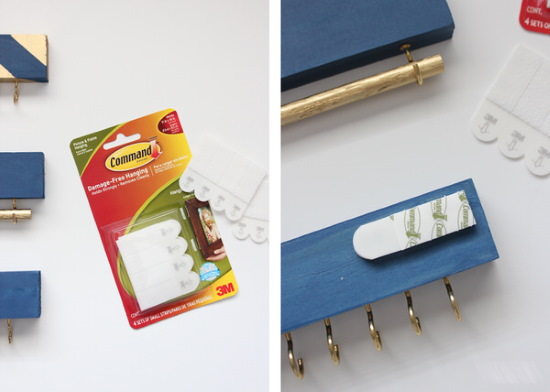
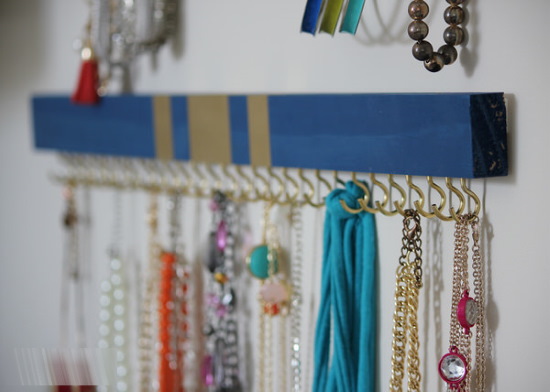
Materials required to make a women's organizer:
- stencil;
- sponge;
- 4 cork boards;
- decorative hooks or small nails;
- wall mounting.
Manufacturing technique:
- Using a stencil, paint the wooden blanks in the selected pattern. Leave the board to dry for 2-3 hours.
- Screw in hooks or hammer in nails in a specific order.
- Attach the structure to the wall and hang the jewelry.
Organizers sewn by hand will help to tidy up the space, organize new places for storing things in the rooms and bathroom. You can store everything in them, from seeds to work tools or wardrobe items. This device is made as a gift or for yourself. For example, the product will be a great thing as a New Year's surprise.
Video about DIY organizers
DIY Storage Organizers - 10 Ideas: