The best way to keep shells as pleasant memories of the beach and swimming in the sea is in the form of hand-made crafts. Souvenirs made from marine material are durable and beautiful.
Preparing the shells
Crafts from shells are made with your own hands after the material is carefully prepared for work. Preparation includes several stages.
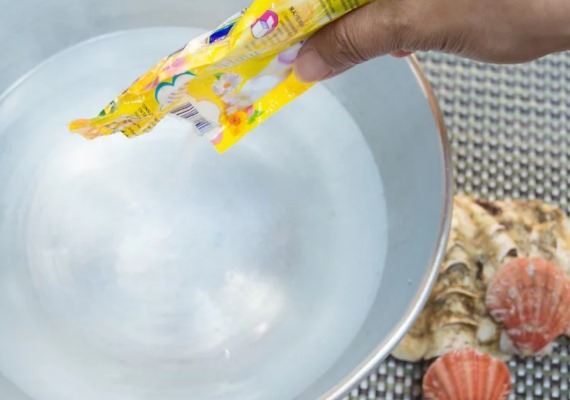
Cleaning
If the sink is dead, it can be cleaned in the following ways:
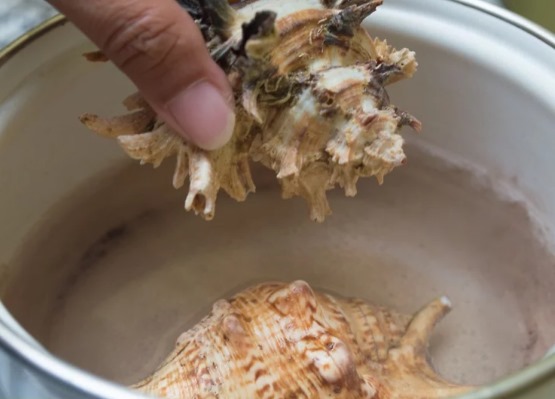
- Soak the hard shell of invertebrates in clean water for 1 week. The liquid will dissolve the dirt on the surface. It is recommended to change the water daily. After the procedure, it is advisable to boil the material.
- Use bleach. This product will help remove dirt and growths inside the shell. To prepare the composition, you need to add bleach to the water solution, the proportions of the components should be the same.
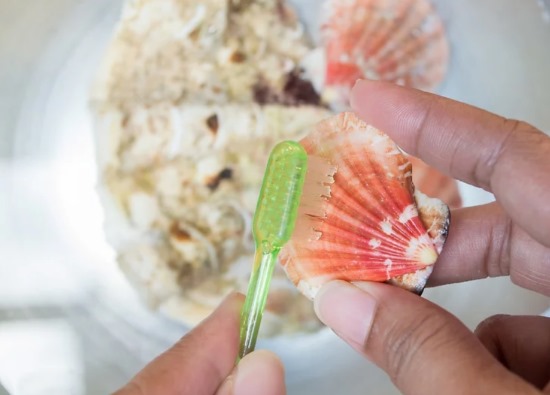
Soak the raw material in liquid extract, wait until the film peels off, then pull it out. Finish by cleaning the remains with a toothbrush. Wash and dry the cleaned mollusks.
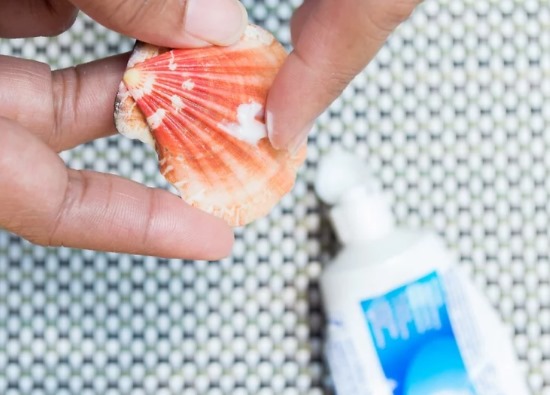
- Using toothpaste. Apply the jelly-like mass to all sides of the shell and leave it like this for 5-8 hours. When the mastic hardens or becomes sticky, you need to clean the workpiece with an unnecessary soft brush and warm clean water. Finally, you can rinse them under running water.
- If there are dry mollusks left on the shell, it is recommended to rub them with a soft brush or a device with thin metal bristles. This technology will be more effective if the workpiece is cleaned or soaked beforehand.
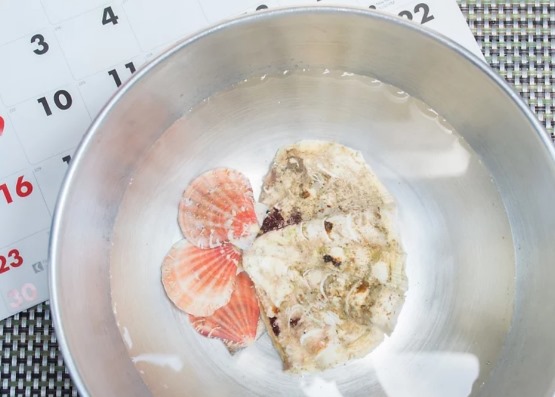
Methods for removing organic tissue from shells:
- The shell needs to be boiled, then the organic matter will become soft and easy to remove.
To do this, place the raw material in a large aluminum container, fill it with tap water so that the liquid covers the mollusks by 5 cm. Let the mixture boil and keep it on the stove for 5-10 minutes. Then pull out the hard shells with tongs and place them on a hot towel. Carefully pull out the insides with tweezers.
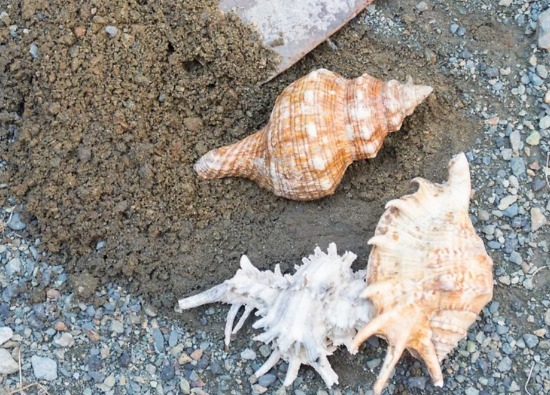
- A safer technology involves burying the material in the ground. In this case, insects eat the internal tissues.
In the chosen place, you need to dig a spacious hole 50-60 cm long. Evenly lay out the shells so that there is some distance between them, then bury the hole. It is recommended to keep natural preparations in the ground for several months. After removing from the ground, rinse and dry the sea shells.

- Freezing will destroy animal remains and make the process of removing them easier. To do this, place the shells in a zip-lock bag. Pour clean water into the bag until the items are completely covered.
Place the package in the freezer for several days. After the specified time, remove the container and defrost its contents. Remove the organic matter from the shell.
Processing
During the processing of the external skeleton of mollusks, the following actions are performed:
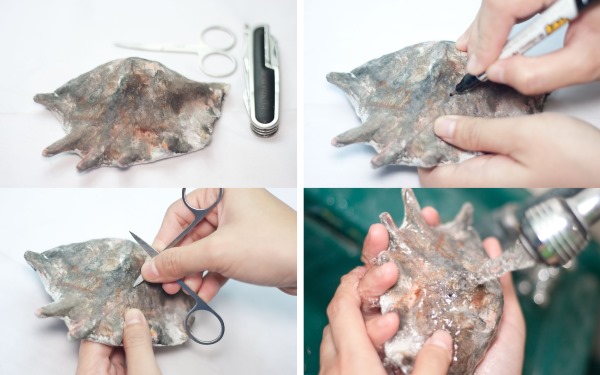
- To remove small cracks and chips, it is necessary to sand the shell surface with sandpaper or a sanding block. If you don’t have these tools, a pumice stone or a nail file will do.
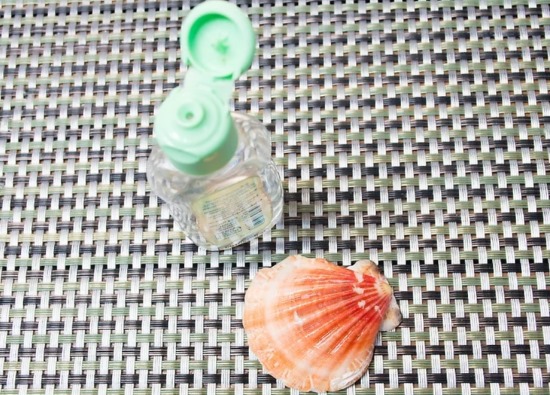
- It is necessary to rub each sea preparation with mineral oil to ensure shine and better preservation. For this purpose, it is recommended to use the universal product WD-40. It is better to wear gloves when working with the product.
- Spray the sinks. For this, matte polyurethane or colorless nail polish will do. First, you need to coat one side of the product and let it dry for 1 day, then repeat the same steps on the other side.
Varnish coating
To give the sinks a glossy shine, they need to be varnished.
The following tools are suitable for this:
- Acrylic varnish (colourless or pearlescent) is applied to the hard shell with an ordinary artist's brush. The composition dries quickly. At the same time as painting, you can decorate the product with loose glitter, which gives the craft volume and texture.
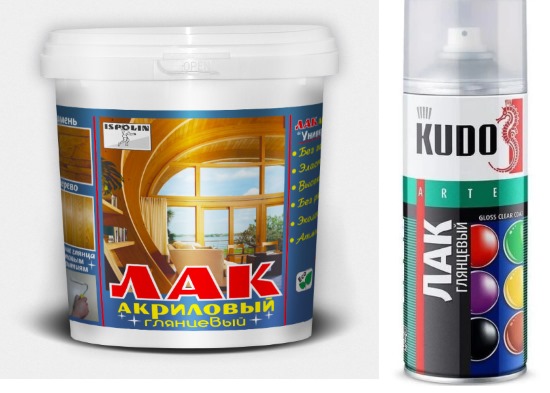
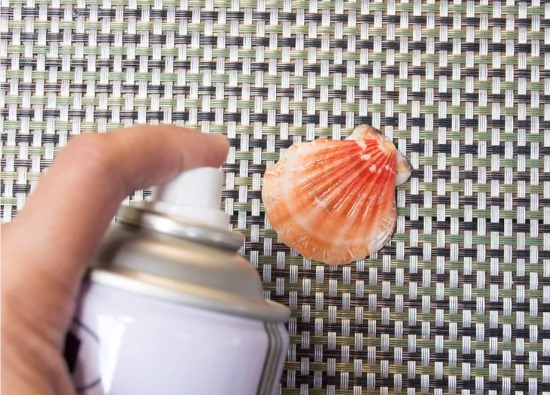
- Aerosol varnish It can be transparent, as well as with gold and silver glitter. It is recommended to work with such a sprayer outdoors or in special, well-ventilated rooms.
Drilling holes
Some shell crafts require holes. They are easy to make, but the difficulty is that the shell can delaminate or crack. It is important to remember: the thinner the hard shell of the mollusk, the smaller the hole should be.
There are 2 methods for making a through recess in a sink:
- With a drill or screwdriver. To do this, you need to select a drill (d. 0.8-2 mm). Place the limestone sea mantle on a plastic or wooden flat board and secure it with masking tape. The hole is drilled directly through the adhesive tape. This step will prevent the workpiece from splitting.
- The manual method involves using a hammer or a nail. Cover the sink with tape and put a mark on its inside. Then put a nail to the marked point and gently tap it with a hammer to form an initial depression.
Then the thin rod should be rocked from one end to the other, thereby widening the hole to the selected diameter. The nail can be replaced with a knitting needle or a needle.
Shell painting
Crafts made from shells are bleached or painted. Before decorating, the shell is often treated with a primer, applying it directly to the convex hard surface, while its relief is more clearly drawn under the whitewash.
During the painting process, you will need various brushes, ranging from wide ones (for complete retouching of the mollusk) to thin instruments (for drawing inclusions and lines).
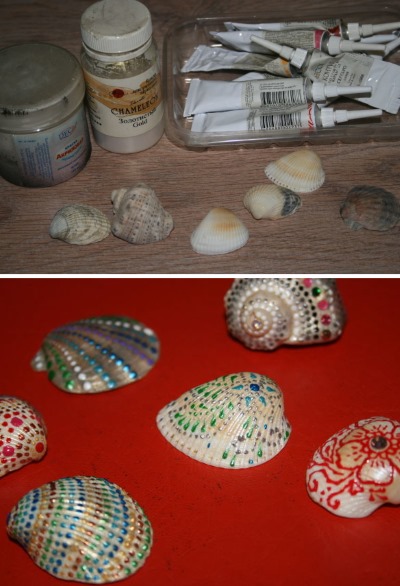
The following tools are suitable for painting shells:
- Acrylic, which is preferably poured onto the palette in small quantities, adding small doses as needed. Acrylic composition dries quickly. Until it dries, it is easy to erase, otherwise the color is corrected by applying another shade on top.
- Whitewash intended for painting ceramics or porcelain.
- The aerosol is convenient and will help you quickly give your craft the chosen shades.
- Gold leaf.
- Gouache. Children can easily handle it.
- Painting with permanent markers is suitable for beginners.
Decoupage of shells
Few people know that shells can be decoupaged, and this process is no different from decoupaging other items.
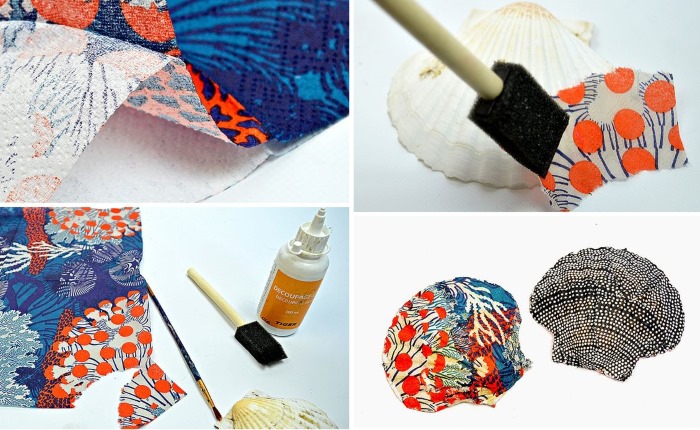
Step by step decorating process:
- The surface of the hard shell is primed or covered with acrylic paint.
- The next step involves gluing the desired paper napkin segments onto the mollusk skeleton. PVA glue is suitable for this. First, the sea blank should be coated with adhesive, the paper should be placed on it, and then the surface should be treated with a brush and glue again.
- Finally, cover the craft with acrylic varnish or a special composition for decoupage.
Beginner needlewomen can practice their skills in decorating shell souvenirs using decoupage.
Rhinestone inlay
Crafts inlaid with rhinestones look rich. For the decorating procedure, you will need special glue to fix the shiny stones, as well as a magnetic pencil or tweezers to have something to take the miniature parts with. You can arrange them on a hard sea shell in any order you wish.

This process is quite painstaking, beginners are advised to practice on simple ornaments and small mollusks. Rhinestone chains are easier to glue because you do not need to fix each bead separately.
Flowers from shells
DIY crafts from shells involve making inflorescences.
Master class on making a painting with a flower composition:
- Prepare a medium-sized photo frame, preferably A4 format. If there is glass, it must be removed.
- Insert a sheet of colored paper or light blue cardboard as a base.
- It is necessary to imagine the future composition in general terms. It is better to schematically outline the zones of the inflorescences with a simple pencil.
- Then you need to take an oblong twisted shell. Put a drop of hot glue on the tip (where the curls are located) and attach 3 flat shells.
- The next shell tier is laid out in a checkerboard pattern.
- In a similar way, form several layers of petals, gluing larger pieces in each subsequent row.
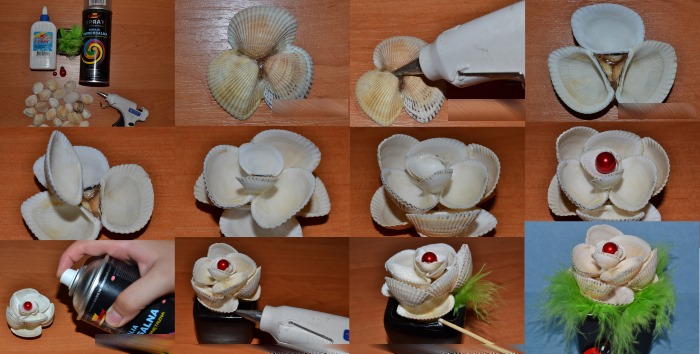
- Place the resulting buds on a cardboard sheet and attach them with a hot glue gun.
- Between the inflorescences, glue miniature branches and small shells instead of leaves.
- Glue small rhinestones on top of the leaves; this will add elegance and shine to the product.
Decorating a flower pot
The principle of decorating a flower pot with shells consists of the following steps:
- Before work, it is recommended to thoroughly wash and degrease the hard shells of mollusks.
- The parts should be fixed to the surface of the flowerpot using construction glue, which has increased viscosity and dries quickly.
- For better adhesion, the adhesive is applied to the shell blanks and to the container.
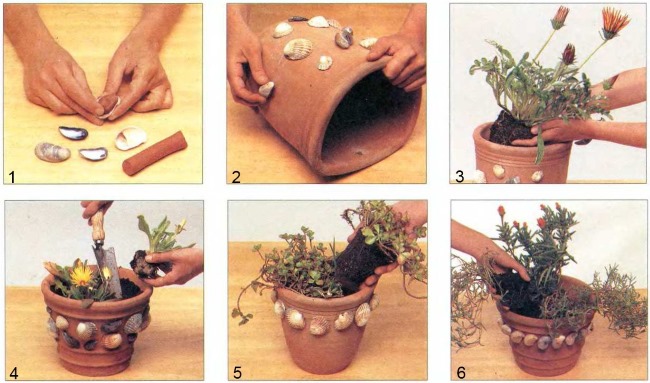
- After covering with paste, decorative elements must be pressed against the walls of the pot and held for a few seconds.
- The shell patterns are laid out in random order.
- Finally, empty spaces can be retouched with acrylic paints or a mixture of PVA and cement (the consistency of sour cream). The mixture should be applied with a brush.
Decorating Photo Frames and Paintings with Shells
Step-by-step instructions for decorating photo or painting frames with shells:
- If you are not satisfied with the color of the frame, it can be painted in the desired shade.
- Shells of different sizes, from miniature parts to large elements, are sorted by size to make it easier to form the craft.
- Apply glue to the frame and start laying out the components.
- The first row is laid out from small and medium shell blanks along the perimeter of the base.
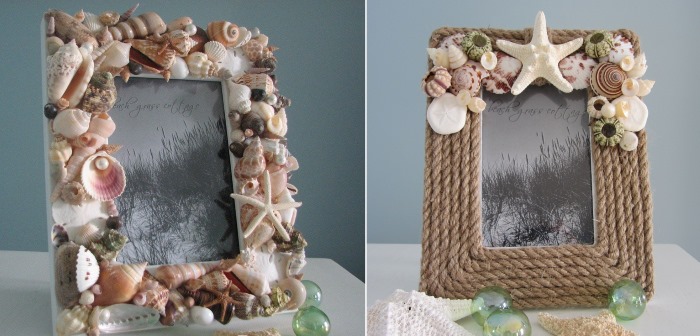
- Then it is recommended to glue the largest shells of mollusks. You can play around with the layout variations in advance and settle on the most successful one.
- If epoxy glue is used in the work process, the finished craft must be dried for 8 hours.
- Finally, the gaps between the large pieces are filled with smaller shells.
- If desired, the product can be decorated with starfish and pearls.
Candles and candlesticks
The shells resemble candlesticks in their configuration.
Step-by-step technology for making candles:
- Carefully remove the small paraffin lamps from the tin mold together with the wick. Separate it from the candle.
- Fix each flagellum with double-sided tape or PVA glue in the middle of the large mollusk shells.
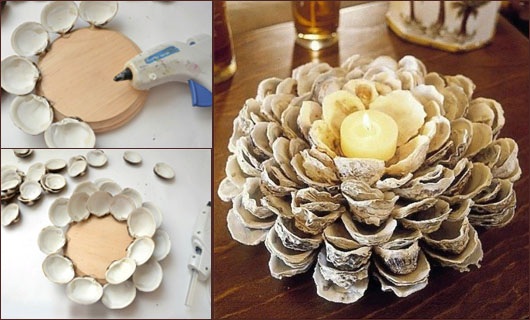
- Then you should melt the paraffin. This can be done with a hair dryer or by placing the candles on a hot plate and making sure that the raw material does not burn. Another method involves boiling water in a saucepan, reducing the heat to a minimum, and then dipping the paraffin lamps into it.
- Once the wax has melted, remove the molds from the heat.
- Protect the work surface with newspaper or paper.
- The shells are filled with paraffin using Chinese sticks or tongs.
- If the shells are unstable, it is advisable to place them in the cells of an egg tray and fix them with plasticine that does not leave marks.
- Let the finished candles sit for 20-25 minutes.
Beautiful jewelry and bijouterie
Crafts made from shells with your own hands look original in the form of jewelry and various decorations.
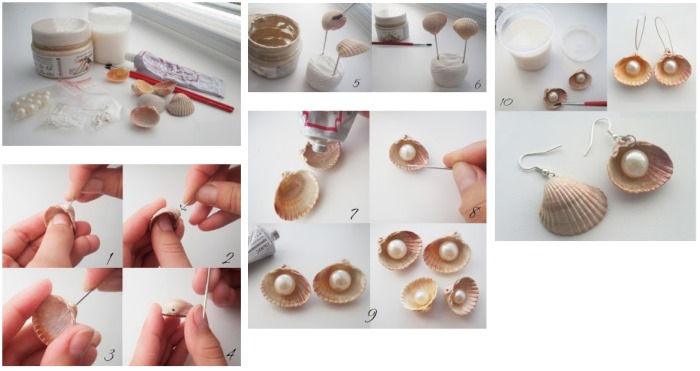
Step-by-step technology for making earrings:
- Select the desired shell shape for the product.
- Make a hole in the upper part of the blanks using a thick needle using rotational movements.
- If necessary, paint the earrings in the desired color and let them dry.
- Cover the surface of the decorations with varnish.
- Finally, attach the earwires.
Simple necklace design:
- Select suitable shells. They can be medium-sized with an unusual shade or small in size.
- It is recommended to decorate the beads with other decorative elements – beads, stones, inflorescences.
- As a thread, you should use a silver chain, thin wire, nylon thread, linen cord or twine.
- On each hard surface of the mollusk, put a mark, and in this place, drill the part from the inside with a drill or make a through recess with a nail and hammer.
- Attach a connecting ring to each shell shell. To do this, spread the ends of the ring with pointed pliers, thread it through the drilled hole and move the metal edges again. For variety, you can attach beads and several shells to each ring.
- Then you need to string the blanks on the cord in the desired order (symmetrically or to create asymmetry).
- The ends of the necklace are simply tied or secured with special clasps.
Shell Crafts for Kids
It is recommended that children make appliques from shells or decorate plasticine figures with them.
Older children will be able to create complex crafts from hard shells of mollusks, in the form of three-dimensional animals.
Animals
The simplest craft is a mouse, a master class on how to make it:
- Take the shell of a rapana and place it with the opening facing down, with the sharp end pointing forward.
- Glue 2 round shells to the top of the future animal; they will serve as ears.
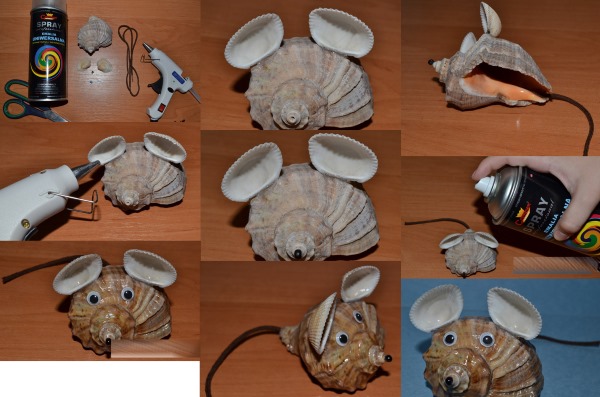
- The sharp part protrudes like a muzzle and attach a black bead to its tip.
- Attach a cord to the back of the product in the form of a tail.
- Cover the finished mouse with varnish and finally glue on the eyes.
Frog
Materials required:
| Name | Quantity, pcs. |
| Simple identical shells of medium size | 2 |
| Large shells | 2 |
| 2 small hard shells | 4 |
| Glue gun | 1 |
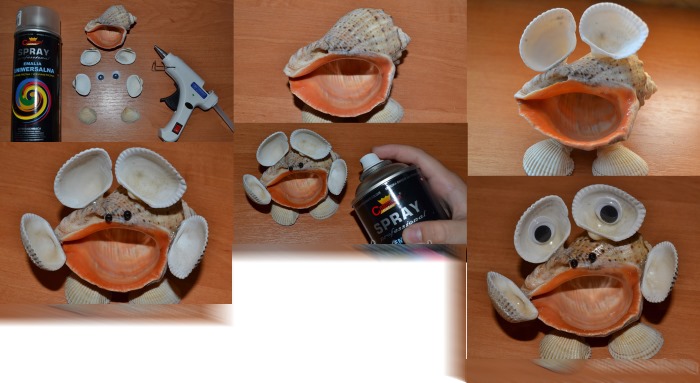
Step-by-step formation of a frog:
- For the body, take 2 medium-sized shells and secure them together with a glue gun.
- For the head, glue 2 large shells together so that they are slightly open, as if the frog is croaking. Connect both parts together.
- For the upper and lower legs, take 2 small hard sea shells and glue one pair at the bottom on 2 sides, and the second pair on the sides of the body.
- Attach 2 unique shell-shaped details to the head with glue in the shape of eyes, so that they create volume.
- Paint the finished craft green and glue dark miniature beads onto the eyes.
Ship
You can make a craft in the shape of a ship from shells with your own hands.

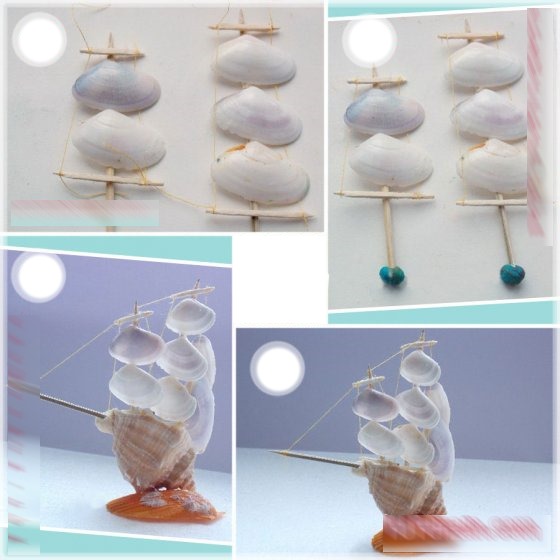
Step-by-step implementation technology:
- First, it is advisable to draw a diagram of the vessel on paper to get an idea of how much material will be needed.
- Place a row of shells of different sizes vertically in the form of a pyramid, at the same time coat a toothpick with glue and place the prepared parts on it, then dry the structure.
- The formed sail must be attached to a large shell base, while the skewer must be fixed with Superglue inside the shell.
- Make the 2nd sail in the same way and secure it to the base.
- Glue a long toothpick along the body. The base is also decorated with beads or 2 small shells of mollusks.
- It is recommended to fix 2 more large shells at the stern near the sail.
- Finally, take some shiny ribbon or chain and wrap it around the mast.
- For stability, the ship should be attached to a wide flat stone or wooden plank.
Hen
You can make a chicken out of shells.
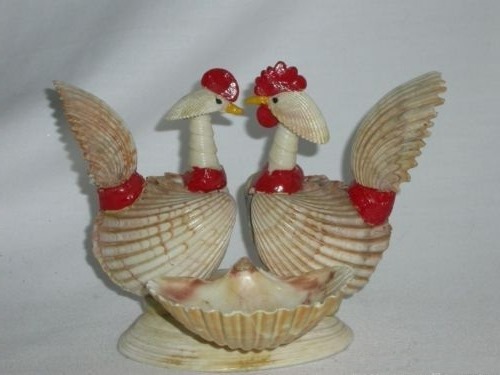
Step-by-step process of making chicken:
- For the body and head, take 2 regular medium-sized shells and glue them together.
- Insert a fan-shaped mollusk into one of the pairs in the upper rounded part to make a tail, and attach short red threads to the top of the other part for the scallop.
- Glue small shells onto both sides of the body to serve as wings.
- Glue the two prepared parts together to form a chicken.
- For stability, glue the entire structure to the hard surface of the mollusk.
- Finally, attach the finished eye piece.
Children's applications
Shells are also successfully used in appliques.
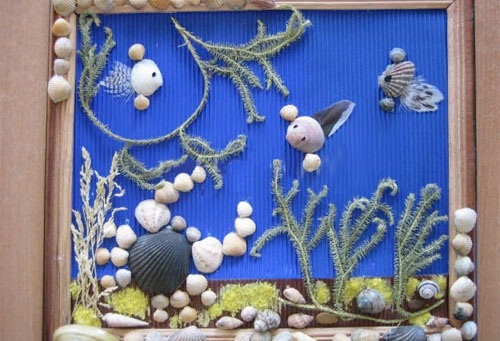
Master class on making appliques with fish:
- To ensure that the shell rock holds well, it is advisable to use canvas or thick cardboard.
- Paint the base with a blue seabed paint. A sponge or thick brush will do. It is desirable that the painting be uneven.
- Give the craft time to dry.
- Glue large shells in the shape of fish bodies onto the canvas.
- Attach smaller shells to the larger pieces using glue - at the back as tails and on the sides as fins.
- Attach ready-made eyes, you can make them from paper or plasticine.
- Draw a bright red mouth on the fish and depict green algae on the bottom.
Nature gives mankind materials that can be used to make various crafts with your own hands. The process of decorating products from shells will be fascinating. It is advisable to involve children in the activity, and then the joint activity will unite the family.
Article formatting:Natalie Podolskaya
Video about making crafts from shells
Crafts from shells (with photos):