To do it right draw a teddy bear for children or together with children, it is recommended to listen to the advice of professionals. In addition to artistic skills, knowledge of zoology will be required.
Features of drawing an animal
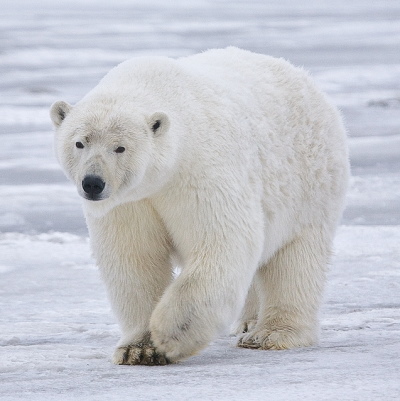
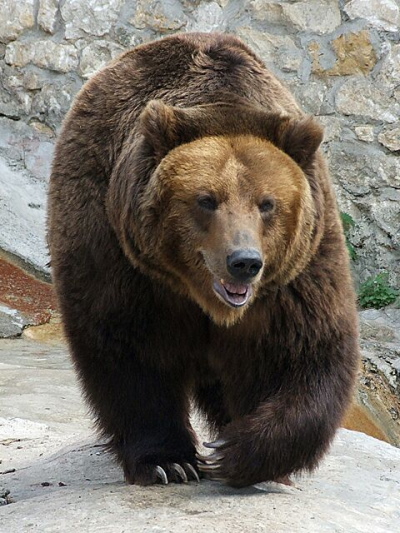
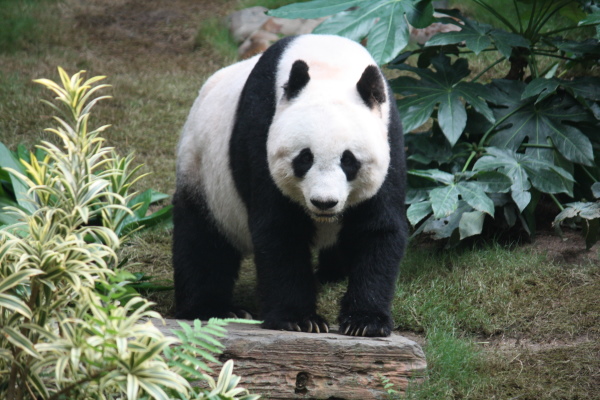
The person drawing must have a good idea of what a bear looks like. As for the differences between the polar and brown bears, in fine art they are insignificant. The panda is drawn in a similar way.
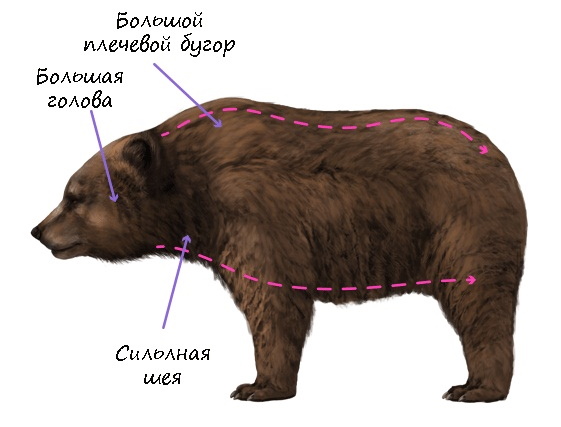
The bodies of all bears have the following features:
- they are very big;
- have a stocky structure;
- are distinguished by a short neck;
- have a large chest;
- have strong limbs;
- have long claws on their paws;
- have hard fur.
When drawing a sketch, you need to:
- take into account that the sternum is a powerful part of the predator and a guide for maintaining the correct proportions;
- highlight the shoulder blades on the back;
- draw the front paws, taking into account 3 reference points - wrist, shoulder, elbow;
- draw the hind legs in the form of a heel, knee and pelvic joints.
When creating a drawing of a bear, it is necessary to draw a horizontal line that acts as an axis. It will also be the spine. The entire body of the predator will be built along this axis. To get beautiful paws, it is necessary to carefully draw their bends.
How to draw with pencil
A bear cub (it is convenient to divide the drawing for children into 4 main stages) on a sheet of paper begins with drawing the head, and then drawing the limbs. After that, the woolen bear skin is depicted, and at the final stage, the muzzle is detailed.
However, before you start working, you need to decide what kind of bear it will be.
The main differences in the structural features of their bodies are as follows:
| Bear | Differences |
| Brown | The bear has a powerful withers, a head with a developed chin and forehead area. |
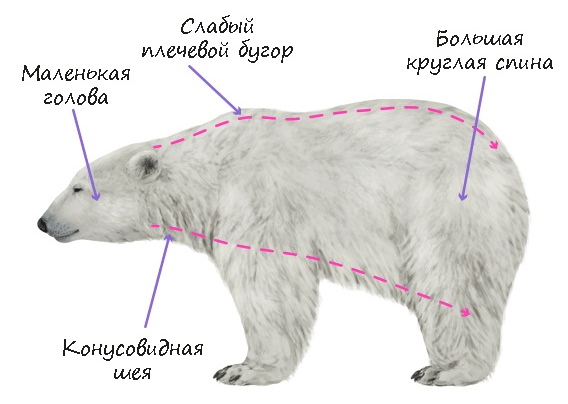
| White | This animal has a rounded eye opening, a sagging belly, and thicker hind legs compared to the front ones. The polar bear also has a narrow and long muzzle. |
| Panda | The main distinguishing feature of the panda is its large head, rounded ears, and soft, rounded body. |
The steps to create a bear are as follows:
| No. | Stage | Description |
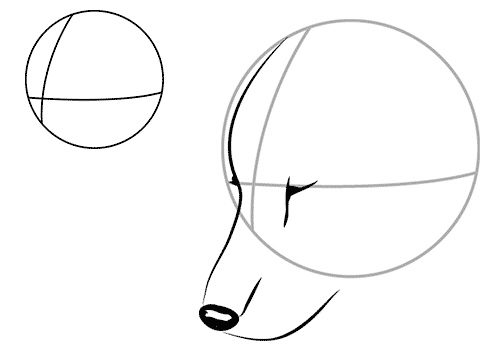
| 1 | Drawing a face | This is one of the most important parts, so it needs to be drawn with maximum precision and realism. To maintain proportions, you should follow the following sequence:
Having drawn the head, move on to working on the neck, which is very short in this predator. |
| 2 | Drawing paws |
|
| 3 | Drawing wool | When depicting a bear's fur, the following factors must be taken into account:
|
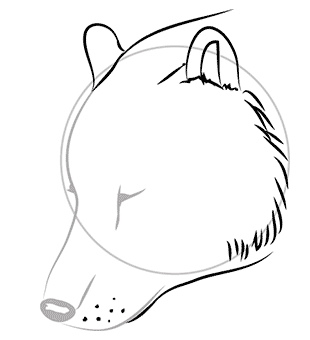
| 4 | Detailing of the muzzle | It is necessary to carefully draw:
|
On hind legs
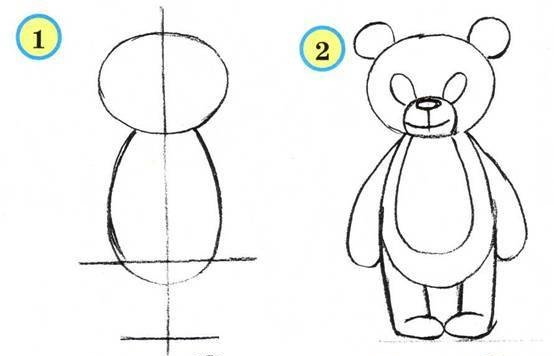
A teddy bear (a drawing for children can be done in different techniques), standing on its hind legs, can be done in the following steps:
- Start with the head. It should be a slightly flattened circle, in the center of which is a black flattened nose.
- Place an oval-shaped muzzle under the nose.
- On the muzzle, draw an arced line that will represent the bear's smile.
- Make a couple of short strokes at the top of the head. These will be the eyes.
- Draw the ears, each of which should look like half a donut.
- Draw the body. First, create its general outline. To do this, draw a large oval under the head. Draw the belly with the navel in the lower part of the body.
- Draw the right upper paw. It is represented by an elongated arc line.
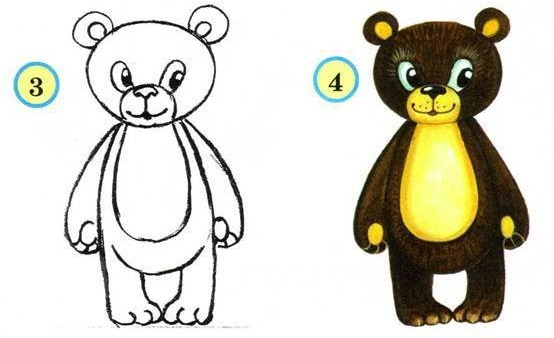
- Draw claws on the end of the paw you just drew. The bear has 5 on each paw, corresponding to the number of fingers. However, in this example, designed for children, you can make 3 claws.
- Draw the left upper paw using the same principle as the right one.
- Finish drawing both lower paws.
In a sitting position
A children's version of drawing a sitting teddy bear can be done by following these steps:
- Draw a large circle that will become the bear's head.
- Draw ears on the sides above the circle, each of which should be represented by a semicircle.
- Mark the base of the muzzle at the bottom of the head. This base should be represented by an oval.
- Detail the head in detail. At the top, draw 2 black circles with small white highlights. These will be the eyes.
- Draw a nose above the oval of the muzzle. It should be represented by a smaller oval.
- Draw an arced line approximately in the center of the oval muzzle. This will be the mouth.
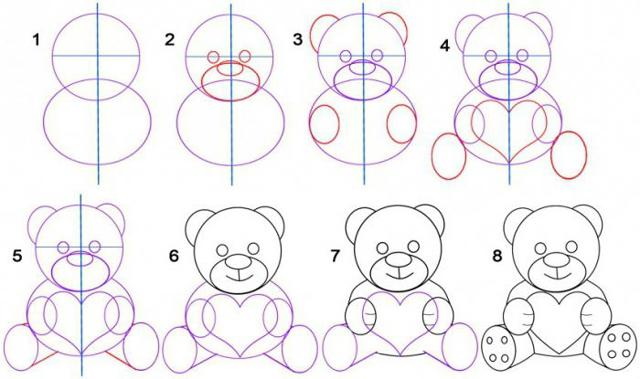
Sequence of drawing for children "Sitting bear" - Draw the upper limbs. To do this, draw wavy lines from the lower contours of the head. They go down, at their ends there should be 1 oval. On each oval - 2 short arced lines that indicate the borders of the fingers. As a result, it should turn out that the bear cub squeezes his fingers, as if he is holding something in front of him.
- Draw an object that is in the bear's front paws. It could be a heart or a pot of honey.
- Finish drawing the lower part of the bear's body. Draw 2 paws at the bottom. You can start with the ovals located on the sides. Draw an arc under the object that the bear is holding in his hands. Then connect this arc with straight lines to the lower parts of the side ovals. From the upper parts of the side ovals, draw another 1 line each, directed toward the body.
- Trace all the lines to make the drawing clearer and easier to color.
On the move
The walking teddy bear (a drawing for children can be done with pencils, felt-tip pens or paints) will differ in the particular arrangement of its paws.
The stages of its drawing are as follows:
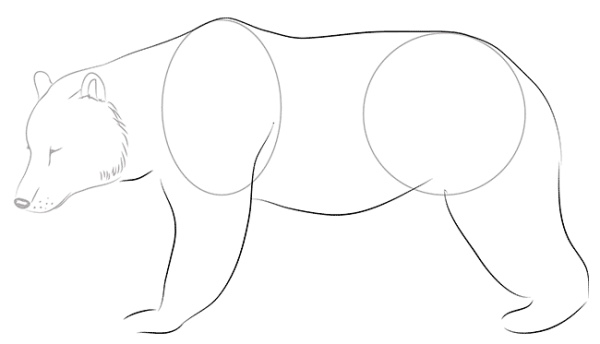
- Draw the head. It should be represented as a circle. At this stage, draw the muzzle, nose and eyes.
- On the head, draw ears and many short strokes to indicate fur.
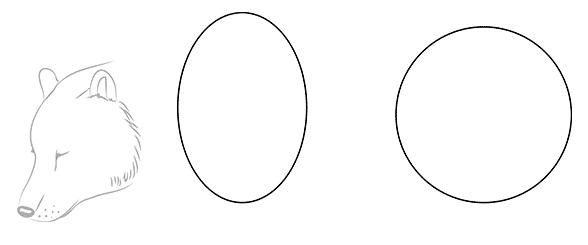
- To the right of the head, draw an oval, elongated vertically. To the right of it, draw a circle of approximately the same size.
- Using the auxiliary figures depicted in the previous stage as a basis, draw the shape of the bear's body. The lines should be very thin. One of the front limbs is located under the elongated oval, and one of the hind limbs is under the circle. Since the bear is walking, its hind limb should be slightly tilted.
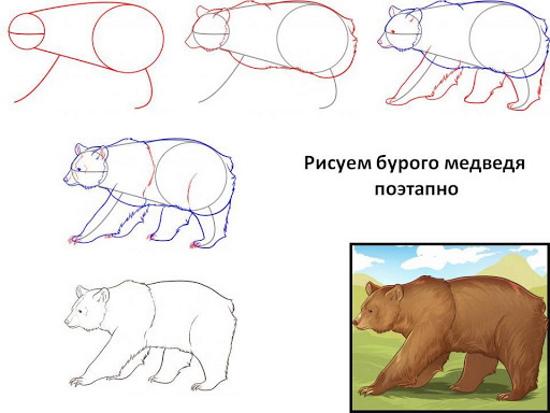
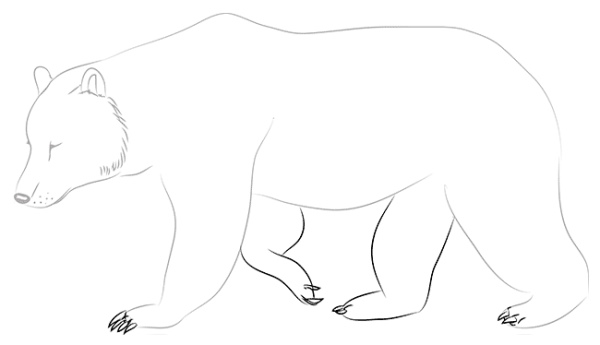
- Having erased all the auxiliary components, draw another front paw and another back paw. The front limb should be slightly bent, because the bear is going to put it on the ground. The 2nd back limb, like the 1st, drawn in the previous stage, should be tilted, but in the opposite direction.
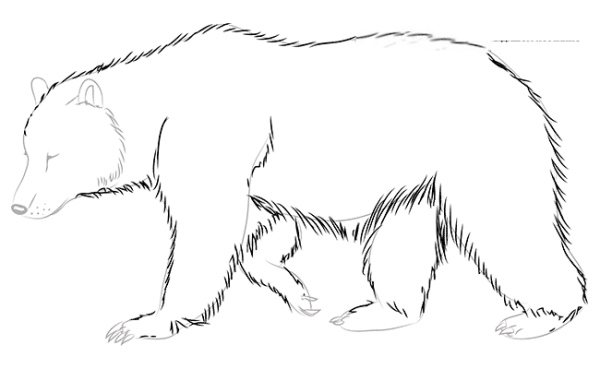
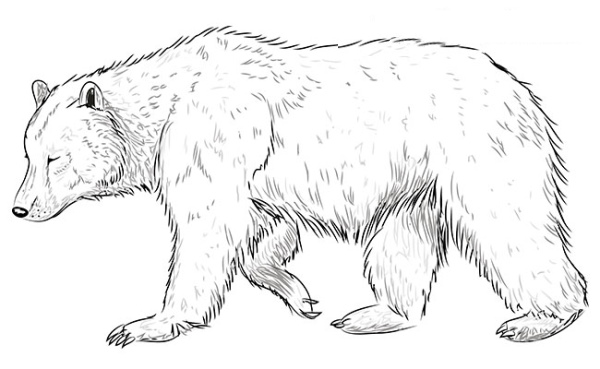
- Draw the fur as a series of short curves located very close to each other all over the animal's body.
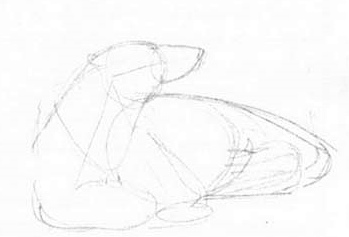
Lying bear
The polar bear may be depicted resting after hunting for fish.
The stages of its creation are as follows:
- Draw the outlines using smooth semicircles. Using straight lines, outline the tilt of the neck and the raised head.
- Outline the large paws. To do this, draw soft, smooth lines.
- Draw the contours of the neck and head. The polar bear's nose is the same length as the skull.
- Create an outline of a lying predator along the marked lines.
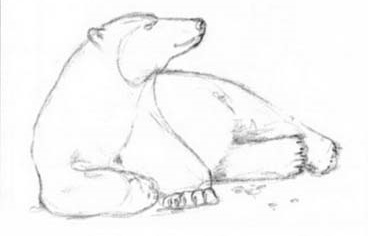
- Refine the shape of the head and limbs.
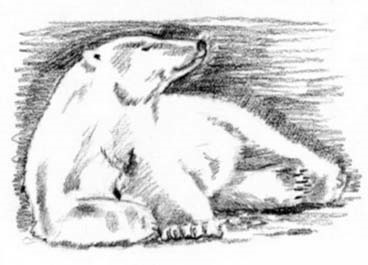
- Use charcoal to draw the outline of the background to show that the bear has white fur.
- Apply light shading to the most shaded areas and outline the shadow.
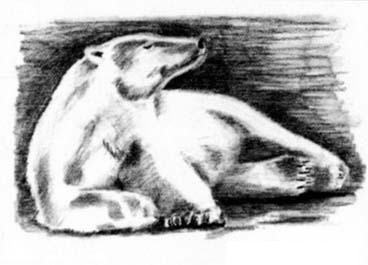
- Do a neat shading job. It is important to remember that the bear is white.
- Use the tip of a charcoal stick to place the necessary accents, clarifying the most important details.
From a fairy tale
The child will be able to independently draw a brown bear, which is often found in Russian folk tales.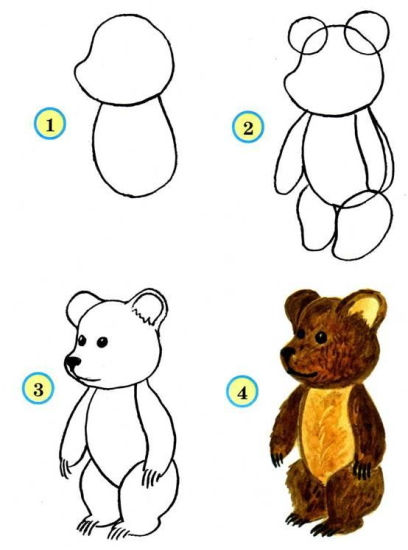
The stages of its creation are as follows:
- On the right side of the album sheet, draw an unfinished circle. Between its edges, draw a nose in the form of an oval.
- Complete the circle with an elongated muzzle.
- Draw the eyes, represented by ovals. Inside each eye, place another oval – the pupil.
- Draw the ears in the form of semi-ovals.
- From the top of the head, draw a curved line that goes to the left. This will be the back. It should smoothly transition into the hind limb.
- From the bottom of the head, draw another segment down. It is needed for the front paw.
- Draw paired paws. Each paw should have claws in the form of dashes or small triangles.
- On the back, draw fur using a zigzag line.
The figure of a bear is well suited for drawing by children. It is enough to know several basic features in the structure of the predator's physique to create magnificent drawings that will please the eye for a long time.
Video on the topic: drawing for children "teddy bear"
How to quickly and easily draw a teddy bear: