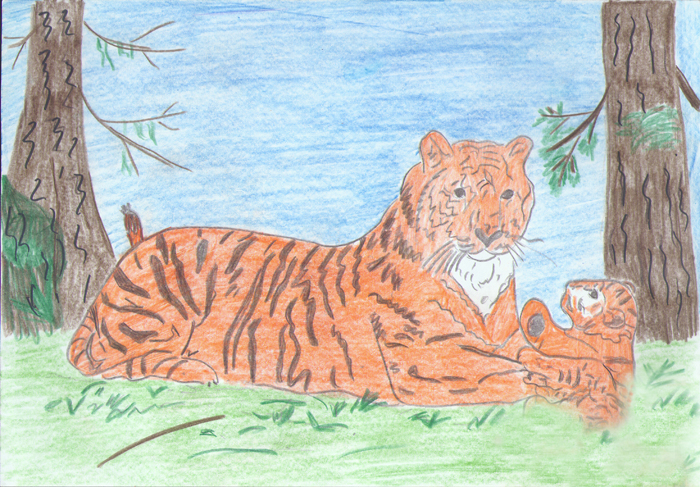
The Amur tiger is a graceful animal, a symbol of the Far East and one of the most beloved characters in Disney cartoons, the drawing of which is quite complex, due to the need not only to maintain the proportions of the animal, but also to convey the beauty, majesty and grace of a wild cat.
For small children, a tiger is just a big cat, the cruel Shere Khan or the kind Rajah, the drawing of which should turn into an entertaining game, aimed at creating an incredibly beautiful pencil drawing.
Necessary tools and stages of creating a drawing
A pencil drawing of an Amur tiger requires careful elaboration of the main details and is carried out in 3 main stages:
- creating a general sketch of the animal;
- drawing the facial features, whiskers and fur of the tiger;
- a play with color and shadow transitions that gives the drawing visual volume and brightness.
Of no small importance is the preparation of the workplace and the necessary tools, which requires the presence of:
- white album sheet;
- a set of simple pencils of varying degrees of hardness (H, HB and B);
- eraser;
- orange, black and pink felt-tip pens for coloring.
Drawing of an Amur tiger
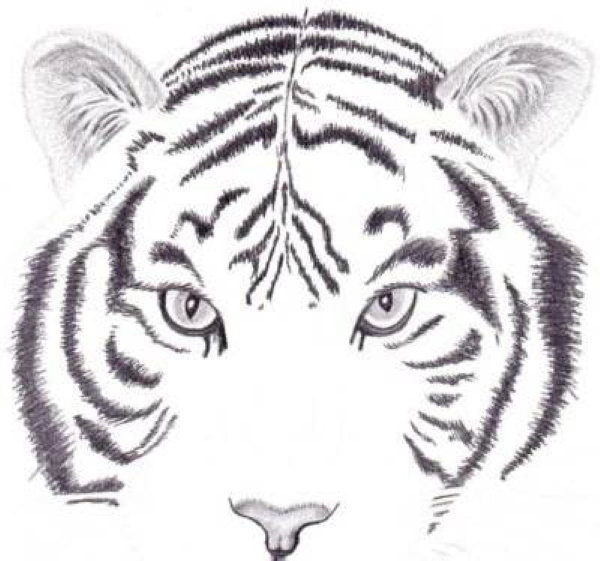
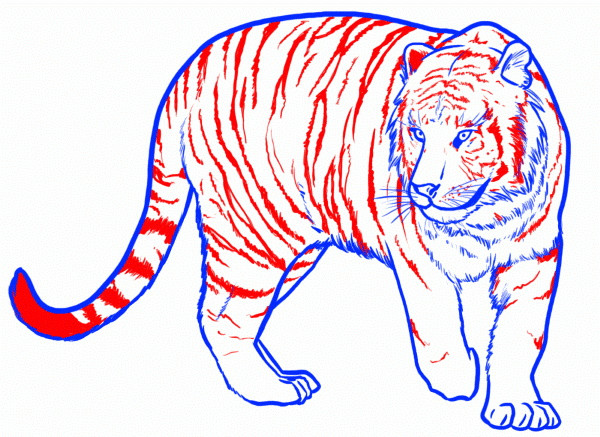
The Amur tiger (a pencil drawing is best done on a thick, large-format landscape sheet of paper) is a true symbol of the Far East, with thick and very beautiful fur and iconic stripes that are quite difficult to execute. It is best to apply such a drawing on a large-format landscape sheet, with the obligatory observance of all the proportions of the animal.
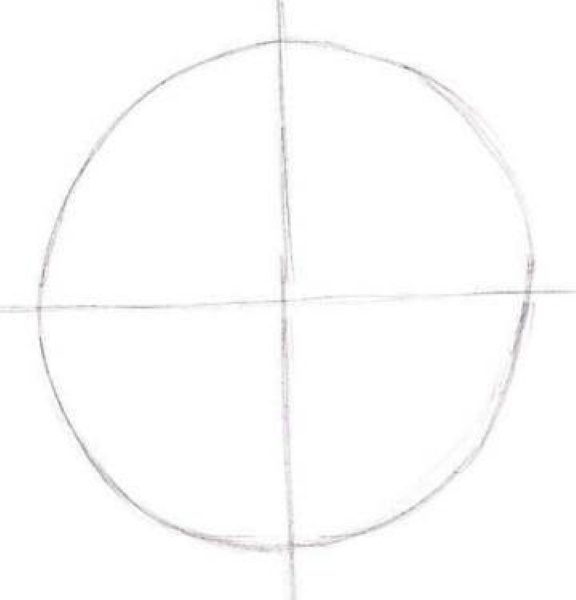
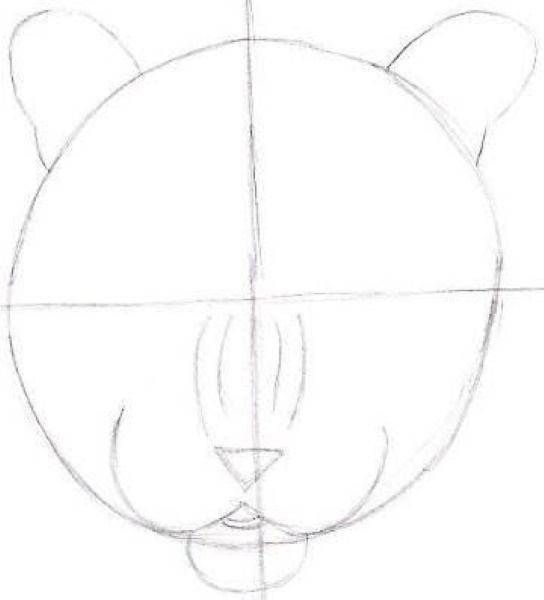
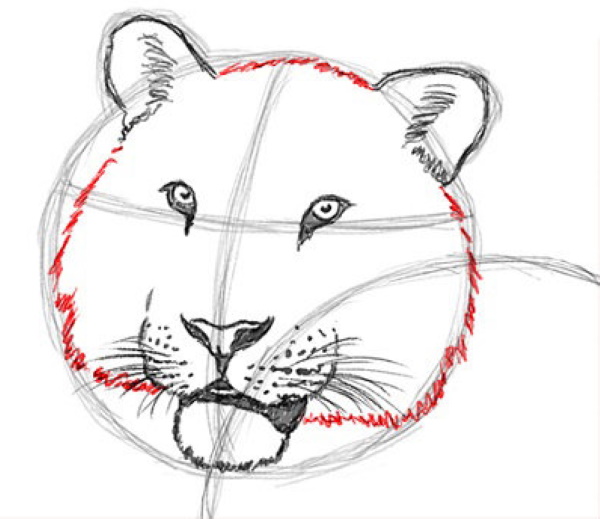
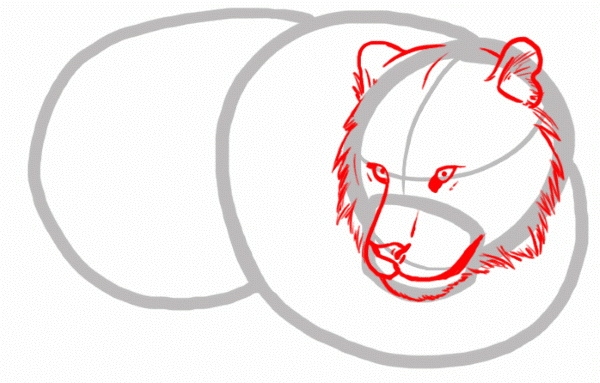
At the beginning of the work, a three-dimensional circle should be drawn on the sheet, not necessarily of the correct shape, and then divided by horizontal and vertical axes into 4 equal parts. It is best to place the circle in the middle of the sheet, leaving additional space for the animal's body.
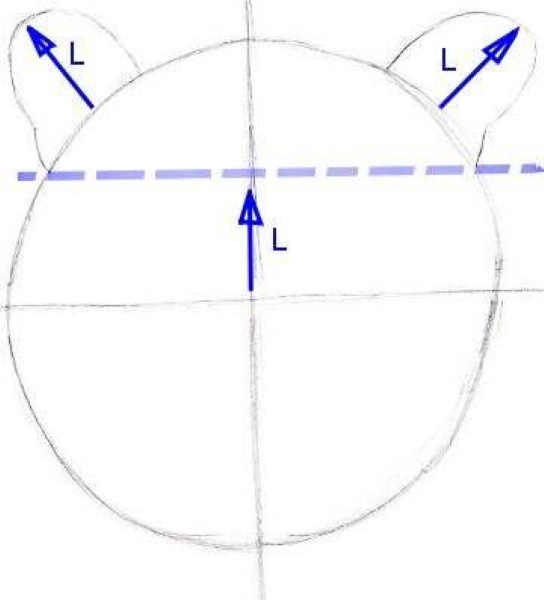
The 2nd stage of work is drawing the ears of the Amur tiger. To do this, the upper half of the circle must be divided horizontally into 2 more equal parts with a dotted line. In the side corners of the first part of the drawing, small ovals of the future ears are drawn, the ends of which are adjacent to the dotted line.
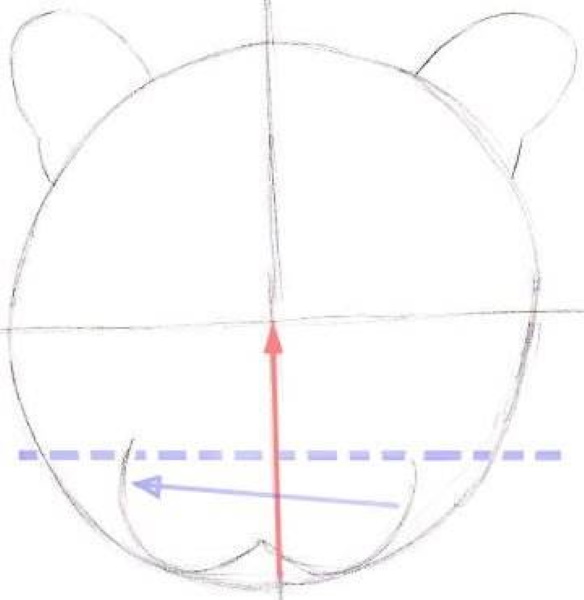
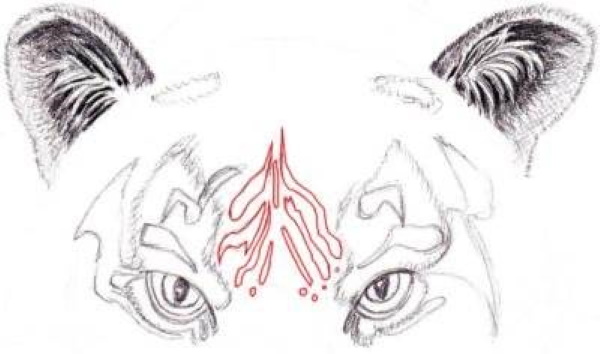
Stage 3 – design of the animal’s muzzle. Here, you need to divide the lower half of the circle, also into 2 equal horizontal parts, and draw part of the tiger’s muzzle at the very bottom. This part includes the chin, resembling an unfinished heart or the English letter W, the width of which must be equal to the height. This is done so that the resulting tiger looks slightly to the side.
At the 4th stage, an additional, small semicircle of the future chin of the predator is drawn to the letter W, and the animal's mouth is placed in its upper part. Following the mouth, you need to draw a triangle of the base of the tiger's respiratory organ, and on the sides of the central axis, 2 curved lines should be drawn, making up the future nose of the predator.
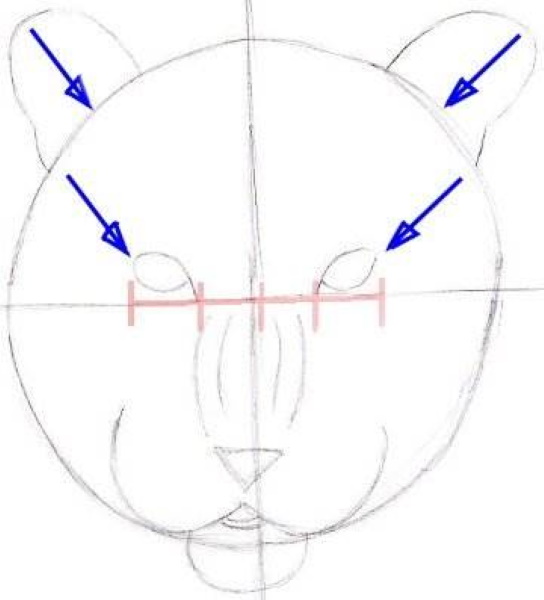
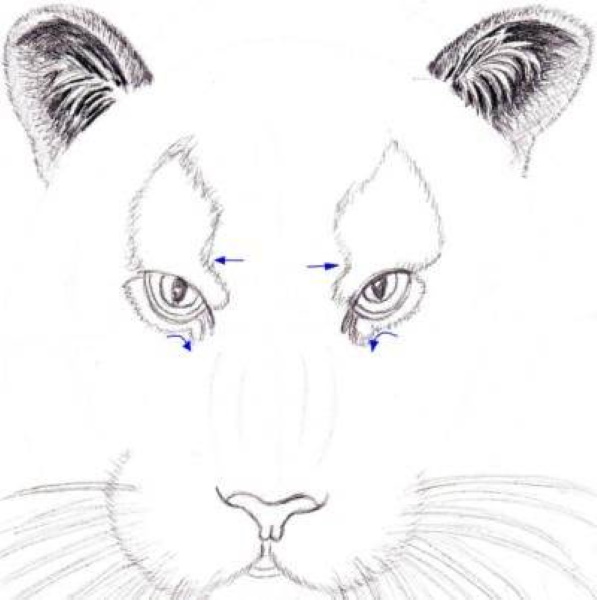
The tiger's eyes are almond-shaped, and their distance from the top of the head corresponds to the length of the ears (as shown by the arrows). Drawing them correctly requires dividing the surface of the line into 4 equal intervals, so that between each eye and the central axis there could be another eye.
At the 6th stage, you need to add sideburns to the tiger's head, as well as a sloped line between the ears. In the lower part of the face, you need to draw oval lines from the base of the animal's muzzle (letter W) towards the eyes, and then draw the contours of the tiger's body (2 oval lines at the bottom of the drawing in the direction from the head).
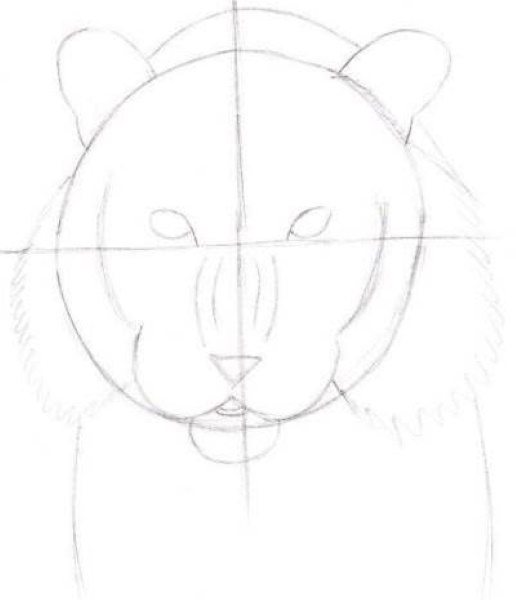
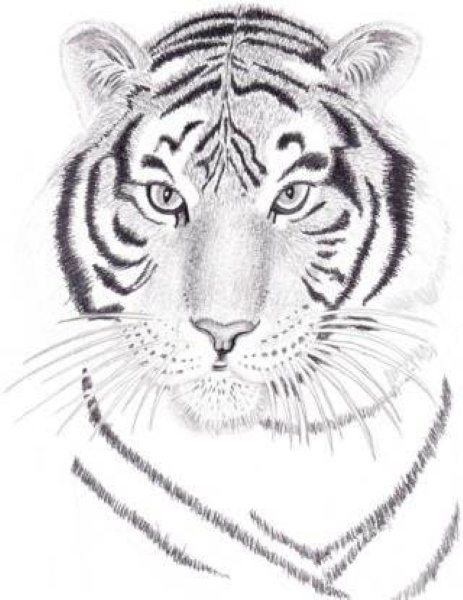
The main parts of the Amur tiger's muzzle are drawn. The contours can now be outlined with a softer pencil, and the auxiliary and dotted lines can be erased with an eraser.
Working out the auxiliary details of the drawing
Having drawn the muzzle, you need to move on to detailed drawing of the animal's appearance, namely the eyes, nose, ears and fur pattern.
| Body part | Peculiarities | Drawing |
| Eyes | The tiger's visual organs are almond-shaped with a clear, black pupil and additional arcs. | 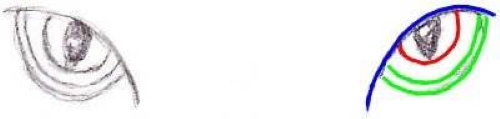 |
| Nose | Its shape resembles the letter W. | 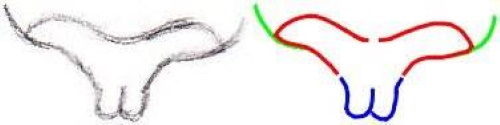 |
| Ears | To draw them, you should make several small dots around the entire perimeter of the ear. Thus, giving it additional fluffiness, and then darken them a little on the left side. Then, in each ear, you need to draw a bunch of white hair, and darken the space around them a little with a softer pencil. |  |
| Whiskers and fur on the chin | The tiger's chin is given a fluffiness by small hairs drawn along its entire perimeter. At the end of this part, long whiskers are added, slightly shortening towards the chin. | 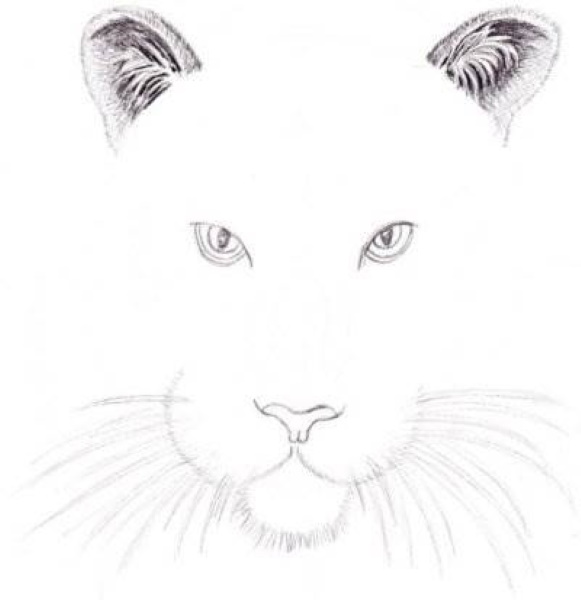 |
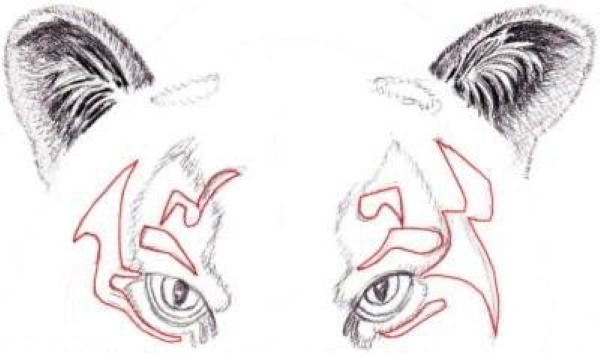
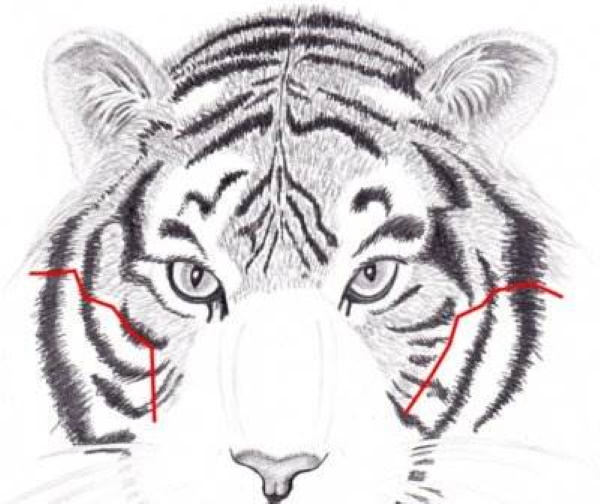
The creation of the fur pattern requires special attention - black zigzag spots located around the entire perimeter of the animal's body.
When creating it, the following are drawn:
- 2 large, unevenly shaped spots located above and below the eyes;
- spots located near the ears;
- the chin rim that starts just below the nose.

Having drawn the central lines, you can continue to draw the fur patterns over the entire surface of the head, strictly following the instructions:
Ready.
Final development of the drawing
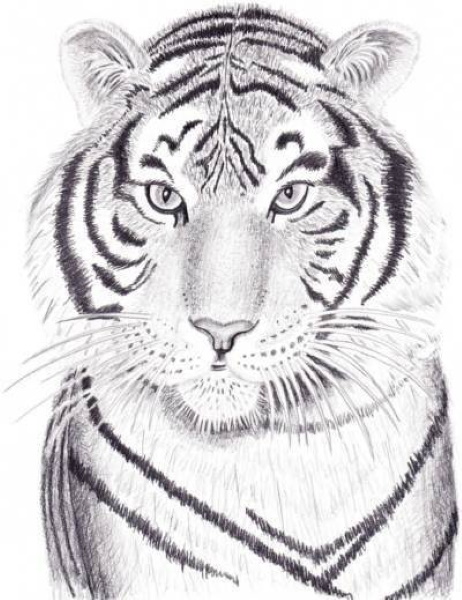
The final stage of drawing, consisting of shading and elaboration of the details of the image. To achieve maximum effect, it is necessary to use pencils of different degrees of hardness.
| Body part | Peculiarities | Drawing |
| For the eyes | The pupil here is filled with a softer pencil, and the white of the eye can be left unpainted. | 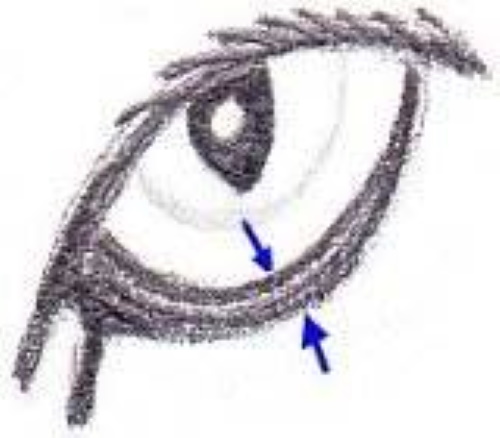 |
| The lower eyelids should be designed with a softer pencil to give them a 3D effect, and for the upper eyelids, use a single-color thick line with the addition of shading (eyelashes) along the contour. The iris of the eye is drawn with a hard pencil, moving along curved lines towards the middle of the pupil. | 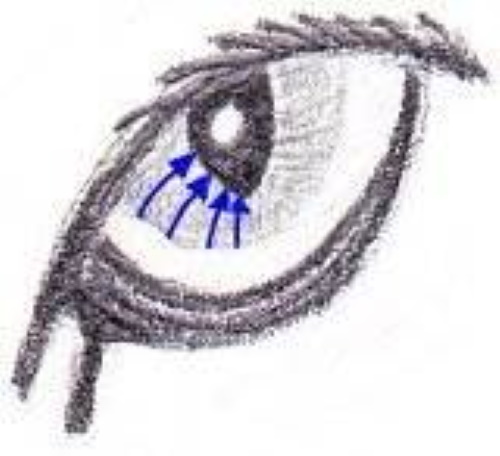 | |
| For the nose | Using a soft pencil, draw clear lines with lots of small hairs under the nose. | 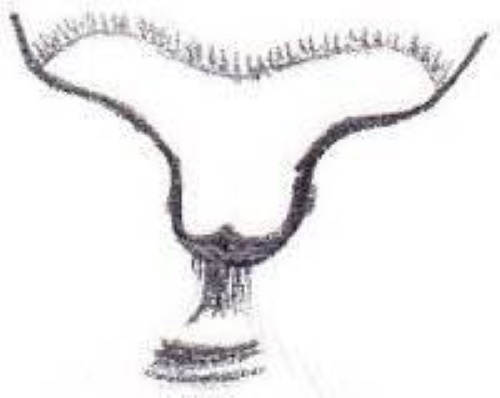 |
| On the right side of the drawing a small shadow is created (as shown by the arrows) and shaded with a light gray shade. Below, darker areas are created with a soft pencil. | 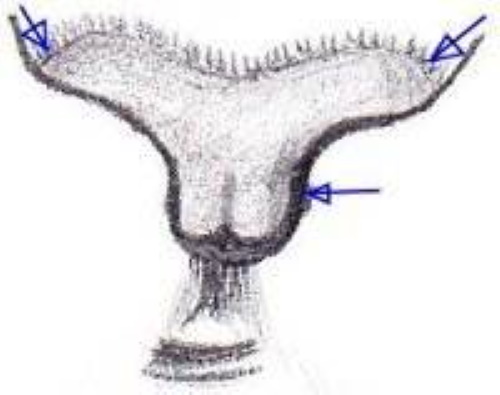 |
To draw fur, you only need a sharpened soft pencil, which you need to use to shade the stripes previously applied to the predator's muzzle. Using thin hatching lines will give the drawing a 3D effect, and will also add the necessary volume to the fur.
When shading, you need to remember the direction of movement all the time, since the hairs of the fur on the forehead should be facing strictly upwards, on the sides - located on both sides of the muzzle, and on the sideburns - looking down.
The shadow transitions in the drawing are also made with hatching, but using a hard pencil. The gray space is located here in the gap between the black and white stripes with short strokes. In the lower part of the animal's muzzle, the hatching can be a little longer, and the direction for it is exactly the same as when making the black stripes (up, to the side and down).
The fur on the tiger's nose is almost invisible, so it is recommended to make the hairs here with fine shading, and for an additional visual effect, you can darken the wings of the nose a little.
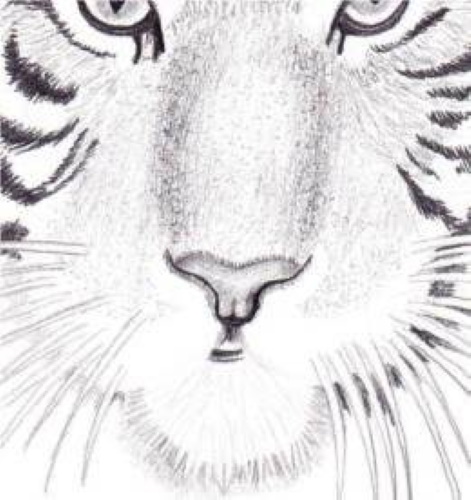
Along the edges of the Amur tiger's nose there are many long dots that can be drawn with a hard pencil to show the presence of fur on the chin. A light shading shadow should also pass between the animal's hairs and whiskers.
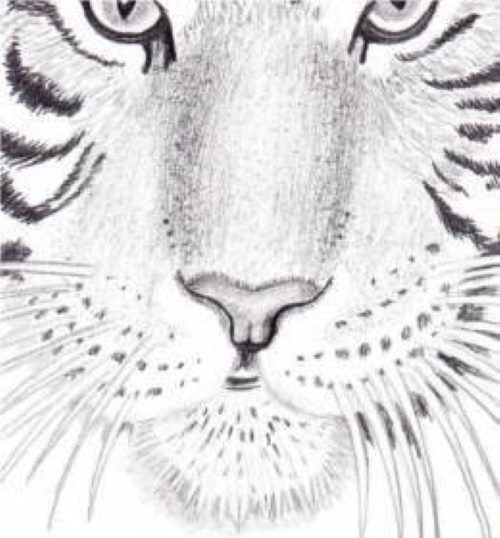
Additionally, a small number of dots should be placed on the sides of the bridge of the nose in order to emphasize the boundaries of the most prominent part of the muzzle.
Drawing the body
Since the tiger is not drawn in full height on paper, to complete the drawing you should only draw the animal's massive neck. This should be done with a very soft pencil (4B) drawing the hairs on the stripes of the body with small strokes.
The next step is to draw the animal's fur, which is slightly darker on the left and lighter on the right. The fur on the body should be drawn in the same way as on the animal's muzzle, using fine shading with a hard pencil.
Add a few oblique strokes to the drawing on the sideburns and body of the animal, emphasizing the thickness of the tiger's fur.
Full-length drawing
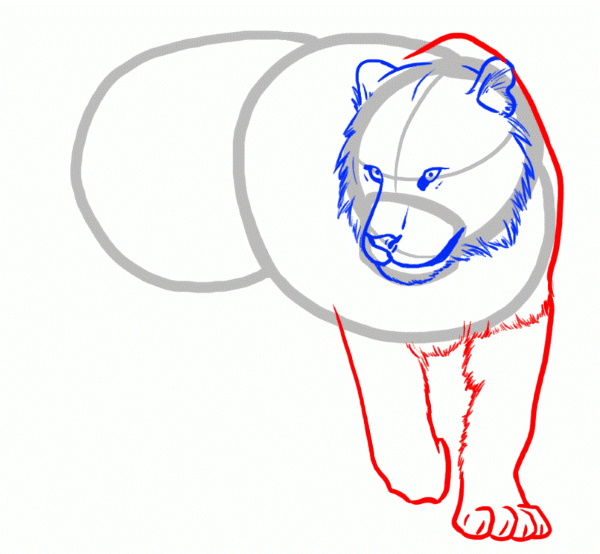
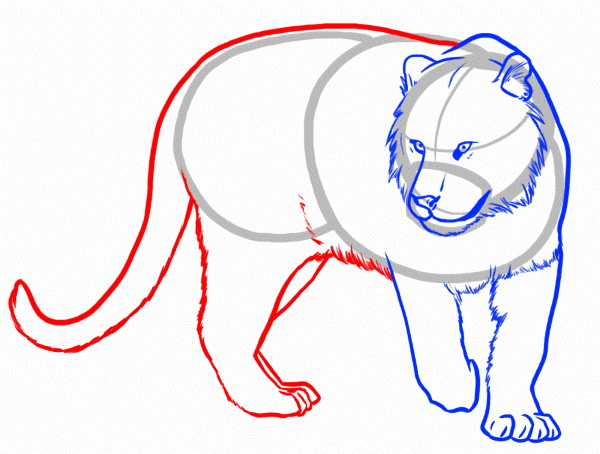
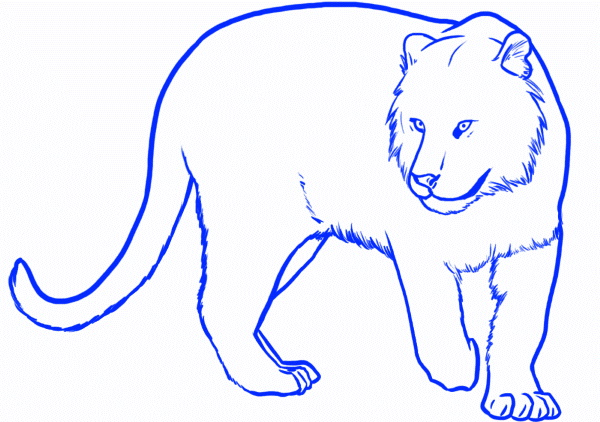
The Amur tiger (it is best to start a pencil drawing by creating an outline of the animal, which will allow you to correctly place the main parts of the predator's body on the sheet) is a graceful and majestic animal with luxurious, soft fur, the image of which must certainly reflect the threat emanating from it. When trying to draw a tiger in full growth, it is necessary to remember to maintain the proportions of the animal, inherent in all representatives of the cat family.
So, first of all, on the sheet it is necessary to place the circles necessary for drawing the head and body of the tiger. The shoulders and sacrum of the predator are indicated by two circles located at a small distance from each other. When doing this, it should be remembered that the shoulders of the predator are large, located slightly above the sacrum and well developed, and the back is narrower and connected to the elongated body.
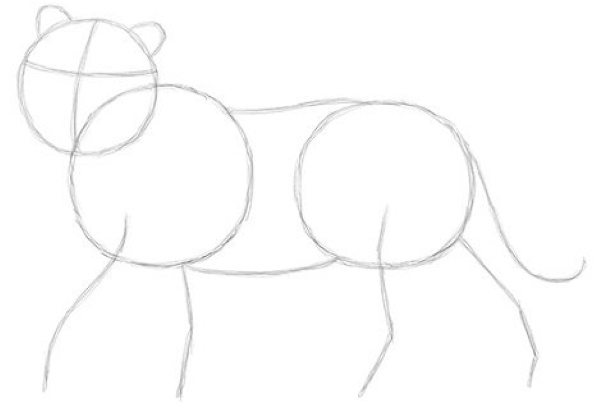
The third circle - intended for the head - should be the smallest, since the animal's skull is round and short. Having decided on the circles, you need to draw the lines of the future paws of the animal and the tail. When outlining the latter, you should remember that it is much shorter than the length of the body.
The second stage of the lesson is drawing the head, which requires showing the strength and durability of the tiger's bones. Keeping symmetry, the upper circle should be divided in half by the vertical axis, and into 3 parts by the horizontal axis. To draw the nose, choose the border of the first and third parts of the circle. The eyes should be located in the first and second thirds, and the ears are placed at the top, from the center of the vertical part of the head.
The outline of the head is drawn with shading, indicating the short but very thick fur of the animal, and then the stripes need to be highlighted.
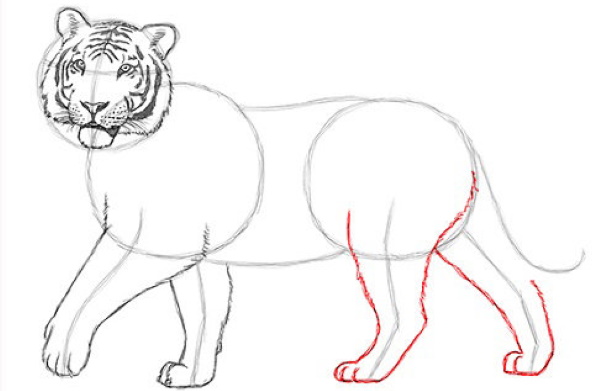
The shoulder and back hemispheres of the body should be connected with soft lines on the back and chest, and then you should start drawing the animal's paws. When drawing the limbs, you need to remember that the Amur tiger's hind legs are slightly longer than the front ones, which allows the animal to jump well, and if necessary, to deliver a fatal blow, tearing the enemy's stomach.
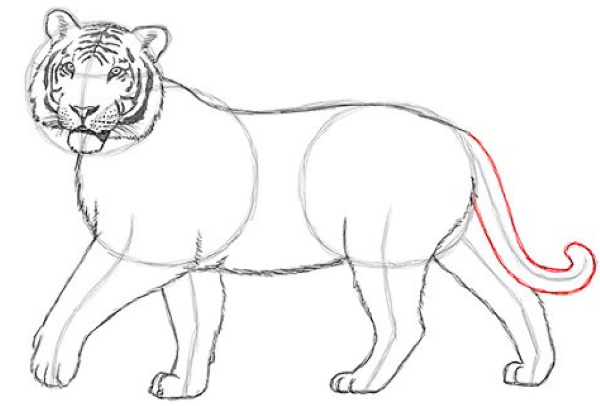
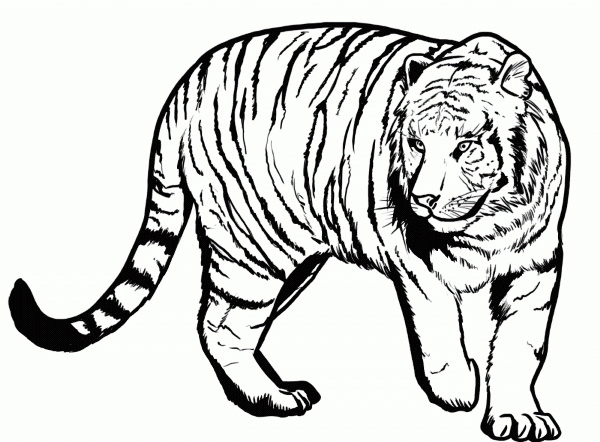
The created outline of the Amur tiger should be outlined, drawing the fur and stripes on the entire body, paws and tail.
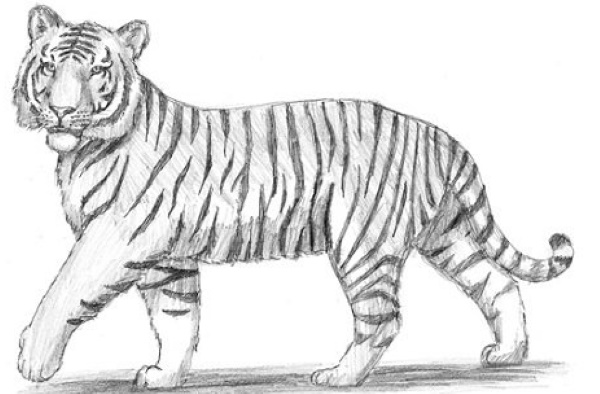
At the final stage, the resulting drawing of the tiger needs to be shaded, playing with light and shadow transitions.
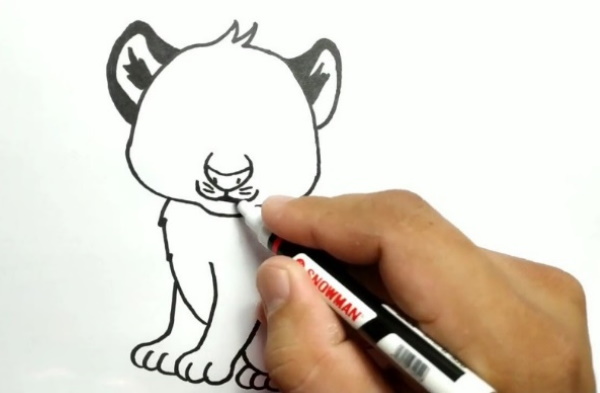
Amur tiger cub
The Amur tiger (a pencil drawing can take quite a long time due to the need to create a visual effect) in the form of a tiger cub is available not only to adults. A child can easily cope with the drawing, which does not require careful drawing of details, on their own, with only a little help from an adult.
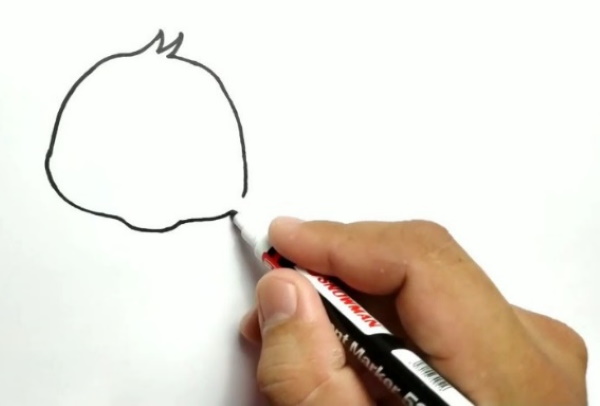
For kids, a tiger cub is a cheerful big cat, so the technique for creating it is no different from any representative of the cat family. At the first stage of creation, a sheet of paper should be visually divided in half. In the upper part of the face, the tiger cub's muzzle is drawn, formed from a large circle.
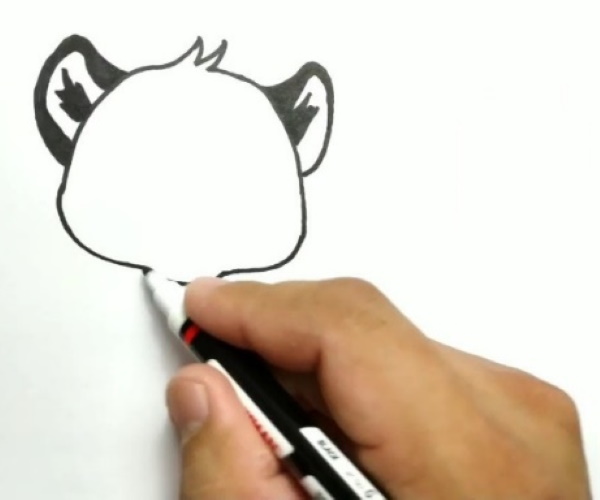
On the sides of the created drawing, in the right and left upper parts, ears are placed, inside which dark stripes and fur are drawn with a pencil.
The body of the sitting tiger cub is created with two curved lines, and then the animal's two front paws and one back paw are added to it, since the tiger cub is sitting in the drawing.
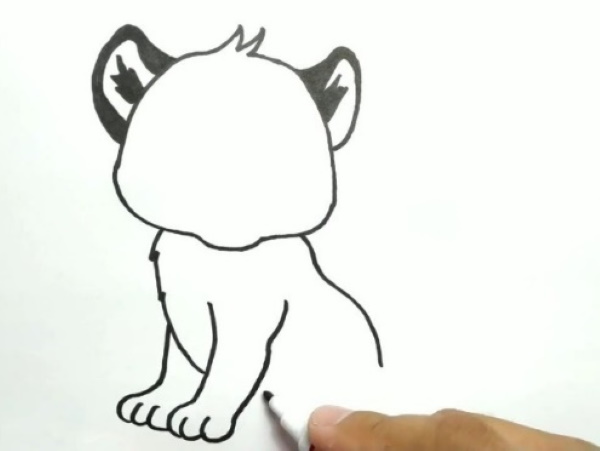
To complete the outline, you need to draw the tail, with a mandatory brush at the end.
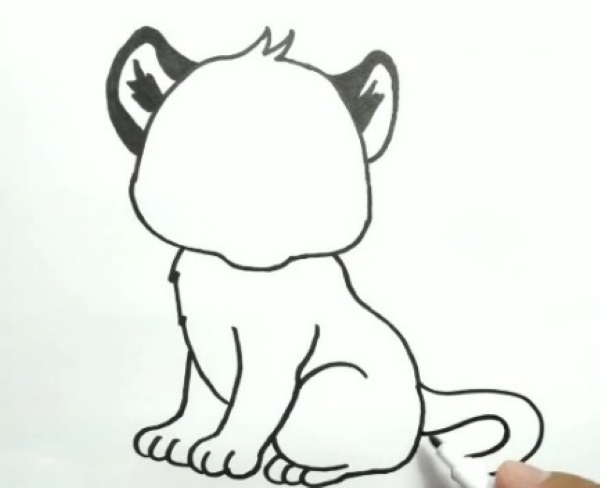
Having completed the outline of the animal, you can return to drawing its muzzle. To do this, the circle should be divided by vertical and horizontal axes, and then draw the animal's nose at the point of their intersection. The tiger cub's eyes are located in the first and second upper squares and are large, almond-shaped with mandatory darkened pupils.
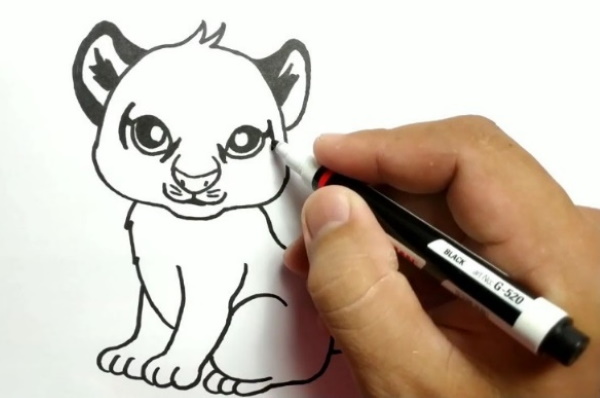
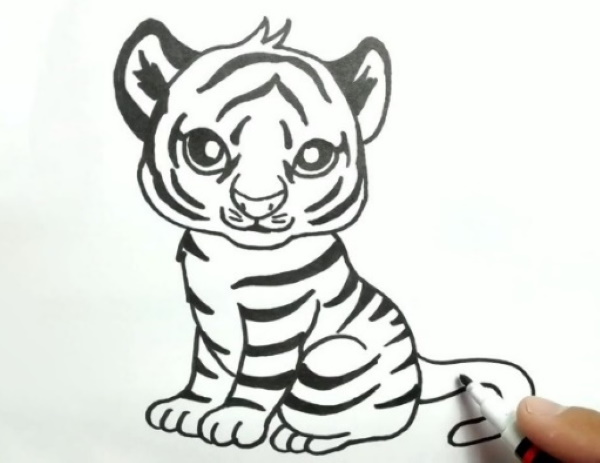
The resulting tiger cub must have stripes, for which they are applied first to the muzzle with a pencil, and then to the entire body of the animal, including the paws and tail.
At the final stage, you need to outline the drawing, and then use an orange marker to color the tiger cub’s fur as desired.
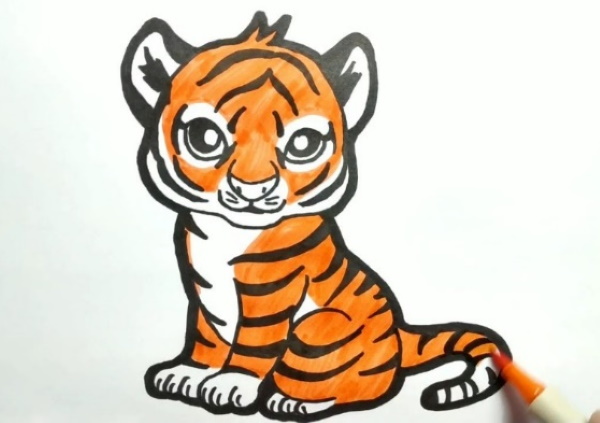
If you don’t have a felt-tip pen, you can do the shading with a pencil, playing with the light and shadow transitions.
Drawing of a tiger in motion
The Amur tiger (a pencil drawing of a moving predator should fully reflect its character traits) is a cruel and professional predator, known for its graceful habits and love of running and jumping.
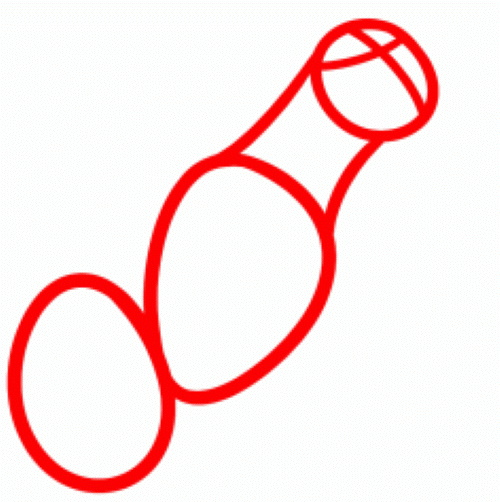
When depicting a moving tiger, the artist also needs to start from creating three circles, but in this case, arrange them in a slightly different order:
- in the foreground - a small head with strong bones;
- on the second - the animal's withers and the largest circumference;
- on the third - the circumference for the tiger's sacrum.
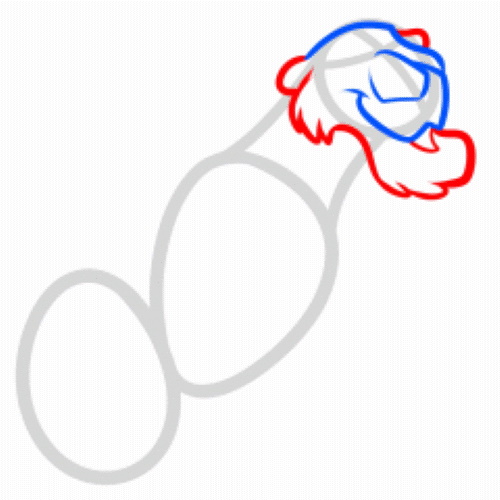
When drawing the head (the first circle), it should be divided by horizontal and vertical axes, and in the resulting lower part, create a powerful, but not voluminous oval mouth. Small eyes here will be located on the horizontal axis in the 1st and 2nd parts of the circle.
As the tiger moves, one of its front paws will be firmly planted on the ground, while the other will be slightly bent, as if walking.
To create the animal's body from the withers to the sacrum, you need to draw a slightly rounded line that smoothly turns into the tail, and then also connect the front and back legs, creating the animal's chest.
Unnecessary lines left from the sketch can be removed, the outline should be highlighted with a brighter color, and then you need to start drawing the stripes and fur of the Amur tiger.
At the final stage, the tiger is given beautiful whiskers and the outline is shaded with light transitions.
Drawing of a growling tiger face
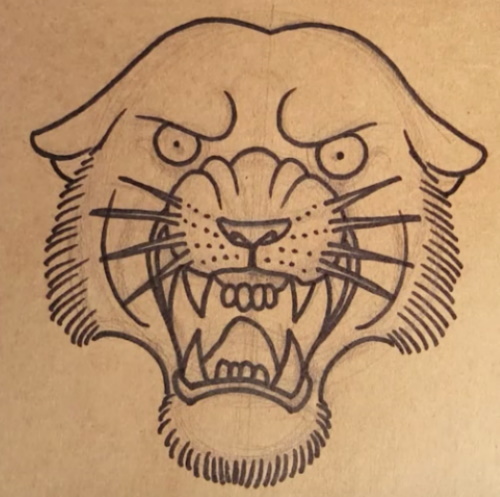
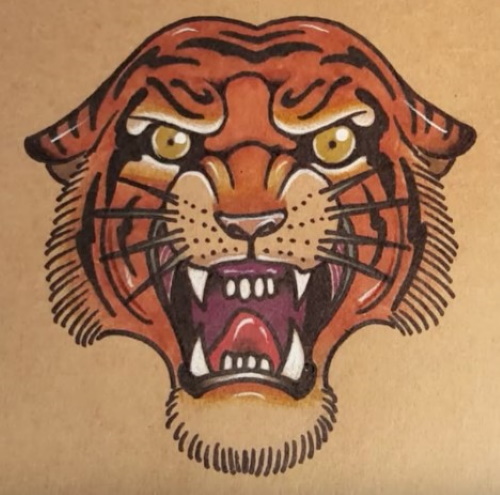
The Amur tiger's muzzle, in addition to its luxurious red-and-white coloring, also has a predatory grin of white fangs that has a frightening effect on any opponent.
When creating such a drawing, first of all, you need to draw a large central circle (the outline of the muzzle). In its center is a smaller oval (the nose), along the edges of which in the upper part are placed 2 small circles (the future eyes of the animal). A central axis is drawn across the entire surface of the drawing, dividing it into 2 equal parts, and on the sides of the large circle are the tiger's ears pressed to the head.
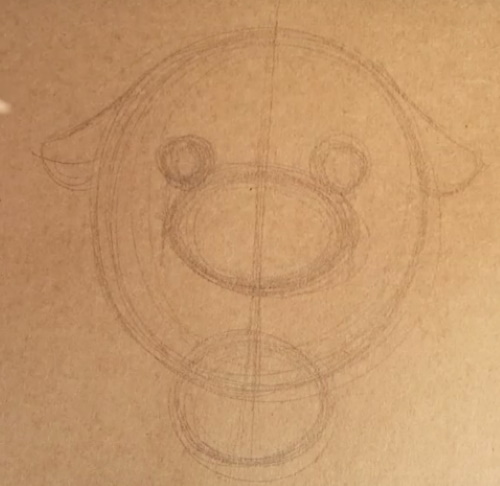
In the center of the oval is the triangular nose of the animal, and in the space between the lower circle and the oval is the mouth of the tiger, with clearly drawn teeth and fangs.
Stripes are applied to the sides, eyes and chin of the animal.
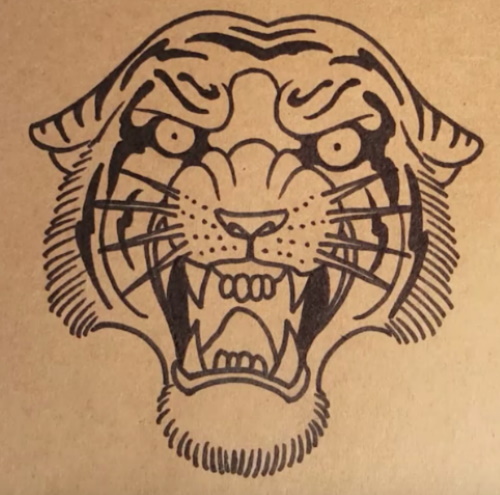
Then unnecessary auxiliary lines are removed with an eraser. The remaining outline of the tiger's mouth is highlighted with a softer pencil and colored in orange or decorated with hatching.
Ready.
Cartoon tiger
The Amur tiger is the prototype of many cartoon characters, one of which, the tiger Shere Khan, is adored and feared not only by adults but also by children. The creation of the main cartoon villain of the "Jungle Book" will appeal to a child of any age, and will also give him and his parents a few happy minutes of joint creativity.
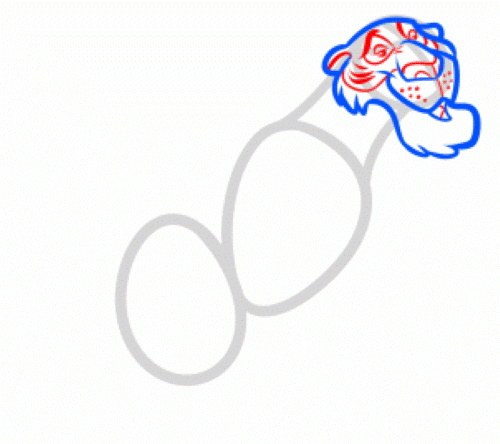
To create a cartoon character, first of all, you should draw 3 circles of different diameters on an album sheet (head, shoulder axis and sacrum). The upper axis of the head should be divided into 4 parts by horizontal and transverse arcs.
Next, the parts of Sherkhan's face are carefully drawn: ears, nose, mouth and sideburns. Particular attention is paid to the character's good-natured smile.
Once the face is sketched, the eyes, chin dots, and Sherkhan stripes need to be detailed. Special attention should be paid to the almond shape of the eyes and the darkening of the eyeball, as well as the tip of the nose, which resembles an inverted W.
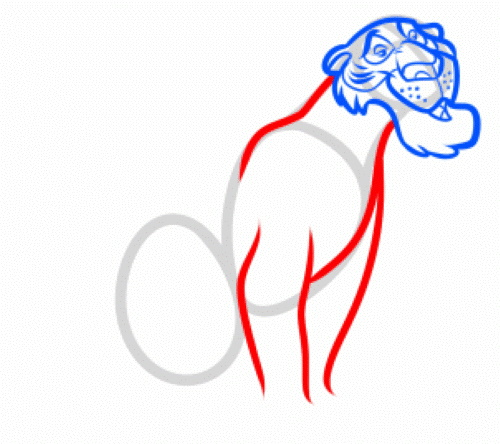
Having finished with the animal’s muzzle, you should move on to the design of its paws, body and neck, as well as its voluminous chest, using wavy lines.
After the front part of the body, you can focus on creating the character's hindquarters, using curved lines to create the animal's buttocks and hind legs. The animal's thighs are drawn in a sitting position.
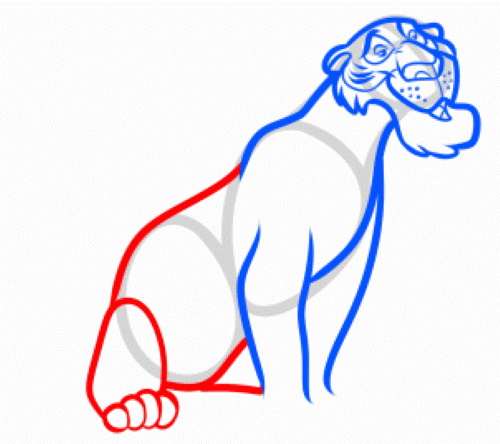
The next stage will be the design of the front toes on the animal's paws and its tail, which is considered a continuation of the cross circle and has the appearance of a semicircle.
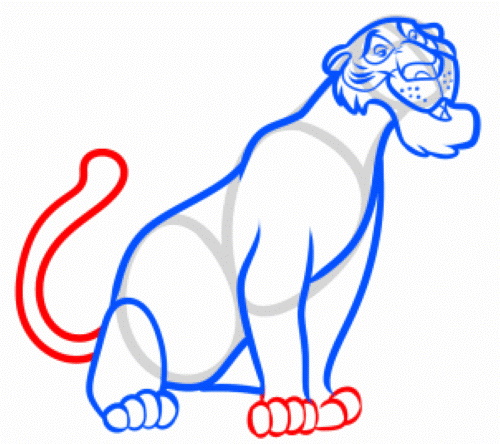
Having completed the contours of the body, you need to apply markings to Sherkhan’s chest, and then draw stripes along the entire length of the tiger’s back and paws.
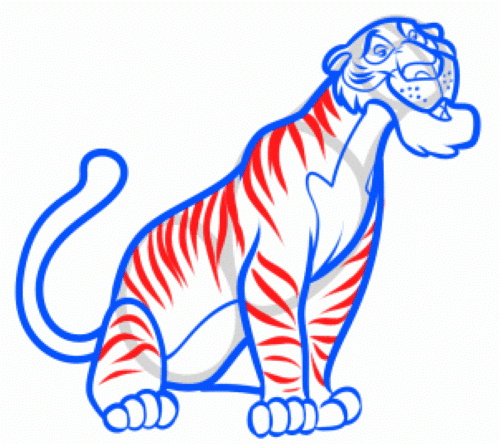
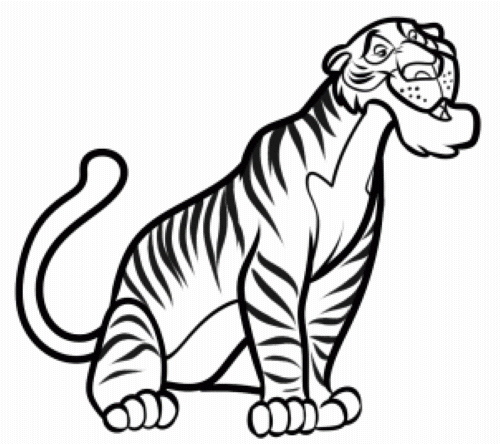
At the final stage of drawing, all auxiliary lines should be erased, and the outline of the tiger should be outlined with a softer pencil. If desired, Sherkhan can also be colored or shaded with small strokes.
The Amur tiger is a strong, hardy and very beautiful animal that evokes universal admiration and adoration. Using a small set of pencils of different hardness, an eraser and album sheets, each child can, with the help of parents, learn to draw both a cartoon character and a real inhabitant of the Far East with huge massive paws, a flexible body and soft, thick fur.
Video on how to draw an Amur tiger
How to draw a tiger easily step by step: