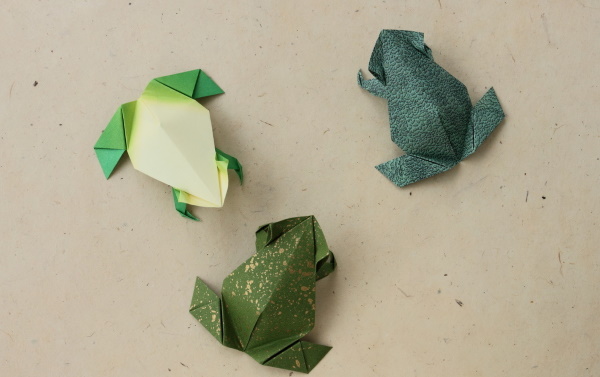
You can make frogs of different sizes and shapes from paper. Before you start doing origami, you need to find out what materials and tools you might need, and also look at master classes and diagrams for making jumping, mouth-opening, and motionless crafts.
What you need to create an origami frog
Necessary materials and tools:
- green double-sided paper;
- scissors;
- ruler;
- glue stick;
- black marker;
- simple pencil.
Additionally, you may need colored cardboard and other colors of double-sided paper.
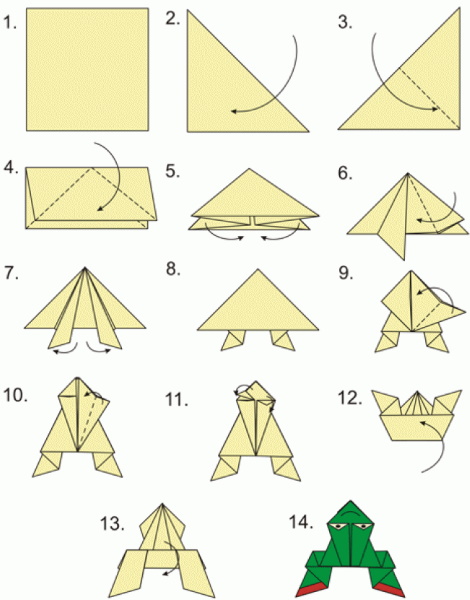
Master class on creating a jumping paper frog
A paper frog jumping (a diagram with an image of each step will help to assemble origami correctly) on the table, with a light touch of the fingers - this is a functional craft that can be used for games with children. Further in the article all stages of creating such a toy are described step by step.
Preparing paper
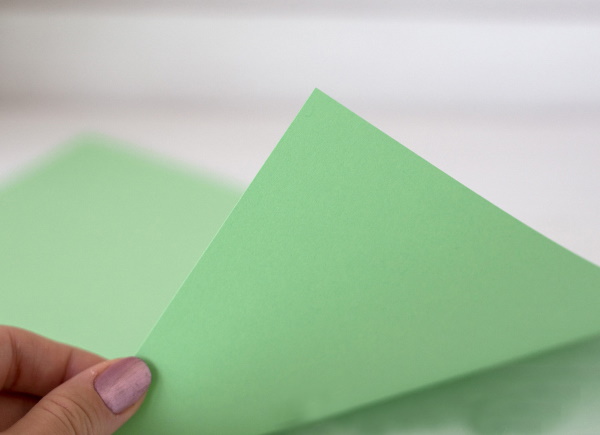
Cut a square with sides of 20 cm from green paper:
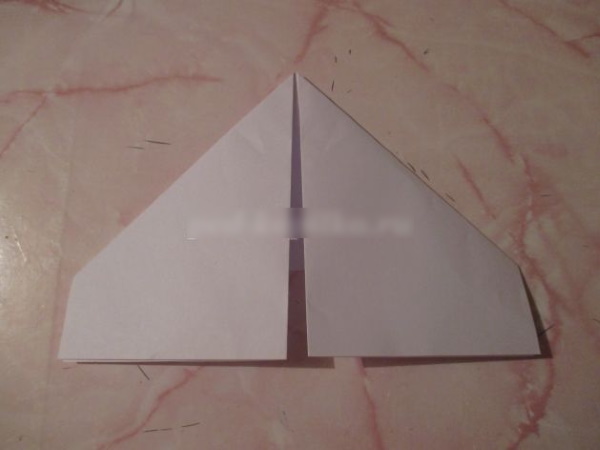
- First, you need to make 2 diagonal folds. You need to fold the paper in half, connecting the upper left and lower right corners. Unfold the sheet, and similarly make another diagonal line, connecting the remaining 2 corners.
- Unfold the paper and fold it in half horizontally. You should get a rectangle.
- The resulting fold should be redirected towards the center of the workpiece.
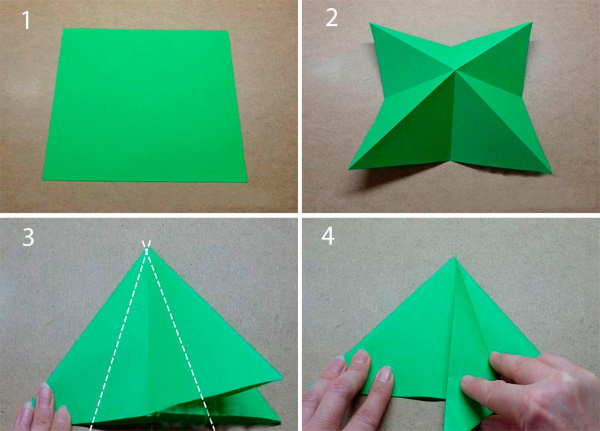
The result should be a triangle-shaped piece.
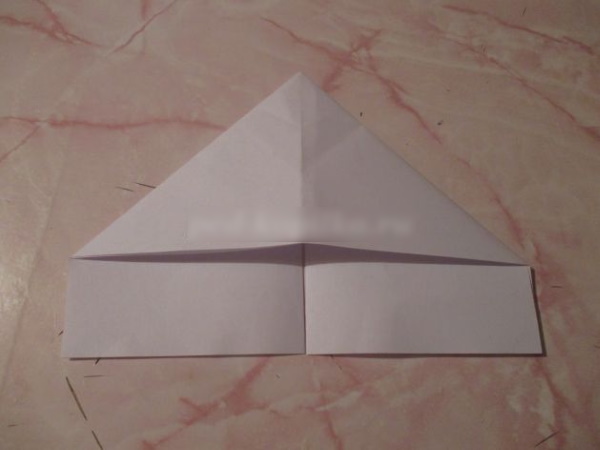
The hind legs of a frog
A jumping paper frog (the design of this model may differ from the classic version) has paws that help it move.
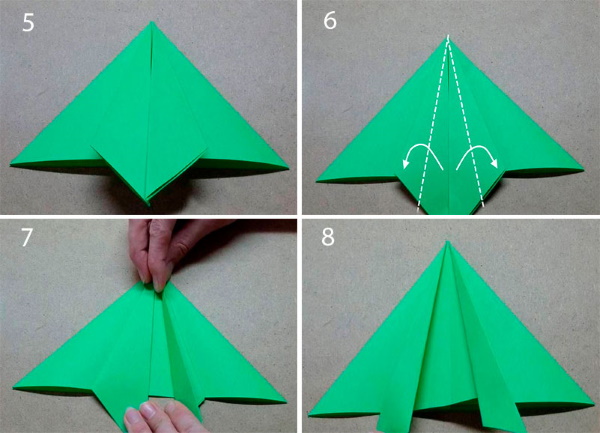
How to make them:
- Fold the right corner down, then redirect it to the center of the workpiece.
- Fold the left corner in the same way.
- 1 side of the workpiece needs to be folded to the right, then connected to the edge of the part.
- Fold the other side in the same way, only to the left.
Turn the workpiece over to the other side.
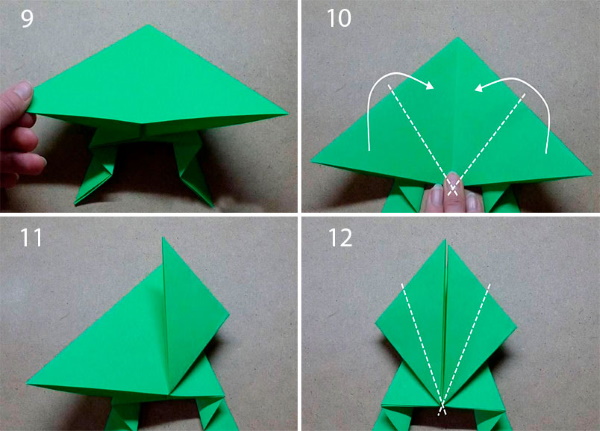
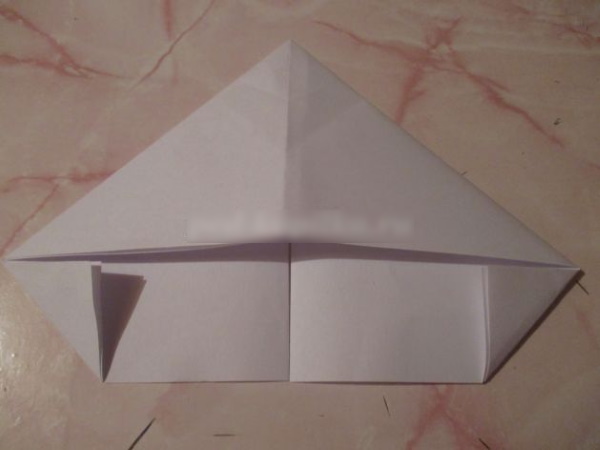
Frog's front legs
How to make the front paws:
- Pull the right corner, connect its edges with the top corner.
- Fold the right angle by analogy.
- Bend the right corner and the edge of the resulting piece. Redirect the corner to the center of the workpiece.
- Bend the left side in the same way.
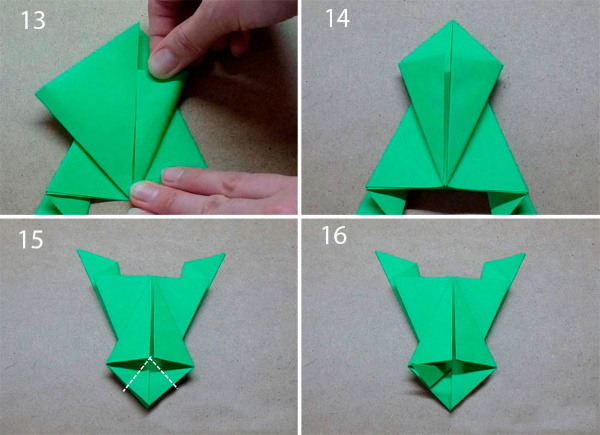
Use your fingers to smooth out all the fold lines.
Finishing folds
The jumping paper frog (a diagram showing how to complete the work is presented later in the article) must be flat so that it can move easily.
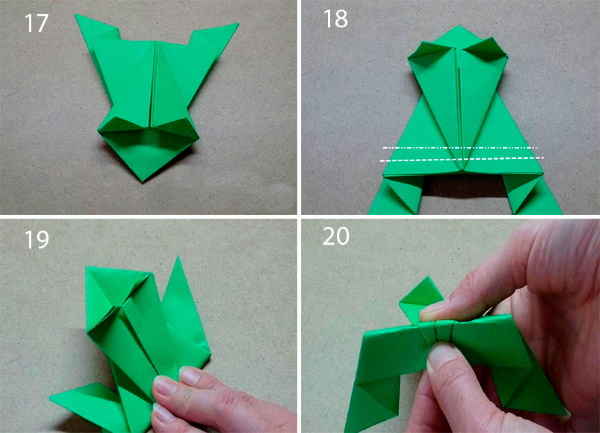
How to make a frog's body correctly:
- At the bottom of the workpiece, you need to make a fold that will help the frog jump. First, you need to bend the bottom part of the part upward, ironing the fold line well.
- The same part should be redirected in the opposite direction and folded inside the workpiece. At this stage, it is important not to rush and be patient. The paper in this part is quite dense, in order to fold it evenly, some effort may be required.
- Turn the frog over to the other side.
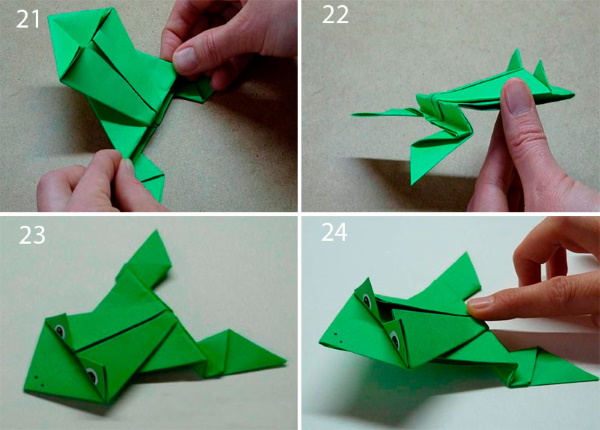
Cut out 2 circles of 2 cm in diameter from yellow paper. Draw pupils on the circles with a black felt-tip pen. Glue the eyes to the frog using a glue stick.
Modular Origami Frog
Modules are origami triangles that can be used to fold three-dimensional figures.

How to make triangles:
- Cut a rectangle out of paper. The larger it is, the larger the module will be.
- Fold the rectangle in half vertically.
- Bend, then unbend to create a clear fold line. Turn the piece over so that the convex part of the bend is at the front.
- Bend the edges of the piece towards its center.
- Turn the part over to the other side.
- Bring the bottom edges up. Press the fold lines well with your fingers.
- Fold the edges back.

- Turn each edge, left and right, to form small triangles. Fold the edges up again.
- Fold the piece in half vertically.

You should get a triangle with 2 pockets into which you can insert new modules.
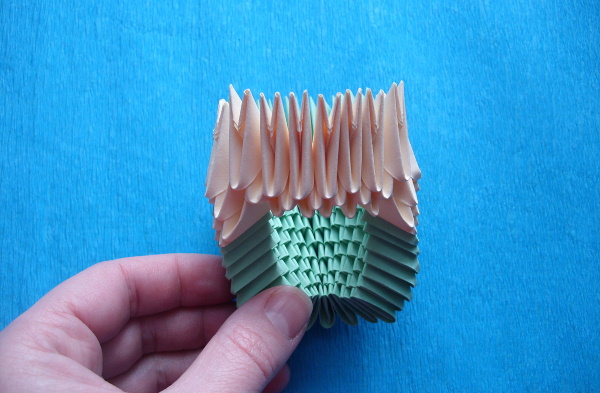
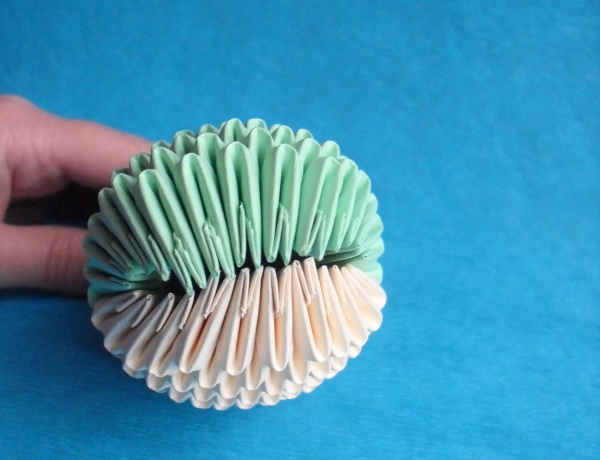
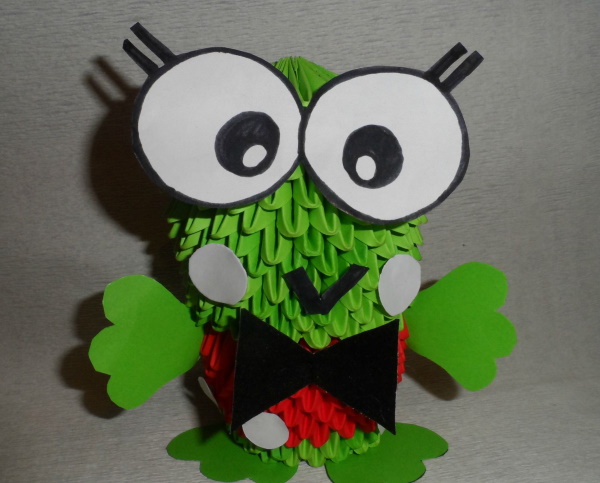
To make a frog, you will need to collect 330 green triangles and 105 white ones. You will also need a small rectangle of black paper for the eyes. Making a modular frog starts from the back.
Algorithm of actions:
- Row 1 consists of 7 triangles; Row 2 consists of 8 triangles; Row 3 – 9 triangles; Row 4 – 10 triangles; Row 5 – 11 triangles; Row 6 – 12 triangles; Row 7 – 13 triangles.
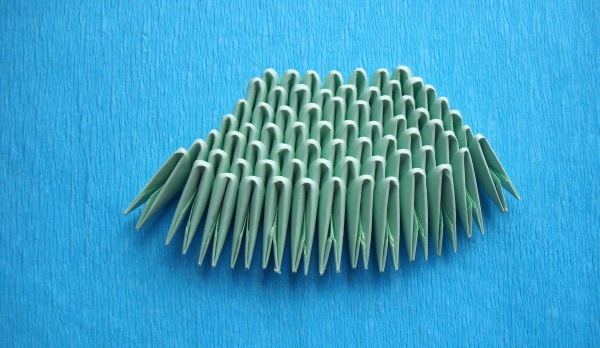
- Now you need to start assembling the frog's belly from white modules. First, you should attach 2 triangles along the edges of the already assembled back piece. Then close the empty space between the attached triangles and the green triangles (there should be 10 pieces).
- Row 9 consists of: 2 white, 11 green and 2 white triangles.
- Row 10: 4 white, 8 green, 4 white triangles.
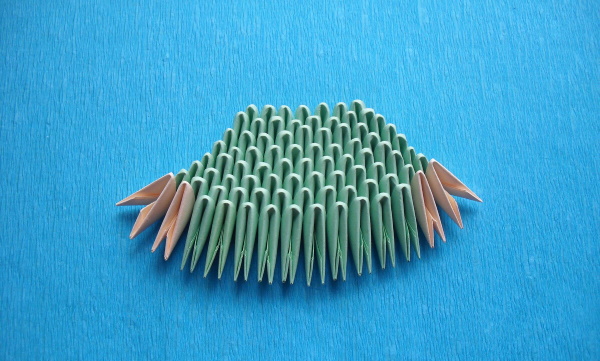
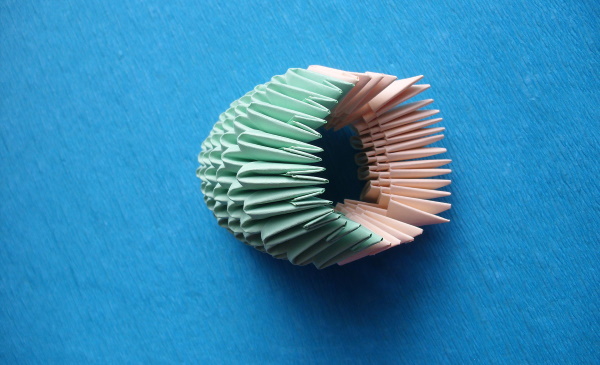
- The resulting back blank should be put aside, and continue to assemble the belly from white triangles separately. 1 row consists of: 5 white triangles.
- Next row: 4 white triangles.
- Carefully attach the belly to the back piece.
- The next row is made from 7 white triangles.
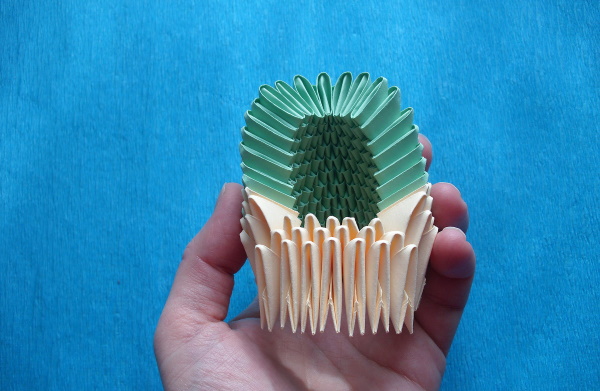
- Continue assembling by combining modules: 10 white, 10 green triangles; 9 white, 11 green; 8 white, 12 green; 9 white, 11 green triangles; 8 white, 12 green; 7 white, 13 green; 8 white, 12 green; 7 white, 13 green; 6 white, 14 green triangles.
- Now you need to assemble the 2 parts of the frog's mouth. They are folded separately. Assembly scheme: 7 white, 10 green triangles; 8 white, 9 green triangles; 7 white, 8 green triangles; 6 white, 7 green triangles; 5 white, 6 green triangles; 4 white, 5 green triangles.
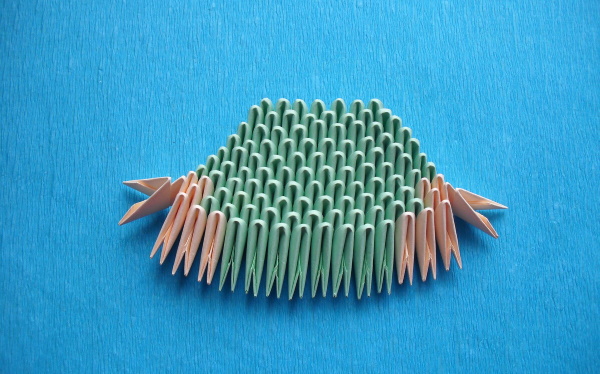
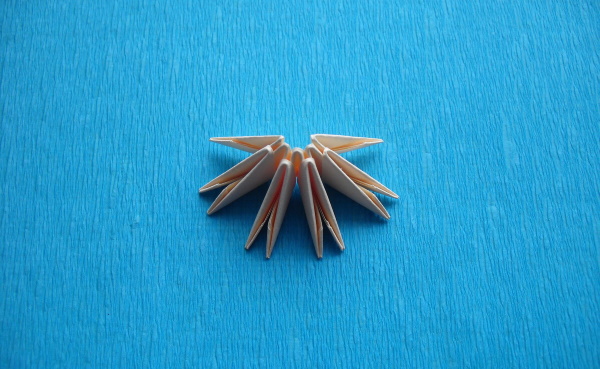
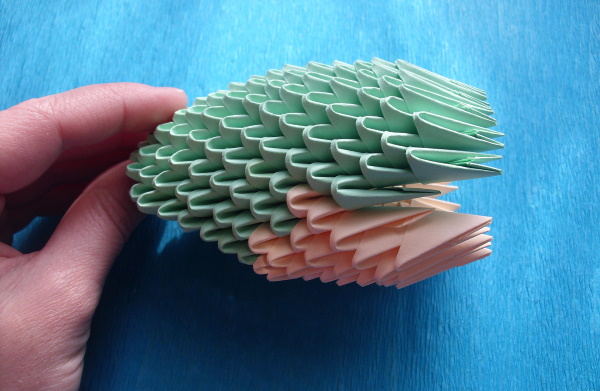
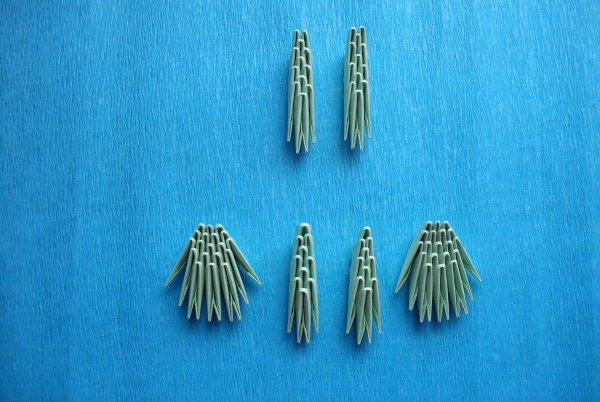
- The frog's body is ready. Now we need to make the paws. The frog's hind legs consist of 2 parts: a paw and a thigh. How to make a thigh correctly: Row 1 consists of 3 triangles. Row 2 of 4 triangles. Row 3 - 5 triangles. Row 4 - 4 triangles. Row 5 - 3 triangles.
- By analogy, you need to make 2 frog thighs.
- How to assemble the hind legs: 1 row – 1 triangle; 2 row – 2 triangles; 3 row – 1 triangle; 4 row – 2 triangles; 5 row – 1 triangle; 6 row – 2 triangles; 7 row – 1 triangle.
- How to assemble the front paws: 1 row – 2 triangles; 2 row – 1 triangle; 3 row – 2 triangles; 4 row – 1 triangle; 5 row – 2 triangles; 6 row – 1 triangle; 7 row – 2 triangles; 8 row – 1 triangle. Assemble the other paw in the same way.
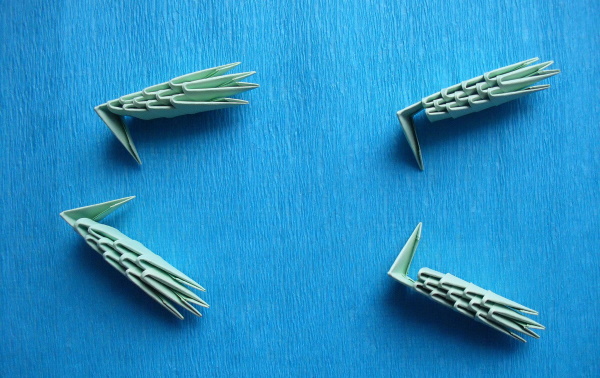
- The paws need to be fixed to the body with additional triangles, and the thighs need to be attached with toothpicks.
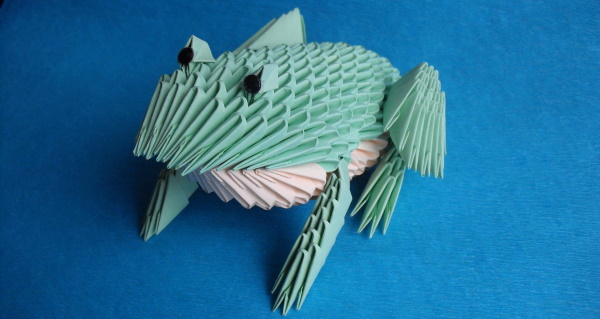
Cut out 2 circles of about 1.5 cm in diameter from black paper. Glue them to the frog’s face.
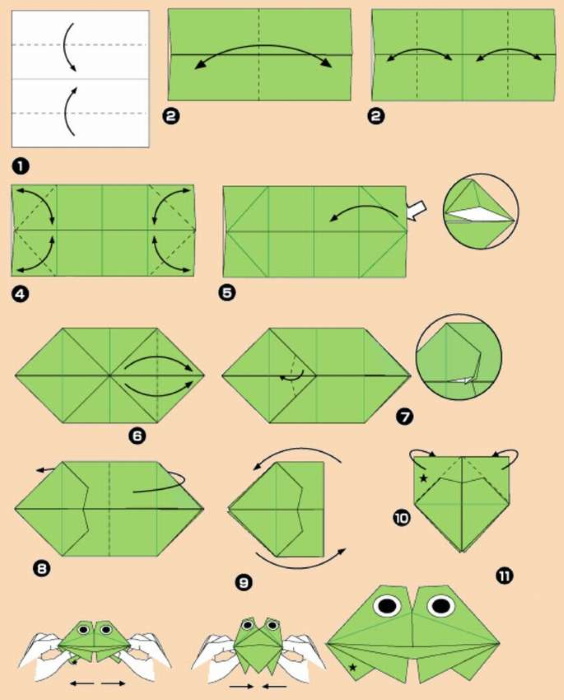
Easy Paper Frog for Kids
Origami paper crafts are often made using long instructions that are difficult for children to follow. You can offer your child a simpler pattern for assembling a jumping frog, consisting of only 7 steps.
Procedure:
- Cut a square out of green paper.
- Mark the center and indicate the diagonals of the square.
- Fold the workpiece into the shape of an isosceles triangle, tucking the sides inward into the piece.
- Fold the corners of the top layer of the workpiece, located at the bottom, upward twice.
- Bend the top of the workpiece down and turn it over to the other side.
- Fold the sides so that they overlap slightly.
- Bend the extended part in the opposite direction.
- Fold the resulting figure like an accordion.
Use a black marker to draw the frog's eyes.
Paper Frog Princess
You can make a beautiful composition from colored paper for the fairy tale about the Frog Princess.
To work you will need:
| Materials | Purpose |
| green paper | To assemble the frog |
| yellow paper | For the crown and water lily flower |
| felt-tip pens | To decorate the frog's face |
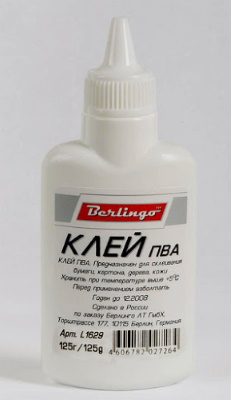
| PVA glue | To reliably connect all the details of the composition together |
How to do:
- First, you need to make a frog using the origami technique. Cut out a square from double-sided green paper.
- Mark 2 diagonals of the workpiece.
- Fold the 2 pieces of fabric inward to form a double triangle.
- Turn the piece so that the top corner is facing you.
- Fold the 2 top corners towards the center of the piece.
- Fold these same corners in half one more time.
- To make the frog's bulging eyes, you need to bend the small corners so that they remain upright.
- Turn the workpiece over to the other side.
- Bend the corners. Then bend them again, but in the opposite direction.
- Fold the frog in half.
- Make a small horizontal fold in the opposite direction. This will be the frog's support, thanks to which it will be able to sit.
- Use felt-tip pens to draw the frog's eyes, mouth and nostrils.
- To make a crown, you need to cut a small rectangle from yellow paper.
- Roll it onto a felt-tip pen and glue the tip.
- Remove the blank from the marker.
- Use scissors to cut out the corners of the crown.
- Glue the crown to the frog's head.
- Cut out a water lily leaf and a small rectangle from dark green cardboard.
- Make several cuts on the rectangle to imitate blades of grass. Bend the rectangle at the bottom and glue it to the water lily.
- Place the frog on a water lily leaf. For reliability, you can grease its paws with glue.
- Cut a flower out of yellow paper and glue it next to the frog.
Additionally, you can cut out Ivan Tsarevich's arrow from brown paper and place it next to the frog.
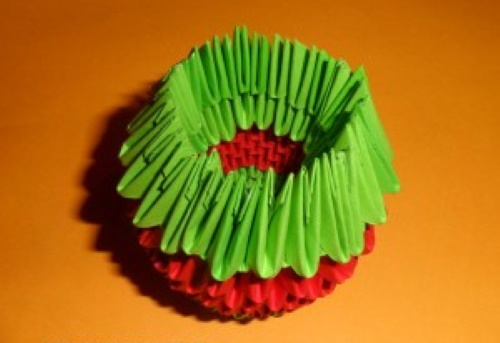
Frog made of paper triangles
This is another modular frog scheme, only a little simpler. You will need green and red paper for the work. The frog will be "dressed" in a red sweater. To make the figure stable, you first need to make its bottom. 20 modules need to be laid out in a ring.
Further assembly is carried out according to the following instructions:
- The first 3 rows consist of 20 green triangles.
- The next 5 rows need to be assembled from red triangles, 20 pieces in each row.
- In the same way, assemble 9 more rows of green triangles.
The frog made of paper triangles is almost ready, all that remains is to decorate it.
For this you will need colored cardboard in yellow, green and pink:
- You need to cut out 4 paws from green cardboard.
- Glue them to the frog's body.
- Cut out round eyes from yellow cardboard.
- Use a marker to draw pupils inside each eye.
- Glue the eyes on the frog.
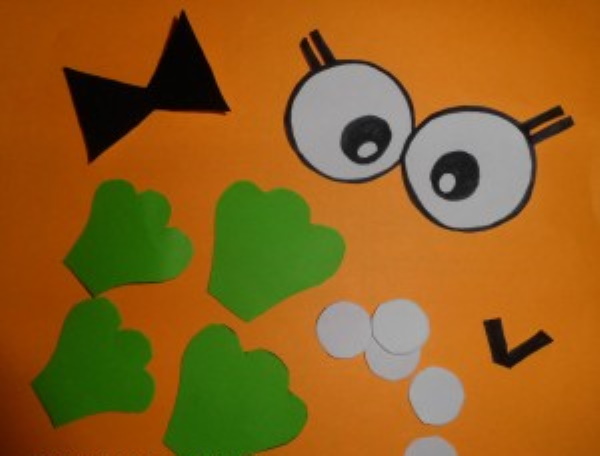
Cut a bow out of pink cardboard and glue it onto the frog's collar.
Volumetric origami frog
The distinctive feature of this model is its three-dimensional shape. The assembly diagram is simple, but contains several nuances. For work, you will need a square sheet of green double-sided paper.
Algorithm of actions:
- Fold the square in half horizontally.
- Straighten the paper and mark another line by folding the sheet in half vertically.
- Divide each part in half.
- Make another fold vertically.
- Fold the left and right sides to the middle.
- Divide these parts into 2 halves again.
- Mark diagonal lines on 2 sides of the workpiece.
- The lines should form cells with diagonals.
- Fold the paper along the marked lines so that the top edges go to the bottom.
- Make 2 more folds along the marked lines.
- Fold the workpiece to the end.
- Fold the resulting part underneath.
- Fold the bottom of the piece, pressing it from the sides so that the paper folds neatly.
- Make the frog's hind legs.
- Bend the front legs.
The volumetric origami frog is ready.
"Talking" origami frog
This is a fun opening mouth craft that can be used to play with kids.
How to make such a frog:
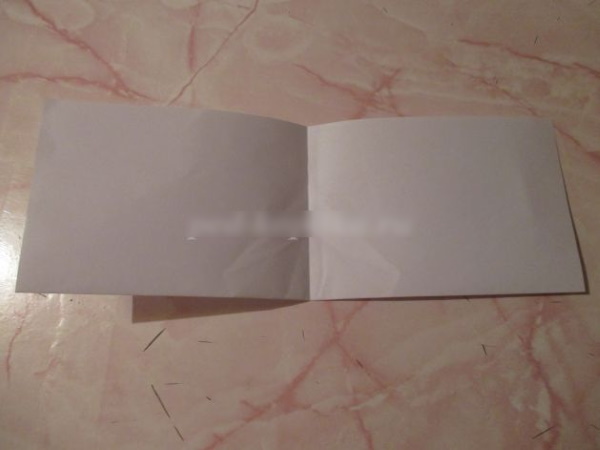
- Fold an A4 sheet of paper in half horizontally. Unfold it.
- Fold the paper again, this time vertically. Straighten the paper.
- Fold the top corners of the rectangle towards the vertical fold.
- The remaining paper from the bottom, in the form of rectangles, should be folded upwards, on both sides. The result should be a blank in the form of a boat.
- Bend small triangles on 2 sides.
- Open the blank from the bottom, then return it to its original form. Only the folded triangles should be both in front and behind.
- Fold the corners with small triangles upward on 2 sides.
- Pull the vertical folds on the triangle to the sides. The workpiece should take the shape of a rhombus.
- Fold the diamond in half along the crease.
Draw eyes on the frog, put your fingers in the resulting pockets. If you make several of these frogs, you can play puppet theater with them with your children.
Following step-by-step instructions and graphic diagrams, you can easily assemble several models of paper frogs. They can be jumping, opening their mouths, or three-dimensional. You can play with wiggling crafts, but it is better to use model products only as decoration, since they are easy to disassemble.
Video on how to make a jumping paper frog
How to make a jumping paper frog: